1
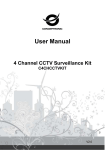
Ness IP Video intercom
10” Indoor Phone (IDP)
Users Manual
IP Intercom (IDP)
101-132
Ness 101-132
132 10” Android Indoor Tablet
User Manual
Thank you for selecting IP intercom for your communication and security needs. .
The Ness SmartBell Intercom allows user to communicate to each other via the Ness
Ness SmartBell eGateway. Once a
unit is programmed (‘paired’) into the eGateway they can communicate to any device that is also programmed to it.
This includes Outdoor Phones, (also known as Door Stations), Indoor Phone (also known as Room Stations or 10”
Tablet Room) or Smartphone’s (Android or iOS (iPhone / iPad) devices.)).
Introduction
This manual is for the 10” (Indoor Phone – IDP) Intercom tablet used the for indoor unit operation, running on the
Google Android operating system. The Android system can also be used for other applications including for example,
Web browser, email send program, photo programs, music and video player etc. It requires a hard wired Ethernet
cable to be connected between it and the Ness eGateway (POE available) to connect it onto the LAN and therefore
subsequently onto the Internet if required.
The system on boot up will enter the Android home page, as shown below:
Reference picture
2
Ness 101-132 10” Android Indoor Tablet
Table of Contents
1. Precautions…………………………………………………………………………………………………………5
2 For New Users……………………………………………………………………………………………………...5
2.1 Acce·ssories…………………………………………………………………………………………………5
2.2 Guide for Quick Start……………………………………………………………………………………….5
2.5 Inserting the Storage Card (Optional Accessories)…………………………………………………………5
Taking out………………………………………………………………………………………………….6
3 Basic Operations…………………………………………………………………………………………………...6
3.1 Power On/Off………….………………………………………………………………………………...…..6
3.2 About Your Pad……………………………………………………………………………………………...7
3.3 Using the Touch Screen……………………………………………………………………………………..8
3.4About Your Home Screen……………………………………………………………………………………9
3.5 Viewing Applications……………………………………………………………………………………..10
3.6 Customizing Your Pad………………………………………………………………………………………10
3.7 Inputting Texts………………………………………………………………………………………………12
4 Basic Applications………………………………………………………………………………………………….13
4. 1 Networks……………………………………………………………………………………………………13
4.2 Browser……………………………………………………………………………………………………...13
4.3 Searching…………………………………………………………………………………………………….14
4.4 Communication………………………………………………………………………………………………14
4.4.1 E-Mail…………………………………………………………………………………………………14
4.4.2 SMS………………………….………………………………………………………………………..15
4.5 Entertainment………………………………………………………………………………………………..16
4.5.1 Music Player……………….…………………………………………………………………………16
4.5.2 Sound Recorder………………………………………………………………………………………16
4.5.3 Camera………………….…………………………………………………………………………….17
4.5.4 Photos…………………..……………………………………………………………………………..17
4.5.5 Videos…………………..……………………………………………………………………………..17
4.5.6 Picture Base…………...………………………………………………………………………………18
5 Applications of the Third Party Software…………………………………………………………………………18
5. 1 Downloading and Installing Software…………………………………………………………………….18
5. 2 Application of Software……….……………………………………………………………………….…..18
6 Functions……………………………………………………………………………………………………….…19
6. 1 Personal Information (Contacts)……………………………………………………………………….…19
6. 2 Calendar……………………..………………………………………………………………………….….20
6.3 Connection…………………..………………………………………………………………………….…..20
6.3.1 Connecting to the Personal Computer………………………………………………………….…….20
6.4 Toolkit…………………………………………………………………………………………………….21
6.4.1 My Document……………………………………………………………………………….……..21
6.4.2 Clock……….………………………………………………………………………………….…21
6.4.3 Searching…………………………………………………………………………………….…….22
3
Ness 101-132 10” Android Indoor Tablet
7 Setting…………………………………………………………………………………………………………….22
7.1 Wireless and Network…..…………………………………………………………………………………..22
7.2 Call Setting………………...………………………………………………………………………………..22
7.3 Sound……………………..…………………………………………………………………………………22
7.4 Display………………….………………………………………………………………………….……..23
7.5 Location and Security……………………………………………………………………………….……..23
7.6 Applications………………………………………………………………………………………….…….23
7.7 Accounts and Syncing………………………………………………………………………………….….23
7.8 Privacy………………………………….……………………………………………………………….….23
7.9 SD Card and Internal storage………………………………………………………………………….…..24
7.10 Searching…………………………….………………………………………………………………..…..24
7.11 Language and Keypad………………………………………………………………………………..…..24
7.12 Date and Time……………………….………………………………………………………………..…..24
7.13 About the Product…………………….……………………………………………………………..…....24
4
Ness 101-132 10” Android Indoor Tablet
1. Precautions
This manual provides very important information such as safety precautions and the instructions on how to
use this product correctly, so for the purpose of avoiding any accident, please read this manual carefully
before using this product.
Please do not place the product in high-temperature, high-humidity or dusty areas.
Please do not place the product in high-temperature areas, especially in a car with all windows closed in
summer.
Please do not drop or fiercely crash the product or violently shake TFT screen, otherwise it might cause the
damage or abnormal display of TFT screen.
Please choose appropriate volume when you using the headset. In case your ears are tingling, please turn
down the volume or stop using the headset.
Please do not break off the connection when the player is formatting, uploading or downloading files,
otherwise it might be caused program error.
The Company shall bear no responsibility for the loss of internal memory arising from the damage,
maintenance of the product or other reasons. The user shall have standard operation in accordance with this
manual.
Please do not disassemble the product or clean the surface of the product with alcohol, thinner or benzene
solvent.
Please do not use the product in areas where it is not allowed to use electronic products, for example, in the
aircraft.
Please do not use the product when driving or walking in the street, otherwise it might be cause traffic
accidents.
USD is provided for data transmission only.
★ (This product is not waterproofed)
※ The Company reserves the right to improve the product, and the specification and design are subject to
change without any further notice!
2 For New Users
2.1 Accessories
Please check if there are the following accessories when you opening the packaging box: pad, USB cable, adapter,
and headset.
2.2 Guide for Quick Start
1) Only licensed software is allowed. Using pirated or illegal software might result in damage or fault, in
which case the manufacturer is not responsible to offer free repair service.
2) The accessories came with the product may vary due to the software or parts applicable in your area or
supplied by the service provider.
3)
You may purchase other accessories from local distributors.
4) The accessories came with the product provide the best support for the pad.
5)
Accessories except those came with the product may be incompatible with the pad.
2.5 Inserting the Storage Card (Optional Accessories)
1)
In order to store files, you need a storage card. This pad supports a micro SD card with the maximum
capacity of 32GB (depending on the manufacturer and the type of your storage card).
2) Though the pad supports all storage cards which are up to standards recognized in the industry, it may be
not compatible with some brands of storage cards, which may cause the damage of the pad or the storage
card and loss of the data stored in the card.
5
Ness 101-132 10” Android Indoor Tablet
3)
4)
5)
6)
7)
8)
9)
The pad only supports the storage card with FAT file system. When inserting any other storage card with
different file system, the pad will reformat it.
The service life of the storage card will be affected if frequently storing and deleting the data.
After inserting the storage card into the pad, you will find the file catalog of the storage card in “extsd”
folder under the internal storage of the pad.
Pull out the cover of storage card slot.
Keep the golden contact point downward when inserting the storage card.
Slide the storage card into the slot until it is locked in the slot.
Replace the storage card cover.
Taking out the Storage Card
For the safety, Please unlock the storage card before taking it out.
1)
Press the Menu button, click setting icon → SD Card and Internal Storage → Uninstall the SD Card, and
the screen will display “SD card will be uninstalled, and you may view it in notification area”.
2)
Pull out the cover of storage card slot.
3)
Push slightly the storage card to detach it from the pad.
4)
Pull the storage card out of the slot.
Note: When transmitting data or sharing information, please do not take out the storage card, otherwise it will cause
the loss of data or damage of the pad and storage card.
Formatting the Storage Card
1)
Using a computer to format the storage card may cause the storage card incompatible with the pad. Please
use the pad to format the storage card.
2) Press the Menu button, click setting icon →SD Card and Internal Storage → Uninstall the SD Card →
Format the SD Card → Format the SD Card →Delete All.
3)
Please be reminded to backup all important data to the pad before formatting the storage card.
Note: The manufacturer or Ness is not responsible to offer free repair service in case of any data loss arising from
the operation of the user.
3 Basic Operations
3.1 Power On/Off
Power On: Long press the Power button.
Power Off: Long press the Power button, and click Power Off → OK.
Switching to Flight Mode
In flight mode, all wireless networks are disabled, and the user can only access non-network services. Please turn on
flight mode when you are in areas such as airplane and hospital where it is prohibited to use wireless communication
devices.
1)
In order to activate the flight mode, please click the setting icon →Wireless and Network →Flight Mode
or long press the Power button and then select flight mode.
2)
In order to turn off flight mode and use wireless network, please click the setting icon →Wireless and
Network, and clear the select box beside flight mode.
Switching to Mute Mode
6
Ness 101-132
132 10” Android Indoor Tablet
In order to switch to mute mode, please long press the Power key and select mute mode.
3.2 About Your Pad
Parts of Your Pad
Buttons
Press the Power button “
” to power on (long press); or enter quick menu (long press); lock the touch screen.
Press the Volume button “
” to adjust the volume.
Press the Menu button “
” to display all available options on the screen.
Press the Home button “ ” to return to home screen; open the list of recently used applications (long press).
Press the Back button “ ” to return to previous screen.
In standby mode, press the Search button “ ” to open Google search application; When other applications are in
operation, open search input window.
Description of Icons
The icons shown on the screen might vary due to the location and service provider.
Icons
Description
signal level
GPRS (NOT AVAILABE FOR 10” SERIES 101-132 at this time) connected
EGDE (NOT AVAILABE FOR 10” SERIES 101-132 at this time) connected
UMTS (NOT AVAILABE FOR 10” SERIES 101-132 at this time) connected
HSDPA (NOT AVAILABE FOR 10” SERIES 101-132 at this time) connected
WLAN (NOT AVAILABE FOR 10” SERIES 101-132 at this time) activated
Bluetooth (NOT AVAILABE FOR 10” SERIES 101-132 at this time) activated
Bluetooth (NOT AVAILABE FOR 10” SERIES 101-132 at this time) headset
connected
receive GPS (NOT AVAILABE FOR 10” SERIES 101-132 at this time) data
download data
computer connected
USB connected
no SIM card or USIM card
new SMS or MMS
new e-mail
alarm activated
mute mode activated
vibrate and mute
flight mode activated
music playing
error or attention
battery level
current time
7
Ness 101-132 10” Android Indoor Tablet
3.3 Using the Touch Screen
Touch screen helps you to select options and use functions easily. Please read the following to know the basic
operations:
1)
Please do not let any sharp tool scratch the touch screen.
2) Please do not let other electronic equipments contact the touch screen; otherwise it will cause the
malfunction of the touch screen due to electrostatic discharge.
3)
Please keep the touch screen away from water. Humid environment or water might cause the malfunction
of the touch screen.
4)
In order to make good use of the touch screen, please take off the protective film before using.
5) The touch screen has a probe layer which is sensible of the feeble charge of human body. In order to
better use the touch screen, please tap the touch screen with fingers. Any stylus or pen is not applicable to
this touch screen.
6)
You can have the following operations on the touch screen:
7)
Click: One click on the screen with your finger to enter menu interface or select items or applications.
8)
Drag: Slide your finger on the screen upward, downward, leftward or rightward to move any item in the
list.
9) Tap and Hold: Tap an item and hold it for more than 2 seconds to open the list of this item.
10) Drag and Release: Tap and hold an item and slide the finger to move the item.
11) Double Click: When viewing photo, please double click the photo twice to zoom in or zoom out.
Rotating the Touch Screen
The pad has a motion sensor built-in to perceive the direction of the pad. If rotating the pad, the interface shown on
the screen will rotate accordingly.
In order to keep the direction of the interface, please click the setting icon → Display and deselect the autorotation
option.
Locking or Unlocking the Touch Screen
In order to avoid unintended operation, the touch screen will be automatically locked if it is not used for a long
period.
1) To lock the touch screen manually, please press Power button.
2) To unlock the touch screen, please press Power button to power on and drag the unlock icon according to
the direction of unlock arrow.
3)
In case the touch screen is already set to be locked, you need to input PIN code or password, or draw the
unlocking pattern to unlock the touch screen.
8
Ness 101-132
132 10” Android Indoor Tablet
3.4About Your Home Screen
In standby mode, you can see the home screen, view the status of your pad and enter menu interface. Flick left or
right to switch to your favorite panel for your home screen.
The above photo may vary slightly.
Icons
Functions
Tap Google Search functional icon to search
for the network.
Enable the application by shortcut.
Turn on web browser.
Access Menu interface.
Select the point at the top of the screen to
switch to corresponding panel.
Activate e-mail application.
Adding Items to the Home Screen
You can add any applications, items, functional icons, shortcuts of file folders on the home screen.
Add Item to Home Screen:
1)
In home screen interface, long touch the screen until you see the items you want to add to the home
screen.
2)
Select Item Type.
Icon Group: add functional icons. Desktop Tool is an application to provide quick functions and
information in standby screen. For example, you can add power control application to directly switch on or
switch off 3G (not available on 10’ series 101-132) on desktop; if no 3G (not available on 10’ series 101-132)
service is needed, please click 3G (not available on 10’ series 101-132) icon to make it gray to save the flux
and power; if 3G (not available on 10’ series 101-132) service is needed, please click 3G (not available on 10’
series 101-132) icon again to activate it.
Shortcut: Add the shortcut of an item such as an application, bookmark, and contact.
File Folder: Create or add contact file folder.
Wallpaper: Set background picture.
3)
Select the item you want to add to the home screen.
9
Ness 101-132 10” Android Indoor Tablet
Moving Items on the Home Screen
1)
Click and move the item until it turns gray.
2)
Drag the item to expected position.
Deleting Items on the Home Screen
1) Tap and hold the item, and the recycle icon will appear at the bottom or the right side of home screen.
2)
Drag the item to the recycle.
3)
Release the item when the item and recycle icon turns red.
Adding Shortcuts of Applications
1)
Press the Menu button and click the application icon. The shortcut icon of the application is added to the home
screen.
2) Move the icon to expected position or move it to another panel of the home screen.
Using the Shortcut Menu
Please press the Menu button, the shortcut menu will pop up. You may manage applications, set wallpaper, search for
information, manage notification, quickly enter setting interface, and add desktop functional icons.
Using the Shortcut Panel
In standby mode or when there is some application in operation, please click the indicator icon and drag it downward
with your finger to open the shortcut panel. You may also drag the lower border of the list upward to hide the list.
The available options may vary due to the location and service provider.
3.5 Viewing Applications
1)
In standby mode, press the Menu button to enter the Menu interface.
2)
You may flick left or right on the screen to select another Menu interface.
3)
Select the application.
4)
Press the Back button to return to previous screen; press the Home Button to return to the home screen.
Viewing Recently Used Applications
1)
Long press the Home button to open the list of recently used applications.
2)
Select the application.
Using the Task Manager
You may use the pad to open multiple applications and these operations can operate at the same time. However, it
may cause the interruption of communication, system failure, storage problems or more power consumption. For the
sake of avoiding these problems, please use task manager to turn off unnecessary applications.
1)
Press the Menu button and click the setting icon → Application → Application in Operation.
2)
Please select Close to turn off the application.
3.6 Customizing Your Pad
You may customize your pad according to your preference to have more functions.
Changing Languages
1)
Press the Menu button and click the setting icon →Keypad and Language → select the region.
2) Select needed language.
Setting Date and Time
1)
Press the Menu button and click the setting icon →Date and Time.
2)
Select time zone and set the date and time. You may change to select other options.
10
Ness 101-132 10” Android Indoor Tablet
Selecting the Home Screen Wallpaper
1)
In standby mode, long touch the screen → Wallpaper.
2)
Click the picture folder → Wallpaper/Picture Base. Select to save or set the wallpaper, and set the
wallpaper panel.
Note: The Company shall bear no responsibility for the use of the default pictures or wallpapers.
Adjusting Screen Brightness
1)
2)
Press the Menu button and click the setting icon →Display →Brightness.
Clear the select box beside Auto-Brightness.
Drag the slider to select brightness level.
Select OK.
The brightness level of the screen may increase or decrease power consumption.
Locking/ Unlocking the Touch Screen
You can use unlocking pattern or password to lock touch screen to prevent other persons using your pad without
your permission.
After setting to lock the screen, it is required to input the password to unlock the screen each time you
turn on the pad or unlock the screen.
If you forget the PIN code or password, please take the pad to customer service center to reset. Before
that, please be reminded to backup important data stored in the pad.
Note: The Company shall bear no responsibility for the loss of safety code or private information or any other
damage arising from the use of illegal software.
Setting Unlocking Pattern
1)
Press the Menu button and click setting the icon → Location and Security → Lock the Screen → Pattern.
2)
Please pay attention to the prompt on the screen and pattern example and select Next Page if necessary.
3)
Slide the finger on the screen to connect at least 4 points to draw the pattern.
4)
Select Continue.
5)
Draw the pattern again to verify it.
6)
Select OK.
Setting PIN Code
1)
Press the Menu button and click the setting icon → Location and Security → Lock the Screen → PIN.
2)
Input new PIN code (digits) and select Continue.
3)
Input again the new PIN code and select OK.
Setting Unlock Password
1)
Press the Menu button and click the setting icon → Location and Security → Lock the Screen →
Password.
2)
Input new password (letters and/ or digits) and select Continue.
3)
Input again the new password and select OK.
11
Ness 101-132 10” Android Indoor Tablet
Locking the SIM card or USIM card
You can activate the PIN code came with SIM card or USIM card to lock the pad.
1)
Press the Menu button and click the setting icon → Location and Security → set the SIM card lock →
Lock the SIM Card.
2)
Input the PIN code and select OK.
If you want to activate PIN code lock, please input PIN code each time you turn on the pad or enter
the menu interface requesting the PIN code.
The SIM card or USIM card will be locked in case you wrongly input PIN code for several times, and
you need to input PUK to unlock SIM card or USIM card.
If the SIM card or USIM card is locked due to wrong PUK, please take the card to service provider to
unlock.
3.7 Inputting Texts
1)
You can input texts by selecting letters/characters on virtual keypad.
2)
You may not be able to input texts in some languages. When inputting a text, please choose an available
language.
Change the Input Method: Tap and hold the text input field, long press the screen, and select the input
method → Text Input Method (Android keypad or a third-party input method).
Input a text with Android keypad: You may input a text by clicking alphanumeric keys or the
following keys.
Keys
Functions
Switch to uppercase or lowercase.
Switch to Digit/Symbol mode or ABC
mode.
Insert blank space.
Clear input errors.
View keypad setting; change the text input
method (tap and hold)
Input frequently used symbols.
Copying and Pasting Texts
When inputting a text, you may copy or paste the text to other applications.
1)
Please click at the starting position and the cursor appears.
2) Tap and hold the text input filed.
3)
Select letters/characters from the list.
4)
Click at the position you want to stop inputting the text.
5) Tap and hold the text and it displays in reverse.
6)
Select to copy or cut the text and move it to clipboard.
7)
Entering the interface of another application, tap and hold the text input field.
8)
Select Paste to move the text from clipboard to text input field.
12
Ness 101-132
132 10” Android Indoor Tablet
4 Basic Applications
4. 1 Networks
In order to access network services, data connection is required. The network operator provides the best data
connection plan.
4.2 Browser
Please read the following to know how to view web pages and add bookmarks.
Note:
1) There may be additional charges if visiting website or downloading data. Please contact your service
provider to know the details.
2) The label of web browser menu may vary and depends on the service provider.
3) The available icons may vary due to the location and service provider.
Browsing Web Pages
1)
In main menu interface, click the browser icon to open the home page.
If you want to visit a webpage, please select URL input filed to input website address and click Start
or the Search icon.
2) The following functions are available when visiting webpage:
In order to add a bookmark for the webpage you are viewing, please press the Menu button “
”→
More → Add a Bookmark.
In order to search current webpage for a text, please press the Menu button “
” → More → Search
the Webpage.
In order to refresh current webpage, please press the Menu button “
” → Refresh.
In order to view the information of current webpage, please press the Menu button “
” → More →
Webpage Information.
In order to customize browser setting, please press the Menu button “
” → More → Setting.
In order to send the website address to someone, please press the Menu button “
” → More →
Share the Webpage.
In order to stop or go forth from current webpage, please press the Menu button “
” → select Stop
or Forth.
Opening Multiple Web Pages
You can open several web pages and switch between them.
1)
In main menu interface, click the browser icon.
2)
Select the Menu button/ New window.
3)
Select and open new windows. (Note: 8 new windows at most)
4)
Visit another webpage in a new window.
In order to switch between windows, please press the Menu button/ New Window, and select the
webpage you want to view.
You may add bookmarks for your favorite web pages.
You can also add bookmarks manually if you have website addresses.
13
Ness 101-132 10” Android Indoor Tablet
Adding Bookmarks
1)
In main menu interface, select the browser icon.
2)
Press the Menu button “
” and select Bookmark.
In bookmark interface, select to add a bookmark and input the title and address of a webpage. If you
want to add a bookmark for current webpage, please directly click OK.
In order to open the bookmark page in current window, please long press the bookmark and select
Open.
In order to open a webpage in a new window, please long press the bookmark and select to open it in a
new window.
In order to add a bookmark shortcut to the home screen, please long press the bookmark and select to
add shortcut to the home screen.
In order to share a webpage with someone, please long press the bookmark and select to share the link.
In order to copy a website address, please long press the bookmark and select to copy and link with
the website address.
In order to set a webpage as the home page of your browser, please long press the bookmark and select
to set as the home page.
In order to delete a bookmark, please long press the bookmark and select Delete.
Editing Bookmarks
Create a Bookmark Folder
1)
In main menu interface, click the browser icon.
2)
Press the Menu button “
” → Bookmark, and long press a bookmark and select Edit.
3)
Input the name and address of the bookmark folder and select OK.
Visit Recently Visited Web pages or History
1)
In main menu interface, click the browser icon.
2)
Press the Menu button“
” → Bookmark, and select Most Visited and History.
3)
Select the webpage you want to visit.
4.3 Searching
You can search the applications your pad have and designated data on network.
1)
In main menu interface, select the Search icon.
2)
Input the first letter or the first word of the data to search.
3)
Select the name of the item you want to visit.
4.4 Communication
4.4.1 E-Mail
Please read the following to know how to use personal or company e-mail account to send or view E-Mail.
Setting E-Mail Accounts
1)
In main menu interface, select Send E-mail.
2)
Input an e-mail address and password.
3)
Select Next Step (for ordinary e-mail accounts) or Set Manually (for company e-mail accounts).
4)
Operate according to the prompt on the screen.
5)
If you want to add e-mail accounts, press the Menu button and select to add e-mail accounts, and repeat
step 2, 3 and 4. After finishing setting, E-Mail will be downloaded to the pad.
If you have already created two or more accounts, you can switch between these accounts; in one account interface,
press Menu button and select Account to view the account where there are E-Mail you want to edit.
14
Ness 101-132 10” Android Indoor Tablet
Sending E-Mail
1)
In main menu interface, select Send E-mail → select E-mail Account.
2)
Press the Menu button “
” → Edit.
3)
Add e-mail recipients.
4) Manually input the e-mail address and use semicolon or comma to separate if there are multiple
addresses.
Press the Menu button and you can add e-mail addresses on the CC/BCC list and add contacts.
Select the subject field to input e-mail subject.
Select Edit to input the text of e-mail.
Press the Menu button → select Attachment to attach pictures, music files or videos.
Select Send to send the e-mail.
Note: If the user is off line or out of the service area, all messages will remain in Outbox until the user is on line or
in the service area.
Viewing E-Mail
After opening an e-mail address, you can check the E-Mail you read before in the offline mode or connect to e-mail
server to view new E-Mail. After the pad collects the information of these new E-mails, you can view them again
offline.
1)
In main menu interface, select Send E-mail→ E-mail Account.
2)
Press the Menu button → Refresh, to refresh the e-mail list.
3)
Select the E-Mail you want to see.
The following functions are available when viewing E-Mail.
1)
In order to delete E-Mail, please select Delete.
2)
In order to reply to the sender or reply to all, please press the Menu button “
” → Reply or Reply to
All.
3)
In order to forward an e-mail to someone, please press the Menu button “
” → Forward.
4)
In order to write an e-mail, please press the Menu button “
” → Write.
5)
In order to view an attachment, please click the attachment area. In order to download an attachment to
the pad, please select the attachment and select Save.
4.4.2 SMS
Please read the following to know how to write and send SMS, view or manage sent SMS and incoming SMS.
Note: There may be additional charges if the user sends or receives SMS when he or she is out of local service area.
Please contact the service provider to know the details.
Sending SMS
1)
In main menu interface, select SMS.
2)
Select New SMS (Write).
3)
Add SMS receiver. Manually input the phone number and use semicolon or comma to separate if there are
at multiple receivers.
4)
Select Input to input the text.
5)
In order to insert an emotion icon, please press the Menu button “
” → Insert an Emotion Icon.
6)
Select Send to send SMS.
15
Ness 101-132 10” Android Indoor Tablet
Viewing SMS
In main menu interface, select SMS and all messages will appear and lines in groups according to different contacts.
Select a contact to view the communications with the contact.
4.5 Entertainment
4.5.1 Music Player
Please read the following to know how to play your favorites music and songs with music player.
Adding Music Files to Your Pad
Transmit files to your pad or the storage card:
1)
Download files from the computer with the data cable.
2)
Copy files to storage card. (SD Card)
Playing Music
1) Transmit music files to your pad or the storage card:
2)
Press the Menu button and select the music player icon.
3)
Select music type.
4)
Select a music file.
5) The following functions are available when playing the music file.
Adjust the volume by pressing Volume button.
Drag or click the progress bar to skip to any point you want.
Click the random play icon to activate random play mode.
Click the previous track icon to play previous music file.
Click the list icon to open the list of music files.
Click the repeat icon to switch between repeat play modes (Stop, Repeat Single or Repeat All)
Click the next track icon to play next music file.
Click the Pause/ Play to pause or resume the current playing.
Creating a Play List
1)
Press the Menu button and click the music player icon.
2)
Long press the music file you want to add to the play list → Add to Play List.
3)
Select Create a Play List
4)
Input the name of play list and select Store.
5)
Select the files you want to add and select Add.
6) When a music file is playing, you may also press the Menu button → Add to Play List to add music files.
4.5.2 Sound Recorder
Please read the following to know how to record and play audio files.
1)
Press the Menu button and click the sound recorder icon.
2)
Click the Record key to starting recording.
3)
Click the Stop key if you want to finish recording.
4)
After recording, you can click the Play key to play the audio file.
5)
After recording, please select to keep this record or not.
6)
If keeping this record, the audio file will be saved in the record list.
7)
If you don’t want to keep this record, the audio file will not be saved.
16
Ness 101-132 10” Android Indoor Tablet
4.5.3 Camera
Please read the following to know how to take photos and videos and how to view them.
The capacity may vary due to different shooting conditions and scenes.
4.5.4 Photos
1)
Press the Menu button and click the camera icon.
2)
Focus on the target and make the following adjustment if necessary.
Select focus method and shoot mode
Change or keep saving path
Adjust white balance
Open or close flash
Change zoom scale
Switch to Video
3)
Select to take a photo.
4)
Click the image viewer icon to view the photo.
5) The photo will be automatically saved.
6)
You may click the image viewer icon to view all photos.
Flick left or right to view more photos.
Put two fingers on the screen and pinch them apart to zoom in (two fingers together to zoom out) or
double click the screen to zoom in and double click again to zoom out.
Press the Menu button → Share to send photos to someone.
Press the Menu button → More → Setting to set photos as wallpapers or the icons of incoming callers.
Press the Menu button → Delete to delete photos.
4.5.5 Videos
1)
Press the Menu button and click the camera icon.
2)
Slide the icon upward to switch to camera.
3)
Focus on the target and make the following adjustment if necessary.
4)
Check the condition and setting of the camera.
Adjust color effect
Adjust white balance
Turn on or turn off the flashlight
Set the quality of the video
Switch to Photo
Start recording the video
Click the image viewer icon to view videos.
5)
Click the camera icon to start.
6)
Click the camera icon again to stop.
7) The video will be automatically stored. The video might not be able to be saved in storage card due to low
transmission speed.
8)
After recording, please click the image viewer icon to view videos.
Flick left or right to view more videos.
You can select the image of a video to play the video.
Press the Menu button → Share to send videos to someone.
Press the Menu button → Delete to delete videos.
17
Ness 101-132 10” Android Indoor Tablet
4.5.6 Picture Base
Please read the following to know how to view images or play videos stored in internal storage or the storage card.
Viewing Images
1)
Press the Menu button and click the picture base icon.
2)
Select a file folder.
3)
Select the photo you want to view.
Click the zoom in icon to scale up the image;
Click the zoom out icon to scale down the image;
Click the play the slide icon to play the slide;
Click the menu icon to pop up submenus such as Share, Delete and More.
Click Share to send all viewed images by means of Bluetooth (not available on 10’ series 101-132) or
message.
Click Delete to delete all viewed images.
Click More to pop up some options such as More Information, Set As, Shear, Rotate Leftward, Rotate
Rightward, etc.
Click Detail to view the detailed information of images, such as titles, types, shooting dates, etc.
Click Set As to set viewed images as wallpapers or icons of contacts.
Click Shear to shear images, and please save or exit after shearing.
Click Rotate Leftward to rotate images counterclockwise 90 degree.
Click Rotate Rightward to rotate images clockwise 90 degree.
Press the Back button to return to previous interface.
Playing Videos
1)
Press the Menu button and click the picture base icon.
2)
Select a file folder.
3)
Select the video you want to view.
Select Play/Pause key to pause or resume playing.
Tap and hold the icon “
” to rewind the video.
Tap and hold the icon “
” to fast-forward the video.
Click or drag the progress bar to skip to any point you want to play;
You may adjust the volume of video players by pressing the Volume button.
5 Applications of the Third Party Software
5. 1 Downloading and Installing Software
User may download software in Apk. format from Internet through the LAN network and install them onto the Pad
folder, such as eoemarket, Himarket.
User may check the downloading status at the taskbar.
5. 2 Application of Software
After the software is installed, the system will generate a shortcut icon on the desktop as a link; click the icon to
activate the software.
18
Ness 101-132 10” Android Indoor Tablet
6 Functions
6. 1 Personal Information (Contacts)
Please read the following to know to create or manage personal or business contact list, and how to store names,
phone numbers, e-mail addresses, birthdays and other information of contacts.
Creating Contacts
1)
In main menu interface, click the contacts icon.
2)
Press the Menu button “
” → add a contact.
3)
Select the storage position. If you have multiple accounts, please choose one of them to add the contact.
4)
Input the information of contacts.
5)
Store the information of the contact to the storage.
Creating Contacts from the Dial Screen
1)
In main menu interface, click the dial icon.
2)
Input a phone number and add to Contacts.
3)
Select to Add a Contact.
4)
Select the storage position. If you have multiple accounts, please choose one of them to add the contact.
5)
Input the information of the contact.
6)
Store the information of the contact to storage.
Finding Contacts
1)
In main menu interface, click the contacts icon.
2)
Press the Menu button “
” → Search, or directly press the Search button. Input the first letters of a name.
3)
Select the contact from the contact list and view the information of the contact.
4)
After finding the contact, you may use the following functions:
You may select the contact and long press it and select to call the contact.
You may select the contact and long press it and select to send a message to the contact.
You may select the contact and long press it and select to send an e-mail to the contact.
You may select the contact and long press it and select to edit the information of the contact.
You may select the contact and long press it and select to delete the information of the contact.
You may select the contact and long press it and select to add to Favorites folder.
Importing or Exporting Contacts
In order to import contacts (in vcf. format) from the storage card to the pad:
1)
In main menu interface, click the contacts icon.
2)
Press the Menu button “
” → select Import/ Export → Import from SD Card.
3)
Select the storage position. If you have multiple accounts, please choose one of them to add the contact.
4)
Select to import one vCard file or import multiple vCard files, or import all vCard files.
5)
Select OK.
6)
Select the contact file you want to import and select OK.
In order to export contacts from the pad to the storage card:
1)
In main menu interface, click the contacts icon.
2)
Press the Menu button “
” → select Import/ Export → Export to SD Card.
3)
Please select OK in export verification interface to export contacts to SD card.
19
Ness 101-132 10” Android Indoor Tablet
6. 2 Calendar
Please read the following to know how to create and manage daily, weekly and monthly activities and set alarms to
remind yourself of important activities.
Calendar Viewing Modes
1)
In main menu interface, click the contacts icon.
2)
Select the viewing mode above the calendar icon.
Day: See the appointments and events in a day by hour.
Week: See the appointments in a week.
Month: See the appointments and events in a month by day.
Schedule: See all appointments.
Creating Activities
1)
In main menu interface, click the calendar icon.
2)
In calendar interface, press the Menu button “
3)
Input the detailed information of activities.
4)
Select OK.
Viewing Events
To view the events in a day:
1)
In main menu interface, click the calendar icon.
2)
In the calendar interface, press the Menu button “
3)
Select the event and view the details.
” → More→ Create Activities.
” → Today.
Turning Alarms Off: If setting alarms for events, it will sound at the time you set. If you need alarms to sound
again or to turn alarms off, you may select Delay All or Turn All Off.
6.3 Connection
6.3.1 Connecting to the Personal Computer
Please read the following to know how to use the data cable came with the pad to connect to the computer and how
to transmit the data between the computer and the pad.
Connecting to the Large-Capacity Storage Device
If inserted with T-Flash card, the pad can be used as a portable disk to connect to the computer, and you may visit the
file catalog of T-Flash.
1)
You may insert the storage card into the pad to transmit files to or from the storage card.
2)
You may use the data cable to connect the multifunctional interface of the pad with the computer.
3)
After connection, select USB Connected in information column and select Install, and you will see the
USB storage device in the computer.
4)
Open the file folder and view a file.
5)
Copy the file from the computer to the storage card.
6)
Select to turn off the USB storage device.
7)
Note: If you need to disconnect the pad from the computer, please click the USB storage device icon
shown in the taskbar of the computer and click the option Safely Delete USB Storage Device. Before that,
please do not remove the data cable from the computer. Otherwise, it might cause the loss of data in
storage card and the damage of the storage card.
20
Ness 101-132 10” Android Indoor Tablet
6.3.2 Wi-Fi
WiFi is not available on this model. It will support hard wired Ethernet LAN only.
6.3.3 Mobile Network
3G is not available on this model.
6.3.4 Bluetooth(Tablet 7 series only, not for 10 series)
Bluetooth is not available on this model.
6.3.5 GPS
GPS is not available on this model.
6.4 Toolkit
6.4.1 My Document
Please read the following to know how to find images, videos, music files, sound clips and other files in the storage
card.
Supported Files
Types Formats
Images BMP、GIF、JPG、PNG
Videos 3G(Tablet 7 series only, not for 10 series)P、
MP4、AVI、WMV、FLV、KKV、ASF
Music MP3、3G(Tablet 7 series only, not for 10
Files
series)PP、WMA、OGG、AAC、WAV、AMR
Some files are not supported, and it depends on the software installed in the pad.
In case the file size is large than the storage capacity, there will be an error when opening the file.
1)
Open a file: Press the Menu button and select My Document.
2)
Select a file folder. You may press the Back button to return to previous interface. Select the file you want
to open.
3)
Create a file folder: Press the Menu button and select My Document.
4)
Press the Menu button → New File Folder. Input the name and select OK.
5)
Copy or cut the file: Press the Menu button and select My Document → Select.
6)
Select the file folder or file you want to copy or cut. Select Copy or Cut. Find the file folder and select
Paste.
7)
Delete the file: Press the Menu button and select My Document → Select. Select the file folder or file you
want to delete. Select Delete.
6.4.2 Clock
You may see the time, watch the slide, play music and set an alarm.
1)
See the time: Press the Menu button and click the clock icon.
2) Watch the slide: Press the Menu button and click the clock icon. Select the slide icon to show images in
your picture base.
3)
Play music: Press the Menu button and click the clock icon; Click the the music icon. Select the music file
to play.
21
Ness 101-132 10” Android Indoor Tablet
Alarm
Please read the following to know how to set alarms for important activities and control alarms.
1)
Set an alarm: Press the Menu button and click the clock icon. Select the alarm icon; Select to add an
alarm; Set the details of the alarm; after finishing the setting, select Finish.
2) Turn off an alarm: When the alarm sounds, select Cancel in the prompt box to turn off the alarm. Select
Pause/ Sound Again in the prompt box to have the alarm sound again after the specified period of time.
3)
Delete an alarm: Press the Menu button and click the clock icon. Select the alarm icon and enter alarm
interface; Select the alarm you want to delete; select Delete. You may also select the alarm to long press
and select Cancel to delete the alarm.
4)
Change alarm setting: Press the Menu button and click the clock icon. Select the alarm icon and press the
Menu button → Setting, and change the alarm setting.
6.4.3 Searching
Please read the following to know how to use the search function to get the information of devices, networks,
applications, and contacts.
Press the Menu button and click the search icon.
Input the keyword and search range (All, Network, Application, Contacts)
The pad will search for the information and webpages according to the search range and keyword.
7 Setting
Visit setting menu:
1)
Press the Menu button and click the setting icon.
2)
Select setting type, and select the option.
7.1 Wireless and Network
Change the setting for wireless network connection.
Flight mode: Disable all wireless functions and only non-network services are available.
Wi-Fi Setting
WiFi is not available on this model.
7.2 Call Setting
Customize Call Setting.
Voicemail: Select the service provider or other providers to receive voicemail.
Voicemail Setting: Input the number to access voicemail service. You may ask your service provider to get
the number.
7.3 Sound
Reset the Sound Settings of your pad.
Silent Mode: Activate silent mode to turn off all sounds except media sound and alarm sound.
Vibrate: Select to vibrate in one of these ways, such as all the time, at no time, vibrate in mute mode only,
or vibrate in non-mute mode only.
Volume: Adjust the volume of ringtone, media sound, alarm sound and notification sound.
Device Sound: Select the ringtone for incoming calls.
Alert Sound: Select alert sound for events. For example, new e-mail.
Key Sound: Set the pad to sound when you click the dial key.
Selection Sound: Set the pad to sound when you choose applications or options on the screen.
Touch: Set the pad to vibrate when pressing the key.
22
Ness 101-132 10” Android Indoor Tablet
7.4 Display
Brightness: Set the brightness of the screen. Change the setting for display.
Autorotation: Set the display screen to automatically rotate.
Animation: Set the pad to play the animation when switching window
Screen Timeout: Set how long the time is before turning off the background light.
7.5 Location and Security
Set the security for changing device.
Set Screen Lock: Set unlocking password. If the password is already set, the option will be to change screen lock.
1)
None: Disable screen lock.
2)
Pattern: Set the unlocking pattern to unlock the screen.
3)
PIN: Set PIN code (digits) to unlock the screen.
4)
Password: Set the password (letters and/or digits) to unlock the screen.
Lock SIM card: SIM Card is not available on this model.
Password Visible: For the sake of security, the password shown on the screen is · by default. You may set to make
the password visible when inputting.
Device Manager: You can select to view the device manager or activate device manager to apply the new strategy.
Security Certificate: Use security certificate to securely use all applications.
Install Encryption Certificate from SD card: To install the encryption certificate stored in the storage card.
Set the Password: Create and verify the password for access.
Clear the Storage: Delete the certificate in the device and reset the password.
7.6 Applications
Change the setting for the management of installed applications.
Unknown Source: Select this option to download any application from anywhere. If not selecting this option, the
pad will only be able to download the applications from Android Market.
Manage Applications: visit the list of installed application and view the information. You may also view the
applications in operation or stored in the storage card.
Services in Operation: view the services the user is using and manage the services.
Development:
1)
USB Debugging: Select this option to connect the pad to the computer with data cable. This is used in
developing application.
2) Keep Awaken: Set the pad to keep in standby status when charging the pad.
3)
Accept Mock Location: Accept to send mock location and service information to location management
service to test. This is used in developing application.
7.7 Accounts and Syncing
Change sync function setting or manage the account you want to sync.
Background Data: Select to use auto sync function and it proceed in the background without opening applications
and sync data.
Auto Sync: Set the pad to auto sync contacts, calendar and E-Mail.
Add Accounts: Inputting e-mail addresses and passwords to add accounts.
7.8 Privacy
Resume Default Setting: Reset all settings to factory default and clear all data in the pad, however, current system
software and bundled applications as well as files in SD card such as music files and photos won’t be deleted.
23
Ness 101-132 10” Android Indoor Tablet
7.9 SD Card and Internal storage
Check the storage card and the storage information in the pad: to view the capacity and available space of SD card
and the available space of internal storage.
Uninstall SD Card: You need to uninstall the SD card before safely removing it.
Format the SD card: format (clear) the external SD card.
Format Internal storage: format internally installed T card.
7.10 Searching
Change search setting.
Google search:
1)
Display Webpage Advices: Set the pad to display the advices when you inputting keywords.
2)
Searchable Items: Select the types of items you want to search for.
3)
Delete Shortcuts: Delete recently searched information.
7.11 Language and Keypad
Change text input setting.
Selecting Languages: Select all menus and applications to display in which language.
Selecting Input Methods: Select to use default keypad type to input texts.
Android Keypad
1)
Vibrate When Clicking the Key: Set the pad to vibrate when you touch the screen to click the key.
2)
Play Music When Clicking the Key: Set the pad to play music when you touch the screen to click the key.
3)
Auto Capitalization: Set the pad to capitalize all letters inputted in editing interface.
4)
Input Languages: Set to slide the finger on space key to switch input languages.
5)
Display Advices: set to activate smart prompts when inputting texts.
6)
Auto-Filling: Set to automatically insert highlighted words when clicking the space key and punctuation
marks.
Note: (1) You may download third-party input methods via networks, such as Google Pinyin IME and Sogou Input
Method etc. In addition, it is suggested to download the input method from official website, since the input method
version may be incompatible with the pad.
(2) After downloading and installing input methods, please select an input method when setting the language and
keypad, so that the downloaded input methods will not appear as options in editing interface.
User’s Dictionary: the user can customize words.
Auxiliary Function: Press the Power button to end a call: set the pad to end a call by pressing the Power
button instead of turning off the screen.
7.12 Date and Time
You may visit and change the following settings to have the pad display the date and time:
1)
Auto: Set the pad to update the time automatically when you go across the time zone.
2)
Set Date: Manually set current date.
3)
Select Time Zone: Set local time zone.
4)
Set Time: Manually set current time.
5)
Use 24-Hour Time: Set the pad to display 24-hour time.
6)
Select Date Format: Select Date Format.
7.13 About the Product
You may know the information of your product, such as model and version, check the status of this pad and battery
power as well as how to use this product.
24
Ness 101-132 10” Android Indoor Tablet
Notes:
25
Ness 101-132 10” Android Indoor Tablet
Head Office:
4/167 Prospect Hwy,
Seven Hills NSW, Australia
Phone +61 2 8825 9222
email : [email protected]
Sydney Office - (02) 8825 9222
Melbourne Office -(03) 9875 6400
Brisbane Office - (07) 3399 4910
Perth Office -(08) 9328 2511
Adelaide Office - (08) 8152 0000
Support
email
[email protected]
Phone
1300 551 991 (Within Australia)
+61 2 8825 9222 (Outside Australia)
26