1
P&E Microcomputer
Systems, Inc.
PKGPPCNEXUS
Quick Start Guide
for the
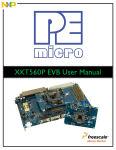
PHYTEC phyCORE-MPC5554
Rapid Development Kit
Visit us on the web: www.pemicro.com
© 2006 P&E Microcomputer Systems, Inc.
All Rights Reserved
QuickStart Guide for the PHYTEC phyCORE-MPC5554
CONTENTS
1 Topics Included In This Guide ................................................................ 1
2 PKGPPCNEXUS - Software Overview..................................................... 3
3 Installing the PKGPPCNEXUS Development Environment .................. 4
3.1 Changing the Default Installation Location....................................... 4
4 PKGPPCNEXUS – Quick Start Guide...................................................... 5
4.1 Configuring the Target Board ........................................................... 5
4.2 Starting WinIDE ................................................................................ 5
4.3 Creating a New Project with a WinIDE Template............................. 6
4.4 Files Included in the Template Project ............................................. 8
4.5 Windows Layout for C-compilation................................................... 9
4.6 Viewing Source Files to Compile - The Build Dialog ...................... 11
4.7 Viewing Compiler Options .............................................................. 12
4.8 Compiling the Application, Interpreting the Result ......................... 12
4.9 Programming Flash Using PROGPPCNEXUS .............................. 15
4.10 Starting the Debugger .................................................................... 18
4.11 Boot Assist Module Considerations................................................ 19
4.12 Loading the Debug Information ...................................................... 20
4.13 Stepping through C Instructions ..................................................... 21
4.14 Using Code Window Quick Execution Features ............................ 23
4.15 Using Code Window Popup Debug Evaluation Hints..................... 25
4.16 Using the Variables Window .......................................................... 26
4.16.1 Modifying a Variable's Value ...............................................27
4.16.2 Modifying a Variable's Properties ........................................28
4.17 Using the register interpreter .......................................................... 29
4.17.1 Register interpreter display..................................................29
4.17.2 Adding Register Field Descriptions to the
VAR Window........................................................................31
4.18 Executing the PowerPC Nexus Application.................................... 31
4.19 Creating an Application for SRAM.................................................. 32
2006
L-489e_1
Topics Included in This Guide
1 Topics Included In This Guide
This document is a step-by-step guide to using PKGPPCNEXUS with the Phytec phyCOREMPC5554 evaluation board. The guide covers creating a C language project, compiling the source
code with the GNU compiler, programming code to internal Flash memory and internal SRAM, and
debugging with the P&E ICDPPCNEXUS in-circuit debugger.
The "PKGPPCNEXUS User's Manual" includes detailed information about using WinIDE to configure
the GNU compiler. The "Application Framework and Solutions Guide" summarizes the process of
customizing the target application for your system.
2006
L-489e_1
1
QuickStart Guide for the PHYTEC phyCORE-MPC5554
2
2006
L-489e_1
PKGPPCNEXUS – Software Overview
2 PKGPPCNEXUS - Software Overview
The P&E PKGPPCNEXUS Windows development environment for PowerPC Nexus includes software
to edit and compile C source code for the PowerPC Nexus family of processors that use the e200z6
core. PKGPPCNEXUS contains software for programming Flash and debugging with a PowerPC
Nexus target system.
This version of PKGPPCNEXUS provides templates for building an application for the MPC5553 and
MPC5554 processors. Although the templates are intended to be used with select evaluation boards,
you may use PKGPPCNEXUS to create an application for any MPC5553 or MPC5554 board. The
GNU compiler supports any PowerPC processor that implements the e200z6 core or e200z3 core
operating in non-VLE mode.
PKGPPCNEXUS includes the following software:
WinIDE – Integrated Development Environment for the PowerPC Nexus architecture.
This is the primary editing environment for the software kit. It is the launch pad for other applications,
such as the P&E in-circuit debugger, P&E in-circuit Flash programmer, and the GNU C compiler.
Control the settings for the GCC compiler within the WinIDE environment.
ICDPPCNEXUS – In-Circuit Debugger for PowerPC Nexus series devices.
This debugger supports reading and writing memory and variables, loading code to RAM, controlling
processor execution, and more. Use the debugger to step through both assembly language and C
language source code. The debugger loads the Elf/Dwarf (version 2.0) debug file format, which is
output by many compilers, such as the GNU compiler included in this package.
PowerPC EABI SPE GCC Compiler – Windows GNU C compiler for select PowerPC 55xx
targets.
Without requiring a UNIX shell, this compiler executes under the Windows operating system. WinIDE
controls the operation of the compiler, providing one-touch compilation of a C project. The GNU
software produces both the Elf/Dwarf 2.0 and S19 file formats. P&E’s in-circuit Flash programmer will
program with the S19 file, and P&E’s in-circuit debugger will use the Elf/Dwarf file for debugging.
The GNU toolset includes the following components:
GCC version 3.4.4
Binutils version 2.15.91
Newlib version 1.13.0
Both GCC and Binutils have been patched to support the e200z6 core and e200z3 core operating in
non-VLE mode.
PROGPPCNEXUS – In-circuit Flash programmer for PowerPC Nexus.
Register File Viewer for PowerPC Nexus
This software simplifies viewing and editing PowerPC registers and register bits.
2006
L-489e_1
3
QuickStart Guide for the PHYTEC phyCORE-MPC5554
3
Installing the PKGPPCNEXUS Development
Environment
You must have administrator privilege on the Windows 95/98/ME/NT/XP computer that will host the
software. After launching the installer, follow the instructions to install all of the software in the default
location, C:\pemicro\pkgppcnexus.
Take note of several subdirectories in the PKGPPCNEXUS installation directory:
\gnu
GNU/GCC software (P&E Build)
\gnu\bin
GNU/GCC executables (P&E Build)
3.1 Changing the Default Installation Location
The default installation location for PKGPPCNEXUS is C:\pemicro\pkgppcnexus. Using the installer
software, you may install the software at any location.
We do not recommend that you manually change the location of PKGPPCNEXUS after installation.
Do not copy-and-past the GNU compiler to a different location. However, you may place your source
code and WinIDE project files at any location.
4
2006
L-489e_1
PKGPPCNEXUS – QuickStart Guide
4
PKGPPCNEXUS – Quick Start Guide
The following sections walk you through select tasks using PKGPPCNEXUS. For more information
regarding each of the P&E software components, see the Windows help files for WinIDE,
ICDPPCNEXUS, and PROGPPCNEXUS.
4.1 Configuring the Target Board
There are templates to create projects for both internal Flash and internal SRAM using the
phyCORE-MPC5554 board. First, we will create a project that runs in internal Flash. Be sure that your
target board is configured to boot from internal Flash memory. Later, we will create a project for RAM
only.
4.2 Starting WinIDE
After installing PKGPPCNEXUS, launch the WinIDE development environment by using the Windows
Start menu. Select the WinIDE icon in the program group for the P&E PowerPC Nexus kit.
lternatively, double-click on the WinIDE32.exe icon in the installation directory,
C:\pemicro\pkgppcnexus.
When the WinIDE development environment launches for the first time, it will display a file containing
a description of the documentation included with PKGPPCNEXUS.
2006
L-489e_1
5
QuickStart Guide for the PHYTEC phyCORE-MPC5554
A WinIDE project file contains the names of user files associated with a project as well as a wide
range of compilation and editing settings. The WinIDE project name appears in the title bar of the
main WinIDE window, shown as ReadMe_pkgPPCnexus.ppf, above.
4.3 Creating a New Project with a WinIDE Template
Use WinIDE's templates to create a C language project for your target system. Use the template to
create a new WinIDE project and to automatically configure the GNU C compiler. After WinIDE copies
default source files to your new project folder, it will tailor the compiler settings for your target system.
Begin by selecting the WinIDE Environment menu, New Project from Template. A list of processors or
evaluation boards will appear. Select the template "EVB_PHYTEC_PHYCOREMPC5554". This will
create a project that will reside in internal Flash and utilize internal SRAM and cache. We will discuss
the template "EVB_PHYTEC_PHYCOREMPC5554_SRAM" later.
6
2006
L-489e_1
PKGPPCNEXUS – QuickStart Guide
A dialog will ask you to select an empty directory for the new project.
Instead of selecting an existing directory, type the path and name of a new folder in the edit box.
Then, hit the Create New Folder button, then OK. WinIDE will create the new, empty folder.
Next, type the name of your new project file.
2006
L-489e_1
7
QuickStart Guide for the PHYTEC phyCORE-MPC5554
WinIDE will ask you for the root directory of the GNU compiler. In most cases, WinIDE will
automatically select the correct folder. The default compiler root directory is
C:\pemicro\pkgppcnexus\gnu.
WinIDE will ask if you want to save the initial project, ReadMe_pkgPPCnexus.ppf; select No or Yes.
The default project files will now be located in the new project directory, C:\new_project. WinIDE will
open the new WinIDE project file, project.PPF.
4.4 Files Included in the Template Project
A PowerPC Nexus template creates a project whose source code is very similar to the Freescale
code for the processor. Freescale publishes this processor initialization code on the Freescale
website. Differences between the Freescale source code and the P&E code are clearly noted in the
P&E source code.
The P&E template includes Freescale's header files and initialization code for the PowerPC
processor, as well as P&E's linker script and WinIDE project file. Take note of several subdirectories
and files within the new project directory:
Subdirectory \headers
This folder contain Freescale header files for the PowerPC 55xx.
Subdirectory \src
This includes the Freescale initialization source code for the PowerPC 55xx.
Subdirectory \PEGnu
The folder contains the P&E linker script, WinIDE project file, and compiler output files, such as the
ELF/DWARF, s-record, and compiler error log files.
8
2006
L-489e_1
PKGPPCNEXUS – QuickStart Guide
P&E GNU Linker Script (*.ld )
This file works in conjunction with the Freescale code to control the memory map of the PowerPC
application. The top of the linker script contains user defined settings, such as stack location and
other memory settings.
WinIDE Project File (*.ppf)
This file contains all of the WinIDE settings, including compiler settings. Do not alter
this file manually in a text editor.
4.5 Windows Layout for C-compilation
After creating your new project with a template, WinIDE will open the project file. Close the initial file,
ReadMe.txt, which appears. WinIDE's window contains two areas, a left window pane to display open
project files and a right window pane to display the names of the files in the current WinIDE project.
Open the file, main.c, whose file name appears on the right pane. Click on the file name to open
main.c, maximize the file, and WinIDE will appear as below:
2006
L-489e_1
9
QuickStart Guide for the PHYTEC phyCORE-MPC5554
The file, err.log, will contain the output messages of the GNU compiler, including warnings and
errors. If this file is not already open during compilation, WinIDE will automatically open err.log.
Opening the error log before running GCC will maintain the log's state, its window size and location.
Open the error log and arrange the windows, as pictured below:
10
2006
L-489e_1
PKGPPCNEXUS – QuickStart Guide
4.6 Viewing Source Files to Compile - The Build Dialog
WinIDE project files appear in WinIDE's right window pane. These files are not automatically passed
to the GNU compiler. To view the files that will be compiled, select WinIDE's Environment menu,
Environment Settings, Assembler/Compiler tab, Build Dialog. Add files, remove files, or change the
compilation order from within this dialog. It is not necessary to alter the Build Dialog for this example.
2006
L-489e_1
11
QuickStart Guide for the PHYTEC phyCORE-MPC5554
4.7 Viewing Compiler Options
WinIDE configures the GNU compiler to build the PowerPC application. To view the compiler settings,
select WinIDE's Environment menu, Environment Settings, Assembler/Compiler tab.
Use this screen, including the Compiler Options (General), Compiler Options (Paths), WinIDE Error
Options, and Build Dialog, to configure the GNU compiler. It is not necessary to change the GNU
compiler settings for this example.
4.8 Compiling the Application, Interpreting the Result
The default memory map for our example uses on-chip Flash memory, internal
SRAM, and cache. For this example, use the default memory map, making no
changes to the P&E linker script or the Freescale source files.
To compile the PowerPC Nexus application, either press the <F4> function key or click the
compilation button
12
on the tool bar at the top of the WinIDE screen.
2006
L-489e_1
PKGPPCNEXUS – QuickStart Guide
When compiling, WinIDE will generate a Windows batch file to control the GNU compiler. The batch
file will contain the compiler settings from WinIDE.
The user may be prompted to confirm that the existing batch file should be overwritten.
Click OK. WinIDE will execute the batch file, and the batch file will execute the GNU compiler. WinIDE
will read the results of the compilation and display the compiler messages in the file, err.log.
If there are no errors during compilation, WinIDE's status bar will indicate that WinIDE detects no
errors.
To ensure that no error has occurred, always refer to the output in err.log to view all compiler
messages.
2006
L-489e_1
13
QuickStart Guide for the PHYTEC phyCORE-MPC5554
If there is an error during compilation, WinIDE automatically opens the file containing the first error
and attempts to highlight the line with the error.
WinIDE's status bar, at the bottom of the window, displays the first compiler error
message. WinIDE recovers error messages from the file err.log. For more
information on a specific error, refer to the compiler output in err.log. Certain errors,
such as those that occur during linking, may not have a corresponding source line.
To be sure that no error has occurred during the build process, always refer to the
log file.
14
2006
L-489e_1
PKGPPCNEXUS – QuickStart Guide
4.9 Programming Flash Using PROGPPCNEXUS
The template project produces a PowerPC Nexus application that will execute in the on-chip Flash
memory. The PowerPC target application uses on-chip SRAM for global variables and on-chip cache
for stack space. Use the default memory map for this example. The application base address, in
Flash, is 0x00000000.
After compiling the application, program the application to on-chip Flash memory. Power down the
target board. Before launching the Flash programming software, connect the host PC to the target
board using a P&E hardware interface, such as the Cyclone MAX (USB port), USB-ML-PPCNEXUS
(USB port), or the CABPPCNEXUS (parallel port). Power up the target board.
Launch the Flash programming software from within WinIDE by using the <F7> hotkey or the
programming button
on the tool bar. Alternatively, there is an icon for PROGPPCNEXUS in the
Windows Start menu in the program group for PKGPPCNEXUS.
After starting the Flash programmer, the connection assistant dialog will appear.
Use the drop-down menu labeled "Port" to choose the proper PC connection to your target board.
Click the Connect button, and PROGPPCNEXUS will attempt to contact the target processor.
PROGPPCNEXUS will attempt to establish communications and to reset the processor.
2006
L-489e_1
15
QuickStart Guide for the PHYTEC phyCORE-MPC5554
Next, the Flash programmer will prompt you for a programming algorithm file.
Select the appropriate file in the Algorithms folder of the installation directory, and click Open. For this
example, select 5554_2meg_04_and_Later.PCP.
16
2006
L-489e_1
PKGPPCNEXUS – QuickStart Guide
At this point, double click the "EM Erase module" command and allow the command to complete.
Issue the "BM Blank check module" command, and wait for the command to complete. Next, issue
the "SS Specify Object File" command. The software will prompt for the S19 file. Select the file
main.s19 in the directory C:\new_project\PEGnu. Next, execute the commands "PM Program
module" followed by "VM Verify module". If PROGPPCNEXUS reports no errors, then the Flash
memory on the processor has been programmed.
Exit the Flash programmer.
2006
L-489e_1
17
QuickStart Guide for the PHYTEC phyCORE-MPC5554
4.10 Starting the Debugger
After compiling and programming the PowerPC Nexus application to Flash, launch the debugger from
WinIDE by using the <F6> key or the “run debugger” button
on the tool bar. Alternately, use the
debugger icon in the program group for PKGPPCNEXUS, located in the Windows Start menu.
Upon starting the debugger, the connection assistant dialog appears.
Use the drop-down menu labeled "Port" to choose the proper PC connection to your target board.
Click the Connect button, and ICDPPCNEXUS will attempt to contact the processor. Using the
default debugger settings, ICDPPCNEXUS will establish communications and reset the processor.
After establishing communications, the main debugger screen will appear, and a debugger macro
should automatically execute and complete. If you do not see the debugger macro executing, issue
the
MACRO
command
in
the
debugger
and
select
the
file
C:\pemicro\pkgppcnexus\MPC5500_any_init.mac. See the next section for an explanation of this
debugger macro file.
18
2006
L-489e_1
PKGPPCNEXUS – QuickStart Guide
4.11 Boot Assist Module Considerations
This section does not contain any steps for the user to complete, it simply explains the initialization
that the debugger performs on the processor. A debugger initialization script controls the processor
initialization. The user can view and modify all the script's initialization tasks.
The processor Boot Assist Module (BAM) would normally initialize the memory of the processor.
However, when running the target application from the debugger, the BAM functionality is disabled.
To account for this, the debugger must run a script file on reset. The script initializes the memory of
the processor similar to the way in which the BAM would initialize the processor.
The appropriate macro file should automatically run on reset. To run the script file manually, type the
MACRO command in the debugger status window or click the play macro
button on the debugger
toolbar. Select the macro file MPC5500_any_init.mac, located in the PKGPPCNEXUS installation
directory as well as C:\new_project\PEGnu in this example. When the script file runs, if the debugger
has not been configured to run in silent mode, you will see a significant number of status messages
scroll down the status window of the debugger.
The macro file MPC5500_any_init.mac does not initialize the external bus. You may run the macro
files MPC5500_ebi_32.mac or MPC5500_ebi_16.mac to configure the external bus for 32-bit or 16bit memory.
2006
L-489e_1
19
QuickStart Guide for the PHYTEC phyCORE-MPC5554
To configure the debugger macro to execute automatically on reset, select the debugger
Configuration menu, Automated Script Options dialog, shown here:
4.12 Loading the Debug Information
After executing the initialization script, it is time to load the debugging information into the debugger.
Issue the HLOADMAP command (type in HLOADMAP and hit enter) in the debugger status window,
and select the Elf/Dwarf file, C:\new_project\PEGnu\main.elf. This will load the debug information
that corresponds to the PowerPC application, now located in Flash.
Depending on the version of ICDPPCNEXUS, the debugger may display the following dialog box:
This warning relates to the format of the GNU Elf/Dwarf file. For more information, see the document
"P&E, GNU, and Elf/Dwarf". When using GNU GCC, always select "Yes".
20
2006
L-489e_1
PKGPPCNEXUS – QuickStart Guide
After loading the Elf/Dwarf 2.0 file, the debugger status window will display the amount of debug and
object information loaded from the file.
By default, when the debugger loads an Elf/Dwarf 2.0 file, the debugger sets the program counter
(PC) to the start address of the target application.
4.13 Stepping through C Instructions
After loading the Elf/Dwarf file, the debugger code window displays assembly language startup code.
After loading the file main.elf, the code window should show this source:
2006
L-489e_1
21
QuickStart Guide for the PHYTEC phyCORE-MPC5554
To run past the startup code, issue the debugger command "GOTIL main" in the status window. Note
that the labels are case sensitive and that the “main” label should be lowercase. This will set a
breakpoint at the beginning of the main function in main.c and start the processor running. Execution
should stop almost immediately, and the program counter will be pointing to valid C source code.
Instead of using the GOTIL command, you may step through the startup code to reach the main
function. Step through the initialization code, or any source code, using the high-level language
source step command. Use this feature by typing HSTEP in the status window or by clicking the highon the debugger tool bar. Each time the HSTEP command executes, the
level step button
debugger will rapidly single step assembly instructions until it encounters the next source instruction,
at which point target execution will cease. When the debugger reaches the next source instruction, all
visible windows will be updated with data from the board.
After reaching the main function, step through several C language instructions. Notice that some
instructions will take longer to step through than others because each C instruction may consist of a
greater or fewer number of underlying assembly instructions.
22
2006
L-489e_1
PKGPPCNEXUS – QuickStart Guide
4.14 Using Code Window Quick Execution Features
In the source code window, there will be a small red dot and a small blue arrow next to each source
instruction that has underlying object code. If a large blue arrow appears on a source line, this
indicates that the program counter (PC) points to this instruction. If a large red stop sign appears on
the source line, this indicates that a breakpoint exists on this line.
Set a breakpoint at an instruction by double-clicking the tiny red dot. To remove a breakpoint, doubleclick the large red stop sign. When you issue the HGO command or click the high-level language GO
on the debugger tool bar, execution will begin in real-time. If the debugger encounters a
button
breakpoint, execution will stop on this source line. If it does not encounter a breakpoint, target
execution will continue until you press a key or use the stop button on the debugger tool bar.
By double clicking the small blue arrow, you will be issuing a GOTIL command to the address of this
source line. A GOTIL command will set a single breakpoint at the desired address, and the processor
will begin executing code in real-time from the point of the current program counter (PC). When the
debugger encounters the GOTIL address, execution stops. If the debugger does not encounter this
location, execution continues until you press a key or use the stop button on the debugger tool bar.
Note that all user breakpoints are ignored when the GOTIL command is used.
2006
L-489e_1
23
QuickStart Guide for the PHYTEC phyCORE-MPC5554
You may also double-click the red and blue symbols in the disassembly window. The disassembly
window may display an additional symbol, a small, blue "S" enclosed in a box. This indicates that that
a source code instruction begins on this disassembly instruction.
24
2006
L-489e_1
PKGPPCNEXUS – QuickStart Guide
4.15 Using Code Window Popup Debug Evaluation
Hints
When debugging source code, it is advantageous to view the contents of a variable while viewing
your source code. The in-circuit debugger has a feature, debug hints, which displays the value of a
variable while the mouse cursor is held over the variable name. The hint may be displayed in any of
three locations, as shown below.
The three locations for the debug hints are the code window title bar, the status window caption bar,
and a popup hint that appears over the variable in source code. You can configure the hints to display
in any combination. Set the locations in the configuration menu of the debugger.
The information in the popup hint box is similar to the information displayed in the variables window.
The information includes the variable name (cnt), value ($0), and type (signed long).
2006
L-489e_1
25
QuickStart Guide for the PHYTEC phyCORE-MPC5554
4.16 Using the Variables Window
The variables window displays the current value of application variables. The following window shows
a display of variables from the example application.
Variables that are pointer types are displayed in red. Normal variables are displayed in black. Real
time variables are displayed in blue. A real-time variable is a variable that is updated while the
processor is running. Add real time variables by using the RTVAR varname command in the status
window. Add normal variables by using the VAR varname command.
To view the variables above, type "var cnt" and "var &cnt" in the debugger status window. Also, you
may add a variable by right clicking the variables window and choosing “Add a variable”. Delete a
variable by selecting it in the variables window, right clicking, and choosing "Delete variable".
When adding a variable using the pop-up menu, the debugger displays the following screen.
In the variable field, type the address or name of the variable. Typically, set the type of the variable to
“Default”, which means that the variable will be displayed as it is defined in the debugging
information. When adding a variable, you may specify the numeric display base of the variable.
26
2006
L-489e_1
PKGPPCNEXUS – QuickStart Guide
4.16.1
Modifying a Variable's Value
To modify the current value of a variable, double-click the variable name in the
variables window. If the debugger supports modification of this type of variable, it will
display the modify variable dialog. Check the “Modify value” checkbox, and type the
variable’s new value. After you click the OK button, the debugger updates the
variable value on the target memory, and the debugger refreshes the variable
window to display the new value. Note that the debugger will not edit certain userdefined types, such as enumerated types.
2006
L-489e_1
27
QuickStart Guide for the PHYTEC phyCORE-MPC5554
4.16.2
Modifying a Variable's Properties
To modify a variable’s display properties, such as the type or numeric display base,
double-click the variable name in the variables window. Check “Modify display
properties” in the modify variable dialog. Change the variable type and base. Click
the OK button, and the debugger will update the variable's display properties in the
variables window.
28
2006
L-489e_1
PKGPPCNEXUS – QuickStart Guide
4.17 Using the register interpreter
The register interpreter provides a descriptive display of bit fields within the processor’s peripheral
registers. The register interpreter allows you easily to change the value of these registers. You may
quickly check the current state of a peripheral and examine the configuration of the target device.
When you use the register interpreter within the debugger, it reads the current value of the peripheral
register, decodes it, and displays it. When using the register interpreter within WinIDE, all the fields
are initialized to 0. When the user hits the Enter key, the value is written into the editor at the current
cursor location, as opposed to being written back into memory, as the debugger does.
Note that the register interpreter is available for select processors only.
4.17.1
Register interpreter display
To launch the register interpreter in the debugger, either use the “R” command or click the view/edit
register
button on the tool bar. To display the interpreter from WinIDE, use the “SHIFT-F1”
keystroke combination or the register files
button on the tool bar. In either application, a window
will appear that allows you to select a peripheral block to examine.
Double clicking the module of choice will launch the register selection window.
2006
L-489e_1
29
QuickStart Guide for the PHYTEC phyCORE-MPC5554
Double clicking a specific register will launch the edit/display window for that register.
The window lists the keystrokes and mouse actions, allowing you to modify the values of each of the
fields. After right clicking on a specific field, the register interpreter will display all options for that field.
In the debugger, when you quit the register view/edit window by hitting the ESC key, you will be given
the opportunity to write the new value into the register, as shown in the following window.
30
2006
L-489e_1
PKGPPCNEXUS – QuickStart Guide
4.17.2
Adding Register Field Descriptions to the VAR Window
Add register bit fields to the variables window by using the “_TR” command in the debugger. Add bit
fields defined within a register description. After selecting the register field, the field appears in the
debugger variables window, and the debugger will continually update its value. A variables window
with fields from a chip select register may look like this.
4.18 Executing the PowerPC Nexus Application
Issue the HGO command in the debugger. The PowerPC Nexus application will execute in real time.
The LED on the target board should be blinking.
2006
L-489e_1
31
QuickStart Guide for the PHYTEC phyCORE-MPC5554
4.19 Creating an Application for SRAM
You may create an application for the MPC5554 that runs in on-chip SRAM and
cache only. The PowerPC application will not use Flash memory.
Follow these steps:
1. In WinIDE, select the Environment menu, New Project from Template.
Select EVB_PHYTEC_PHYCOREMPC5554_SRAM. Finish creating the new
project and compile using <F4>. The new PowerPC application will execute in
on-chip SRAM at address 0x40000000 and use the cache as stack space.
2. In WinIDE, press <F6> to launch the debugger. The debugger should
automatically execute macro file mpc5500_any_init.mac. If not, issue the
MACRO
command
in
the
debugger
and
select
C:\pemicro\pkgppcnexus\mpc5500_any_init.mac.
3. In the debugger, issue the HLOAD command. Select your Elf/Dwarf file, such
as C:\new_project\PEGnu\main.elf. This will load the object code to SRAM
as well as load the debugging information to the debugger. When you see
source code in the debugger, you are ready to debug as described in the
previous sections.
32
2006
L-489e_1
Suggestions for Improvement
Document:
QuickStart Guide for the PHYTEC phyCORE-MPC5554 Rapid Development Kit
Document number: L-486e_1, 2006
How would you improve this manual?
Did you find any mistakes in this manual?
Submitted by:
Customer number:
Name:
Company:
Address:
Return to:
PHYTEC Technologie Holding AG
Postfach 100403
D-55135 Mainz, Germany
Fax : +49 (6131) 9221-33
2006
L-489e_1
page
2006
Ordering No. L-489e_1