1
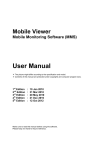
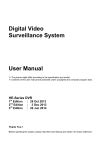
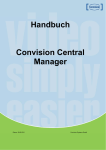
1
WARNING
TO REDUCE FIRE OR SHOCK HAZARD,
DO NOT EXPOSE THE UNIT TO RAIN OR MOISTURE.
The installation should be made by a qualified
service person and conformed to all local codes.
* This is a brief manual for quick and convenient reference.
Please refer to the User Manual contained in CD for details.
* The picture & functions & supplied items might differ according to the
specification and model.
2
Contents
1. Getting Started ……………………………..…………………………. 4
1.1
1.2
1.3
1.4
Checking Supplied Items ……………………………………………………….
User Login ………………………………………………………………………..
Date/Time Setting and HDD Format …………………………………………..
Quick Setup ………………………………………………………………………
4
4
5
5
2. System Operation ………………………………….…………………… 6
2.1
2.2
2.3
2.4
2.5
2.6
Using Tool Bar ……………………………………………………………………
Using Pop-Up Menu …………………………………………………………….
Display Mode …………………………………………………………………….
PTZ Mode ………………………………………………………………………..
Search and Playback Mode ……………………………………………………
Quick Backup Mode …………………………………………………………….
6
6
7
7
8
8
3. System Setting …………………………………..……………………… 9
4. Web Operation by M/S I/E …………………….……………………… 10
5. Remote Software …………………………………….………………… 11
5.1 RMS(RemoteManager Software) …………………………………………….. 11
5.2 CMS(CentralManager Software) ……………………………………………… 11
6. Mobile Viewer (WAP Connection) …………………………………… 12
7. MMS (Mobile Viewer by Smart Phone) ……………………………... 13
7.1
7.2
7.3
7.4
iPhone ……………………………………………………………………………
Google Android Phone …………………………………………………………
Black Berry ………………………………………………………………………
Windows Mobile O/S Phone …………………………………………………..
3
13
13
14
14
1. Getting Started
1.1 Checking Supplied Items
Make sure that you have following items supplied with your DVR. If any of these items is
missing or damaged, notify your vendor immediately.
l
l
l
l
l
l
NOTE
Quick Manual
CD (User Manual & Software)
12V D/C Adaptor & Power Cable
IR Remote Controller
Terminal Block
Rubber Mount
:
:
:
:
:
:
1
1
1
1
1
1
Piece
Piece
Set
Piece
Pair
Set
1) Refer to the [Separate Manual] on CD for functional explanation of Front
Panel, Rear Panel and IR Remote Controller.
2) The type of IR Remote Controller and Terminal Block may differ depending on
the DVR model.
3) Supplied items can be different according to the model.
1.2 User Login
1) After turning on the system, login
window will show up.
2) Click the keyboard icon to call virtual
keypad and input password.
Default USER ID and PASSWORD
are “ADMIN” and “1234”. Admin user
is to fully control the DVR system.
3) Click [OK] to finish login process.
4
1.3 Date/Time Setting and HDD Format
1) Go to the menu of [TOOL > System > System Info > Date/Tome] and make a proper
time/date setting based on your time zone.
2) User has to format new HDD before use. Go to the menu of [TOOL > System > HDD]
and select the HDD to format.
NOTE
Click [CHECK] button of each HDD to open the window of DVR HEALTH
CHECK. User can see full information of each HDD such as model name, serial
no, capacity, bad sector ratio, life time (used time) and temperature.
1.4 Quick Setup
Quick Setup is to help user make easy configuration for recording resolution, recording
speed, recording mode, recording quality and recording periods based on the capacity
of HDD installed.
1) Go to the menu of [TOOL > Quick
Setup] and select [Use Quick Setup]
2) Input [Desired Days], then the system
optimally adjusts full setting values and
shows “Recordable Period” based on
the capacity of HDD installed.
CAUTION !
Recordable period calculated by Quick
Setup is just for reference and may vary
depending on the actual site situation.
5
2. System Operation
2.1 Using Tool Bar
Move the mouse cursor to the low part of the screen to open the hidden Tool Bar and
click [TOOL] icon. Then, system setting menu such as MENU, SEARCH, BACKUP,
USER and SHUTDOWN shows up.
Icon on Tool Bar
Instant Recording
Go to PTZ Mode
Go to Playback Mode
Fixing Tool Bar to always open
HDD capacity
2.2 Using Pop-Up Menu
Click the right button of the mouse to open pop-up menu.
DISPLY
> Select channel display mode
SEQUENCE
> Sequentially change display screen
ZOOM
> Zoom control of the selected camera
SEARCH
> Search the recorded image
PTZ
> Control the PTZ camera installed
MENU
> Open the main menu for system setting
6
2.3 Display Mode
User can select display mode by using tool bar or pop-up menu. The images can be
seen on real-time speed by 1, 4, 9, 16 split screen and PIP screen.
Icon on Each Channel Screen
Icon on Main Screen
Continuous Recording
No HDD or HDD Failure
Motion Recording
On Emergency Recording
Sensor Recording
Using PTZ Camera
Continuous & Motion
Warning for Overheated Temp
Continuous & Sensor
Showing Sequence Mode
Motion & Sensor
Digital Zoom Mode
Emergency Recording
Sensor Activated
Motion Detected
Audio Channel
PTZ Camera
2.4 PTZ Mode
User can get into PTZ mode by clicking PTZ icon on the Tool Bar. While pressing the left
button of mouse, user can drag the mouse pointer to up/down or left/right to move
pan/tilt position of the camera.
7
2.5 Search and Playback Mode
User can click the Playback icon on the Tool Bar to playback the latest video clip and
search the recorded image by selecting the date & time on calendar.
2.6 Quick Backup Mode
User can easily archive video image under playback mode.
1) Press [ENTER] button on the front panel to set “start” time.
2) Once “Quick backup starts” message is shown on the screen, press the same
[ENTER] button again to set “end” time.
3) Backup window will shows, then, select the backup media like CD/DVD or USB
thumb drive and execute archiving.
NOTE
[HELP] button can help you understand how to setup several important settings.
NOTE
Some models do not support functions such as PTZ, Sensor, Alarm, Dual-Stream,
POS, etc.
8
3. System Setting
The structure of system setting consists of 6 categories as below.
Main Classification
Sub Classification
SYSTEM INFO
USER
SYSTEM
EXPORT/IMPORT
HDD
FACTORY DEFAULT
CAMERA
AUDIO
SENSOR
DEVICE
MOTION ALARM
EXTRA ALARM
PTZ
CAMERA
RECORD
SCHEDULE
NETWORK
DDNS
NETWORK
NOTIFICATION
POS
BACKUP
MANUAL BACKUP
QUICK SETUP
QUICK SETUP
Advanced Features
l
l
l
l
l
l
l
l
NOTE
Time Sync by NTP Server
Multi-Language Pack
Screen Saver
Level of User Authorization
Intensive Recording
Instant Recording (Emergency recording)
Network Bandwidth Control
Dual-Stream Function
[Multi-Language Pack]
DVR supports three different language packs. If you can not find your language,
contact your dealer to get the right pack of language.
l Pack 1 : English, French, German, Dutch, Italian, Spanish, Portuguese, Hebrew
l Pack 2 : English, Russian, Turkish, Hungarian, Polish, Slovak
l Pack 3 : English, Simplified & Traditional Chinese, Japanese, Korean, Thailand
Some models do not support functions such as PTZ, Sensor, Alarm, Dual-Stream,
NOTE POS, etc.
9
4. Web Operation by M/S I/E
The system is equipped with built-in web server, thus, user can be connected to the
system by ordinary web-browser for live monitoring, playback or remote configuration.
[Setting in IE Web browser]
1) Input IP address or mac address.
(ex, http://00231c381f2d.cctv-link.net.)
2) After downloading Active-X file, login page
will show up. Input user ID and password.
Default USER ID and PASSWORD are
“admin” and “1234”, respectively.
[Web Monitoring & Playback]
1) Click [Web monitoring] or [Playback]
button in the right-top corner of the
window.
2) Select the number of channel or select [All
Channel], and then click [CONNECT]
button
[Remote Configuration]
1) Click [Configuration] button in the right-top
corner of the window.
2) User can remotely make full setting of the
system.
This Web Configuration is available to
[admin] user only.
10
5. Remote Software
5.1 RMS (RemoteManager Software)
RMS is the basic remote management software, offering Live Monitoring, VOD
Playback with Intelli-Search Bar, Live & VOD Backup and Built-In Backup Player.
• 16 Ch Real-Time Monitoring
• Remote VOD Playback
• Remote Backup (Live & VOD)
• Remote System Configuration
• AVI Backup & Watermark
• Built-in Multi-Channel Backup Player
5.2 CMS (CentralManager Software)
CMS (Central Management System) is a powerful centralized management solution
that offers user full flexibility to control the entire system over the network, and consists
of 4 functional modules, System Monitoring, Image Display, E-Map and System
Configuration.
• Max. 180 Channel Real-Time
Monitoring
• Up to 5 Monitors on a Single P/C
Workstation
• Schedule Backup over Network
• Cloning Features to Create the
Separate Windows.
• Multi-Layer E-Map Editor
NOTE
For detailed information, refer to the User Manual of RMS & CMS.
11
6. Mobile Viewer (WAP Connection)
WAP (Wireless Application Protocol) is a system which allows devices such as mobile
phones to connect to the Internet. If user wants to connect to the DVR especially
under narrow-bandwidth network situation by sing 2G cellular phone, it is
recommended to use WAP connection.
It is the most simple and convenient way for mobile viewing because there is no
need to install any client software on the phone.
Just type in IP address on the phone, then clear JPEG image is automatically refreshed
by about 5 seconds interval depending on the network situation.
Input the IP address on the phone with following format.
l http://DVR IP/wap/index.html
(ex, http://123.123.123.123/wap/index.html)
l If web port is changed to “8088”
http://123.123.123.123:8088/wap/index.html
l If using a public DDNS server
http://yourddnsname.dvrdns.org/wap/index.html
1) If connection is successfully made, [Mobile Viewer Login] window will show up, then
input User ID and Password (same one in the DVR menu)
2) Click Camera # to get the video image
JPEG image is shown and refreshed by 3~5 seconds interval depending on the
network situation.
3) If you want to change Camera #, click [BACK] button and then select new Camera #.
12
7. MMS (Mobile Viewer by Smart Phone)
MMS is the mobile viewer software that allows user to view video image from the
DVR on the mobile phones. By installing the corresponding MMS software on the
mobile phone, user can view live video image through WAP, Wi-Fi or Dial-up Network.
7.1 iPhone
MMS software for iPhone is registered at “App Store in USA”, hence you have to get
your Apple account registered at same App Store in USA for software download.
7.2 Google Android Phone
MMS software for Google Android Phone is registered at “Google Market”. Download
[MobileViewer] software from this site and install it on your phone.
13
7.3 Black Berry
1) Execute MobileViewer after installation on your phone.
2) Select the target site and channel # by using track ball, and then click [LIVE] button.
7.4 Windows Mobile O/S Phone
1) Execute MobileViewer software after installation on your phone.
2) Select the target site from DVR LIST and click [CONNECT] button to get live image.
NOTE
Smart Phone connection may be made through 3G if Wi-Fi is not available,
in this case, heavy charges would be levied.
It is strongly recommended that user has to pay attention to connection mode,
Wi-Fi (
) or 3G (
).
14
MEMO
15