1
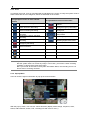
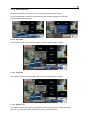
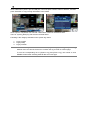
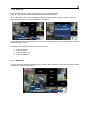
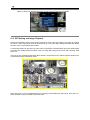
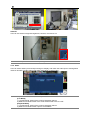
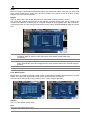
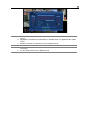
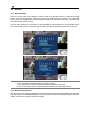
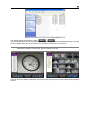
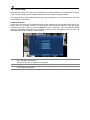
Network Video Surveillance System User Manual xNVR4P, xNVR8P, xNVR16P ※Contents of this user manual are protected under copyrights and computer program laws. Thank You! Before operating the system, please read this User Manual and retain it for future reference. WARNING TO REDUCE FIRE OR SHOCK HAZARD, DO NOT EXPOSE THE UNIT TO RAIN OR MOISTURE. The installation should be made by a qualified service person and conformed to all local codes. 3 Cautions Read Before System Operation Follow these details to prevent material damage or personal injury. Signs of Caution and Warning Warning: This sign indicates that the user could die or be seriously wounded if not used or installed properly. Caution: This sign indicates that the user could be wounded or could expect property damage if not used or installed properly. Warning: Do not expose the product to fog, rain or too much humid to decrease danger from electric shock or fire. General Warning Warning 1. Use the power cord, which is supplied or recommended by the supplier, or it may cause fire. 2. Do not disassemble or reassemble the product. It may cause malfunction or fire. 3. Enquire to your vendor for repair. It may cause electric shock or fire if the repair is not done properly. 4. Do not touch the product with wet hands. It may cause malfunction or electric shock. 5. Product installation must be ensured to a professional for product installation, or it may cause malfunction, electric shock or fire. 6. Ground applies to video products equipped with a 3-wire grounding type plug having a third (grounding) pin. This plug only fits into a grounding-type power outlet. If grounding is not done, it may cause malfunction or electric shock. 7. Ground connection must not touch gas pipe, water pipe or telephone line. If grounding is not done properly, it may cause electric shock. 8. Prevent metallic foreign substance from going inside the product. It may cause malfunction or electric shock. 9. Do not spray insecticide or flammable spray while driving. It may cause fire. 10. Place the system in a open place where air ventilation is guaranteed, or it may cause over-heating and seriously damage the system to be fired. 11. Prevent water from instilling inside electrical parts. Clean with a dry towel or malfunction or electric shock could result. Caution 1. Use the power cord, which is supplied or recommended by the supplier. The internal fan rotates at high speed and may cause an accident. 2. Do not drop, give strong vibration, or shock to the product. It may cause malfunction. 3. The air inhaler of the front panel and air outlet of the back panel must not be blocked during installation. The internal temperature of the product would be greater than allowable and could cause malfunction or fire. 4. Do not touch the product or the power cord when there is thunder. It may cause electric shock. 5. Do not install the product near or on top of heating source. The internal temperature of the product would be greater than allowable and could cause malfunction or fire. 6. Do not install the product on inclined or unstable location or where vibration could be committed. It may cause malfunction. Cautions about the Power Warning 1. Must use the outlet of the grounding to connect the power cord, or it may cause fire. 2. Do not connect on the middle of power cord or use extension cord. It may generate heat or cause fire. 3. Do not touch the power cord with wet hands. It may cause electric shock. 4. Keep power cord dry and protect from humidity. It may generate heat or cause fire. The power cord is not waterproof. 5. Hold the body of the plug while removing the power plug. Do not pull the power cord. Damage to the power cord may generate heat or cause fire. 6. Check the power plug regularly. Humidity and moderation in smoking may cause fire. 7. Remove power cord from outlet when product is not used for a long time. It may cause short-circuit or electric shock. Caution 1. Do not turn off the power by removal of the power plug. To turn off the power, click the power button from the front panel. When the system stops abnormally, the power button might not work. Click power button for 5 full seconds to turn power off. 2. Do not cut off the power artificially, or give shock or vibration to unit while the hard disk is activating. It may cause hard disk failure or loss of data. Remarks ※ Pictures and buttons are subject to be changed or modified up to different models. ※ Function or configuration is subject to be changed or modified without prior notice for improvement of the product. 5 Contents 1. GETTING STARTED .......................................................................................................................................................................... 1 1.1 1.2 1.3 2. OPERATION ........................................................................................................................................................................................ 4 2.1 2.2 2.3 2.4 2.5 2.6 2.7 2.8 2.9 2.10 2.11 2.12 3. USE LOG-IN .........................................................................................................................................................................................4 LIVE DISPLAY MODE ...........................................................................................................................................................................5 SEQUENCE ...........................................................................................................................................................................................8 ZOOM ..................................................................................................................................................................................................9 FREEZE MODE .....................................................................................................................................................................................9 ADD BOOKMARK .................................................................................................................................................................................9 IP CAMERA INFORMATION .................................................................................................................................................................10 PTZ CONTROL ...................................................................................................................................................................................10 PLAYBACK RECORDED IMAGES ......................................................................................................................................................... 11 QUICK BACKUP DURING PLAYBACK .................................................................................................................................................. 11 SEARCH RECORDED IMAGE ...............................................................................................................................................................12 DST SETTING AND IMAGE PLAYBACK ...............................................................................................................................................17 SETTING ............................................................................................................................................................................................ 19 3.1 3.2 3.3 3.4 3.5 3.6 4. CHECKING SUPPLIED ITEMS ................................................................................................................................................................1 SYSTEM STARTUP ................................................................................................................................................................................2 SYSTEM SHUTDOWN ............................................................................................................................................................................3 SYSTEM...........................................................................................................................................................................................19 DEVICE ..............................................................................................................................................................................................30 RECORD.............................................................................................................................................................................................36 NETWORK ..........................................................................................................................................................................................40 BACKUP .............................................................................................................................................................................................49 QUICK SETUP ....................................................................................................................................................................................51 Q&A .................................................................................................................................................................................................... 52 1 1. Getting Started 1.1 Checking Supplied Items Make sure that you have following items supplied with your NVR. If any of these items is missing or damaged, notify your vendor immediately. Keep the packing utilities for moving or storage purposes afterwards. Items Photo User Manual and Remote Software Quantity 1 Set (*) Quick Manual and CD 48V D/C Adaptor and Power Cable 1 Set IR REMOTE CONTROL 1 Set Rubber Feet 1 Set (4 Pieces) . USB Mouse 1 Set Ground Cable 1 Set 2 1.2 System Startup This NVR System receives the data of IP cameras based on ONVIF and stores it and transfers it to other devices. After connecting all peripheral devices, connect power cord to the NVR for system startup. Input USER and PASSWORD for login after turning on the system. The factory default of user and password are “ADMIN” and “1234” respectively. Admin user is to fully control the entire NVR system. . Note 1) Do not forget the administrator’s password that was set for the first time. In case the Password is forgot, contact your local dealer for help. 2) Refer to the “Section 3.1.2 User” for AUTO LOGIN and AUTO LOGOFF. Caution It may take a few minutes to startup the system after turning on the power, in case that user sets the network configuration as DHCP mode but there is neither DHCP server in user’s network nor physical network connection. 3 1.3 System Shutdown When mouse point moves to bottom of the screen, the menu bar is shown. To turn off the power, click “TOOL” button and then click “SHUTDOWN” in the GUI software as below. Do not pull off the power by pulling the power plug. When the system asks User & Password, input them which has the rights to system shutdown. Note User can put password by virtual keyboard, or front numeric buttons. (if available) 4 2. Operation 2.1 Use Log-in Check the power connection. After checking power on, User can log-in Note 1) LOGIN Window will be permanently displayed in monitor as above picture until user logs in with correct ID and Password. 2) If NVR is set as AUTO LOGIN, login process isn’t necessary. Please refer to the “Section 3.1.2 User” for details. 5 2.2 Live Display Mode 2.2.1. Channel Selection The images can be seen on real-time by 1, 4, 9, 16 screen. Whenever the up/down arrow button on the front panel or IR remote controller is pressed, the screen mode will be changed sequentially. And, whenever the left/right arrow button on the front panel or IR remote controller is pressed, the screen display will be sequentially changed. [1 Ch] [4 Ch] [6 Ch] [9 Ch] [16 화면] To select a channel & see as 1 Ch. mode, make double click of the left mouse button. To return previous screen mode after selecting certain full channel, make another double click of the left mouse button. Note This system only support 1, 4, 9, 16 display mode in playback To properly select channel by mouse, user is supposed to make slow and clear double-click of the left mouse button. 6 2.2.2. Menu (Tool) Bar When user place USB mouse pointer in the bottom of the monitor in live mode, menu (tool) bar will be instantly appeared as below picture. Sequence button as per time setting. makes screen display change, based on the current display mode, sequentially Instant (emergency) recording button is which is useful to urgently start recording. In emergency recording, the system records all the channels within its maximum frame rate at CIF resolution. Joystick icon button means “PTZ” mode, which is useful to instantly switch to PTZ control. In PTZ mode, user can control pan/tilt by moving the mouse pointer and zoom-in/out by controlling mouse wheel. In order to control focus by mouse wheel, click the right mouse button and select Focus. User can click the right-forwarded arrow button to automatically playback the latest video clip. Pin icon button means that user can fix this menu bar, or disable fixing the menu bar by moving out mouse pointer. If user fixes the menu bar, then this menu will not disappear even though user moves away mouse pointer out of this range. If user does not fix the menu bar, then the menu will be shown when user places mouse pointer in this bottom area only. Quadrilateral icon button means the HDD usage percentage by video recording. If it shows 60%, then 60% of HDD space has been used up for recording. Usage percentage is displayed by 5% unit. 7 2.2.3. Icons In real time live mode, icons or messages will be indicated on the screen to notify the system mode or status. Below are the icon categories, which are indicated on the monitor. Icon to be shown at right-upper corner on each channel screen Icon to be shown at right-bottom corner on full screen. Continuous Recording No HDD, Smart Alarm & HDD Failure Motion Detection Recording Using Emergency Recording Sensor Activating Recording Using PTZ Continuous + Motion Alarm Recording Continuous + Sensor Activating Recording Motion Detection + Sensor Activating Recording Warning for exceeding temperature Showing sequence mode Showing digital zoom mode Emergency Recording Sensor Activated Motion Detected Audio Connected Channel PTZ Camera Connected Channel Note If you can’t find any recording icon in the right up corner of the live screen mode, it means that the system does not record any image. In this case, you need to check recording schedule or camera of the main setup menu. But if you turned off the OSD in the System Information Menu, the recording icon is not shown even if it is being recorded. 2.2.4. Pop-up Menu User can click the right mouse button to pop up the menu as below. With this pop-up menu, user can use various functions (display mode change, sequence, zoom, freeze, add bookmark, search, PTZ, recording info and move to menu.) 8 2.2.5. Video Loss “Video Loss” is shown on the display screen when no camera is connected or camera is disconnected on a certain channel. When camera is disconnected, warning sound shall be generated depending on the system setting. 2.2.6. User Add/Edit Admin user can set different level of authorization for each user. If a certain user is not allowed to view a certain live and playback channel, then no image is shown on the display screen as below. Note If no camera is connected after system booting, the channel is shown as “Video Loss”. 2.3 Sequence When “SEQUENCE” is selected, icon is shown on the right-bottom corner of the screen and display screen will be sequentially changed. Dwell time can be set in the menu (System Info Display). 9 2.4 Zoom When “ZOOM” is selected on full screen mode, digital zoom function is activated and icon is shown on the right-bottom corner of the screen. In zoom pop-up menu, user can select ZOOM-IN or ZOOM-OUT and exit to normal live display mode by selecting ZOOM EXIT. User also can use mouse wheel to control zoom-in & out. Note There will be possible to use limited function, which depends on the model of system 2.5 Freeze Mode Click the right mouse button and select the FREEZE mode on pop-up menu while viewing live image, then live image pauses, but system clock (date/ time information) continues running. Open pop-up menu by right-click on the mouse and select the FREEZE mode again to resume the live view. 2.6 Add Bookmark Click Bookmark button to save the information on the current showing image, including description, in live & playback mode. 10 Note The Bookmark saves the information of time and its checking, not moving picture. 2.7 IP Camera Information Click the right mouse button and select the IPCAM STATUS on pop-up menu while viewing live image. Then, IP Camera information and status can be checked in the information screen. 2.8 PTZ Control User can get into PTZ mode by clicking right mouse button and selecting “PTZ” in the pop-up menu as below, or select joystick button in the menu bar appeared in the bottom of the main screen. In PTZ mode, user can control PTZ operation with the mouse. While pressing the left button of mouse, user can drag the mouse pointer to up/down or left/rightward to move pan/tilt position of the camera. If user moves the mouse pointer long away from the center position of the main screen, the PTZ camera moves at faster speed (in case that the PTZ camera support speed control function), User can also move zoom-in/out by rolling the mouse wheel to up or downward. 11 Note Full PTZ functions are available by using mouse, IR remote control, or keyboard controller.. User can select preset button or exit PTZ screen mode. Note Maximum Preset number is 255 but it can be restricted by the number that PTZ camera supports. 2.9 Playback Recorded Images To playback recorded image, press Play button from the Front Panel or IR Remote Controller. When the Play button is pressed, the latest recording image will be playback. It is easy to use USB mouse or the Front Panel’s Jog/Shuttle to playback recording files. Turn the Jog and the recorded files can be seen backwards or forwards. Turn the Shuttle and the playback speed can be controlled 2, 4, 8, 16, 32 times while playback backwards or forwards. User can click the right-forwarded arrow button ( )to automatically playback the latest video clip. In playback screen, user can make various playback modes, make an instant manual backup (archive), go to calendar search mode, change channel, and change screen modes. User can make a click of the left mouse button in colored-time bar to move white-vertical line that represents playback time. . 2.10 Quick Backup during Playback User can easily archive video while he/she watches video playback. In playback mode, user can press “ENTER” button in the front panel to set archive “start” time. After pressing this “ENTER” button, user will see “Quick backup starts” in right bottom of the playback monitor. 12 Once “Quick backup starts” message is shown, user can keep playing back video until user wants to finish archiving, and then press the same “ENTER” button again to set backup “end” time. Then, backup menu window will be popped up and user can select the backup media like CD/DVD or USB thumb drive, and execute archiving. Press “ENTER” button to set “start” and “end” time during video playback. Button type may be different depending on the NVR case. Note “HELP” button can help you understand how to setup several important settings. For example, if you need help about how to set Backup, click “HELP” button at the right bottom of the menu. 2.11 Search Recorded Image The user can search recorded image by clicking the right mouse button and select Search button or clicking Tool button in the menu bar and select Search button. 2.11.1. Calendar Search The user can select date and time to search for a certain image within the recorded image. 13 User can move the white-vertical line to the time that user wants to search. The colors of the time bar are different by each recording mode. Please, refer to section 3.3.3 for details on colors. Time bars in color shows by 4channel group. “*” mark in date as above picture means that there is a video data recorded. 14 2.11.2. Search Date/Time Enter the desired date and time for the user to playback the recorded image. Use the arrow button to move to each day/month/year and time category for selecting second/minute/hour/month/year. 2.11.3. First Data Go to the first screen of the recorded image. This is the oldest image recorded. 2.11.4. Last Data Go to the last screen of the recorded image. This is the latest image recorded. 2.11.5. System Log The system log search is used to find particular system log information, quickly and easily. User can copy this event list to USB memory device in text file format. 15 Once USB memory stick is put via USB port, user must press “SCAN” button to detect it, and then press “EXPORT” to copy the log information to the media. Once export is completed, user can find a date folder created in USB thumb drive. There is “system_(Date).log” file stored in the date folder. Following is the category indicated on the system log viewer. 1. Log by system 2. Log by setup 3. Log by network Note 10 numbers of log record will be shown on one page of the [System Log] and [Event Log] window. User can click the arrow icon to search the log records on another page. To see the corresponding list of [System Log] and [Event Log], user needs to click SEARCH button after selecting desired date and event type. 16 2.11.6. Event Log The Event log search is used to find particular event, quickly and easily. User can copy this event list to USB memory device in text file format. Once USB memory stick is put via USB port, user must press “SCAN” button to detect it, and then press “EXPORT” to copy the log information to the media. To see particular event of activated time, move the arrow button of the Front Panel or Remote controller to the desired time range. Following is the category indicated on the Event Viewer. 1. 2. 3. 4. Alarm by Sensor Alarm by Motion Alarm by Video Loss Alarm by HDD Full 2.11.7. Bookmark It can be checked, modified and deleted the bookmark data. Select one of list and click [PLAY] button to display the relevant image video. 17 Note User can press “SEARCH” button in the front panel to get the SEARCH pop-up menu as below. In this menu, full search function by using front key buttons is available. 2.12 DST Setting and Image Playback During DST (Daylight Saving Time) period, NVR time clock has to be adjusted according to regional time zone. That is, NVR time clock will be shifted by one hour after DST setting while NVR will restore the time clock to normal after DST finishes. To make DST setting on the NVR, go to the menu of SYSTEM > SYSTEM INFO and click “DATE/TIME” to get the DST setting window as below. User can setup DST “Begin & End” time after checking “USE DST” box. There is an hour overlapped data when DST finishes. Such period of hour will be indicated in Blue color in Intelli-Search Bar on playback mode. When user click on such overlapped period, a message of “Data Selection” will pop up, then user can select whether to play DST data or Non-DST data. 18 19 3. Setting General setting structure consists of “System”, “Device”, “Record”, “Network”, “Backup” and ‘Quick Setup” as below. Main Classification Sub Classification SYSTEM INFO USER SYSTEM EXPORT/IMPORT HDD FACTORY DEFAULT CAMERA AUDIO DEVICE SENSOR MOTION ALARM EXTRA ALARM RECORD IP CAMERA SCHEDULE NETWORK NETWORK DDNS NOTIFICATION BACKUP BACKUP QUICK SETUP QUICK SETUP 3.1 SYSTEM User can find the menu button in “TOOL” of the menu bar or pop-up menu of mouse right button. User can move mouse pointer from “System” through “Quick Setup” to instantly look around the submenus in the menu screen. 20 3.1.1. System Info SITE NAME User can designate the site name by using virtual keyboard as below. Site name will be used as a folder name for back-up the data or log. SITE ID User must setup SITE ID to match with the ID setting of keyboard controller, if user wants to use it to control NVR. User also needs to select the correct model of keyboard controller and BUAD RATE setting. 21 DATE/TIME User can make various settings such as time zone selection, DST (Daylight Saving Time) and time sync mode. Note “HELP” button can help you understand how to setup several important settings. For example, if you need help about how to set Date/TIME, click “HELP” button at the right bottom of the menu. TIME SYNC MODE There are three types of time sync mode. Server Mode The operating NVR is set as a Time Sync Server, which can synchronize the time clock of another NVR(s) connected over the same network environment. Client Mode The operating NVR is set as one of the client NVR(s). Input the IP No of designated NVR or Remote Manager P/C (RMS) or Central Management P/C (CMS) as a Time Sync Server in “SYNC SERVER”, then NVR time clock is synchronized with Time Sync Server by interval time set in “TIME SYNC CYCLE”. NTP Mode NTP server is one of standard time servers available on Internet and it is recommended to use “pool.ntp.org”. If you want to activate this mode, you have to correctly set the TIME ZONE of your local area and then click SYNC NOW. LANGUAGE User can select the language according to the country or user’s preference. The language included in the product according to the model. 22 REMOTE ID User must setup REMOTE ID to match with the ID setting of IR remote controller, if user wants to use it to control NVR. Note [How to setup the ID # in IR Remote Controller] 1) Keep pressing ID selection button for about 5 seconds. 2) Set the ID number by pressing numeric button on IR Remote Controller. ID number is available from 000 up to 255. 3) You have to press numeric button as three-digit number format. For example, press “000” for 0, “023” for 23, “234” for 234. When the ID at the remote controller is inputted and it can communicate with the NVR correctly, NVR sounds beep once at the first time. VERSION Current firmware version & MCU (H/W) version of the NVR can be checked. By clicking UPGRADE button, user can upgrade firmware. UPGRADE FIRMWARE User can easily upgrade the system firmware via DVD/CD/USB Memory Stick/FTP server Caution Do not click CANCEL button during firmware upgrade. It may cause serious damage on the system. Do not turn off the power of the NVR. It may cause serious damage on the system and NVR may not be turned on after that. The setting value might be changed to that of factory default in case that there are a lot of changes between new firmware and existing firmware in functions, etc. Therefore, it is recommended to check the setting value and operating condition of the NVR after firmware upgrade. 23 Procedure How to upgrade system firmware by using USB memory stick 1) Put USB thumb-drive which was formatted by FAT/FAT32 in any USB port of NVR that shall be compatible with USB 2.0 version 2) Once the system detects the thumb-drive, user can see a brand or model name in “DEVICE” after pressing “SCAN” button. 3) Select NVR name and version to be applied, and then click “OK” to confirm. (*) It is not allowed to use the partitioned and/or password-encoded USB memory. VIDEO SIGNAL It shows current setting video signal. IP ADDRESS It shows current setting value of IP address. User can change it in Network setting menu. MAC ADDRESS It is the unique identity number for each system and cannot be changed. DISPLAY User can set sequence dwell time, resolution, OSD display on the monitor as below picture. SEQUENCE User can set dwell time for sequence display. Display Resolution User needs to set the proper resolution in accordance with the monitor resolution. 24 Fit in VGA Fit-in VGA is to get the proper edge alignment of display image depending on the monitor to be used. In case that edge part of display image is cut off on the VGA monitor, then try to change the setting of “Fit-in VGA” by checking or unchecking. The position of icon is changed depending on the setting. [[Fit-in VGA is checked]] [Fit-in VGA is not checked] OSD User can select the information that will be displayed on monitoring screen. SCREEN SAVER User can select CRT and/or VGA by checking the boxes and set the WAITING TIME, after that the monitor will be converted to sleeping mode. When Screen Saver is working, user cannot see the movie via selected mode like CRT and/or VGA output. If you want to recover monitor display, select CRT and/or VGA on the menu and then press any key button on the front panel or remote controller or mouse. 25 Note Users can select WAITING TIME from NONE, 1,2,3,4,5,6,7,8,9,10,20,30,40,50, up to 60 MIN. SCREEN SAVER may not work during firmware upgrade, HDD format and data backup process. NVR continues to record while SCREEN SAVER is activated. Regarding “AUTO LOGOFF”, refer to the USER setting. 3.1.2. User The ADMIN user (default password is 1234) has got the full authority for system setting, and can change the system password or assign different permission level to each user. FUNCTION MENU ACCESS LIVE & PLAYBACK Note : shutdown, search, PTZ control, backup and playback. : system, device, record, network, backup, and quick setup. : live & playback channel Total number of users including administrator is 16. Admin cannot be deleted. Click OPTION button to make setting of “Auto Login & Auto Logoff” function. 26 AUTO LOGON and AUTO LOGOFF If user selects “On Boot”, System does not request to input ID and Password during system rebooting. On the contrary, if user selects” Auto Logoff” and sets the time, NVR will go to live display mode just after the setting time. User has to login again by input of ID and Password to control the System. It will be synchronized with the time of the Auto Logoff of Screen Saver. LEVEL OF USER AUTHORIZATION The administrator can control full function of the system and add the New User with a different authorized level and also delete/edit User details. Setting Authorized Level at NVR Go to the menu of [SYSTEM > USER] and click [ADD]. You can add or edit user details. Example: How to set a User with “Live Monitoring only” 1) 2) 3) 4) 5) Add a new user name, description and password. Disable all options in [FUNCTION] and [MENU ACCESS]. In [LIVE & PLAYBACK], select channel(s) for live monitoring, and click [OK]. A new user has been added, and click [SAVE]. To verify this limited function, go to the menu of [TOOL > LOGOUT] and login as the User set as above. User can get the live images. However, when user clicks Playback button or select any other function, warning message will pop up. 27 3.1.3. Export/Import User can copy and paste the system configuration values in this menu. “Export” allows user to copy the setting values of this system to USB memory devices. “Import” allows user to call up the setting values of other system from CD/DVD/USB memory devices. During import process, make sure that the F/W version of source NVR has to be the same as the one of target NVR which user wants to import setting values to. If user imports the setting value from the system which is in the same network, there will be IP confliction. Therefore, IP setting should be changed after import procedure. 3.1.4. HDD User can select “Overwrite” or “Stop recording” when HDD becomes full and also can easily format new HDD or existing HDD by ticking in the check box. STORING PERIOD OF A DATA User can set the storing period of a recording data. If user sets the storing period of a data and then setting period is elapsed, the system deletes the overdue data automatically, 28 Note User can select from 1day to 366days as storing period of a data. 29 HDD HEALTH 체크 Click CHECK button of each HDD to open the window of NVR HEALTH CHECK. User can see full information of each HDD such as model name, serial no, capacity, bad sector ratio, life time (used time) and temperature. HDD FORMAT When the new HDD is installed or there seems to be a problem on the HDD, user needs to format the HDD. If system resources are occupied such as network connection or image playback during format process, format may be failed. In this case, it is recommended to reboot the system to release system resources and then try to format again. Note 1) The system always reserves some space in each built-in HDD to effectively utilize archiving memory. 2) When the format is done, all data in the HDD will be deleted. WARNING MESSAGE To achieve high-level system stability, warning message will be popped up when temperature inside the system exceeds optimum range. This problem may be driven from mal-function of ventilation fans. In this case, user shall inspect if the cooling fan is properly working, or ambient temperature around the system is properly kept. 3.1.5. Factory Default When the overall change of configuration is required or the system operation doesn’t seem to be normal, user can make the system to factory default. The system setting will be originated by factory defaults. However, video data recorded are protected. 30 3.2 Device 3.2.1. Camera NAME In order to distinguish the channel from the others, user can designate the channel name. The name is applied to both NVR and remote monitoring software. COVERT If a channel is set as COVERT, no other users except administrator can see the image in live & playback mode. It is applied to both NVR and remote monitoring software. PRIVATE AREA SETUP User can select a specific area to conceal it in live & VOD playback, in order to protect privacy or the other purposes. 1) Change MODE to PRIVATE AREA SETUP. Then, other setting factors, such as motion area & color adjust, etc., are disabled. 2) Select area to conceal by clicking block or drag of the mouse. 3) Adjust DARKNESS to set the degree of conceal the area.(20~100) As the number becomes higher, the area is getting darker. 31 ADJUST User can set channel image like brightness, contrast, color and so on. Note It may have some limitation depending on the Model. 3.2.2. Audio User can select audio input and output during live display, and match the audio input to a designated channel. Number of audio channel may differ depending on NVR model Note Depends on the condition, audio output channel is different. [Live Mode] 1) 1 Screen Mode: Audio of the currently displayed channel. 2) Multi-Screen Mode: Audio of the audio channel that is set at “LIVE”. [Playback Mode] 1) 1 Screen Mode: Audio of the currently displayed channel. 2) Multi-Screen Mode: Audio output is not available. 32 3.2.3. Sensor It allows user to set alarm generation when the external sensor device, connected to the NVR, detects signal. User can install multiple sensors on the system to get the pre & post alarm recording and intensive recording function as well. User can set all channels at once by selecting “ALL” button of upper-right side. ON/OFF Turn on or turn off the sensor CAM Select the associated camera OUT Select the associated alarm output Caution Relay contact can stand up to 24V/1A. In case that it is connected to the external circuit which is over 24V/1A, it can cause a problem on the system. INTENSIVE RECODING When alarm is triggered, system instantly assigns “remaining fps” to alarm-triggered channel and increases recording speed during the selected dwell time, and also will trigger alarm signal via the selected sensor-out channel. The recording speed of all other channel will remain unchanged. PRESET User can select the camera to move to preset position, once the sensor is triggered. (User should setup preset position in PTZ menu 3.2.6 in advance) DWELL (Post Alarm) Set the recording period from the start of sensor input activation. During this period, the corresponding camera image will record according to the frame and alarm (relay) output set. The recording stops and alarm output is turned off when the setting period is elapsed. PRE-ALARM Set recording period in seconds just before perceiving sensor input. The system records in certain seconds of time prior to the time that alarm is activated, so that user can search video even before alarm is triggered. The pre-alarm recording mode is always “continuous” at the recording speed that user sets in “record” of “camera” menu. 33 TYPE Select the sensor type between N/O(Normal Open) and N/C(Normal Close), connecting to alarm input plate. Circuit of N/O type is usually open, and the activation of the sensor occurs at the time of close, and N/C type works the reverse way. NOTIFY User can select how to be alerted upon sensor is activated by pressing “NOTIFY” button. The system will generate buzzer sound in the selection of buzzer and/or make pop-up screen of the camera in the selection of camera pop-up. And both notifications work together when “All” is selected. If user doesn’t want to notify during a certain period of time, select “ALARM DISABLE TIME” and set the time. Note Check the setting of the sensor type (N/O or N/C). The alarm might not function if the used sensor type and the system setting are inconsistent. Note “Camera pop-up” means that multi-screen live video mode will be switched to single channel mode automatically upon alarm triggered. This single channel video is the channel triggered by alarm. Note It may have some limitation depending on the Model. 3.2.4. Motion Alarm Motion alarm is to start the recording when motion is detected by installed camera based on the area setting. The system will trigger alarm signal via the selected sensor-out channel. User can set all channels at once by selecting “ALL” button of upper-right side. ON/OFF Turn on or turn off the motion alarm OUT Select the associated alarm output Caution Relay contact can stand up to 24V/1A. In case that it is connected to the external circuit 34 which is over 24V/1A, it can cause a problem on the system. INTENSIVE RECODING When alarm is triggered, system instantly assigns “remaining fps” to alarm-triggered channel and increases recording speed during the selected dwell time, and also will trigger alarm signal via the selected sensor-out channel. The recording speed of all other channel will remain unchanged. DWELL (Post Alarm) Set the recording period from the start of alarm activation. During this period, the corresponding camera image will record according to the frame and alarm (relay) output set. The recording stops and alarm output is turned off when the setting period is elapsed. PRE-ALARM Set recording period in seconds just before perceiving motion alarm. The system records in certain seconds of time prior to the time that alarm is activated, so that user can search video even before alarm is triggered. The pre-alarm recording mode is always “continuous” at the recording speed that user sets in “record” of “camera” menu. NOTIFY User can select how to be alerted upon motion is detected by pressing “NOTIFY” button. The system will generate buzzer sound in the selection of buzzer and/or make pop-up screen of the camera in the selection of camera pop-up. And both notifications work together when “All” is selected. If user doesn’t want to notify during a certain period of time, select “ALARM DISABLE TIME” and set the time. Note It may have some limitation depending on the Model. 3.2.5. Extra Alarm There are several alarm functions available on the system such as SMART, VIDEO LOSS, RECORDING FAILURE and HDD FULL. S.M.A.R.T It is to trigger alarm signal when HDD might be about to be out of operation. VIDEO LOSS It is to trigger alarm signal when the camera signal is disconnected. RECORDING FAILURE It is to trigger alarm signal when the system doesn’t record image due to the error in HDD or system and so on. DISK FULL It is to trigger alarm signal when the HDD is occupied with a certain percentage of its capacity If user set HDD FULL as STOP RECORDING in HDD menu and the HDD is occupied with the certain percentage set here, NVR stops recording and alarm trigger. Note Extra alarm will be remained in the event log only when it is set as “ON”. 35 Note Note S.M.A.R.T (Self-Monitoring Analysis and Reporting Technology) is the technology that is developed by HDD manufacturers. In some cases, S.M.A.R.T may not detect the abnormal operation of the HDD. It is recommended to do HDD health check in the HDD menu, regularly. It may have some limitation depending on the Model. 36 3.3 Record 3.3.1. IP Camera [Automatic Connection - Camera Search] Click “Camera Search” to connect with NVR. System searches the IP Cameras on the same local network. Note It takes some time to search IP cameras. On its searching, if user clicks [CAMERA DISCOVERY] button, system will restart the process of search. Until the list is shown, wait for some time. User can register IP camera to system after selection of camera from the list and channel No. If IP camera requires ID & Password, please input corresponding value. After clicking [APPLY] button, IP Camera is registered corresponding channel. On clicking [DETAIL INFO], user can check the detail information of each IP Camera. In order to connect several IP Camera, use may repeat this process. 37 [Manual Registration] In case of user knows the information of IP Camera, user can register it via manual input of camera information without using the [CAMERA DISOVERY] button on the list. Note [POE Version] 1) The NVR supporting PoE (Power over Ethernet) can connect each IP Camera automatically to corresponding channel without the process of extra registration. It means the system supports Plug & Play. Then System will display the moving picture to user easily like the way of Analogue NVR. 2) User can only connect LAN Cable to matching PoE Port. 3) It may take a bit more time to detect IP Camera automatically depending on product model. Each menu indicates as follows. ON/OFF It indicates IP Camera connection & disconnection status. It should be ON to be recorded. MODEL It indicates connected IP Camera model name. STREAM It indicates image data transmission of IP Camera. ONVIF Stream or RTSP Stream. IP ADDRESS It indicates IP Address of the connected IP Camera. SET User can set the Resolution and Frame and Quality of IP Camera also audio and PTZ activation. ACCOUNT User can input the ID & Password and transmission port matching with each IP Camera, if IP Cameras need them. 38 Delete It indicates the delete of connected IP Camera. 3.3.2. Schedule Set recording schedule for each camera. First, select the camera to set schedule, or “All”. Recording can be set by each hour from 00 through 23 a day. NO COLOR (Off) “Off” means no recording. Even though user set recording frames and on in “CAMERA”, the system will not record anything if user sets “OFF” in SCHEDULE. YELLOW COLOR (Continuous Recording) In continuous recording mode, the system records all the time as set by “CAMERA”. GREEN COLOR (Motion-Detection Recording) In this mode, the system records only when motion is detected in the motion area, and stops recording when motion is not occurred. In addition, user can make motion recording configuration in “MOTION ALARM” of “DEVICE” menu. If user sets “OFF” in “MOTION ALARM” of “DEVICE” and sets “MOTION” in “SCHEDULE”, then the system will record when motion is detected but motion alarm will not be activated. ORANGE COLOR (Sensor-Activated Recording) In sensor mode, the system will record when sensor is triggered only during dwell time as set in “SENSOR” of “DEVICE” menu. If user sets “OFF” in “SENSOR” of “DEVICE” and sets “SENSOR” in “SCHEDULE”, then the system will not record anything even though a sensor is triggered. SKY BLUE COLOR (Continuous + Motion Detection Recording) The system records all the time by “continuous” as set by “CAMERA” of “RECORD” but will switch recording mode to motion configuration as made by “MOTION ALARM” of “DEVICE” if motion is detected in motion area. The system also will notify “motion event” message to Remote Software over the network. If user sets “OFF” in “MOTION ALARM” of “DEVICE” and sets “CONT + MOT” in “SCHEDULE”, then the system 39 will record with continuous recording mode even though motion is detected in motion area. DARK ORANGE COLOR (Continuous + Sensor-Activated Recording) The system records all the time by “continuous” as set by “CAMERA” of “RECORD” but will switch recording mode to sensor configuration as made by “SENSOR” of “DEVICE” if a sensor is triggered during dwell time. The system also will notify “sensor event” message to Remote Software over the network. If user sets “OFF” in “SENSOR” of “DEVICE” and sets “CONT + SENS” in “SCHEDULE”, then the system will record with continuous recording mode even though a sensor is triggered. PINK COLOR (Motion Detection + Sensor-Activated Recording) The system does not record in normal operation but records only when motion is detected as set by “MOTION” of “DEVICE” and a sensor is triggered as set by “SENSOR” of “DEVICE”. If user set “OFF” in both “MOTION” of “DEVICE” and “SENSOR” of “DEVICE”, then the system will record only when the motion is detected but will not record even though a sensor is triggered. And, the system will not notify both motion & sensor to Remote Software. Note In case the recording schedule is set by “CONT + MOT” or “MOT + SENS”, then the system records by continuous or motion detection mode in normal operation. However, when motion is occurred in motion area or alarm is activated, then recording mode will be automatically switched to intensive recording as set by “MOTION” or “SENSOR” of “DEVICE” menu. Note Some function may not support depending on the IP Camera model or Manufacturer. User can add holiday in HOLIDAY SETUP as below picture to up 32 holidays. Press “DATE” first and write description, and then press “ADD” button to list up holiday. Note Emergency Recording In case of a specific model that has “Emergency recording” button in front face, the system will instantly start recording all the channels with its maximum frame rate in total & highest resolution when user press the “Emergency recording” button. User can do the same with Emergency Recording button in the Tool bar. All the channels, regardless of recording mode & recording on/off, are to be recorded. is shown in live mode and red-colored bar is shown in the time search bar of playback mode for the video recorded by emergency recording. 40 3.4 Network 3.4.1. Network NETWORK TYPE Select either STATIC IP or DHCP for dynamic IP. If DHCP is selected, click “IP DETECT” button to get the updated IP address information, then you can see the process on “Progress Bar”. IP Address Designate IP address of the system. User can input static IP address directly in case of selecting static IP. Or when it is DHCP, User can get a dynamic IP. SUBNET MASK Subnet Mask address classifies the subnet that the system belongs to. For more information, please consult your network administrator or your internet provider. GATEWAY This is the IP address of the network router or gateway server. It is required when the user wants to connect through external router. For more information, please consult your network administrator or your internet provider DNS SERVER Enter the IP address of the Domain Name Server. You should input the DNS Server information in order to use DDNS, E-mail notify and NTP Server. If it is hard to know the correct information, user can input “8.8.8.8”. For more information, please consult your network administrator or your internet provider. TCP/IP PORT Input the port number to use when connecting locally or remotely. It is for use with Remote Software P/C (RMS & CMS) & mobile device (MMS). MOBILE PORT Input the mobile port number to use when connecting from mobile devices. It is for use with Mobile Software (MMS) of Windows Mobile or Blackberry. It is also for use with Mobile Viewer 1 of Android or IOS (iPhone / iPad). In case of Mobile Viewer 2 or higher version, TCP/IP Port is used instead of MOBILE Port. WEB PORT Input the port number to use when connecting from the Web Browser. UPnP (Universal Plug and Play) UPnP supports “auto port forward function (NAT TRAVERSAL)” even if the user does not set port forward in the router. It may not be supported in some routers and some network conditions. 41 BANDWIDTH LIMIT Depending on the setting made by user, the system can control the data volume transmitted over network ranging from 25 kbps up to 1Gbps. This function is effective especially under narrow bandwidth network condition or when user wants to limit “network bandwidth occupied by video transmission” to a certain level. Input necessary information based on your network environment, and then click [SAVE] button. NETWORK TYPE IP ADDRESS SUBNET MASK GATEWAY DNS SERVER : : : : : TCP/IP PORT : MOBILE PORT : WEB PORT : BANDWIDTH LIMIT Select STATIC IP (in case of fixed IP) Assign a local IP # to NVR (ex, 192.168.0.164) Input subnet mask of your LAN (ex, 255.255.255.0) Input gateway of your LAN (ex, 192.168.0.1) Input IP # of your DNS server You must input this IP # for internet connection. Please contact your ISP to get this IP #. You can input “8.8.8.8” in case you do not know this IP #. Default is 9010 If your ISP blocks the port # 9010, you need to input another valid port number. (ex, 9020) Default is 9011 If your ISP blocks the port # 9011, you need to input another valid port number. (ex, 9021) Default is 80 If your ISP blocks the port # 80, you need to input another valid web port number. (ex, 8080) : Default is 100 Mbps Select bandwidth limit you want to set in consideration of network condition. 42 3.4.2. DDNS User can use either a public DDNS server or the DDNS server operated by NVR maker (cctv-link.net) to connect through dynamic IP. It is recommended to use maker’s DDNS server for stable network connection. DDNS 서버 User has to tick on “Use DDNS” check box. The default is [CCTV-LINK.NET] and user can select [DYNDNS.COM] by using drop-down list. “cctvlink.net” is the fixed domain name of DDNS server operated by NVR maker while “dyndns.com” is one of public DDNS severs. Input necessary information based on your network environment, and then click [SAVE] button. Note Enable USE DDNS box DDNS SERVER : Select CCTV-LINK.NET or DYNDNS.COM TCP/IP PORT : Default is 80 If your ISP blocks port 80, select 8245 DOMAIN NAME : 1) In case of CCTV-LINK.NET, assign domain name for your NVR (ex, abc), then click [CHECK] to confirm whether you can use such domain name. 2) In case of DYNDNS.COM, input full domain that was generated at dyndns.com. USER : If you use DYNDNS.com, input user ID registered at dyndns.com PASSWORD : If you use DYNDNS.COM, input password registered at dyndns.com. It takes a little time to check Domain Name. If there is no response, please check the internet connection of the NVR. In order to use DDNS function, the accurate DNS server address should be required. 43 Setting of Remote Manager Software (RMS) User has to input the DDNS address and Port No. in [Option > Setting] The data of DDNS should correspond with of NVR’s. (“cctv-link.net” and Default web Port is “80”) User has to input “Mac address + cctv-link.net” in IP Address (or URL) for DDNS connection. User can find the Mac Address in the menu of [System > System Info] of the NVR. The default web port is 80 For example, if Mac address is “00:1C:84:01:00:02”, then the right IP Address (or URL) in Site Property shall be “001c84010002.cctv-link.net”. Setting of Internet Explorer User has to input “Mac Address + cctv-link.net” Ex: http://00231c381f2d.cctv-link.net In case of domain name of user, user has to input “domain name”+cctv-link.net. Ex: http://[domain name].cctv-link.net 44 3.4.3. Router Setting (Port Forwarding) If user wants to use router for network connection, necessary Port Forwarding in the router (both static IP and dynamic IP) is required. The procedure described as below is just one of the example for the reference and the captured figures may differ depending on the model of the router. Please refer to the manual of the router for details. 1) Login to the router through M/S IE browser. 2) Go to the menu of [ADVANCED > Port Forwarding] 3) Do necessary Port Forwarding as below. (TCP Port & Mobile Port & Web Port) For TCP/IP Port of NVR If you use 9010 for TCP/IP Port (mentioned as above), then you have to forward Port # 9010 to NVR LAN IP. Note : If you change NVR TCP/IP Port to 9020, you have to open and do Port Forwarding for 9020. For Mobile Port of NVR If you use 9011 for Mobile Port (mentioned as above), you have to forward Port # 9011 t o NVR LAN IP. Note : If you change NVR Mobile Port to 9021, you have to open and do Port Forwarding for 9021 For Web Port of NVR If you use 80 for Web Port (mentioned as above), you have to forward Port # 80 to NVR LAN IP. 45 Note : If you change NVR Web Port to 8080, you have to open and do Port Forwarding for 8080. NVR needs several ports to be opened for remote image transmission, configuration, time synchronization and etc. Please refer to below port list to make sure that those ports are not blocked by firewall or other network setting. It may differ depending on the model of the router. Please refer to the manual of the router for details. Protocol Port TCP 9010 TCP 9011 Usage NVR Data Port (for Remote S/W) NVR Mobile Port (for Mobile Viewer 1) Remark Editable Location Network > Network TCP Port Yes Mobile Port Yes Network > Network Yes System Info > Date/Time Setting TCP 8002 NVR Time Sync Service Port TCP 8003 Event Port for Event Notify If NVR works as the client, port should be opened at the server side. Need port forward at remote P/C network TCP 80 Web Service Web Port TCP 80,8245 DDNS Server Need to be opened Select TCP 123 NTP Server Need to be opened Fixed Yes Yes Network > Notification Network > Network Network > DDNS System Info > Date/Time Setting 46 3.4.4. Notification REMOTE NOTIFY The system can notify an event to the IP address of Remote Software PC over the network. Select REMOTE NOTIFY to use this function and set IP address & events. ADD/EDIT/DELECT User can use these to add/edit/delete IP address of Remote Software PC. IP ADDRESS Input the IP address of Remote Software PC which will receive events notification. PORT Input Port number which is set at the Remote Software PC. Default is 8003. EVENT Select events to be notified. When “ALL” is selected, all of the events will be notified.. Note Configuration first priority is always on “SCHEDULE” of “RECORD”. Thus, the system will not notify alarm upon motion alarm or sensor even though user ticks the check-box of above event selection, unless user sets the “SCHEDULE” of “RECORD” and “MOTION”/”SENSOR” of “DEVICE” accordingly. For example, if user sets just “Continuous” only in “SCHEUDLE” of “RECORD” and tick “All” check-box of “REMOTE NOTIFY”, the system will not notify alarm message. In this case, user has to set “CONT + MOT”, “MOTION”, “SENSOR” or “CON + SENS” to enable REMOTE NOTIFY properly. Note User can set remote pop-up in Remote Manager S/W (RMS) and Central Management S/W (CMS) upon alarm trigger in NVR. In order for RMS or CMS user to receive an instant pop-up video over network from NVR, NVR user has to tick “SENSOR” or “MOTION ALARM” in above menu. “SENSOR” means the alarm triggered by physical alarm, while “MOTION ALARM” means the alarm triggered by motion detection. Note In order to receive event notification properly, event port in the setting menu of the Remote Software PC should be the same to that of in this setting screen. Note In case the Remote software PC is not in the same network with NVR, port forwarding for the PC should be required to receive remote notify properly. E-MAIL NOTIFY The system can make an event notification to the e-mail address registered in the NVR. Select E-MAIL NOTIFY to use this function and set e-mail address & events. ADD/EDIT/DELECT User can use these to add/edit/delete e-mail address. E-MAIL 47 Input e-mail address which will receive events notification. EVENT Select events to be notified. When “ALL” is selected, all of the events will be notified. SENDER Setting (SMTP Setting) User needs to set sender to send e-mail notification. SMTP : Input SMTP server address. PORT : Input Port number that will be used for e-mail sending. USER : Input User in case the log-in is required to SMTP server. PASSWORD : Input Password in case the log-in is required to SMTP server. FROM : Input sender’s e-mail address. E-MAIL TEST : User can check if setting is done properly or not. NVR sends e-mail and inform you of the result. 1) It may take long depending on the SMTP server’s response time. 2) In some cases, SMTP server does not send e-mail even though the test result is OK. Thus, please check at the receiver’s e-mail if it receives the mail or not. USE SSL AUTHENTICATION : In case the SMTP server requires SSL authentication (ex. Gmail, Yahoo mail, etc.), select it to send e-mail after log-in with SSL authentication Note Configuration first priority is always on “SCHEDULE” of “RECORD”. Thus, the system will not email alarm message upon motion alarm or sensor even though user ticks the check-box of above event selection, unless user sets the “SCHEDULE” of “RECORD” and “MOTION”/”SENSOR” of “DEVICE” accordingly. For example, If user sets just “Continuous” only in “SCHEUDLE” of “RECORD” and tick “All” check-box of “REMOTE NOTIFY”, then the system will not make email notification. In this case, user has to set “CONT + MOT”, “MOTION”, “SENSOR”, or “CON + SENS” to enable Email Notification properly. MOBILE NOTIFY The system can make an event notification to the mobile device registered in the NVR. Mobile Push Notification can be set as following steps. 1) Go to menu (Network Notification). 2) Click “Mobile Notify” button on the bottom. 3) Check “Use Mobile Notify” to enable Push Notification function. 4) When the mobile device is registered to the NVR correctly, it shows in the list. Device ID is a unique ID of the mobile device. If you want to delete it, select the device and click “Delete” button. Then, push notification setup in the mobile device will be disabled. 48 Note 1. Mobile Push Notification function is available only with the iOS (iPhone, iPad, iPod Touch). 2. Registration of Mobile Push Notification is available when it is applied at the mobile device 3. Maximum number of mobile device to be registered is 50. Note 1. Push Notification function only works when the NVR & mobile device has network connection. 2. For the detail, please refer to MMS manual. 49 3.5 Backup 3.5.1. Manual Backup User can archive video clip recorded for certain period for a selected channel or channels as below picture. Connect an appropriate USB memory device like USB thumb drive, built-in CD or USB ODD burner and press “SCAN” button to get the system recognize it before actual archiving. Necessary file size will be shown before burning. User can leave ticking in the check-box of “ADD VIEWER” to automatically put in an executable viewer file of SSF format in order to help user play the video clip without installing program in the computer. . Note It is recommended to use built-in CD/DVD burner or well-known major brand of USB thumb drives formatted by FAT/FAT32/NTFS for proper backup. 1) The system does not detect external HDD due to different format type. 2) It is not allowed to use the partitioned and/or password-encoded USB memory. 3.5.2. Backup Video Retrieve After archiving, there would be multiple files created as the picture below if “ADD VIEWER” was selected. User can double click “MultiBackupPlayer.exe” file and open the video data file (SSF format) in the folder of date. The folder is named by the date recorded. 50 The Backup player supports two modes. ( , ) User can drag and drop a SSF file (Video data file) in the empty screen of Multi Backup Player as shown picture to begin video play. In the left box, files & folders saved in the PC are shown. Note Single Channel Mode: It shows SSF files in a selected folder. Multi-Channel Mode: It shows SSF files and folders in the PC. User can print out, capture a still image, and zoom-out by using the icons on the bottom left of the player window. 51 3.6 Quick Setup Quick Setup is to help user make easy configuration for recording resolution, recording speed, recording mode, recording quality and recording periods based on the capacity of HDD installed. The setting made by QUICK SETUP will get the first priority to apply on the system whatever user sets configurations in other menu. USE QUICK SETUP If user ticks in the check-box of USE QUICK SETUP and designate the “Desired Recording Period”, the setting value for recording resolution, fps and quality will be optimally adjusted to get the similar recording period set in the box of INPUT DESIRED DAYS. Furthermore, user can adjust the setting value at CUSTOMER SETTINGS by manual input finally to get the “Recordable Period” at DAYS TO RECORD based on the capacity of HDD installed. Note If the camera is set as “OFF” in the camera setting menu, it will not be recorded even if it is set in the Quick Setup menu. Please check if any of camera is not recorded. Note Recordable period calculated by QUICK SETUP is just for reference and may vary depending on the actual site situation. 52 4. Q&A 1. There is a HDD installed but “No HDD” icon ( ) is still shown on the screen. 1) Please check the cable connection of the HDD again. 2) If you can see the HDD list at [System > HDD] but the capacity indicates “0”, it means that the HDD requires format. 2. There is nothing displayed on the monitor though electric power is supplied to NVR. 1) Please check if the power is supplied properly. When the power is supplied, you can hear the noise from FAN and HDD operation. 2) Please check the cable connection with the NVR. Remove all the cable connections, except for the monitor cable, and then apply power to the NVR again and check booting status. 3) In case that the display screen is stopped at logo screen (H.264 Network Video Surveillance System), please contact your dealer or distributor. 3. How to make PPPoE connection (xDSL, cable and so on)? 1) There is no function to log-in at the NVR. 2) Please use the router which supports PPPoE log-in. 4. Is it necessary to open the port when using DDNS (cctv-link.net, dyndns.org)? Yes, it is. DDNS is the function to let remote software acknowledge the changed address of the NVR (dynamic IP provided by ISP) or to allow connection to the NVR by sub domain (sub domain.cctv-link.net) without memorizing IP. . 5. Remote software connection to the NVR works fine but WEB connection doesn’t 1) Some ISP blocks port number 80. Please try again after changing WEB port. (8080 or 8088 is recommended.) 2) Please check whether the WEB port is opened or not. 6. Image is not shown after login at WEB monitoring TCP Base port should be opened. Default of TCP base port is 9010. 7. No image is shown on MMS connection Mobile port has to be opened for MMS connection (In case of Mobile Viewer 1, Mobile Port that is set in the network menu should be used -9011port) (In case of Mobile Viewer 2 or higher version, TCP/IP Port is used instead of Mobile Port.-9010port) 8. NVR doesn’t record images in sensor mode and/or motion mode. 1) It records images only when there is an event for the corresponding mode 2) Please check if the setting is correctly done at the menu of [Device > Sensor] and [Device > Motion]. 9. Image on remote software is suddenly disappeared after displaying for a short time. 1) Some ISP restricts upload data/traffic volume. Please contact your ISP. 2) Upload traffic restriction can be easily checked with the following steps. > Turn off the power of Modem & Router. > After some time (1~5minutes), turn on the power of Modem first and then Router. > After reconnection, if it is disconnected again after a shot time (in a similar period later), it means that the ISP restricts upload traffic. 53 10. Backup or firmware upgrade through USB memory stick cannot be made though it is detected by the NVR. 1) USB memory stick should be formatted by FAT or FAT 32 or NTFS 2) It is not allowed to use the partitioned and/or password-encoded USB memory 11. Time sync through NTP server doesn’t work. NTP server requires DNS server address. Please check if DNS server address is correct at [Network] tab. 12. E-mail transmission doesn’t work in using E-mail notify function. 1) E-mail notify function works based on SMTP service. Please check if the sending mail address is correct and if the mail server supports SMTP service. 2) SMTP service is provided based on DNS. Please check if the DNS server address is correct at [Network] tab. 13. There is an error message shown as “Maximum user exceeded” at the remote software. In order to assure of system stability, NVR has the limitation on the number of remote connection. Please check how many users are in connection to the NVR. For your information, the number of connection from IE & MMS is also 14. How can users find the stream of IP camera? User can find the set menu of IP Camera. Please refer to the manual of IP Camera to get more details Visionhitech Co., Ltd. Vision Bldg., 150-3, Simgok-Dong, Wonmi-Gu, Buchon-City, GyeonggiDo, Korea Tel: +82(0)32-668-3112 Fax: +82(0)32-668-3113 E-mail: [email protected] Web site: www.visionipvideo.com www.visionhitech.co.kr