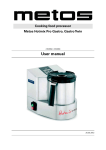
1
1. Report No. FHWA/TX-13/0-6005-3 Technical Report Documentation Page 2. Government 3. Recipient’s Catalog No. Accession No. 4. Title and Subtitle Developing a Testing Device for Total Pavements Acceptance—Final Report 7. Author(s) Kenneth H. Stokoe, II, Jung-Su Lee, Mike Lewis, Richard Hayes (CTR); Thomas Scullion and Wenting Liu (TTI) 5. Report Date November 2012; Revised April 2013 Published June 2013 6. Performing Organization Code 8. Performing Organization Report No. 0-6005-3 9. Performing Organization Name and Address Center for Transportation Research The University of Texas at Austin 1616 Guadalupe St., Suite 4.202 Austin, TX 78701 Texas A&M Transportation Institute The Texas A&M University System 3135 TAMU College Station, Texas 77843-3135 10. Work Unit No. (TRAIS) 11. Contract or Grant No. 0-6005 12. Sponsoring Agency Name and Address Texas Department of Transportation Research and Technology Implementation Office P.O. Box 5080 Austin, TX 78763-5080 13. Type of Report and Period Covered Technical Report 9/1/2008–8/31/2012 14. Sponsoring Agency Code 15. Supplementary Notes Project performed in cooperation with the Texas Department of Transportation and the Federal Highway Administration. 16. Abstract During the fourth year of Project 0-6005, construction of the Total Pavement Acceptance Device (TPAD) was completed. The TPAD is a multi-function pavement evaluation device used to profile continuously along pavements at speeds in the range of 2 to 5 mph. The test functions include those associated with a Rolling Dynamic Deflectometer (RDD), ground penetrating radar (GPR), Distance Measurement Instrument (DMI), high-precision differential GPS, surface temperature and digital video imaging of the pavement, and right-of-way conditions. The towing frame system used to position and pull the RDD rolling sensors was developed and installed on the TPAD. The towing frame system minimizes the transmission of vibrations from the TPAD mobile platform and loading system to the rolling sensors, and allows for the incorporation of three rolling sensors (front, center, and rear) on the TPAD. The front and rear rolling sensors have 12.5-in. diameter wheels and a 90-lb hold-down weight while the center rolling sensor has 9.5-in. diameter wheels and a 40-lb hold-down weight. Initial deflection measurements using the new towing frame/sensor cart arrangement were performed at the TxDOT Flight Services Facility (FSF). Based on these tests, it is recommended that most deflection profiling be done with the center and rear rolling sensors at a testing speed of 2 mph. Three case studies with the TPAD were performed at a testing speed of 2 mph: on US 297 near Wichita Falls, at TxDOT FSF, on US 290 near Houston. The pavements at the three sites are continuously reinforced concrete pavement (CRCP), jointed concrete pavement (JCP), and full-depth, hot-mix asphalt (HMA), respectively. The TPAD proved durable during the testing period and provided valuable information for all three types of pavements. 17. Key Words 18. Distribution Statement Continuous Deflection Profiling, Testing Speed, GPR No restrictions. This document is available to the Imaging, GPS Measurements, Video Imaging, public through the National Technical Information Pavement Surface Temperature Measurements, Service, Springfield, Virginia 22161; www.ntis.gov. Distance Measurements, and Single Moving Platform 19. Security Classif. (of report) 20. Security Classif. (of this page) 21. No. of pages Unclassified Unclassified 94 Form DOT F 1700.7 (8-72) Reproduction of completed page authorized 22. Price Developing a Testing Device for Total Pavements Acceptance—Final Report CTR Kenneth H. Stokoe, II Jung-Su Lee Mike Lewis Richard Hayes TTI Thomas Scullion Wenting Liu CTR Technical Report: Report Date: Project: Project Title: Sponsoring Agency: Performing Agency: 0-6005-3 November 2012 0-6005 Developing a Testing Device for Total Pavement Acceptance Texas Department of Transportation Center for Transportation Research at The University of Texas at Austin Texas A&M Transportation Institute Project performed in cooperation with the Texas Department of Transportation and the Federal Highway Administration. Center for Transportation Research The University of Texas at Austin 1616 Guadalupe St, Suite 4.202 Austin, TX 78701 www.utexas.edu/research/ctr Copyright (c) 2013 Center for Transportation Research The University of Texas at Austin All rights reserved Printed in the United States of America Disclaimers Author's Disclaimer: The contents of this report reflect the views of the authors, who are responsible for the facts and the accuracy of the data presented herein. The contents do not necessarily reflect the official view or policies of the Federal Highway Administration or the Texas Department of Transportation (TxDOT). This report does not constitute a standard, specification, or regulation. Patent Disclaimer: There was no invention or discovery conceived or first actually reduced to practice in the course of or under this contract, including any art, method, process, machine manufacture, design or composition of matter, or any new useful improvement thereof, or any variety of plant, which is or may be patentable under the patent laws of the United States of America or any foreign country. Engineering Disclaimer NOT INTENDED FOR CONSTRUCTION, BIDDING, OR PERMIT PURPOSES. Project Engineer: Kenneth H. Stokoe, II Professional Engineer License State and Number: Texas No. 49095 P. E. Designation: Research Supervisor v Acknowledgments The research team wishes to express its sincere gratitude to TxDOT for supporting this research project. The interaction and support from the Research Monitoring Committee—Mr. Joe Leidy, Mr. Ed Oshinski, Dr. Dar Hao Chen, and Dr. German Claros—has been very important to the success of the project. The UT Staff—Mr. Cecil Hoffpauir, Mr. Curtis Mullins, Mr. Andrew Valentine, and Dr. Farn-Yuh Menq—helped significantly in the field tests with the UT RDD, which was used in developing improved rolling sensors and an improved data analysis software, as well as evaluating new data collection hardware. We owe thanks to Industrial Vehicles International (ivi) for developing the prototype ivi RDD that was used in Year 1. The generosity of Mr. Jay Bird, Mr. Elmo Christensen, and Mr. Mike Grady of ivi in sharing their ideas, the prototype vehicle, and prototype rolling sensors with us in Year 2, at no cost to the project, is appreciated. Further, the willingness of ivi to loan the hydraulic system associated with the front rolling sensor for prototype testing in Years 3 and 4 was greatly appreciated, as was the constant interaction and strong support between ivi, CTR, and TTI during acceptance testing. Finally, we are grateful to Mr. Don Ramsey and the personnel of the TxDOT Flight Services Facility for their kindness in allowing us to continue to use a pavement testbed at their facility during Years 3 and 4 of the project. Products Appendix B contains product 0-6005-P2, CTR Post-Processing Software for Calculating Peak-to-Peak Dynamic Deflections from the Voltage Signals Generated by the RDD Rolling Sensors. vi Table of Contents Chapter 1. Introduction................................................................................................................ 1 1.1 Brief Overview of All Components of the TPAD .................................................................1 1.2 Activities during Year 4 .........................................................................................................3 Chapter 2. Rolling Noise Measurements, Design and Installation of Towing Frame, and Field Evaluation of the Complete TPAD RDD System ...................................................... 5 2.1 Introduction ............................................................................................................................5 2.2 Rolling Noise Measurements with an Independent Towing Frame at TxDOT FSF .............5 2.3 Design of Towing Frame by CEM Personnel ........................................................................9 2.4 TPAD Testing with Towing Frame System at TxDOT FSF ...............................................15 2.5 Summary ..............................................................................................................................22 Chapter 3. TPAD Case Study #1: US 287 near Wichita Falls, CRCP ................................... 25 3.1 Introduction ..........................................................................................................................25 3.2 TPAD Operating and Data Collection Functions ................................................................25 3.3 Poor Pavement Conditions Identified in RDD Deflection Profile .......................................27 3.4 GPR, Pavement Temperature and GPS Data Collected During TPAD Profiling ...............30 3.5 Conclusions from US 287 TPAD Testing ...........................................................................32 Chapter 4. TPAD Case Study #2: TxDOT FSF in Austin, JCP ............................................. 33 4.1 Introduction ..........................................................................................................................33 4.2 RDD Deflection Profiling at the TxDOT FSF .....................................................................33 4.3 The TPAD Potential for Evaluation of LTE with Comparison to FWD Data .....................34 4.4 GPR Data Collected at the TxDOT FSF ..............................................................................39 4.5 Conclusions from TxDOT FSF Testing...............................................................................40 Chapter 5. TPAD Case Study #3: US 290 Houston, Full-Depth, Hot-Mix Asphalt Pavement...................................................................................................................................... 41 5.1 Introduction ..........................................................................................................................41 5.2 RDD Deflection, GPR, Elevation, and Testing Speed Profiling .........................................41 5.3 Conclusions from US 290 Testing .......................................................................................43 Chapter 6. Conclusions............................................................................................................... 45 References .................................................................................................................................... 47 Appendix A. TPADana 1.0: User’s Manual for the TPAD Data Analysis Software ............ 49 Appendix B. CTR Post-Processing Software for Calculating Peak-to-Peak Dynamic Deflections from the Voltage Signals Generated by the RDD Rolling Sensors ..................... 69 vii viii List of Figures Figure 1.1: Photograph of the TPAD Preparing to Evaluate the JCP at TxDOT FSF.................... 1 Figure 1.2: Cross-Sectional View of the TPAD RDD Loading System Which Applies Static and Sinusoidal Dynamic Loads to the Pavement with Two Loading Rollers .......... 2 Figure 1.3: Photograph of Rolling Sensor Composed of a Three-Wheel Cart, 2-Hz Geophone with 40-lb Hold-Down Weight .......................................................................... 3 Figure 2.1: Rolling Sensor, Computer, DAQ and Battery Installed on an Independent Towing Frame on JCP at TxDOT FSF ............................................................................... 6 Figure 2.2: Four Combinations of Wheels on the Rolling Sensor Installed in the Independent Towing Frame ................................................................................................ 7 Figure 2.3: Rolling Noise Levels Averaged over 125-ft Long Testing Path at Three Different Testing Speeds Measured with Wheel Set SA .................................................... 8 Figure 2.4: Rolling Noise Levels Averaged over 125-ft Long Testing Path at Three Different Testing Speeds Measured with Wheel Set SB .................................................... 8 Figure 2.5: Rolling Noise Levels Averaged over 125-ft Long Testing Path at Three Different Testing Speeds Measured with Wheel Set SC .................................................... 9 Figure 2.6: Rolling Noise Levels Averaged over 125-ft Long Testing Path at Three Different Testing Speeds Measured with Wheel Set SD .................................................... 9 Figure 2.7: Vertical Space Constraints under the TPAD for Towing Frame................................ 10 Figure 2.8: Lateral Width Constraints under the TPAD for the Towing Frame ........................... 11 Figure 2.9: Vertical and Horizontal Distances from the Loading Frame to the TPAD Frame ................................................................................................................................ 11 Figure 2.10: Towing Frame Design Drawing by CEM Personnel................................................ 12 Figure 2.11: RDD Rolling Sensor Used for Towing Frame System ............................................ 13 Figure 2.12: Three RDD Rolling Sensors Attached to the Towing Frame ................................... 13 Figure 2.13: Arrangement of Sensor Array with Three RDD Rolling Sensors ............................ 14 Figure 2.14: Photograph of the RDD Portion of the TPAD Showing the Towing Frame, Front Rolling Sensor, Location of Center Rolling Sensor and One Loading Roller ........ 15 Figure 2.15: Set-up Used for In-Situ Calibration of a Rolling Sensor.......................................... 16 Figure 2.16: Field Calibration Curves for the Three Rolling Sensors .......................................... 16 Figure 2.17: TxDOT’s FSF at Austin Bergstrom International Airport (ABIA) .......................... 17 Figure 2.18: Continuous Deflection Profiles at 0.5 and 1 mph Using the Center Rolling Sensor in the Towing Frame along Path E at TxDOT, FSF ............................................. 18 Figure 2.19: Continuous Deflection Profiles at 0.5 and 2 mph Using the Center Rolling Sensor in the Towing Frame along Path E at TxDOT, FSF ............................................. 18 Figure 2.20: Continuous Deflection Profiles at 0.5 and 3 mph Using the Center Rolling Sensor in the Towing Frame along Path E at TxDOT, FSF ............................................. 19 Figure 2.21: Continuous Deflection Profiles at 0.5 and 1 mph Using the Front Rolling Sensor in the Towing Frame along Path E at TxDOT, FSF ............................................. 20 ix Figure 2.22: Continuous Deflection Profiles at 0.5 and 2 mph Using the Front Rolling Sensor in the Towing Frame along Path E at TxDOT, FSF ............................................. 20 Figure 2.23: Continuous Deflection Profiles at 0.5 and 3 mph Using the Front Rolling Sensor in the Towing Frame along Path E at TxDOT, FSF ............................................. 21 Figure 2.24: Continuous Deflection Profiles at 0.5 and 1 mph Using the Rear Rolling Sensor in the Towing Frame along Path E at TxDOT, FSF ............................................. 21 Figure 2.25: Continuous Deflection Profiles at 0.5 and 2 mph Using the Rear Rolling Sensor in the Towing Frame along Path E at TxDOT, FSF ............................................. 22 Figure 2.26: Continuous Deflection Profiles at 0.5 and 3 mph Using the Rear Rolling Sensor in the Towing Frame along Path E at TxDOT, FSF ............................................. 22 Figure 3.1: US 287/US 81 Start Location ..................................................................................... 25 Figure 3.2: Deflection Profile (in mils/10 kips) vs. Distance for the Worst Areas on US 287..................................................................................................................................... 26 Figure 3.3: Area of Highest Deflection on US 287 ...................................................................... 27 Figure 3.4: Typical Problems Found at Either End of Concrete Patches ..................................... 28 Figure 3.5: Area High Deflection Area Not Associated with a Patch .......................................... 28 Figure 3.6: Problem Areas on US 287 .......................................................................................... 29 Figure 3.7: GPR Data – (a) Upper Plot is from a Problem Area (Around 9000 feet) and (b) Lower Plot from a Sound Area ................................................................................... 31 Figure 3.8: Additional Data Items Collected in a Typical TPAD Run (Temperature and Elevation) .......................................................................................................................... 31 Figure 4.1: Typical TPAD Deflection Profile for the JCP at the TxDOT FSF ............................ 33 Figure 4.2: Repeated Runs of the JCP at Different Speeds with the Center Sensor at TxDOT FSF ...................................................................................................................... 34 Figure 4.3: FWD Set Up for LTE Measurements ......................................................................... 35 Figure 4.4: Schematic of the Proposed Change in Sensor Deflections over a Poor Joint ............ 36 Figure 4.5: Deflection Patterns Collected with the Front Sensor ................................................. 37 Figure 4.6: Blow Up of the Front Sensor Deflections with Several of the Joints Tested with the FWD .................................................................................................................... 37 Figure 4.7: The Front Sensor Deflection Patterns over Two Joints with Different LTEs ............ 38 Figure 4.8: Comparison of FWD LTE to a Statistic from the Front Sensor of the TPAD at 84℉................................................................................................................................... 39 Figure 4.9: Comparison of FWD LTE to a Statistic from the Front Sensor of the TPAD at 104℉................................................................................................................................. 39 Figure 4.10: GPR Data from the TxDOT FSF.............................................................................. 40 Figure 5.1: Typical TPAD Data from Full-Depth Asphalt Section of US 290............................. 41 Figure 5.2: US 290 TPAD Data from a Location of Varying Deflection ..................................... 42 Figure 5.3: GPR Data Collected by TPAD Showing Variation in Subgrade Moisture Content .............................................................................................................................. 42 Figure 5.4: Elevation and Speed Data from the US 290 Data Collection..................................... 43 x Figure A.1: Main Menu Screen of the TPADana Software .......................................................... 51 Figure A.2: Program Setup or Options Screen ............................................................................. 53 Figure A.3: Showing the Total Number and Current Segment Selected ...................................... 54 Figure A.4: Filter Parameter ......................................................................................................... 54 Figure A.5: Sensor Selection and Calibration Factor Input Screen .............................................. 54 Figure A.6: Offset and Moving Average Parameters Input Screen .............................................. 55 Figure A.7: Options to Smooth Raw Deflection Data .................................................................. 55 Figure A.8: Output Chart Format Parameters ............................................................................... 55 Figure A.9: Open File Dialog Box................................................................................................ 56 Figure A.10: Plot of Raw Data (Blue Line) and Filtered Data Using the Options Selected in Figure A.8 ..................................................................................................................... 56 Figure A.11: Raw Load Data Chart (DMI vs. Load in Kips) ....................................................... 57 Figure A.12: Raw Load Data Chart When Turning to Other Pages ............................................. 57 Figure A.13: Raw Geophone Data Chart (Y-Axis in mils, X-Axis in feet).................................. 58 Figure A.14: Power Spectrum Chart of Raw Load Signal............................................................ 59 Figure A.15: Power Spectrum Chart of Raw Geophone Signal ................................................... 60 Figure A.16: Chart of Raw and Filtered Load Data...................................................................... 61 Figure A.17: Chart of Raw and Filtered Geophone Data ............................................................. 62 Figure A.18: The Comprehensive Results View Screen, View Option 1 ..................................... 63 Figure A.19: Comprehensive Results View Screen, View Option 2 ............................................ 64 Figure A.20: Infrared Sensor for Getting the Surface Temperature ............................................. 65 Figure A.21: GPS Antenna Mounted at the Top of the Loading Frame ....................................... 65 Figure A.22: Other Information Charts (Surface Temperature, Sea Elevation, and Running Speed) ................................................................................................................. 66 Figure A.23: Video Frames Showing the TPAD Cross the Bride ................................................ 67 Figure A.24: Open File Dialog Box.............................................................................................. 68 xi xii List of Tables Table 3.1: Areas Needing to be Inspected Prior to Placing the Overlay ...................................... 30 Table 4.1: FWD Determined LTEs at both 84 and 104℉ ............................................................ 35 Table A.1: File Size for the US287 Field Testing ........................................................................ 49 Table A.2: Function of Each Toolbar Button ............................................................................... 52 xiii xiv Chapter 1. Introduction 1.1 Brief Overview of All Components of the TPAD The objective of Project 0-6005 is to develop the Total Pavement Acceptance Device (TPAD). The TPAD is a multi-function, nondestructive testing device that will be used to continuously profile along pavements to assess their structural conditions. The multi-functions include (1) Rolling Dynamic Deflectometer (RDD) measurements, (2) Ground Penetrating Radar (GPR) imaging, (3) a Distance Measurement Instrument (DMI), (4) high-precision differential GPS measurements, (5) pavement surface temperature measurements, and (6) digital video imaging of the pavement surface and right-of-way conditions. A photograph of the TPAD is presented in Figure 1.1. Figure 1.1: Photograph of the TPAD Preparing to Evaluate the JCP at TxDOT FSF The TPAD is a hydraulically operated mobile platform with a total weight of about 18 kips. The TPAD is 20 ft long, 7.5 ft wide, and has a maximum height of 7.8 ft. While conducting pavement profiles, the TPAD has a control system for profiling at a constant speed within a range of 0.5 to 10 mph. The TPAD RDD loading system is capable of generating static forces of 3.4 to 14 kips and dynamic sinusoidal forces with a peak-to-peak amplitude of 2 to 24 kips over a frequency range of about 7 to 200 Hz. Static hold-down forces are measured based on hydraulic pressure measurements and dynamic forces are measured with accelerometers installed on the reaction mass and support frame of the loading rollers. Two loading rollers are used to apply the static and dynamic forces to the pavement. Each loading roller is 1.5 ft in diameter, 1.2 ft wide and has a tread that is about 2.5 in. thick and is made of a 92-durometer, shore-A polyurethane material. A cross-sectional view of the TPAD RDD loading system is shown in Figure 1.2. The air-conditioned cab at the front houses the driver, operator of the data collection activities, and hardware and software systems. The cab has an internal volume of approximately 1 142 cubic feet. Electrical power is generated with an onboard, 2,000-watt pure sine wave inverter. All movements of the mobile platform, the RDD loads imparted to the pavement, and the raising/lowering portion of the rolling sensor system are hydraulically operated. Figure 1.2: Cross-Sectional View of the TPAD RDD Loading System Which Applies Static and Sinusoidal Dynamic Loads to the Pavement with Two Loading Rollers Currently, the TPAD has three RDD rolling sensors. Each rolling sensor is composed of a three-wheel cart on which a 2-Hz geophone is attached. One sensor is shown in Figure 1.3. The 2-Hz geophone is used to measure dynamic deflections of the pavement created by the sinusoidal dynamic loads. The sensors are arranged in a linear array that is oriented along the longitudinal axis of the TPAD. A towing frame is used to position the rolling sensors and pull them along with the TPAD while the TPAD moves along the pavement. The towing frame is designed to minimize the transmission of vibrations from the dynamic loading system through the machine and to the rolling sensors. The towing frame has the potential to be modified so that additional sensors can be incorporated as the need arises. The other TPAD testing functions, GPR, GPS, video camera, and pavement surface temperature sensors are described in the Year 3 report by personnel from the Texas A&M Transportation Institute (TTI), who were responsible for developing these systems and integrating all facets of the data collection and processing into one computer system. 2 Figure 1.3: Photograph of Rolling Sensor Composed of a Three-Wheel Cart, 2-Hz Geophone with 40-lb Hold-Down Weight 1.2 Activities during Year 4 In Year 4, a towing frame used to position the rolling sensors on the pavement was designed and installed on the TPAD by personnel from UT’s Center for Electromechanics (CEM). The towing system is configured to hold three rolling sensors. Initial prototype tests with the towing frame and three rolling sensors were performed at the Texas Department of Transportation (TxDOT) Flight Services Facility (FSF). After the initial tests, modifications were made to parts of the towing frame as discussed in Chapter 2 and the final system was added to the TPAD. Concurrently, rolling noise measurements were performed using an independent towing frame on a jointed concrete pavement (JCP) at the TxDOT FSF to optimize the wheel diameter and tread width of the 3-wheel sensor cart. Earlier in this project, wheels with tread widths of 1, 2, and 4 in. and diameters of 9.5 and 12.5 in. were fabricated to allow a variety of three-wheel carts for the rolling sensor to be studied. These sensor carts were installed on the independent towing frame pulled by hand over a range of speeds. The RDD function of the TPAD with the final towing frame and rolling sensor system was tested on three different types of pavements in Texas, presented as three case studies in this report. The pavements were a JCP at the TxDOT FSF, a continuously reinforced concrete pavement (CRCP) on US 287 near Wichita Falls, and a hot-mix asphalt (HMA) pavement on US 290 near Houston. At the TxDOT FSF, Falling Weight Deflectometer (FWD) testing was also performed and the results from the TPAD and FWD are compared. Personnel from TTI conducted these three case histories with the assistance of CTR personnel. The rolling noise measurements and the final design of the towing frame on the TPAD are described in Chapter 2. The three case studies are described as follows: TPAD testing near Wichita Falls is presented in Chapter 3; TPAD and FWD tests at the TxDOT FSF are presented in Chapter 4; and the testing results near Houston are discussed in Chapter 5. Finally, conclusions are presented in Chapter 6. In addition, a user’s manual of the TPAD data analysis software developed by TTI personnel is presented in Appendix A. Appendix B provides a 3 manual for post-processing software for calculating peak-to-peak dynamic deflections from the TPAD RDD rolling sensors developed by CTR personnel. 4 Chapter 2. Rolling Noise Measurements, Design and Installation of Towing Frame, and Field Evaluation of the Complete TPAD RDD System 2.1 Introduction Rolling noise measurements to optimize the wheel configurations on the rolling sensor carts were performed at TxDOT’s FSF. An independent towing frame that was pulled by hand was used in these tests. The pavement at the TxDOT FSF is a JCP. Many different combinations of rolling sensor wheels were tested. These tests are described in Section 2.2. The final towing frame configuration that is attached to the TPAD is also presented in this chapter. CEM personnel designed and installed this towing frame on the TPAD. The design and installation of the final towing frame are discussed in Section 2.3. The field calibration of the rolling sensors and initial TPAD testing with the final towing frame were performed at the TxDOT FSF. Field calibration procedure, results, and initial TPAD testing results analyzed using the CTR data processing methodology are presented in Section 2.4. Finally, a brief summary of Chapter 2 is discussed in Section 2.5. 2.2 Rolling Noise Measurements with an Independent Towing Frame at TxDOT FSF Rolling noise generated at a level near the RDD dynamic loading frequency (typically 30 Hz) is mainly caused by pavement roughness. In general, lower rolling noise is desirable. Successive testing of three-wheel sensor carts to determine the optimum combination of wheel diameter and tread width necessary to minimize rolling noise was conducted on the JCP at the TxDOT FSF. The independent towing frame at the TxDOT FSF is shown in Figure 2.1. The rolling sensor, computer, Data Acquisition (DAQ) system, and battery for the computer and DAQ system installed on the independent towing frame are shown in Figure 2.1a. In Figure 2.1b, it is easier to see the rolling sensor and also the portable air supply used to inflate the hold-down air springs. 5 (a) (b) Figure 2.1: Rolling Sensor, Computer, DAQ and Battery Installed on an Independent Towing Frame on JCP at TxDOT FSF During earlier rolling noise tests in the third year (Stokoe et al., 2011), three different hold-down weights of 20, 40, and 90 lb were evaluated. In these earlier tests, it was found that the heaviest hold-down weight (90 lb) resulted in the least rolling noise. Therefore, only a hold6 down weight of 90 lb was used in this study. Different sets of rolling sensor wheels used during the rolling noise measurements with the designations for each set of wheels as follows: • SA: 9.5-in. diameter wheels; two, 1-in. wide treads and one, 2-in. wide tread, • SB: 9.5-in. diameter wheels; two, 2-in. wide treads and one, 4-in. wide tread, • SC: 12.5-in. diameter wheels; two, 1-in. wide treads and one, 2-in. wide tread, and • SD: 12.5-in. diameter wheels; two, 2-in. wide treads and one, 4-in. wide tread. Photographs of the four wheel sets of the rolling sensor installed in independent the towing frame are shown in Figure 2.2. (a) SA: 9.5-in. Diameter Wheels: Two, 1in.and One, 2-in. Wide Treads (b) SB: 9.5-in. Diameter Wheels: Two, 2-in. and One, 4-in. Wide Treads (c) SC: 12.5-in. Diameter Wheels: Two, 1in.and One, 2-in. Wide Treads (d) SD: 12.5-in. Diameter Wheels: Two, 2-in. and One, 4-in. Wide Treads Figure 2.2: Four Combinations of Wheels on the Rolling Sensor Installed in the Independent Towing Frame In this study, each wheel set on the same sensor cart body was installed in the independent towing frame. The towing frame was pulled along a 125-ft testing path at the TxDOT FSF. The testing path included seven joints on the JCP. Rolling noise measurements were performed at three different speeds. The exact speed in each test was not measured. However, the average walking/running speed of the person pulling the towing frame was “calibrated” by measuring the time it took to walk/run a known distance. It was determined that testing speeds associated with “slow walking,” “fast walking,” and “slow running” were 7 approximate 1, 3, and 5 mph, respectively. Rolling noise levels were recorded for all wheel sets for each of these speeds. The results of the rolling noise-level measurements (in mV) at the three testing speeds are shown in Figures 2.3, 2.4, 2.5, and 2.6. The figures show the mean and plus and minus one standard deviation of the rolling noise level for the sensors. As the testing speed increases with a given wheel set, the rolling noise level increases as expected. In general, 12.5-in. diameter wheels (SC and SD) showed better performances than 9.5-in. diameter wheels (SA and SB). The results from narrow (SA and SC) and wide (SB and SD) showed similar results. Noise Level (mV) 35 SA: 9.5 in. Diameter, two, 1-in. and one, 2-in. Wide Tread 30 25 20 15 10 5 0 0 1 2 3 4 5 6 Approximate Speed (mph) Figure 2.3: Rolling Noise Levels Averaged over 125-ft Long Testing Path at Three Different Testing Speeds Measured with Wheel Set SA Noise Level (mV) 50 SB: 9.5 in. Diameter, two, 2-in. and 40 one, 4-in. Wide Tread 30 20 10 0 0 1 2 3 4 5 6 Approximate Speed (mph) Figure 2.4: Rolling Noise Levels Averaged over 125-ft Long Testing Path at Three Different Testing Speeds Measured with Wheel Set SB 8 Noise Level (mV) 35 SC: 12.5 in. Diameter, two, 1-in. and one, 2-in. Wide Tread 30 25 20 15 10 5 0 0 1 2 3 4 5 6 Approximate Speed (mph) Figure 2.5: Rolling Noise Levels Averaged over 125-ft Long Testing Path at Three Different Testing Speeds Measured with Wheel Set SC Noise Level (mV) 35 SD: 12.5 in. Diameter, two, 2-in. and one, 4-in. Wide Tread 30 25 20 15 10 5 0 0 1 2 3 4 5 6 Approximate Speed (mph) Figure 2.6: Rolling Noise Levels Averaged over 125-ft Long Testing Path at Three Different Testing Speeds Measured with Wheel Set SD 2.3 Design of Towing Frame by CEM Personnel The new format of the TPAD towing system for the rolling sensors was designed, constructed, and installed during this year. The towing frame will replace the IVI designed sensor system described in report 0-6005-4. The new towing and lifting frame on the TPAD is used to position and tow three rolling sensors. The towing/lifting system was designed by CEM personnel at UT. 9 The functions of the towing frame are to (1) pull all rolling sensors from a single frame that is towed by the TPAD mobile platform, (2) make the towing frame bridge the loading roller assembly so that the frame will automatically be lifted when the loading rollers are raised, (3) make the towing frame compatible with all rolling sensors, and (4) maintain rolling sensors at a uniform spacing with respect to the loading rollers and each other. The towing frame was designed to accommodate three constraints that exist mainly due to space limitations under the TPAD. The open space under the TPAD varies with the position of the loading rollers with respect to the loading frame. The open space when the loading rollers are raised and lowered as well as when the static and dynamic loads are fully applied to the pavement must be considered. The first constraint is the vertical space between the round bar and rectangular loading frame, which is just over 3 in. when full load is applied as shown in Figure 2.7. The second constraint is the width (space) available for the towing frame. As seen in Figure 2.8, even though the total width of the rectangular loading frame of the loading rollers is 22 in., the width available for the towing frame is just 14 in. The third constraint is the vertical and horizontal distances between the loading frame and the TPAD mobile platform when the loading frame is fully lifted. The measurements from the rectangular loading frame to the TPAD frame when the loading frame is fully lifted are shown in Figure 2.9. They are about 3 and 8 in., respectively. Figure 2.7: Vertical Space Constraints under the TPAD for Towing Frame 10 Figure 2.8: Lateral Width Constraints under the TPAD for the Towing Frame Figure 2.9: Vertical and Horizontal Distances from the Loading Frame to the TPAD Frame As a trial in designing the towing frame, a wooden mock-up was built and then test fitted to define the acceptable size of the towing frame. After the trial with the mock-up, the design (shape) of the towing cart frame was determined. The towing frame consists of three connected pieces, which are a center bridge rectangular box beam and two end sections bolted to the center bridge beam as shown in Figure 2.10. Vertical channel assemblies are bolted to each section. The 11 vertical channels are used to attach the rolling sensor carts. Four 8-in. diameter, pneumatic wheels are used to support the towing frame when it is on the pavement; the two front wheels swivel while the two back wheels are rigidly attached to the towing frame. The drawing of the towing frame design is shown in Figure 2.10. Figure 2.10: Towing Frame Design Drawing by CEM Personnel Since the rolling sensor carts with 12-in. diameter wheels (SC and SD) and the higher hold-down weight generally performed better in the rolling-noise measurements, it was determined to use larger diameter wheels wherever physical constraints would permit. The drawings of one rolling sensor package are shown in Figure 2.11. The drawing of three rolling sensors positioned in the towing frame is shown in Figure 2.12. 12 (a) Whole View (b) Front View (c) Side View Figure 2.11: RDD Rolling Sensor Used for Towing Frame System Figure 2.12: Three RDD Rolling Sensors Attached to the Towing Frame 13 Fabrication of the towing frame, attachments of rolling sensors to the frame, and installation of the towing frame with three rolling sensors were all completed in January 2012. As mentioned above, the TPAD currently has three RDD rolling sensors. These sensors are arranged in a linear array as shown in Figure 2.13. The array is oriented along the longitudinal axis of the TPAD and is centered mid-way between the loading rollers. The sensors are named according to their locations relative to the loading rollers. The center sensor (CS) is located midway between the two loading rollers while the front sensor (FS) and rear sensors (RS) are located 0.635 m (25 in.) forward of and to the rear of the center sensor (CS), respectively. Figure 2.14 shows a photograph of the front rolling sensor (FS) attached to the towing frame and the location of the center sensor (CS). In an initial plan, all three RDD rolling sensors had 12.5-in. diameter wheels and heavier hold-down weight (90 lb) because this sensor cart format had the lowest rolling noise. However, 9.5-in. diameter wheels and a 40-lb of hold-down weight were used for the center sensor (CS) because of space limitations between the loading rollers. In general, since the center sensor is located closest to the loading rollers, it will have the largest signal and a good signal-to-noise ratio (SNR). Therefore, use of 9.5-in. diameter wheels and the lighter hold-down weight (40 lb) for the center sensor are considered acceptable. Direction of Travel Loading Roller Front Sensor (FS) 0.635 m (2.1 ft) Loading Roller Loaded Area Loaded Area Center Sensor (CS) 0.365 m (1.2 ft) 0.635 m (2.1 ft) Loading Roller Contacts Pavement Rear Sensor (RS) 0.533 m (1.75 ft) 0.533 m (1.75 ft) Figure 2.13: Arrangement of Sensor Array with Three RDD Rolling Sensors 14 Figure 2.14: Photograph of the RDD Portion of the TPAD Showing the Towing Frame, Front Rolling Sensor, Location of Center Rolling Sensor and One Loading Roller 2.4 TPAD Testing with Towing Frame System at TxDOT FSF After installation of the towing frame with the three RDD rolling sensors, the TPAD was brought to TxDOT FSF and the performance of the RDD rolling sensors with towing frame was evaluated. 2.4.1 Rolling Sensor In-Situ Calibration As part of work conducted on earlier RDD projects, CTR personnel have developed a procedure for in-situ (field) calibration of the rolling sensors. This in-situ calibration was performed on the pavement at the TxDOT FSF. This calibration is done using two laboratory calibrated 4.5-Hz geophones borrowed from the Soil Dynamics Laboratory at UT. The reference transducers are used to measure the motion on the pavement surface while the TPAD loading system is applying both static and dynamic forces to the pavement. The rolling sensor and reference transducers set-up in the field calibration procedure are shown in Figure 2.15. The insitu calibration is performed by changing the excitation loading frequency (sweeping) of the loading rollers on the pavement (typically between 20 to 50 Hz) while the TPAD is stationary. Usually, uncracked mid-slab areas are selected as a testbed for JCP to reduce the influence from any cracks or joints. For this site, the mid-slab area on an 8-in. thick slab was used. During application of the forces over a range in frequencies to the pavement, the signals of 2-Hz geophone in the rolling sensor package and the two 4.5-Hz geophones were recorded and then averaged; movements from the two reference geophones and rolling sensor transducer were compared. This procedure was performed for all three rolling sensors. Field calibration curves for the three RDD rolling sensors are shown in Figure 2.16. As seen in the figure, the front and 15 rear sensors showed similar values while the center sensor showed a slightly different value, likely because the center sensor has different sized wheels. (a) Front View (b) Side View Figure 2.15: Set-up Used for In-Situ Calibration of a Rolling Sensor Calibration Factor (Vol/(in/Sec) 1.6 1.4 1.2 1 0.8 Calibration Factor (30Hz) 0.6 CS, 0.65 V/(in./sec) 0.4 FS, 0.73 V/(in./sec) 0.2 RS, 0.75 V/(in./sec) 0 20 25 30 35 40 45 50 Frequency (Hz) Figure 2.16: Field Calibration Curves for the Three Rolling Sensors 2.4.2 Deflection Profiling with the Rolling Sensors In March 2012, personnel from CTR and TTI performed TPAD testing at the TxDOT FSF. This testing was conducted to check the performance of the rolling sensors with the towing frame system. Testing Path E at the TxDOT FSF was used for this work. Testing Path E is shown in the aerial photograph of the TxDOT FSF in Figure 2.17. In an earlier study, the effect of temperature on the rolling dynamic deflections were well established (joint #33 deflection dropped from 38 mils/10kips at 91 F to 12 mils/10 kips at 128 F; Stokoe et al., 2010). To avoid 16 this effect, testing was performed during the morning time when pavement surface temperature was quite stable and around 70℉. Figure 2.17: TxDOT’s FSF at Austin Bergstrom International Airport (ABIA) Continuous profiling along Path E with the final system of rolling sensors and the towing frame was performed at average testing speeds of 0.5, 1, 2, and 3 mph. The deflection profiles collected with the center sensor (CS) at testing speeds of 0.5, 1, 2, and 3 mph are shown in Figures 2.18, 2.19, and 2.20, respectively. In these figures, the deflection profile evaluated at a testing speed of 0.5 mph was used as the reference. It is well known that rolling noise level generally increases as testing speed increases. Upon comparing the figures, it can be seen that profiles determined at 0.5, 1, and 2 mph show similar results (see Figures 2.18 and 2.19). Figure 2.20 presents the comparison between profiles determined at 0.5 and 3 mph and the rolling noise has increased considerably at the joints but there is still a reasonable match between the two profiles. 17 16 CTR Measurements Actual Peak-to-Peak Dynamic Load = 8 kips Deflection (mils/10kips) 14 12 0.5 mph (9:00AM, 70F) 1 mph (9:30AM, 71F) 10 8 6 4 2 0 0 100 200 300 400 500 600 700 Distance (ft) Figure 2.18: Continuous Deflection Profiles at 0.5 and 1 mph Using the Center Rolling Sensor in the Towing Frame along Path E at TxDOT, FSF 16 12 Deflection (mils/10kips) 0.5 mph (9:00AM, 70F) CTR Measurements Actual Peak-to-Peak Dynamic Load = 8 kips 14 2 mph (9:30AM, 72F) 10 8 6 4 2 0 0 100 200 300 400 500 600 700 Distance (ft) Figure 2.19: Continuous Deflection Profiles at 0.5 and 2 mph Using the Center Rolling Sensor in the Towing Frame along Path E at TxDOT, FSF 18 16 14 12 Deflection (mils/10kips) 0.5 mph (9:00AM, 70F) CTR Measurements Actual Peak-to-Peak Dynamic Load = 8 kips 3 mph (9:38AM, 72F) 10 8 6 4 2 0 0 100 200 300 400 500 600 700 Distance (ft) Figure 2.20: Continuous Deflection Profiles at 0.5 and 3 mph Using the Center Rolling Sensor in the Towing Frame along Path E at TxDOT, FSF The deflection profiles collected with the front rolling sensor at testing speeds of 0.5, 1, 2, and 3 mph are shown in Figures 2.21, 2.22, and 2.23, respectively. The deflection profiles collected with the rear rolling sensor at 0.5, 1, 2, and 3 mph are shown in Figures 2.24 through 2.26. In all cases, the deflection profile determined at 0.5 mph is also used as the reference. As with the comparisons shown in Figure 2.18 through 2.20 for the center rolling sensor, deflection profiles determined at testing speeds of 0.5, 1, and 2 mph with the rear rolling sensor were very well matched (see Figures 2.24 and 2.25) while the deflection profile at 3 mph showed some differences, especially at the joints (see Figure 2.26). On the other hand, deflection profiles evaluated with the front rolling sensor at testing speeds of 0.5, 1, and 2 mph exhibited good comparisons (see Figures 2.21 and 2.22) but exhibited considerable differences at 3 mph, especially at the joints (see Figure 2.23). The poorer performance of the front rolling sensor compared with the rear rolling sensor is attributed to the chatter created by the front swiveling wheels on the towing frame compared with the fixed wheels on the back of the towing frame. This chattering noticeably increased with speed. 19 _ , 8 0.5 mph (9:00AM, 70F) CTR Measurements Actual Peak-to-Peak Dynamic Load = 8 kips 7 Deflection (mils/10kips) 6 1 mph (9:30AM, 71F) 5 4 3 2 1 0 0 100 200 300 400 500 600 700 Distance (ft) Figure 2.21: Continuous Deflection Profiles at 0.5 and 1 mph Using the Front Rolling Sensor in the Towing Frame along Path E at TxDOT, FSF 8 0.5 mph (9:00AM, 70F) CTR Measurements Actual Peak-to-Peak Dynamic Load = 8 kips 7 Deflection (mils/10kips) 6 2 mph (9:30AM, 72F) 5 4 3 2 1 0 0 100 200 300 400 500 600 700 Distance (ft) Figure 2.22: Continuous Deflection Profiles at 0.5 and 2 mph Using the Front Rolling Sensor in the Towing Frame along Path E at TxDOT, FSF 20 8 7 6 Deflection (mils/10kips) 0.5 mph (9:00AM, 70F) CTR Measurements Actual Peak-to-Peak Dynamic Load = 8 kips 3 mph (9:38AM, 72F) 5 4 3 2 1 0 0 100 200 300 400 500 600 700 Distance (ft) Figure 2.23: Continuous Deflection Profiles at 0.5 and 3 mph Using the Front Rolling Sensor in the Towing Frame along Path E at TxDOT, FSF 8 7 Deflection (mils/10kips) 0.5 mph (9:00AM, 70F) CTR Measurements Actual Peak-to-Peak Dynamic Load = 8 kips 6 1 mph (9:30AM, 71F) 5 4 3 2 1 0 0 100 200 300 400 500 600 700 Distance (ft) Figure 2.24: Continuous Deflection Profiles at 0.5 and 1 mph Using the Rear Rolling Sensor in the Towing Frame along Path E at TxDOT, FSF 21 8 6 Deflection (mils/10kips) 0.5 mph (9:00AM, 70F) CTR Measurements Actual Peak-to-Peak Dynamic Load = 8 kips 7 2 mph (9:30AM, 72F) 5 4 3 2 1 0 0 100 200 300 400 500 600 700 Distance (ft) Figure 2.25: Continuous Deflection Profiles at 0.5 and 2 mph Using the Rear Rolling Sensor in the Towing Frame along Path E at TxDOT, FSF 8 7 6 Deflection (mils/10kips) 0.5 mph (9:00AM, 70F) CTR Measurements Actual Peak-to-Peak Dynamic Load = 8 kips 3 mph (9:38AM, 72F) 5 4 3 2 1 0 0 100 200 300 400 500 600 700 Distance (ft) Figure 2.26: Continuous Deflection Profiles at 0.5 and 3 mph Using the Rear Rolling Sensor in the Towing Frame along Path E at TxDOT, FSF 2.5 Summary Rolling noise measurements were performed with the rolling sensors using an independent towing frame that was pulled by hand—hence, no additional noise created by the TPAD or loading rollers. These measurements were performed on JCP at the TxDOT FSF. In general, the rolling sensors with larger diameter wheels showed better performance in terms of lower rolling noise, while almost no difference was found between wide and narrow treads on 22 the sensor wheels. Therefore, the researchers elected to use larger diameter wheels (12.5 in. compared to 9.5 in. wherever space beneath the TPAD allowed). A final towing frame for the rolling sensors was designed and fabricated by CEM personnel. The towing frame system is isolated from the TPAD mobile platform as much as possible to prevent transmission of vibrations from the dynamic loading system to the rolling sensors. Initially, the towing frame was intended to incorporate 12.5-in. diameter wheels on the rolling sensor carts and a heavier hold-down weight (90-lb). However, 9.5-in. diameter wheels and a 40-lb hold-down weight were used for the center rolling sensor because of the space limitations around the loading rollers. Since the center sensor generally has a higher SNR because of the proximity to the loading rollers, this wheels/weight set-up was considered to be acceptable. Three rolling sensors in the towing frame system were tested at TxDOT FSF under similar surface temperature conditions (around 70℉). The center and rear rolling sensors showed good agreements in deflections profiles determined at testing speeds up to 2 mph when compared with the deflection profile at 0.5 mph. In contrast, the front rolling sensor showed poorer performance in the same comparison (0.5 vs. 1, and 2 mph). It seems that this poorer performance of the front sensor results from the chatter in the front swiveling wheels on the towing frame. At a testing speed of 3 mph, deflection profiles collected with the center, rear, and front rolling sensors exhibited comparable results in general, but showed considerable differences mainly at the JCP joints. 23 24 Chapter 3. TPAD Case Study #1: US 287 near Wichita Falls, CRCP 3.1 Introduction The US 287 data collection effort was on a CRCP section near Wichita Falls that was scheduled to receive a bonded concrete overlay. The total project length was around 5 miles, with data collected at a profiling speed of 2 mph. This project was the first project-level test conducted with the TPAD. The primary goal was to check that the system is working correctly with sufficient ruggedness for longer projects, and to determine if useful information could be obtained for the District staff with regard to the upcoming construction project. Figure 3.1 shows the start location of testing performed in the southbound outside lane. Figure 3.1: US 287/US 81 Start Location 3.2 TPAD Operating and Data Collection Functions No major problems were found with the TPAD operating and data collection functions. At a few locations where severe faulted punch-outs were found, the RDD geophone carriage was stopped and lifted over the faulted areas to avoid the risk of damaging the rolling sensors, which are not designed to clear vertical offsets of more than about 0.5 in. A total of 26,800 feet of continuous deflection data was collected. The results below were obtained from TTI’s TPADana software package, which is described in Appendix A. The deflection data from the worst areas (in terms of both condition and high deflections) are shown in Figure 3.2. This figure presents a plot of deflections normalized to a 10-kip load level versus distance along the pavement in feet. The worst area was found to exist between 9000 and 10000 ft from the start of the data collection. In Figure 3.2 the blue line represents a continuous deflection profile based on every cycle while the red line shows the average deflection collected for every 2 feet of pavement tested. The 2-ft average is somewhat similar to the reporting window used in CTR’s earlier data analysis software. 25 Figure 3.2: Deflection Profile (in mils/10 kips) vs. Distance for the Worst Areas on US 287 It became clear in reviewing the deflection data that some of the high deflection peaks were found at the ends of recently patched areas. The photograph from the location with the highest deflection in Figure 3.2 is shown in Figure 3.3. The spikes in defection were measured at either end of the patch shown. These high deflections were a real concern as bonded concrete overlays will perform well as long as they have uniform support. In other locations, the concrete next to the patched area has started to fail. 26 Figure 3.3: Area of Highest Deflection on US 287 3.3 Poor Pavement Conditions Identified in RDD Deflection Profile Based on the results shown above, the TTI team, with the help of the project director Joe Leidy of the Construction Division, reviewed all of the localized high deflection locations from the complete data set. Two examples of typical data are shown in Figures 3.4 and 3.5. Figure 3.4 is the classic case of high deflections at the end of patches. The plot below the main deflection plot (Figure 3.4a) shows 100 ft of deflections around the location selected by the user and marked with the vertical red line in Figure 3.4a. High deflections were found at 5650 feet and 5680 feet at either end of the 30-ft long patch as shown in Figure 3.4b. 27 Figure 3.4: Typical Problems Found at Either End of Concrete Patches Figure 3.5: Area High Deflection Area Not Associated with a Patch Figure 3.5 shows a different pavement condition from the one shown in Figure 3.4. In Figure 3.5a, a high-deflection area in highlighted by the vertical red line at this location, the pavement has closely spaced cracks (2 to 4 feet apart) but no patching. Photographs showing other problem areas are presented below in Figure 3.6. The photograph on the left (Figure 3.6a) shows the consequences of problems at the end of the patches, where the adjoining concrete fails next to the new patch. The photograph on the right (Figure 3.6b) shows the lack of a seal between the CRCP main lanes and the HMA shoulder. It is thought that the lack of the seal is the origin of most of the distress on this highway. The lack of the seal results in base erosion which 28 leads to edge failures and patching. The proposed concrete overlay will not address the fundamental problem with this pavement section. Figure 3.6: Problem Areas on US 287 To summarize the recommendations to the District on the results from the TPAD data, the TTI team and Joe Leidy generated Table 3.1, listing locations that should be inspected prior to placing the concrete overlay. These locations were thought to be areas where reflection cracks could potentially appear in the concrete overlay. A total of 14 locations were identified for inspection. The Priority Rating (PR) column in Table 3.1 is the priority researchers assigned to each problem area. Additional verification testing was recommended with the FWD. The District staff needs to inspect each area to determine what, if any, maintenance action should be taken prior to placing the bonded concrete overlay. 29 # 1 2 3 4 5 6 7 8 9 10 11 12 13 14 Table 3.1: Areas Needing to be Inspected Prior to Placing the Overlay Distance GPS PR. Comments from Coordinates start 0m + N 33.4400731 1 Patch check either side with FWD 2671 W 97.7644745 0m + N 33.4408793 High deflection only on 1 side of patch?? Test 1 3041 W 97.7652607 with FWD? 0m + N 33.4413374 Two adjacent small patches high localized 1 3246 W 97.7657174 deflections. Patch within a patch? Partial lane width patch - clear high deflections N 33.4464208 1m + 351 1 at either end of patch - good one to test with W 97.7707743 FWD to confirm location of high deflections Deflection pattern not as clear, many peaks N 33.4473576 1m + 786 2 close together?? End of patch looks to have W 97.7716964 problems Major failures at either end of patch - RDD 1m + N 33.4483291 1 pattern unclear as device had to be lifted over 1221 W 97.7725820 failures (flat line) 1m + N 33.4528141 Not on patch, localized high deflection no 2 3106 W 97.7759548 apparent cause, check for close crack spacing 1m + N 33.4537038 1 Multiple peaks failure at end of patch 3471 W 97.7765700 N 33.4599434 RDD had to be lifted over failure at end of 2m + 781 1 W 97.7809276 patch 2m+ N 33.4612626 RDD had to be lifted over failure at each end of 1 1321 W 97.7818424 patch 4m+ N 33.4881118 High deflections but no clear cause from 2 1651 W 97.7991886 pavement – no patch 4m + N 33.4881118 Three peaks around patch - not sure if this is an 2 1816 W 97.7991886 issue 4m + N 33.4919789 Partial Patch with failure at leave side RDD 1 3366 W 97.8020680 had to be lifted 4m + N 33.4928505 Multiple patches back to back, check joint 1 3666 W 97.8027162 between patches 3.4 GPR, Pavement Temperature and GPS Data Collected During TPAD Profiling Examples of the GPR data collected on this project are shown in Figure 3.7. The upper plot (Figure 3.7a) is from close to the problem area described above and shown in Figures 3.2 and 3.3. From the GPR data, no problems were detected at the top of the base as the data were collected closer to the middle of the lane than to the (open) joint between the CRCP lane and HMA shoulder. Different conclusions would possibly have been found if the GPR had been performed close to the pavement edge. In Figure 3.7a, the strong and continuous reflection (red color) at the mid-slab depth is at the level of the rebar. The deflection pattern should be contrasted with that from the solid area shown at the bottom of Figure 3.7. No verification coring was performed at this location but this strong reflection could be associated with issues at mid- 30 depth in the concrete, possibly midslab delamination where stresses tend to concentrate at the rebar/concrete interface. Figure 3.7: GPR Data – (a) Upper Plot is from a Problem Area (Around 9000 feet) and (b) Lower Plot from a Sound Area The TTI data collection package also monitors the surface temperature during the test as well as project elevation, GPS coordinates, and the speed of the TPAD. Figure 3.8 shows the surface temperature (upper plot) and elevation (lower plot) measurements from the GPS. The spikes in the data were caused by travelling under bridges along the project where (a) the concrete temperatures are significantly cooler in the shade and (b) the system temporality lost the GPS signal. Figure 3.8: Additional Data Items Collected in a Typical TPAD Run (Temperature and Elevation) 31 3.5 Conclusions from US 287 TPAD Testing 1. The TPAD loading and automotive systems and data acquisition system worked well at the test speed of 2 mph. All sensors were operational. The only issue encountered was crossing failed areas (similar to Figure 3.6), where the load sensors were lifted to avoid the risk of damage. 2. Very limited continuous deflection data has previously been collected on CRCP pavements but the data generated on this project point out some important issues with the pavement structure. 3. The data highlighted problems with the current full depth patching operation that the District has been using. This should be reviewed by the District staff and Construction Division personnel. Patching CRCP is extremely difficult and there is always a risk of damaging the adjoining concrete. 4. The data collected was used to generate a list of 14 locations with their GPS coordinates that the District should inspect to determine if additional repairs are required prior to placing the concrete overlay. 5. TPAD testing of upcoming CRCP rehabilitation projects should be encouraged. 32 Chapter 4. TPAD Case Study #2: TxDOT FSF in Austin, JCP 4.1 Introduction TxDOT’s FSF in Austin is an ideal test section for evaluating TPAD’s capabilities on JCP. Previous testing at this site has shown a wide range in load transfer efficiencies (LTE) for the various joints along Testing Path E shown in Figure 2.16. Testing with both the TPAD and FWD was conducted at two time periods during one day—early morning and close to mid-day— to evaluate the effect of temperature on the LTEs. Testing was conducted with the TPAD at various speeds. The results below are based on TPAD data collected at a profiling speed of 2 mph. 4.2 RDD Deflection Profiling at the TxDOT FSF As with all TPAD testing, deflections were measured with the three rolling sensors. The center sensor (CS) is located between the loading rollers, with the front and rear sensors, approximately 2 feet before and after the loading rollers (see Figure 2.13). The deflection pattern from the center sensor for this site is shown in Figure 4.1. The first seven joints are known to be on longer, thicker slabs (16-in. thick slabs). Joint 8 is a transition joint to a thinner set of slabs (8to 10-in. thick slabs). The deflections are substantially lower in the first few slabs; both the center slab and joint deflections are low. Figure 4.1: Typical TPAD Deflection Profile for the JCP at the TxDOT FSF During this testing, TPAD data were collected at several different speeds. The deflection profiles are shown at speeds of 1, 2, and 3 mph in Figure 4.2. These profiles are discussed in Section 2.4.2 by the CTR team. From these data and other data sets collected in Project 6005, the 33 TPAD gave stable readings up to 2 miles per hour, but above 2 miles per hour, significant additional noise was introduced into the signals, especially in the front sensor (as discussed in Section 2.4.2). Figure 4.2: Repeated Runs of the JCP at Different Speeds with the Center Sensor at TxDOT FSF 4.3 The TPAD Potential for Evaluation of LTE with Comparison to FWD Data The main purpose of the testing at this facility was to evaluate the TPAD’s potential to rapidly assess LTE for any JCP. The testing involved measurement of LTE with an FWD at two different surface temperatures. The FWD set up and the definition of LTE is presented in Figure 4.3. In the upstream computation, the load plate was placed on the arrival slab shown in Figure 4.3. LTE was calculated using Equation 4.1: LTE upstream = 100 * ((w2j/w1j)/(w2c/w1c)) Normalized to 9 kips, with w1j : Deflection of w1 at joint, w2j : Deflection of w2 at joint, w1c: Deflection of w1 at center slab, w2c: Deflection of w2 at center slab. (Equation 4.1) For the downstream computation, the load plate is placed on the departure slab. The computation then includes the deflection under the load plate W1 compared to W4, which is the deflection on the unloaded side of the joint. For both the upstream and downstream calculations, the ratio of unloaded versus loaded deflections is normalized to the same ratio measured at the mid slab. 34 Figure 4.3: FWD Set Up for LTE Measurements FWD data was collected on 16 joints known to represent a wide range of LTE values. Table 4.1 shows the results obtained at the two surface temperatures. Clearly a wide range of LTEs was found on this pavement, ranging from 6% to 100%. Table 4.1: FWD Determined LTEs at both 84 and 104℉ % LTE 84 F % LTE 84 F % LTE 104 F % LTE 104 F Joint Number Upstream Downstream Upstream Downstream 1 59 59 46 40 3 96 87 87 85 6 81 82 64 70 8 12 7 19 10 10 100 100 98 98 11 6 72 27 59 20 100 100 99 96 21 94 78 98 84 22 100 100 93 96 27 47 80 64 81 28 100 100 94 100 29 21 70 64 67 32 98 98 100 100 33 6 30 65 33 34 100 100 100 100 35 100 94 93 89 35 When reviewing the RDD profiling data from all sensors, the research team realized that the most valuable information about LTE would be found in analyzing the data collected with the rear sensor. Figure 4.4 presents a schematic illustrating the passage of the three TPAD rolling sensors over a joint with assumed poor LTE. In Figure 4.4, the rolling sensors are the small circles at five different positions (A through E) with respect to the joint in the JCP. The plots at the bottom of the figure are the expected deflection patterns for each of the three sensors. The front sensor, FS, is the lead sensor; the deflection it measures will increase as it rolls towards the joint, reaching a maximum when it reaches the joint. As soon as the front sensor passes over the joint, the loading rollers will still be on the other slab and the measured FS deflection will drop substantially. The degree that the deflection drops will be a function of the LTE of the joint. The rear sensor (RS) will have a similar pattern but delayed in time. It is expected that the center sensor (CS), which is between the loading rollers, will be severely impacted by the presence of the joint. However, the center sensor measures the overall pavement response to load; if there is a void beneath the slab, then the total deflection measured at the center sensor will be high. Figure 4.4: Schematic of the Proposed Change in Sensor Deflections over a Poor Joint The next step is to review the shape of the actual deflections observed in the front sensor for the joints with known poor LTE. Figure 4.5 shows the normalized deflection pattern for the front sensor at the 84oF test temperature. Three of the joints are labeled (Joints 29, 32, and 33), 36 for which the measured LTE were 21%, 100%, and 6%. The center plot shows a close-up of the deflections measured over these joints. Joints 29 and 33 have a pattern very similar to the pattern shown in the front sensor plot in Figure 4.4, with a significant drop in deflection, whereas joint 32 has a very symmetric deflection pattern with very little change as it rolls over the joint. The deflection patterns for the front sensor are also shown in Figure 4.6, where several of the joints tested with the FWD are also marked. There is evidence of the relationship between shape of the deflection pattern and measured LTE. The joints with close to 100% LTE have very symmetric deflections whereas those with poor LTE have a distorted pattern, where the deflections drop and then rise again as the load moves to the second slab. Figure 4.5: Deflection Patterns Collected with the Front Sensor Figure 4.6: Blow Up of the Front Sensor Deflections with Several of the Joints Tested with the FWD 37 The next step in the analysis is to generate a statistic that captures the non-uniformity of the deflection as the sensor and load passes over the joint. Many parameters can be generated based on the shape of the deflections. Figure 4.7 shows the patterns over two adjacent joints. The joint in the middle of the plot has the characteristic shape proposed in Figure 4.4 with a clear large rise (4.72 mils), drop (2.56 mils), and rise (3.25 mils) as the sensor rolls over the joint. This pattern indicates possible low LTE. The second joint with a deflection of 3.03 mils is completely symmetric indicating possible good LTE. Figure 4.7: The Front Sensor Deflection Patterns over Two Joints with Different LTEs The numbers on the plots are the deflections in mils per 10 kips at the maximums and minimums. For this analysis a simple parameter was generated as follows: TPAD LTE = 100 * (max – min)/max = 100 * (4.72 – 2.56)/4.72 = 45.7% For the symmetrical case where there is no minimum value, the min and max are selected to be the same value. In this case the TPAD LTE statistic would be 0% (note: many different parameters could be computed to describe the shape of the deflection pattern; other parameters should be evaluated). For each of the joints tested with the FWD, the TPAD LTE was calculated at both temperatures. The relationship between the TPAD LTE and the FWD LTEs is shown in Figures 4.8 and 4.9. 38 LTE @ 84F T P A D L T E 100 80 60 40 20 0 0 20 40 60 80 Load Transfer from FWD 100 120 Figure 4.8: Comparison of FWD LTE to a Statistic from the Front Sensor of the TPAD at 84℉ Figure 4.9: Comparison of FWD LTE to a Statistic from the Front Sensor of the TPAD at 104℉ In both cases the correlation between the FWD and TPAD evaluation of LTE were reasonable. Recall that the LTE is the critical parameter in making overlay design decisions on all pavement types; it is required input to TxDOT’s new ME Overlay design program. The TPAD even at 2 mph will be approximately 10 times faster than the stop-and-go FWD. This potential should be built upon in future TPAD implementation efforts. 4.4 GPR Data Collected at the TxDOT FSF GPR data was also collected on the runs at the airport; see Figure 4.10. 39 Figure 4.10: GPR Data from the TxDOT FSF GPR signals are more highly attenuated by rigid pavement slabs compared to flexible pavement systems. The thicker the slab, the more the signal will be attenuated. At the TxDOT FSF, there is a noticeable improvement in data quality after the transition to the thin slabs. In the GPR data the slab bottoms are clear and there is also a layer of steel at mid depth in the concrete. On the first few thicker slabs it is very difficult to see the bottom of the slabs and there does not appear to be any steel in these slabs other than at the joints. 4.5 Conclusions from TxDOT FSF Testing 1. The TPAD works very well on JCP. 2. Areas of poor pavement support can be easily located based on the center slab deflections from the center sensor. 3. The front and rear sensors provide the best information for computing LTEs. The TPAD will be more than 10 times faster than traditional FWD testing and it can also readily test every joint in the pavement. 4. Future efforts should be aimed at automatically generating statistics from the shape of the deflection pattern over joints; this seems to be highly correlated to the FWD LTE. 5. Temperature has a large effect on LTE: joints with poor LTE at lower temperatures will see an increase in LTE as the temperature rises and the joints lock up. 6. More work is needed to account for test temperature on LTE determination with the TPAD. 40 Chapter 5. TPAD Case Study #3: US 290 Houston, Full-Depth, HotMix Asphalt Pavement 5.1 Introduction The Houston District wanted to test a full-depth asphalt section of US 290 to determine if it is a suitable candidate for a concrete overlay. The key requirement is that the deflections/pavement support should be uniform. Very little TPAD data has been collected on full-depth flexible pavements so this project presented the project team with an opportunity to explore this potential. 5.2 RDD Deflection, GPR, Elevation, and Testing Speed Profiling The basic deflection data from the east-bound test run is shown in Figures 5.1 and 5.2. Figure 5.1 is typical of most of this project. The HMA thickness is over 20 inches and the deflections are all low, in the range of 3 to 6 mils. The exceptions are very close to the bridges or at the bridge approach slabs. In these cases, the deflections increase substantially. The gaps in the deflection profile are over bridges because no testing was done on the bridge decks. In these cases, loading rollers and rolling sensors were raised when crossing each bridge deck. Figure 5.1: Typical TPAD Data from Full-Depth Asphalt Section of US 290 The one case where deflections were found to increase is shown in Figure 5.2. In this case, the high deflections are associated with a bridge approach on an embankment that was 14000 ft. from the start of the data collection operation. As can be seen right of the vertical red line, the deflections increase by a factor of 3.5 (from 2 to 7 mils on average). To explain the cause of this large increase in deflections, it is necessary to view the synchronized GPR data, shown in Figure 5.3. The GPR data from the embankment with increasing deflections is shown below. The red line at the top of the figure is the surface of the pavement. The lower red line is 41 from the interface at the bottom of the HMA and top of the stabilized subgrade layer. This section has over 20 inches of HMA over a lime-treated soil. At this location no major deflects were noted in the HMA layer and the thicknesses were reasonably uniform throughout the section. The one major difference is the change in intensity of the reflection from the top of the subgrade. A strong reflection is marked in Figure 5.3, shown as a strong red line in the areas where the surface deflections increase. This strong reflection can only be associated with a change in moisture content of the lime stabilized layers. Where the deflections are low, the reflections are fainter, implying a drier subgrade and better support conditions. Figure 5.2: US 290 TPAD Data from a Location of Varying Deflection Figure 5.3: GPR Data Collected by TPAD Showing Variation in Subgrade Moisture Content As with other runs, the elevation above sea level and TPAD speed were monitored throughout the test. The results are shown in Figure 5.4. The humps in the elevation data are as 42 the TPAD passes over the bridge approaches. For this data collection effort, the TPAD was profiling at 2 mph. However, when crossing bridges with the loading rollers and rolling sensors in the raised position, the speed of the TPAD was increased to an average of about 5 mph as it crossed the bridge decks. Figure 5.4: Elevation and Speed Data from the US 290 Data Collection 5.3 Conclusions from US 290 Testing 1. The TPAD provided useful data on this full-depth HMA pavement. 2. Areas with high deflections can be easily identified. 3. The GPR data can be used to determine the possible causes of the higher deflections and identify locations where validation coring or additional testing would be helpful or required. 43 44 Chapter 6. Conclusions The activities during Year 4, the final year of project 0-6005, have been successful and productive. Rolling noise measurements with four different sets of wheels on the rolling sensor cart were evaluated to determine the wheels that created the least rolling noise. To perform these tests, an independent towing frame was utilized. The optimum wheel diameter and tread width for the sensor carts was determined by a series of tests on the JCP at the TxDOT FSF. The independent towing frame was pulled by hand to determine the rolling noise created by the pavement roughness and joints. The use of larger diameter wheels (12.5-in.) resulted in lower rolling noise but little difference was found between wide (one 4-in. and two 2-in.) and narrow (one 2-in. and two 1-in.) tread widths through the rolling noise measurements. Concurrently, the final towing frame used to position and tow the rolling sensors was designed, fabricated, and installed by CEM personnel. The transmission of vibrations from the TPAD dynamic loading system to the rolling sensors was effectively prevented with the towing frame system. The original plan for the towing frame system was to have it designed so that three 12.5-in. diameter wheels and 90-lb of hold-down weight could be used by all three rolling sensor carts. However, 9.5-in. diameter wheels and a 40-lb hold-down weight had to be used for the center rolling sensor due to space limitations between the loading rollers on the TPAD mobile platform. This wheels/weight setup was thought to be acceptable because the center rolling sensor generally has a highest SNR because of the proximity of the sensor to the loading rollers. Initial deflection profiling to check the performance of the rolling sensors with the final towing frame was conducted on Testing Path E at the TxDOT FSF (see Figure 2.16). In this testing, the deflection profile performed at a testing speed of 0.5 mph was used as a reference and the deflection profiles determined at 1, 2, and 3 mph were compared for all three rolling sensors; the center, rear, and front rolling sensors designated as CS, FS, and RS, respectively. The CS and RS showed good agreement up to a testing speed of 2 mph while the FS exhibited somewhat poorer agreement compared with the CS and RS. All three rolling sensors showed generally poorer results at 3 mph, combined with significant rolling noise at the joints. The poorer performance of the FS at 2 and 3 mph is due to the chatter created by the front swiveling wheels on the towing frame. A testing speed of 2 mph and use of the CS and RS for pavement performance analysis are recommended. If, however, a testing speed of 1 mph is used, then all three sensors work well. Three case studies with the TPAD were performed: on US 297 near Wichita Falls (CRCP), at TxDOT FSF in Austin (JCP), and on US 290 near Houston (HMA). Conclusions from US 297 near Wichita Falls are as follows. 1. The TPAD system and data acquisition system worked well at the testing speed of 2 mph. All sensors were operational. The only issue encountered was crossing failed areas (similar to Figure 3.6); the load sensors were lifted to avoid the risk of damage. 2. Very limited continuous deflection data has previously been collected on CRCP pavements but the data generated on this project point out some important issues with the pavement structure. 3. The data highlighted problems with the current full depth patching operation that the District has been using. This should be reviewed by the District staff and Construction 45 Division personnel. Patching CRCP is extremely difficult and there is always a risk of damaging the adjoining concrete. 4. The data collected was used to generate a list of 14 locations with their GPS coordinates that the District should inspect to determine if additional repairs are required prior to placing the concrete overlay. 5. TPAD testing of upcoming CRCP rehabilitation projects should be encouraged. Conclusions from TxDOT FSF at Austin are as follows. 1. The TPAD works very well on JCP. 2. Areas of poor pavement support can be easily located based on the center slab deflections from the center rolling sensor. 3. The front and rear rolling sensors provide the best information for computing LTEs. The TPAD will be more than 10 times faster than traditional FWD testing and it can also readily test every joint in the pavement. 4. Future efforts should be aimed at automatically generating statistics from the shape of the deflection pattern over joints; this seems to be highly correlated to the FWD LTE. 5. Temperature has a large effect on LTE; joints with poor LTE at lower temperatures see an increase in the LTE as the temperature rises and the joints lock up. 6. More work is needed to account for test temperature on LTE determination with the TPAD. Conclusions from US 290 near Houston are as follows. 1. The TPAD provided useful data on this full-depth HMA pavement. 2. Areas with high deflection could be easily identified. 3. The GPR data was useful in determining the possible causes of the higher deflections and identifying locations where validation coring or additional testing would be beneficial. 46 References Bay, J. A., and Stokoe, II, K. H., (1998), “Development of a Rolling Dynamic Deflectometer for Continuous Deflection Testing of Pavements,” Publication Report No. FHWA/TX-99/1422-3F, FHWA/Texas Department of Transportation, Center for Transportation Research. Stokoe, K. H., Kallivokas, L. F., Nam, B. H., Carpenter, C. K., Bryant, A. D., Weeks, D. A., Beno, J. H., Scullion, T., and Liu, W. (2010), “Progress during the First Year towards Building the Total Pavement Acceptance Device (TPAD),” CTR Technical Report 0-6005-1, Center for Transportation Research, University of Texas at Austin. Stokoe, K. H., Lee, J. –S., Nam, B. H., Lewis, M., Hayes, R., Scullion, T., and Liu, W. (2011), “Developing a Testing Device for Total Pavements Acceptance-Third-Year Report,” CTR Technical Report 0-6005-4, Center for Transportation Research, University of Texas at Austin. 47 48 Appendix A. TPADana 1.0: User’s Manual for the TPAD Data Analysis Software Dr. Wenting Liu A.1 Summary The TPAD is a continuous pavement deflection testing device enhanced with several additional survey features. Since the device is designed for total acceptance of pavements, we have combined the deflection testing with Ground Penetrating Radar (GPR), digital video, and GPS technologies, and the final system will be suitable for testing both new pavements in a quality assurance capacity and those scheduled for rehabilitation to determine suitable strategies. This user’s manual describes the data processing system and uses the data collected on a 2012 survey of US 287 in the Wichita Falls District for illustrative purposes. The executable load module for this software and the associated data from US 287 are supplied with this manual. The TPADScan data acquisition software developed by TTI to collect TPAD raw data is run on one laptop computer. After each field test, TPADScan will create four files: • GPR raw data (also has DMI and GPS information); file extension is .DAT • RDD raw data (also has Infrared temperature and DMI information); file extension is .RDD • Digital video data file (also has DMI data imbedded); file extension is .IMG • GPS raw data file (also has DMI on trace number and time data); file extension is .GPS The detailed data structure inside each file type is given in the TPAD data acquisition user’s manual. An example of output file volume based on test survey settings for the US287 field testing is given in Table A.1. The basic settings for the test surveys were as follows: File name SBTA SBTB SBTC SBTD SBTH The deflection data collection rate is 1000 sample/s with four channels of data. Video collection rate is 5 feet per frame, and the video resolution is 1280x800, collected in distance mode. GPR collection rate is one trace per foot, collected in the distance mode. GPS location is collected once per second, as is the infrared (temperature) data. Table A.1: File Size for the US287 Field Testing Video RDD GPS Comment Speed Length GPR file file file file mph miles Kbytes Kbytes Kbytes Kbytes SB 2.0 5.0 miles 51400 491700 76000 653 SB 2.0 1000 feet 2010 22460 3175 26 SB 3.0 1000 feet 1988 22980 2069 18 SB 4.0 1000 feet 1972 23380 1614 14 SB 1.0 500 feet 968 9120 4880 29 49 From this table, we noticed that based on the quoted settings, the video file size is more than 10 times the GPR data file size, and for a 2.0-mph running speed, the RDD data file size is around 1.5 times the size of the GPR data file. Compared to these files, the GPS file is much smaller. Since the TPAD geophone data are processed in the frequency domain, we cannot collect the deflection data in the distance mode. So the TPAD data file size is only dependent on the sampling rate (user defined) used for collecting data. In contrast, the GPR and video data are collected in the distance mode so the file size is only tied to the tested distance and trace collection interval. From Table A.1, we noticed that for a 5-mile data set, the file size is quite large. Just one geophone sensor provides around 9,267,000 data points. The current data processing software (TPADana) processes and displays the deflection, video, GPS, and temperature data. Currently the GPR and video data are processed with the Pavecheck software. Future versions of this software will integrate the evaluation of both data sets. A.2 Installation of TPADana System Requirements TPADana has been developed for computer systems that meet these requirements (most new computers do): • Windows 2000 with Service Pack 3 or Windows XP with Service Pack 2. • 1.0GHz Processor, • 2GB RAM, • 20GB free hard drive space, • 17 inch monitor with at least 1440x1024 resolution. The TPAD data processing software is installed by running the setup software as follows. Double-click the TPADana setup program with the icon , then follow the instructions step by step. If the following dialog box appears, this means the version of the existing installed DLL file (Dynamic link library file) is older than the file already existing in your computer. Always answer “No” to keep the latest version of the DLL file. The installation procedure also asks the user for the installation folder, and you can choose the default folder or select/create the folder you like. The whole installation takes about 50 two minutes. The installation program also loads one set of TPAD data into a folder called “Testdata;” this is a 1000-foot set of data collected on US 287. After the installation, you can find the installed program icon on the desktop or in the program folder. Double-click this icon to start the TPADana program and the first screen shown in Figure A.1 will appear. Figure A.1: Main Menu Screen of the TPADana Software We can see that all the functions can be accessed from the toolbar buttons. Table A.2 describes the function of each button. The correlation of icon symbols to TPAD functions is as follows: icon means the geophone, icon means the raw data of geophone icon means the load related, and icon means the raw data chart of load signal. 51 No. Icons 1 Table A.2: Function of Each Toolbar Button Functions Program setup or options (clicking this button will show the options dialog box); used to set up the basic parameters for running this software 2 Loads the analysis file to be processed—the first step required to analyze test data 3 Shows the raw load chart (similar buttons shown in #9 and #10 are used for turning to other pages of data to be displayed) 4 Shows the raw geophone chart 5 Shows the power spectrum chart for each set of 5000 raw load data points (button on #9,10 are used for turning to other pages of data to be displayed) 6 Shows the power spectrum chart for each 5000 raw geophone data points 7 Shows the raw and filtered load chart (button on #9, 10 are used for turning to other pages of data to be displayed) 8 Shows the raw and filtered geophone chart 9 Turns to previous page for the operations controlled by buttons #3 to #8 10 Turns to next page for the operations controlled by buttons #3 to #8 11 12 Shows the continuous normalized deflections trace chart (deflections for each 10-kip dynamic loading). Use when wishing to return to analysis of deflections after using other features. Shows Comprehensive Results view (important: this displays the deflection and video data on a single screen) 13 Shows Comprehensive Results view (similar to above but with different summary graphs) 14 Turns to previous segment of data (each max segment size is 3,200,000) 15 Turns to next segment of data(each segment size is 3,200,000) 16 Shows the chart of altitude above sea level, surface temperature, and survey speed vs. DMI 17 Saves the final result to disk for viewing in other software (like Excel) 18 Changes the TTI format to UT Austin format for analyzing UT data 52 The first and second buttons are used for loading and setting the parameters in the analysis. Buttons #2–8 are used for viewing the raw and filtered data in chart form. Buttons #9 and 10 are used with #3–8 buttons for scrolling through the data file. Buttons #11–13 are used for showing the analysis results in different formats. ButtonS 14 and 15 are for scrolling to earlier or later sections in the data file. Button 16 is used to display the temperature, vehicle speed, and elevation data. Button 17 is for saving a table of deflections vs. DMI data into ASCII format, and this data can be used by Excel for report generation. The last button is used to transfer the raw TTI-formatted data to the raw UT Austin format, allowing the UT researchers to analyze the data with their existing software. In the following sections, we will discuss the function of each button in detail. A.3 Program Options and Configuration Button Click this button and the screen shown in Figure A.2 will be displayed; this shows the options available to process and display the TPAD data. Figure A.2: Program Setup or Options Screen This software is supplied with a data set collected on US 287, stored in the folder “TestData” under the name US81SBTB.RDD. This is a short run of just over 1000 feet in length. Loading the raw data is described in Section A.2. 53 Once the file is loaded, the total number of segments in the selected data set is displayed (1 for the provided short data set) in the upper right dropdown edit box (Figure A.3). The maximum number of data points that can be displayed in one segment is 3.2 million points. At a TPAD speed of 2 mph, using the default sampling rate, this corresponds to roughly 9000 feet of data. For long runs such as were made on US 287, over 5 miles of data was collected in a single complete run. In this case the data is broken into three segments for viewing. Figure A.3: Showing the Total Number and Current Segment Selected In the top left dialog box, the user can input the filter parameters to control how the raw data will be processed using a digital software filter. Inside the software, a band-pass filter is used to remove unwanted noise and to get the geophone and load peak to peak amplitudes. The TPAD currently uses a 30Hz loading frequency; a band-pass filter range of 29Hz to 31Hz is used to remove unwanted components of other frequencies. Only signals in this frequency range will be accepted for analysis. A 2Hz low pass filter is recommended for getting the static load. Both filters are set in the Signal Analysis Filter Control box shown in Figure A.4. Figure A.4: Filter Parameter At the top center of the options dialog box (Figure A.5), the user can select which geophone sensor is to be analyzed and displayed, as well as input the sensor calibration factors. The unit of the load calibration factor is 5.0 klb/V, and the geophone calibration factor is V/(in/sec). The units of the geophone calibration factor are tied to velocity; the final deflection results are reported in mils (one thousandth of inch). The software converts the geophone output into mils. Geophone 1 is the sensor between the loading rollers of the TPAD, whereas sensor 2 is the lead sensor and sensor 3 is the trailing sensor. Figure A.5: Sensor Selection and Calibration Factor Input Screen 54 In the right middle section of the options dialog box (Figure A.6), the user is asked to input the offset distance from the loading wheels to the video image. Since the video camera is mounted on front of the TPAD vehicle, the image from the camera does not match the TPAD’s deflection test location. The goal is to provide an offset so the user can view the pavement condition at the location of high deflections. Currently a default value of 15.75 feet is the input value for distance from the loading rollers to the GPR antenna. This value may be revised at a later date if an alternate camera aim point is selected. With the proper value, the program automatically lines up the data. This offset is automatically added to each display chart. Figure A.6: Offset and Moving Average Parameters Input Screen The user is provided with three options to smooth the deflection data (Figure A.7). When selected, a smoothed data curve is plotted on top of the raw data as a red line, as shown in Figure A.9. For the TPAD travelling at 2 mph with a data collection system operating at 1000 Hz, using a 30 Hz loading frequency, approximately one deflection point is collected for every 1 inch of travel. Figure A.7 provides the user with options to down-sample, and smooth these data plots. The down-sampled data can also be output to Excel for further data analysis and display (Button 19). Figure A.7: Options to Smooth Raw Deflection Data From the center of the options dialog box (Figure A.8), the user can format the output data charts, defining the chart title, minimum, maximum, and x-y labels of each chart. Figure A.8: Output Chart Format Parameters 55 A.4 Load the Raw Data Button This button is used for loading the TPAD raw test data file collected using the TTI data acquisition system. When the user clicks this button, the open file dialog box shown in Figure A.9 appears. Figure A.9: Open File Dialog Box The TPAD raw field data file is given the extension name of .RDD—this file is in binary format and cannot be edited or viewed with any other software. In the background, the software actually reads three files: the RDD geophone file, the video file, and the GPS file. After the user selects the raw data file from the dialog box shown in Figure A.9, then clicks the “Open” button, data processing will begin. A graphic is automatically displayed as a plot of sensor deflection in mils versus distance in feet (Figure A.10). The blue line is the raw deflection data and the red line is the smoothed data. The red line can be removed by putting a zero in the selected box in Figure A.8. Figure A.10: Plot of Raw Data (Blue Line) and Filtered Data Using the Options Selected in Figure A.8 56 A.5 Button for Showing the Raw Load Chart After you click the button and the raw data is loaded, selecting the button will display the raw load data shown in Figure A.11. In the top left corner, the information shows the data point range displayed on this screen. The buttons and can be used to turn to other pages. This chart shows the raw load signal vs. the DMI in feet. This is the beginning of the data file (the TPAD is not moving). Therefore, all the DMI values in Figure A.11 are zero and the load signal is a perfect sine wave. When turning to other pages using the button, Figure A.12 is displayed, then the load signal changes with time and the DMI is no longer zero. Figure A.11: Raw Load Data Chart (DMI vs. Load in Kips) Figure A.12: Raw Load Data Chart When Turning to Other Pages 57 A.6 Button for Showing the Raw Geophone Chart As in Section A.3, when the button is selected, the screen will show the raw geophone data chart (shown in Figure A.13). The Y-axis is in mils and X-axis is in feet. The geophone data is much more variable than the load signal (this data comes from a section of US287 near Bowie: a survey in the northbound direction running at 2 mph). Work is continuing with the TPAD to determine the best sensor mounting arrangement and operating speed. Figure A.13: Raw Geophone Data Chart (Y-Axis in mils, X-Axis in feet) A.7 Button for Showing the Power Spectrum Chart of Raw Load Data Power spectral density (PSD)—the power spectrum of the time series—describes how the power of a signal or time series is distributed with frequency. It is a method of defining the SNR where the value at 30 Hz (the input loading frequency) should be significantly different from that observed at other frequencies (background noise). The power spectrum shows the strength of the variations (energy) as a function of frequency. It shows at which frequencies variations are strong and at which frequencies variations are weak. The PSD units are energy per frequency (width) and it is possible to obtain energy within a specific frequency range by integrating PSD within that frequency range. Computation of the PSD is done directly by the method called Fast Fourier Transform (FFT) or by computing the autocorrelation function and then transforming it. When the user clicks the button , the PSD chart of raw load time series will show on the screen as in Figure A.14. The analysis is currently performed for each set of 5000 data points (this segmenting option is under review at this moment). Figure A.14 shows data points from 65,000 to 70,000 (accordingly the DMI is from 126.49 feet to 141.09 feet). The chart’s Y-axis is 58 in log10 units, and the X-axis is in frequency. This chart shows the dynamic load frequency is exactly 30 Hz. Buttons and can be used to turn to other pages. Each page covers 5000 data points. Figure A.14: Power Spectrum Chart of Raw Load Signal A.8 Button for Showing the Power Spectrum Chart of Raw Geophone Data Similar to the button discussed in Section A.5, the the geophone’s Power Spectrum chart as given in Figure A.15. 59 button is used for showing Figure A.15: Power Spectrum Chart of Raw Geophone Signal A.9 Button for Showing the Chart of Raw and Filtered Load Data This button’s operation is very similar to button (discussed in Section A.3), except when clicking this button the chart will show the raw and filtered data together in one chart as shown in Figure A.16. Notice that the filtered data appears as blue lines, and green lines represent the raw load data. Since we use the 29–31 Hz band filter, the static load component is removed, and the filtered data oscillate around the zero. On the filtered load signal, the red dot specifies the peak location. This peak will be used for calculating the continuous deflections. 60 Figure A.16: Chart of Raw and Filtered Load Data A.10 Button for Showing the Chart of Raw and Filtered Geophone Data This button’s operation is very similar to that of button (discussed in Section A.7), except this button is used for showing the geophone’s raw and filtered data chart as given in Figure A.17. 61 Figure A.17: Chart of Raw and Filtered Geophone Data A.11 Button for Showing the Normalized Continuous Deflections Trace Chart When the user clicks the button (as shown in Section A.2), all the data is loaded to the memory and the chart from Figure A.10 is displayed. The user can also return to evaluating deflections after using other program features by clicking the button. This chart shows the deflection normalized to a 10kip load. The X-axis is in units of feet, and the Y-axis is in mils/10kips. A.12 Comprehensive Results View Option 1 By clicking , the comprehensive results screen shown in Figure A.18 will be displayed. The top part of this screen shows the normalized deflections results as in Figure A.10. On the top right side of this chart, you can find the GPS coordinates, DMI offset, and deflection value in mils that are updated when the user moves the mouse inside the chart. In the bottom left side of the screen, the video frame shows the video with the DMI offset in miles and feet corresponding to the location on the deflection trace that the user clicks on. This view of the data is potentially the most useful to the user. Once the mouse is clicked in the top graph two lower graphs are generated that zoom in on the area around the cursor location in the top graph. The upper of these graphs shows the deflection plot for a total of 100 62 feet, 50 feet either side of the selected location. The lower graph zooms in even closer, with a deflection plot of approximately 15 ft, 7.5 ft either side of the selected location. Figure A.18: The Comprehensive Results View Screen, View Option 1 If the user moves the cursor to any of these three charts, the DMI offset and the “Value” field will show the normalized deflection magnitude of the mouse location. The overlap buttons on the video frame can be used to control the play mode of the video. The function of each button is listed below: Go to the first frame of video Play the video backwards Go to previous video frame Go to next video frame Play the video forwards Go to the last frame of video Save the current frame to a JPEG image file When the user plays the video by using button or , the vertical red line showing the current location on the normalized deflections trace chart moves along with the video. 63 A.12 Comprehensive Results View Option 2 This data view shows the normalized continuous deflections plot in the upper part of the screen and an enlarged video image of the highway surface (Figure A.19). Clicking on any location in the deflection plot will display the image from that location. Figure A.19: Comprehensive Results View Screen, View Option 2 A.12 Buttons for Showing Other Information As shown in Figures A.20 and A.21, the TPAD is equipped with an infrared surface temperature sensor and an accurate GPS antenna, mounted on top of the loading frame. A GPS allows the user to permanently record the test location in the data file. In cases where the user wants to go back to the site to further investigate problematic locations, the GPS is the best tool for locating problem areas. Also a concrete pavement’s behavior under loading (especially at joints and working cracks) is related to slab temperature when tested, and it’s necessary to account for temperature effects when evaluating deflections. The button is used for showing this information. By clicking this button, the screen shown in Figure A.22 will be shown. From this chart, we noticed four locations where the pavement surface temperature is low compared with other locations, and the temperature drops nearly 25°F. These four locations are marked with red circles. When we looked at the video frames at these locations, we find that the temperature drops occur when the TPAD passes under a bridge. Figure A.23 shows the video frames for the four low surface temperature locations. 64 The middle chart of Figure 2.21 shows the elevation above sea level in feet. Since the elevation data is obtained from the GPS system, when the TPAD passed under the bridge, the GPS had poor signal reception. Compared with the top temperature chart, we noticed that when the temperature drops, the GPS reading under the bridge has an error and the elevation data point fluctuates much more than at other locations. The bottom chart just shows the TPAD running speed with DMI offsets. We can see the TPAD’s speed was close to 2.0 mph, and this reading matches the specified test speed of 2 mph. Figure A.20: Infrared Sensor for Getting the Surface Temperature Figure A.21: GPS Antenna Mounted at the Top of the Loading Frame 65 Elevation above Sea Level Figure A.22: Other Information Charts (Surface Temperature, Sea Elevation, and Running Speed) 66 Figure A.23: Video Frames Showing the TPAD Cross the Bride A.13 Button for Saving Output of the Normalized Deflections Results If the user wants to import the data into other software such as Excel, this button is used to save the results to an ASCII format. The output format has two columns: one is the DMI offset and the other is the normalized (10 kip) deflections. The DMI offsets are in feet, and the deflections are in mils/10kips. Executing this operation is straightforward and will not be covered further here. A.14 Button for Saving Output of the Raw Data to the UT Austin Format Since UT Austin already has a history of evaluating continuous deflection data using their own process, this feature allows sharing the data with their system by changing TTI’s TPAD data format to the UT Austin format. The TTI researcher went to great lengths to fully understand the UT Austin format. The main problem is that the UT Austin’s data acquisition system outputs the data according to an old Apple® Mac format. The sequence for saving the raw sensor and DMI data is reversed from the normal Windows format. Now, however, the process has been made simple for the user. To convert, simply click the button; the open file dialog box will appear as in Figure A.24 (same as Figure A.9). After clicking the “Open” button, the conversion process will 67 start. Based on the size of the file, it takes a while for converting the file. When the toolbar button begins to respond again to the mouse actions, the conversion process is finished. As a check, the user can browse the raw data folder and find the two new files for the UT Austin analysis system. For example, if the user selects US81NBTB.RDD file as the file to convert as in Figure 2.23, then the two new files names are the following: • US81NBTB_A.DAT is the sensors and DMI raw data file (32bit floating point data format) • US81NBTB_C.DAT is the DMI processed data format (two columns, time and distance in feet, in 64 bits) Figure A.24: Open File Dialog Box 68 Appendix B. CTR Post-Processing Software for Calculating Peakto-Peak Dynamic Deflections from the Voltage Signals Generated by the RDD Rolling Sensors Kenneth H. Stokoe II and Jung-Su Lee Introduction to the Software As part of the development of the Total Pavement Acceptance Device (TPAD), CTR created post-processing software for calculating the dynamic deflections of the pavement from the output of the rolling dynamic deflectometer (RDD) rolling sensors. To analyze the data, the software performs these steps: (1) load raw voltage signals of the RDD rolling sensors, (2) apply the composite infinite impulse response and finite impulse response filters, (3) apply field or lab determined calibration factors to calculate peak-to-peak deflections over a time interval determined by a testing speed, (4) normalize the dynamic deflections to a force level selected by the data processor with dynamic force-time data (normally a peak-to-peak force level of 10 kips), (5) average the converted rolling sensor deflections over a selected distance, and (6) apply a moving average. Figure 1 presents a flow chart of the post-processing software. Note that running this software requires the MS Windows® operating system (Windows XP, Windows Vista, or Windows 7) and software packages IGOR PRO and Matlab. The CD accompanying this manual contains the CTR software to load onto the user’s computer: “TPAD ana_ver 2.0_TxDOT.pxp” and “Analysis.m.” 69 Figure 1: Flow Chart of the 6-Step Data Analysis Procedure Used to Calculate Normalized Peak-to-Peak Dynamic Displacements from the Rolling Sensor Outputs Time-Based Data Analysis IGOR software is used for the time-based data analysis performed in Steps (1), (2), (3), and (4). The initial programming was completed by Dr. James Bay; details are in TxDOT report 1422-3F (Bay and Stokoe, 1998). Figure 2 shows a screen shot of when IGOR is opened. The steps for the time-based analysis are as follows. (1) Raw data needs to be loaded. To load raw data, click “Load general binary file” in the “Load waves” submenu under the Data tab, as shown in Figure 3. For the CTR data processing, raw data consists of two parts: “File name_A. DAT” and “File name_C. DAT”. A data collector assigns the file name when recording the raw data. “File name_A. DAT” consists of one force and up to three geophones and “File name_C. DAT” is data from the distance measurement instrument. The data type of A. DAT is single float and C. DAT is double float. When “Load General Binary Data” is clicked, the screen shown in Figure 4 appears. Both raw data files, A. DAT and C. DAT, need to be loaded separately. 70 Figure 2: Screenshot of IGOR When Opened Figure 3: Screenshot of IGOR to Load Raw Data (2) After choosing the data type in the Input File dialog box (see Figure 4), the path to the raw data needs to be determined. To determine the path, click the “File” button and select a general binary file to load. After loading the two types of raw data (“File name_A.DAT and File name_C.DAT) separately, click the the “Do It” button. 71 Figure 4: Screenshot of IGOR When “Load General Binary Data” Is Clicked (3) After loading the two types of raw data, click “analysisProc” under the Macros tab; the screen shown in Figure 5 will appear. Testing parameters such as sampling frequency, operating frequency, nominal peak-to-peak dynamic force, and time resolution can be selected. Among parameters, the sampling frequency should be the same as the frequency used while collecting the raw data (default is 1000 Hz). The time resolution varies with the testing speed. In general, the time resolutions of 1, 0.5, and 0.33 seconds are used, respectively, at testing speeds of 1, 2, and 3 mph (default is 0.5 seconds). Normally, an operating frequency of 30 Hz (vibrating frequency), a normalization peak-to-peak dynamic force of 10 kips, and a minimum dynamic force of 2 kips are used and designated as default values. The attenuator is installed to avoid sending voltages that are too large for the data acquisition system and the default is “in”. After setting all parameters, click the “Continue” button. (4) The data analyzed in IGOR needs to be imported as a .txt file for distance-based moving average analysis. Click “New Table” under the Windows tab and choose “danf1”, “danf2”, “danf3”, and “dout1”. They are measurements for center (danf1), front (danf2), and rear (danf3) rolling sensors and the distance (dout1) measurement, respectively. Figures 6 and 7 present screen shots of when “New Table” is clicked and a new table is made. The table can be copied and pasted in a text file by using keyboard shortcuts “Ctrl A”, “Ctrl C”, and “Ctrl V”. The name of the text file should be “F1”, as designated by an operator so that the text file can be imported to Matlab and be used in “Analysis.m”. 72 Figure 5: Screenshot of IGOR When “AnalysisProc” Is Clicked Figure 6: Screenshot of IGOR When “New Table” Is Clicked 73 Figure 7: Screenshot of IGOR When “New Table” Is Made Distance-Based Moving Average Analysis After IGOR finishes the time-based analysis, Matlab performs the distance-based moving average analysis, as follows: (1) The time-based analyzed data saved in the text file (F1.txt) needs to be imported into Matlab. Click the “Load data file” button to import the text file “F1”, as shown in Figure 8. By importing the “F1.txt” file, the F1 table consisting four columns is created as shown in Figure 9. The first, second, third, and fourth columns of F1 are time-based analyses of the center, front, and rear rolling sensors and distance measurements, respectively. (2) Open the “Analysis.m” file by clicking “Open” under the File tab. Figure 10 presents a shot of the screen after opening the “Analysis.m” file. (3) Note: The center rolling center analysis is conducted first; Step 7 provides the specific inputs for then running an analysis of the front and rear sensors. To analyze the center rolling sensor, go to the “Analysis.m” dialogue box and type “dist=F1(:,4)”, “amp=F1(:,1)”, and “critic(i)=3.0*i+0.0”, and then click the “Save and Run” button as shown in Figure 11. The deflections are averaged over a 3-ft distance. Figure 12 shows a screenshot of the Matlab main screen after clicking the “Save and Run” button. Many arrays are generated, as the figure indicates. Under the list of arrays, click “deflection” and copy and paste the array to an Excel spreadsheet, thus creating column A. Click “distance” and copy and paste the array to Excel spreadsheet to create column B. Note that the user needs to create the column headings 0 ft, Deflection, and Distance (see Figure 13). (4) Return to the “Analysis.m” box and then change “critic(i)=3.0*i+1.0” to move the averaged distance window by 1 ft. Click the “Save and Run” button. As in the previous step, go to the Matlab main screen’s list of arrays and click “deflection” and then copy and paste the array to 74 the Excel spreadsheet to create column C. Again, click “distance” and copy and paste the array to the Excel spreadsheet to create column D. Note that the user needs to create the column headings 1 ft, Deflection, and Distance (see Figure 13). (5) Return to the “Analysis.m” dialogue box and then change “critic(i)=3.0*i+2.0” to move the averaged distance window by another 1 ft. Click the “Save and Run” button. Again, go to the Matlab main screen and click “deflection” and then copy and paste the array to the Excel spreadsheet, creating column E. Click “distance” and copy and paste the array to the Excel spreadsheet, creating column F. Note that the user needs to create the column headings 2 ft, Deflection, and Distance (see Figure 13). Figure 8: Screenshot of Matlab Importing the “F1.txt” File 75 Figure 9: Screenshot of Matlab after Importing the “F1.txt” File Figure 10: Screenshot of Matlab after Importing the “Analysis.m” File 76 Figure 11: Screenshot of the “Save and Run” Button in the “Analysis.m” Box Figure 12: Screenshot of Matlab after Clicking the “Save and Run” Button 77 (6) In the spreadsheet, create two final deflection and distance columns (columns G and H), adding the column headings All, Deflection, and Distance. Columns G and H will be populated with data from Columns A through F. First, copy the data from Columns A and B and paste under the corresponding headings of G and H. Then copy the data from Columns C and D and paste directly under the pasted data from A and B. Under that, paste data copied from Columns E and F. Lastly, select Columns G and H and sort by the Distance column to arrive at the final distance-based moving average data. The plot can be drawn in the Excel spreadsheet. Figure 13 presents the Excel spreadsheet with one example of a deflection profile. (7) For a front rolling sensor, type these specifications into the “Analysis.m” box: “dist=F1(:,4)”, “amp=F1(:,2)”. Then repeat steps (3), (4), (5), and (6). For a rear rolling sensor, type “dist=F1(:,4)”, “amp=F1(:,3)” and repeat steps (3), (4), (5), and (6). Headings typed by user Continuous Deflection Profile (Step 6) Step 3 Step 4 Step 5 Step 6 Figure 13: Excel Spreadsheet after Sorting and Drawing Deflection Profile 78 Reference Bay, J. A., and Stokoe, II, K. H., (1998), “Development of a Rolling Dynamic Deflectometer for Continuous Deflection Testing of Pavements,” Publication Report No. FHWA/TX-99/14223F, FHWA/Texas Department of Transportation, Center for Transportation Research. 79