1
A Division of The Baby Jogger Company
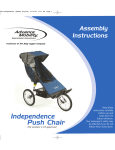
Spirit Push Chair
This product is CE approved.
Assembly
Instructions
Read these
instructions carefully
before use and
keep them for
future reference.
Your passenger’s safety may
be affected if you do not
follow these instructions.
For the sake of your precious cargo, please read
these warnings before using your brand new
Spirit Push Chair.
•W
arning: Prevent serious injury to your passenger by always using the
safety harness.
•W
arning: Any load attached to the handle affects the stability
of the push chair.
• Warning: It may be dangerous to leave your passenger unattended.
•W
arning: Recommended weight for seat pocket is 2 pounds and basket
is 10 pounds. Excessive weight may cause a hazardous unstable
condition to exist.
•A
ccessories which are not approved by the manufacturer or distributor
should not be used.
•A
lways use your wrist strap – this push chair can really roll, and the
wrist strap gives you control if you should slip or fall down.
• The passenger should remain seated (no standing in push chair).
• Watch out for cars – never assume that a driver can see you.
• Intended for children aged 6 months and up.
• T otal weight load recommended for this push chair is 75 lbs. (34 kg.)
(combined passenger and baggage weight.)
• This push chair seats one passenger.
• It may be unsafe to use replacement parts other than those supplied or
approved by the manufacturer.
• Do not run/jog with a baby under 6 months of age.
2
EC-REP: European Device Solutions • Contact: [email protected]
Frame
1U
npack the push chair from the box and set
wheels and footplate aside.
2U
nfold the push chair by lifting the
front fork away from the handlebar
until it clicks into place.
3 T urn stroller
over to upright
position.
1
Under Seat Basket
1U
sing the two Velcro straps,
secure the front end of the under
seat basket to the frame just
above the footplate holder slot.
2 Snap the rear basket straps
around the frame.
Footplate
1 Insert the
footplate tab
into the footplate
holder slot.
2 Press down on
footplate until it
slides into place.
2
Front Wheel
1 To install, squeeze the two brake
calipers together and push the
black lever backwards to open
brake pads. Release calipers so
that they spring open.
2 Insert the front wheel into the fork tips by aligning the axle flats with the fork tip flats.
3 Tighten by turning the wheel lever clockwise while holding the opposite side.
4 Close the wheel lever by
pushing it flush against
the tubing. Be sure not
to over tighten – light pressure is needed to close the wheel lever. You should not strain to close.
5 S queeze the two brake
calipers together against
the metal rim of the front
wheel and flip the black
lever forwards to close
brake pads.
3
Rear Wheels
1 To install, slide the axle peg of the rear wheel
into the axle until you hear it click into place.
Complete on both sides.
Rear Brake
2 To remove, push the round button on the
rear axle while pulling out the wheel.
arning: Engage parking
W
brake before loading and
unloading passenger.
1 Press down on
the brake pedal to
engage rear wheel
parking brake.
2 To release, flip the
lever upwards.
4
Seat
1. S tart with snapping seat
to upper frame and work
your way down frame.
2A
t knee area of the seat, secure the seat to
the frame by threading one side of the Velcro
straps through the D-ring on the other.
3 T ighten and secure the Velcro together.
4A
t foot area of the seat, secure the seat
to the frame by threading one side of
the Velcro straps through the D-ring on
the other.
5
Note: The seat of your jogger can be
removed for washing. Unsnap the fabric
from the frame and undo any Velcro straps.
See page 15 for washing instructions.
5 T ighten and secure around the frame.
6 S nap the seat strap around the support bar on the frame.
6
Safety Harness
1 Un-clip top of shoulder strap from the seat
2 Adjust the strap length by moving the plastic
3 Buckle harness by sliding harness pegs into
4 To unbuckle, squeeze the sides of the buckle
and re-clip on the pair of seat loops closest
to the child’s shoulder height.
the buckle on the crotch strap until it locks
into place.
guide up or down to lengthen or shorten.
while pulling the two harness pegs out of
the buckle.
7
Reclining Seat
1 Simply adjust seat straps to desired degree of
recline by releasing the length of the strap.
2 Pull on strap when you want to return the
seat to its upright position.
8
2 Push chair is packaged with seat support
board and can be easily removed or inserted
into the seat back if additional support is
desired
Note: Be sure to remove the support panel from the back of the seat before washing.
Accessory
Bracket Adapter
Accessory bracket adapter allows
for easy use of many Baby Jogger
brand accessories
9
Canopy
1Y
our canopy is equipped with side ventilation
panels that Velcro closed or can be rolled up
and secured with a loop and toggle.
2C
lear view windows are provided at two positions of the canopy.
Roll up the window flap and secure with the Velcro tabs.
Note: The canopy of your push chair can be removed for washing.
Using a Phillips head screwdriver, unscrew the canopy brackets from
the frame and remove the canopy fabric from the metal supports.
10
Warning: Always be
sure the safety strap is
securely snapped onto
the frame on both
sides before using the
push chair.
Quick-Fold
1 T hread the fold strap through the
opening in the seat.
2A
ttach the folding strap to the trigger underneath
the seat by sliding the open end of the triangle
shaped fastener into the hole on the trigger.
3C
lose the openings of the triangle shaped
fastener by rotating the attached nut until
it tightens in place. Repeat on both sides.
11
4 S nap the safety strap to the frame.
To fold:
• Unsnap the safety straps on the side of the frame. Lift
up on the fold strap in the center of the seat until the
push chair folds in half.
12
Hand Brake
B
A
C
•Y
our stroller is equipped with a hand
brake for your convenience.
Adjusting the hand brake:
• If you do not have good braking action, simply squeeze the brake handle (A) five or six times. If the problem persists, loosen the brake’s cylinder ring (B) to adjust the
small ring (C) and then move the small
ring away from the handle to tighten
the cable. (Please do not over tighten!)
To lock the rings, tighten the cylinder ring (B) against the handle while holding the small ring (C) in place.
1 To use the hand brake make sure
brake pads are properly installed (see
page 3). Squeeze the hand brake to
give you better control over your push
chair.
2 To rotate the hand brake’s position
on the handle bar, loosen the bolt
using the supplied Allen wrench.
Rotate the hand brake assembly
on the handlebar until it is in a
comfortable position. Tighten
the bolt to secure hand brake.
13
In Motion
Steering
• S teering your push chair is simple.
It’s balanced to turn with just a
light touch on the handlebar.
Wrist Strap
•M
ake sure wrist strap is around your wrist
when in use. The Spirit is ready to roll with or
without you – and the wrist strap helps you stay
in control of your push chair.
In the Dark
• S ince we are concerned about safety, we recommend
that you not use your push chair at night. However,
if you choose to, please attach reflective strips
to the wheel spokes and the seat. Bicycle lights
can also be mounted on the handlebar.
14
Push Chair Care
Washing
•Y
ou can machine wash the Spirit’s seat in cold water with a mild detergent.
To minimize shrinkage, simply reattach the seat to the frame to dry.
(Please do not put the seat in the dryer!)
•B
e sure to remove the board from the back of the seat
before washing.
•Y
ou may clean the frame using a soft, dry cloth, and
an occasional spray of household wax will maintain
its healthy glow.
Wheel Care
•M
oisture – especially from the beach – can rust the wheel bearing case.
Spraying regularly with a silicone lubricant will keep your wheels looking healthy.
•A
lso, if you use your push chair regularly, your push chair will benefit from a yearly
visit to the bike shop for wheel alignment. Refer to the number on the tire wall for
the optimum pressure for your tires.
Storing
• S unshine can fade seat fabric and dry out tires, so storing your push chair
indoors will prolong its good looks. However, if you do store it outside, using
a tarp will protect against weather wear.
15
Warranty Registration On-Line AT
www.advancemobility.org/register
Advance Mobility’s Limited Lifetime Warranty:
Advance Mobility warrants that the frame is free of manufacturer defects for the lifetime of the product. Manufacturer’s
defects include but are not limited to the breaking of welds and frame tube damage. Textile or soft side materials and all other
components shall be warranted for one year from the date of purchase (except for tubes and tires). Proof of purchase is required
to make a warranty claim and the warranty is only extended to the original purchaser.
This warranty does not cover:
• Normal wear and tear
• Corrosion or rust
• Incorrect assembly or the installation of third party parts or accessories not compatible with the original design
• Accidental or intentional damage, abuse or neglect
• Commercial use
• Improper storage/care of the unit
• Accidents/injuries related to leaving the passenger unattended
This warranty specifically excludes claims for indirect, incidental, or consequential damages. The implied warranties of merchantability and
fitness for a particular purpose is according to the specific warranty period for this model unit at time of purchase. Some states do not allow the
exclusion or limitation of incidental or consequential damages, so the above limitations or exclusions may not apply to you. This warranty gives
you specific legal rights, and you may also have other rights which vary from state to state. To know what your legal rights are in your state,
consult your local or state consumer affairs office or your state’s Attorney General.
E-Mail: [email protected]
Call:1-800-241-1848 between 8am – 6pm EST, Mon. – Fri.
Fax:
1-804-262-6277
Mail:
Adva nc e M o b i l i t y
8575 Magellan Parkway
Suite 1000
Richmond, VA 23227
16
Thank You!
We wish you many happy journeys with your new
push chair! Your push chair is a great product, and
we are proud to manufacture it. If you have any
questions or comments, please give us a call at:
1.800.241.1848
Advance Mobility is a Division of Baby Jogger
8575 Magellan Parkway, Suite 1000 • Richmond, VA 23227
T: 800.241.1848 • F: 804.262.6277
www.advancemobility.org