1
 User Manual
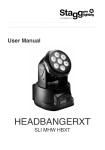
HEADHUNTER10
SLI-MHB-HH10
Table of Contents
1.BEFORE USAGE
This package contains
Unpacking
Introduction
Specifications
Features
2.INSTALLATION
Power Connection
DMX 512 Connection
3. OPERATION
Control panel Function
Menu Map
Operating Instructions
DMX Channels
1. BEFORE USE
This package contains
•
1x HeadHunter 10
•
1x Power Cable
•
1x User Manual
Unpacking
• Thank you for purchasing this product, it has been thoroughly tested
and has been shipped in perfect operating condition.
• Carefully check the packaging for damage that may have occurred during
shipping.
• If the packaging appears to be damaged, carefully inspect your fixture
for any damage and be sure all equipment necessary to operate the unit has
arrived intact.
• If damage has been found or parts are missing, please contact your vendor
or our customer support number for further instructions.
Introduction
• This fixture can operate in four different operating modes: DMX control,
sound active, automatic or in a Master/Slave configuration.
• This product comes with several built-in programs that can be used while
operating as a single unit or with multiple units linked in a master/slave
configuration.
• For best results use fog or special effects smoke to enhance
the beam projection.
• Warning! To prevent or reduce the risk of electrical shock or fire, do not
expose this unit to rain or moisture.
• Warning! This product may cause severe eye damage. Avoid looking directly
into the light source at all times!
Specifications
• Voltage: AC100V~240V
• Power Consumption: 150W
• Light source: USA CREE 36×3W (R8+G10+B10+W8)
• LED drive current: 750mA
• Beam angle: 8°
• Max output @1m: 88750 lux
• IP class: IP20
• DMX channels: 9/14 DMX Channels
• Packing Dimensions: 315x295x22mm
• Net weight: 4.9 Kg
• Gross weight: 6 Kg
Features
• 3PIN XLR DMX in and out
• IEC power in and out
• 4 control modes: DMX512, automatic programs, sound control, mast/slave
• LCD display for easy setup
• Indoor operation temperature range: -20°C~+40°C
• 2 DMX Modes: 9ch/14ch
• Dimmer: 0-100%
• Pan: 630 degree
• Tilt: 220 degree
• Temperature controlled fan cooling (fan will change speed according
to temperature)
2. INSTALLATION
Installation requirements
• The product can be hung or placed on a solid surface
with the double mounting brackets
• If you install the light in a hanging position, always use a suitable mounting
position and a clamp or screw that is strong enough to hold the product
without stress. Always use a safety wire to secure the light.
• Always keep a distance of minimum 0.5m to all objects or persons
• Installation should always be done by a trained professional.
• Make sure the light always has good ventilation
• It is recommended to always use 110 Ohm DMX cable to prevent data
corruption of your DMX control signal
Power connection
The equipment has an auto-switching power supply that can accommodate a
wide range of input voltages. The only thing necessary to do before powering on
the unit is to make sure the line voltage you are applying is within the range of
accepted voltages.This equipment will accommodate between 100V and 240v
AC 50-60HZ. It is possible to daisy-chain the power connection from one fixture
to the next. We recommend not connecting more than 20 fixtures on one 16A
220V socket and not more than 10 fixtures on one 16A 110V socket.
Color
Brown
Blue
Green/Yellow
Connection
AC live wire
AC zero curve
AC ground wire
PIN
1
2
3
DMX serial Data Link
1. Connect the male 3pin DMX input of the first fixture to the female 3pin DMX
output of the lighting controller using 110 Ohm DMX cable, for example a Stagg
Commandor 10 (skip this step when not using a controller)
2. Connect the output of the first fixture to the input of the next fixture using 110
Ohm DMX cable. Repeat this process until you reach your last fixture. Here it is
recommended to connect a DMX terminator to the output of the last fixture in the
chain.
1. OPERATION
Control Panel Function
Button
MODE
ENTER
UP
DOWN
Function
Exits from the current menu or function
Enables the currently displayed menu or sets the
currently selected value into the selected function
Navigates upwards through the menu list and
increases the value when in a function
Navigates downwards through the menu list and
reduces the value when in a function
Menu map
Operating Instructions
[DMX Address Setup]
• Press MENU, then Up or DOWN until "DMX Address" is displayed, then
press ENTER
• Change the DMX address by pressing UP or DOWN
• Press ENTER to save the DMX address
[Setup Control Mode]
• Press MENU, then Up or DOWN until "Control Mode" is displayed, then
press ENTER
• Press UP or DOWN to choose 9CH or 14CH DMX mode
• Press ENTER to save the Control Mode
[Master and Slave Modes]
• Press MENU, then Up or DOWN until "Slave Mode" is displayed, then
press ENTER
• Press UP or DOWN to choose Master or Slave mode
• Press ENTER to save the Control Mode
Slave units run synchronised programs when daisy chained to the output
3pin XLR of a master unit. Set the first unit as MASTER, set the rest as
SLAVE and use a 3pin XLR DMX cable to daisy chain the units to run
automatic programs or sound controlled programs in sync.
[Auto Mode and Sound Control setup]
• Press MENU, then Up or DOWN until "Auto Sound" is displayed, then
press ENTER
• Press UP or DOWN to choose Auto or Sound
• Press ENTER to save
[Pan inverse setup]
• Press MENU, then Up or DOWN until "Pan Inverse " is displayed, then
press ENTER
• Press UP or DOWN to choose Yes or No
• Press ENTER to save
[Tilt inverse setup]
• Press MENU, then Up or DOWN until "Tilt Inverse " is displayed, then
press ENTER
• Press UP or DOWN to choose Yes or No
• Press ENTER to save
[Dimming speed setup]
• Press MENU, then Up or DOWN until "Dimmer Speed" is displayed,
then press ENTER
• Press UP or DOWN to choose between Fast (linear dimming curve)
or Smooth (logarithmic curve that simulates a halogen lamp)
• Press ENTER to save
[Lamp runtime]
• Press MENU, then Up or DOWN until "Power On Hours " is displayed, then
press ENTER
• The LCD will display the total amount of runtime hours, press MENU to exit
[Lamp temperature display]
• Press MENU, then Up or DOWN until "Fixture Temp" is displayed,
then press ENTER
• The LCD will display the temperature of both the LED's
and the Main PCB in sequence
• Press MENU to exit
[Lamp Auto Test]
• Press MENU, then Up or DOWN until "Auto Test" is displayed, then press
ENTER
• The light will run a test program testing all colours individually followed by
all together
• Press MENU to exit
[Software Version]
• Press MENU, then Up or DOWN until "Firmware Version" is displayed, then
press ENTER
• The LCD will show the currently installed Firmware Version
• Press MENU to exit
[System Reset]
• Press MENU, then Up or DOWN until "System Reset" is displayed, then
press ENTER
• The light will reset itself
DMX Channels
14 CH
CH
1
2
3
4
5
6
7
8
9
10
11
12
13
14
Value
0-255
0-255
0-255
0-255
0-255
0-255
0-255
0-255
0-255
0-255
0-35
36~55
56-75
76-95
96-115
116-135
136-155
156-175
176-195
196-215
216-235
236-255
0-14
15-255
0-19
20-255
0-99
Function
PAN 0-630º
PAN 16 bit
Tilt 0-220º
Tilt 16 bit
Pan & Tilt Speed (fast to slow )
Dimmer 0-100%
Red 0-100%
Green 0-100%
Blue 0-100%
White 0-100%
No function
Color temperature selection White=3200K
Color temperature selection White=3400K
Color temperature selection White=4200K
Color temperature selection White=4900K
Color temperature selection White=5600K
Color temperature selection White=5900K
Color temperature selection White=6500K
Color temperature selection White=7200K
Color temperature selection White=8000K
Color temperature selection White=8500K
Color temperature selection White=10000K
No function
Color Macros
No function
Strobe0-20HZ
Disable Sound Control
100-199
Enable Sound Control
200-255
System Reset when this value is held 5 second
9 CH
CH
1
Value
0-255
Function
PAN 0-630º
2
3
0-255
0-255
Tilt 0-220º
Pan & Tilt Speed (from fast to slow )
4
5
0-255
0-255
Dimmer 0-100%
Red 0-100%
6
7
8
0-255
0-255
0-255
Green 0-100%
Blue 0-100%
White 0-100%
9
0-19
20-255
No function
Strobe 0-20HZ
IMPORTANT SAFETY INSTRUCTIONS
READ AND KEEP THESE INSTRUCTIONS. HEED ALL WARNINGS.
• If, after you have followed the instructions outlined above, this device fails to function, please
contact your dealer. Under no circumstances should this device be opened. Leave all servicing to
qualified personnel.
•Electrical appliances must never be used in conditions of high humidity or heat. To prevent any risk
of fire or electric shock, never spill or splash liquids on this device. Should this happen, unplug the
power cable from the mains outlet and switch off the mixer immediately.
S
MARKING & CONFORMITY
1. The CE mark on this product means it conforms to the EMC Directive (2004/108/CE), CE marking
Directive (93/68/EEC) and Low Voltage Directive (2006/95/EC).
2. The «Crossed-out Wheeled Bin» is to draw your attention to the WEEE (Waste Electric &
Electronic Equipment) Directive (2002/96/EC). It means this apparatus must be collected separately
for recycling.
3. «RoHS compliant» means this device conforms to the Directive (2002/95EC) on the restriction of
the use of certain hazardous substances in electrical and electronic equipments, such as: Mercury,
Lead, Cadmium, Hexavalent Chromium, Polybrominated Buphenyl (PBB) and Polybrominated
Diphenyl Ethers (PBDE).