Download Setup IB-NAS902 - akcesoriaPC.pl
Transcript
http://www.icybox.de
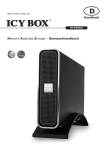
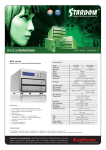
IB-NAS902
Network Attached Storage – User Manual
Content
Content............................................................................................................... 2
Introduction ....................................................................................................... 3
SMB .............................................................................................................. 3
FTP ............................................................................................................... 3
DHCP ............................................................................................................ 3
More than a NAS ............................................................................................ 3
Package content ................................................................................................. 4
Take a look at the IB-NAS902............................................................................. 4
Front ............................................................................................................... 4
Back ................................................................................................................ 4
Assembly ............................................................................................................ 5
Connecting the IB-NAS902 to your Computer..................................................... 5
USB Mode ........................................................................................................ 5
e-SATA Mode .................................................................................................... 5
Max OS X ...................................................................................................... 6
Windows XP & Windows ME .............................................................................. 6
Windows 98 ................................................................................................... 6
NAS Mode ........................................................................................................ 7
Connecting to your Network ............................................................................. 7
Setup IB-NAS902 ............................................................................................... 7
Configuring the IB-NAS902 on Windows ............................................................. 7
Configuring the IB-NAS902 (Other Operating Systems) ........................................ 8
Web based Setup .............................................................................................. 9
Status – System Information .......................................................................... 10
IP Configuration ........................................................................................... 10
Maintenance ................................................................................................ 11
SMB Administration ....................................................................................... 11
FTP Configuration ......................................................................................... 12
XBOX360 Media ............................................................................................ 12
Disk Utility ................................................................................................... 13
File Access ........................................................................................................ 13
Access Files from the IB-NAS902 – Windows ....................................................... 13
Access Files from the IB-NAS902 – Mac OS ......................................................... 14
Frequently Asked Questions ............................................................................. 16
2
Introduction
NAS is short for “Network attached Storage”, which is used to name a specialized device
that offers mass storage towards a data network. SOHO NAS like the ICY BOX IBNAS902 are small devices that simply share data from HDDs to an Ethernet. There are
many approaches; some are using custom shaped methods in offering the storage space
to the network participants. This approach needs special software to be installed on the
network clients and in most cases is limited to one particular operating system.
The ICY BOX IB-NAS902 has chosen to offer the HDD space in the way common
operating systems are expecting it. This means it uses the same principles (protocols) to
offer HDD-Storage as common file servers are doing it but with less noise, lower power
consumption and in a much simpler way. The main advantage is that, that special
software is unnecessary to access the storage provided.
SMB
The SMB server implemented in the ICY BOX IB-NAS902 offers storage in a way regular
Windows shares are doing it (commonly known as SMB or CIFS protocol). Even Operating
systems like MAC OS and Linux are capable of using this kind of network storage access.
FTP
The FTP protocol is one of the oldest ways for file transfer in the internet. It is fast and
could easily be used to access the HDD even via the internet. A huge set of different
software clients exists even for exotic operating systems using this simple but fast
protocol. Most internet access routers used in small offices and at home offer a
mechanism called port forwarding (virtual server, etc.) which could be easily used to
expose the ICY BOX IB-NAS902’s storage to the internet. The FTP protocol offers access
control based on user.
DHCP
If your network does not provide a DHCP server for auto configuring the IP settings of
the client, the IB-NAS902 has a built in DHCP server to be activated. This server then
distributes the IP-Addresses among the network participants.
More than a NAS
The ICY BOX IB-NAS902 is not only an easy to use network storage device. It is a truly
double functional HDD box. It offers a complete USB 2.0 HDD access chipset, offering
greater flexibility. Users have the option of using it as a NAS where a network connection
is available or connect it via the much faster USB 2.0 Interface in the same way they do
it with a conventional external hard drive. This dual-functional design provides a
maximum of flexibility to access the data on the ICY BOX anytime anywhere.
3
Package content
•
•
•
•
•
•
•
IB-NAS902
RJ-45 Network cable
USB cable
e-SATA Cable
Power adaptor
CD-ROM
User guide
Take a look at the IB-NAS902
Front
Back
Power On/Off
Power jack
USB port
eSATA port
Ethernet port
Reset button
4
Assembly
1. Unscrew the HDD mounting
frame from the bottom and push
it out to the front.
2. Connect the Cables to the HDD.
3. Screw the HDD into the mounting
frame.
4. Push the mounting frame back
into the case and screw it tight
from the bottom.
Connecting the IB-NAS902 to your Computer
The IB-NAS902 is a multifunctional hard drive enclosure. In addition to being a network
storage device, you can also use it as a standalone external hard drive via the USB
interface.
USB Mode
In USB 2.0 High Speed mode, the IB-NAS902 is directly attached to a single computer
using the USB port.
e-SATA Mode
In e-SATA mode, the IB-NAS902 is directly attached to a single computer using the eSATA port.
5
Max OS X
Driver installation is not required for systems using Mac OS 10.1.2 or above. Simply
connect the IB-NAS902 using the included USB cable and access the data by clicking the
“Untitled” HDD icon located on your Desktop.
Windows XP & Windows ME
Driver installation is not required for Windows XP and Windows Me. Simply connect the
IB-NAS902 using the included USB cable and access the data via “My Computer”.
Windows 98
To utilize the USB connectivity, please install the USB driver from the attached driver CD.
Please ensure that you install the device driver before connecting the USB port. When
you complete the driver installation, reboot your computer, connect the IB-NAS902 to
your computer and access the data via “My Computer”
6
NAS Mode
In NAS mode, the IB-NAS902 is directly attached to an Ethernet switch. Each user on the
network can use the IB-NAS902 almost as if it were a local drive.
Connecting to your Network
Connect the power adapter to the back panel of the IB-NAS902 and plug the other end to
a wall outlet or power strip. Connect the network cable to the LAN port on the back of the
IB-NAS902 and the other end of the network cable to a port on your hub, switch or
router.
You can also access data in the IB-NAS902 connecting it directly using the
Ethernet cable with your computer. The IB-NAS902 will have a default IP of
169.254.0.1 when connected directly.
The Ethernet port on the IB-NAS902 is Auto-MDI/MDIX, which means you can
connect it using either a crossover or a direct network cable.
Setup IB-NAS902
Configuring the IB-NAS902 on Windows
The IB-NAS902 features a web-based control interface to manage your settings. If you
are using an operating system other than Windows, please refer to next section labelled
“Other Operating Systems”.
Open your web browser and enter
http://Storage or http://Storage<XXXX> in the URL address field.
You can also enter the IP address of
the IB-NAS902.
7
Enter the default login information:
Username: admin
Password: admin
For security purposes, your login information
can be changed via the web control interface.
When two new IB-NAS902s are simultaneously connected to your network,
you need to distinguish between the two by typing “http:// Storage-<XXXX>”
with their unique MAC address. Please refer to the sticker on the rear panel
for the address and replace <XXXX> with the last four digits of the MAC
address.
For example if your IB-NAS902’s MAC Address is 00-14-3F-AA-01-68, you will
need to enter “http://Storage-0168” in the URL address bar.
Configuring the IB-NAS902 (other Operating Systems)
When you are planning to perform administrative tasks from a different operating
system, you will need to input IP address of the IB-NAS902 in the browser URL address
bar.
If you do not know the IP address of the IB-NAS902, you will have to do this additional
procedure. You will need to connect the IB-NAS902 directly to your computer, input the
default IP address 169.254.0.1 in the browser URL address bar to access the web control
panel.
8
Web based Setup
After a successful login, you will see the following screen.
An overview description of the functions on the left menu bar:
Menu Item
Description
Status
Shows the data related to your IB-NAS902, such as
networking status and hard drive information. You may
also edit administration and file language settings here.
IP Config
Allows you to manually configure the IP address of the
IB-NAS902
Maintenance
Perform firmware upgrade, reboot or reset the IBNAS902
SMB Server
Configure the Samba feature of IB-NAS902 for the
home/office network file sharing capabilities. You can also
create/remove folders and their share permissions.
FTP Server
Configure the FTP features of the IB-NAS902. You may
add/remove users and their permissions.
XBOX360 Media
For sharing photos and music to XBOX360 through UPnP
protocol.
Disk Utility
Perform hard drive maintenance routines such as
Scandisk and Format.
9
Status – System Information
The welcome screen displays the IP
address, firmware version and the
hard drive information such as the
hard drive type and storage space
available.
The administrator may change the web
control panel login information in here.
You may also change the default hostname of your IB-NAS902 here. Keep in mind that
after you change the hostname, you will need to use it to access your IB-NAS902. For
example, if you changed your hostname to “FileServer”, please type “http://FileServer” to
access the Web Control Panel after you submitted your changes.
The Language setting is used to recognize files with characters other than English. If you
have trouble reading your files on the IB-NAS902, please select the appropriate
language.
When you reset the IB-NAS902, either by the hardware switch or through the
web control panel, all the settings will return to the default setting including
the hostname. The default hostname will remain as Storage-<XXXX> (where
<XXXX> is the last four digits of the MAC address).
IP Configuration
The administrator may use this
option to manually define the IP
address of the IB-NAS902. If the
hub/router/switch in your network
has a DHCP server, then the IBNAS902 will automatically be
assigned an IP address.
The IB-NAS902 can also act as a DHCP server when one is not present in your
network. The default IP of the IB-NAS902 in DHCP server mode is
“169.254.0.1” and any device that is linked to the network containing will be
assigned an IP of “169.254.0.x” automatically.
10
Maintenance
The administrator can perform
maintenance tasks on the IBNAS902 here. Update the firmware
only if you are experiencing
problems with your IB-NAS902.
New firmware files are available for
download from our website:
http://www.icybox.de
After updating the firmware or resetting to factory defaults, please make sure
that you restart the IB-NAS902 and refresh your browser.
SMB Administration
SMB enables the core function of the
IB-NAS902 which is network file
sharing.
This option allows the administrator to
determine the folders/directories to be
shared.
In here, you can create, rename and delete folders/directories in your IB-NAS902. All the
folders/directories in the root directory that were previously in your hard drive before it
was installed in the IB-NAS902 will also be shown in the “Folder List”.
The arrow keys in the middle are used to determine if the selected folder/directory is to
be shared. Password protection for each shared folder can also be implemented.
When creating folders/directories through the web control panel, please use
only English alphabets.
11
FTP Configuration
Abbreviated from File Transfer
Protocol, FTP enables file exchange
between computers on the
Internet. The IB-NAS902 can work
as a stand-alone FTP server when
it is assigned a static IP
Anonymous FTP is Enabled by default. The administrator can determine if the users
have read or write permission and the “Home Directory” will be the folder/directory the
anonymous user can access upon logging in.
The Account List displays the current FTP user accounts, the administrator can add new
users, modify their permissions, temporary disable users and delete users.
XBOX360 Media
This option allows the
administrator to
determine the photo or
music folder/directory to
be shared.
In here, you can set Enable/Disable UPNP AV Server share folder in your IB-NAS902. The
user can set “PUBLIC” folder as Photo and Music share folder or create a specific folder
name from SMB Server.
The default value for “Photo Directory” and “Music Directory” is “Disable”. User can
choose any folder from the “Folder List” of drop down list and after click on “Set” button,
the status under “Photo/Music Directory” will display the name as choosing from “Folder
List”.
12
Disk Utility
If you have installed a new hard drive
in the IB-NAS902, that is not
formatted, this will be the place to
format it to the FAT32 format.
Since the IB-NAS902 supports power
management, you can also determine
the time the hard drive have to be
inactive in order for the IB-NAS902 to
enter sleep mode.
The Scan Disk function can be used to detect potential problems with the hard drive.
Click on the refresh button to display the scandisk result.
File Access
Access Files from the IB-NAS902 – Windows
In Windows, the data can be accessed by searching for the IB-NAS902 in the “Network
Neighborhood” (as a computer with the name “Storage”). Or you can access the data in
the IB-NAS902 with the following instructions.
Note:
The follow screenshots are taken from a PC running Windows XP SP2
and may vary slightly from your computer screen.
Click on the Windows Start button,
select “Run” from the menu and a
dialogue box as shown will appear.
Type “\\storage” in the field and click
“OK”.
If you change the IB-NAS902 hostname, you will need to replace the word
“storage” with it. For example, if you changed your hostname to “FileServer”,
please type “\\FileServer” instead.
13
The Windows Explorer will appear and you should be able to see all the folders that were
previously selected to be shared under “SMB Server” in the control panel. Clicking on the
corresponding folder will reveal the files in that folder.
Access Files from the IB-NAS902 – Mac OS
If the client computer is an Apple Macintosh running Mac OS, they will have to follow the
procedure below to mount each shared folder as an SMB share to access the data.
Note:
The follow screenshots are taken from an iMac running OS 10.3.x and
may vary slightly from your computer screen.
Under Finder, select
Go >> Connect to
Server or use the
hotkey
<Command>+<K>
14
The dialogue box
“Connect to Server”
will appear. Type
“smb://storage” and
click the Connect
button.
If you change the IB-NAS902 hostname, you will need to replace the word
“storage” with it. For example, if you changed your hostname to “FileServer”,
please type “smb://FileServer” instead.
The next dialogue
screen will prompt
you for the folder
that you will like to
access. Select it
and click the OK
button.
You might be prompted to enter a password, unless a password was previously assigned
in the control panel, you can leave it blank. After a successful mount, a network folder
icon will be created based on the folder you selected as shown.
15
Frequently Asked Questions
1. The IB-NAS902 displays error messages / crashes during the file
transmission?
Please ensure you update patches for your operating system frequently. The
latest firmware for the IB-NAS902 is also available to download from our website
at: http://www.icybox.de
2. Does the IB-NAS902 support power management?
Yes, when there isn’t any hard drive activity within fifteen minutes, the IBNAS902 will power down to reduce power consumption. The sleep time can be
configured via the web control panel.
3. How does the IB-NAS902 achieve its data sharing capabilities?
Utilizing the SMB (Server Message Block) protocol, the IB-NAS902 allows any
computer client that supports TCP/IP, NetBui or IPX/SPX to share files. The builtin FTP server also allows any clients with internet connectivity to access the IBNAS902.
4. What is the size limitation for the IB-NAS902?
The IB-NAS902 support LBA (48-bit Logical Block Addressing) which in theory
includes all hard drives from 32 gigabytes to 2 terabytes.
5. Why supports the IB-NAS902 only FAT32 format?
As a cross platform file server, FAT32 format is compatible with all major
operating systems (Windows/Mac OS/Linux). The only drawback of a FAT32
format is the single file size limitation of 4 GB. In the NAS Mode the limit of a file
is 127 GB. If a file is over 4 GB the IB-NAS902 splits it in the NAS Mode into parts
under 4 GB and provides them transparently.
6. How does the IB-NAS902 DHCP service work?
The IB-NAS902 functions as a DHCP(Dynamic Host Configuration Protocol) server
when it does not detect the presence of other DHCP servers in its network. DHCP
is an Internet protocol for automating the configuration of computers that use
TCP/IP by automatically assigning IP addresses.
7. What are there naming limitations of the files in the IB-NAS902?
The maximum length of a folder/directory/file name is 12 characters. Invalid
characters such as “* \ : " < > . ? /” may not be used.
8. What kind of hard drive is compatible with the IB-NAS902?
The IB-NAS902 supports 3.5” Ultra DMA/ATA hard drives which are mostly
manufactured after 1998. Below is a list of manufacturer websites you can refer to
for more information on the hard drive you own.
Manufacturer
Web Site
Western Digital
http://www.westerndigital.com
IBM/Hitachi
http://www.hitachigst.com
Samsung
http://www.samsung.com
Seagate
http://www.seagate.com
Maxtor
http://www.maxtor.com
16
Manufactured for:
RaidSonic Technology GmbH
Kurt-Fischer-Straße 50
D-22926 Ahrensburg
Germany
www.raidsonic.de
© 2008 RaidSonic Technology Ahrensburg, Germany
17


