1
XVME-6400 Intel® 4th Generation Core Single-Slot VMEbus CPU Module USER’S MANUAL ACROMAG INCORPORATED 30765 South Wixom Road Wixom, MI 48393-2417 U.S.A. Tel: (248) 295-1541 Fax: (248) 624-9234 Copyright 2015, Acromag, Inc., Printed in the USA. Data and specifications are subject to change without notice. 8501024C USER MANUAL XVME-6400 Table of Contents 1.0 GENERAL INFORMATION............................................................................................ 7 1.1 Intended Audience .......................................................................................................7 1.2 Preface .........................................................................................................................7 1.2.1 Trademark, Trade Name and Copyright Information ....................................................................... 7 1.2.2 Class A Product Warning ................................................................................................................... 7 1.2.3 Environmental Protection Statement ............................................................................................... 7 1.3 Product Summary .........................................................................................................8 1.4 Related Material...........................................................................................................9 1.5 Ordering Information ...................................................................................................9 1.6 Key Features and Benefits .......................................................................................... 10 1.6.1 1.6.2 1.6.3 1.6.4 1.6.5 1.6.6 1.6.7 Intel® 4th Gen (Haswell) Core CPU ................................................................................................. 10 Intel QM87 Chipset (Lynx Point) PCH .............................................................................................. 11 Intel 82580EB Quad Ethernet Controller ........................................................................................ 11 Nuvoton NCT6106D Super-I/O ........................................................................................................ 12 Atmel AT97SC3204 TPM ................................................................................................................. 12 IDT TSI-148 PCI-X to VME Bridge ..................................................................................................... 12 Expansion Sites................................................................................................................................ 12 2.0 PREPARATION FOR USE........................................................................................... 13 2.1 Unpacking and Inspecting ........................................................................................... 13 2.2 Installing into a Backplane .......................................................................................... 14 3.0 HARDWARE INFORMATION AND CONFIGURATION....................................... 15 3.1 Module Hardware Switch Configuration ..................................................................... 16 3.1.1 3.1.2 3.1.3 3.1.4 3.1.5 3.1.6 Core Configuration Switch SW1 ....................................................................................................... 16 Core Configuration Switch SW2 ....................................................................................................... 17 VME Configuration Switch SW4 ....................................................................................................... 18 JTAGVREF Configuration Switch SW5 .............................................................................................. 18 VME Configuration Switch SW6 ....................................................................................................... 19 VME Configuration Switch SW7 ....................................................................................................... 20 3.2 Power Supply and Management ................................................................................. 20 Acromag, Inc. Tel: 248-295-1541 http://www.acromag.com -1- -1- www.acromag.com USER MANUAL XVME-6400 3.2.1 Power Options ................................................................................................................................ 20 3.2.2 Programmable CPU Power Limits ................................................................................................... 21 3.2.3 Power Management ....................................................................................................................... 22 3.2.3.1 ACPI System States ........................................................................................................ 22 3.2.3.2 APCI Processor States .................................................................................................... 22 3.3 CPU ............................................................................................................................ 23 3.3.1 Active Processor Core Selection ...................................................................................................... 23 3.3.2 Turbo Boost Configuration .............................................................................................................. 23 3.3.3 PCI Express Graphics (PEG) ............................................................................................................. 23 3.4 Platform Controller Hub (PCH) .................................................................................... 24 3.5 System Memory ......................................................................................................... 25 3.6 Video ......................................................................................................................... 25 3.6.1 VGA ................................................................................................................................................. 25 3.6.2 Digital Display Interfaces ................................................................................................................. 25 3.6.2.1 DVI ................................................................................................................................. 26 3.6.2.2 HDMI .............................................................................................................................. 26 3.6.2.3 Integrated Audio ............................................................................................................ 26 3.6.3 Configuring the Primary Display ..................................................................................................... 27 3.6.4 Configuring the Video Memory....................................................................................................... 27 3.6.5 Video Display Options ..................................................................................................................... 27 3.7 Intel® High Definition Audio ........................................................................................ 27 3.8 SATA .......................................................................................................................... 27 3.9 General I/O ................................................................................................................ 28 3.9.1 3.9.2 3.9.3 3.9.4 SMBus and I2C ................................................................................................................................ 28 Low Pin Count (LPC) ........................................................................................................................ 28 Serial Ports ...................................................................................................................................... 28 USB .................................................................................................................................................. 29 3.10 Gigabit Ethernet ....................................................................................................... 29 3.11 Battery Powered Real Time Clock (RTC) .................................................................... 30 3.12 Security .................................................................................................................... 30 3.12.1 Trusted Platform Support ............................................................................................................. 30 3.12.2 Password Control .......................................................................................................................... 30 3.13 System Management ................................................................................................ 31 3.13.1 Intel® Hyper-Threading Technology ............................................................................................... 31 3.13.2 Enhanced Intel® SpeedStep Technology (EIST) .............................................................................. 31 Acromag, Inc. Tel: 248-295-1541 http://www.acromag.com -2- -2- www.acromag.com USER MANUAL XVME-6400 3.13.3 3.13.4 3.13.5 3.13.6 3.13.7 3.13.8 Intel® Virtualization Technology (Intel VT-x and VT-d) .................................................................. 31 Intel® Trusted Execution Technology (TXT) ................................................................................... 32 Intel® Turbo Boost Technology ...................................................................................................... 32 Intel® Active Management Technology ......................................................................................... 33 Intel® Matrix Storage Technology.................................................................................................. 33 Intel® Configurable TDP Technology ............................................................................................. 33 3.14 Thermal Management .............................................................................................. 33 3.14.1 Thermal Monitoring ...................................................................................................................... 34 3.14.2 Thermal Throttling ........................................................................................................................ 34 3.14.2.1 CPU Throttling (Hardware Controlled) ........................................................................ 34 3.14.2.2 Thermal Management (OSPM Controlled) .................................................................. 34 3.14.3 Memory Throttling ........................................................................................................................ 34 3.14.4 Thermal Management Hardware .................................................................................................. 34 3.15 Watchdog ................................................................................................................. 35 3.16 Expansion Sites ......................................................................................................... 36 3.16.1 3.16.2 3.16.3 3.16.4 3.16.5 XMC Modules ................................................................................................................................ 36 PMC Modules ................................................................................................................................ 36 PMC/XMC JTAG Interfaces ............................................................................................................ 37 XBRD-9060 I/O Expander Module ................................................................................................. 38 Power Available to Expansion Modules ........................................................................................ 38 3.17 VME Interface........................................................................................................... 40 3.18 Front Panel Layout.................................................................................................... 40 4.0 FIRMWARE/BIOS INFORMATION AND CONFIGURATION ............................ 41 4.1 XVME-6400 Special BIOS Features .............................................................................. 41 4.2 Drivers and Utilities .................................................................................................... 41 5.0 SERVICE AND REPAIR ............................................................................................... 42 5.1 Service and Repair Assistance ..................................................................................... 42 5.2 Preliminary Service Procedure .................................................................................... 42 5.3 Where to Get Help...................................................................................................... 42 6.0 SPECIFICATIONS ......................................................................................................... 43 6.1 Physical ...................................................................................................................... 43 Acromag, Inc. Tel: 248-295-1541 http://www.acromag.com -3- -3- www.acromag.com USER MANUAL XVME-6400 6.2 Connector Information .............................................................................................. 43 6.2.1 J3 CPU XDP Debug Connector ......................................................................................................... 43 6.2.2 J6 SPI BIOS Programming Header ................................................................................................... 43 6.2.3 VME Interface ................................................................................................................................. 44 6.2.3.1 P0 VME Connector (Optional)........................................................................................ 44 6.2.3.2 P1 VME Connector ......................................................................................................... 45 6.2.3.3 P2 VME Connector (Standard I/O) ................................................................................. 45 6.2.3.4 P2 VME Connector (XVME-6300 Compatible I/O - Consult Factory for this Option) .... 47 6.2.4 Lower PMC/XMC Site ...................................................................................................................... 48 6.2.4.1 J11 Lower PMC Site PCI-X Connector ............................................................................ 48 6.2.4.2 J12 Lower PMC Site PCI-X Connector ............................................................................ 49 6.2.4.3 J13 Lower PMC Site PCI-X Connector ............................................................................ 50 6.2.4.4 J14 Lower PMC Site Rear-I/O Connector ...................................................................... 51 6.2.4.5 J15 Lower XMC Site PCIe Connector .............................................................................. 52 6.2.4.6 J8 Lower PMC/XMC Site JTAG Connector ...................................................................... 52 6.2.4.7 J16 Lower XMC Site Rear I/O Connector ....................................................................... 53 6.2.5 Upper PMC/XMC Site ...................................................................................................................... 54 6.2.5.1 J21 Upper PMC Site PCI-X Connector ............................................................................ 54 6.2.5.2 J22 Upper PMC Site PCI-X Connector ........................................................................... 55 6.2.5.3 J23 Upper PMC Site PCI-X Connector ............................................................................ 56 6.2.5.4 J24 Upper PMC Site Rear I/O Connector ....................................................................... 57 6.2.5.5 J25 Upper XMC Site PCIe Connector .............................................................................. 58 6.2.5.6 J9 Upper PMC/XMC Site JTAG Connector ...................................................................... 58 6.2.5.7 J7 Upper PMC/XMC Site Expansion Connector ............................................................. 59 6.2.6 Front Panel Connectors................................................................................................................... 60 6.2.6.1 J5 COM/USB/VGA Connector ........................................................................................ 60 6.2.6.2 J4 Dual Ethernet RJ Point 5 Connector .......................................................................... 61 6.2.7 P3 CPU Fan Connector .................................................................................................................... 61 6.3 P2 I/O Signal Requirements ........................................................................................ 62 6.3.1 VGA ................................................................................................................................................. 62 6.3.2 ESD .................................................................................................................................................. 62 It is strongly suggested that ESD protection be included in interface circuitry on the VGA and USB ports. Failure to do so may cause damage the XVME-6400 in the event of an ESD discharge into the I/O pins. 62 6.4 Power Requirements .................................................................................................. 63 6.5 Environmental Considerations .................................................................................... 64 6.6 Reliability Prediction.................................................................................................. 65 6.7 XVME-6400 Certificate of Volatility ............................................................................. 66 7.0 XBRD-9060 I/O EXPANDER ACCESSORY MODULE......................................... 67 Acromag, Inc. Tel: 248-295-1541 http://www.acromag.com -4- -4- www.acromag.com USER MANUAL XVME-6400 7.1 Ordering Information................................................................................................. 67 7.2 Hardware Information and Configuration .................................................................. 68 7.2.1 Switch SW1 Configuration .............................................................................................................. 68 7.3 mSATA Module Installation ....................................................................................... 68 7. 4 Installation onto XVME-6400 .................................................................................... 68 7.5 Specifications ............................................................................................................ 69 7.5.1 Physical........................................................................................................................................... 69 7.5.2 Connector Information .................................................................................................................. 70 7.5.2.1 J3 Expansion Connector ................................................................................................ 70 7.5.2.2 J7 Ethernet Connector ................................................................................................... 71 7.5.2.3 J2 RS-232 Serial Connector ............................................................................................ 71 7.5.2.4 RS-232 Serial Adapter Cable .......................................................................................... 71 7.5.2.5 J4 USB 2.0 Connector ..................................................................................................... 72 7.5.2.6 J5 USB 2.0 Connector ..................................................................................................... 72 7.5.2.7 J1 mSATA Connector ...................................................................................................... 73 7.5.2.8 J6 mSATA Connector ...................................................................................................... 74 7.6 Power Requirements .................................................................................................. 75 7.7 Environmental Considerations .................................................................................... 75 7.8 XBRD-9060 Certificate of Volatility .............................................................................. 76 8.0 XVME-9640 REAR-TRANSITION ACCESSORY MODULE ................................ 77 8.1 Ordering Information................................................................................................. 78 8.2 Hardware Information and Configuration .................................................................. 78 8.2.1 Switch SW1 Configuration .............................................................................................................. 78 8.3 mSATA Module Installation ....................................................................................... 78 8.4 Specifications ............................................................................................................ 79 8.4.1 Physical........................................................................................................................................... 79 8.4.2 Connector Information .................................................................................................................. 79 8.4.2.1 RJ0 VME Connector (Optional) ...................................................................................... 79 8.4.2.2 RJ2 VME Connector ....................................................................................................... 80 8.4.2.3 J1 VGA Connector .......................................................................................................... 81 8.4.2.4 J4 USB 2.0 Connector ..................................................................................................... 81 8.4.2.5 J3 USB 2.0 Connector ..................................................................................................... 81 8.4.2.6 J7 DVI-D Connector ........................................................................................................ 82 8.4.2.7 J8 Dual Ethernet RJ Point 5 Connector .......................................................................... 83 Acromag, Inc. Tel: 248-295-1541 http://www.acromag.com -5- -5- www.acromag.com USER MANUAL XVME-6400 8.4.2.8 J5 Upper PMC/XMC User I/O Connector ...................................................................... 84 8.4.2.9 P4 Lower PMC/XMC User I/O Connector (Optional) ..................................................... 85 8.4.2.10 P2 RS-232/RS-485 Serial Port....................................................................................... 85 8.4.2.11 P3 Lower PMC/XMC User I/O Connector (Optional) ................................................... 86 8.4.2.12 P1 Audio Connector ...................................................................................................... 86 8.4.2.13 J6 mSATA Connector .................................................................................................... 87 8.4.2.14 J2 mSATA Connector .................................................................................................... 88 8.5 Power Requirements .................................................................................................. 89 8.6 Environmental Considerations .................................................................................... 89 8.7 XVME-9640 Certificate of Volatility ............................................................................. 90 REVISION HISTORY ............................................................................................................ 91 Acromag, Inc. Tel: 248-295-1541 http://www.acromag.com -6- -6- www.acromag.com USER MANUAL XVME-6400 1.0 GENERAL INFORMATION 1.1 Intended Audience This users’ manual was written for technically qualified personnel who will be working with systems incorporating the XVME-6400 CPU. It is not intended for a general, non-technical audience that is unfamiliar with VMEbus devices and their application. 1.2 Preface The information contained in this manual is subject to change without notice, and Acromag, Inc. (Acromag) does not guarantee its accuracy. Acromag makes no warranty of any kind with regard to this material, including, but not limited to, the implied warranties of merchantability and fitness for a particular purpose. Further, Acromag assumes no responsibility for any errors that may appear in this manual and makes no commitment to update, or keep current, the information contained in this manual. No part of this manual may be copied or reproduced in any form, without the prior written consent of Acromag, 1.2.1 Trademark, Trade Name and Copyright Information © 2015 by Acromag Incorporated. All rights reserved. Acromag and Xembedded are registered trademarks of Acromag Incorporated. All other trademarks, registered trademarks, trade names, and service marks are the property of their respective owners. 1.2.2 Class A Product Warning This is a Class A product. In a domestic environment this product may cause radio interference, in which case the user may find it necessary to take adequate corrective measures. 1.2.3 Environmental Protection Statement This product has been manufactured to satisfy environmental protection requirements where possible. Many components used (structural parts, circuit boards, connectors, batteries, etc.) are capable of being recycled. Final disposition of this product after its service life must be conducted in accordance with applicable country, state, or local laws or regulations. Acromag, Inc. Tel: 248-295-1541 http://www.acromag.com -7- -7- www.acromag.com USER MANUAL XVME-6400 1.3 Product Summary The XVME-6400 is a CPU module that uses an Intel® 4th Generation Core Processor (Haswell) 6U VME64X VMEbus form factor. It is available in both air and conduction-cooled varieties. The module can support either one or two DDR3L ECC SODIMMs, for a total of up to 16GB. The SODIMMs are firmly attached to the module with screws and surrounded by heat sink material to provide a mechanically and thermally robust mechanism. Extended temperature models are available for operating in a -40°C to +85°C range. A large amount of I/O is available, as summarized in the “Key Features and Benefits” section below. There are two PMC/XMC sites available on the module. These can be used as 2 XMC, 2 PMC, or one of each type. All 64 pins of rear I/O from the PMC/XMC module's P4 connector are routed to the XVME-6400's P0 and P2 connectors. Note the P0 connector is optional and also carries 2 Gigabit Ethernet connections. Two special build options are offered for the P0 and P2 I/O. Instead of the 64 pins of rear I/O from the lower site XMC module's P4 connector, the P0 connector can instead carry I/O from the XMC module's P6 connector. An option is also available to have the P2 connector's I/O compatible with the XVME-6300 by giving up some of the PMC/XMC I/O normally available on the P2 connector. Please consult the factory for these options. In lieu of one PMC/XMC module, the optional XBRD-9060 I/O Expander module may be installed to give more I/O on the front panel, as well as 2 SSD mSATA drives. The module uses the IDT TSI-148 VME bridge on a dedicated PCI-X bus to minimize VMEbus transfer times. The module will function in either a 3-row (with reduced I/O) or 5-row VMEbus backplane, with or without a 3.3V backplane power supply (reduced 5V & 3.3V power are available to the PMC/XMC sites when a 5V-only power supply is available from the backplane. The optional XVME-9640 Rear-Transition Module is available to give easy access to all of the P2 connector's I/O signals. A two digit LED display is available for Power ON Self-Test (POST) codes, should a problem arise during the boot operation. This display is available for application software user codes after POST to aid in software debugging. A 26-pin XDP debug connector is also available for connecting compatible emulator tools directly to the CPU. For more information see Intel publication 479493, Shark Bay and Denlow Platforms Debug Port Design Guide. Acromag, Inc. Tel: 248-295-1541 http://www.acromag.com -8- -8- www.acromag.com USER MANUAL XVME-6400 1.4 Related Material The following manuals and part specifications provide the necessary information for in-depth understanding of the xvme-640 module. ANSI/VITA 1.1-1991 (R2003), VME64 Extensions. http://vita.com ANSI/VITA 1.5-2003 (R2009), 2eSST. http://vita.com ANSI/VITA 39-2003, PCI-X Auxiliary Standard for PMCs and Processor PMCs. http://vita.com ANSI/VITA 42, XMC. http://vita.com APTIO Core BIOS Manual For Acromag Products (8501026)The APTIO Core BIOS Manual For Acromag Products. Intel® document No. 328901, Mobile 4th Generation Intel® Core™ Processor Family Datasheet – Volume 1 of 2, Rev: 002, September, 2013. http://www.intel.com/content/www/us/en/processors/core/CoreT echnicalResources.html TSI148 User Manual. http://www.idt.com/products/interface-connectivity/vme/pcixvme-bridge/tsi148-vme-pci-x-bridge 1.5 Ordering Information When ordering the XVME-64AA-BCCDE-X VMEbus CPU module, please select from and specify the available option choices (A, BB, C, and D) as defined below (such as XVME-6410-116E-LF, etc.): Acromag, Inc. Tel: 248-295-1541 http://www.acromag.com Select the cooling option (AA): 10: Air-Cooled 20: Conduction-Cooled (not available – consult factory) Select the CPU option (B): 1: 47W, i7-4700EQ, 2.4GHz, quad core, 6MB Cache 3: 25W, i5-4402E, 1.6GHz, dual core, 3MB Cache Select the memory option (CC); 08: 8GB 16: 16GB Select the Connector Option (D): 0: with P0 1: without P0 Select the operating environment (temperature) option (E): Blank: Standard temperature operation 0°C to 70°C (Air-Cooled Models) -40°C to 85°C (Conduction-Cooled Models) (not applicable) E: Extended temperature operation (not available – consult factory) -40°C to 75°C (Air-Cooled Models Only) Select the solder option (X): L: Leaded solder (not available – consult factory) LF: Lead-free solder -9- -9- www.acromag.com USER MANUAL XVME-6400 1.6 Key Features and Benefits The XVME-6400 block diagram shown in Fig. 1.6.a illustrates the key components and features that are summarized on the following pages. Fig. 1.6.a: XVME6400 Block Diagram 1.6.1 Intel® 4th Gen (Haswell) Core CPU Available as either a 2.4GHz quad-core i7 or a 1.6GHZ dual-core i5. This 64-bit, 22nanometer (Haswell) CPU with integrated GT2 graphics contains direct interfaces for DDR3L, DDI, and PCIe x16. In addition, the Direct Media Interface (DMI) is used to connect to the QM87 Platform Control Hub (PCH). DDR3L SDRAM – Two SODIMM sockets support up to 16GB of DDR3L ECC at 1600MHz. Dual-channel mode is used with the two SODIMMs. The SODIMMs are attached to the module firmly with screws and surrounded by heat sink material to provide a robust mechanism both mechanically and thermally. PCIe x8 (2) – Traditionally used for external graphics, but on the XVME-6400 supports any PMC/XMC devices. One of the connections is muxed with a PEX8114 PCIe > PCI-X bridge for PMC vs. direct XMC connection. This bridge drives both PMC sites when enabled, but the lower site may still contain an XMC module even if the PMC bridge is enabled. DVI-D – This digital display interface supports connection of both DVI-D or HDMI display devices. Acromag, Inc. Tel: 248-295-1541 http://www.acromag.com - 10 - - 10 - www.acromag.com USER MANUAL XVME-6400 Programmable CPU power limits – By simply programming a lower power limit in the BIOS setup, the CPU can be used in applications where less power is available or heat removal is an issue. This is accomplished by the CPU automatically underclocking its frequency to maintain a power level at the set limit. 1.6.2 Intel QM87 Chipset (Lynx Point) PCH The Intel 8 Series QM87 (Lynx Point) PCH provides extensive I/O support, as listed below: PCIe x4 (2) – There are two PCIe ports of x4 width. The first is connected to a PEX8114 PCIe > PCI-X bridge for the TSI-148 VME Bridge. The other is connected to the Intel 82580EB Quad Gigabit Ethernet controller. SATA II (2) – There are two SATA ports that operate up to 3Gb/sec connected to the VME P2 connector. SATA III (2) – There are two SATA ports that operate up to 3Gb/sec. connected to the Expansion Site connector for the optional XBRD-9060 Bootable on-board SSD Flash – 8GB of soldered-down on-board SSD Flash is standard on all units. As a special build option, devices are available up to 32GB. Please consult the factory for this option. USB 2.0 (6) – There are two ports connected to the VME P2 connector and two ports connected to the front panel's 26-pin connector that function at USB 2.0 or USB 1.1 speeds. There are an additional two ports available on the Expansion Site connector for the optional XBRD-9060. VGA – An analog VGA port is available, including DDC clock and data, at either the VME P2 connector or the front panel's 26-pin connector. Only one connection may be used at a time and should auto switch when a monitor is plugged in to either port. Override switches are available on SW2. LPC – The Low Pin-count Bus is connected to both the NCT6106D Super-I/O for serial ports and debug port 80 connections, in addition to the AT97SC3204 TPM device. SPI – The Serial Peripheral Interface is used for the onboard boot flash. HDA Audio – The HDA audio port is connected to an ALC892 high definition audio codec. Analog stereo line-in and line-out ports are available on the VME P2 connector. SMBUS – This I2C-compatible System Management Bus has connections to the memory DIMMs, the XMC connectors, and also to an onboard EEPROM for module identification. 1.6.3 Intel 82580EB Quad Ethernet Controller The Intel 82580EB Gigabit Ethernet Controller contains both the MAC and the physical layer. It provides 4 ports that auto-sense 10-Base-T, 100Base-T, and 1000Base-TX connections. Two of these are available on the front panel's RJ Point 5 connector. Two are available on the optional VME P0 connector, for use on a VITA 31.1 Switch-Fabric compliant backplane, or via the optional XVME-9640 RTM module. One of these P0 ports may instead be switched to the Expansion Site connector, making it available on the front panel via the XBRD-9060 I/O Expander module. Acromag, Inc. Tel: 248-295-1541 http://www.acromag.com - 11 - - 11 - www.acromag.com USER MANUAL XVME-6400 1.6.4 Nuvoton NCT6106D Super-I/O The Nuvoton NCT6106D is an LPC device that provides temperature and voltage monitoring, Port 80 debug via 2 digit 7-segment display, and the following serial ports: One RS-232 only, including RTS, CTS, DTR, and DSR control lines. Available on the front panel's 26-pin connector. One RS-232/RS-422/RS-485 (software selectable). TX/RX signals only. Available on the VME P2 connector. One RS-232 only. TX/RX signals only. Routed to the Expansion Site connector to make the port available on the front panel via the optional XBRD-9060. 1.6.5 Atmel AT97SC3204 TPM The Atmel AT97SC3204 is a fully integrated security module that implements version 1.2 of the Trusted Computing Group (TCG) specification for Trusted Platform Modules (TPM). The TPM includes a cryptographic accelerator capable of computing a 2048-bit RSA signature in 200ms and a 1024-bit RSA signature in 40ms. Performance of the SHA-1 accelerator is 20μs per 64-byte block. 1.6.6 IDT TSI-148 PCI-X to VME Bridge The TSI-148 is a high performance VMEbus bridge that is fully compliant with the 2eSST and VME64 Extension standards. This allows the XVME-6400 to take advantage of the higher performance VME protocols, but sill co-exist with VME boards utilizing legacy protocols. 1.6.7 Expansion Sites There are two expansion sites available on the XVME-6400, referred in this manual as the Upper Site and the Lower Site. The Upper Site is at the top of the XVME-6400 when installed vertically in a VME chassis. The Lower Site is in the middle of the board, adjacent to the CPU heatsink. The Upper Site can be used for a PMC or XMC module, with the I/O from the J24 connector routed to the VME P2 connector. The Upper Site can instead be used with the optional XBRD-9060 I/O Expander module. The Lower Site can be used for a PMC or XMC module, with the I/O from the J14 connector routed to the VME P0 connector, if installed. Note: If one PMC and one XMC module are installed in the Expansion Sites, the PMC module must be installed in the Upper Site. Acromag, Inc. Tel: 248-295-1541 http://www.acromag.com - 12 - - 12 - www.acromag.com USER MANUAL XVME-6400 2.0 PREPARATION FOR USE IMPORTANT PERSONAL AND PRODUCT SAFETY CONSIDERATIONS It is very important for the user to consider the possible safety implications of power, wiring, component, sensor, or software failures in designing any type of control or monitoring system. This is especially important where personal injury or the loss of economic property or human life is possible. It is important that the user employ satisfactory overall system design. It is understood and agreed by the Buyer and Acromag that this is the Buyer's responsibility. WARNING: This board utilizes static sensitive components and should only be handled at a static-safe workstation. This product is an electrostatic sensitive device and is packaged accordingly. Do not open or handle this product except at an electrostatic-free workstation. Additionally, do not ship or store this product near strong electrostatic, electromagnetic, magnetic, or radioactive fields unless the device is contained within its original manufacturer’s packaging. Be aware that failure to comply with these guidelines will void the Acromag Limited Warranty. 2.1 Unpacking and Inspecting Upon receipt of this product, inspect the shipping carton for evidence of mishandling during transit. If the shipping carton is badly damaged or water stained, request that the carrier's agent be present when the carton is opened. If the carrier's agent is absent when the carton is opened and the contents of the carton are damaged, keep the carton and packing material for the agent's inspection. For repairs to a product damaged in shipment, refer to the Acromag Service Policy to obtain return instructions. It is suggested that salvageable shipping cartons and packing material be saved for future use in the event the product must be shipped. This board is physically protected with packing material and electrically protected with an anti-static bag during shipment. However, it is recommended that the board be visually inspected for evidence of mishandling prior to applying power. Acromag, Inc. Tel: 248-295-1541 http://www.acromag.com - 13 - - 13 - www.acromag.com USER MANUAL XVME-6400 2.2 Installing into a Backplane The XVME-6400 is a 6U, single-slot module. For proper cooling the air-cooled models must only be installed into an air-cooled chassis and the conductioncooled models must only be plugged into a conduction-cooled chassis. The XVME-6400 modules are designed to comply with all physical and electrical VMEbus backplane specifications of VME64X. The XVME-6400 is available both with and without a P0 connector. Without P0 would normally be required for a legacy system that contains a stiffener bar in that location. In order to have access to some of the listed P2 I/O and to supply enough power for the i7-4700EQCPUit is recommended that a backplane with 5-row, 160-pin P1 and P2 connectors be used. Note: When used in a legacy system with 3-row, 96-pin P1 and P2 connectors, only the i5-4402E CPU is supported. WARNING: Never install or remove any boards before turning off power to the bus and all related external power supplies. 1. Disconnect all power supplies to the backplane and the card cage. Disconnect the power cable. 2. Make sure backplane connectors P1 and P2 are available. 3. Verify that all DIP switch settings are correct. 4. Verify that the card cage slot is clear and accessible. 5. Install the XVME-6400 in the card cage by centering the unit on the plastic guides in the slots (P1 connector facing up). Push the board slowly toward the rear of the chassis until the P1 and P2 connectors engage. The board should slide freely in the plastic guides. WARNING: Do not use excessive force or pressure to engage the connectors. If the boards do not properly connect with the backplane, remove the module and inspect all connectors and guide slots for damage or obstructions. 1. Secure the module to the chassis by tightening the machine screws at the top and bottom of the board. 2. Connect all remaining peripherals by attaching each interface cable into the appropriate connector on the front of the XVME-6400 board, or on the XVME-9640 Rear Transition Module. Acromag, Inc. Tel: 248-295-1541 http://www.acromag.com - 14 - - 14 - www.acromag.com USER MANUAL XVME-6400 3.0 HARDWARE INFORMATION AND CONFIGURATION Fig. 3.1.a: XVME-6400 Top View Acromag, Inc. Tel: 248-295-1541 http://www.acromag.com - 15 - - 15 - www.acromag.com USER MANUAL XVME-6400 3.1 Module Hardware Switch Configuration 3.1.1 Core Configuration Switch SW1 Table 3.1.a summarizes the functions, settings, and descriptions for dip switches SW1-1 thru SW1-4. Table 3.1.a: Core Configuration Switch SW1 Core Configuration Switch SW1 Position Function 1 Front Panel Reset Button 2 ORB GND Switch Setting Description OFF No Pushbutton Reset ON OFF ON 3 Reserved 4 Onboard 3.3V Regulator OFF ON OFF ON Front Panel Reset Button Causes Local Reset ORB GND Isolated ORB GND tied to digital GND Normal Operation Reserved Auto Enable Onboard 3.3V Regulator if Not on Backplane Force Onboard 3.3V Regulator On SW1-1 is used to configure whether the front panel reset switch can be used to reset the XVME-6400 (and subsequently the whole VME chassis depending on SW6-3). SW1-2 is used to isolate ORB GND (the front panel's chassis connection) from digital ground, if necessary to isolate ground loops. SW1-3 is reserved and should be left in the OFF position for normal operation. SW1-4 is used to configure the operation of the onboard 3.3V regulator. When the switch is OFF the onboard 3.3V regulator is automatically enabled whenever 3.3V is not detected on the backplane. Setting this switch to ON forces the onboard 3.3V regulator to be enabled always. Acromag, Inc. Tel: 248-295-1541 http://www.acromag.com - 16 - - 16 - www.acromag.com USER MANUAL XVME-6400 3.1.2 Core Configuration Switch SW2 Table 3.1.b summarizes the functions, settings, and descriptions for dip switches SW2-1 thru SW2-4. Table 3.1.b: Core Configuration Switch SW2 Core Configuration Switch SW2 Position Function Switch Setting Description 1 PMC Bus Speed Override OFF 100/50/25MHz ON 2 XMC Select Override OFF 133/66/33MHz Upper Site XMC/PMC Autodetect 3:4 Monitor Auto-Detect Override ON Upper Site Force XMC OFF:OFF Force Rear VGA Port Enable OFF:ON Force Front VGA Port Enable ON:OFF VGA Port Auto-Detect ON:ON Force Front VGA port Enable SW2-1 is used to override the automatic selection of the PMC bus speed. When the switch is on the bus speed is automatically selected at 133/66/33MHz. When the switch is off the speed is overridden as follows: 133MHz normal bus speed will slow down to 100MHz 66MHz normal bus speed will slow down to 50MHz 33MHz normal bus speed will slow down to 25MHz Note that with two 133MHz PMC modules installed there may be instability unless the bus speed is slowed down to 100MHz, as recommended by VITA 39. SW2-2 is used to override the automatic detection of PMC/XMC modules in the upper PMC/XMC site. If an installed XMC module is not automatically recognized, closing this switch will turn off the PMC bridge and force the connection to the XMC card instead of the bridge. SW2-3 and 2-4 are used to override the automatic VGA monitor detection on the VGA ports. If a monitor connected to a port is not automatically recognized, setting the switches as shown will force a particular VGA port to be active. Acromag, Inc. Tel: 248-295-1541 http://www.acromag.com - 17 - - 17 - www.acromag.com USER MANUAL XVME-6400 3.1.3 VME Configuration Switch SW4 Table 3.1.c summarizes the functions, settings, and descriptions for dip switch SW4. Table 3.1.c: VME Configuration Switch SW4 VME Configuration Switch SW4 Position 1-6 Function ASIDEN GSIDEN Switch Setting Description 2-3, 5-6 CR/CSR Disabled 2-3, 4-5 Geographical Address 1-2, 5-6 Auto Slot ID Geographical Address Defaults to Auto Slot ID if all GA pins are High 1-2, 4-5 SW4 is used to configure the Auto Slot ID Enable (ASIDEN) and the Geographic Slot ID Enable (GSIDEN) VME features. The ASIDEN feature allows the CR/CSR base address to be configured using the Auto Slot ID protocol. The GSIDEN function initializes the CR/CSR base address register using the VMEbus GA signals. This allows the board to come out of reset with the CR/CSR registers visible from the VMEbus. 3.1.4 JTAGVREF Configuration Switch SW5 Table 3.1.d summarizes the functions, settings, and descriptions for dip switch SW5. Table 3.1.d: JTAG VREF Configuration Switch SW5 JTAG VREF Configuration Switch SW5 Position 1-3 4-6 Function Lower Site (J8) JTAG VREF Configuration Upper Site (J9) JTAG VREF Configuration Switch Setting Description 1-2 Lower Site VREF = 3.3V 2-3 Lower Site VREF = 2.5V 4-5 Upper Site VREF = 3.3V 5-6 Upper Site VREF = 2.5V SW5 is used to select the VREF voltage for the XMC/PMC JTAG connections on J8 and J9. Acromag, Inc. Tel: 248-295-1541 http://www.acromag.com - 18 - - 18 - www.acromag.com USER MANUAL XVME-6400 3.1.5 VME Configuration Switch SW6 Table 3.1.e summarizes the functions, settings, and descriptions for dip switches SW6-1 thru SW6-4. Table 3.1.e: VME Configuration Switch SW6 VME Configuration Switch SW6 Position 1:2 3 4 Function SYSCON Configuration Switch Setting Description OFF:OFF SYSCON Autodetect OFF:ON SYSCON Enabled ON:OFF SYSCON Disabled ON:ON SYSCON Disabled Local Reset Does Not Drive VME SYSRST# Local Reset Drives VME SYSRST# VME SYSRST# Does Not Drive XVME-6400 Local Reset VME SYSRST# Drives XVME-6400 Local Reset VME SYSRST# OUT Configuration OFF VME SYSRST# IN Configuration OFF ON ON SW6-1 and SW6-2 are used to configure SYSCON functionality. If SYSCON is set to autodetect and the BG3 functionality of the backplane is correct, the XVME-6400 will assume SYSCON functionality if it is the left-most slot in the backplane. SYSCON functionality can be forced to be enabled or disabled as well. SW6-3 is used to configure the driving of VME SYSRST# when a local reset happens on the XVME-6400. SW6-4 is used to configure the behavior of the XVME-6400 when a VME SYSRST# is driven onto the backplane from some other module. When this switch is off the VME SYSRST# signal is isolated from the XVME-6400 and does not reset the VME resources of the TSI-148 VME bridge. Acromag, Inc. Tel: 248-295-1541 http://www.acromag.com - 19 - - 19 - www.acromag.com USER MANUAL XVME-6400 3.1.6 VME Configuration Switch SW7 Table 3.1.f summarizes the functions, settings, and descriptions for dip switch SW7. Table 3.1.c: VME Configuration Switch SW7 VME Configuration Switch SW7 Position 1-3 4-6 Function SFAILEN BIT POWER UP DEFAULT SFAILAI BIT AUTO CLEAR Switch Setting Description 1-2 VME SYSFAIL# Not Driven 2-3 VME SYSFAIL# Driven 4-5 SFAILO is Auto-Negated SFAILO Negated when SFAILAI Cleared 5-6 SW7 is used to configure the default state of the System Failure Enable (SFAILEN) bit and the System Failure Auto Slot ID (SFAILAI) bit auto clear. The SFAILEN bit controls the assertion of the VME SFAIL# signal. The SFAILAI bit is used when the Auto Slot ID protocol is enabled in the system to assign the CR/CSR address. When Auto Slot ID is used to assign the CR/CSR base address, the SFAILAI bit is set by the assertion of the SRSTI_ signal. The SFAILAI bit must be cleared in order for Tsi148’s System Fail Output (SFAILO) signal to be negated. SFAILO is automatically negated if the VCFG2 jumper is in the 1-2 position. Otherwise SFAILO is negated when software clears the SFAILAI bit in the VCTRL register. The initial value of the SFAILAI bit can be configured at power-up reset through the SFAILAI_AC power-up option or a value can be programmed by software in the SFAILAI bit in the VMEbus Control register (VCTRL). 3.2 Power Supply and Management 3.2.1 Power Options The XVME-6400 can be used in any of the following VMEbus systems, with the associated caveats: Acromag, Inc. Tel: 248-295-1541 http://www.acromag.com 3-row, 5V-only legacy system. This system will limit the P2 I/O and the incoming power to the XVME-6400 to 60W. The DVI-D port and the lower 15 diff pair of PMC I/O will not be accessible. Because of the reduced power input, the use of the i7 CPU requires that the programmable power limits be employed. See Section 3.16.5 for guidance on what limits should be used in conjunction with the installed PMC/XMC modules. 5-row, 5V-only legacy system. This system permits all available P2 I/O to be accessible to the XVME-6400, but the lack of a 3.3V power supply means that the available 90W of 5V power also feeds the - 20 - - 20 - www.acromag.com USER MANUAL XVME-6400 3.3V needs of the XVME-6400, as well as those of any attached PMC/XMC modules. 5-row, 5V + 3.3V VME64x system. This system permits all available P2 I/O to be accessible to the XVME-6400, as well as allows for the maximum available power from the backplane (90W from 5V and 66W from 3.3V). This is the recommended system for the XVME-6400. 3.2.2 Programmable CPU Power Limits The XVME-6400 features programmable power limits, allowing the user to 'dial-down' the maximum power consumption of the CPU in systems where power is a concern. The graph below shows that the i7-4700EQ CPU outperforms other available embedded Intel CPU's at every power point from 5W - 47W, even the i5-4402E, which can also use the programmable power limits. i7-4700EQ (5-47W) CPU Mark i5-4402E (5-25W) i7-3612QE (35W) i7-3615E (45W) i7-3517UE (17W) Atom E3845 (10W) Power Rating or Throttle Setting (W) By simply programming a lower power limit in the BIOS setup, the CPU can be used in applications where less power is available or heat removal is an issue. This is accomplished by the CPU automatically underclocking its frequency to maintain a power level at the set limit. Note: Once the minimum frequency of 800MHz is reached the programmed limit could be exceeded. Extremely large workloads have a realistic minimum power of around 20W. However light to medium workloads can effectively maintain a power limit as low as 5-10W. There are two programmable CPU limits. These are the long-term average Power Limit 1 (PL1) and the short-term Power Limit 2 (PL2). Depending on a windowed Power Limit 1 Time 'constant', the CPU can spend a short time above power level PL1 up to a maximum of PL2, allowing a significant performance boost for short workloads. If the CPU power remains above PL1 Acromag, Inc. Tel: 248-295-1541 http://www.acromag.com - 21 - - 21 - www.acromag.com USER MANUAL XVME-6400 at the end of this time the power is then limited back to PL1. The power must drop below the PL1 limit before it allowed to increase back to PL2 again. For time spent above PL1 an equivalent amount of time must be spent below PL1 in order for it to rise again to PL2. The maximum time could be as much 2.5x the value of PL1 Time. The default values for each CPU are as follows: CPU I7-4700EQ I5-4402E PL1 47W 25W PL2 59W 31W Tau 28 seconds 28 seconds PL1 and PL2 can be programmed in watts to any value below the default. Entering a value above the default will result in the default value being used. Entering 0 also results in the default value being used. PL1 Time can be programmed to any number of seconds up to 256, however it is recommended by Intel to always use the default value of 28. This value maximizes the effectiveness of the short-term performance boost while ensuring that the life of the part is not jeopardized by spending too much time above PL1. See Section 3.16.5 for guidance on what limits should be used in conjunction with the installed PMC/XMC modules. More details about programming these power limits using the BIOS setup utility are provided in The Acromag Core BIOS Manual. 3.2.3 Power Management The XVME-6400 module uses the Advanced Configuration and Power Interface (ACPI) 3.0 standard to provide user-managed power via the operating system. 3.2.3.1 ACPI System States There are only two ACPI “Module States” supported by the XVME-6400: G0/S0: Fully operational; the main memory is being used for all work. G3: Unpowered. Power has been mechanically removed from the system. Wake‐up is not possible in this state. Note that S3 (Standby or Sleep), S4 (Hibernate) and S5 (Soft Off) are not supported by the XVME-6400, even if the VME system supports a standby power supply. 3.2.3.2 ACPI Processor States The Advanced Configuration and Power Interface (ACPI) provides an open standard for device configuration and power management by the operating system. More details about this feature are provided in The APTIO Core BIOS Manual For Acromag Products. Acromag, Inc. Tel: 248-295-1541 http://www.acromag.com - 22 - - 22 - www.acromag.com USER MANUAL XVME-6400 3.3 CPU The Intel® Gen 4 (Haswell) CPU is available as either a 2.4GHz quad-core i7 or a 1.6GHZ dual-core i5. This 64-bit, 22-nanometer CPU with integrated GT2 graphics contains direct interfaces for DDR3L, DDI, and PCIe x16. In addition, the Direct Media Interface (DMI) is used to connect to the QM87 Platform Control Hub (PCH). DDR3L SDRAM – 2 SODIMM sockets support up to 16GB of DDR3L ECC at 1600MHz. Dual-channel mode is used with 2 SODIMMs. The SODIMMs are attached to the module firmly with screws and surrounded by heat sink material to provide a robust mechanism both mechanically and thermally. PCIe x8 (2) – Traditionally used for external graphics, but on the XVME-6400 supports any PMC/XMC devices. One of the connections is muxed with a PEX8114 PCIe > PCI-X bridge for PMC vs. direct XMC connection. This bridge drives both PMC sites when enabled, but the lower site may still contain an XMC module even if the PMC bridge is enabled. DVI-D – This digital display interface supports connection of both DVI-D or HDMI display devices. Programmable CPU power limits – By simply programming a lower power limit in the BIOS setup, the CPU can be used in applications where less power is available or heat removal is an issue. This is accomplished by the CPU automatically underclocking its frequency to maintain a power level at the set limit. 3.3.1 Active Processor Core Selection All of the CPU cores should be kept active in high-performance systems requiring all available computing power. Conversely, applications having reduced power requirements can save power by disabling one or more of the CPU cores. The number of active CPU cores can be specified in the CPU configuration menu. More details about this feature are provided in The APTIO Core BIOS Manual For Acromag Products. 3.3.2 Turbo Boost Configuration By default Turbo Mode is enabled in the BIOS setup screen. Turbo Mode allows the CPU to go beyond the rated nominal clock frequency when there is headroom from the maximum Thermal Design Power of the CPU. This results in the highest available performance, but with a larger, more dynamic power draw during peak operations. More details about this feature are provided in The APTIO Core BIOS Manual For Acromag Products. 3.3.3 PCI Express Graphics (PEG) The x16 PEG interface is bifurcated into 2 x8 general PCIe ports that connect the Intel®4th Gen (Haswell) processor to the PMC/XMC Expansion Sites. Lanes [0:7] connect directly to the Lower XMC Site's J15 connector. Acromag, Inc. Tel: 248-295-1541 http://www.acromag.com - 23 - - 23 - www.acromag.com USER MANUAL XVME-6400 Lanes [8:12] are muxed between the lower 4 lanes of the Upper Sites's J25 connector and the PEX8114 PCIe to PCI-X Bridge that is used to drive the PMC bus. This mux should switch automatically to XMC when an XMC module is installed into the Upper Site. If it does not this can be overridden with DIP Switch SW2-2. Lanes [13:16] connect to the upper 4 lanes of the Upper Site's J25 connector. The PEG interface meets the PCI Express Base Specification, Revision 3.0 and supports: Low Swing (low‐power/low‐voltage) and Full Swing operating modes Static lane numbering reversal The Gen3 (8 GT/s) PCI Express frequency (not supported by XMC connectors) 3.4 Platform Controller Hub (PCH) The Intel 8 Series QM87 (Lynx Point) PCH provides extensive I/O support, as listed below: PCIe x4 (2) – There are two PCIe ports of x4 width. The first is connected to a PEX8114 PCIe > PCI-X bridge for the TSI-148 VME Bridge. The other is connected to the Intel 82580EB Quad Gigabit Ethernet controller. SATA II (2) – There are two SATA ports that operate up to 3Gb/sec connected to the VME P2 connector. SATA II (2) – There are two SATA ports that operate up to 3Gb/sec. connected to the Expansion Site connector for the optional XBRD-9060. Bootable on-board SSD Flash – 8GB of soldered-down on-board SSD Flash is standard on all units. As a special build option, devices are available up to 32GB. Please consult the factory for this option. USB 2.0 (4) – There are two ports connected to the VME P2 connector and two ports connected to the front panel's 26-pin connector that function at USB 2.0 or USB 1.1 speeds. There are an additional two ports available on the Expansion Site connector for the optional XBRD-9060 VGA – An analog VGA port is available, including DDC clock and data, at either the VME P2 connector or the front panel's 26-pin connector. Only one connection may be used at a time and should auto switch when a monitor is plugged in to either port. Override switches are available on SW2. LPC – The Low Pin-count Bus is connected to both the NCT6106D Super-I/O for serial ports and debug port 80 connections, in addition to the AT97SC3204 TPM device. SPI – The Serial Peripheral Interface is used for the onboard boot flash. Acromag, Inc. Tel: 248-295-1541 http://www.acromag.com - 24 - - 24 - www.acromag.com USER MANUAL XVME-6400 HDA Audio – The HDA audio port is connected to an ALC892 high definition audio codec. Analog stereo line-in and line-out ports are available on the VME P2 connector. SMBUS – This I2C-compatible System Management Bus has connections to the memory DIMMs, the XMC connectors, and also to an onboard EEPROM for module identification.. 3.5 System Memory XVME-6400 COM Express modules have two 204‐pin, right‐angle SO‐DIMM sockets (J1, J2) to accept DDR3L ECC SDRAM modules. At least one SDRAM module is required to make the system operational. Note that ECC (x72) SODIMM modules are required. Non-ECC modules (x64) are not supported. Support for the following features is provided by the system memory interface: DDR3 SDRAM with transfer rates of 1600 MT/s 1 GB, 2 GB, 4 GB, and 8 GB DDR3 SDRAM densities 72-bit wide channels (64-bits plus 8 bits of ECC) 3.6 Video 3.6.1 VGA The XVME-6400 COM Express module uses the Intel® Lynx Point controller to support the analog VGA interface. The VGA interface features include: Integrated 180 Mhz 24‐bit RAMDAC Support for analog monitor resolutions up to 1920x2000 @60 Hz The VGA port is available on either the front panel's 26-pin connector, or via the rear VME P2 connector. Only one port may be used at a time. It should auto-switch when a monitor is plugged in, but if it does not it can be configured with DIP switches SW2-3 & SW2-4. 3.6.2 Digital Display Interfaces The DVI-D port, available on the rear VME P2 connector, will support the connection of either an HDMI or DVI display device. It can support 2.97 GT/s, with resolution up to 4096x2304 at 24 Hz or 2560x1600 at 60Hz using singlelink HDMI, and up to 1920x1200 at 60Hz using single-link DVI. The processor supports High-bandwidth Digital Content Protection (HDCP) for high-definition content playback over digital interfaces. The processor also integrates a dedicated Mini HD audio controller to drive audio on an HDMI connection. The HD audio controller on the PCH would continue to support down CODECs, and so on. Acromag, Inc. Tel: 248-295-1541 http://www.acromag.com - 25 - - 25 - www.acromag.com USER MANUAL XVME-6400 3.6.2.1 DVI A Digital Visual Interface (DVI) transmits uncompressed digital audio and video signals from AV sources to video display devices. The DVI interface originates from the CPU, and supports DVI-D (digital only), The DVI interface utilizes transition minimized differential signaling (TMDS) to transmit audio, video and auxiliary (control/status) data information through the DVI cable. The BIOS will automatically detect installed devices that are using DVI interfaces, and will automatically configure the installed devices according to the video BIOS settings. For further information regarding BIOS device configuration BIOS, refer to Section 4.0, “BIOS Information and Configuration. 3.6.2.2 HDMI (The information below is from Intel® document No. 328901, “Mobile 4th Generation Intel® Core™ Processor Family Datasheet – Volume 1 of 2”, Rev: 002; September, 2013.) The High-Definition Multimedia Interface (HDMI) is provided for transmitting uncompressed digital audio and video signals from DVD players, set-top boxes, and other audiovisual sources to television sets, projectors, and other video displays. It can carry high quality multi-channel audio data, and all standard and high-definition consumer electronics video formats. The HDMI display interface connecting the processor and display devices uses transition minimized differential signaling (TMDS) to carry audiovisual information through the same HDMI cable. HDMI includes three separate communications channels: TMDS, DDC, and the optional CEC (consumer electronics control). CEC is not supported on the processor. The HDMI cable carries four differential pairs that make up the TMDS data and clock channels. These channels are used to carry video, audio, and auxiliary data. In addition, HDMI carries a VESA DDC. The DDC is used by an HDMI Source to determine the capabilities and characteristics of the Sink. Audio, video, and auxiliary (control/status) data is transmitted across the three TMDS data channels. The video pixel clock is transmitted on the TMDS clock channel and is used by the receiver for data recovery on the three data channels. The digital display data signals driven natively through the PCH are AC coupled and needs level shifting to convert the AC coupled signals to the HDMI compliant digital signals. The processor HDMI interface is designed in accordance with the HighDefinition Multimedia Interface with 3D, 4K, Deep Color, and x.v. Color. 3.6.2.3 Integrated Audio (The information below is from Intel® document No. 328901, “Mobile 4th Generation Intel® Core™ Processor Family Datasheet – Volume 1 of 2”, Rev: 002; September, 2013.) Acromag, Inc. Tel: 248-295-1541 http://www.acromag.com - 26 - - 26 - www.acromag.com USER MANUAL XVME-6400 HDMI and display port interfaces carry audio along with video. The processor supports two DMA controllers to output two high definition audio streams on two digital ports simultaneously. The processor supports only the internal HDMI and DP CODECs. The processor will continue to support Silent stream. Silent stream is an integrated audio feature that enables short audio streams, such as system events to be heard over the HDMI and DisplayPort monitors. The processor supports silent streams over the HDMI and DisplayPort interfaces at 44.1 kHz, 48 kHz, 88.2 kHz, 96 kHz, 176.4 kHz, and 192 kHz sampling rates. 3.6.3 Configuring the Primary Display To select a specific primary display, refer to The APTIO Core BIOS Manual For Acromag Products. 3.6.4 Configuring the Video Memory To configure the video memory, refer to The APTIO Core BIOS Manual For Acromag Products. 3.6.5 Video Display Options The XVME-6400 supports simultaneous, independent displays on the VGA and DVI-D ports. Display mode choices when using multiple monitors include: Single display, in which one port is activated to display the output on one device. Clone mode, in which the same content, resolution, and color depth are sent to up to three display devices. Different refresh rates may be used on each display. Extended desktop, in which a larger Windows desktop spans up to three display devices. The displays can support different refresh rates, resolutions, and color depth. 3.7 Intel® High Definition Audio The XVME-6400 uses Intel High Definition Audio thru an ALC892 Audio CODEC to provide both stereo line-in and stereo line-out connections. Enabling and configuring the HDA is discussed in The APTIO Core BIOS Manual For Acromag Products. 3.8 SATA SATA (Serial Advance Technology Attachment) is the interface that connects the PCH to the supported mass storage devices (see below). Independent operation is achieved with the two integrated SATA host controllers on the PCH using the four SATA 3.0 ports. The SATA features support: Acromag, Inc. Tel: 248-295-1541 http://www.acromag.com - 27 - - 27 - www.acromag.com USER MANUAL XVME-6400 The SATA hard disk drives, solid state drives (SSD), and CD‐ ROM/DVD‐ROM drives IDE, AHCI, and RAID (0, 1, 5, and 10) modes Data transfer rates of up to 6.0Gbps (ports on the XBRD-9060) Data transfer rates of up to 3.0Gbps (ports on the rear VME P2) To configure SATA operation, refer to The APTIO Core BIOS Manual For Acromag Products. 3.9 General I/O 3.9.1 SMBus and I2C Table 3.9.1.a: SMBus Address Table The SMBus is connected directly to the PCH, and contains several devices accessible at the addresses shown below to Table 3.9.1.a, SMBus Address Table. SMBus Address 0x32 0x34 0xA0 0xA2 0xA4 0xA8 0xAA Function DIMMA Temp DIMMB Temp ID EEPROM DIMMA SPD DIMMB SPD Lower XMC Site Upper XMC Site 3.9.2 Low Pin Count (LPC) The LPC interface contains the onboard NCT6776D Super I/O device, which supplies the serial ports and also outputs the Port80 Power On Self Test (POST) codes to the dual 7-segment display. For further information regarding the system BIOS and LPC interfaces, refer to The APTIO Core BIOS Manual For Acromag Products. 3.9.3 Serial Ports Four 16550‐compatible serial ports are supplied by the NCT6776 Super I/O chip: Acromag, Inc. Tel: 248-295-1541 http://www.acromag.com One RS-232 only, including RTS, CTS, DTR, and DSR control lines, is available on the front panel's 26-pin connector. One RS-232/RS-422/RS-485 (software selectable), with TX/RX signals only is available on the VME P2 connector. One RS-232 only, with TX/RX signals only is routed to the Expansion Site connector to make the port available on the front panel via the optional XBRD-9060. One RS-232/RS-422/RS-485, including RTS, CTS, DTR, and DSR control lines, is available when the board is built for optional XVME-6300 I/O compatibility mode (consult factory for more info). - 28 - - 28 - www.acromag.com USER MANUAL XVME-6400 For further information regarding BIOS serial port configuration, refer to The APTIO Core BIOS Manual For Acromag Products. 3.9.4 USB The Intel® Lynx Point PCH has up to two Enhanced Host Controller Interface (EHCI) host controllers to support USB high‐speed signaling on all eight USB 2.0 high-speed ports (USB 2.0 allows data transfers up to 480 Mbps.). The Intel® Lynx Point PCH also has an eXtensible Host Controller Interface (xHCI) host controller to support four USB 3.0 ports (available only via options XBRD-9060). This allows data transfers of up to 5 Gbps, which is 10 times faster than high‐speed USB 2.0. These USB features support: USB hard disk drives, flash drives, floppy disk drives, and CD‐ ROM/DVD‐ROM drives Super‐speed, high‐speed, full‐speed, and low‐speed USB USB 3.0 Super-speed on four of eight USB 2.0 expansion ports High‐speed USB 2.0 debug port on USB port 1 Console redirection on USB port 1 with a debug cable PCH USB 2.0 ports 0 and 1 are routed to the front panel's 26-pin connector. Both ports share 1A of available power. PCH USB 2.0 Ports 2 and 3 are routed to the optional XBRD-9060. PCH USB 3.0 ports 5 and 6 are also routed to the optional XBRD-9060, combined with USB 2.0 ports 2 and 3, respectively. PCH USB 2.0 Ports 8 & 9 are routed to the VME P2 connector. Both ports share 1A of available power. For information on configuring specific USB ports see The APTIO Core BIOS Manual For Acromag Products. 3.10 Gigabit Ethernet The XVME-6400 uses the Intel 82580EB Gigabit Ethernet Controller, which contains both the MAC and the physical layer. It provides 4 ports that auto-sense 10-Base-T, 100Base-T, and 1000Base-TX connections. Any port may be used to PXE boot from a PXE server on the network. Link and Activity LEDs are available for each port. Acromag, Inc. Tel: 248-295-1541 http://www.acromag.com Two ports are available on the front panel's RJ Point 5 connector. One adapter cable is included with the XVME-6400 to connect from the front panel's RJ Point 5 connector to a standard RJ45 connector. Two ports are available on the optional VME P0 connector, for use on a VITA 31.1 Switch-Fabric compliant backplane, or via the optional XVME-9640 RTM module. - 29 - - 29 - www.acromag.com USER MANUAL XVME-6400 One of the P0 ports may instead be switched to the Expansion Site connector, making it available on the front panel via the XBRD-9060 I/O Expander module. For information regarding how to boot from the network, refer to The APTIO Core BIOS Manual For Acromag Products. 3.11 Battery Powered Real Time Clock (RTC) A Motorola® MS146818B‐compatible real‐time clock (RTC) is included in the Intel® Lynx Point PCH. The RTC has 256 bytes of battery‐backed RAM and runs on a 32.768 KHz crystal with a 3V battery. The RTC performs two key functions: It keeps track of the time of day, and It stores system data, even after powering down the system. To clear the RTC and CMOS RAM settings, remove battery BT1 from the socket for 10 seconds and reinstall. The battery can be replaced with a standard CR1225 battery. Note: If the battery has been removed, the RTC voltage drops below 2.5V, or when a BIOS update has been done, the first time the system is powered on it may partially boot and then restart up to two times. This behavior is normal. 3.12 Security 3.12.1 Trusted Platform Support The XVME-6400 uses the Atmel AT97SC3204 fully integrated security module, which implements version 1.2 of the Trusted Computing Group (TCG) specification for Trusted Platform Modules (TPM). The TPM includes a cryptographic accelerator capable of computing a 2048-bit RSA signature in 200ms and a 1024-bit RSA signature in 40ms. Performance of the SHA-1 accelerator is 20μs per 64-byte block. 3.12.2 Password Control You are able to specify: An Administrator password with full control, and A User password with limited access to the BIOS settings. For further information on setting the password, refer to The APTIO Core BIOS Manual For Acromag Products. Acromag, Inc. Tel: 248-295-1541 http://www.acromag.com - 30 - - 30 - www.acromag.com USER MANUAL XVME-6400 3.13 System Management 3.13.1 Intel® Hyper-Threading Technology (Note: The following information is from Intel® document No. 328901, “Mobile 4th Generation Intel® Core™ Processor Family Datasheet – Volume 1 of 2”, Rev: 002; September, 2013.) The processor supports Intel® Hyper-Threading Technology (Intel® HT Technology) that allows an execution core to function as two logical processors. While some execution resources such as caches, execution units, and buses are shared, each logical processor has its own architectural state with its own set of general-purpose registers and control registers. This feature must be enabled using the BIOS and requires operating system support. The Intel® HT Technology is enabled by default; no action by the operator is required. For further information on disabling support for this technology, refer to The APTIO Core BIOS Manual For Acromag Products. 3.13.2 Enhanced Intel® SpeedStep Technology (EIST) The Enhanced Intel® SpeedStep Technology (EIST) used by this processor enables very high performance while also meeting power-conservation needs. When EIST is enabled, the clock frequency of the CPU is dynamically changed in response to the CPU load The Intel® SpeedStep feature is enabled by default. For further information on disabling support for this technology, refer to The APTIO Core BIOS Manual For Acromag Products. 3.13.3 Intel® Virtualization Technology (Intel VT-x and VT-d) Intel® Virtualization Technology (Intel VT) makes a single system appear as multiple independent systems to software. This allows for multiple, independent operating systems to be running simultaneously on a single system. Intel VT comprises technology components to support virtualization of platforms based on Intel architecture microprocessors and chipsets. The first revision of this technology (Intel VT-x) added hardware support in the processor to improve the virtualization performance and robustness. The second revision of this specification (Intel VT-d) adds chipset hardware implementation to improve I/O performance and robustness. The Intel® VT‐x and VT-d features are enabled by default. For further information on disabling support for this technology, refer to The APTIO Core BIOS Manual For Acromag Products. Acromag, Inc. Tel: 248-295-1541 http://www.acromag.com - 31 - - 31 - www.acromag.com USER MANUAL XVME-6400 3.13.4 Intel® Trusted Execution Technology (TXT) The featured Intel® Trusted Execution Technology attests to the authenticity of a platform and its operating system and assures that an authentic OS starts in a trusted environment and can be considered a trusted OS. Intel® TXT works in conjunction with the TPM so that the system software may make trust decisions. The Intel TXT feature is enabled by default. For further information on disabling support for this technology, refer to The APTIO Core BIOS Manual For Acromag Products. 3.13.5 Intel® Turbo Boost Technology The number of active cores determines the maximum processor core operating frequency. See Section 3.3.1, “Active Processor Core Selection” for information and instructions. (Note: The following information is from Intel® document No. 328901, “Mobile 4th Generation Intel® Core™ Processor Family Datasheet – Volume 1 of 2”, Rev: 002; September, 2013.) The Intel® Turbo Boost Technology allows the processor core to opportunistically and automatically run faster than its rated operating frequency/render clock if it is operating below power, temperature, and current limits. The Intel Turbo Boost Technology feature is designed to increase performance of both multi-threaded and single-threaded workloads. The processor supports a Turbo mode in which the processor can use the thermal capacity associated with the package and run at power levels higher than TDP power for short durations. This improves the system responsiveness for short, surging usage conditions. The turbo feature needs to be properly enabled by BIOS for the processor to operate with maximum performance. See the appropriate processor family BIOS writer’s guide for enabling details. Since the turbo feature is configurable and dependent on many platform design limits outside of the processor control, the maximum performance cannot be ensured. Turbo Mode availability is independent of the number of active cores; however, the Turbo Mode frequency is dynamic and dependent on the instantaneous application power load, the number of active cores, user configurable settings, operating environment, and system design. Compared with previous generation products, Intel Turbo Boost Technology will increase the ratio of application power to TDP. Thus, thermal solutions and platform cooling that are designed to less than thermal design guidance might experience thermal and performance issues since more applications will tend to run at the maximum power limit for significant periods of time. Acromag, Inc. Tel: 248-295-1541 http://www.acromag.com - 32 - - 32 - www.acromag.com USER MANUAL XVME-6400 Refer to The APTIO Core BIOS Manual For Acromag Products and the appropriate processor Turbo Implementation Guide for more information. 3.13.6 Intel® Active Management Technology (Note: The following information is from Intel® publication “External Design Specifications – April 2013, Revision 2.1” for the Intel® 8 Series / C220 Series Chipset Family Platform Controller Hub [PCH]). Intel® Active Management Technology (Intel® AMT) is a set of advanced manageability features developed to extend the manageability capability for IT through Out Of Band (OOB). This allows asset information, remote diagnostics, recovery, and contain capabilities to be available on client systems even when they are in a low power, or “off” state, or in situations when the operating system is hung. For further information on configuring this technology, refer to The APTIO Core BIOS Manual For Acromag Products. 3.13.7 Intel® Matrix Storage Technology Intel® Matrix Storage Technology is supported by Intel’s 8 Series QM87 Lynx Point PCH, which provides: AHCI functionality, RAID 0/1/5/10 Support, and Intel® Smart Response Technology. 3.13.8 Intel® Configurable TDP Technology Intel® Configurable TDP Technology (cTDP) allows users to reconfigure the 47W thermal design power (TDP) level of the i7-4700EQ CPU down to 37W in systems where a lower amount of power is available or a smaller thermal solution is required. For further information on configuring the TDP levels, refer to The APTIO Core BIOS Manual For Acromag Products. 3.14 Thermal Management The Intel® Haswell processor contains a digital thermal sensor for each execution core and a thermal monitor to measure the processor’s temperature. A thermal sensor connected to the NCT6776 Super-I/O is used to measure the module‘s temperature. The integrated graphics and memory controller (GMC) monitors its temperature and initiates thermal management with an internal digital thermal sensor. Memory loading or high GMC temperatures will result in bandwidth throttling. The temperature of the Intel® Lynx Point PCH is monitored by two thermal sensors located on the PCH. The system will be shut down by the PCH when its thermal limit is reached. Acromag, Inc. Tel: 248-295-1541 http://www.acromag.com - 33 - - 33 - www.acromag.com USER MANUAL XVME-6400 3.14.1 Thermal Monitoring The BIOS setup utility displays the processor and board temperatures. For further information on how to check these temperatures, refer to The APTIO Core BIOS Manual For Acromag Products. 3.14.2 Thermal Throttling 3.14.2.1 CPU Throttling (Hardware Controlled) The processor must not exceed the 100°C maximum junction temperature (Tj). When the integrated thermal monitor on the processor determines that the maximum processor temperature has been reached, the CPU clock speed will be throttled back in 100MHz increments to keep Tj from exceeding the maximum junction temperature of 100°C. If throttling is not enough to keep the processor’s Tj below the catastrophic temperature limit of 105°C, the voltage supply to the processor will be turned off within 500ms to prevent permanent silicon damage. 3.14.2.2 Thermal Management (OSPM Controlled) In addition to the hardware throttling described above, software controlled passive trip points may be configured using the system BIOS setup. For information on how to configure these trip points, refer to The APTIO Core BIOS Manual For Acromag Products. 3.14.3 Memory Throttling The memory bandwidth can be throttled back automatically if a thermal sensor is on the DIMM. The NCT6776D will alert the memory controller via PECI when the system memory exceeds its normal operating temperature. For further information on configuring the memory bandwidth throttling based on temperature readings from the DIMM’s thermal sensor, refer to The APTIO Core BIOS Manual For Acromag Products. 3.14.4 Thermal Management Hardware The XVME-6400 is available in either air-cooled or conduction cooled varieties. Air-cooled assemblies must be installed into an air-cooled VME chassis with proper airflow across the board. At least 300LFM of airflow is required to ensure proper operation across entire specified temperature range. Conduction-cooled assemblies must be installed into a conduction VME chassis. Acromag, Inc. Tel: 248-295-1541 http://www.acromag.com - 34 - - 34 - www.acromag.com USER MANUAL XVME-6400 In addition to the air or conduction heatsink assemblies, special SODIMM heat spreaders are used to remove heat from the SODIMM modules, as well as hold them tightly secured to the board. To remove the SODIMM modules, simply remove the 4 screws per SODIMM from the back side of the PCB. 3.15 Watchdog The XVME-6400 features a software-triggered multi-stage watchdog solution. When the watchdog timer expires the module by default causes a system reset. For further information on the Watchdog feature, refer to The APTIO Core BIOS Manual For Acromag Products. Acromag, Inc. Tel: 248-295-1541 http://www.acromag.com - 35 - - 35 - www.acromag.com USER MANUAL XVME-6400 3.16 Expansion Sites The XVME-6400 features two expansion sites that allow the board to be customized for a wide array of customer applications. The Lower Site accepts either PMC or XMC modules, with the module's P4 user I/O routed as 100ohm differential pairs to the optional P0 connector on the XVME-6400. A build option is available to instead route the I/O from the module's P6 connector to the XVME-6400's P0 connector. Please consult factory regarding this option. The Upper Site accepts PMC or XMC modules, with the module's P4 user I/O routed as 100ohm differential pairs to the P2 connector on the XVME-6400. A build option is available to instead add a second serial port, 4 General Purpose Digital Inputs, and 4 General Purpose Digital Outputs to the XVME-6400's P2 connector, making the XVME-6400 compatible with the P2 I/O of the XVME6300. Please consult factory regarding this option. 3.16.1 XMC Modules XMC modules can be used in either or both Upper and Lower Expansion Sites on the XVME-6400, however if one XMC module is used in conjunction with one PMC module the XMC module must be in the Lower Site. Each Expansion Site connects to the XMC module with a x8 PCIe interface. While the connection itself supports Gen2 speeds, please note that the XMC connectors are only rated for Gen1 speeds, limiting the supported speed of the XMC modules to Gen1. A build option is available for the XMC connectors to instead be VITA 61 connectors, which do support Gen2 speeds, however this limits the site(s) to having only VITA 61 modules supported. Please consult factory regarding this option. When an XMC module is installed in the Upper Site, the PEX8114 PXIe to PCI-X Bridge is automatically disabled and all 8 lanes of the PCIe interface for the Upper site are connected to the XMC module. If this automatic mechanism does not work with a particular XMC module, SW2-2 may be used to force the site to work in XMC mode. Note: Processor XMC modules are not supported on the XVME-6400. Note: Conduction-cooled XMC modules must be used on conduction-cooled models of the XVME-6400. 3.16.2 PMC Modules PMC modules can be used in either or both Upper and Lower Expansion Sites on the XVME-6400, however if one PMC module is used in conjunction with one XMC module the PMC module must be in the Upper Site. When a PMC module is installed in the Upper Site, the PEX8114 PXIe to PCI-X Bridge is enabled and connected using lanes of the PCIe interface for the Acromag, Inc. Tel: 248-295-1541 http://www.acromag.com - 36 - - 36 - www.acromag.com USER MANUAL XVME-6400 Upper Site. If PMC modules are not recognized, check SW2-2 to be sure it is not forcing the sites to work in XMC mode. The PMC interface uses PCI-X and can function at 133MHz, 100MHz, 66MHz or 50MHz bus speeds. SW2-1 may be used to select a maximum bus speed, or allow it to be automatic based on the PMC card(s) installed. Note: The VITA 39 Specification, "PCIX Auxiliary Standard for PMCs" states that "Dual PMC site carriers shall under-clock the bus at 100MHz when 133MHz capable PMC(s) are installed and the 133MHz mode is enabled." Instability may result with some 133MHz capable PMC modules with the bus speed set at 133MHz. Under-clocking to 100MHz using SW2-1 is recommended when 133MHz module(s) are installed. Note: Processor PMC modules are not supported on the XVME-6400. Note: Conduction-cooled PMC modules must be used on conduction-cooled models of the XVME-6400. 3.16.3 PMC/XMC JTAG Interfaces Some PMC/XMC modules may utilize JTAG connections for FPGA programming or other module debug activities. Individual JTAG connections are available for each site through the use of a Molex 78171-5006 6-pin micro connector. J8 is used for connection to the Lower Site, while J9 is used for connection to the Upper Site. Adapter cables the connect between J8/J9 and a Xilinx USB programmer are available. Please consult factory for more information. VREF voltage on the connector can be selected as either 2.5V or 3.3V using switch SW5. Acromag, Inc. Tel: 248-295-1541 http://www.acromag.com - 37 - - 37 - www.acromag.com USER MANUAL XVME-6400 3.16.4 XBRD-9060 I/O Expander Module The optional XBRD-9060 module may be installed in the Upper Site of an aircooled XVME-6400 to bring more I/O to the front panel, as well as allow mSATA SSD modules to be added for storage. The following I/O is available on the front panel of the XBRD-9060: One Gigabit Ethernet port via a standard RJ-45 connector. When this port is enabled on the XBRD-9060 module, one of the Ethernet ports on the P0 connector is disabled. One RS-232 serial port. This port only contains TX/RX signals. It is brought out on a mini USB-B connector, but an adapter cable is included with the module for connection using a standard DB-9 connector. Two USB 2.0 ports. These ports use standard USB-A connectors and can operate as either USB 2.0 or USB 1.1 connections. The XBRD-9060 contains 2 mSATA sockets that allow 2 SSD drives to be added to the XVME-6400 while still remaining within a single VME slot. Using the software RAID functionality of the QM87 PCH, these drives can even be setup as a RAID0/1 array if redundancy or extra speed is desired. 3.16.5 Power Available to Expansion Modules The power requirements given in Section 6.4 do not include attached expansion modules. The amount of power available to the expansion sites depends on which CPU is used on the XVME-6400, the programmable PL1 power limit used for that CPU, and what type of backplane/power supply combination is powering it. In order to maintain the stability and long life of the XVME-6400, the programmed CPU PL1 power limit should be set according to the following equation: PL1 = Total Available 5V Power - Expected Combined Expansion Card 5V Power - Rest of Board 5V Power. The Total Available 5V Power is determined by the backplane type: Backplane Type 5-row with 5V & 3.3V supplied 5-row with 5V only supplied 3-row with 5V only supplied Total Available 5V Power 90W 87.5W (2.5W of 3.3V made from 5V) 57.5W (2.5W of 3.3V made from 5V) Expected Combined Expansion Card 5V Power is the amount of 5V power the installed PMC/XMC expansion modules are expected to consume. The Rest of Board 5V Power is ~22W (typical). Example 1: An XVME-6400 is used in a 5-row backplane with 5V only power. The expected expansion card power is 40W. To determine the value to use for PL1: PL1= 90W - 40W - 22W = 28W. A value no larger than 28 should be programmed into the BIOS setup utility for PL1 in this situation. Acromag, Inc. Tel: 248-295-1541 http://www.acromag.com - 38 - - 38 - www.acromag.com USER MANUAL XVME-6400 Example 2: An XVME-6400 is used in a 3-row backplane with 5V only power. The expected expansion card power is 40W. To determine the value to use for PL1: PL1= 57.5W - 40W - 22W = -4.5W. The expected expansion card power is too large for this scenario. Example 3: An XVME-6400 is used in a 3-row backplane with 5V only power. The expected expansion card power is 30W. To determine the value to use for PL1: PL1= 57.5W - 30W - 22W = 5.5W. Care must be taken in this situation. Since this value is much less than 20W, only very small workloads on the CPU will keep the power at this limit. The expected expansion card power is still likely too large to maintain a long life of the XVME-6400. See Section 3.2.2 for more details regarding Programmable CPU Power Limits. If PL1 is not lowered using the Programmable CPU Power Limits, the following tables describe the available power for installed expansion modules. For i7-4700EQ CPU: Backplane Type 5-row with 5V & 3.3V supplied 5-row with 5V only supplied 3-row with 5V only supplied Combined Expansion Module Power 5V: 20W 3.3V: 63.5W 5V: 17.5W 3.3V: included in 5V ONLY SUPPORTED WITH PL1 lowered For i7-4402E CPU: Backplane Type 5-row with 5V & 3.3V supplied 5-row with 5V only supplied 3-row with 5V only supplied Combined Expansion Module Power 5V: 42W 3.3V: 63W 5V: 39W 3.3V: included in 5V 5V: 9.5W 3.3V: included in 5V Acromag, Inc. Tel: 248-295-1541 http://www.acromag.com - 39 - - 39 - www.acromag.com USER MANUAL XVME-6400 3.17 VME Interface The XVME-6400 connects to the VMEbus through the high-performance TSI-148 VME Bridge that is fully compliant with the 2eSST and VME64 Extension standards. This allows the XVME-6400 to take advantage of the higher performance VME protocols, but sill co-exist with VME boards utilizing legacy protocols. The TSI-148 connects to the QM87 PCH through the use of a dedicated PEX8114 PCIe to PCI-X bridge running at 133MHz, allowing maximum throughput to/from the VMEbus. The bridge utilizes a slave clock mechanism that allows the SYSCON# functionality of the TSI-148 to remain in place on the VMEbus while the XVME-6400 undergoes a local reset. This allows other boards in the VMEbus system to remain fully functional if a local reset of the XVME-6400 becomes necessary due to a hardware or operating system problem. For VMEbus configuration options, see Sections 3.1.3, 3.1.5, and 3.1.6. For more information refer to the TSI-148 User Manual. 3.18 Front Panel Layout Acromag, Inc. Tel: 248-295-1541 http://www.acromag.com PASS/FAIL LEDs: The green PASS and red FAIL LEDs are used as an indication of board health during the BIOS boot up. As the BIOS starts the POST, the red FAIL LED will be turned off. When the BIOS completes the POST, the green PASS LED is turned on. USER LEDs: The USER LEDs are accessible by user software. See Section 4 for more information. ETHERNET LINK/ACTIVITY LEDs: For each Ethernet port, the top LED shows the port is LINKed, while the bottom LED indicates ACTIVITY. RESET Switch: The front panel switch can be configured to cause a local reset and also may reset the VME backplane, depending on the configuration of SW1-1 and SW6-3. - 40 - - 40 - www.acromag.com USER MANUAL XVME-6400 4.0 FIRMWARE/BIOS INFORMATION AND CONFIGURATION 4.1 XVME-6400 Special BIOS Features This section contains information on configuring features specific to the XVME-6400. For other, more generic BIOS setup information, refer to The APTIO Core BIOS Manual For Acromag Products. To access the XVME-6400 specific items in the BIOS setup, select the Acromag menu item. Fig. 4.1.a Acromag BIOS Setup Menu The GPO0-3 default output levels can be configured. Note that these outputs are only available with the 'XVME-6300 Compatible I/O' build option. The default output levels of the front panel User LEDs can be configured. The LED is on when the output level is high. The serial protocol used by COM1 and COM2 can be either RS-232 or RS-422/485. Note that COM1 is only available with the 'XVME-6300 Compatible I/O' build option. The ID EEPROM on the SMBus can be configured as Read/Write or Read-Only. The soldered-down SSD can be configured as Read/Write or Read-Only. The XMC mezzanine modules can configured as Read/Write or Read-Only. XMC Slot A is the lower slot. XMC Slot B is the upper slot. Note the mezzanine must support use of the MVMRO signal. The rear DVI-D port can be enabled/disabled. The TSI-148 PCI Memory window size can be set to 1, 4, 8, 16, 32, 64, or 128MB. 4.2 Drivers and Utilities Drivers and Utilities for the XVME-6400 can be downloaded from Acromag's website at http://www.acromag.com. Acromag, Inc. Tel: 248-295-1541 http://www.acromag.com - 41 - - 41 - www.acromag.com USER MANUAL XVME-6400 5.0 SERVICE AND REPAIR 5.1 Service and Repair Assistance Single Board Computer (SBC) products like the XVME-6400 COM Express module are generally difficult to repair. The module can be easily damaged unless special SBC repair and service tools are used. Further, Acromag has automated test equipment that thoroughly checks the performance of each board. For these and other reasons, it is strongly recommended that a nonfunctioning SBC be returned to Acromag for repair. Please refer to Acromag's Service Policy Bulletin or contact Acromag for complete details on how to obtain parts or return parts for repair. 5.2 Preliminary Service Procedure CAUTION: POWER MUST BE TURNED OFF BEFORE REMOVING OR INSERTING BOARDS Before beginning repair, be sure that all of the procedures in the "Preparation for Use" section have been followed. Also, refer to the documentation for the module to verify that it is correctly configured. Replacement of the module with one that is known to work correctly is a good technique to isolate a faulty module. 5.3 Where to Get Help If the problem persists, the next step should be to visit the Acromag worldwide web site at http://www.acromag.com. Our web site contains the most up-to-date product and software information. Go to the “Support” tab to access: Application Notes Frequently Asked Questions (FAQ’s) Product Knowledge Base Tutorials Software Updates/Drivers Acromag’s application engineers can also be contacted directly for technical assistance via email, telephone, or FAX through the contact information listed below. Note that an email question can also be submitted from within the Knowledge Base or directly from the “Contact Us” tab. When needed, complete repair services are also available. Email: [email protected] Phone: 248-295-0310 Fax: 248-624-9234 Acromag, Inc. Tel: 248-295-1541 http://www.acromag.com - 42 - - 42 - www.acromag.com USER MANUAL XVME-6400 6.0 SPECIFICATIONS 6.1 Physical The XVME-6400 conforms to the 6U Eurocard form-factor. Height Depth Minimum Backplane Pitch 233.35 mm (9.187 in) 160.0 mm (6.3 in) 20.32 mm (0.8 in) Unit Weight Air-Cooled (with P0 connector): Conduction-Cooled (with P0 connector): 16.3 oz (0.462 kg) TBD Air-Cooled (without P0 connector): 15.8 oz (0.449 kg) Conduction-Cooled (without P0 connector): TDB 6.2 Connector Information 6.2.1 J3 CPU XDP Debug Connector This connector is a 26-pin Molex 52435-2671 and complies with Intel Shark Bay Debug Port Design Guide. It can be used for debug of the CPU using tools and guides available from authorized Intel representatives. 6.2.2 J6 SPI BIOS Programming Header This header is used to program the 128Mb SPI Flash EPROM containing the BIOS and ME Firmware and is for factory use only. Acromag, Inc. Tel: 248-295-1541 http://www.acromag.com - 43 - - 43 - www.acromag.com USER MANUAL XVME-6400 6.2.3 VME Interface 6.2.3.1 P0 VME Connector (Optional) This optional connector is a standard 6-row, 2mm Type B, 95-pin Harting 17-25-095-2102. It contains 2 Ethernet and the Lower Site's PMC I/O (XMC instead with build option) ROW/PIN A B C D E F 1 2 3 4 5 6 7 8 9 10 11 12 13 14 15 16 17 18 19 GND ENET0_MX0_P GND ENET0_MX0_N GND GND GND ENET0_MX2_P GND ENET0_MX2_N GND ENET0_MX1_P ENET0_MX1_N GND ENET0_MX3_P ENET0_MX3_N GND ENET1_MX0_P 1 ENET1_MX0_N 1 GND ENET1_MX2_P 1 ENET1_MX2_N 1 ENET1_MX1_P 1 ENET1_MX1_N 1 GND ENET1_MX3_P 1 ENET1_MX3_N1 ENET1_ACT# ENET0_ACT# ENET1_LINK# ENET0_LINK# +3.3V_TO_RTM LWR_IO0_P LWR_IO2_P LWR_IO2_N LWR_IO3_P LWR_IO3_N LWR_IO0_N LWR_IO4_P LWR_IO4_N LWR_IO5_P LWR_IO5_N LWR_IO8_P LWR_IO6_P LWR_IO6_N LWR_IO7_P LWR_IO7_N LWR_IO8_N LWR_IO1_P LWR_IO1_N LWR_IO9_P LWR_IO9_N LWR_IO12_P LWR_IO10_P LWR_IO10_N LWR_IO11_P LWR_IO11_N LWR_IO12_N LWR_IO25_N LWR_IO25_P LWR_IO13_P LWR_IO13_N LWR_IO16_P LWR_IO14_P LWR_IO14_N LWR_IO15_P LWR_IO15_N LWR_IO16_N LWR_IO31_N LWR_IO31_P LWR_IO17_P LWR_IO17_N LWR_IO20_P LWR_IO18_P LWR_IO18_N LWR_IO19_P LWR_IO19_N LWR_IO20_N LWR_IO29_N LWR_IO29_P LWR_IO21_P LWR_IO21_N LWR_IO24_P LWR_IO22_P LWR_IO22_N LWR_IO23_P LWR_IO23_N LWR_IO24_N LWR_IO26_N LWR_IO26_P LWR_IO27_N LWR_IO27_P NC LWR_IO30_N LWR_IO30_P LWR_IO28_N LWR_IO28_P GND GND GND GND GND GND GND GND NC = NO CONNECT 1 ENET1 signals may instead be switched to XBRD-9060 I/O Expander module, if installed. Acromag, Inc. Tel: 248-295-1541 http://www.acromag.com - 44 - - 44 - www.acromag.com USER MANUAL XVME-6400 6.2.3.2 P1 VME Connector This standard VME 5-row, 160-pin Harting 02-01-160-2101 connector brings in power and VMEbus signals: ROW/PIN 1 2 3 4 5 6 7 8 9 10 11 12 13 14 15 16 17 18 19 20 21 22 23 24 25 26 27 28 29 30 31 32 Z NC GND NC GND NC GND NC GND NC GND NC GND NC GND NC GND NC GND NC GND NC GND NC GND NC GND NC GND NC GND NC GND A DO0 DO1 DO2 DO3 DO4 DO5 DO6 DO7 GND SYSCLK GND DS1# DS0# WRITE# GND DTACK# GND AS# GND IACK# IACKIN# IACKOUT# AM4 A07 A06 A05 A04 A03 A02 A01 -12V +5V B BBSY# BCLR# ACFAIL# BG0IN# BG0OUT# BG1IN# BG1OUT# BG2IN# BG2OUT# BG3IN# BG3OUT# BR0# BR1# BR2# BR3# AM0 AM1 AM2 AM3 GND NC NC GND IRQ7# IRQ6# IRQ5# IRQ4# IRQ3# IRQ2# IRQ1# NC +5V C D08 D09 D10 D11 D12 D13 D14 D15 GND SYSFAIL# BERR# SYSRESET# LWORD# AM5 A23 A22 A21 A20 A19 A18 A17 A16 A15 A14 A13 A12 A11 A10 A09 A08 +12V +5V D +5V GND NC NC NC NC NC NC GAP# GA0# GA1# +3.3V1 GA2# +3.3V1 GA3# +3.3V1 GA4# +3.3V1 NC +3.3V1 NC +3.3V1 NC +3.3V1 NC +3.3V1 NC +3.3V1 NC +3.3V1 GND +5V NC = NO CONNECT 1 The XVME-6400 will use +3.3V from the backplane, if present, but it is not required. 6.2.3.3 P2 VME Connector (Standard I/O) Acromag, Inc. Tel: 248-295-1541 http://www.acromag.com - 45 - - 45 - www.acromag.com USER MANUAL XVME-6400 This standard VME 5-row, 160-pin Harting 02-01-160-2101 connector brings in standard PC I/O, as well as the Upper Site's PMC I/O. Note: The signals on the 'A' and 'Z' rows is not available when installed in a legacy, 3-row backplane. ROW/PIN 1 2 3 4 5 6 7 8 9 10 11 12 13 14 15 16 17 18 19 20 21 22 23 24 25 26 27 28 29 30 31 32 1 Z UPR_IO0_P GND UPR_IO0_N GND UPR_IO1_P GND UPR_IO1_N GND UPR_IO2_P GND UPR_IO2_N GND UPR_IO3_P GND UPR_IO3_N GND UPR_IO4_P GND UPR_IO4_N GND UPR_IO5_P GND UPR_IO5_N GND UPR_IO6_P GND UPR_IO6_N GND UPR_IO7_P GND UPR_IO7_N GND A SATA_TX2_P SATA_TX2_N GND SATA_RX2_P SATA_RX2_N UPR_IO16_N SATA_TX3_P SATA_TX3_N UPR_IO24_P SATA_RX3_P SATA_RX3_N UPR_IO24_N USB_P4_P USB_P4_N UPR_IO25_P USB_P5_P USB_P5_N UPR_IO25_N USB_+5V USB_+5V UPR_IO26_P UPR_IO26_N UPR_IO27_P UPR_IO27_N UPR_IO28_P UPR_IO28_N UPR_IO29_P UPR_IO29_N UPR_IO30_P UPR_IO30_N UPR_IO31_P UPR_IO31_N B +5V GND VME_RETRY# VME_A24 VME_A25 VME_A26 VME_A27 VME_A28 VME_A29 VME_A30 VME_A31 GND +5V VME_D16 VME_D17 VME_D18 VME_D19 VME_D20 VME_D21 VME_D22 VME_D23 GND VME_D24 VME_D25 VME_D26 VME_D27 VME_D28 VME_D29 VME_D30 VME_D31 GND +5V C AUD_OUT_R AUD_OUT_L AUD_GND AUD_IN_L AUD_IN_R UPR_IO16_P UPR_IO17_N UPR_IO17_P VGA_RED VGA_GRN VGA_BLUE VGA_VSYNC VGA_HSYNC UPR_IO18_N VGA_I2C_DAT VGA_I2C_CLK UPR_IO18_P COM2_TX COM2_TX-1 UPR_IO19_N COM2_RX COM2_RX-1 UPR_IO19_P UPR_IO20_N UPR_IO20_P UPR_IO21_N UPR_IO21_P UPR_IO22_N UPR_IO22_P UPR_IO15_N UPR_IO23_P UPR_IO23_N D DVI_P0_P DVI_P0_N GND DVI_P1_P DVI_P1_N GND DVI_P2_P DVI_P2_N GND DVI_CLK_P DVI_CLK_N GND DVI_HPD DVI_SDA DVI_SCL UPR_IO8_P UPR_IO8_N UPR_IO9_P UPR_IO9_N UPR_IO10_P UPR_IO1R_N UPR_IO11_P UPR_IO11_N UPR_IO12_P UPR_IO12_N UPR_IO13_P UPR_IO13_N UPR_IO14_P UPR_IO14_N UPR_IO15_P GND +5V TX- and RX- only used when serial port is in RS-422/RS-485 mode Acromag, Inc. Tel: 248-295-1541 http://www.acromag.com - 46 - - 46 - www.acromag.com USER MANUAL XVME-6400 6.2.3.4 P2 VME Connector (XVME-6300 Compatible I/O - Consult Factory for this Option) A factory build option makes the P2 I/O compatible with the XVME-6300 pinout, although some PMC I/O signal differences remain from those on the XVME-6300. The highlighted pins below show the pin differences from the standard XVME-6400 I/O. ROW/PIN 6 7 8 9 12 14 15 16 17 18 19 20 21 22 23 24 25 26 27 28 29 30 31 32 A GND C NC NC GND D GND GND GND GND GND GND GND GND COM1_TX COM1_RTS#_TX-1 GND COM1_RX COM1_DSR#_RX-1 GND COM1_CTS# COM1_DTR# GND NC NC NC NC GND GND GPIN0 GPIN1 GPIN2 GPIN3 GPOUT0 GPOUT1 GPOUT2 GPOUT3 NC NC = NO CONNECT 1 TX- and RX- only used when serial ports is in RS-422/RS-485 mode. RTS# and DSR# are available in RS-232 mode. Acromag, Inc. Tel: 248-295-1541 http://www.acromag.com - 47 - - 47 - www.acromag.com USER MANUAL XVME-6400 6.2.4 Lower PMC/XMC Site 6.2.4.1 J11 Lower PMC Site PCI-X Connector This standard 64-pin Molex 71439-0164 connector interfaces the PCI-X bus to the Lower PMC module. PIN 1 3 5 7 9 11 13 15 17 19 21 23 25 27 29 31 33 35 37 39 41 43 45 47 49 51 53 55 57 59 61 63 SIGNAL JTAG_TCK GND INTC# NC INTA# GND CLK_PCI GND REQ# +3.3V AD(28) AD(25) GND AD(22) AD(19) +3.3V FRAME# GND DEVSEL# PCIXCAP NC PAR +3.3V AD(12) AD(9) GND AD(6) AD(4) +3.3V AD(2) AD(0) GND SIGNAL -12V INTB# INTD# +5V NC NC GND GNT1# +5V AD(31) AD(27) GND C/BE(3)# AD(21) +5V AD(17) GND IRDY# +5V PU to 3.3V NC GND AD(15) AD(11) +5V C/BE(0)# AD(5) GND AD(3) AD(1) +5V REQ64# PIN 2 4 6 8 10 12 14 16 18 20 22 24 26 28 30 32 34 36 38 40 42 44 46 48 50 52 54 56 58 60 62 64 NC = NO CONNECT PU = PULLUP Acromag, Inc. Tel: 248-295-1541 http://www.acromag.com - 48 - - 48 - www.acromag.com USER MANUAL XVME-6400 6.2.4.2 J12 Lower PMC Site PCI-X Connector This standard 64-pin Molex 71439-0164 connector interfaces the PCI-X bus to the Lower PMC module. PIN 1 3 5 7 9 11 13 15 17 19 21 23 25 27 29 31 33 35 37 39 41 43 45 47 49 51 53 55 57 59 61 63 SIGNAL +12V JTAG_TMS JTAG_TDI GND NC PU to 3.3V RST# +3.3V NC AD(30) GND AD(24) AD(22) (IDSEL#) +3.3V AD(18) AD(16) GND TRDY# GND PERR# +3.3V C/BE(1)# AD(14) M66EN AD(8) AD(7) +3.3V NC NC GND ACK64# GND SIGNAL NC JTAG_TDO GND NC NC +3.3V GND GND GND AD(29) AD(26) +3.3V AD(23) AD(20) GND C/BE(2)# NC +3.3V STOP# GND SERR# GND AD(13) AD(10) +3.3V NC NC GND NC NC +3.3V NC PIN 2 4 6 8 10 12 14 16 18 20 22 24 26 28 30 32 34 36 38 40 42 44 46 48 50 52 54 56 58 60 62 64 NC = NO CONNECT PU = PULLUP Acromag, Inc. Tel: 248-295-1541 http://www.acromag.com - 49 - - 49 - www.acromag.com USER MANUAL XVME-6400 6.2.4.3 J13 Lower PMC Site PCI-X Connector This standard 64-pin Molex 71439-0164 connector interfaces the PCI-X bus to the Lower PMC module. PIN 1 3 5 7 9 11 13 15 17 19 21 23 25 27 29 31 33 35 37 39 41 43 45 47 49 51 53 55 57 59 61 63 SIGNAL NC GND C/BE(6)# C/BE(4)# +3.3V AD(63) AD(61) GND AD(59) AD(57) +3.3V AD(55) AD(53) GND AD(51) AD(49) GND AD(47) AD(45) +3.3V AD(43) AD(41) GND AD(39) AD(37) GND AD(35) AD(33) +3.3V NC NC GND SIGNAL GND C/BE(7)# C/BE(5)# GND PAR64 AD(62) GND AD(60) AD(58) GND AD(56) AD(54) GND AD(52) AD(50) GND AD(48) AD(46) GND AD(44) AD(42) GND AD(40) AD(38) GND AD(36) AD(34) GND AD(32) NC GND NC PIN 2 4 6 8 10 12 14 16 18 20 22 24 26 28 30 32 34 36 38 40 42 44 46 48 50 52 54 56 58 60 62 64 NC = NO CONNECT Acromag, Inc. Tel: 248-295-1541 http://www.acromag.com - 50 - - 50 - www.acromag.com USER MANUAL XVME-6400 6.2.4.4 J14 Lower PMC Site Rear-I/O Connector This standard 64-pin Molex 71439-0164 connector interfaces the Rear I/O from the Lower PMC/XMC module's P4 connector. The corresponding signals can be found on the VME P0 connector. The signals are routed as 100ohm differential pairs. PIN 1 3 5 7 9 11 13 15 17 19 21 23 25 27 29 31 33 35 37 39 41 43 45 47 49 51 53 55 57 39 61 63 Acromag, Inc. Tel: 248-295-1541 http://www.acromag.com SIGNAL LWR_IO0_P LWR_IO0_N LWR_IO2_P LWR_IO2_N LWR_IO4_P LWR_IO4_N LWR_IO6_P LWR_IO6_N LWR_IO8_P LWR_IO8_N LWR_IO10_P LWR_IO10_N LWR_IO12_P LWR_IO12_N LWR_IO14_P LWR_IO14_N LWR_IO16_P LWR_IO16_N LWR_IO18_P LWR_IO18_N LWR_IO20_P LWR_IO20_N LWR_IO22_P LWR_IO22_N LWR_IO24_P LWR_IO24_N LWR_IO26_P LWR_IO26_N LWR_IO28_P LWR_IO28_N LWR_IO30_P LWR_IO30_N SIGNAL LWR_IO1_P LWR_IO1_N LWR_IO3_P LWR_IO3_N LWR_IO5_P LWR_IO5_N LWR_IO7_P LWR_IO7_N LWR_IO9_P LWR_IO9_N LWR_IO11_P LWR_IO11_N LWR_IO13_P LWR_IO13_N LWR_IO15_P LWR_IO15_N LWR_IO17_P LWR_IO17_N LWR_IO19_P LWR_IO19_N LWR_IO21_P LWR_IO21_N LWR_IO23_P LWR_IO23_N LWR_IO25_P LWR_IO25_N LWR_IO27_P LWR_IO27_N LWR_IO29_P LWR_IO29_N LWR_IO31_P LWR_IO31_N - 51 - - 51 - PIN 2 4 6 8 10 12 14 16 18 20 22 24 26 28 30 32 34 36 38 40 42 44 46 48 50 52 54 56 58 60 62 64 www.acromag.com USER MANUAL XVME-6400 6.2.4.5 J15 Lower XMC Site PCIe Connector This standard 114-pin Samtec ASP-103612-04 connector connects the PEG (PCIe) interface from the CPU to the Lower XMC module. ROW/PIN 1 2 3 4 5 6 7 8 9 10 11 12 13 14 15 16 17 18 19 A PEG0_RX_P B PEG0_RX_N C +3.3V D PEG1_RX_P E PEG1_RX_N F +5V GND GND NC GND GND PLT_RST# PEG2_RX_P PEG2_RX_N +3.3V PEG3_RX_P PEG3_RX_N +5V GND GND JTAG_TCK GND GND NC PEG4_RX_P PEG4_RX_N +3.3V PEG5_RX_P PEG5_RX_N +5V GND GND JTAG_TMS GND GND +12V PEG6_RX_P PEG6_RX_N +3.3V PEG7_RX_P PEG7_RX_N +5V GND GND JTAG_TDI GND GND -12V NC NC NC NC NC +5V GND GND JTAG_TDO GND GND GND (GA0#) PEG0_TX_P PEG0_TX_N NC PEG1_TX_P PEG1_TX_N +5V GND GND GND (GA1#) GND GND NC PEG2_TX_P PEG2_TX_N NC PEG3_TX_P PEG3_TX_N +5V GND GND GND (GA2#) GND GND SMB_DATA PEG4_TX_P PEG4_TX_N NC PEG5_TX_P PEG5_TX_N +5V GND GND XMCA_WP GND GND SMB_CLK PEG6_TX_P PEG6_TX_N NC PEG7_TX_P PEG7_TX_N NC GND GND NC GND GND NC PEG_CLK_P PEG_CLK_N NC NC NC NC NC = NO CONNECT 6.2.4.6 J8 Lower PMC/XMC Site JTAG Connector This 6-pin Molex 78171-5006 connector carries the Lower PMC or XMC module's JTAG interface. The VREF voltage can be selected between 2.5V or 3.3V with SW5. PIN 1 2 3 4 5 6 Acromag, Inc. Tel: 248-295-1541 http://www.acromag.com SIGNAL JTAG_TDI JTAG_TDO GND JTAG_TCK JTAG_TMS JTAG_VREF - 52 - - 52 - www.acromag.com USER MANUAL XVME-6400 6.2.4.7 J16 Lower XMC Site Rear I/O Connector This standard 114-pin Samtec ASP-103612-04 connector can, with a build option bring the Lower XMC module's P6 I/O to the XVME-6400's P0 connector instead of the XMC/PMC module's P4 connector. The signals are routed as 100ohm differential pairs. Consult Factory for this option. ROW/PIN A B C D E F 1 2 3 4 5 6 7 8 9 10 11 12 13 14 15 16 17 18 19 LWR_IO0_P LWR_IO0_N NC LWR_IO1_P LWR_IO1_N NC GND GND NC GND GND NC LWR_IO2_P LWR_IO2_N NC LWR_IO3_P LWR_IO3_N NC GND GND NC GND GND NC LWR_IO4_P LWR_IO4_N NC LWR_IO5_P LWR_IO5_N NC GND GND NC GND GND NC LWR_IO6_P LWR_IO6_N NC LWR_IO7_P LWR_IO7_N NC GND GND LWR_IO30_N GND GND LWR_IO31_N LWR_IO8_P LWR_IO8_N LWR_IO30_P LWR_IO9_P LWR_IO9_N LWR_IO31_P GND GND LWR_IO28_N GND GND LWR_IO29_N LWR_IO10_P LWR_IO10_N LWR_IO28_P LWR_IO11_P LWR_IO11_N LWR_IO29_P GND GND LWR_IO26_N GND GND LWR_IO27_N LWR_IO12_P LWR_IO12_N LWR_IO26_P LWR_IO13_P LWR_IO13_N LWR_IO27_P GND GND LWR_IO24_N GND GND LWR_IO25_N LWR_IO14_P LWR_IO14_N LWR_IO24_P LWR_IO15_P LWR_IO15_N LWR_IO25_P GND GND LWR_IO22_N GND GND LWR_IO23_N LWR_IO16_P LWR_IO16_N LWR_IO22_P LWR_IO17_P LWR_IO17_N LWR_IO23_P GND GND LWR_IO20_N GND GND LWR_IO21_N LWR_IO18_P LWR_IO18_N LWR_IO20_P LWR_IO19_P LWR_IO19_N LWR_IO21_P NC = NO CONNECT Acromag, Inc. Tel: 248-295-1541 http://www.acromag.com - 53 - - 53 - www.acromag.com USER MANUAL XVME-6400 6.2.5 Upper PMC/XMC Site 6.2.5.1 J21 Upper PMC Site PCI-X Connector This standard 64-pin Molex 71439-0164 connector interfaces the PCI-X bus to the Lower PMC module. PIN 1 3 5 7 9 11 13 15 17 19 21 23 25 27 29 31 33 35 37 39 41 43 45 47 49 51 53 55 57 59 61 63 SIGNAL JTAG_TCK GND INTA# NC INTC# GND CLK_PCI GND REQ# +3.3V AD(28) AD(25) GND AD(22) AD(19) +3.3V FRAME# GND DEVSEL# PCIXCAP NC PAR +3.3V AD(12) AD(9) GND AD(6) AD(4) +3.3V AD(2) AD(0) GND SIGNAL -12V INTD# INTB# +5V NC NC GND GNT1# +5V AD(31) AD(27) GND C/BE(3)# AD(21) +5V AD(17) GND IRDY# +5V PU to 3.3V NC GND AD(15) AD(11) +5V C/BE(0)# AD(5) GND AD(3) AD(1) +5V REQ64# PIN 2 4 6 8 10 12 14 16 18 20 22 24 26 28 30 32 34 36 38 40 42 44 46 48 50 52 54 56 58 60 62 64 NC = NO CONNECT PU = PULLUP Acromag, Inc. Tel: 248-295-1541 http://www.acromag.com - 54 - - 54 - www.acromag.com USER MANUAL XVME-6400 6.2.5.2 J22 Upper PMC Site PCI-X Connector This standard 64-pin Molex 71439-0164 connector interfaces the PCI-X bus to the Lower PMC module. PIN 1 3 5 7 9 11 13 15 17 19 21 23 25 27 29 31 33 35 37 39 41 43 45 47 49 51 53 55 57 59 61 63 SIGNAL +12V JTAG_TMS JTAG_TDI GND NC PU to 3.3V RST# +3.3V NC AD(30) GND AD(24) AD(23) (IDSEL#) +3.3V AD(18) AD(16) GND TRDY# GND PERR# +3.3V C/BE(1)# AD(14) M66EN AD(8) AD(7) +3.3V NC NC GND ACK64# GND SIGNAL NC JTAG_TDO GND NC NC +3.3V GND GND GND AD(29) AD(26) +3.3V AD(23) AD(20) GND C/BE(2)# NC +3.3V STOP# GND SERR# GND AD(13) AD(10) +3.3V NC NC GND NC NC +3.3V NC PIN 2 4 6 8 10 12 14 16 18 20 22 24 26 28 30 32 34 36 38 40 42 44 46 48 50 52 54 56 58 60 62 64 NC = NO CONNECT PU = PULLUP Acromag, Inc. Tel: 248-295-1541 http://www.acromag.com - 55 - - 55 - www.acromag.com USER MANUAL XVME-6400 6.2.5.3 J23 Upper PMC Site PCI-X Connector This standard 64-pin Molex 71439-0164 connector interfaces the PCI-X bus to the Lower PMC module. PIN 1 3 5 7 9 11 13 15 17 19 21 23 25 27 29 31 33 35 37 39 41 43 45 47 49 51 53 55 57 59 61 63 SIGNAL NC GND C/BE(6)# C/BE(4)# +3.3V AD(63) AD(61) GND AD(59) AD(57) +3.3V AD(55) AD(53) GND AD(51) AD(49) GND AD(47) AD(45) +3.3V AD(43) AD(41) GND AD(39) AD(37) GND AD(35) AD(33) +3.3V NC NC GND SIGNAL GND C/BE(7)# C/BE(5)# GND PAR64 AD(62) GND AD(60) AD(58) GND AD(56) AD(54) GND AD(52) AD(50) GND AD(48) AD(46) GND AD(44) AD(42) GND AD(40) AD(38) GND AD(36) AD(34) GND AD(32) NC GND NC PIN 2 4 6 8 10 12 14 16 18 20 22 24 26 28 30 32 34 36 38 40 42 44 46 48 50 52 54 56 58 60 62 64 NC = NO CONNECT Acromag, Inc. Tel: 248-295-1541 http://www.acromag.com - 56 - - 56 - www.acromag.com USER MANUAL XVME-6400 6.2.5.4 J24 Upper PMC Site Rear I/O Connector This standard 64-pin Molex 71439-0164 connector brings the Rear I/O from the PMC/XMC module's P4 connector. The corresponding signals can be found on the VME P2 connector. The signals are routed as 100ohm differential pairs. PIN 1 3 5 7 9 11 13 15 17 19 21 23 25 27 29 31 33 35 37 39 41 43 45 47 49 51 53 55 57 59 61 63 Acromag, Inc. Tel: 248-295-1541 http://www.acromag.com SIGNAL UPR_IO0_P UPR_IO0_N UPR_IO2_P UPR_IO2_N UPR_IO4_P UPR_IO4_N UPR_IO6_P UPR_IO6_N UPR_IO8_P UPR_IO8_N UPR_IO10_P UPR_IO10_N UPR_IO12_P UPR_IO12_N UPR_IO14_P UPR_IO14_N UPR_IO16_P UPR_IO16_N UPR_IO18_P UPR_IO18_N UPR_IO20_P UPR_IO20_N UPR_IO22_P UPR_IO22_N UPR_IO24_P UPR_IO24_N UPR_IO26_P UPR_IO26_N UPR_IO28_P UPR_IO28_N UPR_IO30_P UPR_IO30_N SIGNAL UPR_IO1_P UPR_IO1_N UPR_IO3_P UPR_IO3_N UPR_IO5_P UPR_IO5_N UPR_IO7_P UPR_IO7_N UPR_IO9_P UPR_IO9_N UPR_IO11_P UPR_IO11_N UPR_IO13_P UPR_IO13_N UPR_IO15_P UPR_IO15_N UPR_IO17_P UPR_IO17_N UPR_IO19_P UPR_IO19_N UPR_IO21_P UPR_IO21_N UPR_IO23_P UPR_IO23_N UPR_IO25_P UPR_IO25_N UPR_IO27_P UPR_IO27_N UPR_IO29_P UPR_IO29_N UPR_IO31_P UPR_IO31_N - 57 - - 57 - PIN 2 4 6 8 10 12 14 16 18 20 22 24 26 28 30 32 34 36 38 40 42 44 46 48 50 52 54 56 58 60 62 64 www.acromag.com USER MANUAL XVME-6400 6.2.5.5 J25 Upper XMC Site PCIe Connector This standard 114-pin Samtec ASP-103612-04 connector connects the PEG (PCIe) interface from the CPU to the Upper XMC module. ROW/PIN 1 2 3 4 5 6 7 8 9 10 11 12 13 14 15 16 17 18 19 A PEG8_RX_P B PEG8_RX_N C +3.3V D PEG9_RX_P E PEG9_RX_N F +5V GND GND NC GND GND PLT_RST# PEG10_RX_P PEG10_RX_N +3.3V PEG11_RX_P PEG11_RX_N +5V GND GND JTAG_TCK GND GND NC PEG12_RX_P PEG12_RX_N +3.3V PEG13_RX_P PEG13_RX_N +5V GND GND JTAG_TMS GND GND +12V PEG14_RX_P PEG14_RX_N +3.3V PEG15_RX_P PEG15_RX_N +5V GND GND JTAG_TDI GND GND -12V NC NC NC NC NC +5V GND GND JTAG_TDO GND GND GND (GA0#) PEG0_TX_P PEG0_TX_N NC PEG1_TX_P PEG1_TX_N +5V GND GND GND (GA1#) GND GND XMC_SEL# PEG2_TX_P PEG2_TX_N NC PEG3_TX_P PEG3_TX_N +5V GND GND GND (GA2#) GND GND SMB_DATA PEG4_TX_P PEG4_TX_N NC PEG5_TX_P PEG5_TX_N +5V GND GND XMCA_WP GND GND SMB_CLK PEG6_TX_P PEG6_TX_N NC PEG7_TX_P PEG7_TX_N NC GND GND NC GND GND NC PEG_CLK_P PEG_CLK_N NC NC NC NC NC = NO CONNECT XMC_SEL# = Auto-switches mux to route PEG lines to XMC instead of PMC bridge when XMC module is installed 6.2.5.6 J9 Upper PMC/XMC Site JTAG Connector This 6-pin Molex 78171-5006 connector carries the Lower PMC or XMC module's JTAG interface. The VREF voltage can be selected between 2.5V or 3.3V with SW5. PIN 1 2 3 4 5 6 Acromag, Inc. Tel: 248-295-1541 http://www.acromag.com SIGNAL JTAG_TDI JTAG_TDO GND JTAG_TCK JTAG_TMS JTAG_VREF - 58 - - 58 - www.acromag.com USER MANUAL XVME-6400 6.2.5.7 J7 Upper PMC/XMC Site Expansion Connector This 60-pin Samtec QSH-030-01-L-D-A-K connector is used for I/O connection to the optional XBRD-9060 I/O Expander module. PIN 1 3 5 7 9 11 13 15 17 19 21 23 25 27 29 31 33 35 37 39 41 43 45 47 49 51 53 55 57 59 SIGNAL ENET1_MDI2_N1 ENET1_MDI2_P1 GND ENET1_MDI3_N1 ENET1_MDI3_P1 GND SATA1_TX_N SATA1_TX_P GND SATA1_RX_N SATA1_RX_P GND Reserved Reserved GND Reserved Reserved GND USB2_N USB2_P SMB_CLK +5V USB_OC# +5V PLT_RST# +3.3V NC +3.3V ENET1_SEL# +3.3V SIGNAL ENET1_MDI0_N1 ENET1_MDI0_P1 GND ENET1_MDI1_N1 ENET1_MDI1_P1 GND SATA0_TX_N SATA0_TX_P GND SATA0_RX_N SATA0_RX_P GND Reserved Reserved GND Reserved Reserved GND USB3_N USB3_P SMB_DATA +5V ENET1_ACT# ENET1_LINK# COM3_TXD +3.3V COM3_RXD GND +3.3V +1.5V PIN 2 4 6 8 10 12 14 16 18 20 22 24 26 28 30 32 34 36 38 40 42 44 46 48 50 52 54 56 58 60 NC = NO CONNECT 1 ENET1 signals may instead be switched to XBRD-9060 I/O Expander module, if installed. 2 ENET1_SEL# Auto-switches ENET1 signals to XBRD-9060 when low. Acromag, Inc. Tel: 248-295-1541 http://www.acromag.com - 59 - - 59 - www.acromag.com USER MANUAL XVME-6400 6.2.6 Front Panel Connectors 6.2.6.1 J5 COM/USB/VGA Connector This standard 26-pin D-SUB, TE 5748481-5 connector brings 2 USB, 1 VGA, and 1 RS-232 Serial Ports out the front panel. These can be accessed through standard connectors by using the supplied shielded dongle cable (P/N 4001128). Note: The DB-9 serial connector on this dongle cable is wired as a DTE port. PIN 1 2 3 4 5 6 7 8 9 10 11 12 13 14 15 16 17 18 19 20 21 22 23 24 25 26 Acromag, Inc. Tel: 248-295-1541 http://www.acromag.com SIGNAL GND USB0_P USB0_N GND +5V USB POWER VGA_I2C_DAT A VGA_RED VGA_GRN VGA_BLUE GND USB1_P USB1_N GND +5V VGA POWER VGA_I2C_CLK GND_RED GND_GREEN GND_BLUE COM4_CTS# COM4_RTS# COM4_DSR# COM4_DTR# COM4_TXD COM4_RXD VGA_VSYNC VGA_HSYNC - 60 - - 60 - www.acromag.com USER MANUAL XVME-6400 6.2.6.2 J4 Dual Ethernet RJ Point 5 Connector This 16-pin RJ-Point-Five Connector, TE 2170129-1, brings 2 Gigabit Ethernet ports out the front panel. These can be accessed through standard RJ-45 connectors by using the supplied adapter cables. Note: Patch cables of various lengths with RJ Point 5 connectors on one end and standard RJ-45 connectors on the other are available from TE and Stewart Connector. PIN 1A 2A 3A 4A 5A 6A 7A 8A SIGNAL ENET2_MX0_P ENET2_MX0_N ENET2_MX1_P ENET2_MX1_N ENET2_MX2_P ENET2_MX2_N ENET2_MX3_P ENET2_MX3_N 1B 2B 3B 4B 5B 6B 7B 8B ENET3_MX0_P ENET3_MX0_N ENET3_MX1_P ENET3_MX1_N ENET3_MX2_P ENET3_MX2_N ENET3_MX3_P ENET3_MX3_N 6.2.7 P3 CPU Fan Connector This 5-pin connector, Molex 53398-0571, can be used to power a 5V fan in situations where more cooling is necessary. PIN 1 2 3 4 5 Acromag, Inc. Tel: 248-295-1541 http://www.acromag.com SIGNAL NO CONNECT FAN TACH GND FAN PWM +5V - 61 - - 61 - www.acromag.com USER MANUAL XVME-6400 6.3 P2 I/O Signal Requirements This section provides the information necessary to interface with the P2 I/O signals, without using a XVME-9640 RTM module. 6.3.1 VGA For proper operation of the VGA display, 150ohm termination to GND is required on the CRT_REAR_RED, CRT_REAR_GREEN and CRT_REAR_BLUE signals. Failure to apply this termination may result in poor display quality and improper operation of Intel® HD Graphics control panel in Windows®. Also for proper monitor detection, the REAR_DDC_CLK and REAR_DDC_DATA lines should be level shifted to +5V. See the following for suggested interface schematic: 6.3.2 ESD It is strongly suggested that ESD protection be included in interface circuitry on the VGA and USB ports. Failure to do so may cause damage the XVME6400 in the event of an ESD discharge into the I/O pins. Acromag, Inc. Tel: 248-295-1541 http://www.acromag.com - 62 - - 62 - www.acromag.com USER MANUAL XVME-6400 6.4 Power Requirements The power required to properly operate the XVME-6400 module will vary depending on many variables, including the operating system, application software, and the components that the module is integrated with. See notes below for defined variables used to measure the following power values: +5VDC (+5/-3%) when the backplane supplies +3.3V S0 Idle1: 27.8W 73.5W/86.1W S0 Typ3: 50W 63W/73.5W S0 Typ3: 50W 50.4W/57.8W S0 Typ3: 35W All configurations i7-4700EQ CPU S0 Max2: i7-4700EQ CPU (cTDP = 37W) S0 Max2: i5-4402E CPU S0 Max2: For systems with backplanes that do not supply 3.3V, add ~2.5W to the above 5V values. +3.3VDC (+5/-2%) when the backplane supplies +3.3V All configurations S0 Idle1: 2.5W 2 S0 Max : 2.6W S0 Typ3: 2.5W 1 S0 Idle was measured with module operating at 23°C ambient with 300LFM airflow, using Windows 8.1 Operating System, idle at desktop with no active applications running. 16GB RAM. One connected SATA device, one USB keyboard, one USB mouse, VGA monitor. No PMC/XMC cards installed. 2 S0 Max was measured with module operating at 40°C ambient with 300LFM airflow, using Windows 8.1 Operating System. Prime95 Large FFT torture test stressing all CPU cores at max. 16GB RAM. 1 connected SATA device, one USB keyboard, one USB mouse, VGA monitor, DVI monitor. No PMC/XMC cards installed. At temperatures above this, the CPU throttling during heavy CPU usage reduces the maximum power consumed more than it is raised from the increase in temperature. With Turbo on, power is shown as PL1/PL2, where PL1 is the long-term power used, and PL2 is a short-term (typically <30 sec) power draw during turbo bursts. If Turbo is not used the board should not exceed the PL1 power, but performance may be impacted. 3 S0 Typ was measured with module operating at 23°C ambient with 300LFM airflow, using Windows 8.1 Operating System. Passmark Burn-In test running the following tests: CPU, Memory, 2D Graphics, 3D Graphics, Disk, and Network. 16GB RAM. 1 connected SATA device, one USB keyboard, one USB mouse, VGA monitor, DVI monitor. No PMC/XMC cards installed. Acromag, Inc. Tel: 248-295-1541 http://www.acromag.com - 63 - - 63 - www.acromag.com USER MANUAL XVME-6400 6.5 Environmental Considerations Operating Temperature: 0°C to 70°C (Standard Air-Cooled models)1 -40°C to 75°C (Extended Air-Cooled models)1 -40°C to TBD°C (Conduction-Cooled models)2 1 Measured as Ambient Air Temperature. 300LFM minimum air-flow required. Designed to meet this temperature specification. Tested under Windows 8.1 with Passmark BurnInTest V7.1, running CPU, Memory, and 3D Graphics tests simultaneously. During application testing CPU temp should be closely monitored for max junction temp of 100°C using a program such as Argus Monitor or Open Hardware Monitor. 2 Measured at junction of XVME-6400's conduction rail and the conduction chassis. Board mounted in ARCX conduction enclosure. Every board sold tested to ensure this temperature specification. Tested under Windows 8.1 with Passmark BurnInTest V7.1 running CPU, Memory, Disk, and 3D Graphics tests simultaneously. During application testing CPU temp should be closely monitored for max junction temp of 100°C using a program such as Argus Monitor or Open Hardware Monitor. Note: CPU frequency throttling will occur if the CPU Tj temperature reaches 100°C. This is an effective mechanism to keep the unit from overheating. A small amount of intermittent throttling at higher ambient temperatures is to be expected and does not greatly affect system performance. For systems that need maximum performance at higher ambient temperatures and can handle the XVME-6400 consuming an extra slot, a larger heatsink is available as an accessory. Consult factory for more information. WARNING: If airflow is not adequate, throttling can reach maximum and Tj temperature could exceed 100C resulting in system instability. This temperature should be monitored in end user system with user application software running to determine if final thermal solution is adequate. Relative Humidity: 5% to 95% Non-condensing Storage Temperature: -40°C to 85°C (Air-Cooled models) -55°C to 105°C (Conduction-Cooled models) Shock, Non-Operating: 50g peak acceleration, 11ms duration MIL-STD-202G Method 213B. Vibration, Operating: 11.96g RMS, 50-20,000Hz, each axis, MIL-STD-202G Method 214A. Acromag, Inc. Tel: 248-295-1541 http://www.acromag.com - 64 - - 64 - www.acromag.com USER MANUAL XVME-6400 6.6 Reliability Prediction MTBF (Mean Time Between Failure): MTBF in hours using MIL-HDBK-217F, FN2. Per MIL-HDBK-217, Ground Benign, Controlled, GBGC Table 6.6.a MTBF 1 Temperature MTBF (Hours) MTBF (Years) Failure Rate (FIT1) 25°C 177,026 20.2 5,648.9 40°C 137,429 15.7 TBD FIT is Failures in 109 hours. Acromag, Inc. Tel: 248-295-1541 http://www.acromag.com - 65 - - 65 - www.acromag.com USER MANUAL XVME-6400 6.7 XVME-6400 Certificate of Volatility Certificate of Volatility Acromag Model XVME-64XX-XXXXX-XX Manufacturer: Acromag, Inc. 30765 Wixom Rd Wixom, MI 48393 Volatile Memory Does this product contain Volatile memory (i.e. Memory of whose contents are lost when power is removed) ■ Yes □ No Type (SRAM, SDRAM, etc.) User Modifiable Function: Process to Sanitize: Size: SDRAM ■ Yes Storage of code/data Power Down for CPU Up to 16GB □ No (depends on SODIMM modules installed) Type (SRAM, SDRAM, etc.) PCH internal CMOS SRAM Size: 256 bytes User Modifiable ■ Yes □ No Function: Data storage for system/BIOS Process to Sanitize: Remove Battery BT1 from socket. Non-Volatile Memory Does this product contain Non-Volatile memory (i.e. Memory of whose contents is retained when power is removed) ■ Yes □ No Type(EEPROM, Flash, etc.) Size: User Modifiable Function: Process to Sanitize: Flash 16Mbyte ■ Yes Storage of Code and Data Clear Flash memory by □ No for system/BIOS erasing all sectors of the Flash Type(EEPROM, Flash, etc.) Size: User Modifiable Function: Process to Sanitize: U47: Ethernet Firmware/MAC ID EEPROM (Qty: 3) 16Kbytes ■ Yes Clear EEPROM memory U14, U42: PEX8114 Bridge Config each □ No by erasing all bytes. Type(EEPROM, Flash, etc.) Size: User Modifiable Function: Process to Sanitize: U20: Module ID and/or User Data EEPROM 256bytes ■ Yes Clear EEPROM memory □ No by erasing all bytes. Acromag Representative Name: Joseph Primeau Title: Dir. of Sales and Marketing Email: [email protected] Acromag, Inc. Tel: 248-295-1541 http://www.acromag.com - 66 - Office Phone: 248-295-0310 - 66 - Office Fax: 248-624-9234 www.acromag.com USER MANUAL XVME-6400 7.0 XBRD-9060 I/O Expander Accessory Module The optional XBRD-9060 module may be installed in the Upper Site of an aircooled XVME-6400 to bring more I/O to the front panel, as well as allow mSATA SSD modules to be added for storage. The following I/O is available on the front panel of the XBRD-9060: One Gigabit Ethernet port via a standard RJ-45 connector. When this port is enabled on the XBRD-9060 module, one of the Ethernet ports on the P0 connector is disabled. One RS-232 serial port. This port only contains TX/RX signals. It is brought out on a mini USB-B connector, but an adapter cable is included with the module for connection using a standard DB-9 connector. Two USB 3.0/2.0 ports. These ports use standard USB-A connectors and can operate as either USB 3.0 or USB 2.0 connections. The XBRD-9060 also contains 2 mSATA sockets that allow 2 SSD drives to be added to the XVME-6400 while still remaining within a single VME slot. Using the software RAID functionality of the QM87 PCH, these drives can even be setup as a RAID0/1 array if redundancy or extra speed is desired. 7.1 Ordering Information When ordering the XBRD-9060-X I/O Expander module, please select from and specify the available solder option choice (X) as defined below: Acromag, Inc. Tel: 248-295-1541 http://www.acromag.com Select the solder option (X): L: Leaded solder LF: Lead-free solder - 67 - - 67 - www.acromag.com USER MANUAL XVME-6400 7.2 Hardware Information and Configuration 7.2.1 Switch SW1 Configuration Table 7.2.1.a summarizes the functions, settings, and descriptions for dip switch SW1. Table 7.2..a: XBRD-9060 Configuration Switch SW1 Configuration Switch SW1 Position Function 1-3 Ethernet Port Enable 4-6 Switch Setting 1-2 2-3 4-5 ORB GND 5-6 Description Front Panel Ethernet Port Enabled Front Panel Ethernet Port Disabled ORB GND tied to Digital GND ORB GND Isolated SW1:1-3 is used to configure the front panel Ethernet port. When this port is enabled the ETH1 signals are not available on the XVME-6400's P0 connector. SW1:4-6 is used to configure the isolation of the Front Panel (ORB) GND. 7.3 mSATA Module Installation One or two full-size (51mm) mSATA modules may be installed by using the screws provided. In a high-vibration environment the addition of a removable thread locker, such as Loctite 242, is recommended. For installation of halfsize (26.8mm) mSATA modules please consult factory. 7. 4 Installation onto XVME-6400 The XBRD-9060 is installed onto the XVME-6400 in the same fashion as a PMC/XMC module. First insert the XBRD-9060 through the front panel at an angle, and then bring the back of the module down to seat into the expansion connector. Once the module is seated in the connector, install the four screws provided from the back side of the XVME-6400. In a high-vibration environment the addition of a removable thread locker, such as Loctite 242, is recommended. Acromag, Inc. Tel: 248-295-1541 http://www.acromag.com - 68 - - 68 - www.acromag.com USER MANUAL XVME-6400 7.5 Specifications 7.5.1 Physical The XBRD-9060 dimensions are shown below: Length Width Height from XVME-6400 (includes PCB) 128.0 mm (5.039 in) 74..0 mm (2.913 in) 12.6 mm (0.496 in) Unit Weight 2.3 oz (0.067 kg) Acromag, Inc. Tel: 248-295-1541 http://www.acromag.com - 69 - - 69 - www.acromag.com USER MANUAL XVME-6400 7.5.2 Connector Information 7.5.2.1 J3 Expansion Connector This 60-pin Samtec QTH-030-03-L-D-A-K connector is used for I/O connection to the XVME-6400 CPU module. PIN 1 3 5 7 9 11 13 15 17 19 21 23 25 27 29 31 33 35 37 39 41 43 45 47 49 51 53 55 57 59 SIGNAL ENET1_MDI2_N1 ENET1_MDI2_P1 GND ENET1_MDI3_N1 ENET1_MDI3_P1 GND SATA1_TX_N SATA1_TX_P GND SATA1_RX_N SATA1_RX_P GND Reserved Reserved GND Reserved Reserved GND USB2_N USB2_P SMB_CLK +5V USB_OC# +5V PLT_RST# +3.3V NC +3.3V ENET1_SEL# +3.3V SIGNAL ENET1_MDI0_N1 ENET1_MDI0_P1 GND ENET1_MDI1_N1 ENET1_MDI1_P1 GND SATA0_TX_N SATA0_TX_P GND SATA0_RX_N SATA0_RX_P GND Reserved Reserved GND Reserved Reserved GND USB3_N USB3_P SMB_DATA +5V ENET1_ACT# ENET1_LINK# COM3_TXD +3.3V COM3_RXD GND +3.3V +1.5V PIN 2 4 6 8 10 12 14 16 18 20 22 24 26 28 30 32 34 36 38 40 42 44 46 48 50 52 54 56 58 60 NC = NO CONNECT 1 ENET1 signals are not available when SW1 is in position 2-3. 2 ENET1_SEL# enables ENET1 signals when SW1 is in position 1-2. Acromag, Inc. Tel: 248-295-1541 http://www.acromag.com - 70 - - 70 - www.acromag.com USER MANUAL XVME-6400 7.5.2.2 J7 Ethernet Connector This standard 8-pin RJ-45 connector, Bel Fuse L834-1G1T-S7, is for connection to an Ethernet network. The port can auto-sense 10-Base-T, 100Base-T, and 1000Base-TX connections. LIINK and ACTIVITY LEDs are built-in to the connector. PIN 1 2 3 4 5 6 7 8 1 ENET1 SIGNAL ENET1_MX_P1 ENET1_MX_N1 ENET1_MX1_P1 ENET1_MX2_P1 ENET1_MX2_N1 ENET1_MX1_N1 ENET1_MX3_P1 ENET1_MX3_N1 signals are not available when SW1 is in position 2-3. 7.5.2.3 J2 RS-232 Serial Connector This 5-pin USB-mini-B style connector, TE 1734035-2, is used for the COM3 RS-232 serial port connection. PIN 1 2 3 4 5 SIGNAL NC COM3_RXD COM3_TXD NC GND 7.5.2.4 RS-232 Serial Adapter Cable Use the included shielded adapter cable to have a standard DB-9 connector wired as a DTE port. PIN 1 2 3 4 5 6 7 8 9 Acromag, Inc. Tel: 248-295-1541 http://www.acromag.com SIGNAL NC COM3_TXD COM3_RXD NC GND NC NC NC NC - 71 - - 71 - www.acromag.com USER MANUAL XVME-6400 7.5.2.5 J4 USB 2.0 Connector This 9-pin USB 3.0 A-style, FCI 10117835-001LF, connector carries USB data at either USB 2.0 or USB 1.1 speeds. The power is current limited to 1A. Note: Even though the connector is a USB 3.0 connector, it will only function at USB 2.0 or lower speeds. There is no USB 3.0 superspeed signal connection. PIN 1 2 3 4 5 6 7 8 9 SIGNAL +5V USB POWER USB2_N USB2_P GND NC NC GND NC NC 7.5.2.6 J5 USB 2.0 Connector This 9-pin USB 3.0 A-style, FCI 10117835-001LF, connector carries USB data at either USB 2.0 or USB 1.1 speeds. The power is current limited to 1A. Note: Even though the connector is a USB 3.0 connector, it will only function at USB 2.0 or lower speeds. There is no USB 3.0 superspeed signal connection. PIN 1 2 3 4 5 6 7 8 9 Acromag, Inc. Tel: 248-295-1541 http://www.acromag.com SIGNAL +5V USB POWER USB3_N USB3_P GND NC NC GND NC NC - 72 - - 72 - www.acromag.com USER MANUAL XVME-6400 7.5.2.7 J1 mSATA Connector This standard 52-pin mSATA connector, TE 2041119-1, is used for connecting an mSATA drive module to the XBRD-9060. PIN 1 3 5 7 9 11 13 15 17 19 21 23 25 27 29 31 33 35 37 39 41 43 45 47 49 51 SIGNAL NC NC NC NC GND NC NC GND NC NC GND SATA0_RX_N SATA0_RX_P GND GND SATA0_TX_N SATA0_TX_P GND GND +3.3V +3.3V GND NC NC NC NC SIGNAL +3.3V GND +1.5V NC NC NC NC NC GND NC PLT_RST# +3.3V GND +1.5V SMB_CLK SMB_DATA GND NC NC GND NC NC NC +1.5V GND +3.3V PIN 2 4 6 8 10 12 14 16 18 20 22 24 26 28 30 32 34 36 38 40 42 44 46 48 50 52 NC = NO CONNECT Acromag, Inc. Tel: 248-295-1541 http://www.acromag.com - 73 - - 73 - www.acromag.com USER MANUAL XVME-6400 7.5.2.8 J6 mSATA Connector This standard 52-pin mSATA connector, TE 2041119-1, is used for connecting an mSATA drive module to the XBRD-9060. PIN 1 3 5 7 9 11 13 15 17 19 21 23 25 27 29 31 33 35 37 39 41 43 45 47 49 51 SIGNAL NC NC NC NC GND NC NC GND NC NC GND SATA1_RX_N SATA1_RX_P GND GND SATA1_TX_N SATA1_TX_P GND GND +3.3V +3.3V GND NC NC NC NC SIGNAL +3.3V GND +1.5V NC NC NC NC NC GND NC PLT_RST# +3.3V GND +1.5V SMB_CLK SMB_DATA GND NC NC GND NC NC NC +1.5V GND +3.3V PIN 2 4 6 8 10 12 14 16 18 20 22 24 26 28 30 32 34 36 38 40 42 44 46 48 50 52 NC = NO CONNECT Acromag, Inc. Tel: 248-295-1541 http://www.acromag.com - 74 - - 74 - www.acromag.com USER MANUAL XVME-6400 7.6 Power Requirements The power used by the XBRD-9060 board without any mSATA modules installed is negligible. mSATA power draws from the available +3.3V on the XVME-6400. +1.5V is also available, but usage of this voltage on mSATA modules is not widespread. 7.7 Environmental Considerations Operating Temperature: -40°C to 75°C1 1 Measured as Ambient Air Temperature. 300LFM minimum air-flow required. Designed to meet this temperature specification. Note: Temperature rating is exclusive of mSATA module(s). Commercial grade mSATA modules are normally rated 0°C to 70°C. Relative Humidity: 5% to 95% Non-condensing Storage Temperature: -55° C to 100° C Shock, Non-Operating: 50g peak acceleration, 11ms duration MIL-STD-202G Method 213B. Vibration, Operating: 11.96g RMS, 50-20,000Hz, each axis, MIL-STD-202G Method 214A. Acromag, Inc. Tel: 248-295-1541 http://www.acromag.com - 75 - - 75 - www.acromag.com USER MANUAL XVME-6400 7.8 XBRD-9060 Certificate of Volatility Certificate of Volatility Acromag Model XBRD-9060-XX Manufacturer: Acromag, Inc. 30765 Wixom Rd Wixom, MI 48393 Volatile Memory Does this product contain Volatile memory (i.e. Memory of whose contents are lost when power is removed) □ Yes ■ No Type (SRAM, SDRAM, etc.) User Modifiable Function: Process to Sanitize: Size: none □ Yes □ No Non-Volatile Memory Does this product contain Non-Volatile memory (i.e. Memory of whose contents is retained when power is removed) ■ Yes □ No (only with mSATA module(s) installed) Type(EEPROM, Flash, etc.) Size: User Modifiable Function: Process to Sanitize: Flash mSATA ■ Yes Storage of User Data Refer to mSATA module module □ No documentation dependent Acromag Representative Name: Joseph Primeau Title: Dir. of Sales and Marketing Email: [email protected] Acromag, Inc. Tel: 248-295-1541 http://www.acromag.com - 76 - Office Phone: 248-295-0310 - 76 - Office Fax: 248-624-9234 www.acromag.com USER MANUAL XVME-6400 8.0 XVME-9640 Rear-Transition Accessory Module The optional XVME-9640 module may be installed into the rear slot directly behind the XVME-6400 to easily access all of the available I/O on the XVME-6400's P2, and optionally P0 connectors, as well as allow mSATA SSD modules to be added for storage. The following I/O is available on the front panel of the XVME-9640: Two Gigabit Ethernet ports are available on the front panel's optional RJ Point 5 connector (installed if the optional RJ0 connector is installed). One adapter cable is included with the XVME-6400 to connect from the front panel's RJ Point 5 connector to a standard RJ45 connector. One VGA port via standard DB-15 connector. One DVI-D port via standard 24-pin DVI connector. Two USB 2.0 ports. These ports use standard USB-A connectors. The Upper PMC/XMC module's P4 user I/O from the XVME-6400's P2 connector is available via a 68-pin SCSI-3 connector. The following I/O is available via internal connectors on the XVME-9640: Stereo Audio Line-In & Line-Out are available via a 5-pin connector. One software-selectable RS-232/RS-485 serial port is available via a 10-pin header. The Lower PMC/XMC module's user I/O from the XVME-6400's optional RJ0 connector is available via two optional high-speed Samtec connectors (installed if the optional P0 connector is installed). The XVME-9640 also contains 2 mSATA sockets that allow 2 SSD drives to be added while still remaining within a single VME slot. Using the software RAID functionality of the QM87 PCH, these drives can even be setup as a RAID0/1 array if redundancy or extra speed is desired. Note: The standard XVME-9640 cannot be used in a backplane that uses VITA 31.1 Ethernet. A custom build option is available that isolates the Ethernet lines for use in a VITA 31.1 system. Please consult factory for this option. WARNING: The XVME-9640 should not be used with an XVME-6400 that is built with the 'XVME-6300 Compatible I/O' option. For this option instead use the XVME-9630 module (RTM for XVME-6300). Acromag, Inc. Tel: 248-295-1541 http://www.acromag.com - 77 - - 77 - www.acromag.com USER MANUAL XVME-6400 8.1 Ordering Information When ordering the XVME-9640-A-X VMEbus CPU module, please select from and specify the available option choices (A, X) as defined below: Select the connector option (A): 1: With RJ0, P3, P4, J8 Installed 2: RJ0, P3, P4, J8 Not Installed Select the solder option (X): L: Leaded solder LF: Lead-free solder 8.2 Hardware Information and Configuration 8.2.1 Switch SW1 Configuration Table 8.2.1.a summarizes the functions, settings, and descriptions for dip switch SW1. Table 8.2.1.a: XVME-9640 Configuration Switch SW1 Configuration Switch SW1 Position Function Switch Setting 1 Not Used 2 Not Used 3 Not Used 4 OFF ORB GND ON Description ORB GND Tied to Digital GND ORB GND Isolated SW1-4 is used to configure the isolation of the Front Panel (ORB) GND. SW1-1, 1-2, and 1-3 are not used and can be in either position for normal operation. 8.3 mSATA Module Installation One or two full-size (51mm) mSATA modules may be installed using the screws provided. In a high-vibration environment the addition of a removable thread locker, such as Loctite 242, is recommended. For installation of halfsize (26.8mm) mSATA modules please consult factory. Acromag, Inc. Tel: 248-295-1541 http://www.acromag.com - 78 - - 78 - www.acromag.com USER MANUAL XVME-6400 8.4 Specifications 8.4.1 Physical The XVME-9640 dimensions are shown below: Height Depth Minimum Backplane Pitch 233.35 mm (9.187 in) 80mm (3.150 in) 20.32 mm (0.8 in) Unit Weight (with RJ0, P3, P4, J8 installed) 7.8 oz (0.221 kg) 8.4.2 Connector Information 8.4.2.1 RJ0 VME Connector (Optional) This optional connector is a standard 6-row, 2mm Type B, 95-pin Harting 17-25-095-2102. It contains 2 Ethernet and the Lower Site's PMC I/O (XMC instead with XVME-6400 build option) ROW/PIN A B C D E F 1 2 3 4 5 6 7 8 9 10 11 12 13 14 15 16 17 18 19 GND ENET0_MX0_P GND ENET0_MX0_N GND GND GND ENET0_MX2_P GND ENET0_MX2_N GND ENET0_MX1_P ENET0_MX1_N GND ENET0_MX3_P ENET0_MX3_N GND ENET1_MX0_P 1 ENET1_MX0_N 1 GND ENET1_MX2_P 1 ENET1_MX2_N 1 ENET1_MX1_P 1 ENET1_MX1_N 1 GND ENET1_MX3_P 1 ENET1_MX3_N1 ENET1_ACT# ENET0_ACT# ENET1_LINK# ENET0_LINK# +3.3V_FROM_CPU LWR_IO0_P LWR_IO2_P LWR_IO2_N LWR_IO3_P LWR_IO3_N LWR_IO0_N LWR_IO4_P LWR_IO4_N LWR_IO5_P LWR_IO5_N LWR_IO8_P LWR_IO6_P LWR_IO6_N LWR_IO7_P LWR_IO7_N LWR_IO8_N LWR_IO1_P LWR_IO1_N LWR_IO9_P LWR_IO9_N LWR_IO12_P LWR_IO10_P LWR_IO10_N LWR_IO11_P LWR_IO11_N LWR_IO12_N LWR_IO25_N LWR_IO25_P LWR_IO13_P LWR_IO13_N LWR_IO16_P LWR_IO14_P LWR_IO14_N LWR_IO15_P LWR_IO15_N LWR_IO16_N LWR_IO31_N LWR_IO31_P LWR_IO17_P LWR_IO17_N LWR_IO20_P LWR_IO18_P LWR_IO18_N LWR_IO19_P LWR_IO19_N LWR_IO20_N LWR_IO29_N LWR_IO29_P LWR_IO21_P LWR_IO21_N LWR_IO24_P LWR_IO22_P LWR_IO22_N LWR_IO23_P LWR_IO23_N LWR_IO24_N LWR_IO26_N LWR_IO26_P LWR_IO27_N LWR_IO27_P NC LWR_IO30_N LWR_IO30_P LWR_IO28_N LWR_IO28_P GND GND GND GND GND GND GND GND NC = NO CONNECT 1 ENET1 signals not available when enabled on XBRD-9060 I/O Expander module. Acromag, Inc. Tel: 248-295-1541 http://www.acromag.com - 79 - - 79 - www.acromag.com USER MANUAL XVME-6400 8.4.2.2 RJ2 VME Connector This standard VME RTM 5-row, 160-pin Harting 02-04-160-1101 connector brings in standard PC I/O, as well as the Upper Site's PMC I/O. Note: The signals on the 'A' and 'Z' rows is not available when installed in a legacy, 3-row backplane. ROW/PIN 1 2 3 4 5 6 7 8 9 10 11 12 13 14 15 16 17 18 19 20 21 22 23 24 25 26 27 28 29 30 31 32 Z UPR_IO0_P GND UPR_IO0_N GND UPR_IO1_P GND UPR_IO1_N GND UPR_IO2_P GND UPR_IO2_N GND UPR_IO3_P GND UPR_IO3_N GND UPR_IO4_P GND UPR_IO4_N GND UPR_IO5_P GND UPR_IO5_N GND UPR_IO6_P GND UPR_IO6_N GND UPR_IO7_P GND UPR_IO7_N GND A SATA_TX2_P SATA_TX2_N GND SATA_RX2_P SATA_RX2_N UPR_IO16_N SATA_TX3_P SATA_TX3_N UPR_IO24_P SATA_RX3_P SATA_RX3_N UPR_IO24_N USB_P4_P USB_P4_N UPR_IO25_P USB_P5_P USB_P5_N UPR_IO25_N USB_+5V USB_+5V UPR_IO26_P UPR_IO26_N UPR_IO27_P UPR_IO27_N UPR_IO28_P UPR_IO28_N UPR_IO29_P UPR_IO29_N UPR_IO30_P UPR_IO30_N UPR_IO31_P UPR_IO31_N B +5V GND NC NC NC NC NC NC NC NC NC GND +5V NC NC NC NC NC NC NC NC GND NC NC NC NC NC NC NC NC GND +5V C AUD_OUT_R AUD_OUT_L AUD_GND AUD_IN_L AUD_IN_R UPR_IO16_P UPR_IO17_N UPR_IO17_P VGA_RED VGA_GRN VGA_BLUE VGA_VSYNC VGA_HSYNC UPR_IO18_N VGA_I2C_DAT VGA_I2C_CLK UPR_IO18_P COM2_TX COM2_TX-1 UPR_IO19_N COM2_RX COM2_RX-1 UPR_IO19_P UPR_IO20_N UPR_IO20_P UPR_IO21_N UPR_IO21_P UPR_IO22_N UPR_IO22_P UPR_IO15_N UPR_IO23_P UPR_IO23_N D DVI_P0_P DVI_P0_N GND DVI_P1_P DVI_P1_N GND DVI_P2_P DVI_P2_N GND DVI_CLK_P DVI_CLK_N GND DVI_HPD DVI_SDA DVI_SCL UPR_IO8_P UPR_IO8_N UPR_IO9_P UPR_IO9_N UPR_IO10_P UPR_IO1R_N UPR_IO11_P UPR_IO11_N UPR_IO12_P UPR_IO12_N UPR_IO13_P UPR_IO13_N UPR_IO14_P UPR_IO14_N UPR_IO15_P GND +5V NC = NO CONNECT 1 TX- and RX- only used when serial port is in RS-422/RS-485 mode Acromag, Inc. Tel: 248-295-1541 http://www.acromag.com - 80 - - 80 - www.acromag.com USER MANUAL XVME-6400 8.4.2.3 J1 VGA Connector This standard 15-pin D-SUB, Kycon K66X-E15S-N-VESA connector brings the VGA port out the front panel. PIN 1 2 3 4 5 6 7 8 9 10 11 12 13 14 15 SIGNAL VGA_RED VGA_GRN VGA_BLUE NC GND GND_RED GND_GREEN GND_BLUE +5V VGA (1A MAX) GND NC VGA_I2C_DAT VGA_HSYNC VGA_VSYNC VGA_I2C_CLK NC = NO CONNECT 8.4.2.4 J4 USB 2.0 Connector This 4-pin USB 2.0 A-style, Molex 67329-8001, connector Brings USB port 4 out the front panel. The power is current limited to 1A (shared with J3). PIN 1 2 3 4 SIGNAL +5V USB POWER USB4_N USB4_P GND 8.4.2.5 J3 USB 2.0 Connector This 4-pin USB 2.0 A-style, Molex 67329-8001, connector Brings USB port 5 out the front panel. The power is current limited to 1A (shared with J4). PIN 1 2 3 4 Acromag, Inc. Tel: 248-295-1541 http://www.acromag.com SIGNAL +5V USB POWER USB5_N USB5_P GND - 81 - - 81 - www.acromag.com USER MANUAL XVME-6400 8.4.2.6 J7 DVI-D Connector This standard 29-pin DVI, Molex 74320-1004, connector brings the DVI port out the front panel. Only the digital signals are available on this connector. It can be used simultaneously with the VGA connector. PIN 1 2 3 4 5 6 7 8 9 10 11 12 13 14 15 16 17 18 19 20 21 22 23 24 C1 C2 C3 C4 C5 SIGNAL DVI_P2_N DVI_P2_P GND NC NC DVI_I2C_CLK DVI_I2C_DAT NC DVI_P1_N DVI_P1_P GND NC NC +5V DVI (1A MAX) GND HOT PLUG DETECT DVI_P0_N DVI_P0_P GND NC NC GND DVI_CLK_P DVI_CLK_N NC NC NC NC GND NC = NO CONNECT Acromag, Inc. Tel: 248-295-1541 http://www.acromag.com - 82 - - 82 - www.acromag.com USER MANUAL XVME-6400 8.4.2.7 J8 Dual Ethernet RJ Point 5 Connector This 16-pin RJ-Point-Five Connector, TE 2170129-1, brings 2 Gigabit Ethernet ports out the front panel. These can be accessed through standard RJ-45 connectors by using the supplied adapter cables. Note: Patch cables of various lengths with RJ Point 5 connectors on one end and standard RJ-45 connectors on the other are available from TE and Stewart Connector. PIN 1A 2A 3A 4A 5A 6A 7A 8A SIGNAL ENET0_MX0_P ENET0_MX0_N ENET0_MX1_P ENET0_MX1_N ENET0_MX2_P ENET0_MX2_N ENET0_MX3_P ENET0_MX3_N 1B 2B 3B 4B 5B 6B 7B 8B ENET1_MX0_P1 ENET1_MX0_N1 ENET1_MX1_P1 ENET1_MX1_N1 ENET1_MX2_P1 ENET1_MX2_N1 ENET1_MX3_P1 ENET1_MX3_N1 1 ENET1 Acromag, Inc. Tel: 248-295-1541 http://www.acromag.com signals not available when enabled on XBRD-9060 I/O Expander module. - 83 - - 83 - www.acromag.com USER MANUAL XVME-6400 8.4.2.8 J5 Upper PMC/XMC User I/O Connector This 68-pin SCSI-3 style, TE 5787082-7, connector carries the PMC/XMC module rear I/O from the Upper PMC/XMC site on the XVME-6400. PIN 1 2 3 4 5 6 7 8 9 10 11 12 13 14 15 16 17 18 19 20 21 22 23 24 25 26 27 28 29 30 31 32 33 34 Acromag, Inc. Tel: 248-295-1541 http://www.acromag.com SIGNAL UPR_IO0_P UPR_IO1_P UPR_IO2_P UPR_IO3_P UPR_IO4_P UPR_IO5_P UPR_IO6_P UPR_IO7_P UPR_IO8_P UPR_IO9_P UPR_IO10_P GND UPR_IO11_P UPR_IO12_P UPR_IO13_P UPR_IO14_P UPR_IO15_P UPR_IO16_P UPR_IO17_P UPR_IO18_P UPR_IO19_P UPR_IO20_P GND UPR_IO21_P UPR_IO22_P UPR_IO23_P UPR_IO24_P UPR_IO25_P UPR_IO26_P UPR_IO27_P UPR_IO28_P UPR_IO29_P UPR_IO30_P UPR_IO31_P - 84 - SIGNAL UPR_IO0_N UPR_IO1_N UPR_IO2_N UPR_IO3_N UPR_IO4_N UPR_IO5_N UPR_IO6_N UPR_IO7_N UPR_IO8_N UPR_IO9_N UPR_IO10_N GND UPR_IO11_N UPR_IO12_N UPR_IO13_N UPR_IO14_N UPR_IO15_N UPR_IO16_N UPR_IO17_N UPR_IO18_N UPR_IO19_N UPR_IO20_N GND UPR_IO21_N UPR_IO22_N UPR_IO23_N UPR_IO24_N UPR_IO25_N UPR_IO26_N UPR_IO27_N UPR_IO28_N UPR_IO29_N UPR_IO30_N UPR_IO31_N - 84 - PIN 35 36 37 38 39 40 41 42 43 44 45 46 47 48 49 50 51 52 53 54 55 56 57 58 59 60 61 62 63 64 65 66 67 68 www.acromag.com USER MANUAL XVME-6400 8.4.2.9 P4 Lower PMC/XMC User I/O Connector (Optional) This optional 40-pin connector, Samtec QTH-020-01-F-D-DP-A-K, carries the PMC/XMC module rear I/O from the Lower PMC/XMC site on the XVME-6400. PIN 1 3 5 7 9 11 13 15 17 19 21 23 25 27 29 31 33 35 37 39 SIGNAL UPR_IO0_P UPR_IO0_N UPR_IO1_P UPR_IO1_N UPR_IO2_P UPR_IO2_N UPR_IO3_P UPR_IO3_N UPR_IO8_P UPR_IO8_N UPR_IO20_P UPR_IO20_N UPR_IO22_P UPR_IO22_N UPR_IO24_P UPR_IO24_N UPR_IO26_P UPR_IO26_N UPR_IO28_P UPR_IO28_N SIGNAL UPR_IO10_P UPR_IO10_N UPR_IO11_P UPR_IO11_N UPR_IO12_P UPR_IO12_N UPR_IO13_P UPR_IO13_N UPR_IO9_P UPR_IO9_N UPR_IO21_P UPR_IO21_N UPR_IO23_P UPR_IO23_N UPR_IO25_P UPR_IO25_N UPR_IO27_P UPR_IO27_N UPR_IO29_P UPR_IO29_N PIN 2 4 6 8 10 12 14 16 18 20 22 24 26 28 30 32 34 36 38 40 8.4.2.10 P2 RS-232/RS-485 Serial Port This 10-pin standard 0.1" header, TE 5103310-1, is used for the COM2 serial connection. These signals can be accessed through a standard DB-9 connector by using a DB9M TO IDC10 SERIAL (DTK) cable. PIN 1 3 5 7 9 1 SIGNAL NC COM3_RX COM3_TX COM3_TX-1 GND SIGNAL COM3_RX-1 NC NC NC GND PIN 2 4 6 8 10 TX- and RX- only used when serial port is in RS-422/RS-485 mode Acromag, Inc. Tel: 248-295-1541 http://www.acromag.com - 85 - - 85 - www.acromag.com USER MANUAL XVME-6400 8.4.2.11 P3 Lower PMC/XMC User I/O Connector (Optional) This optional 40-pin connector, Samtec QTH-020-01-F-D-DP-A-K, carries the PMC/XMC module rear I/O from the Lower PMC/XMC site on the XVME-6400. PIN 1 3 5 7 9 11 13 15 17 19 21 23 25 27 29 31 33 35 37 39 SIGNAL UPR_IO4_P UPR_IO4_N UPR_IO5_P UPR_IO5_N UPR_IO6_P UPR_IO6_N UPR_IO7_P UPR_IO7_N UPR_IO18_P UPR_IO18_N UPR_IO30_P UPR_IO30_N NC NC NC NC NC NC NC NC SIGNAL UPR_IO14_P UPR_IO14_N UPR_IO15_P UPR_IO15_N UPR_IO16_P UPR_IO16_N UPR_IO17_P UPR_IO17_N UPR_IO19_P UPR_IO19_N UPR_IO31_P UPR_IO31_N NC NC NC NC NC NC NC NC PIN 2 4 6 8 10 12 14 16 18 20 22 24 26 28 30 32 34 36 38 40 NC = NO CONNECT 8.4.2.12 P1 Audio Connector This 5-pin connector, Molex 533980571, is used for the stereo audio line-in and line-out connections. PIN 1 2 3 4 5 Acromag, Inc. Tel: 248-295-1541 http://www.acromag.com SIGNAL AUD_OUT_L AUD_OUT_R AUD_AGND AUD_IN_L AUD_IN_R - 86 - - 86 - www.acromag.com USER MANUAL XVME-6400 8.4.2.13 J6 mSATA Connector This standard 52-pin mSATA connector, TE 2041119-1, is used for connecting an mSATA drive module to the XBRD-9060. PIN 1 3 5 7 9 11 13 15 17 19 21 23 25 27 29 31 33 35 37 39 41 43 45 47 49 51 SIGNAL NC NC NC NC GND NC NC GND NC NC GND SATA2_RX_N SATA2_RX_P GND GND SATA2_TX_N SATA2_TX_P GND GND +3.3V +3.3V GND NC NC NC NC SIGNAL +3.3V GND NC NC NC NC NC NC GND NC NC +3.3V GND NC NC NC GND NC NC GND NC NC NC NC GND +3.3V PIN 2 4 6 8 10 12 14 16 18 20 22 24 26 28 30 32 34 36 38 40 42 44 46 48 50 52 NC = NO CONNECT Acromag, Inc. Tel: 248-295-1541 http://www.acromag.com - 87 - - 87 - www.acromag.com USER MANUAL XVME-6400 8.4.2.14 J2 mSATA Connector This standard 52-pin mSATA connector, TE 2041119-1, is used for connecting an mSATA drive module to the XBRD-9060. PIN 1 3 5 7 9 11 13 15 17 19 21 23 25 27 29 31 33 35 37 39 41 43 45 47 49 51 SIGNAL NC NC NC NC GND NC NC GND NC NC GND SATA3_RX_N SATA3_RX_P GND GND SATA3_TX_N SATA3_TX_P GND GND +3.3V +3.3V GND NC NC NC NC SIGNAL +3.3V GND NC NC NC NC NC NC GND NC NC +3.3V GND NC NC NC GND NC NC GND NC NC NC NC GND +3.3V PIN 2 4 6 8 10 12 14 16 18 20 22 24 26 28 30 32 34 36 38 40 42 44 46 48 50 52 NC = NO CONNECT Acromag, Inc. Tel: 248-295-1541 http://www.acromag.com - 88 - - 88 - www.acromag.com USER MANUAL XVME-6400 8.5 Power Requirements The power used by the XVME-9640 board without any mSATA modules installed is negligible. mSATA power draws from the available +3.3V on the XVME-6400. Note: +1.5V is NOT available, but usage of this voltage on mSATA modules is not widespread. 8.6 Environmental Considerations Operating Temperature: -40°C to 75°C1 1 Measured as Ambient Air Temperature. 300LFM minimum air-flow required. Designed to meet this temperature specification. Note: Temperature rating is exclusive of mSATA module(s). Commercial grade mSATA modules are normally rated 0°C to 70°C. Relative Humidity: 5% to 95% Non-condensing Storage Temperature: -55° C to 100° C Shock, Non-Operating: 50g peak acceleration, 11ms duration MIL-STD-202G Method 213B. Vibration, Operating: 11.96g RMS, 50-20,000Hz, each axis, MIL-STD-202G Method 214A. Acromag, Inc. Tel: 248-295-1541 http://www.acromag.com - 89 - - 89 - www.acromag.com USER MANUAL XVME-6400 8.7 XVME-9640 Certificate of Volatility Certificate of Volatility Acromag Model XVME-96400-X-XX Manufacturer: Acromag, Inc. 30765 Wixom Rd Wixom, MI 48393 Volatile Memory Does this product contain Volatile memory (i.e. Memory of whose contents are lost when power is removed) □ Yes ■ No Type (SRAM, SDRAM, etc.) User Modifiable Function: Process to Sanitize: Size: none □ Yes □ No Non-Volatile Memory Does this product contain Non-Volatile memory (i.e. Memory of whose contents is retained when power is removed) ■ Yes □ No (only with mSATA module(s) installed) Type(EEPROM, Flash, etc.) Size: User Modifiable Function: Process to Sanitize: Flash mSATA ■ Yes Storage of User Data Refer to mSATA module module □ No documentation dependent Acromag Representative Name: Joseph Primeau Title: Dir. of Sales and Marketing Email: [email protected] Acromag, Inc. Tel: 248-295-1541 http://www.acromag.com - 90 - Office Phone: 248-295-0310 - 90 - Office Fax: 248-624-9234 www.acromag.com USER MANUAL XVME-6400 Revision History The following table shows the revision history for this document: Release Date Version EGR/DOC Description of Revision 23 FEB 15 A DWR/ARP Initial Acromag release. 08 JUN 15 B DWR/ARP Added Programmable Power Limits to Section 3.2. Revised Section 3.16.5 based on CPU Prog. Power Limits. Added MTBF info to Section 6.6. Changed name of referenced BIOS manual to APTIO Core BIOS Manual For Acromag Products. 25 SEP 15 C JGV/ARP Removed conduction-cooled, extended temperature and leaded solder models. Customers advised to contact factory. R Acromag, Inc. Tel: 248-295-1541 http://www.acromag.com - 91 - - 91 - www.acromag.com


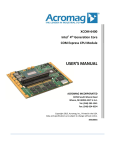
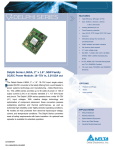


![[Insert the picture here]](http://vs1.manualzilla.com/store/data/005750886_1-61b7896b0a61bec1f004b64a994fc9d3-150x150.png)