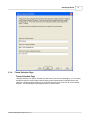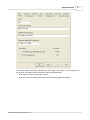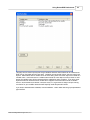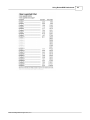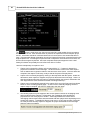
1
RocketDVD Professional User's Manual
©2003-2006 Digital Media Applications, LLC
RocketDVD Professional User's Manual
©2003-2006 Digital Media Applications, LLC
All rights reserved. No parts of this work may be reproduced in any form or by any means - graphic, electronic, or
mechanical, including photocopying, recording, taping, or information storage and retrieval systems - without the
written permission of the Digital Media Applications, LLC.
While every precaution has been taken in the preparation of this document, Digital Media Applications assumes no
responsibility for errors or omissions, or for damages resulting from the use of information contained in this document
or from the use of programs and source code that may accompany it. In no event shall Digital Media Applications, it's
owners or employees be liable for any loss of profit or any other commercial damage caused or alleged to have been
caused directly or indirectly by this document.
The RocketDVD system is designed to easily convert video to DVD. Even if there is a change in medium when
converting video to DVD, it is still a form of copying. Therefore it is assumed that you, the operator or owner of the
RocketDVD system owns the rights to copy any video being converted. Digital Media Applications, LLC accepts no
responsibility for the misuse of the RocketDVD system to copy or convert copyrighted material.
RocketDVD is a trademark of Digital Media Applications, LLC.
Generated: 9/1/2006
Contents
I
Table of Contents
0
Part I Installation Guide
4
Part II Quick Start Guide
4
1 Setup Wizard ................................................................................................................................... 6
Introduction Page
.......................................................................................................................................................... 7
Select Work Directories
.......................................................................................................................................................... 7
Company Variables
.......................................................................................................................................................... 8
Theme Selection
..........................................................................................................................................................
Page
9
Select Live or..........................................................................................................................................................
Pre-Captured Video
11
Select Audio/Video
..........................................................................................................................................................
Inputs and Settings
11
Direct Firewire (IEEE 1394) DV Video Capture with Software MPEG
Encoding......................................................................................................................................................... 12
PCI Capture
.........................................................................................................................................................
Boards with Realtime Hardware MPEG Encoding
13
Vitec VM2-Pro (Hardware
.........................................................................................................................................
MPEG Encoder Board)
13
Vitec MPEG Profiler
.........................................................................................................................................
(Hardware MPEG Encoder Board)
13
Vitec VM2-2C7 (Hardware
.........................................................................................................................................
MPEG Encoder Board)
13
Vitec VM2-2 (Hardware
.........................................................................................................................................
MPEG Encoder Board)
13
Select DVD Writer
.......................................................................................................................................................... 13
Select Default..........................................................................................................................................................
Printers
14
2 Creating a DVD
...................................................................................................................................
From a Video Feed
15
3 Creating a DVD
...................................................................................................................................
From Files on Your Hard Drive
17
Setting Up the..........................................................................................................................................................
Project
19
Start Offline Encoding
.......................................................................................................................................................... 24
Start Authoring
..........................................................................................................................................................
Pre-Encoded Files
25
4 Printing the Paper
...................................................................................................................................
Assets and Writing The DVD
27
Part III Introduction to RocketDVD Professional
1 What it is
28
................................................................................................................................... 28
2 What it isn't ................................................................................................................................... 29
Part IV Using RocketDVD Professional
29
1 Setup Wizard................................................................................................................................... 29
Introduction Page
.......................................................................................................................................................... 30
Select Work Directories
.......................................................................................................................................................... 30
Company Variables
.......................................................................................................................................................... 31
Theme Selection
..........................................................................................................................................................
Page
32
Select Live or..........................................................................................................................................................
Pre-Captured Video
34
Select Audio/Video
..........................................................................................................................................................
Inputs and Settings
35
Select DVD Writer
.......................................................................................................................................................... 36
Select Default..........................................................................................................................................................
Printers
37
2 Software Encoder
...................................................................................................................................
Calibration
38
3 Project
................................................................................................................................... 39
Project Property
..........................................................................................................................................................
Page Dialog
39
©2003-2006 Digital Media Applications, LLC
II
RocketDVD Professional User's Manual
Project Property
.........................................................................................................................................................
Page
40
Deck Control
.........................................................................................................................................................
Page
41
Text Variables
.........................................................................................................................................................
Page
42
First Play.........................................................................................................................................................
Page
44
Pre-Captured
.........................................................................................................................................................
Files Property Page
45
Encoding.........................................................................................................................................................
Property Page
47
OSD Property
.........................................................................................................................................................
Page
50
Authoring.........................................................................................................................................................
Property Page
52
Data Files.........................................................................................................................................................
Property Page
56
DVD Writing
.........................................................................................................................................................
Property Page
56
Printing Property
.........................................................................................................................................................
Pages
59
Disc Label Property
.........................................................................................................................................
Page
59
Case Wrap Property
.........................................................................................................................................
Page
61
Case/Chapter Insert
.........................................................................................................................................
Property Page
62
Load a Project
.......................................................................................................................................................... 64
New Project .......................................................................................................................................................... 65
More
.......................................................................................................................................................... 66
Save a Project.......................................................................................................................................................... 66
4 Print Preview................................................................................................................................... 66
5 Application Preferences
................................................................................................................................... 66
Default Directories
.......................................................................................................................................................... 67
Preferences .......................................................................................................................................................... 69
Audio Notifications
.......................................................................................................................................................... 71
Job Polling .......................................................................................................................................................... 72
Save Settings.......................................................................................................................................................... 73
6 Display Pages
................................................................................................................................... 73
Setup Display.......................................................................................................................................................... 73
Capture Display
.......................................................................................................................................................... 74
Chapter Selection
..........................................................................................................................................................
Display
75
Author Display
.......................................................................................................................................................... 75
Print Display .......................................................................................................................................................... 76
Write Display.......................................................................................................................................................... 76
7 Video Monitor
................................................................................................................................... 77
8 Starting a Project
................................................................................................................................... 80
Live Video Capture
.......................................................................................................................................................... 81
Pre-Captured..........................................................................................................................................................
Files
83
Start Pre-Encoded
.........................................................................................................................................................
File Project
84
Start Encoding
.........................................................................................................................................................
Project
85
Job Polling .......................................................................................................................................................... 85
9 Re-Running Part
...................................................................................................................................
of a Project
87
Re-Authoring..........................................................................................................................................................
a Project
88
Re-Printing a ..........................................................................................................................................................
Project
88
Re-Writing a Project
.......................................................................................................................................................... 89
10 Aborting a Project
...................................................................................................................................
Stage
89
11 Shutting Down
................................................................................................................................... 90
12 DVD Live
................................................................................................................................... 90
Part V Tutorial
90
Part VI Testing Your DVD using PowerDVD
91
©2003-2006 Digital Media Applications, LLC
Contents
Part VII Trouble Shooting
©2003-2006 Digital Media Applications, LLC
III
93
4
1
RocketDVD Professional User's Manual
Installation Guide
Directories & Files
The RocketDVD Professional CD contains the following directories and files:
1.
2.
3.
RocketDVD Pro<Build Number>.msi - this is the RocketDVD Pro windows installer. Doubleclicking on this file will install the RocketDVD Pro software, MenuMaker and the drivers for the
USB anti-piracy dongle.
RocketDVD Pro_desktop.bmp - this bitmap can be installed as the desktop background
showing that this system is a RocketDVD Pro system as well as providing contact telephone
numbers for sales and support.
Adobe_Acrobat_5.exe - RocketDVD Pro manuals are provided in Acrobat *.pdf format. If
your system does not have the Acrobat reader installed, you can install it from this self
extracing archive.
The Cyberlink PowerDVD 6 CD provides a software based DVD player which can be installed and
used for testing DVD's created on the local hard drive. The CD-key for this installation is included on
the outside of the paper sleeve containing thePowerDVD software.
Installation Procedure
Your system should be configured with a boot (usually C:) drive of 36GB or greater, a DVD writer
drive, and for best performance a second and possibly third hard drive with sufficient capacity for
capturing 4-5 GB streams and for creating a 4.7 GB DVD image. An approved analog capture card
or firewire (1394) port is required for live capture and encoding. You may proceed if second and
third hard drives are not available but please note that the time for authoring the DVD will be longer.
Installation should proceed with the following steps:
1.
2.
3.
4.
5.
6.
7.
2
Insert the RocketDVD Professional disc into the DVD-R drive and copy all contents to the root
of c: drive.
Browse to the RocketDVD Pro<Build Number>.msi file and double click to install the
RocketDVD Pro software. This will install the RocketDVD Pro software, MenuMaker and the
drivers for the USB anti-piracy dongle. It will also place RocketDVD Pro and MenMaker icons
on your desktop. If you're running with only one hard drive, make sure you change the
RocketDVD Pro folder pointer to the correct drive when prompted by the install software.
Now install the Green Dongle in an available USB port. Note: Do not loose this Dongle as the
software will not run without it. The system will recognize the USB Dongle and ask if you want
to install drivers. Let the system find the appropriate drivers automatically.
Put PowerDVD disc in DVD-R drive and install PowerDVD using the key supplied on the front
of the CD sleeve. PowerDVD can be used to preview your DVD titles prior to outputting them
on a disc.
Go to the display properties and change the desktop to the supplied RocketDVD Pro bitmap
file (optional). You may change the bitmap to include your contact information if you would
prefer.
Re-boot the system and you're now ready to go.
Call us at 866-775-9067 if you have problems.
Quick Start Guide
The First Time
If you have just launched the RocketDVD Pro application and this Quick Start guide was
automatically started, then you're probably running the application for the first time. We hope this
Quick Start guide along with the Setup Wizard which should also start automatically will help you to
©2003-2006 Digital Media Applications, LLC
Quick Start Guide
5
get a good start creating DVD with RocketDVD Pro.
At this point it would be useful to resize and move this Quick Start Guide window so that you can see
the Setup Wizard and later the application as you go through the Quick Start Guide.
If the following dialog box just popped up with a system beep:
It probably means your digital video source is not connected to your computer. If you got this
message, you will need to click the OK button in order to continue. If you have not finished stepping
through all the Setup Wizard pages, it should automatically start now.
If you choose to follow along in this Quick Start guide as you step through the Wizard, it will provide
you with more detailed information than is available on the Wizard pages.
If you wish to connect your Digital Video (DV) source to your computer at this time, you can continue.
If you do not need or wish to connect a DV source to your computer at this time, you may skip to
'Goal of This Quick Start Guide' which follows the next section.
Connecting a Digital Video Camera to your Firewire port
The following images show the ends of the cable used to connect a digital video camera to a
computer that has a Firewire port.
The cable end on the left side of the picture plugs into the DV port on the digital video camera. An
example of this port on a Sony Digital Camcorder is shown next. The cable end pictured on the right
side plugs into the Firrewire or IEEE 1394 port on the computer.
Please note that some Digital Video Tape Decks and DV Bridge devices may use the larger 6 pin DV
cable connection instead of the 4 pin shown in the Sony camera picture.
When you first connect the Digital Video (DV) source into the computer, it should beep, indicating
that new hardware has been detected. If it's the first time you have ever plugged this device into
your computer, it should attempt to automatically install the software to use it. If successful, it should
tell you that the New Hardware is installed and ready to use.
If you don't get a beep when you plug your DV source into your computer, it is not being detected.
That might mean that your device is not powered on or that it is not a compatible DV device. If you
are not able to get the computer to recognize, the DV device, it will not be recognized by the
RocketDVD Pro application. Please consult the documentation that came with your DV device for
instructions on connecting it to a computer.
©2003-2006 Digital Media Applications, LLC
6
RocketDVD Professional User's Manual
If you have not started the RocketDVD Pro application yet, start it now. If you have already started it,
the application should automatically detect the presence of a DV source and start the video preview
monitor. If your camera or deck is not playing video at the time, the video preview window may only
show a black window.
Goal of This Quick Start Guide
The goal of this quick start guide is to help you produce your first DVD in the shortest time possible.
It will not walk you through all the possible settings or options that can be changed, but rather it will
walk you step by step through the process of creating a DVD using just a few simple clicks.
If you have already stepped through the Setup Wizard and want to proceed directly to Creating your
first DVD, Please specify which type of source material you selected in the setup wizard.
· From a video source
· From files on your hard drive (DV source not needed for this option)
To follow the Setup Wizard with this Quick Start Guide, advance the Wizard to the next page and go
to 'Theme Selection Page' in the guide.
2.1
Setup Wizard
To read more about the setup wizard, go to the 'Setup Wizard' section under Using RocketDVD
Professional.
To follow the Setup Wizard with this Quick Start Guide, advance the Wizard to the next page and go
to 'Theme Selection Page' in the guide.
©2003-2006 Digital Media Applications, LLC
Quick Start Guide
2.1.1
7
Introduction Page
This page merely introduces the Setup Wizard.
2.1.2
Select Work Directories
This page suggests and allow for the selection of work directories/drives. The time taken for the
authoring stage can potentially be reduced the work directory selection. The best performance is
obtained by specifying the following directories on three different physical drives. There is no
advantage to using two different drive letters which are merely partitions on the same physical drive,
over simply using the same drive letter. In some cases there may be an advantage to creating the
VIDEO_TS folder on the root of a drive, but it can be placed in a subdirectory.
©2003-2006 Digital Media Applications, LLC
8
2.1.3
RocketDVD Professional User's Manual
Company Variables
This feature is not available in all versions of the product.
The company name variables use the Text Variable feature to allow dynamic insertion of Company
Name, website and telephone number into the menu's and print assets. In fact, after the setup
wizard completes, the variables and values can be seen on the Text Variable page. Using
MenuMaker, see how these variables are used on the about DVD menu page. The fields are
actually just plain text fields and if no substitution is performed, the actual text would be printed. It
should become obvious that by adding another text field, and then adding it as a variable name on
the Text Variable page, you can create your own variables.
To include a company logo without having to re-create the menu background bitmap, save your logo
as a *.png file and then add it as a bitmap object to the menu layout in MenuMaker.
©2003-2006 Digital Media Applications, LLC
Quick Start Guide
2.1.4
9
Theme Selection Page
Theme Selection Page
This page allows you to specify a default look and feel for your DVD and packaging. You can easily
change the theme for each DVD by simply loading a new template before creating that DVD, but
setting up a default template allows you to create a DVD more easily if you wish to use the default
template. The wizard page for selecting the theme is shown below:
©2003-2006 Digital Media Applications, LLC
10
RocketDVD Professional User's Manual
In this case the 'Home Movies - Insert your own titles.tpl' was chosen. The 'insert your own titles'
means that the theme has merge fields or place holders for text to be dynamically inserted at the
time the project is run. The color, font and placement of the text can be seen or modified by using
the disc layout editor or case wrap layout editor. For this particular menu theme, the first menu is the
main menu and has buttons to play the video, jump to the chapter selection menu(s) or jump to the
second menu page which can be an information page. The third menu page shown is used for
bitmaps to represent each chapter. To modify or see how the menu is laid out, use the
accompanying MenuMaker application. If you choose to modify either the disc label, case wrap
those changes can be saved by saving the project from the application using the 'Save Project'
button. If you choose to modify the DVD menu, use the MenuMaker application. It is probably best
to save the new template and menu theme under different filenames because, if you install an
upgrade, it will most likely overwrite the project and menu theme templates. If you change the menu,
make sure to change the name of menu in the project theme to points to your modified menu.
Finally, if you choose the project theme shown, the rest of the quick start guide will match what you
actually see on your own screen.
To continue the Quick Start Guide, proceed to 'Select Live or Pre-Captured Video'.
For additional information on this Wizard Page see also (Theme Selection Page)
©2003-2006 Digital Media Applications, LLC
Quick Start Guide
2.1.5
11
Select Live or Pre-Captured Video
Select Live or Pre-Captured Video
There are a couple couple different ways to start a project, but they both end up at the same place
with a DVD and printed assets. Selecting a default here will not prevent you from making DVD's the
other way. The two differnt ways of starting a DVD project are brought out because the way the
project is setup and started are completely different. The wizard page for making this selection is
shown below:
If you select the first option, proceed to 'Select Audio/Video Inputs and Settings'.
If you select the second option, proceed to 'Select DVD Writer'.
For additional information on this Wizard Page see also (Select Live or Pre-Captured Video)
2.1.6
Select Audio/Video Inputs and Settings
This page will vary depending on your hardware configuration. For Firewire or IEEE 1394 video
capture, not audio input connector will be shown because the audio is multiplexed in the DV stream.
©2003-2006 Digital Media Applications, LLC
12
RocketDVD Professional User's Manual
If your default video standard is NTSC, select and if it is PAL, make that your default selection.
Currently those are the only two standards supported by RocketDVD Pro.
You can also specify the default aspect ratio of your source video. The options that are shown, if
supported by the hardware configuration are 4x3 and 16x9.
To continue the Quick Start Guide, proceed to 'Select DVD Writer'.
For additional information on this Wizard Page see also (Select Audio/Video Inputs and Settings)
2.1.6.1
Direct Firewire (IEEE 1394) DV Video Capture with Software MPEG Encoding
This feature is not available in all versions of the product. If you do not have access to this
feature and you wish to use it, please contact http://www.dmapp.com or your local dealer.
This product configuration is for capturing video directly from a digital video camera through the
Firewire or IEEE 1394 port.
©2003-2006 Digital Media Applications, LLC
Quick Start Guide
2.1.6.2
13
PCI Capture Boards with Realtime Hardware MPEG Encoding
Enter topic text here.
2.1.6.2.1 Vitec VM2-Pro (Hardware MPEG Encoder Board)
Enter topic text here.
2.1.6.2.2 Vitec MPEG Profiler (Hardware MPEG Encoder Board)
Enter topic text here.
2.1.6.2.3 Vitec VM2-2C7 (Hardware MPEG Encoder Board)
Enter topic text here.
2.1.6.2.4 Vitec VM2-2 (Hardware MPEG Encoder Board)
Enter topic text here.
2.1.7
Select DVD Writer
On this page, you can specify where your DVD's will typically be written. The choices are either a
local DVD writer robotic DVD duplicator/printers. On this page, simply make your selection from the
drop down listbox. As has been mentioned repeatedly, setting up this preference as a default will not
prevent you from changing the writer on each and every project.
©2003-2006 Digital Media Applications, LLC
14
RocketDVD Professional User's Manual
To continue the Quick Start Guide, proceed to 'Select Default Printers'.
For additional information on this Wizard Page see also (Select DVD Writer)
2.1.8
Select Default Printers
On this page, you can specify where your paper assets will normally be printed. The choices are
either a local DVD writer robotic DVD duplicator/printers. On this page, simply make your selection
from the drop down listbox. As has been mentioned repeatedly, setting up this preference as a
default will not prevent you from changing the writer on each and every project.
©2003-2006 Digital Media Applications, LLC
Quick Start Guide
15
To continue the Quick Start Guide, please specify which type of source material you selected in the
setup wizard.
· From a video source
· From files on your hard drive (DV source not needed for this option)
For additional information on this Wizard Page see also (Select Default Printers)
2.2
Creating a DVD From a Video Feed
1.
At this stage, the assumption is made that you have completed the Setup Wizard. Since the
Quick Start Guide used the HOME Movie theme as an example, the following example creates
a DVD with the HOME Movies DVD menu theme. If no Menu Theme is selected, the Setup
Wizard was probably not correctly started. You can re-start the Setup Wizard by right-clicking
on the application logo (located in the upper left hand corner of the RocketDVD user interface)
and then selecting 'Setup Wizard...' from the popup menu.
2.
On the setup tab of the display area on the application enter the text as shown below:
©2003-2006 Digital Media Applications, LLC
16
RocketDVD Professional User's Manual
If you selected an alternate theme when stepping through the Setup Wizard, a different menu
theme may be shown. That is ok!
3.
Next click the record button with the un-lit red LED.
Now the red LED should appear lit and the green encode LED should be blinking.
4.
If the video is a live feed such as a TV or camera feed, simply press the play button. If it is a
tape deck, queue the video to the desired starting place and then start it playing. You should
click the play button very shortly after starting the video feed. Once capture has started, the
green LED will be on without blinking and the display should automatically have switched to the
'Encode' tab shown below.
©2003-2006 Digital Media Applications, LLC
Quick Start Guide
17
5.
After a minute or so, click the stop button (with the square symbol on it shown below) to stop the
video capture before the 1 hr capture limit would have automatically stopped it for you. The
display area should switch to the 'Author' tab where it should take a few seconds to author the
DVD. Upon completion of the authoring, the project is complete and your DVD has been
created on the Hard Drive.
6.
You may now play the DVD on the hard drive using a software DVD player. For help on using
PowerDVD to test your DVD before writing it to disc, go to 'Testing Your DVD using PowerDVD'.
To learn how to print the paper assets and write the DVD, proceed to Printing the Paper Assets and
Writing the DVD
2.3
Creating a DVD From Files on Your Hard Drive
Prerequisites
Creating DVD's from files on your hard disc requires that you to have some appropriate files to use.
So the first question is, what kind of files can you create DVD's from?
1.
Currently our DVD authoring only supports full D1 size video and we don't resize the frame
size so your pre-capture files will need to be full D1 size which is either 720x480 or 704x480
for NTSC or 720x576 or 704x576 for PAL.
2.
Now, as for compression formats, we either support:
a)
DVD ready compression which is DVD compliant MPEG-2. This can come in several
different formats.
©2003-2006 Digital Media Applications, LLC
18
RocketDVD Professional User's Manual
b)
-
Elementary streams where the audio and video are stored in seperate files. Video
files with the following extensions *.mpv or *.m2v may but are not guaranteed to
contain MPEG-2 video. Audio files must also have the correct sampling rate for for
DVD's which is 48 KHz, 16 bit. The audio can be compressed as MPEG layer 2
audio which will typically have extension *.mpa or *.m2v. AC3 audio (*.ac3) of the
correct sampling rate and size are is also acceptable.
-
MPEG-2 program streams are typically MPEG-2 video and MPEG layer 2 audio
multiplexed into a single stream. *.mpg is a common extension for this type of file.
-
VOB files are very similar to MPEG-2 program streams in format. They will typically
be found in the VIDEO_TS folders of DVD's. Do NOT try to use VOB files from
copyrighted or encrypted DVD's, it will not work.
Any video format of the right dimensions (Frame sizes mentioned above) that you have
a DirectShow decoder for. Another way to look at it is any video file of the right size that
can be played by Window Media Player. Our software uses a software MPEG-2
encoder to convert raw video to DVD compliant MPEG-2. Some typical file extensions
which will contain usable media are *.wmv and *.avi. If you have specifically installed a
QuickTime DirectShow
Before, setting up the project, let's set one of the preferences to suit our needs. Click the
preferences button, and the Preferences tab from the property page dialog that pops up. Uncheck
the option to 'Step Through Property Pages as a Wizard'. Don't worry about the other options for
now. If you want to read more about the this options on this page you can do that in the section titled
'Preferences'.
©2003-2006 Digital Media Applications, LLC
Quick Start Guide
19
After making sure that option is unchecked, you can apply your options by clicking OK.
Proceed to 'Setting Up the Project'
2.3.1
Setting Up the Project
You can start out the same way as when doing live capture by entering a Project ID, title, subtitle and
date for the project.
©2003-2006 Digital Media Applications, LLC
20
RocketDVD Professional User's Manual
Selecting the Audio and Video Files
At this time, don't worry about the capture limit because it will not be needed. Leave all four
checkboxes unchecked. Now click the
button to bring up the project property pages.
©2003-2006 Digital Media Applications, LLC
Quick Start Guide
21
The four text fields are the values entered on the setup page of the display. If you changed any of
the text here, the change would be reflected on the setup display page.
· Now check the 'Use Pre-Captured File' option.
· Next click on the 'Pre-Captured Files' tab, and that property page should appear.
©2003-2006 Digital Media Applications, LLC
22
RocketDVD Professional User's Manual
What you need to do now will depend on the type of pre-captured files you have. Select the type of
files you have on your hard disc that you will be making a DVD from. Next click the 'Enter/Edit
FileList' button and the following should appear.
Now click cell under the Video File header.
©2003-2006 Digital Media Applications, LLC
Quick Start Guide
23
Click again, this time in the area circled in red, to get a browse button.
Now click the browse button to select the video or multiplexed file.
After selecting the file and closing the browser dialog, if needed follow the same steps to select your
audio elementary stream.
If you are using Elementary Streams, Program Stream or VOB Files, the video will not need to be
encoded so you can close the 'Pre-Captured FileList' dialog as well as the project property page
dialog. If your hardware supported Video Preview, the preview will stop when the property page is
closed. This is because the application knows that this project has been setup to author preencoded file and will not need the video capture. Proceed to 'Start Authoring Pre-Encoded Files'.
Setting the Encoder Bitrate
If using 'AVI files or other files that need to be transcoded' the software MPEG-2 encoder will be
used. One of the key settings that needs to be made for MPEG encoding is the video bitrate. The
bitrate is the factor that determines how many minutes of video can be stored on a standard DVD.
· The bitrate can be computed automatically if the length of the video clip is known. The length of
the video clip can be entered in the cell under the heading 'Length (hh:mm:ss)'.
· If the length of the video clip is not known, but you know what to set the bitrate to so that the
compressed audio and video will fit onto the DVD, you may set it manually at this time. To set
the bitrate, click on the 'Capture/Encoding' tab on the property page to get the following:
©2003-2006 Digital Media Applications, LLC
24
RocketDVD Professional User's Manual
Select the 'Manual' Bitrate Computation as shown. If your video is less than one hour and
fifteen minutes long, you can leave the bitrate where it is. If your video is longer, you will have to
compute the bitrate yourself. For now, ignore the other fields and click OK accept all the project
settings. If your hardware supported Video Preview, the preview will stop when the property
page is closed. This is because the application knows that this project has been setup to do
offline encoding and will not need the video capture.
Proceed to 'Start Offline Encoding'.
2.3.2
Start Offline Encoding
To begin the offline encoding, click the 'Encode' button shown below. After encoding starts, the
green LED above the 'Encode' button will be lit.
©2003-2006 Digital Media Applications, LLC
Quick Start Guide
25
The application display area should automatically switch to the 'Encode' tab and appear as shown.
When the encoding completes, the project will authomatically switch to the 'Author' display tab and
continue with the DVD authoring. When the DVD authoring is finished, your DVD may be viewed
using the PowerDVD application that was provided with this software. For help on using PowerDVD
to test your DVD before writing it to disc, go to 'Testing Your DVD using PowerDVD'.
To learn how to print the paper assets and write the DVD, proceed to Printing the Paper Assets and
Writing the DVD
2.3.3
Start Authoring Pre-Encoded Files
To begin authoring your pre-encoded files, click the 'Author' button shown below. After authoring
starts, the green LED above the 'Author' button will be lit.
The application display area should automatically switch to the 'Chapter' tab and appear as shown.
Based on the default chapter selection algorithm, the application must first select chapter points and
then acquire bitmaps of the first frame of each chapter to use on the chapter selection menu.
©2003-2006 Digital Media Applications, LLC
26
RocketDVD Professional User's Manual
After the chapter selction is done, the application display area should automatically switch to the
'Author' tab and appear as shown.
When the DVD authoring is finished, your DVD may be viewed using the PowerDVD application that
was provided with this software. For help on using PowerDVD to test your DVD before writing it to
disc, go to 'Testing Your DVD using PowerDVD'.
To learn how to print the paper assets and write the DVD, proceed to Printing the Paper Assets and
Writing the DVD
©2003-2006 Digital Media Applications, LLC
Quick Start Guide
2.4
27
Printing the Paper Assets and Writing The DVD
1.
Go back to the 'Setup' tab by clicking on it. Now check the four boxes as shown below:
2.
Make sure your printers are turned on and have the correct paper. If using a single printer, the
disc label will be printed first, followed by the case wrap and the chapter insert will be printed
last. You must also have a blank DVD in the selected DVD writer. If not, when you try to start
the project, it will prompt you for blank media. If you did not select default printers when you
steped through the Wizard, you should do so now, otherwise you will get errors if you try to print.
3.
Repeat the steps used to create the DVD from a video feed or files on the hard drive.
4.
This time however, the project will not stop after the authoring stage but will proceed to the
printing and writing stages.
5.
Once the printing and writing are complete, if you printed a paper label, you can apply the label
to the DVD. You can also tear or cut the perforated case wrap and cut out the chapter insert.
You should be able to use your DVD in most DVD players on the market today.
If you were happy with the DVD you had created on the hard drive and you simply want to print and
burn the DVD without having to re-capture or re-author the DVD, your could simply have clicked on
the 'Setup' tab as mentioned in step 1, checked the four boxes and then simply pressed the print
button shown below:
Assuming you had not deleted the intermediate files from your work directory, the project would have
started at the print stage and proceeded to the write stage.
©2003-2006 Digital Media Applications, LLC
28
RocketDVD Professional User's Manual
If you had closed the application since you had created the DVD and had not reused the 'test' Project
ID, you could simply load test.prj by clicking on the 'Load 'Project' button and selecting test.prj as the
project file to open. From this point, you could click on the the print button which would perform the
print and write stages.
It should be obvious that this is one way to make extra copies of a project provided the intermediate
files are not removed.
For a more detailed walk through and discussion of options, see the tutorial.
3
Introduction to RocketDVD Professional
Important Note
It is important to realize that there are two root level directory names that are reserved on
the drive that the DVD is to be built. See preferences for setting the Drive for VIDEO_TS
and AUDIO_TS directories. The VIDEO_TS and AUDIO_TS folders on the specified DVD
directory will be overwritten during the authoring stage.
3.1
What it is
The RocketDVD Pro Application is a Windows XP based, full-featured DVD authoring application. It
provides a simple and efficient means of completely setting up a DVD authoring project to be able to
run without user intervention once started. It was designed to increase productivity in commercial
DVD authoring projects by reducing the need for user intervention without sacrificing flexibility and
quality. Using 4x DVD-R writers, a two-hour DVD can be captured and authored in approximately 21/2 hours, and a one-hour DVD can be authored in less than 1-1/2 hours. RocketDVD Professional
can also output to robotic CD/DVD duplicating systems
The output of the completed project is:
· A written DVD sitting in the ejected DVD writer tray containing the following features/options:
·
·
·
·
Full D1 NTSC or PAL video resolution
Variable bit rate MPEG-2 video encoding
Two channel (stereo) Digital Dolby audio encoding
User defined menus with dynamic (number of chapters and scene selection pages
©2003-2006 Digital Media Applications, LLC
Introduction to RocketDVD Professional
29
determined by video content) scene selection menu
· Automatic scene detection, with additional chapters added into long scenes. Natural and
forced scene breaks are distinguished from each other in the DVD scene selection menu as
well as the paper assets.
· Printed/paper asset options
· Disc label
· Self-adhesive disc label with title, subtitle, date.
· Direct to disc printing by robotic duplication system.
· DVD case wrap with title, subtitle, date, running time and full color thumbnails of the chapter
points.
· Case insert with chapter time indices and chapter durations.
· A project file containing all pertinent data that was input to the project as well as data that was
collected as the project progressed. The project file can be used as a template to run another
similar project or re-run the completed project.
3.2
What it isn't
RocketDVD Pro is not a video editing application.
4
Using RocketDVD Professional
This section discusses how to use the RocketDVD Pro application.
4.1
Setup Wizard
The Setup Wizard is automatically run the first time the application is launched. It can also be
launched manually from the popup menu obtained by a right click on the application logo. The
purpose of this wizard is to setup your hardware specific settings to simplify making your first DVD.
All these settings can also be set through the project wizard or property pages. If the wizard is
cancelled without finishing, it will be run again the next time the application is launched unless the
settings are saved using the save settings button.
©2003-2006 Digital Media Applications, LLC
30
4.1.1
RocketDVD Professional User's Manual
Introduction Page
This page merely introduces the Setup Wizard.
4.1.2
Select Work Directories
This page suggests and allow for the selection of work directories/drives. The time taken for the
authoring stage can potentially be reduced the work directory selection. The best performance is
obtained by specifying the following directories on three different physical drives. There is no
advantage to using two different drive letters which are merely partitions on the same physical drive,
over simply using the same drive letter. In some cases there may be an advantage to creating the
VIDEO_TS folder on the root of a drive, but it can be placed in a subdirectory.
©2003-2006 Digital Media Applications, LLC
Using RocketDVD Professional
4.1.3
31
Company Variables
This feature is not available in all versions of the product.
The company name variables use the Text Variable feature to allow dynamic insertion of Company
Name, website and telephone number into the menu's and print assets. In fact, after the setup
wizard completes, the variables and values can be seen on the Text Variable page. Using
MenuMaker, see how these variables are used on the about DVD menu page. The fields are
actually just plain text fields and if no substitution is performed, the actual text would be printed. It
should become obvious that by adding another text field, and then adding it as a variable name on
the Text Variable page, you can create your own variables.
To include a company logo without having to re-create the menu background bitmap, save your logo
as a *.png file and then add it as a bitmap object to the menu layout in MenuMaker.
©2003-2006 Digital Media Applications, LLC
32
4.1.4
RocketDVD Professional User's Manual
Theme Selection Page
This page provides a preview of some of the current theme assets. The first time it is run, no
preview will be showing until a theme is selected.
©2003-2006 Digital Media Applications, LLC
Using RocketDVD Professional
33
Click on the '...' browse button to select a theme. A Theme will determine how your DVD menu will
look as well as the disc label and the case wrap. Once a theme is selected, you can further
customize your DVD if you like by using the project property pages. This software provides the
capability to dynmically insert title and date information into both your DVD menus and paper assets.
The placement of that dynamic text is not show on these previews. If the menu theme contains
more than 3 menus, only the background bitmaps of the first three will be shown. At this time,
thumbnails previews of motion menus are not provided.
The browse button will bring up the following dialog box to select your default look.
©2003-2006 Digital Media Applications, LLC
34
4.1.5
RocketDVD Professional User's Manual
Select Live or Pre-Captured Video
The page allows you to specify whether you will primarily be creating DVD's from a live video feed,
such as a camera or VCR or whether you will be making your DVD's from pre-captured files on your
hard drive. If you select from a live video source, each time the application is launched or the 'New
Project' button is pressed, the application will be initially setup to capture video. This default can
easily be overridden by the radio buttons in the lower left hand corner of the Project Property Page.
Your default setting can be changed by re-running the wizard or by simply pressing the save settings
button after changing the setting on the Project Property Page.
©2003-2006 Digital Media Applications, LLC
Using RocketDVD Professional
4.1.6
35
Select Audio/Video Inputs and Settings
This page is only shown if the live video selection is made on the previous wizard page. This allows
default audio video input settings to be set. On a project by project basis, this default can easily be
overridden by the options on the Encoding Property Page. Your default settings can also be
changed by re-running the wizard or by simply pressing the save settings button after changing the
setting on the Encoding Property Page.
©2003-2006 Digital Media Applications, LLC
36
RocketDVD Professional User's Manual
Some of these settings will not be applicable depending on the hardware configuration.
·
Audio Input Source Connector - may be used to specify analog or digital audio and
possible the type or format of the audio feed.
·
Video Input Source Connector - may be used to specify the type of cable that is used to
connect the video source to the capture card.
·
Video Signal - specifies whether the video feed will be NTSC or PAL.
·
Aspect Ratio - if available will specify whether the default video feed has a 4x3 or 16x9
aspect ratio.
4.1.7
Select DVD Writer
This page allows the DVD writing device to be selected. If no DVD duplicators or towers are
attached, a local DVD writer must be accessible in order to select a writing device. Again as is the
case on each other setup wizard page, on a project by project basis, this default can easily be
overridden by the options on the DVD Writing Property Page. Your default settings can also be
changed by re-running the wizard or by simply pressing the save settings button after changing the
setting on the DVD Writing Property Page.
It is possible for non DVD writer drives to be listed so please take make sure to select appropriate
drives for writing DVD's.
©2003-2006 Digital Media Applications, LLC
Using RocketDVD Professional
37
· Select Primary DVD writer to use - Select your default output device from the drop-down listbox.
· Select Secondary DVD writer to use - If your system has multiple local drives, a secondary
writer choice will be available unless you choose a duplicator for your first choice. If your
secondary choice is different from your primary choice both drives will be used simultaneously for
writing DVD's which will increase your output capacity.
· Destination Directory for Duplicator Job File - If you choose a duplicator, aditional options may
present themselves. RocketDVD Pro interfaces with most duplicators by outputting a job file to a
polled directory. The directory specified here must be the same as that specified in the duplicator
server software.
4.1.8
Select Default Printers
The printers to be selected here are those used for printing paper label, case wrap stock and case
inserts. Again as is the case on each other setup wizard page, on a project by project basis, these
defaults can easily be overridden by the options on the Disc Label Property Page, Case Wrap
Property Page or Case Insert Property Page wizard pages. Your default settings can also be
changed by re-running the wizard or by simply pressing the save settings button after changing the
setting on the project property pages mentioned.
©2003-2006 Digital Media Applications, LLC
38
RocketDVD Professional User's Manual
If outputting to any printer that has the ability to use different settings resulting in different print
qualities, such as ink jet printers, be sure to set the paper type or print quality settings from the
'properties' page of the printer selection dialog. For example, if printing to glossy disc labels, you
may want to select the glossy photo paper output for the disc label printer. The case wrap is a paper
asset that is shows on the outside of the case. It is inserted between the case the it's clear plastic
wrap. The case inserts are are discussed further on the Case Insert Property Page.
4.2
Software Encoder Calibration
This product uses a software MPEG encoder for realtime encoding of DV or uncompressed captured
video. The encoder can be configued to use as much CPU as desired without regard to the time
taken, or it can be configured make certain trade-offs to acheive faster compression times. This
application has taken the approach of determining the optimal setting for realtime compression
through a calibration procedure. For this reason, when required, the calibration wizard will
automatically be launched. This calibration may take as much as 5-10 minutes to complete but once
it has completed successfully, it will not be automatically launched again.
It is important to note that the calibration can be greatly affected by the video content. For instance,
video that is very dark or doesn't change much from frame to frame will be easier to compress and
will probably complete the calibration with a higher quality setting than would be possible for video
that is harder to compress. So in order to make sure the calibration is comes up with a safe value, it
is advisable to run the calibration with video that would be on the high end of compression difficulty.
©2003-2006 Digital Media Applications, LLC
Using RocketDVD Professional
39
An example of this would be commercials from a TV feed.
It is important to make sure the calibration is done properly and conservatively enough. The reason
is that if the compression gets too far behind, video frames may be lost which will result in loss of
A/V synchronization and irregular video playback.
4.3
Project
The project is combination of a project template, a work order, and a project history. In order to kill
two birds with one stone, the following chapter will describe the project and the User interface used
to edit and view the Project.
A project is created by choosing settings on the property pages. This project can be saved using
any file name you like. In this way you are using the project as a template. When saving the
project, you will notice that the Project ID was suggested as the base part of the project file name.
When the project is run, a project file is saved to the default project file directory, using the Project ID
as the base name with a "prj" extension. Note: the automatically saved project file is the same as
the filename suggested when saving a project. This means that the automatically saved project file
will overwrite/update the project file previously saved with that name. [In addition to this, at the
completion of each stage, the project file is written to the default project directory. This is useful if a
failure ever occurs, because then the project file written can be opened and the project can often be
resumed and completed.] Finally, there is project execution data written to the automatically saved
project file such as the number of chapters, the actual chapter points, capture time and number of
frames captured. Without this information, a project cannot be started beginning at the authoring
stage. A previously executed project should have all this data stored in the project file which should
allow the project to be rerun beginning at any stage. Finally, if the work/capture directories are
moved to another drive for storage, stages of the project can be re-run by simply opening the
completed project file and changing the work/capture directories to match the current location of the
work/capture directories.
For your convenience, the application has provisions for changing some of the most commonly
changed settings from the front panel without having to open the project property page dialog box.
4.3.1
Project Property Page Dialog
This dialog box can be used as a Wizard with Next and Back buttons or as a tabbed property page
dialog. This functionality is controlled by the 'Step Through Property Pages as a Wizard' option on
the application preferences dialog. This dialog is used for creating, editing or viewing project files.
The settings are grouped into the following property pages.
·
·
·
·
·
·
·
·
·
·
·
·
·
Project Setup
Deck Control (Hardware Dependent)
Text Variables (Professional Version)
First Play
Pre-Captured Files
Encoding
OSD (Hardware Dependent)
Authoring
Data Files (Professional Version)
Burning
Disc Label Printing
Case Wrap Printing
Chapter Insert Printing
©2003-2006 Digital Media Applications, LLC
40
4.3.1.1
RocketDVD Professional User's Manual
Project Property Page
·
Project ID - this is an alpha numeric string which is composed of characters valid for a
filename. A project file will be written in the default project directory upon completion of the
project with the Project ID being the base part of the filename followed by the file extension
".prj". This field, if kept unique, is very useful to keep track of projects run.
·
Project Text
· Title - this text is used for printing on the DVD assets which includes case wrap, disc label or
disc surface, and case insert.
· Subtitle - this text is used for printing on the DVD assets which includes case wrap, disc label
or disc surface, and case insert.
· Date Range - this text is used for printing on the DVD assets which includes case wrap, disc
label or disc surface, and case insert.
·
Input Options
· Use Video Capture and Realtime Encoding - this is the default option which acquires the
audio/video streams in realtime through a video capture board or digital port and encodes the
media in realtime.
· Use Pre-Captured Files - this option skips the realtime video capture stage by allowing the
user to specify pre-captured files in one of several accepted formats. Starting from these precaptured files, the RocketDVD Pro application take the project through to completion just as it
©2003-2006 Digital Media Applications, LLC
Using RocketDVD Professional
41
would following the end of realtime capture. If unencoded files are specified, encoding will be
done using a software encoder. The encoding step could be very time consuming, possibly
even taking longer than realtime to encode the clips.
·
Video Signal is used to specify whether in the input video source is NTSC or PAL. The
option chosed here will also affect the DVD authored.
4.3.1.2
Deck Control Page
This feature is not available in all versions of RocketDVD Professional. If you do not have
access to this feature and you wish to use it, please contact http://www.dmapp.com or your
local dealer.
Deck control refers to controlling a remote tape deck via Firewire or Serial bus. This feature is not
available in all product configurations. It is generally available when using 1394 (Firewire) capture
and it will be available with some hardware capture solutions via RS-422 or other control bus.
The mark in/out feature if available allows for setting a list of in/out points which can then be used to
automatically capture multiple segments from a tape without any user intervention, once the capture
has begun. This is useful if only a section of the video contrent is desired, or if most of the tape
needs to be captured but some sections of unrecorded tape or ground shooting need to be removed.
No claims are made about frame accuracy when using the IN/OUT marks.
See Deck Control under the Video Monitor section for alternate user interface for setting IN/OUT
marks.
©2003-2006 Digital Media Applications, LLC
42
RocketDVD Professional User's Manual
·
Use In/Out Marks to start/stop deck when capturing video - this control is
used to indicate whether IN/OUT marks are to be used for the project's capture stage.
·
User Book Mark - allows a single timecode per project to be stored for convenience.
This mark is not used with the In/OUT marks when automatically capturing video.
·
Edit In/Out Points - this button brings up a spreadsheet like interface which allow
deleting or inserting rows as well as editing of IN/OUT marks.
4.3.1.3
Text Variables Page
This feature is not available in all versions of the product. If you do not have access to this
feature and you wish to use it, please contact http://www.dmapp.com or your local dealer.
©2003-2006 Digital Media Applications, LLC
Using RocketDVD Professional
43
This page can be used to specify test merge variables and their values which can be insertted into
DVD menus, disc labels and the case wrap. Variables are not special objects, they are merely text
objects. What makes them a variable is for the exact string value of the text object to be listed as a
variable name. If the exact text of a variable name exists as a text object in menus, labels or case
wraps, the variable name will be replaced with the substitution value at runtime. If you have a text
object that was not intended to be a variable but it happens to have the same text as a variable
name, it will be treated as a variable. Because of this, it is a good idea to adopt a unique naming
convention for your variable names that will hopefully avoid this potential conflict.
If you wish to add/edit/delete variables, click the Add/Edit... button which will bring up a spreadsheet
type interface.
©2003-2006 Digital Media Applications, LLC
44
4.3.1.4
RocketDVD Professional User's Manual
First Play Page
This page allows assets to be specified for the DVD first play. The first play is the first thing that is
seen when a DVD is played. Often times the first play is a warning against copying the DVD. In
some cases, it may contain some marketing material such as advertisements or movie previews.
·
Include First Play Video - Check this box if you want to include a first play video clip.
·
Video Elementary Stream, Program Stream or VOB file - The video asset can be
provided in three forms, all of which must be in DVD compliant MPEG-2 format.
· Video Elementary Stream - This is a DVD compliant MPEG-2 video elementary stream. File
extensions will typically be *.mpv or *.m2v.
· Program Stream - This is a DVD compliant MPEG-2 program stream. This program stream
has audio and video multiplexed together into a single file which typically has the extension
*.mpg.
· VOB file - This is a file that has already been multiplexed for DVD. This file also has audio
and video multiplexed together into a single file which should have the extension *.vob.
·
Optional Audio Elementary Stream - The audio stream is a DVD compliant audio
stream. If a multiplexed format was selected for the video file, no audio file will be expected. If
a video elementary stream was selected, that doesn't have an accompanying audio stream, this
field can be left blank.
©2003-2006 Digital Media Applications, LLC
Using RocketDVD Professional
·
45
When playing DVD, do not allow first play to be skipped - this option uses the
DVD User Operation Control (UOP) to allow or prevent viewers from skipping or fast forwarding
over the first play video.
4.3.1.5
Pre-Captured Files Property Page
This feature is not included in the standard version of RocketDVD Professional. If you do
not have access to this feature and you wish to use it, please contact
http://www.dmapp.com or your local dealer to purchase an upgrade.
When running projects with pre-captured files, the file types cannot be combined for a single DVD.
In other words, you cannot make a DVD with a program stream as the first segment and elementary
streams for the second segment.
When creating a DVD from uncompressed files or files that will need to be transcoded, software
audio and video comrpessors will be used to create the DVD compliant elementary streams.
·
Pre-Captured Files Type - this option specifies the type of pre-captured files for the entire
project. What this means is that multiple segments can being joined together into a single title,
and the pre-encoded files specified for each segment must be of the type specified. Currently
©2003-2006 Digital Media Applications, LLC
46
RocketDVD Professional User's Manual
for files to be encoded or transcoded, the file must be Full D1 size (720x480 or 704x480). If
RocketDVD Pro can find the necessary codecs to parse, decode and encode the file, the
encoding and authoring should proceed as usual. Because the variations in video files could be
virtually endless, no guarantee is made regarding the file formats supported. Furthermore,
when transcoding, it is possible that the application may simply stop or hang without
progressing. Under these circumstances, you may contact technical support, but probably that
file format is not supported.
·
Enter/Edit File List - is used to enter or edit the list of pre-captured files. It will pop up the
folllowing dialog box:
·
Expand To Fit - will expand the columns equally to fit the width of the window.
·
Auto Width - will resize the columns to fit the content.
·
Add Row - adds a row to the end.
·
Set Segment Text from Filename - if this option is checked, whenever a cell in the
Video File column is updated, the filename minus the path and extension will be copied over
to the Title column for that row.
·
Import CSV... - will import the pre-encoded file list from a coma/tab separated text file.
·
Export CSV... - will export the pre-encoded file list to a coma/tab separated text file.
·
Audio/Video File - the picture shows elementary streams being specified. If Program
Streams or VOB files were specified, there would be only one column for entering the media.
·
Thumbnail - this column is optional if making a DVD without menu or a DVD with menu but
no scene selection page(s). If no thumbnails are specified, then no thumbnails would be
available for the case wrap either. Since only one thumbnail per segment can be specified,
only one chapter per segment should be specified on the authoring page if chapter thumbnails
are to be used.
·
Length - this column is also optional if making a DVD with only one chapter per segment
and no chapter insert. If lengths are not specified, the following chapter selection methods
cannot be chosen: 'Arbitrary Number of Chapters' and 'Arbitrary Chapter Length'.
·
Title - this column is optional if not making a DVD that has chapter titles on the scene
©2003-2006 Digital Media Applications, LLC
Using RocketDVD Professional
47
selection pages.
4.3.1.6
Encoding Property Page
The encoding page will appear different depending on the configuration of the product being used.
Screen shots are shown for the different configurations that are possible. In both configurations, if
the computer has a DV port, it can also be used to capture the video. The software encoder would
of course be used for the DV capture option.
Capture Card / Hardware Encoding Options
DV (IEEE 1394) Capture
©2003-2006 Digital Media Applications, LLC
48
RocketDVD Professional User's Manual
Encoding/Transcoding Pre-Captured Files
©2003-2006 Digital Media Applications, LLC
Using RocketDVD Professional
·
49
Video Source is for those systems that support more than one type of input connector, this
option specifies which video connectors to capture from.
· Composite - RCA type connector, usually colored yellow.
· S-Video - standard S-Video source.
· RGB - component RGB source.
· YUV - component YUV source.
· SDI - digital SDI source.
· DV - IEEE 1394 port.
·
Audio Input is used by those systems which support more than one audio connector.
· Line In - this input is the unbalanced line level source. This connector is typically a 1/8"
diameter phone plug connecter.
· Balanced - this input is balanced source. This connector is typically an XLR type connector.
In fact for stereo audio, there should be two XLR connectors.
· AES - digital AES source
· Embedded AES - digital AES audio embedded with the SDI video signal. In this case, both
the audio and video will be coming in on the SDI video connector.
·
Video Aspect Ratio for capture cards that support it is used to specify the aspect ratio of
the video source.
©2003-2006 Digital Media Applications, LLC
50
RocketDVD Professional User's Manual
·
Bitrate - the MPEG-2 video encoder can be configured to use a constant bit rate encoder or a
more advanced variable bit rate encoder. The variable bit rate encoder will typically produce
better results than the constant bit rate encoder but the file sizes may be slightly less
deterministic.
·
Audio Algorithm - specifies the encoder to be used on the audio stream. This option may
be set to be set to MPEG audio but in virtually all cases, will be set to AC3. The default DVD
bitrate for stereo (two-channel) Dolby Digital is 192 kbits/sec. The bitrate can be set as high as
640 kbits/sec.
·
Bitrate Computation
· Auto - this option will usually be used which will automatically compute the optimal bitrate for
the DVD length selected. The maximum value that will be used for the target bitrate is 8000
kbps. If a higher bitrate is desired, the manual bitrate computation method should be chosen.
· Manual - this option is chosen only when the user requires a specific bitrate or if they wish to
exceed 8000 kbps.
·
Record length - it is crucial that the capture length specified here is as accurate as possible
for recording lengths over approximately 80 minutes because this number is used to set the bit
rate. The reason it is not crucial for recording lengths under 80 minutes is that for anything of
shorter length, a bit rate of 8 Mbps will be used. When using the auto bitrate computation
method, the highest the target bitrate will be set to is 8000 kbps. In addition to the end-of-tape
detection, this selection can also be used to stop capture at a certain time.
4.3.1.7
OSD Property Page
This feature is not available in all versions of RocketDVD Professional. It is currently
available with the VM2 line of capture boards.
OSD is an acronym for On Screen Display. It provides the ability overlay graphics or text onto the
live captured and encoded video. It is often used to watermark the video with a company logo or
name. In the following example, the 'G' is displayed using white text on a black background as it is
sometimes done for TV ratings. The background in the setup is always shown as opaque black, but
it will actually be displayed on the video using the transparency level set. The Vitec Multimedia world
logo is a *.tga file where the black background is transparent and the logo sphere is semitransparent. The preview snapshot was taken from a Discovery channel feed which contained it's
own OSD logo.
©2003-2006 Digital Media Applications, LLC
Using RocketDVD Professional
©2003-2006 Digital Media Applications, LLC
51
52
RocketDVD Professional User's Manual
·
Enable OSD - this control enables or disables the feature for the current project.
·
Edit - this button pops up the following window which allow WYSIWYG layout of the OSD
graphics or text.
·
Add Bitmap - this button brings up a bitmap selection dialog box. Currently either *.bmp or
*.tga files are accepted. For *.bmp files, the transparency of the entire bitmap can be set, but
*.tga files can be created to have transparency in the back and foreground. Once placed, the
bitmap can be moved around but not resized. To resize, save the bitmap to the desired size.
·
Add Text - this button brings up a text dialog box. Once placed, the text can be moved
around by dragging and dropping the text box. The font and size can be changed using the
combo boxes shown at the top of the edit window. The font, size and color can also be set
using the Font dialog from the context sensetive (right-click) menu. The transparency of the
text (foreground) or background can be set independently. The default transparency for the
background is 100% transparent and the default transparency for the foreground is 0%
transparent.
4.3.1.8
Authoring Property Page
The authoring page is where the DVD navigation and chapter selection is specified. If a DVD
navigation menu is desired, a menu theme should be chosen. RocketDVD Pro comes with a few
basic menu themes and more can be created using the MenuMaker application.
©2003-2006 Digital Media Applications, LLC
Using RocketDVD Professional
·
53
DVD Type - A DVD without menus is typically used for showing demo content. Such a DVD
can be designed to play once through to the end and then stop or it can be made to start playing
from the beginning every time the end is reached. A DVD with menus can be made much more
useful and interesting, depending on how much time is put into creating the menus and extra
features.
·
Chapter Selection Options
· Arbitrary Number of Chapters – For this selection, the capture time specified on the previous
page will be evenly divided up to obtain the length and hence the starting position of each
chapter. If the capture is stopped for any reason before the specified capture length, there
may be fewer chapters than specified if the capture was stopped before the last chapter was
placed.
· Arbitrary Chapter Length – For this selection, each chapter will be made to be the specified
length with the actual number of chapters not being known until the capture has completed.
· Smart Chapter Definition – This selection applies a proprietary algorithm in conjunction with
natural scene detection to determine the optimum chapter selection. This option can include
a combination of natural and forced chapter breaks. Forced chapter breaks may be used to if
there are not as many scene breaks as the specified desired number of chapters. Forced
chapter breaks are simply chapter points occurring at points that are not the start of a new
video scene. These will usually occur within the context of long natural scene breaks. For
example if a camera was set up on a tripod to video tape a lecture or party, etc… there would
be few if any natural scene breaks but it would still be useful to be able to skip through or
©2003-2006 Digital Media Applications, LLC
54
RocketDVD Professional User's Manual
directly jump to sections of those long scenes by using DVD chapters. Finally, in the context
of the thumbnails printed on the case wrap, it is a way of giving an overall picture of the video
content even if there are few of no natural scene breaks.
· Scene Detection Only – This option will place chapters at points determined to be new scenes
by the automatic scene detection code. If the video has glitches, sync problems, or just rapid
panning, spurious scene starts may be detected. These problems are usually minimized by
the 'Smart Chapter Definition' selection.
· No Chapters – This option will not create any chapters. There will also be no chapter
thumbnails for a DVD menu or for the case wrap.
· Custom Chapters – This option will allow the user to specify the time codes for the chapters,
along with some text that will be associated with the chapter and optionally a bitmap to use in
place of the first frame of the chapter. The chapter text will be rendered to the DVD menu if
the menu theme so specifies. The chapter text will also be printed on the chapter insert. If
bitmaps are supplied, they must be supplied for all chapters and will be used in the same way
automatically captured bitmaps are used. If the custom chapter radio button is selected, a
button will appear which will allow the following dialog box to be brought up. Chapter time
must be specified in the hh:mm:ss:ff format where frames is the frame number 0-29 for NTSC
or 0-24 for PAL. If the frame number is not known, zero may be specified for the frame
number. Just because the chapter time is specified in this format, does not mean that the
chapter will occur at that exact frame number. Chapter's must occur at the start of a GOP in
the encoded video stream, so theoretically, the chapter should be within 15 frames or half a
second of the desired chapter time. For optional custom chapter functionality, see Manual
Chapter Insertion.
·
Expand To Fit - will expand the columns equally to fit the width of the window.
·
Auto Width - will resize the columns to fit the content.
·
Add Row - adds a row to the end.
·
Import CSV... - will import a custom chapter list from a coma/tab separated text file.
©2003-2006 Digital Media Applications, LLC
Using RocketDVD Professional
55
·
Export CSV... - will export the custom chapter list to a coma/tab separated text file.
·
Time (hh:mm:ss) - This is the custom chapter point given in term of
hours:minutes:seconds.
·
Thumbnail - this optional column is allows a bitmap to be supplied for use on the menu
scene selection page as well as the case wrap. If thumbnails are needed but not supplied,
bitmaps captured during the live capture or the pre-authoring chapter selection will be used.
If a thumbnail is specified in the pre-encoded file list as well as in the custom chapter list,
the custom chapter thumbnail will be used instead.
·
Chapter Title - this optional column is used to supply chapter titles. Chapter titles are
used in a couple places: 1) If the menu theme shows chapter titles/text on the scene
selection page, this is the text that will be displayed there. 2) If the chapter insert is printed,
the chapter text will be printed there if specified.
·
Menu Theme - A default directory can be specified for menu theme files in the 'Directories'
tab of the Preferences dialog. As mentioned above, menu themes can be created using the
MenuMaker application. Menu themes are text readable files which have a *.menu file
extension. The menu file defines the menus, and their layouts, the buttons, their interactions
etc… The menu theme files contain links to graphics such as background bitmaps, or movies
and audio. If these supporting files are in a subdirectory of the menu theme file, the path's to
them will be relative paths, otherwise they will be absolute paths.
·
Desired Number of Chapters - The purpose of this field may vary depending on the
chapter selection option chosen. In this particular case, when Smart Chapter Definition is
chosen, more than the desired number of potential chapter points are chosen and then the
desired number of chapters are chosen from among the potential chapter points. It is possible
to end up with fewer than the desired number of chapters.
·
Scene Detection Sensetivity - when using one of the scene detection chapter selection
options, this parameter influences how many potential scene changes are identified. Scene
detection is not an exact science trying to decide whether a frame is the start of a new video
sequence can be affected by the video content. The middle of the scale was found to work well
for most video content. There are however cases where the sensetivity may need to be
adjusted up or down.
·
Min. Chapter Length - this value is used to specify the minimum chapter length when
using scene detection. If scene changes result in chapters shorter than the specified length in
seconds, the scenes will be combined into a single chapter until the chapter length is greater
than the minimum chapter length. Note how this is different from every scene shorter than the
minimum length being combined with the previous chapter. In this case, if every scene were
shorter than the minimum length, they would all be combined into a single chapter.
·
Menu Thumbnails Previews are provided simply to give a visual indicator of the menu
theme chosen. It is not intended to show all menu bitmaps, or the placement of buttons and
selection highlights.
· Create DVD Image File – if this option is checked, an image of the specified type is
created from the VIDEO_TS and AUDIO_TS folders. This option should usually be checked
since it speeds up the DVD writing and it allows another DVD to be authored to the DVD
directory without losing the ability to write another DVD by using the image. The format of the
image is ISO 9660/UDF 1.02 bridge file system. The drop down listbox allows the extension of
the image to be changed, but the format of the image file remains the same.
©2003-2006 Digital Media Applications, LLC
56
4.3.1.9
RocketDVD Professional User's Manual
Data Files Property Page
This feature is not available in all versions of the product. If you do not have access to this
feature and you wish to use it, please contact http://www.dmapp.com or your local dealer.
This page is used to include data files on the DVD. If this option is checked, all the contents of the
specified directory will be written to the root of the DVD. If all data files need to be in a directory on
the DVD, they that directory should exist inside the specified directory. Files existing directly in the
specified directory will be written to the root of the DVD. When saving settings on the RocketDVD
Pro application, this option is not saved.
4.3.1.10 DVD Writing Property Page
The DVD burning page is used to specify whether to create a DVD disc or not. If the Write DVD
option is not checked, the DVD can still be authored and the assets printed. This page is also used
to indicate output to a duplicating/printing unit.
©2003-2006 Digital Media Applications, LLC
Using RocketDVD Professional
·
57
Use CD Media – can be used to create mini-DVD's and they can also be used for faster
cheaper test runs.
·
Volume name – is used to specify the name that would appear in the file explorer if the disc
were inserted into a computer.
·
Number of copies to write – will determine the number of copies both for local writes as
well as for duplicators. Even if the Write DVD option is not checked, this value will still affect the
quantity of the printed assets.
·
Project Priority – is used by some duplicators to allow projects to be completed ahead of
other projects that are already in the queue.
·
Select Primary DVD writer to use – specifies which local drive or which duplicator to
use for writing the DVD.
·
Write DVD Now – button is used to write a DVD to the specified DVD writer. This is useful
for testing or for simply writing another DVD for a previously run project.
·
Abort DVD Writing – allows a write in progress to be aborted. The disc will have to be
discarded, so the only reason to abort would be to avoid having to wait for the write to complete.
The abort function will only work for local drives, and not for duplicators.
·
Stop Playing Wave File – is used to stop the write complete audio notification if it is
©2003-2006 Digital Media Applications, LLC
58
RocketDVD Professional User's Manual
enabled.
If a duplicator is selected as the primary DVD writer, different options may be presented and will be
discussed.
·
Destination Directory for Duplicator Job File – is a directory, usually on the
duplicator system where job files will be written. When a duplicator job file is written to that
directory, the duplicator job will automatically begin. If you want the job to be created but not run
immediately, you can change the directory and then copy the job file to the job directory when
ready for the job to be run.
·
Options – if there are additional options that are not specified by the controls in the upper half
of this page, they might be configurable by the Options... button if it is enabled.
©2003-2006 Digital Media Applications, LLC
Using RocketDVD Professional
59
·
UserID – some duplicators may require or allow a UserID.
·
File System – this option allows the file system to be specified.
·
Specify disc rotation for printing (degrees) – for duplicators that support it, this
option is used to rotate the disc from a reference point before printing.
4.3.1.11 Printing Property Pages
4.3.1.11.1 Disc Label Property Page
This page is where the disc (label) printing is specified. This page also allows the user to customize
the layout of the contents on the label. To change the layout, double-click on the picture of the disc,
or click the Edit Layout… button. This will bring up a larger WYSIWYG layout of the disc label on
which the text and graphics can be added, moved or removed. Font and text color can also be
modified as well. When writing multiple discs as specified on the Burn Properties Page, the number
of copies indicated there will be the number of disc labels printed.
©2003-2006 Digital Media Applications, LLC
60
RocketDVD Professional User's Manual
·
Print the DVD disc label – this option controls whether a disc label will be printed as part
of the project.
·
Use *.PRN file – this option allows for a specifically prepared *.PRN file to be used instead
of the disc layout shown in the dialog above. In fact if this option is checked, irrelevant options
will be hidden.
·
Use Duplicator Printer – is only enabled if a duplicator is specified on the Burn page. If
this option is specified, a paper label will not be printed but the duplicator will be used to print
directly onto the disc surface. Furthermore, this option will control if and what is printed on the
duplicator even though it is not part of the Burn page.
·
Choose Paper Stock – this drop down list box allows the selection of pre-programmed
page layouts as well as a persistent user definable layout. This selection simply controls the
three edit fields which specifies the location and size of the label relative to the top and left
edges of the paper. Measurements are specified in millimeters. The three fields can be
manually edited causing the list box to show "Changed Settings". If the Save As Custom button
is pressed, the list box will show "Custom Disc Label", which will retain those settings until Save
As Custom is pressed again with different settings.
·
Select Printer/Properties – this button should be used to select a printer if printing on
paper labels. When a printer is selected, the paper or print quality settings should also be set
base on the type of paper being used. These settings will be saved as part of the project and
©2003-2006 Digital Media Applications, LLC
Using RocketDVD Professional
61
need not be reset unless a different printer is being selected.
·
Print Now – can be used for testing the print layout. It can also be used to print a single disc
label for a previously executed project.
·
Background bitmap for the disc – this optional field allows a full background bitmap to
be specified for the disc label printing. This bitmap will of course be behind any text or other
graphics that are printed on the label. Currently the format of this file must be a 24 bit bmp file.
4.3.1.11.2 Case Wrap Property Page
This page is where the DVD case wrap printing is specified. This page also allows the user to
customize the layout of the contents on the case wrap. To change the layout, double-click on the
picture of the case wrap, or click the Edit Layout… button. This will bring up a larger WYSIWYG
layout of the case wrap on which the text and graphics can be added, moved or removed. Font and
text color can also be modified as well. The size, number of and placement of the chapter
thumbnails can also be modified.
·
Print the DVD Case Cover Insert – also know as the case wrap. This option controls
whether the case wrap will be printed as part of the project.
·
Use *.PRN file – this option allows for a specifically prepared *.PRN file to be used instead
of the case wrap shown in the dialog above. In fact if this option is checked, irrelevant options
©2003-2006 Digital Media Applications, LLC
62
RocketDVD Professional User's Manual
will be hidden.
·
Print Project ID in margin – printing the Project ID in the unused margin of the case wrap
is useful for making sure the right assets come together when packaging the DVD. If printing on
borderless stock, printing of the Project ID can be turned off by unchecking this option.
·
Choose Paper Stock – this drop down list box allows the selection of pre-programmed
page layouts as well as a persistent user definable layout. This selection simply controls the
three edit fields which specifies the location and size of the label relative to the top and left
edges of the paper. Measurements are specified in millimeters. The four fields can be
manually edited causing the list box to show "Changed Settings". If the Save As Custom button
is pressed, the list box will show "Custom Case Wrap", which will retain those settings until Save
As Custom is pressed again with different settings.
·
Select Printer/Properties – this button should be used to select a printer. When a printer
is selected, the paper or print quality settings should also be set base on the type of paper being
used. These settings will be saved as part of the project and need not be reset unless a
different printer is being selected.
·
Print Now – can be used for testing the print layout. It can also be used to print a single case
wrap for a previously executed project.
·
Background bitmap for case wrap – this optional field allows a full background bitmap
to be specified for the case wrap printing. This bitmap will of course be behind any text or other
graphics that are printed. Currently the format of this file must be a 24 bit bmp file of sufficient
resolution to obtain the print quality desired.
4.3.1.11.3 Case/Chapter Insert Property Page
This page is where the DVD case insert printing is specified. The case insert is the printout shown
below containing the title, subtitle, date and chapter time indices. The duration when specified is
given in terms of entire scenes as determined by the scene detection. The black text is used for
chapters that coincide with actual scene starts and the gray text is used for chapters added simply to
break up a long scene. The dashed line can be used for viewer comments about the contents of the
chapter. If custom chapters and chapter text is specified, the chapter text will be printed in place of
the dashed line.
©2003-2006 Digital Media Applications, LLC
Using RocketDVD Professional
©2003-2006 Digital Media Applications, LLC
63
64
RocketDVD Professional User's Manual
·
Print DVD Chapter Index as an Inside the Box Case Insert – this option controls
whether the chapter insert will be printed as part of the project.
·
Use *.PRN file – this option allows for a specifically prepared *.PRN file to be in addition to in
instead of the chapter insert shown above.
·
Select Printer/Properties – this button should be used to select a printer. When a printer
is selected, the paper or print quality settings should also be set base on the type of paper being
used. These settings will be saved as part of the project and need not be reset unless a
different printer is being selected.
·
Print Now – can be used for testing the print layout. It can also be used to print a single
chapter insert for a previously executed project.
4.3.2
Load a Project
This button on the application is used to load a template (*.tpl), or a saved or previously executed
project (*.prj). Once loaded, the project can be restarted or the project settings can be modified
before starting the project. This control can be invoked by using the ALT-L shortcut when the main
©2003-2006 Digital Media Applications, LLC
Using RocketDVD Professional
65
application window has the focus. Pressing this button will bring up the following File Browser Dialog
box.
The project extension should be used when setting up and saving projects to run. When a project is
run, it will automatically create a file in the default project directory using the Project ID as the base
part of the filename with the extension *.prj. So, it the Project ID's are kept unique, the Project ID will
provide somewhat of a record of the projects run.
The template is a special case of the project file. Unlike the project file, when a template it loaded,
not all of the project properties will be changed. For example, if your system is setup to use
particular video capture settings, DVD writer and printers, you can load a project template in without
overwriting any of those settings in the current project. Those system type settings can be saved as
default by clicking the 'Save Settings' button and project templates can be loaded without losing
those settings. As a general rule, the settings that are loaded as part of a template are those that
are set on the following property pages.
·
·
·
·
4.3.3
Authoring Property Page
Disc Label Property Page (minus the printer and print properties)
Case Wrap Property Page (minus the printer and print properties)
Case/Chapter Insert Property Page (minus the printer and print properties)
New Project
This button will revert to the saved project settings. These are the settings that are saved by clicking
©2003-2006 Digital Media Applications, LLC
66
RocketDVD Professional User's Manual
on the 'Save Settings' button at the bottom right corner of the application's main panel.
4.3.4
More
This button, which is located in the lower right hand corner of the Setup Display Tab, will bring up the
full Project Property Page Dialog Box.. It can be used to create or edit current project properties.
4.3.5
Save a Project
Save the current project. The Project ID will always be suggested as the base name of the project
file but it can be overridden if you like. You will always be prompted if your chosen name would
overwrite an existing project file. This option can be invoked by using the ALT-S shortcut.
4.4
Print Preview
The print preview button will allow you to preview the disc label and or the case wrap if they are
enabled for the current project. This allows you to make sure your text fields fit properly on the
printed assets. If you are about to start a project using an existing project file, the preview may show
capture length and thumbnails from the prior project. If Print Disc Label is checked, the disc label
will be previewed first. Press the space bar or click the close box to close the preview window. If
Print Case Wrap is checked, that will be previewed next. Press the space bar or click the close box
to close the preview window. Currently the case inserts will not be previewed.
4.5
Application Preferences
The application preferences present a tabbed property page dialog that allows the following
properties to be set.
·
·
·
·
Default Directories
Preferences
Audio Notifications
Job Polling
©2003-2006 Digital Media Applications, LLC
Using RocketDVD Professional
4.5.1
67
Default Directories
·
Work Directory for DVD Authoring – in this directory, a temporary folder will be
created using the Project ID as the folder name. This directory is where the chapter thumbnail
bitmaps and the temporary bitmaps rendered for the DVD menus. To optimize the performance
of the DVD authoring stage, it is suggested that the 'Work Directory' and the DVD directory be
located on different physical hard drives. (not just different partitions of the same hard drive) The
VIDEO_TS and AUDIO_TS folders must be placed at the root of a drive and their contents will
be completed at the end of the authoring stage. If an image of those directories is created, it will
be placed in the 'Work Directory'. If for some reason another project is run without completing
the image creation stage, the previously authored DVD files will be overwritten.
·
Work Directory for Captured Streams – in this directory, a temporary folder will be
created using the Project ID as the folder name. This directory is where the audio and video
elementary streams will be written as they are captured and encoded. For optimal performance
of the DVD authoring stage, it is suggested that the 'Work Directory', 'Capture Directory' and the
'DVD directory' be located on different physical hard drives. (not just different partitions of the
same hard drive).
©2003-2006 Digital Media Applications, LLC
68
RocketDVD Professional User's Manual
·
Drive for VIDEO_TS and AUDIO_TS directories (Must be the root
directory) – this directory is where the DVD directories will be created. This option must
specify the root directory, so in essence it simply specifies a drive. See the comment regarding
optimization of DVD authoring and the location of the Work Directory relative to the DVD
Directory.
·
Directory for saved project files – this directory specifies where the project file is
written when a project completes. The project file is named by using the Project ID as the base
part of the name with the extension "job". This is the case regardless of what the filename of
the project happens to be. This is also the directory that is checked for files that would indicate
a non-unique Project ID.
·
Directory for bitmap files – this directory specifies the default location to look for bitmaps
that are used as the backgrounds for the disc label and case wrap. Any other bitmap files that
might be used on the print assets would typically be stored here.
·
Directory for wave files – this directory specifies the default location for the wave files
that are used for audio notifications.
·
Directory for *.PRN files – this directory specifies the default location for *.PRN files to be
used for the print assets.
·
Directory for menu themes – this directory specifies the default location for menu theme
files. The *.menu files should be located in this directory and there should be bitmap
subdirectories directories where the bitmaps for the menus are stored.
©2003-2006 Digital Media Applications, LLC
Using RocketDVD Professional
4.5.2
69
Preferences
·
Step Through Property Pages as a Wizard – this option is typically checked for the
application initially, but once the user becomes familiar with the usage of the program, they may
turn off the wizard mode. Turning off the wizard mode makes it so the operator can jump
directly to any configuration page they wish without having to step through each one. The
application must be restarted in order for a change in this option to take effect.
·
Warn if Project ID is NOT unique – if this box is checked, every time the Project ID edit
field on the Project Property Page looses focus, the Project ID is checked against all project files
in the default project directory. If a project is found with the same Project ID, a warning is
issued. If not checked, no warning is issued and the pre-existing project will be automatically
overwritten.
·
Warn if audio channels are unbalanced – if this box is checked, the left and right
audio channels will be monitored. If one channel is consistently higher (2x) than the other over
a period of time, a warning will be issued. The warning will give the option of aborting capture or
not. If capture is not aborted, this warning will not be given for the remainder of the capture
even if the audio channels remain unbalanced.
©2003-2006 Digital Media Applications, LLC
70
RocketDVD Professional User's Manual
·
Copy segment text from filename – this preference takes effect when entering precaptured filenames. If this option is checked, the segment text field will automatically be
populated from the name of the video file selected (not including the extension). This
preference also has the side effect of filling the audio file field if an audio file exists with the
same base name as the video file selected.
·
Anti-Alias Menus – if checked, diagonal anti-aliasing will be performed over the entire
menu. This will have the effect of blurring the menu which will result in less flicker when viewed
on an NTSC monitor. It will also have the effect of making the menu not as crisp or sharp on a
computer monitor.
·
Audo-sense end of content – first of all it needs to be mentioned that sensing the end of
recorded content on a tape is not an exact science. What this feature depends on is the
unchanging frames of a solid color. In cases where unrecorded tapes plays as static or video
noise, the auto-sense feature does not work. When converting home videos, the operator
should be aware that if long unrecorded sections of tape are encountered between scenes,
setting the timeout too short could result in the capture prematurely being stopped. In addition
to these caveats, it is important to remember that it is best to set the record length as close as
possible to the actual running time since this could affect the video bitrate. Having made all
those disclaimers, we can proceed by pointing out that the auto-sense tests the audio level as
well as the video level. The sensetivity slider is provided for cases where tapes or players
produce a solid frame that is a little more variable in color or is not as constant from frame to
frame. If you find that the capture is not being stopped at the end of recorded content when you
think it should be, decrease the sensetivity by moving the slider to the right. This will lessen the
tolerances on what is considered a solid frame or what is considered unchanging (frame to
frame) video.
·
DVD Live! –
This feature is not included in the standard version of RocketDVD Professional and may or
may not be available for your particular version. If you do not have access to this feature
and you wish to use it, please contact http://www.dmapp.com or your local dealer to
purchase an upgrade.
The purpose of this feature is to shorten the Time To First Disc (TTFD), which is the
amount of time from the end of video capture to when the first DVD is finished.
©2003-2006 Digital Media Applications, LLC
Using RocketDVD Professional
4.5.3
71
Audio Notifications
This tab is the page that allows the audio notifications to be set up. They can be enabled or disabled
and the wave files for each can be specified. The user can create their own notification wave files if
the ones supplied are not adequate. The two numbers associated with each notification are the
number of times to repeat the notification, and the frequency at which to repeat it. Setting the
number of times to repeat to zero will cause it to repeat indefinitely until the user presses a button.
This is useful if the user wishes to pause the project before a certain phase to check or change
some of the settings. For example, the user can set the burn complete notification to infinite allowing
them to check the DVD for beginning and ending date stamps. These date stamps can then be
entered into the date field on the project page before proceeding to print the paperwork. If the
number of times to repeat is not zero, the notification will be played that many times at the specified
frequency, after which the project will automatically continue. The play buttons are used to listen to
the wave file.
©2003-2006 Digital Media Applications, LLC
72
4.5.4
RocketDVD Professional User's Manual
Job Polling
This feature is not included in the standard version of RocketDVD Professional. If you do
not have access to this feature and you wish to use it, please contact
http://www.dmapp.com or your local dealer to purchase an upgrade.
On this page, a directory can be specified which is polled for jobs to launch. If this field is left
blank, no directory is polled. This provides a simple means of interfacing this application with
another front end application. When any file with a *.txt extension is found in the directory, that file
will be opened and if parsed successfully, will launch a job based on the contents of the text file.
The syntax of the polled job file is described in the section on launching a Job from a polled
directory.
©2003-2006 Digital Media Applications, LLC
Using RocketDVD Professional
4.5.5
73
Save Settings
This button will save the current project settings minus the Project ID, Title, Subtitle, Date, PreEncoded Files and Data Files. These settings will be saved to a file called default.prj in the directory
where the application resides. When the application is launched, after the completion of the
hardware initialization, the default.prj profile will be loaded.
4.6
Display Pages
The display area on the front panel of the RocketDVD Pro Application serves multiple purposes but
the primary purpose is to display status and project data. There are times for convenience sake that
the display page will allow editing of project data but this function is secondary to the status
functionality. The Setup page is where projects will appear when loaded and is also the project that
will be used when starting a video capture. The display pages can be switched at any time by
clicking on the desired tab. The pages will also be switched automatically as a project advances
from one stage to the next. If the audio notification pause is being used, the next stage LED will
blink and the corresponding display page will allow some editing of project data which will be used by
the next stage upon resuming.
4.6.1
Setup Display
The setup display should be treated as the project staging area. A new project can be created by
simply
pressed.
. If more details are needed, the More... button in the lower right quadrant can be
That would bring up the Project Property Dialog. The project staging area can be used to create or
edit the next project as long as the Project ID is not the same as a project currently being run.
©2003-2006 Digital Media Applications, LLC
74
RocketDVD Professional User's Manual
The reason for this is that as a project advances through the stages, as new data is
accumulated for the project, that data is propogated back through the project containers
for each of the display pages still displaying data for the same Project ID.
4.6.2
Capture Display
The Capture display will show the status of the project currently being captured. The Capture
display page will be automatically switched to when the REC button is pressed to setup for video
capture.
©2003-2006 Digital Media Applications, LLC
Using RocketDVD Professional
4.6.3
75
Chapter Selection Display
The Chapter display tab displays the current progress of the chapter selection stage for pre-encoded
files. The progress resets to zero at the start of each new segment.
4.6.4
Author Display
The Authoring display will show the status of the project currently being authored. The Authoring
display page will be automatically switched to when a project advances from the capture stage to the
authoring stage. There are various intermediate stages in the authoring stage. Some of them may
not be used depending on the options selected. The overall progress is an estimate of the overall
progress of the entire authoring stage.
©2003-2006 Digital Media Applications, LLC
76
4.6.5
RocketDVD Professional User's Manual
Print Display
The Print display will show the status of the project currently being printed. The Printing display page
will be automatically switched to when a project advances to the printing stage. The check boxes on
this display page are read only and cannot be used to alter the collateral being printed. To do this
use the Setup display page or the Project Property Dialog.
4.6.6
Write Display
The Write display will show the status of the project currently being written. The Writing display page
will be automatically switched to when a project advances to the writing stage.
©2003-2006 Digital Media Applications, LLC
Using RocketDVD Professional
4.7
77
Video Monitor
The video monitor window serves different functions depending on the hardware of software
configuration.
Monitor Controls
The monitor provides the following controls:
This button will minimize the video monitor. To restore the video monitor, simply click on the
video monitor task bar item.
Manual Chapter Insertion
This button is not available in all version of the product. If this feature is available in your
version of the product, the button will be visible when custom chaptering is selected. See
Authoring Property Page on chapter selection choices. If you don't see the button under these
circumstances, it may be available as a premium feature upgrade. (Please contact your vendor
for more information)
To use this feature, Custom chaptering must be selected. Some custom chapters may be prespecified if desired, but it is not neccessary to do so. Once video capture has begun, the
chapter button will become enabled for use. After pressing the chapter button during live
capture, the following dialog box will be presented to allow chapter text to be entered:
If chapter text is not needed, simply click the OK button or just press the enter key. If you
press the Cancel key, the chapter will not be included.
The the chapter can also be inserted by clicking on the Enter key instead of using the mouse
to click on the
button. If the video monitor is the active window, the space bar will also
cause a chapter to be inserted. The space bar will not insert a chapter if the main application
window is the active window, but the enter key can still be used in this case.
When pressing the small silver buttons to step through the possible options, only the options
available for the given hardware configuration will be given. For example, if only composite and svideo are available for a given configuration, pressing the bottom left button will alternately show
Composite and S-Video but it will not show RGB, YUV or SDI. These settings can all be made from
©2003-2006 Digital Media Applications, LLC
78
RocketDVD Professional User's Manual
the encoding page of the project property page dialog. Once a video capture is under way, these
buttons are locked and cannot be pressed until the video capture ends.
·
Top left button - is used to select the video standard. Possible options are:
· NTSC
· PAL
·
Top right button - is used to select the aspect ratio of the video. Possible options are:
· 4:3
· 16:9
·
Bottom left button - is used to select the video input connector. Possible options are:
·
·
·
·
·
·
Composite
S-Video
RGB (Component)
YUV (Component)
SDI
Bottom right button - is used to select the audio input connector or level. Possible options
are:
· Line In (typically this is a phone type or RCA type connector)
· Balanced (typically this is an XLR connector)
· AES (digital audio)
· Embedded AES (digital audio embedded in the SDI stream)
Capture View
In this configuration, when the application is launched, the monitor will appear this way:
In this case, the monitor window will be used to show the video once capture has begun. The
monitor window does not replace a physical video monitor since it cannot be used to preview the
video to know when to start recording. It should actually be thought of as a capture view since no
video is presented before capture has begun.
In this usage scenario, even though video is not being shown, the four buttons surrounding the
display area below the monitor window can be used setup for the next capture.
©2003-2006 Digital Media Applications, LLC
Using RocketDVD Professional
79
Preview
In this configuration, as soon as the application is launched, the monitor will attempt to show
whatever video signal is coming in on current connector subject to the other video settings. If the
video doesn't look right, you may need to toggle some of the video input settings in order to match
the video signal coming in. Since the hardware/software configuration gives us the ability to preview
the video before, during and after starting the capture, this video preview can take the place of a
physical video monitor.
When pressing the silver buttons, you should get realtime feedback on how the video looks based
on the current settings.
Deck Control
Deck control refers to controlling a remote tape deck via Firewire or Serial bus. This feature is not
available in all product configurations. It is generally available when using 1394 (Firewire) capture
and it will be available with some hardware capture solutions via RS-422 or other control bus.
If deck control is available, the video monitor will have a deck control panel on it's right hand side.
Just because deck control may be available doesn't mean the mark in/out feature can be used.
When using a deck or tape that doesn't provide a timecode, the seek and mark in/out feature cannot
be used. In this case you may be able to still use the play/stop/wind controls from the VTR Control
Panel.
The mark in/out feature if available allows for setting a list of in/out points which can then be used to
automatically capture multiple segments from a tape without any user intervention, once the capture
has begun. This is useful if only a section of the video contrent is desired, or if most of the tape
needs to be captured but some sections of unrecorded tape or ground shooting need to be removed.
·
This control is used to wind the tape in the remote deck backward.
· If the deck is in the stopped mode, the control will wind the tape quickly with no video
preview.
· If the tape is playing or paused when the wind is started, it will not wind as fast and will
provide a video preview.
©2003-2006 Digital Media Applications, LLC
80
RocketDVD Professional User's Manual
·
·
This control us used to start the tape in the remote deck playing.
This control is used to wind the tape in the remote deck forward.
· If the deck is in the stopped mode, the control will wind the tape quickly with no video
preview.
· If the tape is playing or paused when the wind is started, it will not wind as fast and will
provide a video preview.
·
This control will step the video backward one frame at a time.
·
This control will stop the tape in the remote deck.
·
This control will step the video forward one frame at a time.
·
This control will bookmark the current position of the tape using the current
timestamp. The value can also be entered or edited manually in the edit field where it is
shown.
·
Use In/Out Marks for capture - This control is used to indicate whether IN/OUT marks
are to be used for the project's capture stage.
·
Segment Number - Because the deck control feature allows multiple IN/OUT points to be
specified, this control is used to view the IN/OUT points for a given segment or to add IN/OUT
points for a new segment. For inserting and deleting segments, see the user interface on the
Deck Control Property Page.
4.8
·
This control will mark the current position of the tape using the current timestamp
as an 'IN' point. The value can also be entered or edited manually in the edit field where it is
shown. The mark in point can used to start the video capture at a specific timecode.
·
This control will mark the current position of the tape using the current timestamp
as an 'OUT' point. The value can also be entered or edited manually in the edit field where it
is shown. The mark in point can used to stop the video capture at a specific timecode.
·
Depending on which seek button is pressed, the deck will attempt to seek to the
timecode specified to the immediate left of the seek button.
Starting a Project
Typically a project will start with the video capture stage. The application provides the ability to open
a previously completed project and re-run it starting from the authoring stage, the writing stage or the
printing stage.
©2003-2006 Digital Media Applications, LLC
Using RocketDVD Professional
81
The project properties can be modified before re-running it but be aware that if you do this,
when the project completes, if any of the settings have been changed, the project file will
be re-written with those changes. In other words, the project will no longer be an accurate
history of exactly what was done.
Before starting the project, you will want to make sure the application has the correct project
settings. You can load a previously created project or you can assume that the application default
settings are what you want to use. If all you need to enter are the Project ID, Title, Subtitle, Date,
Capture length and DVD menu theme, you can do that directly on the main application user interface
without having to open up the Project Properties Dialog box. If you need to make additional
changes, you can edit the project properties by clicking the More button (
) on the
application. Once project settings have be entered, you may wish to save the project file.
When setting the capture length, it is important to know that this length of time directly
affects the calculation of the bitrate. The best quality video is obtained by keeping the
video length to an hour. Anything less than an hour will utilize the same video bitrate since
it is limited by the maximum bitrate allowed by the DVD standard. Depending on the video
content, the length can be set to two hours or more but don't expect the same video quality
as on Hollywood DVD titles.
It is also important to realize that there are three root level directory names that are
reserved on the drive that the DVD is to be built. See preferences for setting the Drive for
VIDEO_TS and AUDIO_TS directories. The reserved directories which will be overwritten
during the authoring stage are VIDEO_TS, AUDIO_TS, collateral. The collateral directory
is used to store project collateral whuch would be required to reproduce the DVD paper
assets.
At this point you are ready to start the video capture.
4.8.1
Live Video Capture
To setup for video capture, you must first press the button with the un-lit red LED. When the button
is pressed, there should be some status messages and progress bar activity in the display area.
When the setup is complete, the progress bar and the status will indicate so, and the record setup
button will be depressed with the red LED lit. Next you will want to queue up your video source, then
start it and press the play button which has the triangle on it. Once capture has begun, the following
activity on the display will keep you up to date on the progress of the video capture.
©2003-2006 Digital Media Applications, LLC
82
RocketDVD Professional User's Manual
The
button is used when your video source looks like it might outlast the pre-set capture
limit by a minute or two. Each time the button is pressed, the capture limit will be bumped up by a
minute. This feature should be used with caution since it could result in A/V streams that are too
large. If the automatic-bitrate computation is used, the bitrate will have been computed based on the
original capture limit. Increasing the capture limit will not adjust the video bitrate so as a result, the
A/V files will be larger than planned. Since the computed bitrate was designed to leave a little
leeway, this button can probably be used a few times with no ill effect.
There are multiple ways for capture to end.
1.
Capture can be aborted by clicking on the button with the "x". If capture is aborted, the
project will not advance to the next stage. The abort function is useful if the video capture
was not started at the right time relative to the start of the video source. Once the abort has
completed, the capture is still setup, ready to start at the press of the play button.
2.
Capture can be manually stopped by clicking on the stop button with the square. Unlike the
abort button, when capture is stopped, the project is advanced to the next stage. There is a
short time between when the stop button is pressed and when the project is advanced to the
next stage while the scene selection and audio encoding finished up.
3.
Capture can be automatically stopped by the capture limit set on the front panel area shown
below or on the encoding property page . As in the case of manually stopping, when the
capture stage is complete, the project is advanced to the next stage.
4.
The last way capture may be stopped is after a user specified amount of unchanging video
and no audio has been captured. Unfortunately, the unchanging video has different
properties from one video player to another. Various approaches are used to detect
unchanging video but this feature should be tested with each player before depending on it to
actually stop capture. To disable this feature, enter zero or a very large number of seconds.
As in the previous two ways capture is stopped, the project is advanced to the next stage
when the capture completes.
©2003-2006 Digital Media Applications, LLC
Using RocketDVD Professional
4.8.2
83
Pre-Captured Files
RocketDVD Pro also gives you the ability to author a DVD from pre-captured files. These files can
either be files that are already encoded for DVD and are ready for authoring or they may be files that
need to be encoded before they are authored. This type of project is setup using the "Use PreCaptured Files" "Input Option" on the project setup page as shown below.
Once that option has been chosen, the type and files themselves can be specified on the precaptured files property page.
©2003-2006 Digital Media Applications, LLC
84
RocketDVD Professional User's Manual
· Pre-Encoded Files
· Files that need to be encoded
4.8.2.1
Start Pre-Encoded File Project
Pre-Encoded files must be in DVD compliant format. That means, DVD compliant MPEG-2 video
and MPEG layer-2 audio or AC3 audio. The audio and video can be in the form of elementary
streams or muxed as a program stream or VOB files. Currently only Full D1 size video is supported.
Multiple segments can be selected and they will be joined end-to-end into a single video title. The
segments will be joined together in the same way that live captured segments are created using the
pause button.
Once the project is setup, press the Author button pictured below to begin chapter selection if
neccessary and authoring.
©2003-2006 Digital Media Applications, LLC
Using RocketDVD Professional
4.8.2.2
85
Start Encoding Project
Pre-Captured files that are not in DVD compliant format must be encoded or transcoded. The
software will attempt to dynamically create a Direct Show filter graph to decode and then re-encode
the video and audio into DVD cmpliant streams. Currently resizing and re-sampling is not supported,
and only full D1 video is supported. If RocketDVD Pro can find the necessary codecs to parse,
decode and encode the file, the encoding and authoring should proceed as usual. Because the
variations in video files could be virtually endless, no guarantee is made regarding the file formats
supported. Furthermore, when transcoding, it is possible that the application may simply stop or
hang without progressing. Under these circumstances, you may contact technical support, but
probably that file format is not supported.
Multiple segments can be selected and they will be joined end-to-end into a single video title. The
segments will be joined together in the same way that live captured segments are created using the
pause button.
Once the project is setup, press the Encode button pictured below to begin encoding.
4.8.3
Job Polling
This feature is not included in all version of the product. If you do not have access to this
feature and you wish to use it, please contact http://www.dmapp.com or your local dealer
to purchase an upgrade.
A Project can be launched or re-run by simply dropping a text file in a specified directory. This
directory is specified in on the job polling preferences page. If the job is successfully launched, the
extension is on the file is changed from *.txt to *.running. If the job fails to launch successfully, the
extension will be changed from *.txt to *.err and the error encountered should be added to the
bottom of the file as a comment. If the job completes successfully, the extension will be changed
from *.running to *.done and if there is an unexpected failure, the extension will be changed from
*.running to *.err. The polled file can have any name with a *.txt file extension and must follow the
following syntax (lines that start iwth a ';' are considered comments and are not parsed) :
;
;============================================================================
================
;Required Commands
;-------------------------------------------------------------------------------------------;JobTemplate = Full path to existing job file to serve as a job template
;StartingStage = Transcode|Author|Print|Write
;============================================================================
================
;
;============================================================================
================
;Optional Commands
;-------------------------------------------------------------------------------------------;JobID = New JobID, if not specified the JobID from the template will be used which means
;
the template will be modified. This option should only be used when
©2003-2006 Digital Media Applications, LLC
86
RocketDVD Professional User's Manual
;
UsePre-EncodedFiles is yes or if the job template is set to use pre-encoded files.
;Title = New Title
;Subtitle = New Subtitle
;Date = New Date
;MenuTheme = Full path to new menu to use instead of the one specified in the template
;DiscLabelFile = Full path to new disc label file
;DiscLabelPrnFile = Full path to new disc label PRN file (if the job template is not set to use a PRN
file for the disc label, this option will set it to do so)
;DiscLabelBackground = Full path to new disc background bitmap
;CaseWrapPrnFile = Full path the new case wrap PRN file (if the job template is not set to use a
PRN file for the case wrap, this option will set it to do so)
;CaseWrapBackground = Full path to new case wrap background bitmap
;DataFileDirectory = Full path to a directory whose contents (including subdirectories) will be written
to the root of the DVD
;UsePre-EncodedFiles (this interface is still supported but is supersceded by 'UsePreCapturedFiles') = yes|no
;UsePre-CapturedFiles = yes|no
;Pre-EncodedFileType (this interface is still supported but is supersceded by 'Pre-CapturedFileType')
= ElementaryStreams|ProgramStreams|VobFiles
;Pre-CapturedFileType = ElementaryStreams|ProgramStreams|VobFiles|FilesToEncode
;Pre-EncodedFile (this interface is still supported but is supersceded by 'Pre-CapturedFile') = this
parameter is a coma delimited list whose elements depend on the
;
type. This command is repeated for each segment to be combined onto this video title.
;
For ElementaryStreams
;
<Required: Full path to video stream>,<Required: Full path to audio stream>[,<Full path
to thumbnail bitmap>[,<length of segment in hh:mm:ss>[,<Segment title>]]]
;
;
For ProgramStreams
;
<Required: Full path to muxed program stream>[,<Full path to thumbnail
bitmap>[,<length of segment in hh:mm:ss>[,<Segment title>]]]
;
;
For VOBFiles
;
<Required: Full path to VOB file>[,<Full path to thumbnail bitmap>[,<length of segment
in hh:mm:ss>[,<Segment title>]]]
;
;Pre-CapturedFile = this parameter is a coma delimited list whose elements are determined by the
prefix.
; This command is repeated for each segment to be combined onto this video title.
; coma delimited fields must be prefixed by one of the following:
;
MUXED: Full path to muxed or video elemntary stream file
;
VIDEO: Full path to video elementary stream file
;
LENGTH: Segment length in hh:mm:ss (this is required to set the bitrate)
;
AUDIO: Full path to audio elementary stream file
;
BITMAP: Full path to thumbnail bitmap
;
TITLE: Title
; MUXED or VIDEO and LENGTH are required, the remainder are optional.
;
;Variable = <variable name>,[<substitution value>]
;
The variable command takes a coma delimited pair where the first item is the variable
name
;
and the second (optional) item is the value to be substituted for the variable in
;
the DVD menus and print assets. If the substitution value is left blank, the variable will
be
;
replaced with nothing.
;============================================================================
================
;
©2003-2006 Digital Media Applications, LLC
Using RocketDVD Professional
87
JobTemplate = <full path>\test.job
JobID = test2
StartingStage = Author
Title = New Title
Subtitle = New Subtitle
Date = New Date
MenuTheme=<full path>\vtodvd_nss.menu
UsePre-EncodedFiles=yes
Pre-EncodedFileType = ElementaryStreams
Pre-CapturedFile=VIDEO:D:\RocketDVD Pro\work\streams\video0.m2v, AUDIO:D:\RocketDVD
Pro\work\streams\audio0.ac3,LENGTH:5
Pre-CapturedFile=VIDEO:D:\RocketDVD Pro\work\streams\video1.m2v, AUDIO:D:\RocketDVD
Pro\work\streams\audio1.ac3,LENGTH:0:5
Pre-CapturedFile=VIDEO:D:\RocketDVD Pro\work\streams\video2.m2v, AUDIO:D:\RocketDVD
Pro\work\streams\audio2.ac3,LENGTH:0:0:5
4.9
Re-Running Part of a Project
The three silver buttons shown in the graphic above are used for re-running or re-starting a Project
at some intermediate stage and letting it run through to completion. As was mentioned in Starting a
Project, stages of a project can be re-run. The key word here is "re" which means the project has
been run before.
It is crucial to understand that data is added to the project file as the project progresses
from stage to stage. For example, after the capture stage completes, the project contains
the number of frames and time captured, as well as potential chapter points. If using
"Smart Chapter Selection", the project file would be further altered after the authoring
stage, to contain the optimal chapter starting points after having performed the pruning
algorithm.
The key point is that a project file you just created from scratch and saved is not the same
as a project file that is automatically saved to the default project directory at the completion
of a project. The reason is that the project file automatically saved at the conclusion of a
project has additional data which is crucial to being able to re-run intermediate stages of
the project. In other words, there is data in the project file which cannot be manually
edited in the project property page dialog.
This functionality of starting a project at some intermediate stage can also be used to finish a project
that may have been stopped or failed for some reason. In this case, it is useful to understand the
pre-requisites for starting a stage at any given point. The following table lists the pre-requisites for
each intermediate starting point.
©2003-2006 Digital Media Applications, LLC
88
4.9.1
RocketDVD Professional User's Manual
Re-Authoring a Project
Before starting a project at the authoring stage, it may be useful to understand the project file data
and work directory items needed. Before going into this however, please make sure you read the
page on Re-Running Part of a Project.
There are two occasions when a project is started at the authoring stage by pressig the silver button
under 'Author'.
1.
Re-authoring a project that has been previously captured with RocketDVD Pro. The project
may even have been completed but if changes to the menu are desired, the DVD can be
authored again. The original chapters and thumbnails chosen during the capture stage will
still be used unless custem chapters are specified.
2.
Starting a project at the authoring stage when pre-encoded files are being used rather than
starting with realtime capture and encoding. See Pre-Encoded Files Property Page for further
discussion on the use of pre-encoded files. If this is the case, a determination will be made
based on the project settings whether chapter selection is needed before authoring. In
addition to selecting DVD chapters, this process also captures bitmaps to use for DVD menus
and case wrap printing as well as determining the lengths of the pre-encoded segments. If
chapters, bitmaps and segment lengths are not required, the chapter selection will no be run.
If the chapter selection is required, it can take as much as 30% of the video's time to finish.
(If the video is one hour in length, the chapter selection could take as much as 20 min)
In order to be able to author the DVD, the project file must point to the audio and video elementary
streams. These would have been produced by the video capture stage. These files should be
located in the directory: <working directory>\<Project ID>. If producing a DVD with chapters, the
video capture stage would also have identified candidates for chapter starting points and thumbnail
bitmaps of those frames. The quantity and frame number for each of those potential chapter starting
points must be found in the project file in order to successfully author the DVD. The thumbnail
bitmaps are stored in the same working directory as the elementary streams.
Finally, the project can be re-authored by clicking on the Author button above when the diaplay tab is
either on the Setup or Author page. It is important to note that when re-authoring from the Setup
display page, the above mentioned prerequisites apply to the current project. If re-authoring from
the Authoring display page, the last authored project will be re-authored.
4.9.2
Re-Printing a Project
Before starting a project at the printing stage, it may be useful to understand the project file data and
work directory items needed. Before going into this however, please make sure you read the page
on Re-Running Part of a Project.
In order to be able to print the DVD print assets, the project file should contain the running length of
the DVD which would have been determined in the video capture stage. If printing the case wrap
with thumbnail pictures, the bitmaps must be found in the directory: <working directory>\<Project
ID>. When printing the chapter insert, the starting point and length of each chapter is needed. This
information is produced by the video capture and authoring stages.
©2003-2006 Digital Media Applications, LLC
Using RocketDVD Professional
89
Finally, the project can be re-printed by clicking on the Print button shown above when the diaplay
tab is either on the Setup or Print page. It is important to note that when re-printing from the Setup
display page, the above mentioned prerequisites apply to the current project. If re-printing from the
Print display page, the last printed project will be re-printed.
4.9.3
Re-Writing a Project
Before starting a project at the writing (DVD burning) stage, it may be useful to understand the
project file data and work directory items needed. Before going into this however, please make sure
you read the page on Re-Running Part of a Project.
In order to be able to write a DVD, the project file must point to an image file. This image file would
have been produced by the authoring stage. The image should be located in the directory: <working
directory>\<Project ID>.
Finally, the project can be re-written by clicking on the Write button shown above when the diaplay
tab is either on the Setup or Write page. It is important to note that when re-writing from the Setup
display page, the above mentioned prerequisites apply to the current project. If re-writing from the
Write display page, the last written project will be re-written.
4.10
Aborting a Project Stage
When a project stage is currently running, the green LED for that stage will be lit. In that state, the
button will serve the purpose of aborting that stage. Please note that just because the abort button
is pressed doesn't mean that the stage will immediately abort. It may take some time for the stage
to actually abort. This is especially the case with the writing stage when writing to a local DVD writer.
The abort functionality is currently not implemented for duplicators.
©2003-2006 Digital Media Applications, LLC
90
RocketDVD Professional User's Manual
It is important to realize that there are two root level directory names that are reserved on
the drive that the DVD is to be built. See preferences for setting the Drive for VIDEO_TS
and AUDIO_TS directories. The reserved directories which will be overwritten during the
authoring stage are VIDEO_TS and AUDIO_TS.
4.11
Shutting Down
When the power button on the application is pressed, the dialog shown below is presented which
give the following options:
· Continue - Don't shutdown or minimize the application.
· Minimize - leave the application running but don't take up all that screen real estate.
· Shutdown - Shutdown the application, loosing any unsaved changes.
4.12
DVD Live
This feature is not included in the standard version of RocketDVD Professional and may or
may not be available for your particular version. If you do not have access to this feature
and you wish to use it, please contact http://www.dmapp.com or your local dealer to
purchase an upgrade.
This feature was designed to optimize RocketDVD Professional to be used for live event
recording. As it is, RocketDVD Professional can be used to record live events, however
when this upgrade is purchased, the Time To First Disc (TTFD), which is the amount of time
from the end of video capture to when the first DVD is finished will be shortened. This is
accomplished in several ways, the first of which is to start muxing the vob files during
capture. This should have the effect of reducing the post capture authoring time by more
than half.
5
Tutorial
©2003-2006 Digital Media Applications, LLC
Testing Your DVD using PowerDVD
6
91
Testing Your DVD using PowerDVD
Launch PowerDVD from the Start Menu or the the quick launch toolbar. You should see a Window
and application as shown below.
Click on the control which is circled in red. You should get the following popup menu.
Make the selection shown and you should get a folder browser.
©2003-2006 Digital Media Applications, LLC
92
RocketDVD Professional User's Manual
Browse to the VIDEO_TS folder which should be located on the C:\ under 'My Computer'. Click OK
to select 'VIDEO_TS' and if you used the menu shown in the Quick Start Guide, the PowerDVD
window should show the following DVD main menu.
You can now use the cursor keys on your keyboard as you would the cursor keys on a DVD remote
control and the Enter key as the DVD remote select button. You can also use the mouse to navigate
©2003-2006 Digital Media Applications, LLC
Testing Your DVD using PowerDVD
93
your DVD.
7
Trouble Shooting
Issue:
When I test my DVD using PowerDVD which was provided with RocketDVD Pro, the DVD video is
jerky.
Solution:
If playing the DVD using PowerDVD while RocketDVD Pro is running and previewing video
capture, shut down RocketDVD Pro, then try playing your DVD with PowerDVD again.
Issue:
When I play my DVD, the video is jerky as if some frames are missing. Or when I capture video,
the software encoder lags capture. This issue only relates to direct DV capture and capture from
encoder boards without MPEG encoderer hardware.
Solution:
Re-run the video calibration wizard by right clicking on the application logo and selecting the
calibration wizard. Step through the wizard and make sure that the video feed has significant
motion in it. If you hook up a video camera that's pointing to the corner of a room with no motion,
the video encoder will work faster than it would if there was some actual motion in the video. This
will cause the calibration to set the encoder quality too high resulting in the encoder not being able
to keep up encoding the video in realtime.
Issue:
When I try to start a capture, I get a message saying I'm out of disc space.
Solution:
Everytime you capture video to create a DVD, temporary files are stored on you hard drive. These
files are stored in the directories specified for 'Work Directories for DVD Authoring:' and 'Work
Directory for Captured Streams:' These files are not automatically deleted because as long as
these work files exist, (if you use unique project ID's), you can reload a project and re-author, reprint or re-write the DVD. If you know you will no longer need to re-author the DVD, you can just
delete the directory for captured streams, and still reproduce the job since the image and bitmaps
are in the DVD authoring work directory. If you want to selectively delete work directories, they are
stored in subdirectories with the project ID's name.
Issue:
I selected the DV video source and I know my computer has detected the camera or DV deck,
why don't I see the video preview?
Solution:
Click on the "more..." button on the setup display tab. On the project property page, make sure
the 'Input Options' is 'Use Video Capture and Realtime Encoding'. If the 'Use Pre-Captured Files'
option is set, live video is not used and hence is not shown.
Issue:
When I play my DVD on a DVD player and view it on a TV, my menus are very jittery, but they look
fine on the computer monitor.
Solution:
©2003-2006 Digital Media Applications, LLC
94
RocketDVD Professional User's Manual
The computer monitor is a progressive display but a TV monitor is usually an interlaced display.
This means that alternate odd/even lines are displayed at once but both are not displayed at the
same time. As a result, if you have fine graphics on your menu background, sometimes the top or
edge of a detailed feature including small text may appear to be shifting up and down with the
alternating display of odd/even lines. This effect can be minimized by using less detail with more
blending and blurring. Larger text is less susceptible to the jittery effect caused by interlaced
video. To reduce the jittery effect on detail, an option is available to perform anti-aliasing over all
menu backgrounds. The effect is that the menu background appears softer and possibly more
blurred, but the effect will be better on most TV monitors and the softness will tyipically not be
noticeable. If making DVD's primarily for progressive displays, it may be more desireable to leave
the anti-aliasing off. See the preferences for this option.
Issue:
When I try to use the encode feature to transode a video file for the purpose of creating a DVD,
RocketDVD Pro stop or hangs at the start or in the middle and never finishes.
Solution:
First we must warn that there may not be a solution to this problem. Because the variations in
video files is virtually endless, it is impossible to test every possible input. Currently, we are not
using filters which would do any video frame resizing, so only D1 (720x480 NTSC or 720x576
PAL) size video is currently supported. The method used to transcode the pre-captured file is to
use Microsoft's DirectShow auto connect capability. First the input file is loaded and an attempt is
made to see what kind of video is present. If the file contains MPEG-2 video in the apporpriate
size, it will actually be used as is without transcoding. If transcoding is needed to change the
bitrate, that will have to be done with other software for now. If the video needs to be transcoded,
an attempt is made to connect the video pin of the source filter to the input pin of the video
encoder. If this fails, the operation should end with an error message. If it succeeds, an attempt
is made to connect the audio pin to the input pin of the audio encoder. If this fails, the operation
should end with an error message. If either of these steps fails, it may be due to the lack of a
suitable parser or decoder for the input file format. Microsoft Windows does not come with a
suitable demuxer or decoder for current versions of Apple's quicktime file format. These are not
included with RocketDVD Professional but may be available from third party vendors. After
reading all of this, if you still have questions, you may contact your customer support
representative.
Issue:
I bought the upgrade for the manual chapter feature (
). Why don't I see the button.
Solution:
Manual chapter insertion is only available when the custom chaptering is selected on the authoring
property page. When that option is selected, the button will become visible.
©2003-2006 Digital Media Applications, LLC
2100 196th St. SE
Suite 119
Lynwood, WA 98036
(866) 775-9067
http://www.dmapp.com