1
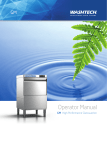
DISHWASHER MANUAL
INSTALLATION AND MAINTENANCE
F14
F16
F18
F20
F22
727
737
747
767
For operator. Do not discard.
2005
Welcome to JET TECH
“creating endless possibilities!”
This manual was created specifically for you, the end -user.
We have included information to help troubleshoot
problems and facilitate resolving those problems. General
information pertaining to our hi-temp ware washers will be
covered in this section. Specific information on our current
models is available upon request, model by model.
If you find any discrepancy or can’t find certain
information, please contact us. We will be glad to be of
assistance.
JET-TECH SYSTEMS
5771 Ferrier street
Montreal, Quebec H4P 1N3
Tel.: 888 -275-4538 (888-ASK-4-JET); 514-737-9701
Fax: 514-737-2792
e-mail: [email protected]
2
Contents
WARRANTY.....................................................4
MACHINES SPECS.........................................5
GENERAL INSTALLATION GUIDELINES.......6
CONNECTING YOUR F-14.............................7
CONNECTING YOUR F-16.............................8
CONNECTING YOUR F-18........................9, 10
CONNECTING YOUR F-20............................11
CONNECTING YOUR F-22......................12, 13
CONNECTING YOUR 727..............................14
CONNECTING YOUR 737..............................15
CONNECTING YOUR 747..............................16
CONNECTING YOUR 767..............................17
CHEMICAL PUMP ADJUSTMENT............18, 19
CONTROL PANELS........................................20
BASICS STEPS TO START............................21
ELECTRICAL STAGES...................................22
OPERATION....................................................23
F18, BASICS STEPS TO OPERATE...............24
F22, BASICS STEPS TO OPERATE...............25
DRAIN PUMP OPERATION.............................26
PROBLEM ANALYSIS...................27, 28, 29, 30
HELP LINE.......................................................31
3
MANUFACTURERS LIMITED WARRANTY
Jet Tech Systems Corporatio n (Jet Tech) hereby warrants all new warewashers bearing the name “JET
TECH” and installed within the continental United States of America or Canada to be free from defects in
material and workmanship, under normal and regular usage and operation, for a period of one (1) year
following the date of original installation, (unless specified otherwise) but in no event can exceed eighteen
(18) months from the date of shipment from the factory.
If a defect in material(s) or workmanship is detected; or found to exist within the stated period above, Jet
Tech, at its sole discretion, shall either repair or replace any original equipment manufacturers part which
has proven to fail within the machine; providing that the equipment has not been altered or tampered with
in any manner, has been installed correctly as per the owners manual, and maintained and operated in
complete accordance with this manual.
The labor cost to repair or replace any part proven to be defective, as per above clause(s), shall be covered
by Jet Tech Systems, within the continental United States of America or Canada; provided that: prior
authorization for this labor was approved by Jet-Tech Systems, the service work was performed by an
authorized Jet Tech service agency; and that this agency installed an original and genuine Jet Tech part in
the machine. Any repair work performed by a non-authorized service depot remains the sole responsibility
of the user, and Jet Tech Systems will not be held responsible. The installation of any generic part will
not be valid; and therefore voids this warranty . All authorized labor coverage shall be limited to regular
hourly rates only. Any supplemental hourly rates or charges, such as weekends or emergency premiums
remain the responsibility of the user.
Jet Te ch Systems Corp. (Jet Tech) hereby states that: warranty travel time shall be limited to, and without
exception, a round-trip total of two (2) hours OR mileage up to a maximum of one hundred (100) miles
round-trip. Any charges exceeding those stated herein must have prior authorization by the factory.
Exceptions to above warranty are: (A) Damages resulting from shipping, handling or abuse. (B) Incorrect
installation and/or connections. (C) Adjustments or calibration of any parts. (D) Faults due to lack of
regular maintenance or cleaning of any internal part(s). (E) Replacement of any wearable items such as:
glasswasher curtains, or peristaltic squeeze tubing or gaskets. (F) Excessive lime, mineral, alkali or hard
water conditions (In excess of 6 grain) and (G) Poor results due to: use of an incorrect type of detergent (for
non-commercial type applications), and excessive or inadequate water temperature(s) or pressure
conditions or incorrect use.
JET TECH SYSTEMS CORPORATION STATES THAT THERE ARE NO OTHER WA RRANTIES,
EXPRESSED OR IMPLIED, THAT ARE NOT SET FORTH HEREIN, JET TECH SYSTEMS
CORPORATION SHALL ASSUME NO OTHER RESPONSIBILITY, EITHER DIRECT OR NON DIRECT, OR BE LIABLE FOR ANY OTHER OR ADDITIONAL LOSS OR DAMAGE WHETHER
BEING DIRECT OR CONSEQUENTIAL, AS A RESULT OF ITS EQUIPMENT.
Warranty:
One year parts & labor (Continental USA and Canada).
Exceptions: Model “F14” - 90 days labor & One year parts.
The manufacturer reserves the rights to alter design and specifications without notice.
4
650 mm
630 mm
600 mm
35 Kg.
Dimensions
high
length
deep
weight
5
9000 W
6000 W
33.9
3.7 GAL/minute
2.7 U.S. GAL
5 US GAL
1.1 US GAL
20 +/- 5 PSI
3/4" NPT
diam.1.5"
1545 mm
710 mm
720 mm
140 Kg.
description
voltage
maximum absorption
washing pump motor
drain pump motor
booster element
tank element
Amp
Hydraulic data
solenoid valve capacity
booster capacity
tank capacity
water consumption
water pressure
water connection
water drain
Dimensions
High
length
deep
weight
F 22 3 PH
220V 60 Hz
9750 W
750 W
2.6 GAL/minute
.66 U.S. GAL
2.4 US GAL
.522 US GAL
20 +/- 5 PSI
"3/4"" NPT"
diam.1"
1400 W
1400 W
13.4
F14
110V 60 Hz
1475 W
75 W
solenoid valve capacity
booster capacity
tank capacity
water consumption
water pressure
water connection
water drain
Hydraulic data
description
voltage
maximum absorption
washing pump motor
drain pump motor
booster element
tank element
Amp
820 mm
500 mm
510 mm
140 Kg.
2.6 GAL/minute
.84 U.S. GAL
2.1 US GAL
.522 US GAL
20 +/- 5 PSI
3/4" NPT
diam.1"
727
220V 60 Hz
3050 W
550 W
100 W
2400 W
2000 W
14.2
724 mm
480 mm
510 mm
44 Kg.
2.6 GAL/minute
.84 US GAL
3.2 US GAL
.522 US GAL
20 +/- 5 PSI
"3/4"" NPT"
diam.1"
F 16
220V 60 Hz
2600 W
184 W
100 W
2400 W
2000 W
12.9
850 mm
600 mm
600 mm
68 Kg.
2.6 GAL/minute
2.05 U.S. GAL
3.15 US GAL
.74 US GAL
20 +/- 5 PSI
3/4" NPT
diam.1"
737
220V 60 Hz
4650 W
550 W
100 W
4000 W
2800 W
22.4
840 mm
600 mm
600 mm
68 Kg.
2.6 GAL/minute
2.05 U.S. GAL
6.8 US GAL
.67 US GAL
20 +/- 5 PSI
"3/4"" NPT"
diam.1"
4000 W
2800 W
22.2
F 18
220V 60 Hz
4550 W
550 W
1445 mm
710 mm
720 mm
140 Kg.
3.7 GAL/minute
2.7 U.S. GAL
4.75 US GAL
1.1 US GAL
20 +/- 5 PSI
3/4" NPT
diam.1.5 "
9000 W
6000 W
48.6
747 1 PH
220V 60 Hz
10100 W
1100 W
840 mm
600 mm
600 mm
68 Kg.
2.6 GAL/minute
2.05 U.S. GAL
6.8 US GAL
.67 US GAL
20 +/- 5 PSI
"3/4"" NPT"
diam.1"
F 18 DP
220V 60 Hz
4650 W
550 W
100 W
4000 W
2800 W
22.4
1445 mm
710 mm
720 mm
140 Kg.
3.7 GAL/minute
2.7 U.S. GAL
4.75 US GAL
1.1 US GAL
20 +/- 5 PSI
3/4" NPT
diam.1.5 "
9000 W
6000 W
35.1
747 3 PH
220v 60 Hz
10100 W2
1100 W
1300 mm
640 mm
650 mm
90 Kg.
2.6 GAL/minute
2.7 U.S. GAL
7.9 US GAL
.8 US GAL
20 +/- 5 PSI
"3/4"" NPT"
diam.1.5"
6000 W
4000 W
31.5
F 20
220V 60 Hz
6750 W
1100 W
1900 mm
900 mm
900 mm
220 Kg.
3.7 GAL/minute
2.7 U.S. GAL
6.6 US GAL
1.3 US GAL
20 +/- 5 PSI
3/4" NPT
diam.1.5 "
9000 W
9000 W
40.1
767
220V 60 Hz
11550 W
2210 W
1545 mm
1210 mm
720 mm
180 Kg.
3.7 GAL/minute
2.7 U.S. GAL
5 US GAL
1.1 US GAL
20 +/- 5 PSI
"3/4"" NPT"
diam.1.5"
9000 W
6000 W
46.9
F 22 1PH
220V 60 Hz
9750 W
750 W
JET TECH - Technical Data
General Installation Guidelines
The unit must be installed on a level surface or allow for easy levelling of the unit.
It must be installed on a non-combustible surface.
All Panels must remain on the equipment when the installation is finished.
An install kit is available for most models.
Information about the kit is available at your reseller.
This instruction Manual must remain with the operator.
Electrical
- Based on the local electrical code, wires must be large enough to carry
the electrical load used by the dishwasher. The electrical breaker must be
large enough to protect those wires. Normally the breaker size or fuse size
should not exceed %110 of total current load (ex.: 23 amps requires max
fuse size of 25 amps).
- All units must be grounded.
- Except for the F14(110 volts), all the high-temp dishwashers do NOT
require a neutral.
- For tri-phase model, three live wire are required and the rotation of the pump(s)
must be verified.
-Only a licensed electrician can make sure the unit is installed with the proper set-up,
according to local codes.
Water supply
- To get best results, supply 140 F at all time.
If water temperature is 120F, the dishwasher must be
allowed an extra two (2) minutes between washes.
- Running pressure must not exceed 25 PSI (20 ~5)
- Water should be free of minerals and other
sediments.
- Hook-up is made with ¾ NPT. It is recommended to
use metal breaded reinforced hose.
- If a hot water tank has to be installed to supply the
dishwasher, the average rate of water consumption is 30 gallons per hour.
Drain connection
- If the unit uses a gravity drain, it has to drain in
an open floor drain.
- The drain hose to be used can not be allowed to
collapsed.
- Do not reduce more than one pipe size.
- Follow local codes for proper waste disposal.
- Allow for easy removal for cleaning and servicing.
Hard plumbing the unit is strongly discouraged.
6
Connecting your new F-14
This dishwasher must be installed on a level, rigid, nonflammable surface. Ensure
that the machine is level by installing the feet (shipped in the wash tank of the
machine) and adjusting the levelling. Be sure to provide adequate space for
water, drain and electrical connections. The rear panel must be removed for the
hook ups and must be put back after the connections are made.
Electrical
ELECTRICAL SUPPLY
A 115 Volt - 15 Amp circuit breaker is required for this washer (please
make sure that this outlet is grounded). A standard power-cord with plug
is provided for your convenience for the 115 Volt version.
NOTE: -If you have purchased the optional 208 Volt version. -The circuit
used for this unit should be independent from any other equipment.
WATER SUPPLY
A 3/4” NPT coupling is required with 25 psi. dynamic pressure. A water
pressure regulator is required to maintain this pressure. The water pressure
cannot be less than 15 psi or exceed 25 psi. If the water pressure exceeds the
prescribed amount, you will get inconsistent washing temperature, premature
failure and thus may void the warranty.
Incoming water temperature must be 140º F ( 60º C). An easily accessible shutoff valve is recommended --- making installation, service and repairs easier.
This type hose is standard for most warewashing machines. Fittings should be
available from your local hardware or plumbing supply house.
Flexible hoses must be used to make installation, servicing and
maintenance easier.
Make sure that the water is free from calcium and hard water
deposits. For these situations, an on-line water cartridge system is
highly recommended. Build-up of calcium and lime deposits in the
washer may occur and servicing will be required on a more
frequent basis which will not be covered by the warranty.
DRAIN CONNECTION
This washer has a gravity type drain. Since this unit is a 'countertype' installation, your flexible drain hose, should be connected to the
drain outlet elbow at the rear of the unit behind the rear access panel;
and extended through the side opening directly into a floor drain or
sink (see Figure )
All panels must be back on the unit when the installation
is finished.
DO NOT manually fill wash tank with water. Let the dish-washer fill
itself when the power is turned ON.
7
Drain outlet
Water inlet connection
Connecting your new F16DP
This glasswasher must be installed on a level, rigid, nonflammable
surface. Ensure that the machine is level by installing the feet
(shipped in the wash tank of the machine) and adjusting the levelling.
Be sure to provide adequate space for water, drain and electrical
connections.
WATER SUPPLY
A 3/4”NPT fitting is required with 25 psi. dynamic pressure. A water
pressure regulator is required. The water pressure cannot be less than
15 psi or exceed 25 psi. If the water pressure exceeds the prescribed
amount, you will get inconsistent washing temperature, premature
failure and thus may void the warranty.
Incoming water temperature must be 140º F ( 60º C). An easily
accessible shut-off valve is recommended --- making installation, service and
repairs easier. This type hose is standard for most warewashing machines.
Fittings should be available from your local hardware or plumbing supply house.
Flexible hoses must be used to make installation, servicing and maintenance
easier.
Make sure that the water is free from calcium and hard water deposits. For these
situations, an on-line water cartridge system is highly recommended. Build-up of
calcium and lime deposits in the washer may occur and servicing will be required
on a more frequent basis which will not be covered by the warranty.
DRAIN
· F-16 DP: This glasswasher is equipped with an automatic drain
pump that will pump the drain water to a maximum height of 36" (0.9
meter). Drain pump equipped machines have a white button on the
control panel beside the green power button. DRAIN PUMP
MODELS ARE FACTORY BUILT. GRAVITY DRAIN UNITS
CANNOT BE CONVERTED TO PUMPED DRAIN UNITS.
1" ID flexible drain hose* is recommended to facilitate maintenance and servicing of the
machine. It is important not to reduce the size of this hose. A 1" check-valve* may be
required. There should be sufficient hose length to permit the machine to be pulled out
for service.
ELECTRICAL
A 208-240 volt, 60 Hz, Single Phase circuit is required for this unit. Check the
rating plate on the machine for amp draw. In spite of the fact that the rating
plate shows 208 volts, the unit is designed function properly on 208 volts to
240 volts.
Water
The terminal block is located at the back of the machine. Open the plastic
cover, pass the cable through the cable strain relief and connect the wires to
the L1, L2 & Ground. There should be sufficient cable length to permit the
machine to be pulled out for service. DO NOT turn on the power to the
machine until the water supply & drain lines have been connected. DO NOT
manually fill wash tank. Let it fill itself.
L1
In
IMPORTANT NOTE
Reasonable access to and around the machine for service must be provided. Disconnecting of hard plumbing
or removal of counter tops or cabinets, etc., for servicing is not covered by warranty.
* - not supplied
All panels must be on the unit when the installation is finished.
8
L2
Water
out
Connecting your new F-18, F18DP
This dishwasher must be installed on a level, rigid, nonflammable
surface. Ensure that the machine is level by installing the feet
(shipped in the wash tank of the machine) and adjusting the levelling.
Be sure to provide adequate space for water, drain and electrical
connections.
WATER SUPPLY
A 3/4” NPT fitting is required with 25
psi. dynamic pressure. A water pressure
regulator is required. The flowing water
pressure cannot be less than 15 psi or
exceed 25 psi. If the water pressure
exceeds the prescribed amount, you will
get inconsistent washing temperature,
premature failure and thus may void the warranty.
Incoming water temperature must be 140º F ( 60º
C). An easily accessible shut-off valve is
recommended --- making installation, service and
repairs easier. This type hose is standard for most
warewashing machines. Fittings should be available
from your local hardware or plumbing supply house.
Flexible hoses must be used to make installation, servicing and maintenance easier.
Make sure that the water is free from calcium and hard water deposits. For these
situations, an on-line water cartridge system is highly recommended. Build-up of calcium
and lime deposits in the washer may occur and servicing will be required on a more
frequent basis which will not be covered by the warranty.
DRAIN
· F-18: This dishwasher has a gravity drain. Maximum height of the floor drain
should not exceed 6" (15cm). A 1.5" ID flexible drain hose* is recommended to
facilitate maintenance and servicing of the machine.
· F-18 DP: This dishwasher is equipped with an automatic drain pump that will
pump the drain water to a maximum height of 36" (0.9 meter). A 1" ID flexible
drain hose* is recommended to facilitate maintenance and servicing of the
Gravity Drain
machine. It is important not to reduce the size of this hose. A 1" check-valve*
may be required on
drain pump equipped models. Drain pump
equipped machines have a white button on
the control panel beside the green power
button. Conversion is not possible in the
field.
There should be
sufficient hose
length to permit
the machine to
be pulled out for
service.
Pumped Drain
More next page
9
Installation F-18 , continued
ELECTRICAL
A 208-240 volt, 60 Hz, Single Phase circuit is required
for this unit. This unit will draw 22.3 amperes on a 220
volt circuit. In spite of the fact that the rating plate
shows 208 volts, the unit is designed function properly
on 208 volts to 240 volts.
The top & back panels must be removed for the
electrical hook -up. The top panel is secured by two
phillips head screw. Once the screws removed, the
panel should be slid to the back and lifted. The back
panel is also held by two screws. Remove them, pull
the bottom away from the machine and lift the panel.
The terminal block is located inside the back cover. Pass the cable through the cable strain relief and
connect the wires to the terminals L1 (brown wire), L2 (blue wire) & Ground (yellow & green wire). Replace
the top & back panels being careful not to pinch or kink any
wires or hoses. There should be sufficient cable length to
permit the machine to be pulled out for service.
G
IMPORTANT NOTE
*Reasonable access to and around the machine for
service must be provided. Disconnecting of hard
plumbing or removal of counter tops or cabinets, etc., for
servicing is not covered by warranty.
*DO NOT fill dishwasher manually with water. Let the
L1
L2
Water
Out
Water In
dishwasher fill itself with power button.
*All panels must be on the unit when the installation is finished.
* - not supplied
Rinse-Aid Pump Detergent Pump
Chemical Installation
· The rinse pump is standard equipment on all JET-TECH
machines and automatically injects rinse additive into the rinse
water for the final rinse.
· The rinse pump is located in the base of the machine. The
front, lower panel (below the door) snaps off to access the rinse
pump. Cut the cable tie, remove the filter at the end of the tube,
insert tube in the container that is supplied, and put the filter
back. The bottle fits nicely in the cubicle on the right.
- Any surfactant isopropanol can be used. This chemical can be
found at any chemical supplier. Never use a chlorinated
product (sanitizer or bleach) as it will destroy the pump.
The detergent pump is peristaltic type with clear cover casing. It situated next to the rinse-aid pump. The
clear feed tube will have to be cut free and fed through the bottom of the dishwasher opening. The weighted
filter has to be inserted in a jug of detergent solution. Any sodium hydroxide can be used.
If liquid detergent is not what you want to use, a crystal(powder) type detergent can be used.
WARNING
Whenever manipulating chemicals, use appropriate protection (eyes and hands) as these
chemicals are corrosive.
10
Connecting your new F-20
This dishwasher must be installed on a level, rigid, nonflammable surface. Ensure that the
machine is level by installing the feet (shipped in the wash tank of the machine) and adjusting the
levelling. Be sure to provide adequate space for water, drain and electrical connections.
WATER SUPPLY:
A 3/4” NPT fitting is required with 25 psi. dynamic pressure. A water
pressure regulator is required. The flowing water pressure cannot be less
than 15 psi or exceed 25 psi. If the water pressure exceeds the prescribed
amount, you will get inconsistent washing temperature, premature parts
failure and thus may void the warranty.
Incoming water temperature must be 140º F ( 60º C). An easily accessible
shut-off valve is recommended --- making installation, service and repairs
easier. This type hose is standard for most warewashing machines.
Fittings should be available from your local hardware or plumbing supply
house.
Flexible hoses must be used to make installation, servicing and
maintenance easier.
Make sure that the water is free from calcium and hard water deposits. For these situations, an online water cartridge system is highly recommended. Build-up of calcium and lime deposits in the
washer may occur and servicing will be required on a more frequent basis which will not be
covered by the warranty.
DRAIN:
This dishwasher has a gravity drain. Maximum height of the floor drain should not exceed
20" (50cm). A 1.5" ID flexible drain hose* is recommended to facilitate maintenance and
servicing of the machine.
ELECTRICAL:
A 208-240 volt, 60 Hz, Single Phase circuit is required for this unit. Check the rating plate on the
machine for amp draw. In spite of the fact that the rating plate shows 208 volts, the unit is designed
function properly on 208 volts to 240 volts.
The top & back panels must be removed for the electrical hook
-up. The top panel is secured by two phillips head screw. Once
the screws removed, the panel should be slid to the back and
lifted. The back panel is also held by two screws. Remove
them, pull the bottom away from the machine and lift the panel.
The terminal block is located at the top of the machine and can
be accessed by removing the top and back panel. Pass the
cable through the cable strain relief at the back and connect
the wires to the terminals L1 (brown wire), L2 (blue wire) &
Ground (yellow & green wire). There should be sufficient cable
length to permit the machine to be pulled out for service.
DO NOT FILL DISHWASHER MANUALLY. LET THE
DISHWASHER GO THROUGH ITS FILL CYCLE.
IMPORTANT NOTE
Reasonable access to and around the machine for service must be provided.
Disconnecting of hard plumbing or removal of counter tops or cabinets, etc., for servicing
is not covered by warranty.
All panels must be on the unit when the installation is finished.
11
Connecting your new F-22
This dishwasher must be installed on a level, rigid, nonflammable surface. Ensure that the
machine is level by installing the feet (shipped in the wash tank of the machine) and adjusting the
levelling. Be sure to provide adequate space for water,
drain and electrical connections. If you plan to install a
Detergent Pump, do it before the back of the unit
becomes inaccessible.
WATER SUPPLY:
A 3/4” NPT fitting is required with 25 psi. dynamic
pressure. A water pressure regulator is required. The
flowing water pressure cannot be less than 15 psi or
exceed 25 psi. If the water pressure exceeds the
prescribed amount, you will get inconsistent washing temperature, premature parts failure and thus
may void the warranty.
Incoming water temperature must be 140º F ( 60º C). An easily accessible shut-off valve is
recommended --- making installation, service and repairs easier. This type hose is standard for
most warewashing machines. Fittings should be available from your local
hardware or plumbing supply house.
Flexible hoses must be used to make installation, servicing and maintenance
easier.
Make sure that the water is free from calcium and hard water deposits. For
these situations, an on-line water cartridge system is highly recommended.
Build-up of calcium and lime deposits in the washer may occur and servicing
will be required on a more frequent basis which will not be covered by the
warranty.
DRAIN:
This dishwasher has a gravity drain. Maximum height of the drain should not exceed 20" (50cm).
A 1.5" ID flexible drain hose* is recommended to facilitate maintenance and servicing of the
machine.
ELECTRICAL:
A 208-240 volt, 60 Hz, Single Phase or Three Phase circuit is required for this unit.
Check the rating plate on the machine for amp draw. In spite of the fact that the
rating plate shows 208 volts, the unit is designed function properly from 208 volts
to 240 volts.
The terminal block is located in the control box on the side of the unit. The
faceplate of the control panel pulls out, exposing the terminal block, after the
screws are removed. Pass the cable through the cable strain relief at the back and
connect the wires to the terminals L1 (brown wire), L2 (blue wire), L3 (black wire) &
Ground (yellow & green wire). There should be sufficient cable length to permit the
machine to be pulled out for service.
DO NOT FILL DISHWASHER MANUALLY. LET THE DISHWASHER GO
THROUGH ITS FILL CYCLE.
IMPORTANT NOTE
Reasonable access to and around the machine for service must be provided.
Disconnecting of hard plumbing or removal of counter tops or cabinets, etc., for servicing
is not covered by warranty.
All panels must be on the unit when the installation is finished.
12
F 22 Tabling configuration
The F22 is design to received standard size dish-tabling (For example; DTC-S60
series from Advance Tabco) .
Below you can see the different
configurations that can be done
with the F-22.
If the solid section is on the right
side (control panel side), the
control panel can be adjusted
down to allocate room for the sink.
If you need to do a corner
installation, change the bracket
that guides the trays from the front
to the left side.
13
Connecting your new 727
This dishwasher must be installed on a level, rigid, nonflammable surface. Ensure that the
machine is level by installing the feet (shipped in the wash tank of the machine) and adjusting the
levelling. Be sure to provide adequate space for water, drain and electrical connections.
WATER SUPPLY
A 3/4” NPT fitting is required with 25 psi. dynamic pressure. A
water pressure regulator is required. The flowing water pressure
Electrical
cannot be less than 15 psi or exceed 25 psi. If the water pressure
exceeds the prescribed amount, you will get inconsistent washing
temperature, premature failure and thus may void the warranty.
Water
Incoming water temperature must be 140º F ( 60º C). An easily
Water In
accessible shut-off valve is recommended --- making installation,
service and repairs easier. This type hose is standard for most
warewashing machines. Fittings should be available from your
local hardware or plumbing supply house.
Flexible hoses must be used to make installation, servicing and
maintenance easier.
Make sure that the water is free from calcium and hard water deposits. For these situations, an online water cartridge system is highly recommended. Build-up of calcium and lime deposits in the
washer may occur and servicing will be required on a more frequent basis which will not be
covered by the warranty.
DRAIN
This dishwasher is equipped with an automatic drain pump that will pump the drain water to a
maximum height of 36" (0.9 meter). A 1" ID flexible drain hose* is recommended to facilitate
maintenance and servicing of the machine. It is important not to reduce the size of this hose.
There should be sufficient hose length to permit the
machine to be pulled out for service.
ELECTRICAL
A 208-240 volt, 60 Hz, Single Phase circuit is required for
this unit. Check the rating plate on the machine for amp
draw. Despite of the fact that the rating plate shows 208
volts, the unit is designed function properly on 208 volts
to 240 volts.
The terminal block is located at the back of the unit.
Open the cover and connect the wires to the terminals
L1 , L2 & Ground. There should be sufficient cable length to permit the machine to be pulled out
for service. DO NOT TURN ON THE POWER TO THE MACHINE UNTIL THE WATER SUPPLY &
DRAIN LINES HAVE BEEN CONNECTED.
IMPORTANT NOTE
Reasonable access to and around the machine for service must be provided. Disconnecting of
hard plumbing or removal of counter tops or cabinets, etc., for servicing is not covered by warranty.
* - not supplied
All panels must be on the unit when the installation is finished.
14
Out
Connecting your new 737
This dishwasher must be installed on a level, rigid, nonflammable surface.
Ensure that the machine is level by installing the feet (shipped in the wash
tank of the machine) and adjusting the levelling. Be sure to provide
adequate space for water, drain and electrical connections.
WATER SUPPLY
A 3/4” NPT fitting is required with 25 psi. dynamic pressure. A water
pressure regulator is required. The flowing water pressure cannot be less
than 15 psi or exceed 25 psi. If the water pressure exceeds the prescribed amount, you will get inconsistent
washing temperature, premature failure and thus may void the warranty.
Incoming water temperature must be 140º F ( 60º C). An easily accessible shut-off valve is recommended --making installation, service and repairs easier. This type hose is standard for most warewashing machines.
Fittings should be available from your local hardware or plumbing supply house.
Flexible hoses must be used to make installation, servicing and maintenance easier.
Ensure that the water is free from calcium and hard water deposits. For these situations, an on-line water
cartridge system is highly recommended. Build-up of calcium and lime deposits in the washer may occur and
servicing will be required on a more frequent basis which will not be covered by the warranty.
DRAIN
This dishwasher is equipped with an automatic drain pump that will pump the drain
water to a maximum height of 36" (0.9 meter). A 1" ID flexible drain hose* is
recommended to facilitate maintenance and servicing of the machine. It is important
not to reduce the size of this hose. A 1" check-valve* may be required.
There should be sufficient hose length to permit the machine to be pulled out for
service.
ELECTRICAL
A 208-240 volt, 60 Hz, Single Phase circuit is required for this unit. Check the
rating plate on the machine for amp draw. In spite of the fact that the rating plate
shows 208 volts, the unit is designed function properly on 208 volts to 240 volts.
The top & back panels must be removed for the electrical hook -up. The top panel
is secured by two phillips head screw. Once the screws removed, the panel should
be slid to the back and lifted. The back panel is held by 6 screws. Remove them,
pull the top away from the machine and lift the panel.
The terminal block is located at the back of the machine.
Pass the cable through the cable strain relief at the back and
connect the wires to the terminals L1 (brown wire), L2 (blue
wire) & Ground (yellow & green wire). There should be
sufficient cable length to permit the machine to be pulled out
for service. DO NOT TURN ON THE POWER TO THE
MACHINE UNTIL THE WATER SUPPLY & DRAIN LINES
HAVE BEEN CONNECTED.
IMPORTANT NOTE
Reasonable access to and around the machine for service
must be provided. Disconnecting of hard plumbing or
removal of counter tops or cabinets, etc., for servicing is not
covered by warranty.
* - not supplied
All panels must be on the unit when the installation is finished.
15
G
L1
L2
Water In
Water
Out
Connecting your new 747
This dishwasher must be installed on a level, rigid, nonflammable surface. Ensure that the
machine is level by installing the feet (shipped in the wash tank of the machine) and adjusting the
levelling. Be sure to provide adequate space for water, drain and electrical connections. If you plan
to install a Detergent pump kit, do so before the back of the unit becomes inaccessible.
WATER SUPPLY:
A 3/4” NPT fitting is required with 25 psi. dynamic pressure. A water pressure regulator is required.
The flowing water pressure cannot be less than 15 psi or exceed 25 psi. If the water pressure
exceeds the prescribed amount, you will get inconsistent washing temperature, premature parts
failure and thus may void the warranty.
Incoming water temperature must be 140º F ( 60º C). An easily accessible shut-off
valve is recommended --- making installation, service and repairs easier. This type
hose is standard for most warewashing machines. Fittings should be available from
your local hardware or plumbing supply house.
Flexible hoses must be used to make installation, servicing and maintenance
easier.
Make sure that the water is free from calcium and hard
water deposits. For these situations, an on-line water
cartridge system is highly recommended. Build-up of calcium and lime
deposits in the washer may occur and servicing will be required on a more
frequent basis which will not be covered by the warranty.
DRAIN:
This dishwasher has a gravity drain. Maximum height of the drain should
not exceed 20" (50cm). A 1.5" ID flexible drain hose* is recommended to
facilitate maintenance and servicing of the machine.
ELECTRICAL:
A 208-240 volt, 60 Hz, Single Phase or Three Phase circuit is
required for this unit. Check the rating plate on the machine for
amp draw. In spite of the fact that the rating plate shows 208 volts,
the unit is designed function properly from 208 volts to 240 volts.
The bottom cover (under the controls) is snapped in to position and
should be removed. The terminal block is located in the base of the
unit, on the left side.
Pass the cable through the cable strain relief at the back and connect
the wires to the terminals L1 (brown wire), L2 (blue wire), L3 (black wire)
& Ground (yellow & green wire). There should be sufficient cable length
to permit the machine to be pulled out for service.
DO NOT FILL DISHWASHER MANUALLY. LET THE
DISHWASHER GO THROUGH ITS FILL CYCLE.
IMPORTANT NOTE
Reasonable access to and around the machine for service must be provided.
Disconnecting of hard plumbing or removal of counter tops or cabinets, etc., for servicing
is not covered by warranty.
Verify rotation of the pumps for three phase unit.
All panels must be on the unit when the installation is finished.
16
Connecting your new 767
This dishwasher must be installed on a level, rigid, nonflammable surface. Ensure that the
machine is level by installing the feet (shipped in the wash tank of the machine) and adjusting the
levelling. Be sure to provide adequate space for water, drain and electrical connections.
WATER SUPPLY:
A 3/4” NPT fitting is required with 30 psi. dynamic pressure. A water pressure regulator is required.
The flowing water pressure cannot be less than 25 psi or exceed 40 psi. If the water pressure
exceeds the prescribed amount, you will get inconsistent washing temperature, premature parts
failure and thus may void the warranty.
Incoming water temperature must be 140º F ( 60º C). An easily accessible shut-off valve is
recommended --- making installation, service and repairs easier. This type hose is standard for
most warewashing machines. Fittings should be available from your local hardware or plumbing
supply house.
Flexible hoses should be used to make installation, servicing and maintenance easier.
Make sure that the water is free from calcium and hard water deposits. For these situations, an online water cartridge system is highly recommended. Build-up of calcium and lime deposits in the
washer may occur and servicing will be required on a more frequent basis which will not be
covered by the warranty.
DRAIN:
This dishwasher has a gravity drain. Maximum height of the drain should not exceed 20" (50cm).
A 1.5" ID flexible drain hose* is recommended to facilitate maintenance and servicing of the
machine.
ELECTRICAL:
A 208-240 volt, 60 Hz, Single Phase or Three Phase circuit is required for this unit. Check the
rating plate on the machine for amp draw. In spite of the fact that the rating plate shows 208 volts,
the unit is designed function properly from 208 volts to 240 volts.
The terminal block is located under the control panel, inside the machine. Pass the cable through
the cable strain relief at the back and connect the wires to the terminals L1 (brown wire), L2 (blue
wire), L3 (black wire) & Ground (yellow & green wire). There should be sufficient cable length to
permit the machine to be pulled out for service.
DO NOT FILL DISHWASHER MANUALLY. LET THE DISHWASHER GO THROUGH ITS
FILL CYCLE.
IMPORTANT NOTE
Reasonable access to and around the machine for service must be provided.
Disconnecting of hard plumbing or removal of counter tops or cabinets, etc., for servicing
is not covered by warranty.
Verification of the pump rotation is very important!
All panels must be on the unit when the installation is finished.
17
CHEMICALS AND PUMP ADJUSTMENT
Models 727, 737, F-16, F-16DP, F-18, F-18DP & F-20 are supplied with a factory installed
liquid detergent pump to automatically dispense detergent into the wash tank chambers.
Before accessing the bottom section
of
the dishwasher, make sure that the
power was turned off at the source
(breaker panel).
The bottom panel can only be
remove with a flat tool like a screwdriver. Insert the screw-driver in the
gap between the front panel and the
side panel. Pry open towards you.
Do this on both side.
The clear hoses connected to the pumps must be pulled out and fed through
the bottom of the dishwasher. The containers can be either to the right or left
of the dishwasher. Perforating the stainless panel is not recommended.
The quantity of liquid detergent can be increased (clockwise) or decreased
(counter
clockwise) by
adjusting the
screw on the
peristaltic pump. The pump works during
the fill cycle and rinse cycle.
(Identified above as “Adjustment screw”)
Don't forget to put the panel back on
when finished.
RINSE PUMP ADJUSTMENT AND
PRIMING
· The rinse pump is standard equipment
on all JET-TECH machines and
automatically injects rinse additive into
the rinse water for the final rinse.
· The rinse pump is located in the base of the
machine near the booster tank. The front, lower
panel (below the door) snaps off to access the
rinse pump. Cut the cable tie, route the tube out
from the base of the machine and drop the clear
vinyl hose and filter into your rinse additive
container. (Some models are supplied with a
rinse additive bottle that fits inside the base of the
machine) Adjustments should be made
clockwise to reduce the amount of rinse additive
and counter clockwise to increase the amount of
rinse additive.
18
· If air gets in the rinse hose or if the pump stops drawing
additive from the container, the pump may need to be
primed.
To Prime (accelerate the injection of chemical) the
pump, follow these steps;
1) Turn OFF the machine and wash tank must be empty
has priming is done during the fill cycle.
2) Turn the adjusting screw on the rinse pump
approximately 10 turns counter clockwise, allowing
maximum travel for the piston. The screw may fall out
but this is not a problem. Just remember how many
turns you had made when the screw fell out.
3) Turn the machine ON and count to 5, turn the machine OFF and count to 5, do this
several times, until the liquid is drawn up the tube to the rinse pump. You should be able to
see the liquid travel the length of the tube.
4) Turn the adjusting screw on the rinse pump 10 turns clockwise or the same amount of
turns you had made before the screw fell out.
The rinse-aid pump can pump up to 3cc of
rinse-additive (drying agent). The liquid is
injected directly in to the booster tank.
DO NOT use sanitizer (chlorinated products,
bleach) with this pump. It is not made to pump
harsh chlorinated liquid. This will void warranty
on the dishwasher.
WHAT TO USE:
The products are a Sodium Hydroxide for the
detergent and a surfactant isopropanol for the
rinse. Quantities will vary with water quality but
as a guideline there should be 200 ppm for the
detergent and 50 ppm for the rinse-agent. Those products are available from any chemical
company. If you need, we can refer you different companies.
Should you run out of these products, you can use residential brand product as a temporary
measure. Do NOT use soap that produces suds. Use those product that are sold for
dishwashers. Good quality chemical
product will improve the washing.
For any other request on set-up and
installation, please contact us at 1 888
275 4538 extension 611.
IMPORTANT
Remember to always use caution and
protective gears whenever you are
manipulating chemicals. They can burn
the skin. Follow supplier’s instructions
carefully.
19
CONTROL PANELS
7
ON
OFF
6
4
2
P
5
5
7
3
6
1
4
3
6
1
3
7
2 5
4
1 Green Power Button Switch
2 Power ON Indicator Light
3 Rinse Temperature Gauge
4 Wash Temperature Gauge
5 “READY” Indicator Light
6 Cycle Start Button
7 Cycle Indicator Light
8 White Drain Pump Button
9 Black Warm Rinse Button
20
BASIC STEPS TO START
Begin with an empty dishwasher, no water in the wash tank. It is easier
to start this way.
!
!
!
!
!
!
!
!
!
!
Make sure the screens and the overflow pipe are in place.
Close the door.
Push the square green button. The dishwasher will take about two minutes
to fill and 20 minutes to heat up the water. The booster will heat up first and
then the wash tank will heat up.
When the dishwasher is ready, the ready light will come on. This indicates
that the dishwasher has reached maximum temperature.
You can now start washing.
Fill the basket.
Slide it in to the dishwasher.
Close the door and press the round black button. The dishwasher will start
washing for a few minutes and than will rinse for about half a minute.
When the cycle light (near the start button) goes off, open the door and
remove the tray to let air dry.
You’re ready for another wash.
You should drain the dishwasher at least once a day.
The dishwasher should turned off and left empty of water at night.
To drain the dishwasher, follow these simple steps;
!
!
!
Turn Off the power.
Pull the overflow tube (water may be hot)
Press the white drain button (if so equipped) until all the water is gone. Be
careful not to let any dirt go down the drain as it may block the pump.
21
OPERATION
Before operating the machine, ensure that the electrical power, water supply and drain connections
have been made as per the installation instructions.
Ensure that the overflow pipe is correctly set in its place (inside the wash tank). The overflow pipe
should never be forced into its position. For the first use of the day, the wash tank should not have
any water.
Familiarize yourself with the gauges, buttons and indicator lights on the
control panel.
Check chemical levels. The containers should have sufficient quantities
for wash (detergent) and rinse (Drying agent).
Press the Square Green Power Button (1).The Power Indicator Light
‚will illuminate (as well as the Digital Temperature Gauges , if so
equipped). If the wash tank is empty, the machine will start to fill. Always
keep the door closed during this time. When the machine has filled to its
required water level, the elements will then raise the rinse and wash
water temperatures automatically.
It will take approximately 15-20
minutes in order to obtain the
optimum temperatures (185°F in the
booster and 160°F in the wash tank).
The Ready Indicator Light (5) will
illuminate to indicate that the machine
is ready for its first load.
Fill the basket with dishware and
trays then push the basket into the
machine. If you are using a powder
detergent, add the required amount
(usually about one full tablespoon) in
the wash tank and close the door. If
you are using liquid detergent with a
chemical pump system (optional)
detergent will be added automatically.
DO NOT use domestic dish soap.
Heater
Water Level
Air Trap
!Do Not Touch
Wash arm
Overflow
Stand pipe
Wash pump
Filter
NOTE: Whenever starting with the
initial fresh water after fill-up, it is recommended to place 1-2 full tablespoonfuls of detergent (if you
are using powder detergent) on the filters in addition to the regular amount per batch. Use a
commercial dish detergent, as recommended by your supplier. Using too much may cause
damage to the pump seals.
It is more economical to wash
when the basket is fully loaded. It is
also important not to overload the
basket. Water should always be
able to spray freely around the
dishware and trays.
Overflow
Press the round black Cycle Start
Button (6) to start the wash cycle.
On the model 767, set the selector to 2, 4 or 6 minute wash. Closing the
hood will activate the cycle. The Cycle Indicator Light (7) will illuminate. The cycle starts and
consists of a wash (up to 6 minutes), a brief pause and then a rinse (from 18 to 25 seconds).
Another basket can be filled while the first one is being washed. The Cycle Indicator Light (7) will
extinguish to signal the end of the cycle. Remove the basket from the machine to let the dishes air
22
dry.
IMPORTANT NOTES:
- Models F-16 and F-16 DP feature an alternative warm water rinse.
Activating the warm rinse with the Black button on the front control panel bypasses
the booster tank for the final rinse and rinses using incoming water temperature
from the water inlet valve.
-The model F22 and 747 differ from the under-counter units on the way the
initiate the wash cycle. Once the unit has filled up with water and the temperatures
have reached their maximums, slide the basket in and close the door. Closing the
door will start the wash cycle. At the end of the cycle, after the cycle light has
switched off, open the door and remove the basket. The cycle light will come on at
that point for a few seconds to reset the timer for the next wash.
- JET TECH ware washers do not dump water and fill after every cycle. The wash
water is refreshed during every cycle by the hot rinse water. Only excess water is
expelled from the machine via the overflow pipe.
- Some models are equipped with an automatic drain pump (White button on the
front control panel) that will evacuate excess water. Please see the section on:
DRAIN PUMP OPERATION.
23
Jet Tech F18DP
BASIC STEPS TO OPERATE
2
185 F
165 F
Close the door
and press the power button.
Wait 20 minutes for the water to
attain optimum washing temperatures.
Make sure dishwasher is empty of water
and the wash tank is clean of debris.
3
4
Load rack in the dishwasher,
close the door.
Pre-rinse dishes and/or glasses and cups.
5
6
Wait for the green light to turn off
before taking the tray out.
Take tray out to let dishes air dry.
Press the Start button.
Wash cycle is 3 minutes.
24
F22
BASIC STEPS TO OPERATE
1
2
150 F
185 F
Close the door,
press the power button to ON.
Wait for the water to obtain
optimum washing temperature.
At the start of each day,
ensure dishwasher is empty (no water)
and that the wash tank is clean (no debris)
3
4
Load rack in the dishwasher
and close the door.
Pre-rinse dishes, glasses and cups.
5
6
Wait for the green light to turn OFF
before removing the rack.
Repeat from step 3 for more trays.
Close the door to start the wash cycle.
25
DRAIN PUMP OPERATION
Models 727, 737, F-16DP and F-18DP are factory built with drain pumps. A square white button
on the control panel beside the green power button also evidences this feature. All other models
have a gravity drain.
Drain pump equipped models will pump the waste water to a maximum height of 36” (0.9 meter). A
1” ID flexible hose* is recommended to facilitate maintenance and servicing of the machine. It is
important not to reduce the size of this hose. A 1” check valve* may be required. There should be
sufficient hose length to permit the machine to be pulled out for service. Drainage time should not
exceed 1 minute.
The drain pump activates automatically during a rinse cycle and functions when the water fill valve
is open: during the fill and rinse cycles. This allows the removal of excess water entering the unit.
To manually drain the wash tank, you must:
1. -Turn off the machine (square green button on control panel).
2. -Open the door, remove the basket, and remove the overflow pipe (also known as stand pipe).
3. -Press and hold the white button on the control panel, which will activate the drain pump.
Release the button when the water has been discharged.
The most common causes of drain pump failure are:
Debris was flushed down the drain and blocked the impeller in the pump. Removing the impeller
cover and clearing the obstruction generally restores normal pump function.
The drain hose, at the back of the unit, is restricted in someway.
Incoming water pressure is higher than 25PSI.
IMPORTANT! Pump failure caused by debris is NOT covered by the warranty.
Push and Hold
Push and Hold
26
PROBLEM ANALYSIS
INDEX
1. Constantly fills
2. Dishwasher makes a high
pitch noise when washing
3. Dishwasher overflow
4. Does not operate/start
5. Does not wash properly
6. Filling is too long. Exceeds 3
minutes.
7. Filling is too short (under 1
minute)
8. Machine takes too long to
empty. Time exceed 2 minutes.
9. Pilot lamps do not illuminate
10. Spots on glasses
11. The wash pump does not
operate consistently during a
wash cycle
12. Wash cycle is too short
>The water level system may have
an air leak.
>>verify the water level system
from the pressure switch to the tube
down to the air trap. Replace the
defective parts as required.
>The air trap may have dirt in it.
>>Clean the air trap.
2. Dishwasher makes a high
pitch noise when washing
>The wash tank may have too
much detergent.
>>Too much soap may cause the
pump to make a high pitch noise.
Reduce the detergent amount; and
ensure it is of the non-foaming type
used. The mechanical seals may be
worn. Replace as required.
PROBLEM
>CHECK
>>ACTION
3. Dishwasher overflow
1. Constantly fills
>Drain outlet hose may be blocked.
>>Un-clog or reposition hose or
replace the drain hose.
>Dishwasher has not been fully
drained in a long time (more then
four hours).
>>Switch dishwasher OFF. Pull
over-flow and drain unit completely.
Once drained, clean wash tank and
filters. Put all parts back in. Close
door, switch it ON, and let fill.
>Is overflow tube(stand-pipe)
properly positioned in wash tank?
>>Check for cracks or burrs at
bottom of overflow tube.
>The air pressure switch may be
faulty.
>>Replace it.
>Drain pump may be blocked or
defective not allowing proper
drainage of machine.
>>Un-clog or replace drain pump,
as required.
>Incoming water pressure may be
incorrect.
>> If the water pressure is too high
(above 25psi), you must install a
pressure regulator.
>Regular dishwashing soap may
have been used or has
contaminated the dishwasher
accidentally, causing massive
amount of sudsing.
>>Drain the tank, remove as much
27
suds as possible. Leave overflow
out, close the door and put power
on. Let unit run for 2 to 4 minutes.
Turn off unit, put overflow back in,
close the door and refill unit. Try
washing. If reoccurs try from the
beginning again.
>The solenoid valve may have dirt
in it or may be defective.
>>Replace as required.
>>Verify all connections.
>Verify that power is going to the
machine.
>>Verify the breaker or fuses. Verify
electrical connections to the
machine.
5. Does not wash properly
4. Does not operate or start
>Are the scrap screens clean?
>>Clean the scrap screens & filters.
Don't forget the wash pump screen.
>The door micro switch may be
defective.
>>Adjust switch. Some of the parts
may have to be replaced.
>Are the wash/rinse arm jets
clogged?
>>Clean the jets/nozzles. Be
careful not to lose the o-rings.
>The momentary relay may be
defective or disconnected.
>>All wires must well in place. If so
replace it.
>Detergent system may be
defective.
>>Peristaltic hose(s) may have to
be replaced. The detergent filter in
the container may be clogged or
worn. Replace. Check the detergent
line for deposits. Clean the line if
necessary.
>The power switch may be
unplugged or defective.
>>Verify connections and replace
as required.
>The pressure switch may be faulty.
>>Adjust switch. Replace as
required.
>The solenoid valve may have dirt
on it or may be defective.
>>Clean filter or replace as
required.
>The timer may be defective.
>>Replace.
>The washing cycle button may be
defective.
>>Replace.
>The wiring may have a break or
short to ground.
>Dishes appear dirty after the cycle
is completed.
>>Pre-rinse the dishes properly
before they are placed into the dish
racks.
>Drain outlet hose may be blocked.
Drain pump may be blocked or
defective, and is not allowing proper
drainage of machine.
>>Un-clog, reposition hose or
change drain hose. Un-clog or
replace drain pump, as required.
>Incoming water pressure may be
either too low or too high will result
in poor rinsing.
>>If the pressure is too low (under
15psi), check that the faucet is fully
28
opened. If it is, the customer may
need to install a pressure-booster
pump to increase the water pressure.
If the water pressure is too high
(above 30psi), you must install a
pressure regulator.
>Is the wash water clean?
>>Drain the tank, rinse and refill.
>Is the water level in the wash tank
correct?
>>Water level should be just under
the opening of the overflow pipe. Too
little water will cause the wash pump
to draw air. Too much water will keep
the arm from spinning properly and
may cause water to come out the
door. Both cases reduce the
performance of the dishwasher.
>Small specs remain on glasses
after rinsing.
>Have the incoming water analysed.
May need a filtering system.
>The air pressure switch may be
faulty.
>>Replace Pressure switch
6. Filling is too long. Exceeds 3
minutes.
>Incoming water pressure may be
incorrect.
>>If the pressure is too low (under
15psi), check that the faucet is fully
opened. If it is, the customer may
need to install a pressure-booster
pump to increase the water pressure.
>The stand-pipe may be set
incorrectly.
>>Remove the stand-pipe and check
the seat for dirt.
>The air pressure switch may be
faulty.
>>Adjust or replace as required.
>The air trap may have dirty in it.
>>Clean the air trap.
>The solenoid valve may have dirt in
it or may be defective.
>>Clean filter or replace as required.
>The air trap may have dirt in it.
>>Clean the air trap.
7. Filling is too short (under 1
>The detergent used is of poor
quality.
>>Replace with a better quality
commercial brand or increase
dosage.
>The air pressure switch may be
faulty.
>>Adjust or replace as required.
>The solenoid valve may have dirt in
it or may be defective.
>>Clean filter or replace as required.
>Wash pump may be clogged or
defective.
>>Open face plate of wash pump for
inspection. Clean wash pump or
replace it if necessary.
minute)
>Incoming water pressure is
probably too high (above 30PSI
flow).
>>Reduce water pressure with a
regulator or close shut-off valve until
desired pressure.
>The air trap may have dirt in it.
>>Clean the air trap.
29
wash cycle
8. Machine takes too long to
empty. Time exceed 2 minutes.
Should be less than 1 minute.
>Machine may not be levelled.
>>Level the dishwasher.
>Drain outlet hose may be blocked.
Drain pump may be blocked or
defective not allowing proper
drainage of machine.
>>Un-clog or reposition hose or
replace the drain hose. Un-clog or
replace drain pump, as required.
>The air pressure switch may be
faulty.
>>Adjust or replace as required.
>The air trap may have dirty in it.
>>Clean the air trap.
>The overflow pipe may be
clogged.
>>Clean out any residue.
>Water level in wash tank is too low.
>>Adjust pressure switch or replace
as required. Water level should be
½" below stand-pipe opening.
9. Pilot lamps do not illuminate
12. Wash cycle is too short
>Pilot lamps may be faulty.
>>Check connections. Replace as
required.
>The timer may be defective.
>>Replace.
>The power switch may be
unplugged or defective.
>>Verify and replace as required.
>>Verify the breaker.
>>Verify electrical connections
behind the machine
IMPORTANT NOTES
10. Spots on glasses
>Rinse aid pump may need to be
primed or adjusted.
>>Prime or adjust. Replace as
required.
>The rinse agent may be of an
inferior quality.
>>Replace with a quality commercial
brand.
Locate and clearly identify the water
shut-off valve that supplies the
dishwasher and the fuse box or
breaker switches.
Only qualified and/or licensed
technician can repair this piece of
equipment. Removing panels expose
wires and live current. Breaker
switch should be switched off or
fuses removed before removing the
panels. Water supply must also be
turned off.
Don’t expose yourself to severe
injuries needlessly. Call a tech.
11. The wash pump does not
operate consistently during a
30
Do you have any questions?
Do you need service?
Phone:
1 888 275 4538
514 737 9701
Fax:
514 737 2792
(Eastern time)
MODEL:________________
SERIAL:________________
DATE INSTALLED:_______
SERVICE:
_______________________
_______________________
31
DISHWASHER MANUAL