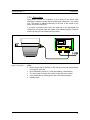
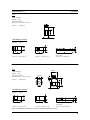
1
PENETRATING PULSE
TECHNOLOGY
SONOCONTROL 11
User’s Manual
Closing date: 5/99
Document No.: 50/11/05/05/99E
HiTECH Technologies
301 Oxford Valley Road - Building 505A
Yardley, PA 19067-7706
1-800-755-4507
FAX 1-215-321-6067
EMAIL: [email protected]
SONOCONTROL 11
Table of contents
SONOCONTROL 11
Universal Level Limit Switch for Liquids
Table of contents
Page
1
Safety alerts and other symbols used .........................................4
2
Safety instructions ........................................................................5
3
Introduction ...................................................................................7
3.1 Overview .....................................................................................7
3.2 Systems components ..................................................................8
3.3 Measuring methods.....................................................................9
3.3.1 Pulse-echo method with lateral sensor attachment ............10
3.3.2 Pulse-echo method with vertical sensor attachment ..........11
3.3.3 Ultrasonic transmission of vessel ....................................... 12
3.3.4. Ultrasonic transmission in pipes..........................................13
3.3.5. Dying down ........................................................................14
4
Installation ...................................................................................15
4.1 Sensor.......................................................................................15
4.1.1 Overview of attachments.................................................... 15
4.1.2 Preparing the coupling face................................................22
4.1.3 Installing the attachments...................................................22
4.1.4 Screwing in the sensor .......................................................25
4.2 SONOCONTROL 11 .................................................................26
4.3 Connections ..............................................................................26
4.3.1 Overview of the unit............................................................26
4.3.2 Switch S1 ........................................................................... 27
4.3.3 Terminal pin configurations ................................................27
4.3.4 Connecting the ultrasonic sensor ....................................... 28
4.3.5 Connecting the operating voltage and the switched output 29
4.3.6 Test output .........................................................................30
4.4 Installation in hazard area .........................................................31
5
Start-up ........................................................................................ 35
5.1
5.2
5.3
5.4
5.5
5.6
6
Installation and wiring check......................................................35
SONOCONTROL 11 operating modes...................................... 35
Functions of buttons.................................................................. 35
SONOCONTROL 11 parameter setting.....................................35
Measured value acquisition .......................................................37
Measured value processing.......................................................42
SONOCONTROL 11 parameters.................................................43
6.1 Parameter P 03: Transmisison energy ...................................... 43
6.2 Parameter P 04: Gain................................................................43
2
SONOCONTROL 11
Table of contents
6.3
6.4
6.5
6.6
6.7
6.8
6.9
7
Parameter P 05 / P 06: Gate beginning / gate width .................44
Parameter P 07 / P 08: Integration Up / Down ..........................45
Parameter P 09: Hold time ........................................................ 45
Parameter P 10: Switched output..............................................46
Parameter P 11: Sensor frequency ........................................... 46
Parameter P 92: Software version.............................................47
Function P 99: Saving parameters ............................................47
Advanced Programming mode...................................................48
7.1 Parameter P 12: Display panel output....................................... 48
7.2 Parameter P 70: Enable / interval for sensor contact
verification .................................................................................48
7.3 Parameter P 71: Transmisison energy for sensor contact
verification .................................................................................49
7.4 Parameter P 72: Gain for sensor contact verification ................49
7.5 Parameter P 73 / P 74: Gate beginning / gate width for sensor
contact verification.....................................................................50
7.6 Parameter P 91: Base interval...................................................50
8
Troubleshooting ..........................................................................51
8.1 Troubleshooting.........................................................................51
8.2 Device faults..............................................................................51
8.3 Warnings ...................................................................................52
9
Default settings ........................................................................... 53
10 Technical data .............................................................................54
3
SONOCONTROL 11
1 Safety alerts and other symbols used
1 Safety alerts and other symbols used
This safety alert symbol indicates an immediate hazardous situation.
If not avoided it will result in serious injury or damage to the equipment!
When you see this symbol, do not use the equipment further unless you
have fully understood the nature of the hazard and have taken the
required precautions.
!
This alert symbol indicates a potential hazard to the operation of the
equipment. When you see this symbol, follow the prompts in this User’s
Manual to avoid the hazard. Call our service team if necessary.
This symbol indicates that you should call our service team.
☞
●
This symbol indicates a note or detailed setting tips.
This symbol indicates enumeration.
<P>
Operator keys are printed in bold type and placed in pointed brackets.
0345
Display text uses a special font on a grey background.
4
SONOCONTROL 11
2 Safety instructions
2 Safety instructions
The SONOCONTROL 11 and the ultrasonic sensors conform to the rules
of the trade and comply with all applicable safety regulations.
The producer has taken every precaution to ensure safe working of the
equipment. The user must take care that the equipment is set up and
installed so that its safe use is not affected.
The equipment has been tested at the producer’s works and is delivered in
safe operating state.
This User’s Manual contains information and warnings which must be
complied with by the user to ensure the safe operation of the equipment.
The following safety instruktions must be followed before starting the
equipment and while using it:
• The equipment must only be started by authorised personnel and
operated by instructed persons. All persons using the equipment must
have read this User’s Manual.
• Only the repair and maintenance operations described in the User’s
manual must be carried out and only specified parts must be used.
• Service work must only be carried out by the authorised service
personnel of HiTECH.
• The equipment and all tools used for service or maintenance as well as
all other equipment must be earthed as prescribed.
• The protective conductors must be continuous and not broken.
• The SONOCONTROL 11 must only be used in the specified
temperature range from -20 to +60°C. For the permitted temperature
range of the ultrasonic sensors, see the type specification. If the
equipment is used under off-limit conditions, it may not function
properly and supply inaccurate results.
• The temperature resistance of the connecting cable must be adapted to
the operating temperature of the measuring system.
• The casing of SONOCONTROL 11 and that of the sensor must remain
closed when the equipment is in use.
• The SONOCONTROL 11 must only be supplied by a power source that
can be separated from the mains supply. The SONOCONTROL 11 is
not fused. Suitable fusing of the operating voltage (+24VDC/
160 mA/T) should be provided by the user.
• The owner must make certain that the current on switched outputs does
not exceed the rated limit of 0,5 amps. This can be ensured, for
exemple, by a fusible link.
• The SONOCONTROL 11 is splashwater-proof (IP65), but it should not
be immersed in water.
5
SONOCONTROL 11
2 Safety instructions
• Use the special cable supplied with the SONOCONTROL 11 to connect
the sensor and the unit. Connect the cable shield properly to frame
earth via the cable socket on the SONOCONTROL 11.
• The sensors should be handled with care and screwed in only hand
tigth. If they are tightened full, the contact face may be damaged. The
sensor housing itself acts as a lever.
• Avoid electrostatic charge.
To prevent injury and damage to the equipment, follow the producer’s
instructions regarding starting and using the equipment, and maintenance.
Maintenance and repairs not described in this User’s Manual must only be
carried out by authorised personnel.
HiTECH is not liable for damage to a third party occasioned by using the
equipment contrary to instructions.
Maintenance, opening the equipment
The SONOCONTROL 11 and the sensor require no maintenance.
Opening the sensor housing is only necessary for installation. The sensor
does not contain wearing parts.
6
SONOCONTROL 11
3 Introduction
3 Introduction
3.1 Overview
Level limit switches of the SONOCONTROL series, in connection with
ultrasonic sensors, are used for universal level limit detection in systems
carrying liquid. The measuring system features a number of benefits:
•
•
•
•
•
The ultrasonic sensors are attached to the outside of the vessel; they
are not in exposed to the liquid in the tank.
As measurement is made from outside, the liquid can be pressurised
or be toxic or chemically aggressive. This has no effect on the
measured data.
The measuring method is particularly suitable for application in the
pharmaceutical and the food industries.
Foam on the liquid does not affect the accuracy of the measurement.
The system can easily be fitted to existing vessels without expensive
testing if the vessel is a pressure vessel.
The SONOCONTROL 11 is of universal application:
• Level monitoring of tanks
• Dry-running protection of pumps
• Detection of gas bubbles in liquids
• Level monitoring in pressure bottles
• Dosing control
• Inspection of pipeline pig systems
• Ice level alarm on ice silos.
The SONOCONTROL 11 level limit switch has many functions and
supports the use of complex instrumentation systems:
• A microcontroller ensures high measuring accuracy and data integrity.
• The parameters required for installation can comfortably be input via
buttons. The parameter inputs are not lost if the power supply is
interrupted.
• The SONOCONTROL 11 supports several operating modes. In pulseecho mode and dying out mode, one ultrasonic sensor is connected, in
ultrasonic transmission mode, two ultrasonic sensors are required.
• The SONOCONTROL 11 must be installed near the ultrasonic sensor.
The distance between the ultrasonic sensor and the SONOCONTROL 11 should not exceed 10 m.
7
SONOCONTROL 11
3 Introduction
3.2 Systems components
The SONOCONTROL 11 system consists of the following components:
• SONOCONTROL 11 evaluator
• one or two ultrasonic sensors of E series
• fixing bracket on the vessel
• connecting cable between sensor and SONOCONTROL 11.
Figure 1: Overview of
measuring system
components
The selection of the suitable ultrasonic sensor and the appropriate bracket
depends on
• the geometrical shape of the vessel,
• the material of which the vessel is made,
• the nature of the monitored liquid.
Our Service staff will be glad to assist you in choosing the most suitable
sensors and brackets.
The following types are currently in the market:
Sensor
type
Range
Measuring
frequency
Attachment
Cable connection
E01
E02
E03
-20 ... +80°C
-20 ... +80°C
hazard area
service,
-20 ... +80°C
-20 ... +80°C
-20 ... +80°C
-20 ... +135°C
-20 ... +135°C
-20 ... +80°C
-20 ... +80°C
1 MHz
1 MHz
1 MHz
M30x1.5
M30x1.5
M30x1.5
10 m fixed cable
plugged connection
10 m fixed cable m
2 MHz
2 MHz
2 MHz
1 MHz
0.5 MHz
0.5 MHz
M18x1
M18x1
M18x1
M30x1.5
M45x1.5
M45x1.5
10 m fixed cable
plugged connection
10 m fixed cable
10 m fixed cable
10 m fixed cable
plugged connection
E04
E05
E10
E11
E20
E21
Table continued overleaf
8
SONOCONTROL 11
E22
E24
E25
E26
3 Introduction
hazard area
service,
-20 ... +80°C
angle probe,
-20 ... +80°C
angle probe,
-20 ... +80°C
angle probe,
-20 ... +135°C
0.5 MHz
M45x1.5
10 m fixed cable
2 MHz
strap fastener
10 m fixed cable
2 MHz
strap fastener
plugged connection
2 MHz
special pipe adapter
plugged connection
Table 1: Overview of available sensors for SONOCONTROL 11
3.3 Measuring methods
The controller operates on the echo time principle. The transmitter emits a
brief pulse through an ultrasonic transducer. This pulse penetrates the wall
of the vessel, enters and propagates in the liquid. Depending on the
measuring method, the reflected ultrasonic signals are received as echo
by the same sensor or the ultrasonic signals are picked up by a separate
sensor on the other side of the vessel.
After triggering, the received pulses are referenced to a time window
(gate) and the result is output. A microcontroller takes over all control
functions.
Ultrasonic probe
Transmitter
(+receiver)
Ultrasonic
transmitter
Microcontroller
Display
keys
S1
Ultrasonic probe
Receiver
Receiver+
trigger
Gate logic
Switched
contact relay
Test output
Figure 2:
SONOCONTROL 11
block diagram
Implemented in the evaluation software is an integration algorithm together
with a threshold value. This effectively suppresses all faults. Besides,
intolerable jitter of the switched output can be prevented by a programmed
hold time.
The controller supports several operating modes:
• pulse-echo mode with one sensor,
• ultrasonic transmission with two sensors,
• dying out with one sensor.
These measuring methods are described with reference to five typical
applications on the following pages.
9
SONOCONTROL 11
3 Introduction
3.3.1 Pulse-echo method with lateral sensor attachment
An ultrasonic sensor is attached laterally at monitored level to the outside
of the vessel. It sends a brief ultrasonic pulse through the wall of the
vessel.
If the vessel is filled with liquid to the monitored level, the pulse travels
through the liquid, is reflected by the opposite wall of the vessel and the
sensor picks it up as echo. If no liquid is present at this level, there is no
echo.
The presence or absence of echo at the expected point is evaluated by
the link-up with the time window (gate) and output as a signal.
Figure 3:
Pulse-echo-method
with lateral sensor
attachment
Uses:
• Vessels whose walls are parallel with each other, or pipes (reflection at
the rear wall)
• Metal, glass: diameter from approx. 200 mm to max. 10 m
• Plastic material: diameter from approx. 50 mm to max. 10 m
• No agitator or other internal fittings at monitored level
• Low-absorbing liquids, free of bubbles and solids
• Ice level monitoring in ice silos of flake ice makers in refrigeration
systems
• Pig detection in pipelines carrying liquids
10
SONOCONTROL 11
3 Introduction
3.3.2 Pulse-echo method with vertical sensor attachment
The ultrasonic sensor is attached externally on the underside of the vessel
so that the ultrasonic pulse is directed vertically upward (max 2-3° off the
vertical line are tolerated).
The pulse is reflected at the surface of the liquid and returns to the sensor.
The gate setting is now conveniently used to set the monitored filling level.
The temperature drift of the velocity of sound and the time needed for the
sonar pulse to return as echo must be observed if necessary.
Figure 4: Pulse-echo
method with vertical
attachment of the
sensor
Uses:
• Vessels with filling height from approx. 50 mm to 10 m with horizontal
face for attaching the sensor to the bottom of the vessel
• No agitator or other internal fittings in the sound path
• Liquid should be of low, free of bubbles and solids
• Cost-effective solution to substitute continuous level monitoring
systems
11
SONOCONTROL 11
3 Introduction
3.3.3 Ultrasonic transmission of vessel
For ultrasonic transmission of vessel, two sensors are attached externally
to the vessel side at opposite locations. One sensor functions as the
transmitter sending out ultrasonic pulses; the other sensor is the receiver
picking up the pulse delayed by the time needed in transmission.
Figure 5:
Uktrasonic
transmission
Uses:
• Vessels of up to 10 m diameter (sensors aligned to each other)
• Sound-absorbing liquids
• Level monitoring in pipes (with special angle adapters)
12
SONOCONTROL 11
3 Introduction
3.3.4. Ultrasonic transmission in pipes
For ultrasonic transmission in pipes, two angle sensors are attached
externally to the pipe. One sensor functions only as the transmitter
sending out ultrasonic pulses into the pipe at a defined angle. The other
sensor is the receiver picking up the pulse which is delayed by the time
needed in transition. Both sensors can be set up offset opposite each
other or on the same side (see Figure 6). The offset arrangement of the
sensors ensures a high level of insensitivity to ultrasonic noise caused by
reflections of the ultrasonic pulse on the pipe wall.
Level limit
Level limit
Transmitter
Transmitter
Receiver
Receiver
To control
Receiving probe
Transmitting probe
Figure 6: Ultrasonic
transmission in pipes
Uses:
• Metal or glass pipes of 10 mm to approx. 200 mm diameter
• Pump protection
13
SONOCONTROL 11
3 Introduction
3.3.5. Dying down
Dying down involves the evaluation of the decay of the sensor after
emitting the ultrasonic pulse and the subsequent reflections in the vessel
wall. The sensor is attached externally to the side of the vessel on the
same level as the liquid limit.
If no liquid is present at this level, the metal wall is not attenuated and
vibrates for a long time under the impact of the ultrasonic pulse. If liquid is
present at this level, the vibration decays faster.
Figure 7: Dying down
Uses:
• Metal vessels with a diameter of 200 mm and over and wall thickness
from approx. 2-20 mm
• Sound-absorbing liquids (e.g. with gas bubbles, contaminants)
• The liquid must not leave any residue on the wall of the vessel.
• If the vessel has no reflecting rear wall or has internal fittings
• Wet/dry alarm
14
SONOCONTROL 11
4 Installation
4 Installation
4.1 Sensor
4.1.1 Overview of attachments
Sensor attachment
There are various types of attaching the sensor to the vessel or pipe,
depending on the sensor type used. Figure 8 to figure 12 on the following
pages contain the dimensional drawings of the sensors and their
attachments.
The sensor is attached optionally by:
• rings welded to the outside of the vessel,
• bottomed rings welded into the wall of the vessel,
• plates glued or strapped to the outside of the vessel,
• pipe attaching elements adpating to the pipe outside diameter,
• strapping tapes by which angle sensors can be directly mounted on
the pipe.
Adapter for special bolted joints (Varivent, milk pipe screw/bolted joints,
clamp closure, etc.) are available on request.
If you are not sure which sensor type is best for you solution, please
consult oir service personnel, which will be glad to help (see tab.1 /
chapter 3.2).
15
SONOCONTROL 11
4 Installation
E01
E02
1 MHz / D20mm ;
material: POM
incl. 10m fixed cable
order-no.:
01 40 10 01
1 MHz / D20mm ;
material: POM
plug-type connection: system LEMO 0E, IP68
order-no.:
01 40 40 02
∅ 27,5
15
∅ 27.5
SW 22
15
30
35
50
15
SW 22
M30x1.5
M 30x1.5
Attachment versions
material :
1.4571
18
40
40
15
Weld-in ring
Weld-on ring
order-no.: 01 50 01 21 02
order-no.: 01 50 01 11 02
8
80 x 80
Plate for strap fastener ,
weld or glue
order-no.: 01 50 02 21 02
E04
E05
2 MHz / D10mm ;
material: POM
incl. 10m fixed cable
order-no.:
01 40 10 02
2 MHz / D10mm ;
material: POM
plug-type connection: system LEMO 0E, IP68
order-no.:
01 40 40 03
∅ 22
15
∅ 22
SW 19
20
30
40
50
15
SW 19
M18x1
M18x1
Attachment versions
material :
1.4571
18
40
40
15
Weld-in ring
Weld-on ring
order-no.: 01 50 01 21 01
order-no.: 01 50 01 11 01
80 x 80
8
Plate for strap fastener,
weld or glue
order-no.: 01 50 02 21 01
Figure 8: Dimensions of sensors E01, E02, E04, E05 and related attachment versions
16
SONOCONTROL 11
4 Installation
E20
E21
0,5 MHz / D35mm ;
material: POM
incl. 10m fixed cablel
order no.: 01 40 10 03
0,5 MHz / D35mm ;
material: POM
plug-type connection system LEMO 0E, IP68
order-no.: 01 40 40 04
27,5
27,5
50
SW 22
42
SW 22
M45x1,5
M45x1,5
Attachment versions
material :
1.4571
55
18
55
Weld-in ring
Weld-on ring
order-no.: 01 50 01 21 03
order-no.: 01 50 01 11 02
15
80 x 80
8
Plate for strap fastener,
weld or glue
order-no.: 01 50 02 21 03
Figure 9: Dimensions of sensors E20, E21 and related attachment versions
17
SONOCONTROL 11
4 Installation
E10
2 MHz / D10mm ;
material: 1.4571
incl. 10m fixed cable
temperature range: -20°C bis 135°C
35
01 40 20 01
23
order-no.:
M 18x1
Attachment versions
material :
1.4571
18
40
40
15
Weld-in ring
Weld-on ring
order no.: 01 50 01 21 01
order-no.: 01 50 01 11 01
80 x 80
8
Plate for strap fastener
weld or glue
order-no.: 01 50 02 21 01
E11
∅ 27.5
SW 19
7
1 MHz / D20mm ;
material: 1.4571
incl. 10m fixed cable
temperature range: -20°C bis 135°C
35
01 40 20 02
15
order-no.:
M 30x1.5
Attachment versions
material :
1.4571
18
40
40
15
Weld-in ring
Weld-on ring
order-no.: 01 50 01 21 02
order-no.: 01 50 01 11 02
80 x 80
8
Plate for strap fastener
weld or glue
order-no.: 01 50 02 21 02
Figure 10: Dimensions of sensors E10, E11 E21 and related attachment versions
18
SONOCONTROL 11
4 Installation
E03
∅ 27.5
1 MHz / D20mm ;
material: 1.4571
incl. 10m fixed cable
temperature range: -20°C bis 80°C
EEx m II T6
35
7
01 40 30 01
15
Bestell-Nr.:
SW 19
M 30x1.5
Attachment versions
material :
1.4571
18
40
40
15
80 x 80
Weld-in ring
Weld-on ring
order-no.: 01 50 01 21 02
order-no.: 01 50 01 11 02
8
Plate for strip fastener
weld or glue
order-no.: 01 50 02 21 02
E22
0,5 MHz / D35mm ;
material: 1.4571
incl. 10m fixed cable
temperature range: -20°C bis 80°C
EEx m II T6
01 40 30 02
15
35
Bestell-Nr.:
43,5
SW 36
M45x1,5
Attachment versions
material :
1.4571
18
55
55
Weld-in ring
Weld-on ring
order-no.: 01 50 01 21 03
order-no.: 01 50 01 11 02
15
80 x 80
8
Plate for strap fastener,
weld or glue
order-no.: 01 50 02 21 03
Figure 11: Dimensions of sensors E03, E22 E21 and related attachment versions
19
SONOCONTROL 11
4 Installation
10
2 MHz / D10mm ;
material: POM
angle 20° in water
incl. 10m fixed cable
temperature range: -20°C bis 80°C
pipe diameter: >53mm
01 40 10 04
30
order-no.:
30
E24
Attachment
30
material: 1.440
fastening strap
order-no.: 01 72 01
turnbuckle for fastening strap
order-no.: 01 72 02
10
2 MHz / D10mm ;
material: POM
angle 20° in water
pluy-type connection: system LEMO 0E, IP68
temperature range: -20°C bis 80°C
pipe diameter: >53mm
01 40 40 05
Attachment
30
order-no.:
30
E25
material: 1.440
fastening strap
order-no.: 01 72 01
turnbuckle for fastening strap
order-no.: 01 72 02
30
E26
order-no.:
60 ... 80
+30
30
Dpipe
2 MHz / D10mm ;
material: PEEK
angle 20° in water
plug-type connection: system LEMO 0E, IP68
temperature range: -20°C bis 135°C
pipe diameter: 10mm to 53mm
01 40 40 08 01
Attachment
material: PEEK
order-no.: 01 40 40 08 02
12
Figure 12: Dimensions of sensors E24, E25, E26 and related attachment versions
20
SONOCONTROL 11
4 Installation
Observe the following instructions for different types of attachment:
Pulse-echo method with
lateral sensor
attachment
Pulse-echo method with
vertical sensor
attachment
Ultrasonic transmission
of vessels
Ultrasonic transmisison
with angle sensors
Table 2: Attachment of
angle sensors
Pulse-echo method with lateral attachment:
The sensor must be accurately located on the opposite wall of the vessel.
The vessel walls must be parallel with each other at the level limit.
Pulse-echo method with vertical attachment:
The ultrasonic sensor is attached outside to the underside of the vessel
which ensures that the ultrasonic pulse travels vertically upwards (the
permitted deviation from the vertical line is max. 2-3°). If the vessel has a
dished bottom, the sensor attachment on the outside is only possible
immediately beside the outlet. Alternatively the ring can be welded in the
vessel bottom.
Ultrasonic transmission of vessels:
The vessel walls must be parallel with each other at the level limit. The
sensors must be exactly opposite each other on the same level.
Ultrasonic transmission with angle sensors:
The set-up of the angle sensors depends on the pipe OD, see Figure 13 to
Figure 15):
Pipe OD
Attachment
Arrangement
D < 30 mm
30 mm ≤ D ≤ 53 mm
D > 53 mm
pipe attachment parts
pipe attachment parts
tightening straps
beside each other
opposite
opposite
Level limit
Level limit
Transmitter
Receiver
Figure 13:
Pipe diameter < 30 mm:
sensor type E26,
attachment module,
angle sensors beside each other
Receiver
Level limit
Transmitter
Figure 14:
Pipe diameter 30 ... 53 mm:
sensor type E26,
attachment module,
angle sensors opposite each other
Receiver
Transmitter
Figure 15:
Pipe diameter > 53 mm:
sensor type E24 or E25,
tightening straps,
angle sensors opposite each other
21
SONOCONTROL 11
4 Installation
4.1.2 Preparing the coupling face
Inspect the condition of
the coupling face
!
The quality of sound coupling is essential to the sensitivity of the
measuring system. Therefore the following points should be noted.
The face to which the sensor is attached on the outside of the vessel must
be plane and smooth. Uneven attachment faces (e.g., on glass vessels)
make sound contact more difficult and the results may not be correct in
some cases. Unevenness of the attachment face can be compensated to
some degree by applying a suitable mounting compound. Peak-to-valley
height should be <10 µm. Paint or surface treatment are detrimental to
good metering results.
There should be no peak or mark (e.g., chisel marks with lateral
bulging, or similar). These can damage the sensor when it is installed.
4.1.3 Installing the attachments
Ring fastener
The ring fastener can be glued or spot welded with max. 4 spots.
Welding-on:
Spot-weld the ring with maximum 4 spots to ensure that
the vessel walls are not distorted and the coupling
surface out of plane. Remember that the sensor should
stand vertically on the reflecting surface.
Gluing:
Apply metal epoxy adhesive to the underside of the ring and press the
contact face to the coupling face. Remember that the sensor should stand
vertically on the reflecting surface.
Remove all adhesive carefully from the coupling face and the female
thread of the bracket. Observe the curing time.
Weld-in type ring fastener
An opening suiting the ring must be available in the vessel
wall allowing the ring to be welded vertically to the vessel
diameter.
The deviation from the vertical line must not exceed
2-3°.
22
SONOCONTROL 11
4 Installation
Mounting plate
The mounting plate can be glued or strapped to the outside wall of the
vessel.
Gluing:
Apply metal epoxy adhesive to the underside of the
plate and press the plate in contact with the coupling
face. Make sure of proper seating.
Remove all adhesive carefully from the coupling
face and the female thread of the bracket.
Install the sensor only when the glue has cured.
Strap fastening
Cut two fastening straps to the required length
(vessel circumference + 20 cm).
Push one end of the strap in the eye of the
turnbuckle from above (appr. 5 cm) and bend it over.
Place the strap around the vessel. The bent end of
the strap should contact the vessel wall.
Slip the other end of the strap underneath the screw
and through the turnbuckle until it projects on the
other side.
Slip the mounting plate between the fastening strap
and the vessel wall at the prepared place and
tighten the strap until the plate is held.
Behälter
Vessel
Install the second strap and place it around the plate
in the same manner.
Align the mounting plate accurately to ensure that the sensor will stand
vertically on the reflecting surface and the opposite mounting plate,
respectively (in ultrasonic transmission mode).
Pull the straps through the turnbuckle as far as possible with your hands.
Then tighten both straps uniformly by turning the screws. Make certain of
proper seating. Some additional tightening may be required later either by
turning the screw or pulling the strap and turning the screw.
23
SONOCONTROL 11
4 Installation
Angle sensors for fastening to pipes
The attachment is adapted to the pipe diameter and consists of
• the sensor,
• the fastener,
• to connecting screws.
Apply mounting compound to both sides of the sensor and the fastener.
Mount the sensor and the fastener on the pipe and tighten uniformly with
two screws.
Install the second angle sensor in the same way. Install the angle sensors
in such a way that the cable terminals show outwards and the smooth
faces are facing each other.
The angle at which the ultrasonic pulse is emitted in the liquid in the pipe is
approx. 20° for most liquids. Position the second sensor at a
corresponding offset.
Angle sensors fastened on the pipe with strap
Cut a fastening strap to the required length
(vessel circumference + 20 cm).
Push one end of the strap in the eye of the
turnbuckle from above (appr. 5 cm) and bend it
over.
Place the strap around the pipe. The bent end of
the strap should contact the vessel wall.
Slip the other end of the strap underneath the
screw and through the turnbuckle until it projects
on the other side.
Rohr
Pipe
Apply mounting compound generously to the
sensor.
Install the angle sensor cube to the prepared
area between the fastening strap and the vessel
wall. (The fastening strip is located in the notch of
the cube). Tighten the strap until the cube is held.
Install the second angle sensor in the same way. Install the angle sensors
in such a way that the cable terminals show outwards and the smooth
faces are facing each other.
The angle at which the ultrasonic pulse is emitted in the liquid in the pipe is
approx. 20° for most liquids. Position the second sensor at a
corresponding offset.
24
SONOCONTROL 11
4 Installation
4.1.4 Screwing in the sensor
For mounting of angle sensors, see chapter 4.1.3.
Install mounting
compound between
sensor and vessel!
To ensure good sonar contact, apply a mounting compound between the
sensor and the vessel. Use special adhesive if you want a permanent
bond.
Apply a finger nail size bead of the adhesive to the tip of the sensor. The
adhesive spreads evenly when the sensor is screwed in or pressed to the
attachment face. Mounting compound and special adhesives are available
from SONOTEC Ultraschallsensorik.
Tighten sensor only
hand-tight!
!
At this point, screw the sensor only hand-tight. Remember that the
ultrasonic transducers have an ultra-precision plastic coat at their fronts.
25
SONOCONTROL 11
4 Installation
4.2 SONOCONTROL 11
The measuring electronic circuitry is installed in a splashwater-proof
housing (IP 65 degree of protection). The controls and the cable
connections are accessible after unscrewing the housing cover. The
fastening holes are outside the sealed space and do not affect the
protection degree of the unit.
Generally, the unit should only be opened for connection or for start-up.
The permitted temperature range from -20°C to 60°C must not be
exceeded.
4.3 Connections
4.3.1 Overview of the unit
Openings for wall mounting
inside: 5 mm, outside 8,3 mm
Cover mounting holes
160
146
Service-displays:
green: power
red:
signal
yellow: relay
Display
100 66
Keys
P + _
1234
Terminals
Figure 16: Controls and
connections
PG9
+24VDC,
switched output
on
off
567 8
Test output
S1
PG7
PG7
Probes
26
SONOCONTROL 11
4 Installation
4.3.2 Switch S1
Switch S1 toggles between single-sensor and two-sensor mode:
ON
OFF
ON:
è
è
ON
OFF
Single sensor mode, i.e. the transmitter and receiver are connected
with each other (pins 5 and 7 switched together). This position is
required for
pulse-echo mode and
dying down mode.
OFF: Two-sensor mode, i.e. the transmitter and receiver operate
separately from each other (pins 5 and 7 not connected with each
other). This position is required for
è
ultrasonic transmission mode.
4.3.3 Terminal pin configurations
Pins connect the sensor to the unit,
supply operating voltage and also the
control system.
Pin
Table 3:
SONOCONTROL 11
terminal pin
configuration
1
2
3
4
5
6
7
8
1234
Terminals
on
off
S1
567 8
Terminals
Supply
Operating voltage +18 ... 30 VDC / 150mA
Earth (connected to housing earth)
Terminal 1 switched contact
Terminal 2 switched contact
Receiving sensor
Receiving sensor, shield
Transmitting sensor
Transmitting sensor, shield
Pins 2, 6, 8 are connected internally and to housing earth.
Provide equipotential bonding between housing earth and vessel
earth externally by a separate earth wire. Otherwise there is risk of
destruction of the internal earth link if different potentials occur.
27
SONOCONTROL 11
4 Installation
4.3.4 Connecting the ultrasonic sensor
Connect the sensor only with the double-shield cable supplied with the
SONOCONTROL 11 unit. The maximum length between the SONOCONTROL 11 and the sensor is 10 m. Longer sensor cables can be used
in special cases. Please consult our Service department. The cable can be
shortened as required.
Connect the outer shield firmly with the housing earth by means of the
cable screw union on the SONOCONTROL 11. Prepare the cable end as
illustrated in Figure 17.
outer shield
inner sheath
outer cable sheath
central cable sheath
Tin-coated wire ends
Figure 17: Preparing
the sensor cable
10 mm
30 mm
9 mm
6 mm
To connect the sensor cable to the SONOCONTROL 11, proceed as
follows:
• only for plug-connected sensors: Push the sensor cable plug fully into
the bush on the sensor. It should latch audibly.
• Slacken metal nut (a) of one of two PG7 cable screwed connections on
the right part of the housing of on the SONOCONTROL 11 and pull the
nut over the cable (see Figure 13).
• Also pull plastic insert (b) over the cable.
• Bend back outer shield (d) and place it over rubber ring (c) of plastic
insert (b).
(a)
(b)
(c)
(d)
(e)
Figure 18:
Connecting the
sensor cable
•
•
•
Install two cable ends (e) through PG7 and connect them to pins 7 and
8, and 5 and 6, respectively. Pull the pins can be removed from the
electronic assembly for ease of connection.
Fully press the plastic insert with the shield in the cable bush so that
the plastic insert presses the cable shield against the metal gland.
Install the metal nut and tighten it with a wrench.
28
SONOCONTROL 11
4 Installation
4.3.5 Connecting the operating voltage and the switched
output
Connect the operating voltage (+24 VDC) and the switched output by
shielded multiple-wire line (4 strands) with maximum outside sheath
diameter of 7.5 mm.
Operating voltage
Connect the cable shield to the housing earth in the same way as
described for the sensor (see chapter 4.3.4).
Pin
Table 4: Connecting the
operating voltage and
the switched output
1
2
3
4
Supply
Operating voltage +18 ... 30 VDC / 150mA
Earth (connected to housing earth)
Terminal 1 switched contact
Terminal 2 switched contact
The unit has integrated polarity reversal protection.
Please note that pin 2 (operating voltage earth) is connected to frame
earth. The operating voltage is not isolated. The SONOCONTROL 11
must only be supplied by a power source that can be separated from the
mains supply.
The unit is not fused. The operating voltage of the SONOCONTROL 11
must be fused externally, e.g., with fuse link 160mA/T.
Efficient protection of the unit from transient voltage (e.g., lighting) must be
provided.
After switching on the operating voltage, the SONOCONTROL 11 needs
about 1 second to be ready for service. run appears on the display
panel.
Switched output
The switched output is implemented by a relay and is potentialfree.
When the relay contact makes, the „relay“ yellow LED lights.
Terminals
4
3
Switching contact
Terminal 1
max. switching current: 0,5 A
max. switching voltage: 50 V
Terminal 2
Figure 19:
SONOCONTROL 11
switched output
29
SONOCONTROL 11
4 Installation
Please make external provision that the maximum switching current of
0.5A on the relay cannot be exceeded.
The relay can be switched off after every application (see parameter P10
in chapter 6.6):
• Relay contact makes if no ultrasonic signal is detected in the gate
or
• Relay contact makes if a ultrasonic signal is detected in the gate.
Irrespective of the above, the switching contact always breaks
(= ALARM) if any one of the following conditions is encountered:
• no operating voltage,
• cable to control system is interrupted,
• no sensor connected or the sensor cable is interrupted,
• an internal device fault has occurred (software or hardware fault).
☞
Overfill guard
In this case the controller works on the closed-circuit principle. If used to protect
against overfill, this means that the broken switching contact trips an ALARM in the
higher-level control.
Depending on the current measuring method, the switching contact breaks or
makes if ultrasonic signals are received in the gate (see parameter P10, switched
output).
4.3.6 Test output
Connect the oscilloscope to the test output for a visual assessment of the
echo pattern. Connect the oscilloscope (RE = 1 MΩ) to the test output with
a test head or other suitable measuring line.
The following oscilloscope settings are recommended:
• Triggering:
AC / negative flank / level: -400 mV
• Y co-ordinate:
200 mV/DIV
• Time base:
100 µs/DIV ... 5 ms/DIV depending on measuring
range
On principle, the following picture will be obtained if the working method is
correct:
Pulse sent
Ultrasonic pulse dying out
Reflections on vessel wall
Echo
Maybe multiple
reflection
200 mV
Gate
Figure 20:
Visual inspection of the
test output using an
oscilloscope
Time
Trigger pulse
30
SONOCONTROL 11
4 Installation
4.4 Installation in hazard area
If sensors and assessment electronic circuitry are to be installed in hazard
area, both must conform to current hazard requirements. Basically two
versions are possible:
(a) Sensor in hazard area, SONOCONTROL 11 not in hazard area
In this case sensors with certified hazard capability are used. These
sensors have a permanently installed connection cable.
The SONOCONTROL 11 is not located within the hazard area and
requires no particular protection. Advantageously the unit can be
parameterised in service without any extra precautions.
Prerequisites
As a rule, this version is only possible where hazard and non-hazard areas
are separated from each other by suitable structures.
The sensor cable between the sensor and the SONOCONTROL 11 must
not be longer than 10m. Longer sensor cables are available in special
cases, for which our Service department staff should be consulted.
(b) Sensor and SONOCONTROL 11 in hazard area
In this case sensors with certified hazard capability are used. These
sensors have a permanently installed connection cable.
The SONOCONTROL 11 is installed in a flameproof enclosure in the
hazard area. The connecting cables are installed in pressure-resistant
compression glands.
Prerequisites
The housing must be opened for parameterising the unit. Hazard
protection does not exist at this moment. The unit cannot be started unless
the safety inspector of the firm gives the go-ahead.
Available components
The use of the SONOCONTROL 11 and the sensors in hazard areas are
subject to international provisions for start-up, maintenance and repair of
electrical equipment. In agreement with CENELEC standards EN 50 014
to 50 020 / 50 028 / 50 039 the following components are available for
service in hazard environments:
EEx d IIB T5
Certified cast aluminium housing type EJB-1 or EJB-2 in flameproof
enclosure for the SONOCONTROL 11 or other components (e.g. power
supply unit)
EEx m II T6
Certified sensors type E03 and E22 with permanently installed cable in
encapsulated design.
EEx d IIC T6
Certified compression glands and blanking plug M20 in flameproof
enclosure.
The supply comprises the hazard certificates for the components.
31
SONOCONTROL 11
4 Installation
The aluminium housing is made
and supplied as required by the
configuration. The EJB-1 housing
accommodates one controller, the
EJB-2 housing accommodates two
controllers or one controller with
power supply unit. The units are
securely attached to the bottom of
the housing when delivered.
On the reverse side of the housing
bottom, there are 4 M8 threaded
holes to which a plate can be
attached. The plate must be
accessible from behind. If the
housing is to be mounted on a wall,
it must at first be fastened with
screws to the plate.
Figure 21:
Protective housing for
hazard service. The
open housing contains in
this case 2 x 2 x SONOCONTROL 11 (units
open)
The housing cover is connected to
the base housing by a hinge. The cover can be opened upwards when
installed.
The cover can be opened through more than 180 degrees to a far-back
position and stays open. Still, the cover should be secured in position
to prevent accidental closing. Risk of injury and damage!
Apply corrosion-inhibiting paste evenly to the sealing faces of the housing
cover and the base before installing the screws. Apply the paste also to all
screw plugs. The paste protects against corrosion and has a sealing
effect.
Protective housing type EJB-1
Protective housing type EJB-2
Outside dimensions
(L x W x H)
296 x 198 x 197 mm
418 x 218 x 208 mm
Inside dimensions
(L x W x H)
Weight of housing
(without unit)
Distance of holes in a
mounting plate for
attaching the housing
240 x 140 x 145 mm
360 x 160 x 150 mm
8.5 kg
14.2 kg
Table 5: Dimensions of protective housings EJB-1 and EJB-2
32
SONOCONTROL 11
4 Installation
Depending on the configuration, the housing has a certain number of
compression glands. Two gland types are used for different cable
diameters.
Cable type
Sensor cable
Table 6: Types of
compression glands
Control lines
mains cable
Outer sheath
diameter of cable
3.0 ... 8.0 mm
Inside diameter of
compression gland
85 mm
7.5 ... 11.9 mm
120 mm
or
Make absolutely certain that the cables are installed through the
compression gland of suitable size. Otherwise the hazard protection
is not ensured.
Install certified blanking plugs on all compression glands that are not
needed.
Install the cables in accordance with local provisions. In particular,
observe VDE 0165.
Properly earth the housing and the components in the housing.
Earthing screws:
The external earthing screw (M6) is located at the edge of the side
opposite the hinge.
The earthing screw (M6) in the housing is located on the housing bottom,
to the left of the component(s) already installed.
Connecting the cables through the compression glands
• Remove compression screw (a) of the compression gland on the
housing and take out neoprene seal (b).
• Slide the compression screw and the neoprene seal over the shielded
cable as illustrated in Figure 22.
(a)
(b)
(c)
Figure 22:
Connecting the cable by
compression gland
•
•
•
•
Slide the compression screw and the neoprene seal over the cable.
Open the outer shield of cable (c).
Install the cable through the gland into the housing.
Connect the cable to the SONOCONTROL 11 as described in chapters
4.3.4 and 4.3.5. Connect the outer shields of the sensor cable as well
as the multiple-wire cable to the housing through the PG cable glands
on the SONOCONTROL 11.
33
SONOCONTROL 11
4 Installation
•
Finally slide the neoprene seal in the gland of the housing and tighten
the compression screw with a wrench. The cable must be clamped
tight to satisfy the flameproof function.
Use of E03 and E22 sensors in hazard areas
Hazard protection exists when the coupling surface of the sensors is
protected mechanically. This means the sensor must not be powered
electrically unless it has been firmly attached to the vessel by mechanical
means.
The sensor cable must be installed so that it is protected against physical
damage.
Start-up with type EJB flameproof enclosure
If a mixture of explosive gases exist, the enclosure must not be opened.
The company safety inspector’s go-ahead is required to install the
flameproof enclosure and the housing of the SONOCONTROL 11. For
details, see chapter 5.
After completing parameterisation, close the SONOCONTROL 11 housing
and close the flameproof enclosure tightly with an allen wrench.
34
SONOCONTROL 11
5 Start-up
5 Start-up
5.1 Installation and wiring check
!
Before feeding operating voltage, make sure of the correct installation of
the sensor and of the SONOCONTROL 11.
If a power supply unit is used, the installation instructions should be
observed.
5.2 SONOCONTROL 11 operating modes
When operating voltage is supplied, the SONOCONTROL 11 is running in
regular measuring mode which is identified by the word run on the display
panel.
In programming mode the parameter settings can be polled and edited.
5.3 Functions of buttons
Button functions in
measuring code
There are three hidden buttons in the front plate. In measuring mode, only
the <P> button has a function assigned to it. It changes to programming
mode.
Button functions in
programming mode
In programming mode, the buttons perform a second function:
•
Button <P>: Selects a parameter, confirms entries
•
Button <+>: Increments the selected parameter
•
Button <->:
Decrements the selected parameter
5.4 SONOCONTROL 11 parameter setting
1. Starting the programming mode
Enabling the
programming mode:
CodE
Code number input:
0000
Normal programming
mode:
0345
Advanced programming
mode:
1799
Pressing button <P> once for about 2 seconds starts the programming
mode. The word CodE is shown on the display panel.
Pressing button <P> again causes the code 0000 to be shown on the
display panel. This is a prompt for you to input a code number.
The programming mode is divided in two different levels. The selection is
made by the input of a code number at the beginning of the programming
mode. Press buttons <+> and <-> until you can enter one of the following
code numbers:
• Normal programming mode:
Enter code number: 0345
On this level you can program all parameters which are important for
the start-up of the SONOCONTROL 11 unit.
• Advanced programming mode: Enter code number: 1799
This level has several functions that are not available to the user in
35
SONOCONTROL 11
5 Start-up
normal programming mode (see chapter 7: Advanced Programming
mode). These functions should only be used by instructed persons.
Wrong code number:
FEHL
If you enter a wrong code number, the prompt FEHL is shown on the
display panel and the system exits the programming mode.
If the correct code number is entered, press <P> to confirm the entry. The
system then goes to the Parameter Selection menu.
+
Entry of the code number is not necessary if the user exited the previous
programming procedure without saving parameters. In this case, pressing button
<P> directly starts the programming mode. If you want to re-enable the code
number to protect from unauthorised access save the data before exiting the
parameter setting function.
Select Parameter menu:
2. Parameter Selection menu
P xx
On the display panel P xx is shown. The number xx indicates the current
parameter number.
Parameter display:
You can set a parameter number by pressing buttons <+> or <->. The
required parameter value is confirmed by a press of button <P> and will be
shown on the display panel.
xxxx
If you select a parameter that has not been implemented or is not
available on the current programming level, the system goes to the next
possible parameter.
3. Setting a parameter
The parameter value on display can be changed within permitted limits by
pressing button <+> or <->. Confirm the new setting by pressing <P> and
the system returns to the Parameter Selection menu, (P xx is shown on the
display panel); the parameter number indicates the next higher parameter.
Exit programming mode
by selecting
P 99
Save parameters:
0
No save
Save
1
End End of
programming
mode
Rapid toggle between:
measuring mode ↔
programming mode
4. Cancelling the programming mode
You can select, view or change the parameters in any sequence. The
programming mode is cancelled by calling the last parameter, P 99 (Saving
parameters, see chapter 6.9). After making and confirming the entry, the
programming mode is cancelled. The word End is shown on the display
panel and the system returns to the measuring mode.
Please note the following:
• Normally, any entry in programming mode is carried out immediately.
The measuring procedure is continued without limitation in the
background.
• If the programming mode was cancelled without saving the parameter
entries, the code-protected access remains disabled. In this case
pressing button <P> returns you to the programming mode directly.
This is a convenient way to toggle between programming mode and
measuring method.
36
SONOCONTROL 11
Warning:
Parameter not saved!
F 09
+
5 Start-up
If the program fails to detect any activity for 16 minutes, it returns to the
measuring mode automatically. To remind the user that the parameter
entries will not be saved when the program is exited and the codenumber protection has not been re-enabled, the code F 09 is shown on
the display panel.
If in programming mode you want to go from one programming level to another
programming level, save the parameter entries at first (see chapter 6.9), cancel the
programming mode and then start it again by pressing button <P>.
5.5 Measured value acquisition
Before the SONOCONTROL 11 can be used for measurement, it must be
adjusted to the concrete conditions (vessel and medium). Two
fundamental settings are required for the acquisition of measured values:
Set transmission
energy/gain
ê
Set gate
ê
(1) The amplitude of the ultrasonic pulse is attenuated as it propagates
through the liquid in the vessel. Hence, the pulse must be electronically
amplified when received.
The transmission energy of the ultrasonic pulse and the gain must be
set so that the pulse can penetrate the medium and is detected clearly
by the receiver.
(2) An internal time window is generated in the SONOCONTROL 11. Only
ultrasonic pulses received in this time window are recorded for
measurement. Pulses received earlier or later will be ignored. The time
window is also referred to as „gate“ as it allows the received pulse to
„pass“ or „blocks“ it.
The gate should be positioned to ensure that the reflected ultrasonic
pulses are received in the defined time window.
The further procedure depends on the selected measuring method. Please
read on at the point that has been written for your application. The
parameter needing change are discussed by way of reference in
chapter 6.
37
SONOCONTROL 11
Pulse-echo with lateral
attachment of probe
5 Start-up
(a) Pulse-echo method with lateral attachment of probe
• Connect the oscilloscope to the test output.
• Make certain that switch S1 is „ON“.
• Fill the vessel with liquid to above the sensor level.
Pulse sent
Ultrasonic pulse dying down
Reflections on vessel wall
Noise echo
Echo
Maybe multiple
reflection
200 mV
Figure 23: Signal at
test output in pulseecho method with
lateral probe
attachment
Gate
Time
Trigger pulse
• If no echo pulses can be seen as illustrated in Figure 23, increase the
transmission energy (P03) and/or the gain (P04) until ultrasonic signals
are received continually.
• Reduce the level of liquid in the vessel to below the level of the sensor.
• The echo that you received should not be visible any more. If any
echoes are received, these represent noise which should remain
outside the gate. To identify the „useful echo“, fill the vessel again and
proceed as described above.
• Shift the gate by changing the value for the gate beginning (P05). If you
decrement the setting, the gate will shift to the left on the oscilloscope,
if you increment it, the gate shifts to the right.
• Change the gate width (P 06) to ensure that the detected echo signal is
received approximately at gate centre. Noise echoes should be
suppressed securely.
Evaluation
Ultrasonic signal in gate
No ultrasonic signal in gate
è Limit level reached
è Level below limit
38
SONOCONTROL 11
Pulse-echo method
with vertical probe
attachment
5 Start-up
(b) Pulse-echo method with vertical attachment of probe
• Connect the oscilloscope to the test output.
• Make certain that switch S1 is „ON“.
• Fill the vessel with liquid as exactly as possible to the required limit
level.
Pulse sent
Ultrasonic pulse dying down
Reflections on vessel wall
Level limit
Maybe multiple
Echo
reflection
200 mV
Figure 24: Signal at test
output in pulse-echo
method with vertical
attachment of probe
Gate
Time
Trigger pulse
• If no echo pulses can be seen as illustrated in Figure 24, increase the
transmission energy (P03) and/or the gain (P04) until ultrasonic signals
are received continually.
• Shift the gate beginning to ensure that the dying down of the ultrasonic
signal ends before the gate begins. This is done by changing parameter
P 05. If you decrement the setting, the gate will shift to the left on the
oscilloscope, if you increment it, the gate shifts to the right.
The gate width (P 06) determines the level limit. If the liquid in the
vessel is exactly at the limit level, set the gate width so that the echo is
marginally still inside the gate. In any other case, calculate the gate
width by means of the equations in chapter 6.3.
• Please note that the transmission time of the ultrasonic pulse and
hence the height of the liquid column in the vessel, depend on the
medium and its temperature.
Evaluation
Ultrasonic signal in gate
No ultrasonic signal in gate
è Level below limit
è Level limit reached
39
SONOCONTROL 11
Ultrasonic
transmission on
vessels
5 Start-up
(c) Ultrasonic transmission method on vessels
• Connect the oscilloscope to the test output.
• To prepare the SONOCONTROL 11 for ultrasonic transmission, set
switch S1 from „ON“ to „OFF“.
• Fill the vessel with medium to above the sensor level.
Ultrasonic pulse
Maybe multiple reflection
200 mV
Gate
Figure 25: Signal at the
test output with
ultrasonic transmission
on vessels
Time
Trigger pulse
• If no echo pulses can be seen as illustrated in Figure 25, increase the
transmission energy (P03) and/or the gain (P04) until ultrasonic signals
are received continually.
• Reduce the level of liquid in the vessel to below the level of the sensor.
• The ultrasonic signal that you received should not be visible any more.
If any echoes are received, these represent noise which should remain
outside the gate. To identify the „useful echo“, fill the vessel again and
proceed as described above.
• Shift the gate by changing the value for the gate beginning (P05). If you
decrement the setting, the gate will shift to the left on the oscilloscope,
if you increment it, the gate shifts to the right.
• Change the gate width (P 06) to ensure that the detected echo signal is
received approximately at gate centre. Noise echoes should be
suppressed securely.
Evaluation
Ultrasonic signal in gate
No ultrasonic signal in gate
è Limit level reached
è Level below limit
40
SONOCONTROL 11
Ultrasonic
transmission on pipes
5 Start-up
(d) Ultrasonic transmission method on pipes
• Connect the oscilloscope to the test output.
• To prepare the SONOCONTROL 11 for ultrasonic transmission, set
switch S1 from „ON“ to „OFF“.
• Fill the pipe with liquid.
Ultrasonic pulse
Maybe multiple reflection
200 mV
Gate
Figure 26: Signal at the
test output with
ultrasonic transmission
on pipes
Time
Trigger pulse
• If no echo pulses can be seen as illustrated in Figure 26 increase the
transmission energy (P03) and/or the gain (P04) until ultrasonic signals
are received continually.
• Drain the pipeline of liquid.
• The ultrasonic signal that you received should not be visible any more.
If any echoes are received, these represent noise which should remain
outside the gate. To identify the „useful echo“, fill the pipeline again and
proceed as described above.
• Shift the gate by changing the value for the gate beginning (P05). If you
decrement the setting, the gate will shift to the left on the oscilloscope,
if you increment it, the gate shifts to the right.
• Change the gate width (P 06) to ensure that the detected echo signal is
received approximately at gate centre. Noise echoes should be
suppressed securely.
Evaluation
Ultrasonic signal in gate
No ultrasonic signal in gate
è Liquid in pipeline
è No liquid in pipeline
41
SONOCONTROL 11
5 Start-up
Dying down
(e) Dying down
with liquid at limit level
• Connect the oscilloscope to the test output.
• Make certain that switch S1 is „ON“.
• Fill the vessel with medium to above the sensor level and observe the
dying down of the transmitted pulse.
• If no echo pulses can be seen as illustrated in Figure 27 and Figure 28,
increase the transmission energy (P03) and/or the gain (P04) until
ultrasonic signals are received continually.
• Shift the gate beginning (P 05) to ensure that the dying down of the
ultrasonic signal ends before the gate begins. If you decrement the
setting, the gate will shift to the left on the oscilloscope, if you increment
it, the gate shifts to the right.
Reduce the liquid level in the vessel to below sensor level.
• Make certain that the dying down of the ultrasonic pulse enters the
gate.
• Set the gate width (P 06) to ensure that it completely embraces the
dying down of the ultrasonic pulse.
with no liquid at limit
level
Ultrasonic pulse dying out
Wall reflection
Pulse sent
Ultrasonic pulse dying out
Wall reflections
Pulse sent
200 mV
200 mV
Gate
Gate
Time
Trigger pulse
Trigger pulse
Figure 27: Signal at test output with dying down with
liquid at limit level
Evaluation
Time
Figure 28: Signal at test output with dying down with no
liquid at limit level
Ultrasonic signal in gate
No ultrasonic signal in gate
è Level below limit
è Level limit reached
5.6 Measured value processing
After setting the echo detection the SONOCONTROL 11 is adjusted to
your process conditions.
Response time,
smoothing
• Parameters P 07 „Integration Time Up“ and P 08 „Integration Time
Down“ control the response time of the SONOCONTROL 11. This
permits to smoothen the result.
Switched output hold
time
• At least the „Hold Time“ set with parameter P 09 must elapse between
any two switching operations of a switched output.
Inverted switching
function
•
Save parameters
The behaviour of the switched outputs on detection of an echo is
determined by parameter P 10.
• The entered parameters are permanently saved with parameter P 99.
42
SONOCONTROL 11
6 SONOCONTROL 11 parameters
6 SONOCONTROL 11 parameters
Table 7: Parameter
overview
Param.
No.
Designation
Setting
CODE
P 03
P 04
P 05
P 06
P 07
P 08
P 09
P 10
P 11
Access code
Transmission power
Gain
Gate beginning
Gate end
Integration Up
Integration Down
Hold time
Switched output
Sensor frequency
0345
1 ... 20 steps
1 ... 3 steps
0.001 ... 30.00 ms
0.001 ... 30.00 ms
OFF, 0.050 ... 200 s
OFF, 0.050 ... 200 s
0.050 ... 1000 s
0:OFF, 1:ON; 2:ON w. echo; 3:OFF w. echo
250 kHz / 500 kHz / 1 MHz / 2 MHz
P 92
P 93
Software version
Save parameter
yyxx: polling only
0: no save / 1: save in EEPROM
6.1 Parameter P 03: Transmisison energy
Settings
0001 ... 0020: Transmisison energy steps
This parameter specifies the energy content of the emitted ultrasonic
pulse. The higher the transmission energy, the higher the energy content
of the emitted ultrasonic pulse.
6.2 Parameter P 04: Gain
Settings
0001 ... 0003: Gain step
The electronic circuitry amplifies the reflected ultrasonic pulse (echo) and
then converts it into a digital signal (triggering). This parameter sets the
strength of gain.
The setting should preferably made with visual inspection by an
oscilloscope connected to the test output (see chapter 4.3.6).
If echo signals are detected, the red „signal“ LED lights and a little arrow
appears in the top left corner of the display panel.
43
SONOCONTROL 11
6 SONOCONTROL 11 parameters
6.3 Parameter P 05 / P 06: Gate beginning / gate width
Settings
0.001 ... 30.00: Gate beginning / Gate width in [ms]
+
The sum of gate beginning and gate width must not be greater than 32.00 ms. The
gate width may be limited by the SONOCONTROL 11.
The parameters P 05 and P 06 set the gate as required by the
transmission time of the ultrasonic pulse.
Generally, the following equation applies:
TSignal [ms] ≈
Equation 1: Ultrasonic
signal transmission
time
TSignal:
LDistance:
v l:
L Distance [mm]
v l [m/s]
Transmission time of the ultrasonic signal
Distance travelled by the ultrasonic signal
Speed of sound in liquid
Table 8 contains the sound speeds of selected liquids at 20 °C
temperature. The speed of sound depends a little on temperature. If you
are in doubt, please consult our Service department.
The following equations adjusted to the different methods apply to water:
Pulse-echo method, lateral attachment: L Dis tan ce = 2 ∗ D B
TBegin . [ms ] ≈ 1.2 * D B [m]
TWidth [ms ] ≈ 0 .4 * D B [m]
Pulse-echo method, vertical attachment: L Dis tan ce = 2 ∗ Fl
Ultrasonic transmission on vessels: L Dis tan ce = D B
TBegin . [ms ] ≈ 0.6 * D B [m]
TWidth [ms ] ≈ 0 .2 * D B [m]
Ultrasonic transmission on pipes: L Dis tan ce = D B
TBegin . [ms ] ≈ 0.6 * D R [m]
TWidth [ms ] ≈ 0.5 * D R [m]
Dying down method:
TBegin. : Visually with test output
Legend:
TBeginn:
Gate beginning
Width :
Equation 2: Setting
the gate
DR:
vl :
Gate width
Pipe diameter
Speed of sound
in liquid
TWidth : Visually with test output
LDistance: Distances trav. by ultrasonic
signal
DB:
Vessel diameter
F l:
Filling level
Fmax:
max. filling level
44
SONOCONTROL 11
Table 8: Speed of sound
in selected liquids (20°C)
Note
6 SONOCONTROL 11 parameters
Water
1,483 m/s
Ethyl alcohol
1,180 m/s
Acetone
1,200 m/s
Diesel oil (light)
1,250 m/s
Transformer oil
1,425 m/s
The gate settings should always be made with the visual assistance of the
test output (see chapter 4.3.6). The vessel must be filled with liquid to
make the settings. A verification of the settings should be made when the
vessel is empty.
The adjustment with the dying down method is made as a direct
comparison of the duration of dying down with the full and the empty
vessel.
6.4 Parameter P 07 / P 08: Integration Up / Down
Settings
OFF:
Integration disabled (i. e. instant response)
0.050 ... 0200: Integration time Up / Down in [s]
You can use this parameter to eliminate occasional noise and to smoothen
the result.
The parameter P 07 „Integration Up“ indicates how quickly the switched
output is to respond when echo signals are detected in the gate.
The parameter P 08 „Integration Down“ determines the speed of response
of the switched output to the lack of echo signals.
6.5 Parameter P 09: Hold time
Settings
0.050 ... 1000: Hold time in [s]
Hold time in [s]
This parameter specifies the rate with which the switched output may
change its state. After each change of state the hold time set here must
elapse before the next change can take place.
This function prevents relay „chatter“, i.e., intolerably rapid toggling of
make and break, when the liquid reaches limit level.
45
SONOCONTROL 11
6 SONOCONTROL 11 parameters
6.6 Parameter P 10: Switched output
Settings
0:
Switching contact permanently at break
1:
Switching contact permanently at make
2:
Switching contact at break if ultrasonic signal is in gate
3:
Switching contact at break no ultrasonic signal is in gate
(inverted function)
When the switching contact is at break, the „relay“ yellow LED lights.
If the controller is used as a closed-circuit device to prevent overfilling,
parameter P 10 must be set as follows for the methods described
inchapter 3.3:
Measuring method
Table 9: Settings of
parameter P 10 for
closed-circuit current
method
Parameter P 10
Pulse-echo method with lateral attachment
3
Pulse-echo method with vertical attachment
2
Ultrasonic transmission method
3
Dying down method
2
For other applications (e.g. protection against dry running) set this
parameter as required.
6.7 Parameter P 11: Sensor frequency
Settings
250 ... 2000: Sensor frequency in [kHz]
The various sensor types operate in different frequency ranges. For the
correct frequency, please refer to the sensor label. The frequency is the
left of the two numbers in MHz. The sensor in Figure 29 is a
0.5 MHz = 500 kHz sensor (note: 1 MHz = 1,000 kHz).
Figure 29:
Frequency label on
sensor
46
SONOCONTROL 11
6 SONOCONTROL 11 parameters
6.8 Parameter P 92: Software version
Only polling
xx.yy :
Software version
xx:
yy:
Main version
Sub-version
The software in SONOCONTROL 11 is continually updated to adjust it to
practical requirements. Besides, user-defined adjustments to the software
are also possible. This parameter shows you the current version of the
software you are using. The main version is separated from the
subordinate version by decimal point. If you require service, please specify
the software version number in your request.
6.9 Function P 99: Saving parameters
This function is enabled after the Parameter Selection menu by showing
the word SAFE on the display panel. When this is confirmed, the following
functions can be enabled:
Settings
0:
l
l
1:
l
l
The parameters are not saved, edited parameters will be lost
by a failure of the voltage supply.
As a reminder F 09 flashes.
To set new parameters you need not enter a code number.
The parameters are saved permanently. They will not be lost
even if the voltage supply fails.
Access to the parameter data is only possible after entering the
code number.
When you have completed confirmed all entries, the software quits the
programming mode and the word End is shown on the display panel.
47
SONOCONTROL 11
7 Advanced Programming mode
7 Advanced Programming mode
The parameters and functions described in chapter 6 are sufficient for a
convenient start-up of the SONOCONTROL 11. In addition to these, there
are more functions for specific applications which increase the safety of
the measuring system or make service work easier.
To start the Advanced Programming mode, a special code number must
be entered. All parameters and functions in chapter 6 are also available in
the Advanced Programming mode. Therefore only the modifications will be
described in the paragraphs below.
Param.
No.
Designation
Setting
CODE
P 12
Access code
Display panel output
1799
0:run; Intergration
value
P 70
Release / interval for sensor contact
verification
Transmission energy for sensor contact
verification
Gain module for sensor contact verification
Gate beginning for sensor contact verification
Gate width for sensor contact verification
OFF, 5 ... 1000 s
P 71
Table 10: Additional
parameters in
Advanced Pogramming
mode
P 72
P 73
P 74
P 91
1 ... 20 steps
1 ... 3 steps
0.001 ... 30.00 ms
0.001 ... 30.00 ms
45.0 ... 55.0 ms
7.1 Parameter P 12: Display panel output
Settings
+
0:
Displays standard text run in measuring mode
1:
Displays the internal integration value in measuring mode
The switching procedure is initiated when the integration value exceeds or drops
below the threshold value of 5000.
7.2 Parameter P 70: Enable / interval for sensor contact
verification
Settings
OFF:
contact verification disabled
0005 ... 1000: Time interval for sensor contact verification in [s]
The SONOCONTROL 11 can verify the attachment of the sensors to the
vessel in regular intervals.
Parameter P 70 disables the sensor contact verification (OFF) or sets
steps of a time interval between two tests in the range from 5 s to 1000 s
(approx. 16 min).
48
SONOCONTROL 11
7 Advanced Programming mode
Functional principle of the contact verification
To verify that the sensor is in contact with the vessel, the signal reflected
by the wall after the transmission of the pulse is evaluated. For this
purpose, a second gate is generated in the dying down area of the pulse.
The test gate has its own Transmission energy, gain and gate times.
Parameters P 71 to P 74 define the test gate. If one of these parameters is
selected in programming mode, the SONOCONTROL 11 internally
changes from the measuring gate to the test gate. The setting of the test
gate should preferably made with an oscilloscope connected to the test
output.
The „signal“ red LED, the arrow on the display panel (cf. chapter 6.2) and
the switched output also indicate the test gate during parameter setting.
Please try which setting of parameters provides the best verification of the
sensor contact with the vessel with or without liquid on sensor level
Interruption of the measurement process during contact verification
Measurement is interrupted for the duration of the sensor contact
verification test. The test duration is 250 ms to 500 ms. To run applications
which do not tolerate even a brief interruption of the measuring process,
the contact verification function should therefore be disabled. In this case,
the sensor contact should be verified during the regular inspection.
The parameters of the sensor contact verification can be set and therefore
adjusted to the shortest possible duration. Please observe the information
in the following paragraphs.
Contact verification with ultrasonic transmission method
The sensor contact verification function is not fully operative in ultrasonic
transmission mode. The reason for it is that two sensors must be verified.
Please set the transmission energy and/or gain to a level high enough that
the dying down of the vessel is detected by the receiving sensor. This
verifies the contact of both sensors.
This may not be possible with large vessels or a strongly attenuating
liquid.
7.3 Parameter P 71: Transmisison energy for sensor
contact verification
Settings
0001 ... 0020: Steps of the transmission energy for sensor contact
verification
If possible, parameter P 71 should be set to the same value as parameter
P 03, this reduces the time required to verify the sensor attachment. Also
see chapter 6.1.
7.4 Parameter P 72: Gain for sensor contact verification
Settings
0001 ... 0003: Gain step for sensor contact verification
Before setting this parameter, read the information regarding parameter
P 04 in chapter 6.2.
49
SONOCONTROL 11
7 Advanced Programming mode
7.5 Parameter P 73 / P 74: Gate beginning / gate width for
sensor contact verification
Settings
0.001 ... 30.00: Gate beginning for contact verification in [ms]
0.001 ... 30.00: Gate width for contact verification in [ms]
Before setting this parameter, read the information regarding parameters
P 05/ P 06 in chapter 6.3.
+
When defining the start of the test gate, make certain that no signal is reflected
when the sensor is not attached. The door should only be wide enough to ensure
that no reflected „useful“ signal is received.
7.6 Parameter P 91: Base interval
Settings
45.0: ... 55.0:
Base interval in [ms]
This parameter defines the time intervals in which the SONOCONTROL 11
carries out measurements.
If several SONOCONTROL 11s are connected to one vessel it may
happen that the units interfere with each other. In this case each unit
should use a different cycle rate. Therefore specify a different value for
parameter P 01 for each SONOCONTROL 11.
Although this will not eliminate the reciprocal ultrasonic interference, the
comprehensive integration function (see chapter 6.4) however provides
efficient protection from wrong measured results.
50
SONOCONTROL 20
9 Troubleshooting
8 Troubleshooting
8.1 Troubleshooting
If your SONOCONTROL 11 dos not respond to the presence of liquid as it
should, the fault must be located. As a first step, find out if the problem is
sonic or electrical. Please work through the following checklist.
•
•
•
•
•
•
•
•
•
•
•
•
•
•
•
•
Is the SONOCONTROL 11 supplied with operating voltage?
Is the sensor connected properly?
Is the sensor making full contact with the mounting compound?
Is there liquid in the vessel/tube?
Are the settings of gate beginning and gate width correct?
Does noise by sound reflection on the vessel wall interfere with the
measuring process in the gate?
Does the liquid contain a large number of baffles or bubbles?
Is there strong turbulence?
Is the setting of the transmission power and/or the gain low?
Has the liquid changed in the course of operation?
Has the temperature or the concentration of the liquid changed
substantially?
Is equipotential bonding ensured between the vessel and the housing?
Are both shields of the sensor cable properly connected to earth?
For ultrasonic transmission: Are the sensors in correct alignment with
each other?
For dying down: Do reflections from the opposite wall interfere with the
gate?
For pulse-echo method: Is there an object which reflects the ultrasonic
signals (e. g. the opposite wall of the vessel or tube)?
If the SONOCONTROL 11 detects a device fault, an appropriate message
is displayed on the display panel. The evaluation is different for faults and
warnings. For details, see the respective passages of this Manual.
Call our service team if you have a problem. We will be glad to assist you
to ensure smooth service of your SONOCONTROL 11.
8.2 Device faults
Device faults either affect or prevent measurement. If a fault is detected,
the alarm relay drops, the appropriate LED lights and a fault message is
shown on the display panel. If several faults are detected at the same
time, the most serious fault is shown.
F 01
The hash total by the program memory is wrong. This is a particularly
grave fault. The SONOCONTROL 11 would cease to operate properly and
was therefore stopped. If this fault occurs, please call our service team.
F 02
The hash total by the non-volatile parameter memory is wrong. You can
make a total reset by pressing the selection key and a new start of the
device. Please contact our service team for repair of defective assemblies.
51
SONOCONTROL 20
9 Troubleshooting
F 03
The device software is not compatible with the device hardware. Please
inform our service team.
F 04
The device software contains a wrong software version. Please inform our
service team.
F 06
The internal working memory of the microcomputer is defective. The
device was stopped. Please inform our service team.
F 07
A difference between the (working) parameter set and the contents of the
non-volatile parameter memory has been found. Please verify your
parameter settings and save them again. If the same fault occurs again,
the computer hardware is defective. Please consult our service team.
F 10
The acoustic attachment of the sensor to the vessel is interrupted or
impaired. Inspect the sensor contact or the settings of parameters P 71 to
P 74.
+
F 11
+
Detection of fault F 10 must be permitted by parameter P 70.
The sensor detects a signal although no signal should actually be present
at this time. The cause may be interference by a strong magnetic. Please
contact our Service department.
Detection of fault F 11 must be permitted by parameter P 70.
F 12
The sensor detects no signal. The cause may be a broken cable or no
sensor is connected. If a wiring check is inconclusive, please inform our
Service department.
F 13
The relay drive of the switched output is defective. Please consult our
Service department.
8.3. Warnings
Warnings inform the user that the measuring process is not proceeding
along the optimum line. Warnings are caused by parameters that are not
the best. The measuring result will not be affected. Currently only one
warning is generated by the SONOCONTROL 11:
F 09
The parameters have not been saved permanently. You quit the
programming mode with P 99 = 0 or the SONOCONTROL 11
automatically returned to the measuring mode after not detecting any
button activity or receiving a serial instruction for 16 minutes.
The warning F 09 is indicated periodically by „flashing“ for a brief moment.
52
SONOCONTROL 11
9 Default settings
9 Default settings
The devices are delivered with the following default settings:
Table 11: Default
settings
Param. Designation
No.
Setting
P 03
P 04
P 05
P 06
P 07
P 08
P 09
P 10
P 11
P 12
Transmission power
Gain
Gate beginning
Gate end
Integration Up
Integration Down
Hold time
Switched output
Sensor frequency
Display panel output
Step 10
Step 2
0.200 ms
0.200 ms
1s
1s
0.500 s
2, i.e. relay ON if echo in gate
1 MHz
0, i.e., standard text "run"
P 70
P 71
P 72
P 73
P 74
Release / interval for sensor contact verification
Transmission energy for sensor contact verification
Gain module for sensor contact verification
Gate beginning for sensor contact verification
Gate width for sensor contact verification
OFF, i.e., blocked
Step 1
Step 2
0.025 ms
0.100 ms
P 91
P 92
P 93
Base interval
Software version
Save parameter
50.0 ms
yy xx
0
.
+
The above default settings will also be adopted after a total reset. A total reset can
be made by pressing all three buttons when the device is switched off, then the
device is switched on and the buttons are held pressed until the display panel goes
blank.
53
SONOCONTROL 11
10 Technical data
10 Technical data
SONOCONTROL 11: Universal Level Limit Switch for Liquids
Measuring principle
Ultrasonic Transmission time measurement
• Pulse-echo method with lateral attachment
• Pulse-echo method with vertical attachment
• Ultrasonic transmission
• Dying down
Sensors
• Screw-in sensors
form of construction /
500 kHz: E20, E21, E22
measuring frequency
1 MHz: E01, E02, E03, E11
2 MHz: E04, E05, E10
• Angle sensors
2 MHz: E24, E25, E26
Attachment of sensors Without exposure to measured liquid, attached to
outside of vessel, or directly in the liquid
Length of sensor cable 10 meters, greater length on request
Parameter setting
• Digital setting by buttons via display panel or
• Unauthorised access control by code number
Measuring range
Maximum transmission time: 32 ms (approx. 23 m with
water)
Resolution
Gate beginning/ gate width: 1 µs
Frequency of
approx. 20 Hz
measuring sequence
Display
Digital display for parameter setting and service
Switched output
Combined switched output for measuring result and
fault output
• programmable as make or break contact
• maximum switching voltage: 50 V
• maximum switching current: 0.5 A
Voltage supply
+18 ... 30 VDC/ 300 mA, protected against polarity
reversal, approx. 1 s response time after start of
operating voltage
Housing
SONOCONTROL 11:
Aluminium, L x W x H: 160 x 100 x 80 mm, IP65
Sensors:
Plastic: E01, E02, E04, E05, E20, E21, E24, E25,
E26
Stainless steel: E03, E10, E11, E22
Connections
SONOCONTROL 11:
IP65 cable gland, internal: plug-in screw terminals
Sensors:
permanently installed connecting cable: E01, E03,
E04, E10, E11, E20, E22, E24
water-tight plug connector: E02, E05, E21, E25, E26
54
SONOCONTROL 11
10 Technical data
Mounting
Temperature range
Hazard protection
Insulation resistance
CE conformity
Scope of supply
Accessories
SONOCONTROL 11: wall-mounted
Sensors: Mounting ring / mounting plate / fastening
strap on vessel:
• Screw thread M18x1: E04, E05, E10
• Screw thread M30x1.5: E01, E02, E03, E11
• Screw thread M45x1.5: E20, E21, E22
• Tightening strap: E24, E25
• Special pipe adapter: E26
SONOCONTROL 11: -20 ... +60 °C
Sensors:
-20 ... +80°C: E01, E02, E03, E04, E05, E20, E21,
E22, E24, E25
–20 ... +135°C: E10, E11, E26
SONOCONTROL 11: installed in housing EJB-1 or
EJB-2, type of protection acc. to EEx d IIB T5
Sensors:
Type of protection acc. to EEx m II T6 for E03, E22
Double basic insulation according to EN 61010-1
between all circuits
EC directives and other legislation 89/336/EEC and
92/31/EEC (Electromagnetic Compatibility), 73/23/EEC
and 93/68/EU (Low Voltage Directive)
• EMC, noise radiation emission:
DIN EN 50081, Part 1 (VDE 0839, Part 81-2)
DIN EN 55011
• EMC, noise immunity:
DIN EN 50082, Part 2 (VDE 0839, Part 82-2):
EN 61000-4-2, EN 61000-4-3, EN 61000-4-4,
EN 61000-4-6; Test result: b
• Low Voltage Directive:
EN 61010-1, EN 61010-1/A2
SONOCONTROL 11, E series ultrasonic sensor incl.
probe cable, user’s manual
Sensor fasteners, mounting compound
HiTECH Technologies
301 Oxford Valley Road - Building 505A
Yardley, PA 19067-7706
1-800-755-4507
FAX 1-215-321-6067
EMAIL: [email protected]_34.DOC
55
SONOCONTROL 11
Parameter Designation
No.
Transmission power
P 03
NOTES
Setting
1 ... 20 steps
P 04
Gain
1 ... 3 steps
P 05
P 06
P 07
P 08
P 09
P 10
Gate beginning
0.001 ... 30.00 ms
Gate end
0.001 ... 30.00 ms
Integration Up
OFF, 0.050 ... 200 s
P 11
Sensor frequency
P 12
Display panel output
P 70
Release / interval for sensor
contact verification
Transmission energy for
sensor contact verification
Gain module for sensor
contact verification
Gate beginning for sensor
contact verification
Gate width for sensor
contact verification
P 71
P 72
P 73
P 74
P 91
P 92
P 99
Integration Down
OFF, 0.050 ... 200 s
Hold time
0.050 ... 1000 s
Switched output
0:OFF, 1:ON; 2:ON w.
echo; 3:OFF w. echo
250 kHz / 500kHz / 1MHz /
2MHz
0: run/ 1: Integration value
Base interval
OFF, 5 ... 1000 s
1 ... 20 steps
1 ... 3 steps
0.001 ... 30.00 ms
0.001 ... 30.00 ms
Software version
45.00 .. 55.00 ms
yyxx: polling only
Save parameter
0: no save / 1: save
Measuring point:
Remarks:
Your settings
Date: