1
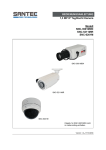
USER MANUAL Panorama IP camera 1.3 MP Model SNC-P3601M Version 1.0m-f/0311/engl/A6 User manual SNC-P3601M Dear customer, Thank you for purchasing a high quality SANTEC device. We recommend that you read this manual thoroughly before operating your new system for the first time. Please follow all instructions and observe the warnings contained in this manual. Please contact your local dealer or use the SANTEC Service Hotline if you have any questions or if you wish to claim for a service or warranty. You will find further information on our website: www.santec-video.com SANTEC Service Hotline: +49 / 900 / 1 72 68 32 +49 / 900 / 1 SANTEC (if available from your country) [email protected] All rights reserved. This publication may not be reproduced, stored in a retrieval system or transmitted, in any form or by any means (electronic, mechanical, photocopying, recording or otherwise), without the written prior permission of Sanyo Video Vertrieb AG. No reproduction of any part or excerpts thereof are permitted. Errors excepted. Specifications are subject to change without notice for quality improvement. SANTEC is a registered trademark of Sanyo Video Vertrieb AG. All other companies or products mentioned in this publication are trademarks, registered trademarks or brands of the respective company. They are not connected in any way with Sanyo Video Vertrieb AG. © Copyright by Sanyo Video Vertrieb AG, Ahrensburg (Germany) _________________________________________________________________________________ -2- User manual SNC-P3601M Table of contents Safety precautions Safety instructions About this user manual Items included in the delivery 4 5 6 6 1. Installation 1.1 Lens 1.2 Camera installation 1.3 Power supply 1.4 Camera overview 7 7 9 9 9 2. IP settings 13 3. Web interface 3.1 Calling-up the camera web interface 3.2 Live-view 3.3 Setting overview 3.4 System settings 3.4.1 Time/date 3.4.2 Time stamp 3.4.3 User 3.4.4 Language 3.4.5 Camera name 3.4.6 Update firmware 3.5 Network 3.5.1 IP-address 3.5.2 SNTP (time server for time synchronization) 3.5.3 FTP 3.5.4 SMTP 3.5.5 DDNS (dynamic domain name system) 3.5.6 Event protocol 3.6 Video settings 3.6.1 Encoding 3.6.2 Camera settings 3.7 Audio settings 3.8 Extended settings 3.8.1 Motion detection 3.8.2 Alarm settings 3.8.3 SD-card 3.8.3.1 SD-card settings 3.8.3.2 SD-card content 3.8.4 Recording 3.8.4.1 Recording settings 3.8.4.2 Recording schedules 14 14 15 17 18 18 19 19 20 20 21 22 22 23 23 24 25 25 26 26 28 29 30 30 31 32 32 33 33 33 34 4. Technical specifications 35 _________________________________________________________________________________ -3- User manual SNC-P3601M Safety precautions Caution Description of symbols Danger: This symbol is intended to alert the user to the presence of un-insulated "dangerous voltage" within the product’s enclosure that may be of sufficient magnitude to constitute a risk of electric shock to a person. Warning: This symbol is intended to alert the user to the presence of important operating and maintenance (servicing) instructions in the literature accompanying the appliance. CE compliance Attention: Any changes or modifications to this appliance which have not been explicitly approved of by the respective regulatory authority, may lead to a prohibition of usage of this appliance. This appliance complies with the CE guidelines. _________________________________________________________________________________ -4- User manual SNC-P3601M Safety instructions Before operating the appliance, please read this manual carefully and retain it for further reference. Before cleaning the appliance, it has to be switched off and unplugged from the power outlet. Wipe the appliance with a soft damp cloth. Do not use harsh cleansers or aerosols for cleaning. The type label may not be replaced. Do not use attachments unless recommended by the manufacturer as they may affect the functionality of the appliance and result in the risk of fire, electric shock or injury. Never install the appliance in areas exposed to water or other liquids. The camera housing complies with class IP-54. The appliance has to be installed in a safe and stable location which is able to carry the weight of the appliance. Quick stops, excessive force, and uneven surfaces may cause the appliance to fall causing serious injury to persons and damage to objects. Openings in the appliance, if any, are provided for ventilation to ensure reliable operation of the appliance and to protect if from overheating. These openings must not be covered or blocked. Please make sure that the appliance does not overheat. The appliance should only be operated from the type of power source indicated on the marking label. If you are not sure of the type of power supplied at the installation location, please contact your local dealer. An appliance which is powered through a polarized plug (a plug with one blade wider than the other) will fit into the power outlet only one way. This is a safety feature. If you are unable to insert the plug into the outlet, try reversing the plug. Do not defeat the safety purpose of the polarized plug. If the appliance is powered through a grounding-type plug, the plug will only fit into a groundingtype power outlet. This is a safety feature. If your outlet does not have the grounding plug receptacle, contact your local electrician. Route power cords and cables in a manner to protect them from damage by being walked on or pinched by items places upon or against them. For protection of the appliance during a lightning storm or when it is left unattended and unused for a longer period, unplug the appliance from the wall outlet. Disconnect any antennas or cable systems that may be connected to the appliance. This will prevent damage to the appliance due to lightning or power-line surges. Do not overload wall outlets and extension cords as this can result in a risk of fire or electric shock. Never insert items into the openings of the appliance. They may touch parts under electric current which may cause an electric shock. Never pour any liquids over the appliance. _________________________________________________________________________________ -5- User manual SNC-P3601M In case of any operating interruption or a complete operating failure please switch off the appliance and disconnect it from the wall outlet. Never attempt to service or repair the appliance yourself, as opening or removing covers may expose you to dangerous voltage or other hazards. Refer all servicing to qualified service personnel. When replacement parts are required, be sure that the service technician uses replacements parts specified by the manufacturer or that have the same characteristics as the original part. Unauthorized substitutions may result in fire, electric shock or other hazards. Upon completion of any service or repairs to the appliance, ask the service technician to perform safety checks to verify that the appliance is in proper operating condition. The appliance should only be installed by qualified service personnel and has to comply with local specifications and regulations. Never point the camera at an object with a high degree of luminance. Bright vertical or horizontal lines can result in a distortion (outshine) of the entire image on the monitor. This artifact is not an error but a particularity of semiconductor CCDs when they are directly exposed to a powerful light source. At the installation site, the camera has to be adjusted to the given light conditions. Please respect the local legal regulations on waste if you need to dispose of discarded appliances. This symbol means that electrical appliances need to be disposed of properly and not simply with unsorted household refuse. Please respect local regulations on waste disposal. About this user manual This manual aims at assisting the user on how to operate camera SNC-P3601M. This manual is subject to rigid quality control. However, no guarantee can be given that mistakes are not present. We reserve the right to make changes to the manual without prior notice. Before operating the appliance, please read this manual carefully and retain it for further reference. Verify that all appliance items are included in the delivery. Should items be missing, do not operate the appliance and contact your local dealer. Never attempt to repair the appliance yourself. This should only be done by qualified service personnel. Improper handling of the appliance will invalidate the warranty. Items included in the delivery 1x camera SNC-P3601M 1x allen wrench 1x torx key 4x screws 1x IP-finder software 1x user manual 4x rubber gaskets To operate the camera, SanGuard or NUUO software is required which you can purchase from SANTEC. _________________________________________________________________________________ -6- User manual SNC-P3601M 1. Installation (also see the pictures on the following pages) Camera SNC-P3601M is a colour camera with electronic day/night switching and a preinstalled 360° lens. You will find the technical data at the end of the manual. 1.1 Lens This camera is equipped with a pre-installed and pre-set 360° lens. When operating the camera, you may need to re-adjust the lens because during the transport the lens might have experienced some vibrations. Step1: Unwrap the camera. Step 2: Connect the camera to the power supply and connect it to the network. Step 3: Open the cameras’s web interface in the Internet Explorer. Step 4: Call up the live. Step 5: Check if the oval position is centered and straight. Step 6: Check if the focus adjustment is set properly. Step 7: If required, adjust the lens. To access the lens, open the camera housing and following the below procedure. Use the allen wrench included in the delivery. (Continue on next page) _________________________________________________________________________________ -7- User manual SNC-P3601M Ensure that the main screw and the focus screw are loose. They have to be loose but don’t need to be taken out completely. Turn the focus ring left or right until the picture is sharp and clear. Turn the master ring left or right to obtain a straight position of the elliptical picture. Turn the adjustment screw left or right to obtain a vertical position of the elliptical picture. The elliptical picture has to be in a centered position. Turn the adjustment screw left or right to obtain a horizontal position of the elliptical picture. The elliptical picture has to be in a centered position. Fix the screws again tightly. _________________________________________________________________________________ -8- User manual SNC-P3601M 1.2. Camera installation Make sure to fix the camera onto a solid basis which is capable to carry the weight of the camera. Ensure that the camera is safely installed by using only suitable screws. If the included screws are not suitable, please replace them by other appropriate screws. 1.3. Power supply The camera can be operated with 12 V DC via the external power supply unit or with PoE (Power-over-Ethernet) via a PoE switch (Ethernet port). 1.4. Camera overview Picture 1: Open the camera housing Screws to open the camera housing _________________________________________________________________________________ -9- User manual SNC-P3601M Picture 2: Reset button Reset button Picture 3: Lens adjustment Screws Screws to adjust the position of the elliptical picture _________________________________________________________________________________ - 10 - User manual SNC-P3601M Picture 4: Dimensions (mm) Picture 5: Surface mounting Screws for surface mounting _________________________________________________________________________________ - 11 - User manual SNC-P3601M Picture 6: Connections Ethernet connection Voltage 12 V DC Audio input/output Alarm input/output _________________________________________________________________________________ - 12 - User manual SNC-P3601M 2. IP settings The SANTEC IP cameras come with the following default settings: IP-address Subnet mask : Gateway DNS-server User ID Password : : : : : 192.168.1.168 255.255.255.0 0.0.0.0 0.0.0.0 admin 9999 To retain the default settings, press the reset button. There are the following 3 options to change the IP-address of the camera: a. IP-finder software Every SANTEC IP camera comes with the IP-finder software. Select the camera from the list by double-clicking. Change the IP settings to the new settings. Enter the user name (ID) and the password. Click on IP Change. b. Camera web interface You will find the description of the web interface in the following chapter. _________________________________________________________________________________ - 13 - User manual SNC-P3601M 3. Web interface 3.1. Calling-up the camera web interface Open the Microsoft Internet Explorer and start the connection of the network camera as follows: Click on the URL field. Type in the URL address of the network camera and press the ENTER key. You will then access the web interface of the camera. The default IP-address of the camera is 192.168.1.168 You need the user ID and the password in order to access the web interface. The default user ID is admin and the default password is 9999. Note: When you call up the camera web interface, it may happen that you are prompted for an ActiveX installation. Please note that the Internet Browser settings allow the installation of ActiveX components. _________________________________________________________________________________ - 14 - User manual SNC-P3601M 3.2. Live view Page for camera adjustments Page for Live-View Live-View with 50% resolution Live-View with defined resolution Digital output (relay) on Digital output (relay) off Audio on (camera -> web interface) Audio off (camera -> web interface) Audio on (web interface -> camera) Audio off (web interface -> camera) Storage location for snapshots and video sequences Save snapshot Start recording (the video sequence is saved as AVI-file) Stop recording _________________________________________________________________________________ - 15 - User manual SNC-P3601M Notes: In order to activate the 2-way audio function, press the and buttons. In order to save a snapshot or a video sequence, select the storage location by using the button. During live mode of the web interface, digital PTZ control is not possible. Please use the SanGuard or NUUO software which you can purchase from SANTEC. _________________________________________________________________________________ - 16 - User manual SNC-P3601M 3.3. Setting overview _________________________________________________________________________________ - 17 - User manual SNC-P3601M 3.4. System settings 3.4.1. Time / date Local time: The local time is the one as set in the camera. Desired time: You can change the time which is set in the camera as follows: o Set manually: Select the desired time and date from the drop-down list. o Synchronize with computer time: If you select this option, the computer time/date is transferred to the camera. o Synchronize with SNTP server: If you select this option, the SNTP server time/date is transferred to the camera. Automatically adjust for daylight saving time changes: This option activates the automatic adjustment to summer/winter time. Time zone: This is the time zone in which the camera is located. This option is important for daylight saving time changes. Submit: Click here to apply the new date/time settings to the network camera. _________________________________________________________________________________ - 18 - User manual SNC-P3601M 3.4.2. Time stamp Enable time stamp: The time stamp is displayed. Time stamp position: o UPPER LEFT o UPPER RIGHT o BOTTOM LEFT o BOTTOM RIGHT Time stamp format: o YY/MM/DD o MM/DD/YY o DD/MM/YY o YY/MM/DD TITLE (YY = year, DD = day, MM = month) Submit: Click here to apply the new time stamp settings to the network camera. 3.4.3. User _________________________________________________________________________________ - 19 - User manual SNC-P3601M User list: This list displays the user(s) and their respective authorisations. Delete user: Select a user from the list to be deleted and click this button. User name: Enter the user name here which is to be added or modified. Password: Password of the above user name. Confirm: Re-enter and thus confirm the password here. Authority: Authorisation level: admin, operator or viewer. Submit: Click here to apply the new user settings to the network camera. 4.4.4. Language Language: Select your language o English o German Submit: Click here to apply the new language settings to the network camera. 4.4.5. Camera name Camera name: Enter the name/title of the camera. Submit: Click here to apply the new camera name to the network camera. _________________________________________________________________________________ - 20 - User manual SNC-P3601M 3.4.6. Update firmware This page displays information on the installed firmware version and the ActiveX components. Search: Select the firmware file from your PC. Update: Start the update process. Restart: Restart the camera. _________________________________________________________________________________ - 21 - User manual SNC-P3601M 3.5 Network 3.5.1 IP-address IP-address: Enter the 4-Byte IP-address (value from 0 to 255). Every network camera has to have its own IP-address which can be identified in the network. Netmask: Enter the 4-Byte subnet-mask (value from 0 to 255). By this, the netmask can be identified in which the network camera is located. Gateway: Enter the 4-Byte gateway (value from 0 to 255). First DNS: Enter the 4-Byte DNS-server address (value from 0 to 255). The DNS-server transforms the domain name into an IP-address. Second DNS: Enter the 4-Byte DNS-server address (value from 0 to 255). The DNSserver transforms the domain name into an IP-address. HTTP port: Displays the specific HTTP port number. Default is 80. Submit: Click here to apply the new network settings to the network camera. _________________________________________________________________________________ - 22 - User manual SNC-P3601M 3.5.2. SNTP (time server for time synchronisation) SNTP server: IP-address of the SNTP server. Can be entered as 4-Byte IP-address or as domain name. Submit: Click here to apply the new network settings to the network camera. 3.5.3 FTP FTP server: IP-address of the FTP server. Can be entered as 4-Byte IP-address or as domain name. Port: Port number of the FTP server. User name: User name to login to the FTP server. Password: Password to login to the FTP server. File upload path: Folder path of FTP server in which the video data is to be stored. Submit: Click here to apply the new network settings to the network camera. _________________________________________________________________________________ - 23 - User manual SNC-P3601M 3.5.4. SMTP If necessary, enable the option „My server requires authentication”. Account name: Account on e-mail server. Password: Password of account on e-mail server. Sender: This information is displayed as e-mail sender. SMTP server: IP-address of SMTP server. Can be entered as 4-Byte IP-address or as domain name. E-mail address: E-Mail address to which the e-mails are to be sent. Send count (1-8): Number of files attached to an e-mail. Submit: Click here to apply the new network settings to the network camera. _________________________________________________________________________________ - 24 - User manual SNC-P3601M 3.5.5. DDNS (dynamic domain name system) DDNS host name: IP-address of DDNS server. Can be entered as 4-Byte IP-address or as domain name. DDNS account: Account on DDNS server. DDNS password: Password of account on e-mail server. Submit: Click here to apply the new network settings to the network camera. 3.5.6. Event protocol On this page, the events are displayed. You can browse in the events by clicking on the buttons “first page”, previous 20” and “next 20”. _________________________________________________________________________________ - 25 - User manual SNC-P3601M 3.6 Video settings 3.6.1 Encoding Stream type: Adjustment of video streaming mode o Single o Dual o Triple Video codec: Adjustment of encoding procedure o Stream type: single: H.264 MPEG4 o Stream type: dual H.264 + JPEG MPEG4 + JPEG Dual H.264 Dual MPEG4 H.264 + MPEG4 o Stream-Typ: triple Resolution: The resolution of each video stream depends on the adjustments of the stream type and the video codecs. The following values can be set: _________________________________________________________________________________ - 26 - User manual SNC-P3601M Stream type Video codec H.264 Single MPEG4 H.264 + JPEG MPEG4 + JPEG Dual Dual H.264 Dual MPEG4 H.264 + MPEG4 Triple Dual H.264 + JPEG Dual MPEG4 + JPEG Resolution 1280x1024 1280x960 1280x720 720x480 640x480 1280x1024 1280x960 1280x720 720x480 640x480 1280x720 + 640x352 640x480 + 640x480 1280x720 + 640x352 640x480 + 640x480 1280x720 + 390x192 720x480 + 720x480 640x480 + 640x480 1280x720 + 390x192 720x480 + 720x480 640x480 + 640x480 720x480 + 720x480 640x480 + 640x480 1280x720 + 320x192 + 640x352 1280x720 + 320x192 + 640x352 Bit rate: Bit rate mode o CBR: Constant bit rate o CVBR: Variable bit rate JPEG adjustment o Quality: HIGH / NORMAL / LOW o Frame rate: 30 / 15 / 7.5 / 3 / 1 fps (1) H.264 / MPEG4 adjustment o Bit rate: 64 ~ 4000 Kbit/sec o Frame rate: 30 / 25 / 15 / 13 / 7.5 / 6 fps (2) H.264 / MPEG4 adjustment o Bit rate: 64 ~ 4000 Kbit/sec o Frame rate: 30 / 25 / 15 / 13 / 7.5 / 6 fps Submit: Click here to save the new encoding settings. Note: Although the camera provides a number of video modes, single H.264/MPEG4 mode with 1280 x 1024 resolution has always to be set in order to enable a digital PTZ contol using SanGuard or NUUO software. _________________________________________________________________________________ - 27 - User manual SNC-P3601M 3.6.2 Camera settings On this page, you can change the following picture settings: o Sens up: OFF / ON o Day and night: AUTO / B/W / COLOR o White balance: AUTO / SUNNY / SHADOW / INDOOR / LAMP o WDR: ON / OFF o WDR Level: 1 ~ 10 o DC IRIS: 0 ~ 200 o Lens type: DC-IRIS / MANUAL o Brightness: 0 ~ 255 o Contrast: 0 ~ 255 o Saturation: 0 ~ 255 o Sharpness: 0 ~ 255 o Noise Reduction: 0 ~ 255 Reset: The picture settings are reset (as shown on the above screen shot). Submit: Click here to save the new picture settings. _________________________________________________________________________________ - 28 - User manual SNC-P3601M 3.7. Audio settings Audio: Set the audio mode to: o OFF: audio is turned off o one-way: audio only from camera to PC o two-way: audio in both directions Audio out volume: 0 - 4 Submit: Click here to save the new audio settings. _________________________________________________________________________________ - 29 - User manual SNC-P3601M 3.8. Extended settings 3.8.1. Motion detection Motion detection: Activation/deactivation of motion detection Sensitivity: Set the sensitivity level of the motion detection o Lowest o Low o Medium o High o Highest CCD reference: CCD reference (20 - 50) Motion detection mask: Click on the picture to set or to delete an element of the motion detection mask. If a motion occurs in the marked field, it will be detected. Submit: Click here to save the new motion detection settings. _________________________________________________________________________________ - 30 - User manual SNC-P3601M 3.8.2. Alarm settings Alarm in (sensor): Activate/deactivate the alarm input o Active type “low”: This means 0 V. The camera will trigger an alarm if the alarm input has 0 V. To achieve 0 V at the alarm input, the contacts are closed. o Active type „high“: This means 3.3 V. The camera will trigger an alarm if the alarm input has 3.3 V. To achieve 3.3 V at the alarm input, the contacts are not closed. Alarm out (relay): Activate/deactivate the alarm output o Active type „low“: This means 0 V. If the camera triggers an alarm, the alarm output has 0 V. o Active type „high“: This means 3.3 V. If the camera triggers an alarm, the alarm output has 3.3 V. o Trigger an alarm when Ethernet is lost: The camera can trigger an alarm if the network connection is interrupted. Alarm relay duration: You can set how long the alarm output should be active since the alarm is not being triggered anymore. o 0 second: The alarm output is set to inactivity immediately after the alarm. o 10 seconds: The alarm output is set to inactivity 10 seconds after the alarm. o 30 seconds: The alarm output is set to inactivity 30 seconds after the alarm. o 1 minute: The alarm output is set to inactivity 1 minute after the alarm. o Endless: The alarm output remains active until the alarm output is manually set to inactivity (press button on the “live view” page of the web interface). Submit: Click here to save the new alarm settings. _________________________________________________________________________________ - 31 - User manual SNC-P3601M 3.8.3. SD-card 3.8.3.1 SD-card settings SD-card enable: Activate/deactivate the SD-card. SD-card rewrite: Activate/deactivate the rewriting of the SD-card. Format: The SD-card is being formatted. Submit: Click here to save the new SD-card settings. 3.8.3.2 SD-card content This page displays the content of the SD-card. Click on the respective file name to open it. Click on „Delete“ to delete the file. _________________________________________________________________________________ - 32 - User manual SNC-P3601M 3.8.4. Recording 3.8.4.1 Recording settings On this page you can set the recording modes: o Schedule record – upload via FTP o Schedule record – save into SD-card o Alarm record – upload via FTP o Alarm record – save into SD-card o Alarm record – upload via SMTP (e-mail sending) Additional setting options: o Buffer: Pre-alarm buffer can be set to: 0 / 1 / 2 / 3 seconds. o SD file format can be set to: AVI / JPEG o FTP file format: only JPEG Submit: Click here to save the new recording settings. _________________________________________________________________________________ - 33 - User manual SNC-P3601M 3.8.4.2 Recording schedules You can set up to 7 schedules in the camera. Submit: Click here to save the new schedule settings. Remove all schedules: All existing schedules are deleted. _________________________________________________________________________________ - 34 - User manual SNC-P3601M 4. Technical specifications Camera Sensor Resolution (pixel) Max. frame rate (fps) Compression (video) Number of video streams Signal processing S/N ratio Lens mount Iris control Lens type Focal length Horizontal picture angle IR cut filter Light sensitivity Automatic Gain Control (AGC) Digital Noise Reduction (DNR) White balance Backlight compensation (BLC) Day/night mode adjustment Camera adjustments Motion detection (zones) Title displayed in picture Video output Audio input/output Alarm input/output Motion detection Schedule Picture upload Supported management software Supported protocols Supported software standards Internal memory Ethernet connection Power over Ethernet (PoE) Classification Vandal-proof Heating Mounting Camera installation Housing colour Housing material Voltage Power consumption Operating temperature (°C) Storage temperature (°C) Relative humidity (%) Dimensions W x H x D (mm) Weight (g) Certification SNC-P3601M colour dome camera 1/3" 1.3 MP Sony Progressive Scan CMOS 1.3 MP (1280 x 1024) 25 at 1.3 MP (1280 x 1024) MJPEG / MPEG-4 / H.264 3 Digital (DSP) >50 dB CS DC Built-in 360° ImmerVision lens 0.9 – 1.15 mm 360° Electronical 1.0 lux Yes Yes Auto / Sunny / Shadow / Indoor / Lamp WDR Auto / colour / black-white Web interface 12 Yes No 1x 3.5 mm jack / 1x 3.5 mm jack 1x / 1x Yes Yes HTTP / FTP / SMTP SanGuard / NUUO HTTP / FTP / SMTP Not availabel SD card (optional) RJ-45, 10Base-T/100Base-TX IEEE 802.3af, Midspan/Endspan IP-54 No No Surface Screw fastening RAL 9020 (matt white) Aluminium 12 V DC or PoE 4.8 watt -10 to +50 -20 to +60 max. 80 135 x 120 x 135 1.1 kg CE Subject to technical changes. Errors excepted. _________________________________________________________________________________ - 35 - Your local distributor: __________________________________________________________________________ www.santec-video.com