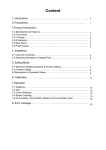
1
Table of Contents
1. Introduction………………………………….………………………………………….
2. Precautions…………………………………….………………………………………..
1
1
3. Before Using the Product
3-1 Unpacking and Checking…………………………………………………………………..
3-2 Installing Components ………………………………………..……………………………
3-3 Leveling the Scale………………………………………………..…………………………
1
1
1
4. Product Introduction
4-1 Specifications & General Features …………………………………..............................
4-2 Front Panel
4-2-1 Display …….………………………………………………………………………………
4-2-2 Keyboard………………………………………………………………………………….
4-3 Power Supply……………………………………………………………………………….
2
3
4
4
5. Operation
5-1 Weighing……………………………………………………………………………………..
5-2 Tare ………………………………………………………………………………………….
5-3 Weight Checking……………………………………………………………………………
5-4 Simple Counting……………………………………………………………………………
5-5 Percentage Weighing ………………………………………………………………………
5-6 Accumulation, Accumulation Display and Accumulation Clear…………………………
4
5
5
6
6
6
6. Calibration
6-1 Single Point Calibration ……………………………………………………………………
6-2 Linear Calibration…………………………………………………………………………..
7
7
7.Setting Mode& Description of Parameter Values……………………………
8
Serial Interface
8-1 RS-232 Connector…………………………………………………………………………
8-2 Single Option……………………………………………………………………………….
8-3 RS-232 Output Format…………………………………………………………………….
Troubleshooting and Error Message……………………………………………….
JWE
10
10
10
13
0
1. Introduction
Thank you for deciding to purchase a JWE Weighing scale from Jadever. This goods has the
excellent performance and splendid properties under severe quality management .It is
recommended to read this manual in full before using it for good function application.
2. Precautions
◎ Place the scale on a flat and stable surface. See 3-3 Leveling the Scale for details.
◎ V erify that the input voltage and the plug type matches the local AC power supply. See 4-3
Power supply.
◎ W arm up the scale for 15minutes before using it the first time.
◎ K eep the scale aw ay from E M I noise, strong wind and vibration, which might cause
incorrect reading.
◎ Avoid sudden temperature changes (suitable operating temperature is between -5℃~ 40℃.)
◎ D isconnectthe pow er supply w hen cleaning the scale.
◎ Do not immerse the scale in water or other liquids.
◎ S ervice should be perform ed by authorized personnelonly.
3. Before Using the Product
3-1 Unpacking and Checking
Open the package and check the instrument for transport damage. Immediately inform your
dealer if you have complaints or if parts are missing. The package should contain:
● Sc ale body
● User manual
● Wire (power cord)
● Stainless steel pan
3-2 Installing Components
1. Before using the scale, remove the Delivery protection screw (rotate counterclockwise),
which is located underneath the scale. This screw ensures protection of the load cell during
transport.
2. Cover the stainless steel pan on the plastic pan properly.
3-3 Leveling the Scale
To compensate for small irregularities or inclinations at the location, the scale can be leveled.
The scale is equipped with a level indicator at the front panel .Adjust the leveling feet until the
air bubble in the indicator is centered as shown.
Note: The scale should be leveled each time its location is changed.
JWE
1
4. Product Introduction
1)
2)
3)
4)
5)
6)
7)
8)
9)
Stainless Steel weighing pan
Plastic weighing pan
Delivery Protection Screw
Power socket
On/Off Switch
HI-LO-OK Signal Output and Bilateral RS-232 Standard Interface
Print Button
Two-stage Switch
Bubble Level Indicator
4-1 Specifications & General Features
Specifications
Model
JWE-3K
JWE-6K
JWE-15K
JWE-30K
Capacity
Division(g)
3000g
6000g
15kg
30kg
0.1g
0.2g
0.5g
1g
Display
Unit
LCD With Backlight、25mm(H)×8mm(W), 6 digits
kg、lb、lboz、g、pcs、﹪、台斤、港斤、斤
Interface
Bi-direction RS-232 (Optional)
Pan size
334mm×245mm Stainless steel
Power
AC 110V/220V (AC±10%) or Rechargeable battery (6V/4A)
Operating Temp.
-5℃ ~ 40℃(23℉ ~ 104℉)
Maximum Humidity
85﹪ relative humidity, non-condensing
JWE
2
General Features
‧3kg/0,1g~30kg/1g
‧1/30,000 display resolution
‧Water-resistant durable keypad
‧ Auto power off / Auto backlight
‧HI/LO/OK setting can be stored
‧HI/LO/OK alarm function
‧Soft-ware filtering
‧Stainless steel weighing pan is for long-term operation
‧Operated by power supply or rechargeable battery
‧Internal battery charger
‧Clear LCD display with backlight
‧Overweight and delivery protection
‧Option: RS-232 interface
4-2 Front Panel
4-2-1 Display
Low battery indication.
The weight on the weighing pan is greater than the upper limit.
The weight on the weighing pan is between upper and lower limits.
The weight on the weighing pan is smaller than lower limit.
The weight is stable.
Net weight indicator.
When “ZERO” indicator appears, the scale is in zero status.
Units of measure
Charge Lamp Lights to indicate battery recharging (red) or charged (green).
Accumulation Lamp Lights up when accumulation function is enable.
JWE
3
4-2-2 Keyboard
1) M+/MR key Memory /Memory recall
2) MC/SET key Enables weight checking function /clear previous accumulation data
Cycles through kg, g, lb, lb-oz,斤, 台斤, 港斤,pcs and %( Enable 斤、台
3) MODE key
斤 and 港斤 under the setting mode if needed .)
4) TARE
key Tares the weight of the pan / shiftkey, moves to the left.
5) ZERO+ key
Cancels tare / zero the scale ((within 2% of max.capacity) / increase values.
4-3 Power supply
Please verify the local AC power source and switch the two-stage switch to the properly
before plugging into the power outlet.
Alternative power supply
1) AC 110V/220V (AC±10%)
2) (6V/4A) Internal Rechargeable Battery
Power Consumption
About 300mW, 80hrs (without backlight)
About 380 mW, 65hrs (with backlight)
Low Battery Warning
When “
” appears in the upper left corner of the display window, the battery power
requires recharging. The charge lamp turns green from red when the recharging is completed
(which takes about 8 hours). Disconnect the scale from power supply when it is fully charged.
Note: Battery is to replaced only by an authorized service dealer .Risk of explosion can occur
if replaced with the wrong type or connected improperly.
5. Operations
5-1 Weighing
Begin with no load on the scale, the display reading zero .Place item(s) to be weighed on the
scale. The display shown is 1000g, gross weight.
→
JWE
4
5-2 Tare
When weighing a sample that must be held in a container, tare stores the container weight
into memory.
Tare
1) Under the weighing mode, place the container on the weighing pan, wait till stable indicator
appears, and press the key TARE
. The container is tared.
→
2) Place the item(s) to be weighed into the container. The weight displayed is the net
weight.
.
3) Remove all items from the weighing pan; the screen displays the tare value.
4) To clear tare with an empty pan, Press down the key TARE
(after the appearance of
“ZERO”) or key ZERO+.
5-3 Weight Checking
1) Under the weighing mode, press key MC/SET to enable the weight checking function.
2) Begin by pressing the key MODE. The value of upper limit will display first, with the
left-most digit blinking.
3) To change the upper limit, Press key ZERO+ to increment the flashing digit and the key
TARE
to shift to the next digit.
4) Advance to the lower limit setting by pressing key MODE with the left-most digit
blinking.
.Repeat the procedure above to set the lower limit.
5) When the lower limit has been set, press key MODE to store the settings and begin
weight checking.
6) Press key M+/MR to cancel Weight Checking and return to weighing mode.
JWE
5
5-4 Simple Counting
1) Under the weighing mode, press key MODE to select the unit “PCS”
2) Press key MC/SET to choose the sampling amount (Options are 25, 50 and 100), then
put the simples on the weighing pan.
3) Wait till the appearance of CAL
4) Two seconds later, the sampling action ends up with a beep.
5) Remove the samples, and put the load on, the scale calculates the amount of the load.
6) Remove the load and press key MODE to select the desired weight unit to go back to
weighing mode.
5-5 Percentage weighing
1) Under the weighing mode, press key MODE to select the unit “%”
2) Press key MC/SET to choose the percentage (Options are 25%, 50% and 100%), then
put the simple on the weighing pan,
3) Wait till the appearance of CAL
4) Two seconds later, the sampling action end up with a beep.
5) Remove the sample, and put the load on, the scale calculates the percentage of the load.
6) Remove the load and press key MODE
to select the desired weight unit to go back to
weighing mode.
5-6 Accumulation, Accumulation Display & Accumulation Clearing
Accumulation
1) Under the weighing mode, put the item on the weighing pan. Press key M+MR at the
appearance of “
” and the Accumulation Lamp Lights up.
2) Remove the item and the display goes back to zero before the next accumulation can
register.
(The maximum is 99 pieces.)
JWE
6
Accumulation Display
Press key M+MR to display total accumulation data (number of weighments & total weight)
and back to weighing mode.
→
→
Accumulation Clearing
To clear accumulation data, press key MC/SET while the total weight is displayed. The
accumulation lamp goes off when the accumulation data is deleted.
6. Calibration
1.For best results, calibrate the scale at regular intervals. Temperature changes, geographic
gravity variations, altitude changes and abuse are few reasons why a scale may need
recalibration.
2. Here we take JWE-3K as an example.
6-1 Single Point Calibration
1)Press and hold key MODE while powering on the scale. The screen displays “CAL”, then
release the keys.
2)Press key TARE
to enter the zero point calibration mode.
3)Press key MODE to select calibration weight value. Options are1/3 of full load, 2/3 of full
load and full load. E.g., options for JWE-3K are 1, 2 and 3(kg).
4)Put the corresponding weights on the weighing pan, then the calibration procedure
starts.
5) The calibration procedure is completed with a beep and“
” flashing. Now, remove
all the weights.
6)Press key ZERO+ to return to weighing mode, key MODE to advance to next setting
menu.
6-2 Linear Calibration
1)Press and hold key TARE
while powering on the scale. The screen displays
,
then release the keys.
JWE
7
2) Press key MODE to enter the zero point calibration mode.
3) Wait till
appears, put weights of 1/3 of full load on the weighing pan and press
down key TARE
4) Wait till
key TARE
E.g., for JWE-3K ,1/3 of full load is 1kg.
appears, and then put weights of 2/3 of full load on pan and press down
E.g., for JWE-3K, 2/3 of full load is 2kg.
5) Wait till
appears, then put weight of full load on and press
TARE
E.g., for
JWE-3K, full load is 3kg.
6) The calibration procedure ends up with a symbol of “PASS”.
7) Remove all the weights, and then press key ZERO+ to return to weighing mode.
7. Setting Mode& Description of Parameter Values
Setting Mode
1) Long-press key MODE while powering on the scale to enter setting mode. The screen
displays “CAL”, then release the keys.
2) Press key MODE to circle through setting modes.
3) Press key M+MR to choose function.
4) Press key MC/SET switch on and off the chosen function. Press key ZERO+ to save the
setting and back to the weighing mode. If more settings are needed, press key MODE again.
Description of Parameter Values
1)
2)
Calibration See “7. Calibration”
Set the active weight unit. The following setting are available:
kg, g, lb, lb-oz,斤, 台斤, 港斤,pcs and % .
3)
(Enable);
(disable)
Set the init weight unit. The following setting are available:
kg, g, lb, lb-oz,斤, 台斤, 港斤,pcs and %.
(Enable);
JWE
(Disable)
8
4)
Set the filtering level in which the stable indication turns on .The higher the
setting, the slower stabilization time. Options are Fil 1,Fil 2,Fil 4 and Fil 8.
Set the period of inactivity before the scale automatically turns off. Options are
5)
Aut.NO=non power-off,Aut.5, Aut.10, Aut.30 and Aut.60(minutes).
6)
Set the activation mode of backlight. Options are lit.Aut=Auto on with items
greater than 9d placed on the weighing pan, lit.ON = Backlight on and lit.OFF=Backlight off.
7)
8)
Set zero display range. Options are Zero.0(one division) , Zero.1(2 divisions),
Zero.2(3 divisions), Zero.3(4 divisions), Zero.4(5 divisions) and Zero.5(6 divisions) .
Set RS-232 Serial Transmission Rate. Options are bAu.96(9600), bAu.48(4800)
and bAu.24(2400)
Set Print mode .Options are Prt.Pr(manual print), Prt.St(Stable print) and
9)
Prt.Co(Continuous print)
Note: In the continuous print mode, computer will be automatic chosen as the external
device.
→
10)
tdp-643.
Set external Interface. Options are PC, SH, ZEBRA,TP, AX, EZ2-S and
11)
Set Weight checking memory.
12)
Set Weight checking buzzer beep. Options are beep.Un, beep.IN, beep.NO
(Enable);
(Disable )
and beep.LO.
13)
Set
RTC Function.
(Enable);
(Disable)
8. Serial Interface
If external interface is needed, please select the proper two-in-one board first, which
integrates RTC (time display), RS-232 and relay (weight checking) functional module onto
one circuit board. Only after this board is adopted, the three functions can be realized.
JWE
9
8-1 RS-232 Connector
8-2 Single Option
1) RS232+RTC+Relay+ TDP / SH-24(TP)/ ZEBRA / GODEX(EZ)printer
2) RS232+RTC+Relay+ LED Light Tower (Applicable to the quality control of the factory
product quantity or weight and that of the total production line.)
3) RS232+RTC+Relay+Computer
8-3 RS-232 Output Format
Baud Rate : 2400、4800、9600
Data Bit
: 8
Parity
: N ( None )
Stop Bit
: 1
Code
: ASCII
Bit Format :
LSB
0
MSB
1
2
3
4
5
Start Bit
6
7
8
Parity
Stop Bit
Data Format
1. Kg
G/N/T
.
W
.
:
+/-
k
g
CR LF
weight
JWE
10
Example:
T.W.:
+ 1.000 kg
N.W.:
+ 1.000 kg
G.W.:
+ 2.000 kg
2、g
G/N/
T
.
W
.
:
+/-
g
CR LF
Weight
Example:
T.W. :
+
0.0
g
N.W. :
+ 1000.0
g
G.W. :
+ 1000.0
g
3、lb
G/N/
.
W
.
T
:
+/-
l
b
CR LF
Weight
Example:
T.W. :
+ 2.2050 lb
N.W.:
+ 2.2050 lb
G.W.:
+ 4.4100 lb
4.台斤
G/N/
. W . : +/T
-
G -
t
l
.
T
C
LF
R
-
G -
t
l
. H
C
LF
R
Weight
Example:
T.W.:
+ 1-10.7G-tl.T
N.W.:
+ 1-10.7G-tl.T
G.W.:
+ 3- 5.3G-tl.T
5.港斤
G/N/
. W . : +/T
Weight
JWE
11
Example:
T.W. :
+ 1-10.5G-tl.H
N.W. :
+ 1-10.5G-tl.H
G.W. :
+ 3- 4.9G-tl.H
6、斤
G/N/
.
W
.
:
+/-
C
-
J
i
n
CR
LF
l
b
CR
LF
T
Weight
Example:
T.W. :
+ 2.0000 C-Jing
N.W. :
+ 1.9998 C-Jing
G.W. :
+ 3.9998 C-Jing
7、lb/oz
G/N/
.
W
.
:
+/-
T
Weight
Example:
T.W.:
+
0- lb 0.000 OZ
N.W.:
+
2- lb 3.280 OZ
G.W.:
+
2- lb 3.270 OZ
8、pcs
T
o
t
a
l
:
+/-
p
c
s
CR LF
Example:
Total:+
645 pcs
JWE
12
9. %
+/-
%
C
LF
%
Example:
+ 24%
G
=
GROSS
N
= NET
9. Troubleshooting and Error Message
Error message Problems
Solutions
Initial zero point exceeds 1. Check whether there are other alien
articles on the scale pan, remove those
+ /-30% (take 10% as
articles. 2. LOAD CELL failure, which
reference basis)
requires to be changed or to contact our
Service.
Higher or lower than A/D 1. Check whether it is A/D failure, if yes,
resolution range.
please replace AD.
2. LOAD CELL failure, replacement is
required or contact our Service.
EEPROM Chksum failure
Re-sold EEPROM or contact our
Service.
Overload condition
Remove weight that is greater than the
scale capacity from the pan.
Wrong calibration weights
Calibrate with the correct calibration
weights or contact service
Accumulated number of 1. No more accumulations.
weighments(max:
99 2. Reset the Tare value.
pieces) or weight exceeds
the display range.
Low battery
Recharge the battery. The scale can be
used while it is recharging.
JWE
13
JWE
14
JWE
15