1
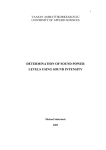
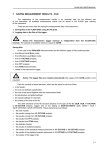
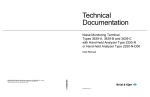
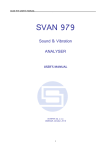
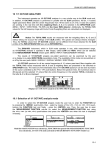
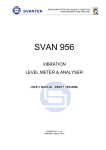
SVAN 958 USER MANUAL
4 FUNCTIONS OF THE INSTRUMENT - FUNCTION
In order to select the FUNCTION list one has to press the <Menu> push-button, select by means
of the <
>, <
> (or <
>, <
>) push-buttons the FUNCTION text and press the <ENTER>.
The FUNCTION list contains two elements: MEASUREMENT FUNCTION and CALIBRATION windows.
The list is closed and the instrument returns to the presentation mode after pressing the <ESC> pushbutton.
b)
c)
a)
Displays with the main list with FUNCTION text selected (a) and FUNCTION window with
MEASUREMENT FUNCTION selected (b) and CALIBRATION selected (c)
4.1 Measurement functions of the instrument - MEASUREMENT FUNCTION
In order to select the required function the user has to enter the MEASUREMENT FUNCTION
window (to select the MEASUREMENT FUNCTION text using the <
>, <
> or <
>, <
> push-buttons
and press the <ENTER> one, when this text is displayed inversely).
After entering the MEASUREMENT FUNCTION window, the set of the available functions appears
on the display (LEVEL METER, 1/1 OCTAVE, 1/3 OCTAVE, DOSIMETER, FFT, RT60). The special
character marks currently active function.
MEASUREMENT FUNCTION window with all available functions
…
…
Displays during the activation of the optional function
The main function of the instrument is the measurement of vibration level (in the case of vibration
signal) and the measurement of sound level (in the case of acoustic signal). The other functions are
optional and they broaden the applications of the instrument. They can be supported by the producer or
purchased later. The producer activates the optional function bought with the instrument. The user should
activate by itself (by entering a special code) the function purchased later.
The sound LEVEL METER (SLM) mode provides the user with the functions of the SLM meeting
the IEC 61672:2002 standard for Type 1 accuracy and the functions of VLM meeting the ISO 8041:2005
standard. The instrument can also be used for the long-term acoustic monitoring using for this purpose
the huge logger, in which the measurement results are stored.
The required function is selected by placing the special character in the line with the proper text.
The position of the character can be changed using the <
>, <
> (or <
>, <
>) push-buttons.
4-1
SVAN 955 USER MANUAL
_
After placing the character in the line with the function’s name the user has to press the <ENTER> pushbutton, which closes the MEASUREMENT FUNCTION window.
Notice: It is not possible to change the mode / measurement function during
the measurements. The instrument displays in this case for about 2 seconds the text: “MEASUREMENT
IN PROGRESS”. In order to change the mode of the instrument the measurement must be finished!
4.2 Instrument’s calibration - CALIBRATION
The instrument is factory calibrated with the supplied accelerometer and microphone for standard
environmental conditions. Each of four channels should be calibrated separately. In the case when
the absolute vibration or sound level value is important, a calibration of the measurement channel has to
be done. This is because the accelerometer or microphone sensitivity is a function
of temperature, ambient pressure and humidity.
In order to select a calibration function the user has to enter the CALIBRATION window (to select
the CALIBRATION text using the <
>, <
> or <
>, <
> push-buttons and press the <ENTER> one,
when this text is displayed inversely) and then select the CHANNEL to be calibrated. All four channels
of the instrument are calibrated independently.
In this window three options are available: the calibration of the measurement channel
by the introduction of the accelerometer’s or microphone’s sensitivity from theirs calibration cards
(BY SENSITIVITY) or by performing the calibration measurement (BY MEASUREMENT). Third option is
CALIBRATION HISTORY, which enables the user to view last calibration result in the chosen channel.
CALIBRATION windows in CHANNEL 1
Note: The calibration level and the calibration result is expressed in different units depending
on the settings of the instrument. The metric or non-metric vibration units are set
in the VIBRATION UNITS (path: MENU / SETUP / VIBRATION UNITS). Additionally, the linear or
logarithmic units are set in the DISPLAY SCALE (path: MENU / DISPLAY / DISPLAY SETUP /
CHANNEL x / DISPLAY SCALE).
4.2.1 Calibration by the sensitivity introduction
Calibration BY SENSITIVITY in the case of acoustic signal
The calibration by the microphone’s sensitivity introduction (path: MENU / FUNCTION /
CALIBRATION / CHANNEL x / BY SENSITIVITY) can be conducted in the following way:
1. Select this type of the calibration (highlight the BY SENSITIVITY text) from the CALIBRATION
window and press the <ENTER> push-button.
4-2
SVAN 958 USER MANUAL
CALIBRATION windows with the selected calibration mode and after entering this mode
Notice: It is not possible to calibrate the instrument during the execution
of the measurements. It is possible to open different lists and windows but the positions in these items are
not displayed inversely and so - not accessible. The “Loudspeaker” icon indicates that the instrument is
in the measurement process. In order to change the sensitivity the measurement must be finished!
CALIBRATION window with SENSITIVITY positions not accessible
2. Set the sensitivity of the microphone taken from its calibration card using the <
>, <
> pushbuttons and then press the <ENTER> one.
The calibration factor is calculated automatically in the relation to 50.0 mV / Pa. The confirmation
of the introduced SENSITIVITY is made after pressing the <ENTER> push-button. For the sensitivity
of the microphone greater than 50.0 mV / Pa, the calibration factor is negative.
CALIBRATION window with the sensitivity greater than 50.0 mV / Pa and calculated calibration factor
For the sensitivity of the microphone smaller than 50.0 mV / Pa, the calibration factor is positive.
CALIBRATION window with the sensitivity smaller than 50.0 mV / Pa and calculated calibration factor
The lowest applicable value of the sensitivity to be introduced is equal to 50.0 µV / Pa (it conforms
to the calibration factor equal to 60.0 dB) and the greatest one – 50.0 V / Pa (calibration factor equal
to -60.0 dB).
In order to return to the CALIBRATION window the user has to press the <ESC> push-button.
4-3
SVAN 955 USER MANUAL
_
b)
a)
CALIBRATION windows with the lowest possible sensitivity and the greatest calibration factor (a)
and the greatest sensitivity and the lowest calibration factor (b)
Notice: The calibration factor is always added to the results of sound level measurements
and the analysis of sound signal.
Calibration BY SENSITIVITY in the case of vibration signal
The calibration by the accelerometer’s sensitivity introduction (path: MENU / FUNCTION /
CALIBRATION / CHANNEL x / BY SENSITIVITY) can be conducted in the following way:
1. Select this type of the calibration (highlight the BY SENSITIVITY text) from the CALIBRATION
window and press the <ENTER> push-button.
CALIBRATION windows with the selected calibration mode and after entering this mode
Notice: It is not possible to calibrate the instrument during the execution
of the measurements. It is possible to open different lists and windows but the positions in these items
are not displayed inversely and so - not accessible. The “Loudspeaker” icon indicates that
the instrument is in the measurement process. In order to change the sensitivity the measurement
must be finished!
CALIBRATION windows with SENSITIVITY positions not accessible
2. Set the sensitivity of the accelerometer taken from its calibration card using the <
>, <
>
push-buttons and then press the <ENTER> one.
-2
The calibration factor is calculated automatically, in the relation to 10.0 mV / ms . The confirmation
of the introduced SENSITIVITY is made by pressing the <ENTER> push-button. For the sensitivity
-2
of the accelerometer greater than 10.0 mV / ms , the calibration factor is negative.
CALIBRATION window during setting the sensitivity greater than 10.0 mV / ms-2
4-4
SVAN 958 USER MANUAL
For the sensitivity of the accelerometer smaller than 10.0 mV / ms
positive.
-2,
the calibration factor is
CALIBRATION window during setting the sensitivity smaller than 10.0 mV / ms-2
The lowest applicable value of the sensitivity to be introduced is equal to 10.0 µV / ms (it conforms
-2
to the calibration factor equal to 60.0 dB) and the greatest one – 10.0 V / ms (calibration factor equal
to -60.0 dB).
-2
In order to return to the CALIBRATION window the user has to press the <ESC> push-button.
b)
a)
CALIBRATION windows with the lowest possible sensitivity and the greatest calibration factor (a)
and the greatest sensitivity and the lowest calibration factor (b)
Note: The calibration factor is always added to the results of the vibration measurements and
the analysis of the vibration signal.
4.2.2 Calibration by the measurement
Calibration BY MEASUREMENT in the case of acoustic signal
The calibration for the sound measurements (path: MENU / FUNCTION / CALIBRATION /
CHANNEL x / BY MEASUREMENT) can be done in the following way:
1. Select the calibration by measurement (highlight the BY MEASUREMENT
from the CALIBRATION window and press the <ENTER> push-button.
text)
2. Attach the acoustic calibrator SV 30A (or equivalent 114 dB / 1000 Hz) to the microphone
of the instrument.
Notice: It is also possible to use the pistonphone, which generates the signal ca 124 dB
or different type of acoustic calibrator dedicated for ½” microphones. In any case, before starting
the calibration measurement, the user has to set (by means of the <>, <> push-buttons) the level
of the signal generated by the given calibrator (CAL. LEVEL position in BY MEASUREMENT window),
which is usually stated in the calibration certificate of the unit (the value of the CAL. LEVEL set
by the producer of SVAN 958 is equal to 114 dB).
3. Switch on the calibrator and wait ca 30 seconds before starting the calibration measurement.
4. Start the calibration measurement by pressing the <Start / Stop> push-button.
4-5
SVAN 955 USER MANUAL
_
The measurement time is set to 5 seconds with 5 seconds delay. During the calibration
measurement the <ESC> and <Pause> push-buttons do not operate but it is possible to stop
the measurement using the <Start / Stop> one. It is not recommended to stop the calibration
measurement before programmed 5 seconds period!
<Start>
CALIBRATION windows during the calibration measurement
Waiting for the start of the measurements the DELAY is counted down on the display. After the end
of the measurement, its result is displayed on the display in the bottom line.
It is recommended to repeat the calibration measurement few times. The obtained results
should be almost the same (with ±0.1 dB difference). The reasons for the unstable results are as follows:
• the calibrator is not properly attached to the instrument,
• there are external disturbances,
• the calibrator or the measurement channel (the microphone, the preamplifier or the instrument
itself) are damaged.
Notice: During the calibration measurement, the external disturbances (acoustic noise or
vibrations) should not exceed the value of 100 dB.
5. Press the <ENTER> push-button in order to accept the measurement result.
The calibration factor is calculated, stored and displayed (cf. next Figure) after pressing
the <ENTER> push-button.
Notice: The user has to press the <ESC> push-button in order to quit the calibration
procedure without saving the calibration factor.
<ENTER>
CALIBRATION windows after the measurements and after the acceptance of the calibration factor value
Calibration BY MEASUREMENT in the case of vibration signal
The calibration by measurements (path: MENU / FUNCTION / CALIBRATION / CHANNEL x /
BY MEASUREMENT) can be conducted in the following way:
1. Select the calibration by measurement (highlight the BY MEASUREMENT
the CALIBRATION window and press the <ENTER> push-button.
4-6
text)
from
SVAN 958 USER MANUAL
CALIBRATION windows with the selected calibration mode and after entering this mode
2. Attach the vibration calibrator to the instrument’s accelerometer.
3. Switch on the calibrator and wait approximately 30 seconds before starting the calibration
measurement.
4. Start the calibration measurement by pressing the <Start / Stop> push-button.
The measurement starts after 5 seconds delay. The measurement time is also predefined
to 5 seconds. During the calibration period, the <ESC> and <Pause> push-buttons do not operate but
it is possible to stop the measurement using the <Start / Stop> push-button. Waiting for the calibration
measurement to begin, a DELAY is counted down. At the end of the measurement, the result is displayed
on the display in the bottom line.
CALIBRATION windows during and after the calibration measurements
The calibration procedure should be repeated a few times to ensure the integrity of the calibration.
The obtained results should be almost identical (with ±0.1 dB difference). The reasons for unstable results
are as follows:
• the calibrator is not properly attached to the instrument,
• there are external disturbances,
• the calibrator or the measurement channel (the accelerometer or the instrument itself) are damaged.
Note: During the calibration period, external disturbances (vibrations or acoustic noise)
should not exceed 100 dB.
5. Press the <ENTER> push-button in order to accept the measurement result.
The calibration factor is calculated, stored and displayed (cf. Fig. below) after pressing
the <ENTER> push-button.
<ENTER>
Confirmation of calibration result by pressing the <ENTER> push-button
Note: The calibration factor is always added to the measurement results in the level meter
mode and to those coming from the frequency analysis.
4-7
SVAN 955 USER MANUAL
_
4.2.3 View on the last calibration result - CALIBRATION HISTORY
In CALIBRATION HISTORY window the user can view up to 10 last calibration records.
In order to enter the CALIBRATION HISTORY (path: MENU / FUNCTION / CALIBRATION / CHANNEL x
/ CALIBRATION HISTORY) the user has to select the CALIBRATION HISTORY text in the CHANNEL x
window using the <
>, <
> push-buttons and press the <ENTER> one.
a)
b)
CALIBRATION window with CALIBRATION HISTORY text selected (a) CALIBRATION HISTORY
window opened with the last calibration result (b)
The opened CALIBRATION HISTORY window contains list of last calibration records. Each
calibration is described by the way the calibration was done (BY SENSITIVITY or BY MEASUREMENT),
the date and time of the performed calibration measurement, the obtained calibration factor
(CAL. FACTOR) and the calibration result.
CALIBRATION HISTORY windows with the last calibration records
In the case when the calibration measurements were not performed, the CALIBRATION HISTORY
window does not contain any records. The window is cleared after the CLEAR SETUP operation.
CALIBRATION HISTORY windows for the first (1) and fourth (4) channel
4-8