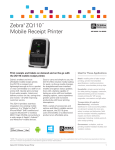
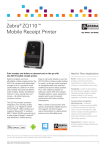
1
HDW-0161
Rev. B
Effective Date: 07/19/06
HDW-0161
THE HDW-0161 MANUAL COMPONENTS:
(1) HDW-0161 LABEL (DOCUMENT)
PRINTING INSTRUCTIONS:
THE DOCUMENT SHOULD BE PRINTED ON A COLOR PRINTER.
Print on 3-holed paper.
AFTER PRINTING DOCUMENT DISCARD THIS PAGE
AND SUBMIT MANUAL TO INSPECTION.
REVISION HISTORY
Rev
A
B
Description
Initial release
NWS 2006 Commercial Release updates.
Author
J. Thebeau
J. Thebeau
Date
03/10/06
07/19/06
ECO#
06-062
06-488
HDW-0161
Rev. B
Effective Date: 07/19/06
Navigant™
Navigation Work Station
Basic User’s Instructions
Navigant 2006
4320 Forest Park Avenue
Suite 100
St. Louis, MO 63108
USA
1-866-646-2346
1-314-678-6100
www.stereotaxis.com
Manual P.N.: HDW-0161
Revision: B
Revision Date: 07/19/06
© Stereotaxis 2006
HDW-0161
Rev. B
Effective Date: 07/19/06
SYMBOL LEGEND
Part Number
Attention: See Instructions For Use
Authorized Representative in the
European Community
Manufactured under one or more of the following patents:
United States:
4,869,247;
5,125,888;
5,353,807;
5,654,864;
5,843,093;
5,931,818;
6,014,580;
6,015,414;
6,148,823;
6,152,933;
6,157,853;
6,212,419;
6,292,678;
6,296,604;
6,298,257;
6,304,768;
6,330,467;
6,352,363;
6,364,823;
6,375,606;
6,428,551;
6,459,924;
6,475,223;
6,505,062;
6,524,303;
6,527,782;
6,529,761;
6,537,196;
6,630,879;
6,662,034;
6,677,752;
6,702,804;
6,755,816;
6,786,219;
6,817, 364;
6,931,818;
6,940,379;
6,968,846;
6,975,197;
6,980,843;
7,019,610;
7,017,584;
7,020,512.
5,707,335;
6,096,048;
6,216,030;
6,311,082;
6,385,472;
6,507,751;
6,542,766;
6,733,511;
6,902,528;
7,008,418;
5,779,694;
6,128,174;
6,241,671;
6,315,709;
6,401,723;
6,522,909;
6,562,019;
6,740,103;
6,911,026;
7,010,338;
Other U.S. patents pending.
Foreign patents issued and pending.
Niobe® and Cardiodrive® are registered trademarks of Stereotaxis, Inc.
NavigantTM is a trademark of Stereotaxis, Inc.
Tangent® is a registered trademark of Stereotaxis, Inc.
CARTOTM is a trademark of Cordis Corporation, Inc.
Biosense Webster® is a registered trademark Cordis Corporation, Inc.
NAVISTAR® is a registered trademark of Cordis Corporation, Inc.
AXIOM Artis dFC Magnetic Navigation System™ is a trademark of Siemens Corporation
Allura® is registered trademark of Philips Electronics NV.
Stereotaxis, Inc
Basic Instructions
ii
HDW-0161
Rev. B
Effective Date: 07/19/06
TABLE OF CONTENTS
1 SCOPE........................................................................................................................................................ 8
1.1
Identification ............................................................................................................................................ 8
1.2
General.................................................................................................................................................... 8
1.3
Companion Systems ............................................................................................................................... 8
1.4
Intended Use ........................................................................................................................................... 9
1.5
Warnings/Precautions ............................................................................................................................. 9
1.6
Acronyms, Abbreviations, and Definitions............................................................................................. 10
1.7
Referenced Documents ........................................................................................................................ 11
2 NAVIGANT USER CONTROLS AND HARDWARE................................................................................. 12
2.1
Operating System.................................................................................................................................. 12
2.2
USB Hub ............................................................................................................................................... 12
2.3
Input Devices......................................................................................................................................... 12
2.3.1
Mouse ............................................................................................................................................ 12
2.3.2
Keyboard........................................................................................................................................ 13
2.3.2.1
Apply or Reduce Field, Transfer Image, Store Points or Navigation .............................. 13
2.3.2.2
Navigation Preset Keys .......................................................................................................... 14
2.3.2.3
Anatomic Direction Adjustment Keys ..................................................................................... 14
2.3.2.4
Rotation and Deflection Keys (only available with Target Navigation) ............................... 14
2.3.2.5
AutoCAS and Step Script Keys .............................................................................................. 15
2.3.2.5.1 CAS Advance and Retract Using Keyboard ....................................................................... 15
2.3.2.6
Display-Relative Field Deflection Using Keyboard ................................................................. 16
2.3.3
Wand (Licensed Feature) .............................................................................................................. 17
2.3.4
CD/DVD Drive ................................................................................................................................ 17
2.4
Display Monitors.................................................................................................................................... 17
3 PATIENT PREPARATION ........................................................................................................................ 18
3.1
Recommended Patient Loading Procedure .......................................................................................... 18
3.1.1. Automatic Positioner Centering ..................................................................................................... 20
3.1.2.1.
Cover Force Sensor ................................................................................................................... 20
3.2
Pre-procedure Tasks............................................................................................................................. 21
3.3
Navigation Procedure Tasks ................................................................................................................. 22
3.4
Post-procedure Tasks ........................................................................................................................... 22
4 STARTING A PROCEDURE .................................................................................................................... 23
4.1
Start New Procedure ............................................................................................................................. 23
4.2
Open Procedure .................................................................................................................................... 24
4.3
Procedure Initiated by Fluoroscopy System ......................................................................................... 26
4.4
Clinical Workflow Manager (CWM) ....................................................................................................... 26
4.5
Selecting a Device................................................................................................................................. 27
4.6
Navigant Software Procedure Restart................................................................................................... 28
5 NAVIGATING WITH NAVIGANT .............................................................................................................. 29
5.1
Display Layout....................................................................................................................................... 29
5.2
Title and Menu Bar ................................................................................................................................ 29
5.2.1
Procedure Menu............................................................................................................................. 29
5.2.1.1
View/Edit Procedure ............................................................................................................. 30
5.2.1.2
Default Layout......................................................................................................................... 30
5.2.1.3
Save Layout ............................................................................................................................ 30
5.2.1.4
Restore Layout ....................................................................................................................... 30
5.2.1.5
Capture Screen....................................................................................................................... 30
5.2.1.6
Print Screen ............................................................................................................................ 31
5.2.1.7
Close Procedure ..................................................................................................................... 31
5.2.2
Mode Menu .................................................................................................................................... 31
5.2.3
View Menu ..................................................................................................................................... 32
5.2.4
Settings Menu ................................................................................................................................ 32
5.2.4.1
General Settings ..................................................................................................................... 32
5.2.4.2
Graphic Display Settings ........................................................................................................ 33
Stereotaxis, Inc
Basic Instructions
iii
HDW-0161
Rev. B
Effective Date: 07/19/06
5.2.4.3
Constellation Sequencing Tools ............................................................................................. 33
5.2.4.4
RMT Settings .......................................................................................................................... 33
5.2.4.5
Master Volume Settings.......................................................................................................... 33
5.2.4.6
Preop Settings ........................................................................................................................ 34
5.2.5
Help Menu...................................................................................................................................... 34
5.3
Navigant Toolbar ................................................................................................................................... 34
5.3.1
Apply Options................................................................................................................................. 34
5.3.2
Navigation Mode ............................................................................................................................ 35
5.3.2.1
Direction Navigation Mode .................................................................................................. 35
5.3.2.2
Drawing Vectors ..................................................................................................................... 36
5.3.3
Anatomy Display ............................................................................................................................ 36
5.3.4
Window Display.............................................................................................................................. 36
5.3.5
Field Angle Step Size..................................................................................................................... 37
5.3.6
Cardiodrive Step Size .................................................................................................................... 37
5.3.7
Field History ................................................................................................................................... 37
5.3.8
Store Navigation............................................................................................................................. 38
5.3.9
Store Points.................................................................................................................................... 39
5.3.10 Image Recall/Transfer Image......................................................................................................... 39
5.3.11 Field Motion Display....................................................................................................................... 40
5.3.12 3D Display Orientation Toolbar...................................................................................................... 40
5.3.13 View Synchronize Orientation........................................................................................................ 41
5.3.14 3D NaviView................................................................................................................................... 41
5.3.15 Wand (Licensed Feature) .............................................................................................................. 42
6 PRIMARY WINDOWS .............................................................................................................................. 43
6.1
3D Views ............................................................................................................................................... 43
6.1.1
3D Anatomic View.......................................................................................................................... 44
6.1.2
3D Constellation View .................................................................................................................... 44
6.1.3
3D Fluoro View............................................................................................................................... 44
6.1.4
3D Navisphere ............................................................................................................................... 45
6.1.5
2D Anatomic View.......................................................................................................................... 45
6.1.6
No Display in Primary Window....................................................................................................... 45
6.1.7
Preoperative View (Licensed Feature) .......................................................................................... 45
6.2
Display Window Tools ........................................................................................................................... 46
6.2.1
Left Mouse Mode ........................................................................................................................... 46
6.2.2
Show/Hide Options ........................................................................................................................ 46
6.2.3
User Views ..................................................................................................................................... 47
6.2.4
Center View Options ...................................................................................................................... 47
6.2.5
Fit Objects to Window .................................................................................................................... 47
6.2.6
Object Opacity................................................................................................................................ 47
6.3
Right Mouse Options in 3D Display Windows....................................................................................... 48
6.4
General Displays ................................................................................................................................... 48
6.4.1
Vectors ........................................................................................................................................... 48
6.4.2
Points Display ................................................................................................................................ 49
Field Buttons.................................................................................................................................... 49
6.4.2.1 ....................................................................................................................................................... 49
6.5
Status Bar.............................................................................................................................................. 50
6.6
2D Navigation Controls ......................................................................................................................... 50
6.7
Selectable Controls ............................................................................................................................... 52
6.7.1
Group View .................................................................................................................................... 52
6.7.1.1
Mark a Point............................................................................................................................ 53
6.7.1.2
Selecting a Point..................................................................................................................... 53
6.7.1.3
Editing Points .......................................................................................................................... 54
6.7.1.4
Group Options ........................................................................................................................ 55
6.7.1.4.1 Constellations ..................................................................................................................... 56
6.7.2
Preset View .................................................................................................................................... 58
6.7.2.1
System Presets....................................................................................................................... 58
Stereotaxis, Inc
Basic Instructions
iv
HDW-0161
Rev. B
Effective Date: 07/19/06
6.7.2.2
User Defined Presets.............................................................................................................. 58
6.7.3
Bulls Eye View ............................................................................................................................... 59
6.7.3.1
Bulls Eye Angle....................................................................................................................... 60
6.7.3.2
Bulls Eye Orientation .............................................................................................................. 60
6.7.3.3
Bulls Eye Central Axis ............................................................................................................ 60
6.7.3.4
Displaying the Bulls Eye ......................................................................................................... 61
6.7.3.5
Bulls Eye Interrogation............................................................................................................ 61
6.7.4
Navigation View ............................................................................................................................. 62
6.7.5
Guidewire Bend Control View ........................................................................................................ 62
6.7.6
Other Group Views ........................................................................................................................ 63
7 3D NAVISPHERE NAVIGATION.............................................................................................................. 64
7.1
3D Navisphere Cardinal Direction Markers........................................................................................... 64
7.2
3D Preset Markers ................................................................................................................................ 65
7.2.1
3D Navisphere Preset Direction Markers Adjustment ................................................................... 65
7.2.2
3D Navisphere Marker Reset......................................................................................................... 66
7.3
3D Navisphere Stored Navigation Markers........................................................................................... 66
7.4
3D Navisphere Field Selection.............................................................................................................. 66
7.5
3D Navisphere View Adjustment........................................................................................................... 66
7.5.1
Orientation and Synchronization Options ...................................................................................... 67
7.5.2
Idealized Anatomy.......................................................................................................................... 67
8 MAINTENANCE/ TROUBLESHOOTING/ MESSAGES ........................................................................... 68
8.1
Maintenance.......................................................................................................................................... 68
8.2
Troubleshooting..................................................................................................................................... 68
8.3
Status Messages................................................................................................................................... 69
9 EMERGENCY........................................................................................................................................... 76
9.1
Emergency Patient Retraction .............................................................................................................. 76
9.2
Emergency Stop (E-stop) ...................................................................................................................... 76
9.2.1
Siemens E-Stops ........................................................................................................................... 76
9.2.2
Philips E-Stop................................................................................................................................. 77
9.3
Overriding Magnet Positioner Interlocks ............................................................................................... 78
9.4
Moving Magnet Positioners Manually ................................................................................................... 78
9.5
Removing an Item That Has Become Stuck to a Magnet ..................................................................... 79
10
INDEX ................................................................................................................................................... 80
Stereotaxis, Inc
Basic Instructions
v
HDW-0161
Rev. B
Effective Date: 07/19/06
List of Figures/Tables
Figure 1 - Keyboard ......................................................................................................................................... 13
Figure 2 – Apply Field, Reduce Field, Transfer Image, and Store Points, Store Navigation Keys.................. 13
Figure 3 - Navigation Preset Keys ................................................................................................................... 14
Figure 4 - Anatomic Direction Keys ................................................................................................................. 14
Figure 5 - Rotation and Deflection Keys .......................................................................................................... 15
Figure 6 - AutoCAS and Step Script keys........................................................................................................ 15
Figure 7 - CAS Advance and Retract keys ...................................................................................................... 15
Figure 8 – Display-relative Deflection Keys ..................................................................................................... 16
Figure 9 - Opening Screen............................................................................................................................... 23
Figure 10 - Information Window ....................................................................................................................... 24
Figure 11 - Open Previous Procedure Window ............................................................................................... 25
Figure 12 – New Patient window ..................................................................................................................... 26
Figure 13 - Clinical Workflow Manager Layout. ............................................................................................... 26
Figure 14 - Device Selection Button ................................................................................................................ 27
Figure 15 - Device Override Window ............................................................................................................... 27
Figure 16 – Navigant Software Button ............................................................................................................. 28
Figure 17 - Capture Screen Button .................................................................................................................. 30
Figure 18 - Mode Menu.................................................................................................................................... 31
Figure 19 - Apply Options ................................................................................................................................ 34
Figure 20 - Navigation Mode Buttons – Direction and Target.......................................................................... 35
Figure 21 - Select Anatomy Button .................................................................................................................. 36
Figure 22 - Two Window, Four Window, Clinical Workflow Manager Buttons................................................. 36
Figure 23 – Field Angle Step Size Button ........................................................................................................ 37
Figure 24 - Step Size Button ............................................................................................................................ 37
Figure 25 - Field History Buttons ..................................................................................................................... 37
Figure 26 - Store Navigation Button................................................................................................................. 38
Figure 27 - Navigation View ............................................................................................................................. 38
Figure 28 - Store Point Button ......................................................................................................................... 39
Figure 29 - Recall and Transfer Image Buttons ............................................................................................... 40
Figure 30 - Field Motion Display ...................................................................................................................... 40
Figure 31 - 3D Orientation Toolbar .................................................................................................................. 40
Figure 32 - Display Sync Button ...................................................................................................................... 41
Figure 33 - NaviView Button ............................................................................................................................ 41
Figure 34 – Wand Button ................................................................................................................................. 42
Figure 35 - Primary Window Display Options .................................................................................................. 43
Figure 36 – Inside and Outside View Toggle Button ....................................................................................... 44
Figure 37- Fluoro Toolbar ................................................................................................................................ 45
Figure 38 - 3D Display Toolbar ........................................................................................................................ 46
Figure 39 - User Views..................................................................................................................................... 47
Figure 40 - Fit Objects to Window Button ........................................................................................................ 47
Figure 41 - Object Opacity Button.................................................................................................................... 47
Figure 42 - Right-click Options......................................................................................................................... 48
Figure 43 - Field Buttons.................................................................................................................................. 49
Figure 44 - 2D Display ..................................................................................................................................... 51
Figure 45 - Group View .................................................................................................................................... 52
Figure 46 – Point Menu.................................................................................................................................... 53
Figure 47 - Point Display Options .................................................................................................................... 54
Figure 48 – Edit Point Window......................................................................................................................... 54
Figure 49 - Group Options ............................................................................................................................... 55
Figure 50 – Edit Group Window....................................................................................................................... 56
Figure 51 - Preset View.................................................................................................................................... 58
Figure 52 - User Preset.................................................................................................................................... 59
Figure 53 - Bulls Eye View ............................................................................................................................... 59
Figure 54 - Bulls Eye Range
....................................................................................................................... 60
........................................................................................................................ 60
Figure 55 - Bulls Eye
Stereotaxis, Inc
Basic Instructions
vi
HDW-0161
Rev. B
Effective Date: 07/19/06
Figure 56 - Bulls Eye Orientation ..................................................................................................................... 60
Figure 57 - Set Bulls Eye Axis.......................................................................................................................... 61
Figure 58 - Hide/Show Bulls Eye Button.......................................................................................................... 61
Figure 59 - Bulls Eye Settings Window............................................................................................................ 61
Figure 60 – Guidewire Bend Menu Item .......................................................................................................... 63
Figure 61 – Guidewire Bend View ................................................................................................................... 63
Figure 62 - 3D Navisphere ............................................................................................................................... 64
Figure 63 - Preset Marker on 3D Navisphere .................................................................................................. 65
Figure 64 - Adjust Marker Window................................................................................................................... 65
Figure 65 - Adjusted Preset Display ................................................................................................................ 65
Figure 66 - Reset Marker Window ................................................................................................................... 66
Figure 67 - 3D Navisphere Stored Navigation Marker..................................................................................... 66
Figure 68 - 3D Navisphere Options ................................................................................................................. 67
Figure 69 – Siemens System Control and Remote Stop Box.......................................................................... 77
Figure 70 - Philips System Control and Power Box......................................................................................... 77
Figure 71 – Manual Hand Crank ...................................................................................................................... 78
Figure 72 – Manual Hand Crank ...................................................................................................................... 79
List of Tables
Table 1 – Navigant Controls and Hardware..................................................................................................... 12
Table 2 - 3D View Sync Options ...................................................................................................................... 41
Table 3 - Left Mouse Modes ............................................................................................................................ 46
Table 4 - Show/Hide Options ........................................................................................................................... 46
Table 5 - Center View Options ......................................................................................................................... 47
Table 6 - Vector Descriptions........................................................................................................................... 49
Table 7 - Constellation Options........................................................................................................................ 57
Table 8 - Cardinal Direction Markers ............................................................................................................... 64
Stereotaxis, Inc
Basic Instructions
vii
HDW-0161
1
Scope
1.1
Identification
Rev. B
Effective Date: 07/19/06
This manual describes how to operate the Navigant™ Navigation Workstation (NWS), a highly sophisticated
software system for use with the Niobe® Magnetic Navigation System (MNS).
1.2 General
The Niobe MNS is a medical device designed for electrophysiological and interventional procedures. The
MNS facilitates the control of the distal tip of compatible magnetic devices via magnetic fields.
Navigant is a tightly integrated companion of the Niobe MNS. The Navigant NWS is the user interface to the
Niobe MNS.
The purpose of this manual is to provide the user of the Niobe MNS and Navigant with instructions for
operating the equipment. This manual has been written to describe Navigant operation, specifically. The
Niobe MNS is described in a separate manual. The instructions for the use of associated magnetic
disposables are not addressed in this manual.
1.3 Companion Systems
The Niobe MNS and Navigant communicate with a choice of digital fluoroscopy systems, either the Siemens
AXIOM Artis dFC Magnetic Navigation System™ with flat panel imaging, the Siemens AXIOM Artis dBC
Magnetic Navigation System™ with flat panel imaging offering Bi-Plane capability with magnets stowed, or
the Philips Allura® Xper FD10. The Niobe MNS and Navigant also communicate with the Biosense
Webster® CARTO™ RMT EP Navigation System.
The MNS integrates with a digital fluoroscopy system to provide real time guidance to the physician during
an interventional procedure. The fluoroscopy system must be able to operate in the high magnetic field
environment produced by the MNS. The documentation for the companion fluoroscopy system is provided
by its manufacturer, and is not duplicated herein.
The Stereotaxis Cardiodrive® Catheter Advancement System (CAS) allows remote advancement and
retraction only of compatible magnetic electrophysiology devices. In the United States, it may only be used
with the Stereotaxis Tangent® Electrophysiology Mapping Catheter of 7F shaft diameter and 8F tip. Refer to
the Cardiodrive Installation, Operation and Service Manual for further information, indications, and
instructions for this product.
Stereotaxis, Inc
Basic Instructions
Page 8
HDW-0161
Rev. B
Effective Date: 07/19/06
1.4 Intended Use
Navigant Navigation Workstation NWS is a component of the Niobe MNS. The Niobe MNS with NWS is
intended to navigate compatible magnetic devices through tissue to designated target sites in the right and
left heart and coronary vasculature by orienting the device tip in a desired direction. Navigant provides an
enhanced navigation interface for the physician to control the MNS.
In the United States, the Stereotaxis Cardiodrive is intended for automatically advancing and retracting only
the Stereotaxis Tangent Electrophysiology Catheter of 7F shaft diameter and 8F tip. The Cardiodrive is
intended to advance the Stereotaxis Tangent Electrophysiology Catheter in the right side of the heart only. It
is not intended to advance the Tangent Electrophysiology Catheter through the coronary vasculature or the
coronary sinus.
Outside the United States, the Stereotaxis Cardiodrive Catheter Advancement System is intended for
automatically advancing and retracting only compatible magnetic electrophysiology (EP) catheters inside the
patient’s heart when used in conjunction with a Stereotaxis Magnetic Navigation System (MNS).
1.5 Warnings/Precautions
While Navigant and the Niobe MNS provide skill amplification and an automated means of steering the distal
tip of catheters and guidewires; they do not replace the physician’s knowledge, expertise, or judgment.
WARNING: Federal (USA) law restricts this device to sale by or on the order of a physician.
WARNING: The MNS and Navigant should be used only by qualified medical professionals who have been
thoroughly trained in its use.
WARNING: The MNS has permanent magnets that always produce a strong magnetic field. The field
cannot be turned off. This field could cause metal objects in the procedure room to become airborne
projectiles if not kept sufficiently far away from the magnet. The magnetic field is present in the vicinity of the
magnets at all times.
WARNING: The Niobe® system produces a strong magnetic field, which is always on. Patients and
operators with pacemakers, internal cardiac defibrillators (ICD), neurostimulators, magnetic sensitive or
ferromagnetic implants should contact the manufacturer of their respective implant prior to entering the
procedure room. Serious injury may result.
WARNING: The user should not attempt to upgrade, configure, or run any other software programs on the
MNS or Navigant computers, other than those specifically called out in the product documentation.
WARNING: There are no user serviceable parts inside the MNS or Navigant. The user should not remove
any covers (other than the hand crank covers), guards, or attempt to disassemble any portion of the MNS or
Navigant.
WARNING: All equipment brought into the procedure (e.g., IV poles, patient monitoring equipment, oxygen
tanks, etc.) must be safe in a magnetic environment. All equipment that is “MRI compatible” meets these
criteria.
WARNING: Target navigation is most effective in open chamber navigation. Target navigation does not
directly account for patient anatomy and is not intended to predict navigation across a valve.
Stereotaxis, Inc
Basic Instructions
Page 9
HDW-0161
Rev. B
Effective Date: 07/19/06
WARNING: When Navigant displays a graphical representation of the catheter tip and shaft on the Navigant
display screen, the graphical representation is a display of the calculated catheter shape, based on the initial
location and orientation of the catheter base and distance of catheter shaft advancement (or retraction) by
the Cardiodrive Catheter Advancement System.
WARNING: Navigant does not track the location or orientation of the catheter. (If the user purchases the
Biosense Webster CARTO RMT EP Navigation System and uses an appropriate Biosense Webster
Navistar™ RMT catheter, Navigant can be instructed to display the location and orientation of the catheter
tip.)
WARNING: The graphical representation of the catheter on the Navigant display represents an approximate
location and orientation of the catheter inside the patient’s heart after the user acquires a new fluoro image
and subsequently transfers it from the x-ray to Navigant using the “Transfer Image” button.
WARNING: The Target Navigation mode is intended to serve as a tool to assist the physician in placing the
compatible magnetic device to the intended location inside the heart chambers. The navigation field is static,
so results may vary in the beating heart. Stereotaxis neither claims nor quantifies the accuracy of the device
tip localization via Target Navigation. Physicians should monitor fluoroscopic visualization and ECG to
correlate between the visual representation and final resulting device tip position.
WARNING: The user should not provide any type of therapeutic treatment while changing magnetic fields or
while moving the device with the Cardiodrive Catheter Advancement System.
WARNING: Exercise caution with moving parts of the system to prevent inadvertent contact or damage to
the patient, operator, or equipment. Moveable items include both magnet positioners, as well as the
accompanying fluoroscopy system’s C-arm and patient table.
WARNING: The Magnetic Navigation System should be used only with magnetic devices and accessories
appropriately labeled as compatible with MNS navigation applications.
WARNING: Make sure that the patient table pivot is in the central position (centered between the Niobe
pods) before moving the Niobe pods out of the Stowed position towards the Navigate position.
WARNING: Operator should always confirm device location using live fluoroscopic image.
WARNING: If the device is moved manually instead of using Cardiodrive, the Cardiodrive display and any
previously stored position data may become invalid. The physician should remove all previously set markers
after moving the device manually.
1.6 Acronyms, Abbreviations, and Definitions
2D ................................. Two-Dimensional
3D ................................. Three-Dimensional
AP................................. Anterior-Posterior
Bulls Eye...................... Used in reference to a navigation scheme devised that allows vector direction
changes to be made on a polar map projected onto a plane.
CAS .............................. Cardiodrive Catheter Advancement System
CRT .............................. Cardiac Resynchronization Therapy
CWM............................. Clinical Workflow Manager
DVD/CD RW ................. Digital Video Disk/Compact Disk Read Write
Desired Vector ............ The 3D location and direction of the next, or desired, magnetic field to be
generated by the MNS.
EP ................................. Electrophysiology
FFS ............................... Feet First Supine
Stereotaxis, Inc
Basic Instructions
Page 10
HDW-0161
Rev. B
Effective Date: 07/19/06
Fluoro........................... Fluoroscopy or Fluoroscopic
Fully Retracted............ Magnet positioners are pivoted toward the patient, and at the farthest distance
from the patient.
HFS............................... Head First Supine
IC .................................. Interventional Cardiology
JPEG ............................ Joint Photographic Experts Group
LAO .............................. Left Anterior Oblique
LIH ................................ Last Image Hold
MNS.............................. Magnetic Navigation System
Navigation Fluoro ....... The fluoroscopy images used for magnetic navigation.
Navigation Volume ..... Spatial volume defined for a MNS, where the MNS is capable of generating any
magnetic field direction at the target magnetic field strength provided by the
MNS.
Niobe............................ a Magnetic Navigation system, which utilizes two opposing permanent magnets
to generate the magnetic fields required for navigation.
NWS ............................. Navigation Workstation
Present Vector ............ The 3D location and direction of the magnetic field presently being generated by
the MNS.
RAO.............................. Right Anterior Oblique
RMT .............................. Remote Magnetic Technology (short for CARTO-RMT EP Navigation System and
the integrated CARTO/Niobe MNS environment)
SVT…………………….. Supraventricular Tachycardia
UI .................................. User Interface
1.7 Referenced Documents
The following Stereotaxis documents are referenced herein:
Document Number
Document Title
HDW-0144
Navigant Navigation Workstation Installation and Maintenance Manual
HDW-0137
Niobe MNS Maintenance and Service Manual
HDW-0134
Niobe User’s Manual
HDW-0169
NaviView Instructions
HDW-0097
EP Instructions
HDW-0098
Preoperative Imaging Instructions
HDW-0156
Wand Instructions for Use
The following commercial third-party document is referenced herein:
Document Number
ISBN: 0974541006
Stereotaxis, Inc
Document Title
Reference Manual for Magnetic Resonance Safety, Implants & Devices
Basic Instructions
Page 11
HDW-0161
Rev. B
Effective Date: 07/19/06
Navigant User Controls and Hardware
2
The hardware components and user controls that make up Navigant are identified in the following table:
CONTROL ROOM
Navigant / Niobe MNS Monitor
EQUIPMENT ROOM
Navigant Computer
Niobe Magnetic Navigation
System
Navigant Keyboard
Navigant Mouse
PROCEDURE ROOM
Navigant /Niobe MNS Monitor
Navigant Mouse
Niobe Magnet Positioners
Niobe Magnet Positioner
tracks
Navigant CD/DVD Drive
Navigant USB Hub
Cardiodrive Advancer Unit (if
available)
Cardiodrive User Interface
Wand (Licensed Feature)
Table 1 – Navigant Controls and Hardware
This section describes each of the Navigant system controls and indicators the user will encounter.
2.1
Operating System
The Navigant computer uses the Microsoft Windows 2000 operating system.
2.2
USB Hub
Navigant provides a USB hub in the control room for connection of Navigant accessories and a facility
supplied printer, if desired.
If the user desires to transfer saved images and other data off of the Navigant computer, Stereotaxis
recommends the user purchase a commercially available USB storage device (such as a “memory stick”), for
use in the Navigant USB hub.
2.3
Input Devices
Navigant/ Niobe provide two standard wheel mice, a specialized keyboard, a CD/DVD drive, and an optional
Wand as input devices in the control room.
2.3.1 Mouse
A wheel mouse is supplied in the control room and a second mouse is located tableside in the procedure
room.
Stereotaxis, Inc
Basic Instructions
Page 12
HDW-0161
Rev. B
Effective Date: 07/19/06
2.3.2 Keyboard
The Navigant keyboard has all 104 industry standard alphanumeric, function, arrow, number pad, and editing
keys. It also includes specialized shortcut keys. The use of each of these keys is explained below.
Figure 1 - Keyboard
2.3.2.1 Apply or Reduce Field, Transfer Image, Store Points or Navigation
The Apply Field, Reduce Field, Transfer Image, Store Points, and Store Navigation keys allow the user to
activate these commands via the keyboard instead of using the mouse. The icons on these keys are similar
to the icons used in the Navigant software.
Figure 2 – Apply Field, Reduce Field, Transfer Image, and Store Points, Store Navigation Keys
Stereotaxis, Inc
Basic Instructions
Page 13
HDW-0161
Rev. B
Effective Date: 07/19/06
2.3.2.2 Navigation Preset Keys
The Navigation Preset Keys allow navigation presets to be stored and recalled later for use. Pressing [Ctrl]
and one of the navigation preset keys simultaneously stores the current desired field direction and origin to
that preset key. After storing to one of the preset keys, pressing the appropriate preset button recalls the
desired field direction and origin that was stored. By default, no navigations are stored and pressing a preset
key will have no effect, and a message will be displayed indicating no navigation has been stored.
And
Figure 3 - Navigation Preset Keys
2.3.2.3 Anatomic Direction Adjustment Keys
The Anatomic Direction Adjustment Keys are useful for small adjustments in the field direction toward a
prescribed anatomic oriented direction. The keys are designed to adjust the field relative to the anatomic
directions illustrated on the keys. Starting at the upper left most of these keys and moving clockwise, the
adjustments cause the field to be adjusted more: superior, anterior, right, left, posterior, and inferior.
Caution: The idealized anatomic models displayed in the Navigant display are not accurate registered
models. They are idealized only and may not agree with patient anatomy. These should be used for
reference only.
Pressing a key a single time causes a single change in field direction of the chosen step size. The step size
is selected using the Step Size Button. Pressing and holding a key causes a continuous change in field
direction. As a field direction is rotated, the vector displays in all views are updated to reflect the changes.
The field direction can only be rotated until the specified anatomic direction is reached (i.e., if the superior
key is pressed, the field can only be rotated more superior until the superior direction is reached).
Figure 4 - Anatomic Direction Keys
2.3.2.4 Rotation and Deflection Keys (only available with Target Navigation)
The Rotation and Deflection Keys are useful for small adjustments in catheter rotation and deflection. The
keys are designed to imitate the actions of a standard (non-magnetic) deflecting catheter. The outside keys
cause counter-clockwise (left key) and clockwise (right key) rotation, which mimics torque of the device. The
middle keys cause an increase (bottom key) or decrease (upper key) in the deflection of the device.
Stereotaxis, Inc
Basic Instructions
Page 14
HDW-0161
Rev. B
Effective Date: 07/19/06
Figure 5 - Rotation and Deflection Keys
2.3.2.5 AutoCAS and Step Script Keys
The AutoCAS key allows the Cardiodrive (if available) to automatically advance the catheter.
The Step Script key runs the current step in a Clinical Workflow Manager script and advances to the next
one.
Figure 6 - AutoCAS and Step Script keys
2.3.2.5.1 CAS Advance and Retract Using Keyboard
Pressing the CAS Advance and Retract keys cause catheter advancement and retraction (see Figure 7).
•
•
Press and release the CAS Advance Key to advance the catheter by one step.
Press and release the CAS Retract Key to retract the catheter by one step.
Figure 7 - CAS Advance and Retract keys
Stereotaxis, Inc
Basic Instructions
Page 15
HDW-0161
Rev. B
Effective Date: 07/19/06
2.3.2.6 Display-Relative Field Deflection Using Keyboard
The arrow keys may be used to deflect the field direction in Navigant (see Figure 8). Field deflection with the
arrow keys is display-relative, meaning that the deflection directions are relative to the display type selected
in General Settings.
Select a View for Keyboard Control in General Settings
1. From the Settings Menu, choose General. The General Settings dialog box appears.
2. Click the View Controlled By Keyboard drop-down box (near the bottom of the dialog box). A list of
available views appears.
3. Choose a view for keyboard field control and click OK.
Display that View in Navigant
4. In the desired window, right click the mouse and select Change View.
5. From the list of views, choose the one set up to utilize keyboard control.
Use the Arrow Keys to Deflect Field Direction
• Press and release the up arrow key to deflect the magnetic field in a vertical up direction.
• Press and release the down arrow key to deflect the magnetic field in a vertical down direction.
• Press and release the right arrow key to deflect the magnetic field in a horizontal right direction.
• Press and release the left arrow key to deflect the magnetic field in a horizontal left direction.
Note: The field deflection is executed in a rotational adjustment about the axis (vertical or horizontal) like a
cone.
Note: The arrow key must be pressed and released for the field deflection to take place.
Figure 8 – Display-relative Deflection Keys
Stereotaxis, Inc
Basic Instructions
Page 16
HDW-0161
Rev. B
Effective Date: 07/19/06
2.3.3 Wand (Licensed Feature)
The Wand is a user interface device that can be connected to the Navigant. The Wand can be used to
control the field direction in Navigant and to control the advancement and retractions of a Cardiodrive (CAS).
The Wand is a licensed option for Navigant. For more information, see HDW-0156 – Wand.
2.3.4 CD/DVD Drive
The CD/DVD drive is used to import data to Navigant.
2.4
Display Monitors
The Navigant 23” display monitors are available in both the procedure room and the control room. The
arrangement of these monitors is site specific.
Stereotaxis, Inc
Basic Instructions
Page 17
HDW-0161
3
Rev. B
Effective Date: 07/19/06
Patient Preparation
This section outlines the basic procedure to be followed in order to perform a generic magnetic navigation
procedure.
3.1
Recommended Patient Loading Procedure
The recommended procedure for loading a patient is illustrated below. The intent of this procedure is to
keep the patient and attending medical staff in a low magnetic field (less than 5 gauss) during the transfer.
The 5 gauss line (for the system in the stowed position) is marked on the floor.
WARNING: The Niobe® system produces a strong magnetic field, which is always on. Patients and
operators with pacemakers, internal cardiac defibrillators (ICD), neurostimulators, magnetic sensitive or
ferromagnetic implants should contact the manufacturer of their respective implant prior to entering the
procedure room. Serious injury may result.
PROCEDURE STEP
ILLUSTRATION
Place Niobe Magnets into the Stowed
position using the bedside control
panel.
Translate the tabletop back fully, away
from the x-ray C-arm and magnets.
Stereotaxis, Inc
Basic Instructions
Page 18
HDW-0161
Rev. B
PROCEDURE STEP
Effective Date: 07/19/06
ILLUSTRATION
Rotate the tabletop 90 degrees.
Roll the patient into the room on the
hospital bed.
Transfer patient from the bed onto the
procedure table. Note: Place arm
guards on both sides of patient to
prevent pinching or squeezing of
appendages.
Remove the bed from the procedure
room.
Rotate the tabletop 90 degrees back to
its normal orientation.
Translate the tabletop to place the heart
(or femoral access point as required) at
isocenter.
Begin x-ray imaging as required.
Move magnets to navigate position as
required.
The recommended procedure for removing a patient from the system is to first place the magnets in the
stowed position, and reverse the process described for patient loading.
CAUTION: To keep patients in a low magnetic field (less than 5 gauss) during the transfers, only one patient
at a time should be in the procedure room.
Stereotaxis, Inc
Basic Instructions
Page 19
HDW-0161
Rev. B
Effective Date: 07/19/06
3.1.1. Automatic Positioner Centering
The Niobe system has the capability to automatically center the positioners in the Navigate position, based
on the patient table lateral and vertical position. The recommended procedure for using this feature is
described below.
General Procedure for Automatic Positioner Centering
1. Place the patient on the table.
a) Center the patient on the tabletop laterally. If the patient is too far off center, it can interfere with
successful automatic positioning.
b) Use arm guards.
c) Make sure that no excess table padding protrudes outside the edge of the tabletop.
2. Using the table controls and fluoroscopy, center the patient anatomy to be navigated at X-ray isocenter.
3. Press one of the Navigate buttons on the Niobe controller and hold it down. The Niobe system will
calculate the target position, including an offset based on the lateral and vertical position of the patient
table and begin moving to that position.
4. If motion stops and the message “Magnets in Navigate Position” is displayed, the automatic positioner
centering has been successful. The Niobe system also gives an audio signal that the system is in
Navigate position.
5. If contact between the cover and patient activates a cover sensor then that cover will stop and retract
slightly. The other cover’s position will be adjusted to attempt to reach the Navigate Position.
6. If motion stops before the system reaches the Navigate Position, one of these conditions has occurred:
•
The operator did not hold down the Navigate button until the system reached the Navigate position.
In this case, the operator may continue to the Navigate position by simply pressing and holding the
Navigate button on the tableside controller.
•
Both cover force sensors have activated. The Niobe system displays a message and gives an audio
signal if the system does not reach Navigate position due to cover force sensor activation.
3.1.2.1.
Cover Force Sensor
The Niobe magnet covers contain cover-force sensors that detect when an obstacle is pressing
against the face of the cover.
When a cover-force sensor is activated, the magnet positioner pauses, then retracts slightly and
stops.
If a single cover-force sensor is activated, the operator may choose to continue holding the
movement button and Niobe will automatically retract the individual cover that is contacting the
patient slightly and advance the opposite cover to continue movement to the Navigate position.
• If the second cover force sensor is activated before the positioner reaches Navigate
Position, an error message is displayed:
Both Cover Force Sensors Activated. Cannot Further Advance the Covers.
•
If the second positioner does have enough room to reach Navigate Position, Niobe adjusts
the Navigate Position center based on this new location and displays a message:
Magnets in Navigate Position.
Stereotaxis, Inc
Basic Instructions
Page 20
HDW-0161
3.2
Rev. B
Effective Date: 07/19/06
Pre-procedure Tasks
CAUTION: If a patient is to receive a permanent pacemaker or internal cardiac defibrillator (ICD) de novo in
the MNS room, the Niobe magnets must be moved and kept in the stowed position. The magnets should
stay in their stowed positions during the entire period starting from the moment the ICD or pacemaker is
brought inside the procedure room, and ending when the patient (with the ICD or pacemaker implanted) is
moved out of the procedure room. Proper functioning of ICDs and pacemakers should be verified following
the removal of the patient from the MNS room.
CAUTION: During patient loading and unloading, there is a very definite squeeze risk for personnel in the
vicinity of the magnet positioners and the C-arm. All personnel should take care to ensure they are not in the
vicinity of this risk when the magnets are moving between the stowed, pivoted, or navigate positions. An
audio signal will sound when magnets have completed their movement operation.
CAUTION: Do not enter the area between the C-arm and magnet positioner when the magnets are in the
pivoted position.
a)
b)
c)
d)
e)
f)
Ensure no ferrous objects are in the area.
Ensure credit cards, watches, floppy disks, cell phones, etc. are not in the area.
Clean and clear magnet positioner floor tracks.
Power up system.
Home system by pressing and holding the Navigate AP button on the tableside controller. Hold
button until status bar displays “Homing Complete”. This may take up to 60 seconds.
Retract magnet positioners back to stowed position to aid in patient loading.
Stereotaxis, Inc
Basic Instructions
Page 21
HDW-0161
3.3
a)
b)
c)
d)
e)
f)
g)
h)
i)
j)
k)
Rev. B
Effective Date: 07/19/06
Navigation Procedure Tasks
Place patient on table as described in section 3.1.
Prep patient per hospital procedure and apply sterile drape over tableside user interface.
Using X-rays, determine preferred RAO/LAO projections.
Take two images between 40 and 140 degrees apart, RAO/LAO or cranial and caudal. Transfer
images after each one as described in Section 5 (if necessary).
Adjust images on Navigant if necessary.
Introduce magnetic device and advance manually to desired anatomy. User may use Cardiodrive
catheter advancer with approved catheters.
Place C-arm and table in C-arm/table safe position.
Move magnets to Navigate [AP] position by pressing the button on the tableside controller.
Perform Magnetic Assisted Procedure.
Press the Reduce Field key or move magnet positioners to retracted position to reduce magnetic
influence to relatively null in the navigational volume.
When procedure is complete, move magnets to stowed position by pressing button on bedside
controller. Hold button until status bar displays “Magnets in Stowed Position”.
CAUTION: The Niobe MNS utilizes a magnetic field to orient the tip of the catheter to the desired
intracardiac orientation.
When magnetic field direction is defined through two X-ray views, the views are not acquired simultaneously,
as with the use of any single plane X-ray system similar to the one employed with the MNS. As a result, the
overlay on the X-ray views is an approximate representation of the magnetic field direction relative to the
heart’s location, because the two X-ray views may have been acquired at different phases in the patient’s
respiratory and cardiac cycle.
It is recommended the user confirm the orientation of the device tip with localization methods, e.g.,
fluoroscopy and electrograms (if using a catheter), when changes are made to the magnetic orientation of
the device tip. If the device tip is not at the desired orientation, update the magnetic field direction and
repeat the magnetic navigation procedure if desired.
3.4
Post-procedure Tasks
a) Depress the E-Stop in the control room.
b) Remove the patient from the room. The recommended procedure for removing a patient is to
reverse the process described for patient loading.
c) Close the procedure on the Navigant screen.
d) Choose Shutdown System if this is the last case of the day.
Stereotaxis, Inc
Basic Instructions
Page 22
HDW-0161
4
Rev. B
Effective Date: 07/19/06
Starting a Procedure
After starting the Navigant software, the Navigant Main Window, shown below, will appear. The buttons on
the left side of the screen are for starting a new procedure. The Open Procedure option opens a previously
saved existing procedure. The Shutdown System option closes Navigant and shuts down the Navigation
Workstation.
Figure 9 - Opening Screen
Note: IR is currently not available in the United States.
4.1
Start New Procedure
Select the desired procedure option from the main window. A drop down menu may appear, allowing
selection of a specific procedure type or the use of a Clinical Workflow Manager script. All scripts that are
licensed will appear in the menus.
Note: the Navigant Version number that appears may be different from the depiction shown in Figure 10.
Once the specific procedure type has been selected, the application will determine which anatomic model is
displayed, as well as the default layout.
Stereotaxis, Inc
Basic Instructions
Page 23
HDW-0161
Rev. B
Effective Date: 07/19/06
Once the procedure type has been selected, the Procedure Information Window will appear, as shown
below. A Study ID, the date and time are automatically assigned. Fill in the procedure type, description, and
physician, by typing or selecting from a drop down list if available. Any other notes can also be entered in
the Notes box at this time. The Device window will be grayed out, as the user will select a device later from
the Navigant display screen. Click OK to start the new Navigant procedure.
Procedure data are saved within Navigant with an automatically generated filename based on the date and
time of the procedure.
Figure 10 - Information Window
4.2
Open Procedure
When Open Procedure is selected from the Main Window, a list of previously created procedures is
displayed as in Figure 11. Select the appropriate procedure from the list on the left. The procedures are
listed by date, time, and the procedure description entered when the procedure was started. Additional
procedural information is displayed on the right.
Stereotaxis, Inc
Basic Instructions
Page 24
HDW-0161
Rev. B
Effective Date: 07/19/06
Figure 11 - Open Previous Procedure Window
Click Open to start the selected procedure. When the selected procedure starts a warning will appear in the
status bar indicating the data may no longer be valid for the current study or patient position. All previously
saved display options for this procedure will be restored.
U
U
If the procedure is from a previous day
• Magnetic navigation will be available only if no navigation was performed in the procedure.
• Magnetic navigation will not be available if navigation was performed in the procedure. In
this case, a warning will appear on the status bar indicating:
“Procedure expiration period has been exceeded. Magnet control will be disabled”
WARNING: After opening a procedure, you must visually assess the state of the procedure. Any change in
the patient’s position or orientation can invalidate the data recovered from the procedure file.
Note: When continuing a previous procedure, verify the validity of the stored data, as it is possible to delete
previously saved data.
To start a new procedure or close the software, click Cancel to return to the previous screen. To delete the
selected case, click Delete and confirm the deletion.
U
U
Stereotaxis, Inc
U
U
Basic Instructions
Page 25
HDW-0161
4.3
Rev. B
Effective Date: 07/19/06
Procedure Initiated by Fluoroscopy System
When a new case is initiated using the digital fluoroscopy system, the window shown below will appear.
Figure 12 – New Patient window
Pressing Yes will start a new Navigant procedure, and all previous data will be reset and saved to the
previous file. Pressing No will continue with the current procedure, all current data will be retained, and the
data may or may not be accurate for the current MNS procedure. The accuracy of the data must be verified.
4.4
Clinical Workflow Manager (CWM)
If a script was selected before the procedure was opened, the procedure will open in CWM mode, as shown
below.
Figure 13 - Clinical Workflow Manager Layout.
Stereotaxis, Inc
Basic Instructions
Page 26
HDW-0161
Rev. B
Effective Date: 07/19/06
The CWM dialog window appears on the left, under the name of the script to be run (SVT in this example)
and the mini-Navisphere. Each tab lists a series of steps to be executed, with the currently active step in
blue. The buttons at the bottom of the CWM window can be used to start over, run the current step and
move to the next step, or jump to the next section, respectively.
The Step Script key on the keyboard runs the current step in a Clinical Workflow Manager script and
advances to the next step.
4.5
Selecting a Device
After starting a procedure, the device to be used must be defined. From this selection, the software will load
the device characteristics needed for various navigation functions. In the upper left hand corner (2 or 4 panel
mode), or the upper right hand corner (CWM mode) of the Navigant screen click the Select Device button.
The Device Selection Window will appear showing any devices that have previously been selected. There
will be no devices selected if this is a new procedure. The list of devices may be filtered by type.
Figure 14 - Device Selection Button
Assuming no devices are shown, click the Override button. Within the Override window (Figure 15), select
the appropriate device to be used and click Add device. Several devices may be added to the Device
Selection list for the procedure. However, only a certain number of overrides will be allowed per system.
Note: Please contact your Stereotaxis Account Manager regarding the addition of overrides.
Figure 15 - Device Override Window
Stereotaxis, Inc
Basic Instructions
Page 27
HDW-0161
Rev. B
Effective Date: 07/19/06
Once a device is added, the user may select any device from the list for use. Only one device may be
selected at a time. If a different device (or type of device) is to be used, the new one must be selected. After
a procedure is started and a device is selected, Navigant is ready for operation.
Note: If you are using a Clinical Workflow Manager script, you will not need to select a device in this way.
Device selection is normally part of the “Start” section of most scripts.
Note: If a filter is selected and there are no devices matching the filter, the Device List will appear empty.
Click the All option to remove the filter and view all available devices.
4.6
Navigant Software Procedure Restart
If the Navigant application is erroneously terminated, restart it by double-clicking the Navigant button on the
desktop. The button is shown in Figure 16.
Figure 16 – Navigant Software Button
Stereotaxis, Inc
Basic Instructions
Page 28
HDW-0161
Rev. B
5
Navigating with Navigant
5.1
Display Layout
Effective Date: 07/19/06
The Navigant display includes a title bar, status bar, reference images, 3D visualization display, and UI
windows.
The Title/Menu and the Navigant Toolbar focus on the procedure type information and enable the user to
implement procedure flow and preferential settings.
U
U
U
U
The Primary Windows provide various views for the user. In these windows, the user may choose to
visualize 3D anatomical, 3D constellations, 2D navigation, 3D Navisphere, 3D fluoro (transferred x-ray
images), or preoperative (optional) views.
U
U
The 2D Navigation Controls offer the user an idealized anatomic model in various planes of view and allows
the user to see the current fields and adjust those fields in that plane.
U
U
The Selectable Controls provide the user more defined methods for navigation.
U
U
The System Indicator window informs the user the status of the communication the magnet positioners, safe
position of c-arm and table, and the status of the magnetic field.
U
5.2
U
Title and Menu Bar
The title bar (blue background) of the Navigant displays the name of the application, and in parentheses, the
procedure description, followed by a colon and the specific procedure type selected when the procedure was
started. The menu bar (gray background) below the title bar implements procedure flow controls, navigation
options, fluoro and preference settings.
5.2.1 Procedure Menu
The procedure menu allows the user to perform the following functions:
• Edit the procedure information
• Review current features available
• Change the current layout to the default screen layout
• Save the current screen layout
• Restore the current layout to user defined default layout
• Capture an image of the current screen displayed and save it to the system’s hard drive
• Print the current screen on a printer
• Close the current procedure
Stereotaxis, Inc
Basic Instructions
Page 29
HDW-0161
Rev. B
Effective Date: 07/19/06
5.2.1.1 View/Edit Procedure
To view or edit the procedure information, select Procedure > Information. (Or use the shortcut key [Ctrl]-I).
The procedure information window appears (see Figure 10), allowing viewing and editing of the procedure
information. Press OK to accept the changes and continue, or Cancel to discard the changes and continue.
5.2.1.2 Default Layout
To restore the screen layout to the default layout for the current procedure type, select Procedure > Default
Layout.
5.2.1.3 Save Layout
To save the screen layout for current physician, select Procedure > Save Layout. The screen layout
(positioning of various control windows, toolbars, and current options) will be saved for the current physician
and current procedure type. Once a layout is saved, each time this procedure is started with this physician,
that layout will be loaded. The Physician field must be completed before a layout can be stored.
5.2.1.4 Restore Layout
To restore the screen layout to the layout previously saved for the current physician and procedure type,
select Procedure > Restore layout. The layout will be restored to the saved layout. This allows the physician
to easily return to his/her standard layout, after changing the layout during the procedure.
5.2.1.5 Capture Screen
To save a screen image as a jpeg image, click the Capture Screen button on the main toolbar. Navigant will
automatically save the screen image and displays a message at the bottom of the screen describing where
the image was saved.
Figure 17 - Capture Screen Button
Note: The saved image is placed in C:\Navigant\Save + a subfolder with the same name as the current
procedure.
Stereotaxis, Inc
Basic Instructions
Page 30
HDW-0161
Rev. B
Effective Date: 07/19/06
5.2.1.6 Print Screen
To print the current screen to the system printer, select Procedure > Print Screen.
5.2.1.7 Close Procedure
To exit the current procedure, select Procedure > Close Procedure (or use the shortcut key, [Ctrl]-C). This
returns the system to the Main Window.
5.2.2 Mode Menu
The mode menu provides a drop down list of apply and navigation options. The apply options are Auto,
Manual, and Disable. The navigation options are Direction and Target. All of these options are described
later in this section. The option currently in use will have a check mark in front of it.
Figure 18 - Mode Menu
Note: Field Strength is an optional feature.
Stereotaxis, Inc
Basic Instructions
Page 31
HDW-0161
Rev. B
Effective Date: 07/19/06
5.2.3 View Menu
The View Menu provides access to a variety of options for the display layout.
Four Panel, Two Panel, Clinical Workflow Manager – These are primary window layout options of two or four
windows to be displayed, or the Clinical Workflow Manager (CWM) layout.
U
U
U
U
U
U
Toolbars – When selected, this expands to provide a list of available toolbars. Any currently displayed
toolobars will have a check mark in front of them.
U
U
5.2.4 Settings Menu
The settings menu allows viewing or changing the default settings for general, graphic display, catheter tools,
voice control, RMT, master volume, and guidewire settings.
5.2.4.1 General Settings
The General Settings window allows the user to change navigation settings, fluoro settings, and
miscellaneous screen settings.
Navigation –
U
Guidewire Lag Angle Compensation causes Navigant to adjust field direction to account for
guidewire stiffness and vessel curvature. The field is deflected toward the vessel center of
the curvature.
U
Fluoro –
U
Auto Image Transfer causes the last image of any fluoro run to be transferred to the most
suitable Navigant 3D fluoro view A or B window.
Stop at Pivot Position (towards Stowed) causes the magnet positioners to stop at the pivot
position, instead of moving completely to the stowed position.
U
U
U
U
U
Miscellaneous – Auto Set Bull Eye Axis on Preset causes the Bulls Eye to be assigned to the desired field
specified by a chosen preset vector.
Auto Set Bulls Eye Axis on Applied Field caused the Bulls Eye to be assigned to the applied
field.
Default Stored Navigation Names assigns default names (i.e., Navigation 1, 2, etc.) to stored
vectors.
Applied Field Sound Setting can be assigned the following options:
• Play sound when any field is applied.
• Play sound when interrogation field is applied.
• No sound.
U
U
U
U
U
U
U
U
U
U
Keyboard Catheter Control – View Controlled By Keyboard is used to select which Navigant view will allow
keyboard-controlled field deflection via the arrow keys.
U
U
Stereotaxis, Inc
U
U
Basic Instructions
Page 32
HDW-0161
Rev. B
Effective Date: 07/19/06
5.2.4.2 Graphic Display Settings
The Graphic Display Settings window allows the user to change the display options on the Navigant screen
and on live fluoro. (Point Annotations do not appear on live fluoro windows.)
General Graphics Display –
Show Target allows set reference target (orange circle) to be displayed.
Display on Live causes graphics to be displayed on x-ray system’s live fluoro screen.
Display on LIH causes graphics to be displayed on x-ray Last-Image-Hold.
Constellation Display Brightness provides a sliding bar from dark to bright.
Show Vessel Outer Tube provides a check box to turn the Endoluminal vessel outer tube
display on and off.
3D Nav Fluoro Object Opacity provides a sliding bar from opaque to transparent.
Fluoro Zoom Factor allows control of the magnification factor for fluoro images.
Point Annotation Font Size Sets the size at which point annotations will be displayed. Default
is 18 pt.
X-ray System Live Fluoro Display –
Selected Points and Constellations - allows the user to display points and constellations.
Magnetic Navigation Status - displays the status of magnetic field change.
Virtual Catheter - allows the user to display the desired and present device curves as well as
the catheter base.
Catheter Adjustment Tools - allows user to display the Catheter Adjustment graphics on the
live fluoro images.
Magnetic Field Vectors - allows the user to display the desired and present magnetic field
vectors.
5.2.4.3 Constellation Sequencing Tools
The Constellation Sequencing Tools Settings window allows the user to control the initial configuration and
operation of the Constellation Sequencing Tools used with imported preoperative images.
5.2.4.4 RMT Settings
The RMT (remote magnetic technology) settings window allows the user to set display settings, tolerances,
and view the status of the link to CARTO system.
5.2.4.5 Master Volume Settings
This window allows the user to set the volume of the audio speaker in the control room and the procedure
room.
Stereotaxis, Inc
Basic Instructions
Page 33
HDW-0161
Rev. B
Effective Date: 07/19/06
5.2.4.6 Preop Settings
This window allows the user to set view preferences for the Preop view. For more information, consult HDW0098 Preoperative Imaging Instructions.
Note: Preop is an optional licensed feature of Navigant.
5.2.5 Help Menu
The help menu provides the Navigant version and copyright information. Help information is also available
through tool tips pop-up windows that appear when the mouse is held over a button.
5.3
Navigant Toolbar
The Navigant toolbar is located at the top of the screen below the menu bar. The functions available are
described below.
5.3.1 Apply Options
This button, when selected, provides a drop down list with the apply mode options - Manual, Auto Apply, or
Apply Disabled.
Figure 19 - Apply Options
Manual Apply, the desired field is only applied when the Apply Field button is selected.
Auto Apply Mode, the desired field is automatically applied whenever it is changed, after the mouse button or
keyboard key is released. This mode is applicable in most navigation modes. Auto Apply does not work
when changing the desired field through the Field History, or when changing vectors via the 3D fluoro A/B
windows.
Apply Disabled Mode, the desired field can be adjusted, but the applied field cannot be changed. This mode
is used to avoid accidental field changes.
The selected mode will be displayed on the toolbar, and the default mode is determined by the layout
selected.
Stereotaxis, Inc
Basic Instructions
Page 34
HDW-0161
Rev. B
Effective Date: 07/19/06
5.3.2 Navigation Mode
This button, when selected, provides a drop down list with the navigation mode options – Direction or Target.
The active mode will have a pink background; the other will have a blue background.
Figure 20 - Navigation Mode Buttons – Direction and Target
Direction Mode: Using two valid reference images, vectors may be drawn overlaying the fluoro images in the
direction the user wishes to change the magnetic field. This is the default mode of navigation and will be
active when a procedure is started.
Target Mode: Using two valid reference images, the base, or fulcrum, of the sheath holding the catheter is
defined by the user allowing the end target to be specified, rather than simply changing the direction of the
device bend. (Target mode is not available in basic navigation).
5.3.2.1 Direction Navigation Mode
To use Direction Navigation, click the Direction Navigation button on the drop down list in the menu bar or on
the Mode toolbar. Direction navigation requires two valid reference images in 3D fluoro A and B window.
Valid reference images must have between 40 and 140 degrees of separation between the two images.
Using these images, vectors must be drawn overlaying the fluoro images in both windows in the direction the
user desires to change the magnetic field.
The cursor will be represented as an arrow with a circle at the opposite end. Vectors are indications of the
direction of the magnetic field, as projected onto the respective x-ray image plane. A vector is drawn to
indicate the position from which the field strength should be set, and indicating the direction the magnetic
field needs to point to orient the distal tip of the magnetic catheter or guidewire. A vector consists of a line,
with a circle at the starting point, and an arrow at the ending point of the vector. The circle contains a dot
(representing the arrow tip) if the vector (in 3D space) is pointing out of the screen, and a cross (representing
the crossed feathers of an arrow) if it is going away from the user, into the screen.
Stereotaxis, Inc
Basic Instructions
Page 35
HDW-0161
Rev. B
Effective Date: 07/19/06
5.3.2.2 Drawing Vectors
1) Starting with either 3D fluoro A or B window, click and hold the left mouse button at the starting point
or desired origin of the vector. Release the left mouse button at the location where the vector should
end. The vector will appear red because it does not yet have a valid second vector.
2) In the second window, follow the cue line and start the second vector anywhere on the plane of that
cue line. The beginning of the second vector must be green in color in order to start a valid vector.
Start the origin of the second valid vector along the cue line by pressing and holding the left-click
button.
3) Once the origin of the second vector has been started and is considered valid, the first cue line will
disappear, and a second cue line will appear. While still holding the left mouse button, drag the
second vector to any point along the plane of the second cue line.
4) Once the end of the vector is at the desired spot and is green, release the left mouse button.
5) The vectors on both windows should now be green. If they are red, correct either vector to assure
both are green.
6) Select the Apply Field button on the toolbar or on the keyboard, and the vector will change to yellow
once the magnetic field change is complete.
7) If a set of vectors is already drawn and the user wishes to just tweak the position of one slightly,
simply left-click and hold on tip of the arrowhead and adjust as desired.
8) To draw a new vector, the user may start drawing normally at some point other than the point of the
arrowhead.
5.3.3 Anatomy Display
This button, when selected, opens a window of idealized anatomy display options. The options are
procedure dependent. Idealized anatomy is for reference only and may not match the current patient.
Figure 21 - Select Anatomy Button
5.3.4 Window Display
By using the Window Display the user may select the two window display, four window display, or the
Clinical Workflow Manager (see section 4.4). The current selection is displayed.
Figure 22 - Two Window, Four Window, Clinical Workflow Manager Buttons
Stereotaxis, Inc
Basic Instructions
Page 36
HDW-0161
Rev. B
Effective Date: 07/19/06
5.3.5 Field Angle Step Size
The Field Angle Step Size button, when selected, provides a drop down list with a range of degrees to set
the field angle step size. The step size is used by the 2D anatomic control windows, the anatomic direction
adjustment keys, and the rotation deflection keys. This value determines how large the change in field
direction is each time the keys or buttons are selected. For small, more precise changes, this value should
be set low, and for large movements it should be set higher.
Figure 23 – Field Angle Step Size Button
5.3.6 Cardiodrive Step Size
The Cardiodrive Step Size button, when selected, provides a drop down list with a range of distances to set
the CAS step size. This value determines the distance a catheter will be advanced or retracted each time the
keys or buttons are selected. For small, more precise changes, this value should be set low, and for large
movements it should be set higher. The default value for this setting is 2mm.
Figure 24 - Step Size Button
5.3.7 Field History
The Field History buttons allow the user to navigate through the ten most recent applied field directions. This
allows recalling a recent field direction later in the procedure, even if the navigation was not stored using the
Stored Navigation Controls.
Note: When the system is in Auto Apply mode, the Field History still operates as though it were in Manual
Apply mode. This allows the user to move through the list and find the desired navigation, without applying
undesired field changes.
When the desired field direction is changed by something other than the Field History, the list will reset so
that it is only possible to step backward through the list, and the first step backward will select the most
recently applied field direction.
All Field History data is written to the procedure file upon application of the field. The field history list is
procedure specific and is removed at the start of a new procedure.
Figure 25 - Field History Buttons
Stereotaxis, Inc
Basic Instructions
Page 37
HDW-0161
Rev. B
Effective Date: 07/19/06
5.3.8 Store Navigation
The Store Navigation button (Figure 26) stores the current field direction in the Navigations View (Figure 23).
If the Cardiodrive is calibrated and being used in the procedure, the CAS catheter position is also stored with
the Stored Navigation.
U
U
The stored navigation is labeled “Navigation 1” by default. The user may edit the name by double-clicking the
name, or by choosing the Edit button in the Store Navigation window. The user may also store the present
field direction using the Store Navigation key on the keyboard or the Store Navigation button on the toolbar.
U
U
Figure 26 - Store Navigation Button
Figure 27 - Navigation View
To Store a Navigation
1. Use Rotate Field mode to locate desired field direction.
2. If using CAS, ensure catheter is advanced/retracted to the desired position.
3. Click the Store Navigation button or click Store in the Navigation View. A default name is given to
the stored position.
4. To enter a name for the stored position, click the Edit button in the Navigations View or double-click
the name in Navigations list.
To Return to a Stored Navigation
• Click on the name of the stored navigation and the field direction will return to the previously saved
position.
• Press and hold the AUTO key down and click on the name of the stored navigation and the CAS will
start to auto drive to the stored distance.
• Release the AUTO key and the CAS will stop moving.
Note: Calibrating the CAS during a procedure invalidates any stored CAS positions in Stored Navigation.
Stereotaxis, Inc
Basic Instructions
Page 38
HDW-0161
Rev. B
Effective Date: 07/19/06
5.3.9 Store Points
Points may be stored using the MNS navigation fluoro images. Points allow a location in 3D space to be
stored, for later use as a reference or a target. This can help with visualization of the layout of various
locations in the heart, and can help to return to a previous location later in a case.
A point or a group of points may be selected, by clicking a point in space on the 3D fluoro A and B screens.
After a valid point in space is identified, select the Store Points button or Store Points key. The user may also
store a point from the button on the floating Store Navigation toolbar. Further instruction of how to store, edit
and utilize points is discussed in section 6.7.1.1 Mark a Point, 6.7.1.2 Select a Point, and 6.7.1.2 Editing
Points.
U
U
U
U
Figure 28 - Store Point Button
5.3.10
Image Recall/Transfer Image
Images acquired with the fluoroscopy system may be transferred to the Primary Windows for reference and
utilization in navigation. Target and Direction navigation modes require two valid images to be transferred. In
order to navigate using the transferred images, these images must have between 40 and 140 degrees
between them, either RAO/LAO or cranial/caudal.
Images acquired during table or C-arm movement cannot be transferred to Navigant. Images that are
electronically zoomed and/or panned cannot be transferred to Navigant. Only images with a patient
orientation of “head first supine” (as noted within fluoroscopy system), and with the image plate not rotated
more than 2.5 degrees from its normal position, can be transferred to Navigant.
For transfers initiated through the transfer key on the keyboard, the button in the main toolbar, or through
external inputs, Navigant assigns images loaded or transferred to either navigation fluoro image A or
navigation fluoro image B based on the following circumstances:
•
•
•
The new image is assigned to the Fluoro A view if the image has an LAO orientation that is
negative, or zero, with degrees rounded to integral numbers.
The new image is assigned to the Fluoro B view if the image has an LAO orientation that is
positive.
If only one fluoro image is currently displayed, and a new image is assigned to the other fluoro
image, Navigant will automatically show the new fluoro image.
Stereotaxis, Inc
Basic Instructions
Page 39
HDW-0161
Rev. B
Effective Date: 07/19/06
If there are images in both fluoro windows, the transferred image will go to the image window with C-arm
orientation closest to the C-arm orientation of the transferred image.
The Recall Image Transfer button allows previously transferred images to be recalled and placed on 3D
fluoro A or B screen. The image will be transferred to the screen that is most similar in C-arm position.
Figure 29 - Recall and Transfer Image Buttons
5.3.11
Field Motion Display
The Field Motion Display toolbar indicates the rate of change in the field direction. The figure shows the
display at 0% when the field is not changing and at 100% when the field is changing at the maximum rate.
When a field is applied, the display will increase from 0% to the current rate of change, with the percentage
displayed, and green and yellow bars filling a portion of the toolbar, to correspond with the percentage. For
most changes in field, the rate will be 100% for the fastest rate change.
Figure 30 - Field Motion Display
5.3.12
3D Display Orientation Toolbar
This toolbar allows the user to reorient the active 3D window to any of the views on the toolbar.
Figure 31 - 3D Orientation Toolbar
The ARB (arbitrary) option provides a drop down list of combination RAO/LAO angles specific to each
coronary artery.
Stereotaxis, Inc
Basic Instructions
Page 40
HDW-0161
Rev. B
5.3.13
Effective Date: 07/19/06
View Synchronize Orientation
Figure 32 - Display Sync Button
When the 3D view synchronization button is selected a drop down list of buttons is displayed. The table
below describes each button.
Synchronize to 3D
Anatomy A View
Synchronize to
3D
Anatomy B View
Synchronize to 3D
Constellation A View
Synchronize to 3D
Constellation B View
Synchronize to
3D
Navisphere View
Synchronize to
Bulls Eye View
Synchronize to 3D
Fluoro A View
Synchronize to
3D
Fluoro B View
Synchronize to
Live X-ray
Synchronize to position
of C-Arm
Synchronize to
CARTO RMT
system
(if available)
Synchronize to
Guidewire Bend
Control
Synchronize to
Ultrasound (if
available)
Synchronize to Wand (if
available)
Table 2 - 3D View Sync Options
When window A is synchronized to window B, the display orientation information from window B to is used to
continuously update the display of window A. They remain synched until objects in window A are manually
rotated.
5.3.14
3D NaviView
Figure 33 - NaviView Button
The NaviView button opens up the window to the program to set up a vessel for reconstruction. This is an
optional feature and is explained in HDW-0169 IC NaviView.
Stereotaxis, Inc
Basic Instructions
Page 41
HDW-0161
5.3.15
Rev. B
Effective Date: 07/19/06
Wand (Licensed Feature)
The Wand button appears on the Navigant Main Toolbar when the Wand is connected and oriented with
Navigant. The Wand is a licensed feature. For more information on the Wand, consult HDW-0156 Wand
Instructions for Use.
Figure 34 – Wand Button
Stereotaxis, Inc
Basic Instructions
Page 42
HDW-0161
6
Rev. B
Effective Date: 07/19/06
Primary Windows
The Primary Windows allow the user to select various 2D, 3D, fluoro, and preoperative views in either the
two or four window layout. Upon starting Navigant, the window layout will default to a two-window display.
The anatomic display will be determined by the type of procedure selected (i.e., coronary arteries for IC
procedure). Any window may be changed by right-clicking within the window and selecting Change Window,
then selecting the desired view. All views, except Preoperative, 2D Anatomic, and 3D Navisphere, have an A
and B option.
The anatomy displayed in the primary windows will be dependent on the procedure type chosen, i.e.
coronary vasculature for an IC procedure; full heart for an EP procedure; torso for basic procedure; or
coronary veins for a CRT procedure. Below are examples from each category.
Figure 35 - Primary Window Display Options
6.1
3D Views
The 3D Views include 3D Anatomic view, 3D Constellation view, 3D fluoro view and 3D Navisphere. The
anatomy displayed is dependent on the procedure chosen: Basic – torso; EP – full heart, right or left atrium;
IC – all coronaries, or right or left coronary only; CRT – coronary sinus.
CAUTION: The idealized anatomic models displayed in the anatomic views are not accurate registered
models. They are idealized only, and may not agree with patient anatomy. These should be used for
reference only.
Within these views, the current (yellow), desired (green), or other vectors, will be shown. The Bulls Eye
“umbrella” will not be shown in the 3D anatomic view for EP. Note some of the toolbar options are not
available in each view, as they do not apply.
Stereotaxis, Inc
Basic Instructions
Page 43
HDW-0161
Rev. B
Effective Date: 07/19/06
6.1.1 3D Anatomic View
The 3D Anatomic views offer an idealized anatomy to use as a reference. The Bulls Eye may be displayed to
use for navigating.
Set the window to display the 3D Anatomic surface as if it were viewed from the inside or outside by clicking
the toggle button.
Figure 36 – Inside and Outside View Toggle Button
Points on the surface of the 3D Anatomic model can be selected and used as targets for magnetic
navigation. See EP Instructions, HDW-0097.
6.1.2 3D Constellation View
The 3D Constellation views display user selected “points” defined in 3D space. These points can be
connected to display vascular or anatomical “constellations”. These constellations may be used for
reference, or may be used in Target Navigation mode. The constellation view also displays the NaviView
reconstructed vessel when defined.
6.1.3 3D Fluoro View
The user may choose to display fluoro reference images. First the user must “transfer an image” as
described in section 5.3.10 Image Recall/Transfer Image.
For transfers initiated through the transfer key on the keyboard, the button in the main toolbar, or through
external inputs, Navigant assigns images loaded or transferred to either navigation fluoro image A or
navigation fluoro image B based on the following circumstances:
•
•
•
The new image is assigned to the Fluoro A view if the image has an LAO orientation that is
negative, or zero, with degrees rounded to integral numbers.
The new image is assigned to the Fluoro B view if the image has an LAO orientation that is
positive.
If only one fluoro image is currently displayed, and a new image is assigned to the other fluoro
image, Navigant will automatically show the new fluoro image.
Stereotaxis, Inc
Basic Instructions
Page 44
HDW-0161
Rev. B
Effective Date: 07/19/06
The fluoro window will have a specialized set of buttons, with the following functions.
Drawing Mode
Window/Level
Zoom/Pan
(can pan Bulls Eye or fluoro image)
Large/Small Objects
(changes the size of objects on image)
Hide Graphics
Cardiodrive Calibration
(for RMT navigation)
Figure 37- Fluoro Toolbar
6.1.4 3D Navisphere
The 3D Navisphere is a spherical navigation object, which contains regularly spaced polar lines and is used
for spherical navigation. See Section 7 for further instructions on using the Navisphere.
6.1.5 2D Anatomic View
The 2D anatomic controls show the present and desired field vectors, an idealized anatomic model, and
buttons for field adjustment. This view is usually synchronized to the c-arm to have the idealized anatomy
change as the live image is changed. See Section 6.6 for a description of the 2D anatomic views.
6.1.6 No Display in Primary Window
Any window may be displayed as a black screen. Right click within the Primary window, then select Change
Window > Close from the drop-down menu, and the contents of that window will be cleared. To open it
again, right-click within the window, choose Change Window and select an option.
6.1.7 Preoperative View (Licensed Feature)
Preop images may be loaded into Navigant by loading a set of DICOM images that were acquired prior to the
current procedure using a 3D medical scanning device (CT or MRI) from a list of compatible medical
scanners. This view allows the user to navigate directly on the imported image. Preoperative image
navigation is an optional feature and is explained in HDW-0098, NWS Preoperative Imaging Instructions.
Stereotaxis, Inc
Basic Instructions
Page 45
HDW-0161
6.2
Rev. B
Effective Date: 07/19/06
Display Window Tools
Figure 38 - 3D Display Toolbar
6.2.1 Left Mouse Mode
The left mouse mode button, when selected, provides a drop down list of buttons which allows the user to
select panning, zooming, or rotation options for the viewing and manipulation of the 3D display. The list
below represents all possible options. Every option will not be available in every window.
Constrained Anatomy Mode
Arbitrary Rotation Mode
Translation mode
Selection mode
Rotate Field (F in corner)
Rotate Bulls Eye (B in corner)
Table 3 - Left Mouse Modes
6.2.2 Show/Hide Options
The Show/Hide option button when selected provides a drop down list of options to be shown or hidden in
the 3D view. Table 4 lists these buttons and their functions. Every option will not be available in every
window. The button will have a pink background when it is active.
Show/Hide Grid
Show/Hide Picture in a Picture
Show/Hide Desired Catheter
Curves
Show/Hide Desired and Present
Vectors
Show/Hide Navigation Volume
Show/Hide Stored Navigation
(3D Navisphere)
Show/Hide IsoSurface Clip Plane
Show/Hide Ultrasound (if available)
Table 4 - Show/Hide Options
Stereotaxis, Inc
Basic Instructions
Page 46
HDW-0161
Rev. B
Effective Date: 07/19/06
6.2.3 User Views
These buttons are used to set preferred views and return to those views with a single click. To save or set
the User View, put the view in the desired position, then right-click the Roman numeral button desired to
represent that view. The status bar will display a message to confirm view has been set. To use the
previously saved view, left-click the appropriate Roman numeral button.
Figure 39 - User Views
User preferred views can be saved as part of a screen layout for the currently selected physician and
procedure type.
6.2.4 Center View Options
The Center View button allows the user to determine what the 3D view should be centered around. The 3D
window may be centered on:
Center at Selected
Point
Center at Magnet
Center
Center on Desired
Vector
Table 5 - Center View Options
6.2.5 Fit Objects to Window
Click the Fit Objects to Window button to fit all 3D objects within the window constraints.
Figure 40 - Fit Objects to Window Button
6.2.6 Object Opacity
Figure 41 - Object Opacity Button
This button allows the objects on the fluoro screen to be seen as opaque or translucent.
Stereotaxis, Inc
Basic Instructions
Page 47
HDW-0161
6.3
Rev. B
Effective Date: 07/19/06
Right Mouse Options in 3D Display Windows
Right-clicking within the Primary Window brings up a drop down list as shown below.
Figure 42 - Right-click Options
Several of these options are also in the display windows toolbar and are duplicated here. The use of each
has been described above.
6.4
General Displays
6.4.1 Vectors
Vectors are indications of the direction of the magnetic field, as projected on the respective x-ray image
plane. Vectors will be displayed throughout the various views on the screen. The vector is drawn or
controlled indicating the position from which the field strength should be set, and indicating the direction the
magnetic field needs to point to orient the distal tip of the magnetic catheter or guidewire. The symbology for
vectors is color-coded as detailed in the table below. All vectors are updated whenever the desired or
present fields change whether through Navigant or the MNS.
Stereotaxis, Inc
Basic Instructions
Page 48
HDW-0161
Vector (→)
Color
Rev. B
Effective Date: 07/19/06
Meaning
Green
Proposed changes to the magnetic field that are valid and match up, three dimensionally,
with a vector drawn in the opposite plane.
Yellow
Currently applied magnetic field direction.
Gold
Changing present magnetic field direction whether the field is being applied or reduced.
Orange
Selected reference magnetic field direction. Current and requested vectors will appear on the
screen simultaneously in order to show the degree of change between the reference vector
and the current or requested vector.
Proposed changes to magnetic fields that are not valid three dimensionally, where the
vectors drawn on the two planes do not coincide. This will only be shown during direction
navigation
Equivalent to yellow vectors, but have reduced (less than expected) field strength. In
practice, blue vectors should not be encountered. In any case, the field represented by a
blue vector will have the expected field direction, only the strength is reduced.
Table 6 - Vector Descriptions
U
Red
Blue
U
U
U
6.4.2 Points Display
Points are 3D locations marked on the fluoro display, which can be displayed in the 3D visualization display.
Points are marked as circles. The currently selected point is displayed as a star. See Editing Points in
section 6.7.1.3.
6.4.2.1 Field Buttons
The field buttons provide options for Reducing or Applying the magnetic field in the navigational volume.
Figure 43 - Field Buttons
Stereotaxis, Inc
Basic Instructions
Page 49
HDW-0161
6.5
Rev. B
Effective Date: 07/19/06
Status Bar
The Status Bar displays messages at the bottom of the Navigant display screen. The status bar is only
visible when there is a message to be displayed. Most messages appear for five seconds and then
disappear. Some messages will persist while the associated condition exists. The background color of the
message corresponds to the level of the message:
• Error messages have a red background
• Warning messages have a yellow background
• Informational messages have a white background
Status messages, warnings, and errors are described in detail in Maintenance/ Troubleshooting/ Messages,
Section 8.3.
6.6
2D Navigation Controls
The 2D anatomic controls show the reference, present and desired field vectors, an idealized anatomic
model, step buttons for field adjustment, and a clock notation of the vector positions in the view. The
anatomic control windows serve two purposes; to illustrate the desired and present vector orientations
(display), and to allow adjustment of the desired vector orientation (control).
The 2D display vectors are displayed as arrows and follow the same color scheme as described in section
6.4 General Display. The vector orientation is displayed, but not the origin (always displayed as the center of
the image). The lengths of the vectors are adjusted to indicate the relative directions in the three views.
These views are displayed down the left side of the Navigant screen. The 2D anatomic display can also be in
the Primary window. All vectors are updated whenever the desired or present fields change.
In the bottom corner of each of the smaller 2D anatomic displays along the left side of the screen, the clock
notation of the vector in the plane of view are displayed, whenever valid vectors exist. The present field
notation is displayed on the left in yellow, and the desired field notation is displayed on the right in green. The
color scheme for the numbers is the same as for the vectors. A vector pointing straight up in the view is
labeled as 12:00. Moving the vector straight down would be 6:00. The default view of a dot is for no vector,
and 00:00 will be displayed.
Right-clicking in a 2D window causes a drop down menu of display options to appear. The display can be
changed like any other view in Navigant. Options are available according to the procedure type chosen and
only those options will be available on the list.
Stereotaxis, Inc
Basic Instructions
Page 50
HDW-0161
Rev. B
Effective Date: 07/19/06
Figure 44 - 2D Display
Caution: The idealized anatomic models displayed in Navigant are not accurate registered models. They
are idealized only and may not agree with patient anatomy. These models should be used for reference only.
The vector rotation buttons in the top corners of the 2D views allow the desired vector to be adjusted either
clockwise or counterclockwise in the plane of the view. Pressing a button a single time causes a single step
of the chosen size. The step size for rotation of the vectors is selected using the Step Size toolbar as
described in section 5.3.5. Clicking and holding a button causes a continuous rotation of the vector. As a
vector is rotated in one view, the vectors in all other views are updated to reflect the changes in vector
direction.
In addition to the vector rotation buttons, the desired vector can also be adjusted by clicking the arrow and
dragging to the desired angle, or by clicking the 2D anatomic display in the desired location. Clicking inside
or outside of the clock face circle of the display makes a difference in the orientation of the plane.
•
•
Clicking inside the click face circle reorients the desired field in the direction specified, but keeps the
orientation of the vector out of the specified plane.
Clicking outside of the clock face circle sets the desired field in the plane identified by the anatomic
2D control.
Stereotaxis, Inc
Basic Instructions
Page 51
HDW-0161
6.7
Rev. B
Effective Date: 07/19/06
Selectable Controls
Various additional controls located either above or to the right of the Primary Windows, depending on
window layout, may be selected. The available controls include Group View, Bulls Eye View, Cardiodrive
View, Preset View, Navigation View, Alignment View, RMT Navigation View, Constellation Sequencing View,
and Guidewire Bend Control View. To change the window displayed, right-click the window and select the
desired control to view.
6.7.1 Group View
The Group view window allows points marked to be stored, to note a point in three dimensional space for
reference and/or future navigation. The use of points can help with visualization of the layout of various
locations in the heart or over vessels, and can help to return to a previous location later in a case. Multiple
points can be marked and displayed as points or constellations and used as targets for navigation. All point
data is written to the procedure file upon storage of the point or any changes to the information associated
with the point.
Note: Images transferred should be in the same cardiac and respiratory cycle.
Figure 45 - Group View
CAUTION: If the patient position changes, points should be redrawn.
Note: If the patient table moves, all previously stored point data is adjusted to account for the new position
of the patient table, maintaining stored point validity.
Stereotaxis, Inc
Basic Instructions
Page 52
HDW-0161
Rev. B
Effective Date: 07/19/06
6.7.1.1 Mark a Point
After transferring valid reference images to 3D fluoro A and B windows, left-click the point in space desired
on either window. In the opposite window, identify the point matching the first point following along the yellow
dashed cue line, left-click to make the matching point, and select the Store Point button on the menu bar or
on the Store Navigation toolbar, or press the Store Point key on the keyboard. When selecting the point on
the second 3D fluoro window it will remain red (invalid) until a point is chosen on the cue line at which time
the point will appear green until stored. Once the point is stored it will be displayed in the color selected by
default or by the user. See Editing a Group for further instructions to change the color of the points.
All fluoroscopic points are added to the Navigant list of points when they are created. When a point is saved
on fluoro, it is assigned a default name by Navigant and added to the currently selected group. Each stored
point in the list includes the following information: an ID, the group it belongs to, a unique name, the 3D
coordinates of the point, and the field vector that was active when the point was stored.
6.7.1.2 Selecting a Point
Right-clicking a point name in the point list causes the Point Menu to appear.
Figure 46 – Point Menu
A single point or multiple points may be selected by clicking a point in the point list. To select more than one
point from a single group, use [Shift] and click to select a series of points in order, or [Ctrl] and click to select
multiple nonconsecutive points. Multiple points from different groups may only be selected by holding the
[Ctrl] key and selecting points via the 3D view where the points are displayed.
In the 3D view, selected points are displayed as a star rather than a circle. In the navigation fluoro images,
selected points are displayed as unfilled circles or bold IDs, rather than filled circles or normal IDs for
unselected points.
Points can also be selected by using the Point Select Cursor in the 3D view. It is not possible to select
multiple points from different groups with this method. When a point is selected by a method other than
selecting it from the point list, the point name is selected in the list and made visible.
Stereotaxis, Inc
Basic Instructions
Page 53
HDW-0161
Rev. B
Effective Date: 07/19/06
Figure 47 - Point Display Options
6.7.1.3 Editing Points
Selecting Edit from the Point menu or double-clicking a point causes the Edit Point window to appear. For a
single selected point, the window displays the point ID, group, Annotation and position. The group or
annotation can be edited. If multiple points are selected, only the group can be changed.
Figure 48 – Edit Point Window
The Annotation is a text string that is stored with the point. It can be displayed on all but live fluoro images
through the use of the Edit Groups window.
Recall Field Selecting Recall Field from the Point menu sets the desired field direction and origin to the
present field direction and origin that were active when the point was acquired. This command is only valid
for a single selected point, and only if a field was applied when the point was taken. If there was no field
applied, a message will appear at the bottom of the screen, indicating “The magnetic field was reduced or
unknown when this point was stored”.
Set as Target Selecting Set as Target from the Point menu sets the selected point as the target for Target
Navigation. This command is only valid for a single selected point.
Stereotaxis, Inc
Basic Instructions
Page 54
HDW-0161
Rev. B
Effective Date: 07/19/06
Deleting Points Selecting Delete from the Point menu causes a window to appear to confirm or cancel the
deletion of the currently selected point(s). After deleing a point, the next point in that group list will be
selected. If the point was the last point in the list, the previous point will be selected. If after deleting the
point, there are no more points in the group, no point will be selected.
Moving and Copying Points Points may be moved from one group to another by selecting them in the point
list and dragging them to the desired group name. Points may be copied from one group to another by
dragging selected points from one group to another while holding the [Ctrl] key.
6.7.1.4 Group Options
Points are collected in groups, which have common display attributes, and allow the points to be sorted by
location, device, etc., so different groups can have different display attributes. Group attributes include a
label identifying the display group, a color, a navigation fluoro display indicator (show or hide) and a 3D
display indicator (show or hide), a constellation type, and a point display type selector (shape only, ID, or
Annotation). Every point must belong to a group.
At the start of a procedure, a default group is created. The default group can be edited, and new groups
created. All new points are added to the currently selected group. When the first point is selected, the
colored box in the group window will display a letter, indicating the source of the data point. An F would
indicate the point was selected from fluoro, a P indicates preoperative image, a V indicates the points
originated from the NaviView window, and C indicates the points were transferred from the CARTO RMT.
Figure 49 - Group Options
Select Group To select a group, click the group in the list. The group selected will be highlighted. There is
always one group selected, which is the group to which all new points are added. Right-clicking a group
name causes the Group menu to appear.
New Group Selecting New from the Group menu causes the Edit Group window to appear. A new name for
the group can be entered, the color of the group can be changed, display options for the group in 3D and on
fluoro can be set, and a constellation type for the group can be set. The new group will be selected after it is
created.
Delete Group Selecting Delete from the group menu causes the currently selected group to be deleted,
including all the points the group contains. A prompt window appears to verify the group should be deleted or
the action may be canceled. If only a single group remains, it may not be deleted.
Edit Group Selecting Edit from the Group menu or double-clicking a group name causes the Edit Group
window to appear with the display group information for the currently selected group.
Stereotaxis, Inc
Basic Instructions
Page 55
HDW-0161
Rev. B
Effective Date: 07/19/06
Figure 50 – Edit Group Window
Options to be edited are as follows:
1) group name
2) group color
3) whether the group is shown in the 3D display
4) whether the group is shown in the fluoro display
5) if shown, as shapes only, with ID letters, or with full annotations displayed
6) constellation type
7) point order
6.7.1.4.1
Constellations
A group may be displayed as a constellation to provide a better 3D representation of the group. By default, a
group has “No constellation” and is merely a collection of individual points. The group may be assigned one
of the following constellation types from the drop down menu in the Edit Group window.
Stereotaxis, Inc
Basic Instructions
Page 56
HDW-0161
Constellation Type
No constellation
Chamber: Exact
Chamber: Smooth
Closed Curve: Exact
Closed Curve: Smooth
Open Curve: Exact
Open Curve: Smooth
Ostium
Surface Patch
Vessel
Rev. B
Effective Date: 07/19/06
Description
Only individual points will be displayed.
Creates a volume from planar surfaces specified by a group of points.
Creates a smooth 3D volume representation of points chosen.
Creates a closed spline curve constellation if the display group contains three or
more points. A curve will be constructed that intersects every point in the display
group, and connects the last point back to the first point. This constellation is point
order dependent, as the spline is constructed to pass from one point to the next.
The order the points are assigned will be maintained in the constellation type.
Creates an ellipsoid constellation from a display group that contains three or more
points. An Ellipsoid will be constructed that best fits the points contained in the
display group to the surface of the ellipsoid. It may not intersect exactly with the
points, but applies a “best fit” curve to the points in the exact order they were
saved.
Same as closed curve exact except the last point will not be connected back to the
first point.
Same as closed curve smooth except the last point will not be connected back to
the first point.
Creates an ostium constellation from a display group that contains three or more
points. The ostium is defined by the ellipse that fits the points contained by the
display group. The constellation generated will be an elliptical surface ring around
the ostium, and an elliptical collar at the ostium. The surface patch will be
represented in 3D displays as a solid surface, viewable from one side or the other.
Step Along Constellation option not available with this constellation.
Creates a surface patch constellation from a display group that contains three or
more points. The surface generated will pass through each point in the display
group. This constellation models a surface that has both local concavity and
convexity. The surface patch will be displayed in 3D displays as a solid surface,
viewable from one side or the other. Step Along Constellation option not available
with this constellation.
Creates a smoothed curved line that passes through and best fits the points in a
fashion that would connect each one in a best fit manner to represent a vessel. The
order of the points determines the shape of the vessel.
Table 7 - Constellation Options
The open curve constellation might be used to mark a linear catheter or a linear lesion. With the smooth
curve constellation, the display may not intersect with the exact points, but will be a “best fit” for the group of
points.
The order of the points in a group is important in some of the constellations, in which case, it affects the
shape displayed. To change the order of the points, use the Edit Group window, select the point to be moved
and use the arrows to move the point up or down to the desired position.
Stereotaxis, Inc
Basic Instructions
Page 57
HDW-0161
Rev. B
Effective Date: 07/19/06
First, vessels must be constructed by storing multiple points overlaying the vessel(s). Once enough points
are stored to satisfactorily outline the vessel, as determined by the user, the points may be made into a
vessel spline constellation by right-clicking over the Group name and selecting Create Vessels. The various
vessels will be assigned to different groups and displayed as vessel splines on the 3D displays.
After using the Create Vessels option, assure the vessel overlay is correct. If it is not correct, the vessels
may be adjusted by moving points from one vessel to another by dragging a point to the correct group as
described in section 6.7.1.3. The drop down option Create Vessels creates one vessel per group of points.
6.7.2 Preset View
The Preset View displays a selection of general preset directions as defined by the device and procedure
selected. The preset group available for basic navigation is Cardinal, which includes preset directions for
superior, inferior, anterior, posterior, right, and left. Below is an example of an IC preset list.
Figure 51 - Preset View
6.7.2.1 System Presets
Regardless of what procedure is chosen, System Presets are always available. System presets are marked
with the Stereotaxis emblem. Device specific System Presets will be displayed once a device has been
selected in the device selection window. System preset lists may not be changed.
6.7.2.2 User Defined Presets
A new preset list can be created by right-clicking in the Preset view and then choosing New List. A Preset
List window will appear. The user may name the list to be created and choose to make the list User or
Shared. If the list is marked as User (one person) the list will only be available to the current physician. If the
list is marked as Shared (two people), it will be available to all users. Once named, the preset list will be
available in the Preset View window.
Stereotaxis, Inc
Basic Instructions
Page 58
HDW-0161
Rev. B
Effective Date: 07/19/06
Vectors may now be stored in this new list. First set the vector desired, and then right-click over the list and
select Store Direction from the drop-down menu that appears. This will cause a Preset Direction window to
appear and through which the vector may be labeled and saved for use within the current and future cases.
Edit or delete a user created preset list by right-clicking over the appropriate list. The drop down list will
appear and the Edit or Delete option may be selected. Only user-created preset lists may be edited or
deleted.
Figure 52 - User Preset
6.7.3 Bulls Eye View
The Bulls Eye View window allows navigation around a central axis. To use the Bulls Eye, center the axis on
the current desired or present vector and then double click anywhere on the surface of the Bulls Eye.
Alternatively, display the Bulls Eye in the 3D window and double click the surface of the Bulls Eye in the 3D
window. The Bulls Eye display is drawn in the 3D view as an umbrella shape depicting the specified range as
a portion of a sphere. The Bulls Eye is displayed on the navigation fluoro images as ellipses.
Settings icon
Interrogation box
Patterns – circular,
regional, radial
Figure 53 - Bulls Eye View
Stereotaxis, Inc
Basic Instructions
Page 59
HDW-0161
Rev. B
Effective Date: 07/19/06
6.7.3.1 Bulls Eye Angle
The Bulls Eye angle indicates the range of directions the Bulls Eye can assign to the desired field vector. The
maximum deflection angle of the desired field vector from the central axis of the Bulls Eye can be selected
within a range from 30-120 degrees.
Figure 54 - Bulls Eye Range
Figure 55 - Bulls Eye
The lines of the Bulls Eye are displayed in 10 degree increments; the bolder lines are 30 degree increments.
6.7.3.2 Bulls Eye Orientation
The red and blue orientation markers on all of the Bulls Eye displays indicate the orientation of the Bulls Eye
relative to the other objects in the display. This correlates the different Bulls Eye displays with one another.
The 3D displays are also shaded to indicate which part of the Bulls Eye is closer and which is farther. The
inside of the Bulls Eye umbrella is shaded dark purple, and the outside is bright blue. On the Bulls Eye
display window, the shading is similar. The orientation can be set in the settings window. The Bulls Eye
orientation markers are locked to the live fluoro display. The blue marker always points superior on the
display.
Figure 56 - Bulls Eye Orientation
6.7.3.3 Bulls Eye Central Axis
The Bulls Eye window allows the selection of a central vector, which aligns with the center of the Bulls Eye,
and then allows small adjustments to be made to the vector using the Bulls Eye graphic. This is designed to
contribute to precise navigation.
Markers are displayed on the Bulls Eye graphic for each of the six cardinal directions and are visible when
inside the range of the Bulls Eye. These markers uniquely identify each direction to facilitate orientation.
To use the Bulls Eye navigation, first select a desired vector. Then, set the desired vector as the central axis
by pressing the Central Bulls Eye Axis button. If the Bulls Eye was already active, and a new vector is drawn
and set as the central axis, the Bulls Eye displays will all be recomputed and redrawn for the new axis.
If Bulls Eye navigation is attempted before setting the central axis, the axis will automatically be set to the
currently applied magnetic field vector. If no field is applied, then the Bulls Eye navigation is unavailable.
Stereotaxis, Inc
Basic Instructions
Page 60
HDW-0161
Rev. B
Effective Date: 07/19/06
Figure 57 - Set Bulls Eye Axis
6.7.3.4 Displaying the Bulls Eye
The Bulls Eye display and controls will be available in all modes except Target navigation mode. While in
Target mode, features on the Bulls Eye control window will not be selectable. The Bulls Eye window may be
hidden from display views by clicking the Hide Bulls Eye button.
Figure 58 - Hide/Show Bulls Eye Button
6.7.3.5 Bulls Eye Interrogation
Within the Bulls Eye window, a navigation pattern can be selected for the magnetic device to be navigated.
Initiate the pattern by checking the box in the interrogation area. To choose the point spacing and delay,
open the Bulls Eye settings window as shown in Figure 59. After selecting the desired pattern; circular,
regional, or radial, choose the desired angle range from the center axis. Choose Play (similar to a standard
DVD player), to play programmed interrogation pattern twice.
Figure 59 - Bulls Eye Settings Window
Stereotaxis, Inc
Basic Instructions
Page 61
HDW-0161
Rev. B
Effective Date: 07/19/06
To stop the interrogation, click the square Stop button. However, if the system is between points, the
magnetic field change will complete the move before stopping and may not stop immediately. To immediately
stop the field from changing, depress the E-stop to stop all magnet positioners and stop the field from
changing. Additionally, you may stop the interrogation immediately by double-clicking on the large Bulls Eye
icon. This will cause the field to move to the selected point.
U
U
WARNING: Depressing the E-stop will immediately stop all magnetic field changes by stopping the magnet
movement and will also prevent the positioners from being moved from navigate to stowed until the E-stop is
reset.
6.7.4 Navigation View
The navigation view allows storage of a specific field direction for use at a later time during the current case.
A field must be applied, and then choose Store. The stored direction will automatically be named Navigation
1, but can be changed by choosing Edit or double clicking Navigation 1 and typing a new name. Stored
directions can be deleted from this view by highlighting the direction to be deleted and then choosing Delete.
A confirmation of the deletion is required. All stored directions are procedure dependent and will not be
carried over to a new procedure.
U
U
U
U
U
U
U
U
6.7.5 Guidewire Bend Control View
The Guidewire Bend Control includes:
• Buttons to deflect desired magnetic field in four directions.
• Indicator controls to show the current desired and applied fields.
• Indicator controls to show the current desired fields deflections.
• A reset button
• Show/hide button for Guidewire Bend graphics in 3D views.
To Open the Guidewire Bend Control View
1. Right click in the Views area of the Navigant screen.
2. Select Change Window.
3. From the View list, choose Guide Wire Bend View.
Stereotaxis, Inc
Basic Instructions
Page 62
HDW-0161
Rev. B
Effective Date: 07/19/06
Figure 60 – Guidewire Bend Menu Item
Figure 61 – Guidewire Bend View
•
•
Click directly on the More or Less curve to set guidewire bend.
The Bend and Rotate buttons use the Field Angle Step Size as the increment for adjustments.
6.7.6 Other Group Views
The Cardiodrive, Alignment, RMT Navigation, Constellation Sequencing, and Voice Control Views do not
have any application in Basic Navigation and will be explained in specific IC and EP Instruction manuals.
Stereotaxis, Inc
Basic Instructions
Page 63
HDW-0161
7
Rev. B
Effective Date: 07/19/06
3D Navisphere Navigation
3D Navisphere is a spherical navigation object, which contains regularly spaced polar lines (e.g. latitude and
longitude lines) and is used for spherical navigation.
Figure 62 - 3D Navisphere
7.1
3D Navisphere Cardinal Direction Markers
Cardinal direction markers are always displayed on the 3D Navisphere and are displayed as cones and
labeled as shown in Figure 62.
S
I
R
L
A
P
Superior
Inferior
Right
Left
Anterior
Posterior
Table 8 - Cardinal Direction Markers
Stereotaxis, Inc
Basic Instructions
Page 64
HDW-0161
7.2
Rev. B
Effective Date: 07/19/06
3D Preset Markers
Preset direction markers are displayed on the 3D Navisphere when a preset list is selected. Each preset
direction marker will have a specified text ID that is visible whether 3D Navisphere is viewed from the inside
or outside. User defined presets will be displayed with text if they have been assigned text ID, otherwise they
will be displayed as colored markers without text. Preset markers are displayed as disks or pucks.
Figure 63 - Preset Marker on 3D Navisphere
7.2.1 3D Navisphere Preset Direction Markers Adjustment
The user may adjust the magnetic field direction associated with a preset marker. This adjustment is made
by first identifying a new desired field direction and then identifying the preset marker to adjust. Right click
the marker to adjust and choose Adjust Marker. This adjustment will change the location of the marker and
set the associated preset direction in the preset list. An * will appear in the window next to the adjusted
preset. Any adjustments are procedure specific and will not be used for subsequent procedures.
Figure 64 - Adjust Marker Window
Figure 65 - Adjusted Preset Display
Stereotaxis, Inc
Basic Instructions
Page 65
HDW-0161
Rev. B
Effective Date: 07/19/06
7.2.2 3D Navisphere Marker Reset
To reset a specific adjusted preset marker, or all adjusted markers back to the original direction, right-click
over an adjusted marker and choose Reset Marker or Reset all Markers.
Figure 66 - Reset Marker Window
7.3
3D Navisphere Stored Navigation Markers
Stored navigation markers are displayed on the 3D Navisphere as small spheres as shown in Figure 67.
Figure 67 - 3D Navisphere Stored Navigation Marker
7.4
3D Navisphere Field Selection
Select locations or markers on the 3D Navisphere to update the desired field. Apply this field to change the
current magnetic field direction.
7.5
3D Navisphere View Adjustment
Manipulate the orientation from which the 3D Navisphere is viewed through view rotation options and zoom.
The view position (inside or outside) cannot be changed by adjusting the view’s zoom.
Stereotaxis, Inc
Basic Instructions
Page 66
HDW-0161
Rev. B
Effective Date: 07/19/06
7.5.1 Orientation and Synchronization Options
Set the window to display the 3D Navisphere as if it were viewed from the inside or outside by clicking the
Navisphere toggle button.
Figure 68 - 3D Navisphere Options
Set the view orientation of the 3D Navisphere to any of a set of predefined view orientations, or set the view
to match its orientation to one of a standardized set of synchronized views.
7.5.2 Idealized Anatomy
The idealized anatomy model is displayed in the 3D Navisphere. A default idealized anatomy model will be
displayed according to which procedure was chosen in the opening screen. The anatomy displayed can be
changed by right-clicking over the display and choosing one of the options available. Options will be
dependent on the type of procedure chosen. The interior view will show a sliced, transparent view of the
anatomical model, but the active surface for selections will remain the Navisphere surface.
Stereotaxis, Inc
Basic Instructions
Page 67
HDW-0161
8
Rev. B
Effective Date: 07/19/06
Maintenance/ Troubleshooting/ Messages
This section describes routine maintenance that should be performed, troubleshooting, and status bar
messages.
8.1
Maintenance
Care and maintenance actions to be performed by the user are described in HDW-0137 Niobe MNS
Maintenance and Service Manual and HDW-0144 Navigant Navigation Workstation Installation and
Maintenance Manual.
8.2
Troubleshooting
Possible problems and solutions with Navigant system are listed in the table below.
Problem
Cannot Reduce Field (button
grayed out)
Cannot Apply Field (button
grayed out)
Cannot delete stored vector
(button grayed out)
Cannot edit stored vector (button
grayed out)
Vector history back/forward
button is unavailable (grayed
out)
No Bulls Eye is displayed in the
3D Display or on the fluoro
navigation displays.
Cannot set Bulls Eye Axis
(button grayed out)
Solution
• No Magnetic field is applied.
• MNS is not connected to Navigant. Check operation of
MNS. Restart MNS if necessary. Check Ethernet cables.
• No valid desired magnetic field vector has been drawn
• Magnets not in Navigate position. Move to one of
Navigate positions.
• MNS is not connected to Navigant. Check operation of
MNS. Restart MNS if necessary. Check Ethernet cables.
• Opened procedure is more than 24 hours old. Start new
procedure.
• No vector is selected. Select a vector and then click
delete.
• No vector is selected. Select a vector and then select
edit.
• No vector has been applied.
• Current desired vector is at beginning/end of vector
history list. There are no more vectors to step through.
• The Bulls Eye display is hidden. Select the show option
button in Bulls Eye UI.
• Select Set Bulls Eye axis button.
• No valid desired magnetic field vector has been drawn.
Draw a valid vector or select a valid magnetic field.
Caution: If the service mode is active on the display monitor, choose Exit Service Mode and then toggle the
input to Input 1. Some displays have a button on the right side of display frame labeled “1”. Some newer
displays have an invisible selection bar that lights up when touched. First, touch the selection bar, then
press Input until the correct input displays.
U
U
Note: If the magnetic field doesn’t line up properly or in the wrong direction, notify service to perform a
consistency check to verify calibration.
Stereotaxis, Inc
Basic Instructions
Page 68
HDW-0161
8.3
Rev. B
Effective Date: 07/19/06
Status Messages
Status Messages are indicated at the bottom of the Primary Window display. There are three types of
messages; informational, warning, and error. Status messages are listed in the table below, along with the
type and an explanation and solution where applicable.
•
•
•
Message
Type
Informational messages have a white background and black text.
Warning messages have a yellow background and black text.
Error messages have a red background and white text.
U
U
U
Status Messages
INFO
INFO
INFO
INFO
INFO
The magnetic field was reduced or
unknown when this point was stored.
•
Drag a line in each view along the
sheath tip from proximal to distal to
define the catheter base.
The device base must be defined first in
order to use Target Navigation. Drag a
line in each view along the sheath tip
from proximal to distal to define the
virtual catheter base.
Select a device on Navigant to use
Target navigation.
Device is straight, rotation has no effect.
•
Device is fully deflected.
•
Device model could not reach identified
target. Device shown at closest position.
•
Keyboard anatomic direction reached.
•
Field stored to <key>.
•
INFO
Recalling field store to <key>.
•
INFO
No field stored to this preset. Press Ctrl
and a preset key to store a preset.
•
INFO
Screen image saved as <name>.
Please assess the state of the
procedure. Any change in the patient’s
position or orientation can invalidate the
data recovered from the procedure file.
Can not delete the last group.
•
•
INFO
INFO
Stereotaxis, Inc
Unable to recall the vector stored with this point.
The magnetic field was reduced when the point
was stored. Only applied fields can be recalled.
The vector for this point must be redrawn rather
than recalled.
Instructional message for defining the device
base for target mode navigation.
•
Define the device base (press set base button
on mode toolbar) before using target navigation.
•
Device must be defined in Device Selection
window.
Device must be deflected for rotation to have an
effect.
No further deflection is possible in that direction
and mode.
Target navigation is unable to reach the target.
Use another mode of navigation, or another
target.
Any further use of this anatomic direction
adjustment key will have no effect, until the field
direction is changed by some other method.
Confirmation the desired field was stored
successfully to the navigation preset key listed.
Confirmation the navigation preset field was
successfully recalled as the desired field.
By default, no fields are stored to the navigation
presets. Follow the given instructions to store a
field.
Confirmation the image was saved successfully.
Verify the procedure data actually matches the
current procedure. Stored points and vectors
should not be assumed to be correct for the
patient’s anatomy or position.
The last group in the system may not be
deleted. (However, you can remove all the
points from that group).
•
INFO
INFO
U
Explanation / Solution
INFO
INFO
U
U
•
Basic Instructions
Page 69
HDW-0161
Rev. B
Message
Type
INFO
INFO
INFO
INFO
INFO
INFO
INFO
INFO
WARNING
WARNING
WARNING
WARNING
Effective Date: 07/19/06
Status Messages
Explanation / Solution
Cannot apply the field outside the
navigation volume
Do not enter the area between the Carm and magnet positioner.
Magnets in Navigate position.
•
Verify table is still in isocenter position
•
Magnets in Pivoted position.
•
Homing complete.
Magnets in Stowed position
•
•
Error cleared. If the problem persists,
cycle power using the power on/off
switch box.
Target mode must be active to use
Target Navigation
A collision condition has been detected.
•
There is a squeeze risk in this area if the
magnets would be moved to Navigate AP.
Confirmation magnets are in the Navigate AP
position.
Confirmation magnets are in the fully pivoted
position.
Confirmation homing process successful.
Confirmation magnets are in the fully stowed
position.
No action. An automated error recovery was
successful.
Movement limit reached.
•
Failed to connect to Cardiodrive, all
markers will be cleared and the display
reset.
•
Failed to load layout for physician.
Failed to create device model.
•
•
Device model failed to reach the
identified target.
•
Device may flip if this field is applied.
•
Connection to Magnetic Navigation
System lost.
•
Group type invalid for point to store.
Select another group.
•
Apply disabled. Navigant cannot apply a
field until switched to another mode.
•
Failed to capture screen image.
•
Failed to access printing device.
•
Printer cannot print graphics.
•
•
•
•
WARNING
WARNING
WARNING
WARNING
WARNING
WARNING
WARNING
WARNING
WARNING
Stereotaxis, Inc
Switch to target mode by selecting the button in
the toolbar or on the menu.
X-ray system and positioners are in close
contact (for Siemens only).
X-ray system and positioners are in close
contact (for Philips only).
Cardiodrive use with Navigant will be
unavailable until the connection is restored.
Navigation can continue without the Cardiodrive
features.
The default layout will be used.
Error in device modeling data or in the
application of this data. Redraw device base
and reselect target.
Target navigation could not identify a device
curve and field that would place the device at
the selected target. Choose another target.
Multiple paths exist between the current device
configuration and the desired field. At least two
paths will result in different device
configurations, which could cause the device to
flip.
Check operation of MNS. Restart MNS if
necessary. Check Ethernet cables. It will not be
possible to apply fields until connection
reestablished.
Check if trying to store fluoro points in a group
marked for preop or vessel. Same if trying to
store preop points in a group marked for fluoro
or vessel.
In the current mode no fields can be applied.
To apply a field, switch to manual apply or auto
apply mode.
Screen capture failed. Check destination and
resave.
Unable to print until connection restored or
established.
Print failed. Check connection and retry.
Basic Instructions
Page 70
HDW-0161
Rev. B
Message
Type
WARNING
WARNING
WARNING
WARNING
WARNING
WARNING
WARNING
WARNING
WARNING
WARNING
WARNING
WARNING
Status Messages
Explanation / Solution
Unable to get procedure information.
•
Patient table moved. Previously stored
points and vectors may no longer be
valid.
Desired vector origin has been reset to
the Bulls Eye origin.
•
Cannot transfer the image. The C-arm
or table was moving during the image
acquisition.
Cannot transfer the image. An image is
not available for transfer.
Cannot transfer the image. An image
cannot be transferred while the x-ray is
on.
Cannot transfer the image. The current
image is zoomed.
Cannot transfer the image. The current
image is a looping image.
Cannot transfer the image. The current
image orientation is not correct.
Cannot transfer the image. The current
image is a panned image.
Cannot transfer the image. The patient
orientation must be HFS.
Cannot transfer the image. The transfer
process timed out waiting for the image.
Cannot transfer the image. Cannot
detect the imaging system.
•
WARNING
WARNING
WARNING
WARNING
WARNING
WARNING
•
Cannot transfer the image. The
displayed image is not the last acquired
image.
Cannot transfer the image. The DICOM
transfer process has failed.
Cannot transfer the image. Cine or
Fluoro must be acquired before
transferring an image.
Cannot transfer the image. The imaging
plate was rotated for this image.
Cannot transfer the image. The table
was tilted for this image.
Unable to perform the image transfer.
The magnets must be in Navigate
Position to apply the fields.
Stereotaxis, Inc
Procedure data file format is not supported or
data file is corrupt.
Stored points and vectors should be assumed to
be correct for the patient’s anatomy or position.
Verify the validity or mark new points.
In Bulls Eye mode, the desired vector direction
is set, with the origin always at the Bulls Eye
origin.
Re-acquire the image with the C-arm and table
stationary and retransfer the image.
•
Procedure B
•
Procedure B
•
Procedure B
•
Procedure B
•
Procedure B
•
Procedure B
•
Procedure B
•
•
•
Attempt to transfer image again.
Procedure C
Ensure x-ray system is running. Restart x-ray
system.
Verify Ethernet communication cables between
MNS and x-ray system are in place.
Procedure C
Procedure B
•
WARNING
WARNING
Effective Date: 07/19/06
•
•
•
•
•
Verify Ethernet communication cables between
MNS and x-ray system are in place.
Procedure C
Procedure B
•
Procedure B
•
Procedure B
•
•
•
Procedure A
Procedure C
Press a Navigate position button and hold until
display message reads “Magnets in Navigate”.
Basic Instructions
Page 71
HDW-0161
Rev. B
Message
Type
WARNING
WARNING
WARNING
Effective Date: 07/19/06
Status Messages
Explanation / Solution
The magnets have not been aligned.
Contact field service for further
instructions.
The E-stop is active. Deactivate the Estop button to continue.
A motor drive fault has been detected. If
the problem persists cycle power using
the switch on the E-stop box.
The system needs “homing”. Press and
hold the <appropriate> controller button
until homing complete (up to 60 sec).
•
Procedure C
•
Deactivate all E-stop buttons.
•
Procedure A
•
Hold the button until the status bar displays
“Homing complete”.
For PM 3.0, and PM 3.1 systems, <appropriate>
is defined as the “Semi-Stowed” controller
button.
For PM 3.2 systems, <appropriate> is defined
as the “Navigate AP” controller button.
Procedure A
Procedure C
Using the tableside magnet control, move the
magnet into the Navigate AP, Retracted, or
Stowed position.
Wait until the current operation is complete and
then try again.
Move the C-arm to the head end position and
reattempt the positioner move.
•
WARNING
•
WARNING
WARNING
WARNING
WARNING
WARNING
WARNING
WARNING
WARNING
WARNING
WARNING
WARNING
WARNING
Unrecoverable error. Please cycle power
using the power on/off switch box.
The floor lock is not set. Hold the
controller button until the positioner
move is complete.
The field is currently being changed.
Please wait.
Cannot move the magnet positioners.
The C-arm is not in the head-end
position.
Cannot move the magnet positioners.
The C-arm and table must be in the
“Navigate” safe range.
Cannot move the magnet positioners.
The C-arm and table must be in the
“Retracted” safe range.
Cannot move the magnet positioners.
The C-arm or table is moving.
X-ray system reports a position error.
Magnet movement is restricted to the
“Stowed” position.
X-ray system reports an active proximity
switch. Magnet movement is only
possible using the “override” buttons.
•
•
•
X-ray system reports the E-stop active.
•
The hand-crank cover is off. Magnet
movement is only possible using the
override buttons.
The specified field direction could not be
applied.
•
Stereotaxis, Inc
•
•
•
Move the C-arm and table to a “Navigate” safe
position and reattempt positioner move.
•
Move the C-arm and table to a “Retracted” safe
position and reattempt positioner move.
•
Make sure C-arm and table are not moving
before attempting to move the positioners.
Procedure C
•
•
•
Deactivate the x-ray system proximity switch or
use “override” to move the positioners.
Movement can only be away from patient with
the “override” option.
Deactivate the x-ray system E-stop before
continuing.
Check the hand-crank cover is on correctly.
The specified target point for the field is likely
outside the navigation volume and should be
redefined.
Basic Instructions
Page 72
HDW-0161
Rev. B
Message
Type
WARNING
WARNING
WARNING
WARNING
WARNING
WARNING
WARNING
WARNING
WARNING
WARNING
WARNING
WARNING
WARNING
WARNING
WARNING
WARNING
WARNING
WARNING
Effective Date: 07/19/06
Status Messages
Explanation / Solution
Caution: The patient’s arms may be
contacted by the magnets if the patient
is not positioned properly.
•
Stopped applying the field. The table is
moving.
Motor-power contactor has
malfunctioned. Contact field service for
further instructions.
Caution: Do not enter the area between
the C-arm and magnet positioner.
•
This is a caution message to alert the user of a
possible contact of the magnet positioners with
the patient when moving to the Retracted or
Navigate AP position from Stowed the first time.
Use arm guards to prevent patient contact with
positioners.
Do not move the table while applying a field.
•
Procedure C
•
Cannot move the magnet positioners.
There is a collision risk with the C-arm.
Cannot move the magnet positioners.
There is a collision risk with the table.
X-ray system does not allow magnet
movement. The L-arm longitudinal
position is not in range.
•
This is a caution message, shown when the
magnets are in the pivoted position, to alert the
user of a possible squeeze risk between the
magnet positioner and C-arm.
Move C-arm to a safe position.
•
Move table to a safe position.
•
Navigant has field changes disabled.
The joystick is disabled
Navigant has field changes disabled.
The current field cannot be changed.
Cannot move the magnet positioners.
The C-arm is not at the magnet
isocenter.
X-ray system has aborted the magnet
movement.
X-ray system does not allow magnet
movement. The table lateral position is
out of range.
X-ray system does not allow magnet
movement. The L-arm is rotated.
X-ray system does not allow magnet
movement. The C-arm LAO/RAO angle
is out of range.
X-ray system does not allow magnet
movement. The X-ray system E-stop is
active.
X-ray system does not allow magnet
movement. Magnet movement is only
possible using the “override” buttons.
X-ray system does not allow magnet
movement. The table tilt angle is out of
range.
Cannot transfer the image. The patient
orientation must be HFS or FFS.
•
Magnets are not allowed to move unless the Larm longitudinal position is in the Navigate
position (i.e. C-arm and magnet isocenters
match.)
The joystick to move the positioners is disabled
when Navigant is in the field-locked mode.
Disable field-locked mode.
Stereotaxis, Inc
•
•
Allura C-arm longitudinal axis must be in c-arm
and magnet isocenter.
•
Alllura system disallows Niobe movement for
unknown reason.
Alllura table lateral position is out of range.
Correct position to continue.
•
•
•
Allura L-arm is rotated. Correct position to
continue.
Allura C-arm LAO/RAO is out of range. Correct
LAO/RAO range to continue.
•
Allura E-stop is active. Deactivate E-stop to
continue
•
Check positions of x-ray system and positioner
path before overriding movement.
•
Allura table tilt is out of range. Correct position
to continue.
•
Patient orientation is not HFS or FFS. Correct
patient orientation to transfer image
Basic Instructions
Page 73
HDW-0161
Rev. B
Message
Type
Effective Date: 07/19/06
Status Messages
Explanation / Solution
Cannot move the magnet positioners.
The bi-plane gantry is not in a safe
position.
Cannot transfer the image. The table
was cradled for this image.
Cannot transfer the image. The L-Arm
was rotated for this image.
Cannot transfer the image. The L-Arm
was not in the working position for this
image.
Cannot transfer the image. The image is
not transferable.
X-ray system does not allow magnet
movement. The L-Arm longitudinal
position is not in range.
Magnetic navigation is not possible. The
L-arm is not in the working position.
Homing in progress. Continue holding
button.
•
Park Bi-plane gantry in magnet positioner safe
range to continue.
•
Image transfer disallowed if table cradle too
great. Correct position to continue.
Procedure B.
WARNING
Homing cancelled. The homing button
was released.
•
WARNING
Patient changed. Closing the current
procedure is recommended.
•
WARNING
Position Error: Recovery in progress.
Please wait. Check for Left cover
interference.
Position Error: Recovery in progress.
Please wait. Check for Left magnet floor
obstacle.
Position Error: Recovery in progress.
Please wait. Check for Right cover
interference.
Position Error: Recovery in progress.
Please wait. Check for Right magnet
floor obstacle.
Position Error: Recovery in progress.
•
Internal Motion Error: Recovery in
progress.
Niobe Startup Error…
Niobe Startup Error. Could not initialize
the Magnet Control System. Power-on
the Niobe system and restart the
software.
•
WARNING
WARNING
WARNING
WARNING
WARNING
WARNING
WARNING
WARNING
WARNING
WARNING
WARNING
WARNING
WARNING
ERROR
ERROR
Stereotaxis, Inc
•
•
•
•
•
•
L-arm not in correct navigate position when
image was acquired. Correct position to transfer
image.
Image transfer rejected by x-ray system for
unknown reason.
Magnets are not allowed to move unless the Larm longitudinal position is in the Navigate
position.
Move L-arm to the working position.
To successfully home the system, press and
hold the Navigate AP button down for
approximately 60 seconds until the monitor
indicates homing is complete.
To successfully home the system, press and
hold the Navigate AP button down for
approximately 60 seconds until the monitor
indicates homing is complete.
This message displays when a new patient is
registered on the x-ray system, but a new study
has not been started in Navigant. The message
clears when a new study is started on Navigant.
Wait for recovery process to complete, then
continue.
•
Wait for recovery process to complete, then
continue.
•
Wait for recovery process to complete, then
continue.
•
Wait for recovery process to complete, then
continue.
•
Wait for recovery process to complete, then
continue.
Wait for recovery process to complete, then
continue.
Procedure C
Procedure A
Procedure C
•
•
•
Basic Instructions
Page 74
HDW-0161
Rev. B
Message
Type
Effective Date: 07/19/06
Status Messages
Explanation / Solution
X-ray system reports CPR mode is
active. Move the magnets to the Stowed
position.
Stowing the magnets when the system
is not homed may result in unacceptable
magnetic field levels outside the room.
There was an error updating the
configuration. Call service if the problem
continues.
A problem has been detected in the
magnet system. Cycle power using the
power on/off switch box.
Cannot communicate with the magnet
positioners. Cycle power using the
power on/off switch box.
An error occurred processing the x-ray
image.
Failed to set procedure type.
Cannot communicate with the x-ray
system.
ERROR
ERROR
ERROR
ERROR
ERROR
ERROR
ERROR
•
•
This is an instruction to move the magnets to
the Stowed position for greater patient access
when in the CPR mode of the x-ray system.
Home the system before stowing the magnets
to ensure the magnets are positioned properly
to minimize the magnetic field outside the room.
Procedure C
•
Procedure A
•
•
Procedure A
Procedure C
•
•
•
•
Procedure A
Procedure C
Unknown procedure type specified.
Ensure x-ray system is running/restart x-ray
system if necessary.
Verify Ethernet communication cables between
MNS and x-ray system are in place.
Procedure C
Continuous navigation failed to generate a
continuous navigation path for the requested
movement.
Image did not transfer in allotted time. Resend
image/reacquire if necessary.
•
•
ERROR
Error calculating navigation path.
•
•
ERROR
System timed out waiting for image to
transfer.
ERROR
•
Where more than one recovery procedure is listed, try each listed recovery procedure in succession.
Procedure A: “Restart procedure”. Refer to the Power Up and Power Down section of this manual. Power
the system down to the standby mode, and then bring it back up from standby to fully operational.
U
U
Procedure B: “Valid X-ray procedure”. Obtain a compatible x-ray image (consulting the error message text
for the source of the problem), then press Transfer Image button.
U
U
Procedure C: Notify Field Service at earliest opportunity of the occurrence of this event, whether the
recovery procedure(s) resolves the problem or not.
U
U
Stereotaxis, Inc
Basic Instructions
Page 75
HDW-0161
Rev. B
9
Emergency
9.1
Emergency Patient Retraction
Effective Date: 07/19/06
To move the magnets out of the way for an emergency patient retraction, press the Stowed position button
on the tableside control. Note the magnets do not have to swing to the full 90 degrees and lock in the
stowed position. The user can release the button when the magnets are sufficiently out of the way –
approximately 20 degrees. If there is a power or other failure that keeps the magnets from moving, see
section 9.4 for manual movement of the magnets.
9.2
Emergency Stop (E-stop)
The System Control and Remote Stop box controls all MNS system power. It provides a centralized means
of enabling or disabling power for magnet motion, and provides a secondary E-stop to stop magnet
positioner motion. (The primary E-stop is located tableside). The System Control and Remote Stop box is
normally located on the System Power Control Panel in the control room. If your system has a remote stop
box as pictured below, the E-stop can be activated on the remote box or at the bedside.
E-Stops are dependent upon x-ray systems as described below.
9.2.1 Siemens E-Stops
Pressing an Emergency Stop (E-stop) button immediately stops all MNS mechanical motion. This includes
not only physical motion of the two magnet positioners, but also all motion of the magnets within the
cosmetic covers. When the E-stop is pressed, the user will see the following message on the screen.
The E-Stop is active. Push in and pull out the E-Stop button to continue
or Deactivate E-stop to continue.
There are two E-stop buttons on the Niobe system when used with a Siemens x-ray system. Both E-stops
perform the same functions, and both must be enabled (pulled out) for the system to operate. They are
located:
•
•
On the Tableside controller in the procedure room
On the MNS system power control panel in the control room
Once the E-stop button is depressed, it must be twisted and pulled back out to re-enable magnet motion.
When the MNS system is powered off the E-stop is automatically activated. If the system is powered on with
the E-stop button pulled out then the positioners will immediately be active.
Caution: There are different emergency stop buttons for the Niobe and the x-ray system. Pressing the
Niobe E-stop will cause an x-ray E-stop via hardware connection. Pressing the x-ray E-stop will cause the
Niobe to stop, via software.
Stereotaxis, Inc
Basic Instructions
Page 76
HDW-0161
Rev. B
Effective Date: 07/19/06
Emergency E-stop is
activated when illuminated (Red)
System power on when
illuminated green.
Emergency Stop (E-Stop)
Press to halt all mechanical
motion.
System power On/Off.
I
0
Figure 69 – Siemens System Control and Remote Stop Box
9.2.2 Philips E-Stop
The Niobe E-stop can only be activated by Philips E-stop on the Geometry module in the procedure room or
the control room. This E-stop stops all motion on the x-ray system and the MNS. A yellow message will
appear saying the E-Stop is Active and the red light on the Niobe Power Box will be illuminated.
The E-stop function is performed by pressing the red Stop button in the upper right hand corner of the Allura
Xper Geometry TSO Module (not pictured) in either the procedure room or control room. The E-stop is reset
by pressing the green Reset button in the upper left hand corner of the Allura Xper Review Module in the
control room.
To restart both systems, press and hold down the green button on the review module in the control room.
Niobe E-Stop will be deactivated approximately 5-10 seconds after the Allura begins to reinitialize. At this
time the yellow message will change to “X-ray E-Stop is Active” until the Allura is completely recovered.
Niobe movement is not possible (even with override) until the Allura is completely recovered.
System power on when
illuminated green
Emergency e-stop
indicator. Illuminated red
when active.
System power
On/Off
Figure 70 - Philips System Control and Power Box
Stereotaxis, Inc
Basic Instructions
Page 77
HDW-0161
9.3
Rev. B
Effective Date: 07/19/06
Overriding Magnet Positioner Interlocks
System software interlocks prevent the positioner from moving into and colliding with the x-ray system
components. The user can override this interlock by simultaneously pressing and holding the Stowed and F1
keys on the bedside control. The magnets will not move into Navigate positions, but will move to all other
positions.
WARNING: When using the interlock override, visually ensure there will not be a physical collision between
magnet and x-ray system components. Closely monitor the magnet positioner movement, and be ready to
release the movement button if a collision is imminent. Failure to heed these warnings may cause damage
to equipment.
9.4
Moving Magnet Positioners Manually
There is a manual positioner hand crank that allows the user to manually move the magnet positioners in the
event of a facility power failure, or if a mechanical or electrical failure renders the system unable to move
normally. See Niobe user manual for specific hand crank use.
WARNING: When using the positioner manual hand crank, EXTREME CAUTION must be taken to ensure
proper patient table, C-arm, and magnet positioning clearance. Also, ensure no one attempts to use the
tableside control while manually moving the positioners. Failure to heed these warnings may cause an
unsafe condition resulting in personal injury and/or damage to equipment.
To move the positioners, follow the steps outlined below. When power is restored and the tableside control is
again used, the interlocks will automatically re-engage.
Step 1 – Remove side cover
by manually pulling it off.
Step 2 – Remove hand
crank bar from clips
Step 3 – Insert bar in slot for
hand crank. Make sure the
bar is fully inserted.
Step 4 – Turn hand crank to
pivot magnet on the curved
floor track.
Figure 71 – Manual Hand Crank
Stereotaxis, Inc
Basic Instructions
Page 78
HDW-0161
Rev. B
Effective Date: 07/19/06
Step 1 – Remove side cover by twisting the
two fasteners.
2
4
Step 2 – slide lever to allow release of floor
lock lever
Step 3 – The floor lock lever will drop down by
itself releasing the floor lock
3
Step 4 – Turn the hand crank to pivot magnet
on the curved floor track
1
Figure 72 – Manual Hand Crank
9.5
Removing an Item That Has Become Stuck to a Magnet
If all safety precautions are followed, ferrous items should never be near the magnet, and there should never
be an incident of something being attracted to, and becoming stuck to a magnet positioner.
However, in the event an item does become stuck to a magnet positioner, please review the following before
attempting removal:
•
•
•
•
•
•
•
The permanent magnets are always “on”, and cannot be turned “off”.
The larger the mass of the item stuck, the harder it will be to remove it.
Use work gloves or other protective equipment around hands to prevent injury (e.g. skinned
or scraped knuckles) when removing large items from a magnet.
The magnetic forces are strongest at the front (flat) face of the magnet.
The force decays rapidly with increased distance from the front face of the magnet.
If the item is sharp, consider potential damage to oneself or others if the user or the item
slips or is re-attracted to the magnet during removal.
The general strategy should be to slide the item (on the surface of the cosmetic cover) away
from the front face of the magnet, and then quickly and firmly pull the item away without
hesitation.
Sliding an item towards an outside corner of the cosmetic cover before making the “pull off”
attempt over the edge of the cover is most effective.
Be aware that the forces around the magnet change. If an item becomes stuck to the
positioner, and one attempts to navigate, or attempts to move the magnet from the navigate
position to the retracted or stowed position, the field will change, and the item could fall on its
own (or become stuck even firmer).
DO NOT remove any of the cosmetic covers in an attempt to remove a stuck item. The
magnet itself, which the covers protect, could be irreversibly damaged if it is contacted.
Contact MNS service personnel for assistance if user is unable to remove an item stuck to a
magnet.
U
U
U
U
U
U
•
•
•
•
Stereotaxis, Inc
U
U
Basic Instructions
Page 79
HDW-0161
10
Rev. B
Effective Date: 07/19/06
Index
2D Anatomic View.............................................. 45
Navigation....................................................... 50
2D Navigation
Controls .......................................................... 50
2D Navigation Controls ...................................... 29
3D Anatomic View.............................................. 44
3D Constellation View ........................................ 44
3D Display Orientation Toolbar.......................... 40
3D Fluoro View................................................... 44
3D Navisphere ................................................... 45
3D Navisphere Navigation ................................. 64
3D Preset Markers
Navisphere ..................................................... 65
3D Views ............................................................ 43
Abbreviations ..................................................... 10
Acronyms ........................................................... 10
Anatomic Direction Adjustment Keys................. 14
Anatomy Display ................................................ 36
AP....................................................................... 40
Apply Disabled Mode ......................................... 35
Apply Field.......................................................... 13
Apply Options..................................................... 35
ARB .................................................................... 40
Auto Apply Mode................................................ 35
AutoCAS key...................................................... 15
Bulls Eye
Displaying ....................................................... 61
Interrogation ................................................... 61
Bulls Eye Angle .................................................. 60
Bulls Eye Central Axis........................................ 60
Bulls Eye Orientation.......................................... 60
Bulls Eye View ................................................... 59
Capture Screen .................................................. 30
CAS...............See Catheter Advancement System
Catheter Advancement System ......................... 10
Center View Options .......................................... 47
Clinical Workflow Manager................................. 26
Constellation Sequencing Tools ........................ 33
Constellations..................................................... 56
CWM .................................................................. 26
Default Layout .................................................... 30
Definitions........................................................... 10
Deflection Keys .................................................. 14
Device
Selection of..................................................... 27
Device Selection Button ..................................... 27
Device Selection Window................................... 27
Direction Mode ................................................... 35
Direction Navigation ........................................... 36
Drawing Vectors................................................. 36
Edit Procedure ................................................... 30
Editing Points ..................................................... 54
Stereotaxis, Inc
Emergency ......................................................... 76
Emergency Stop................................................. 76
E-stop ................................................................. 76
Field History ................................................. 35, 37
Fit Objects to Window ........................................ 47
General Settings................................................. 32
Graphic Display Settings.................................... 33
Group
Edit.................................................................. 55
Group Options .................................................... 55
Group View......................................................... 52
Hide Options....................................................... 46
Image Recall ...................................................... 39
INF...................................................................... 40
Keyboard ............................................................ 13
LAO .................................................................... 40
Left Mouse Mode................................................ 46
LL ....................................................................... 40
Load Patient ....................................................... 18
Magnetic Navigation System...................See MNS
Manual Apply...................................................... 35
Mark a Point ....................................................... 53
Master Volume Settings ..................................... 33
MNS ................................................. 11, 68, 70, 76
Moving Magnet Positioners Manually ................ 78
Navigation
Storing ............................................................ 38
Using 2D Anatomic Views .............................. 50
navigation fluoro ................................................. 39
Navigation Fluoro............................................. 11
Navigation Mode ................................................ 35
Navigation View.................................................. 62
Navigation Volume ........................................... 11
Navisphere ......................................................... 64
Marker Reset .................................................. 66
Markers........................................................... 64
Preset Adjustment .......................................... 65
Stored Navigation Markers ............................. 66
New Procedure................................................... 23
Object Opacity.................................................... 47
opaque ............................................................... 47
Open Procedure ................................................. 24
Opening Screen ................................................. 23
Overriding Magnet Positioner Interlocks ............ 78
PA....................................................................... 40
pacemaker.......................................................... 21
Patient Preparation ............................................ 18
Patient Retraction............................................... 76
Point
Selection ......................................................... 53
Points
Editing............................................................. 54
Basic Instructions
Page 80
HDW-0161
Rev. B
Preoperative View .............................................. 45
Preset View ........................................................ 58
Presets
System............................................................ 58
User Defined................................................... 58
Primary Windows ......................................... 29, 43
Print Screen ....................................................... 30
RAO.................................................................... 40
Recall Image ...................................................... 39
Reduce Field ...................................................... 13
Remote Magnetic Technology ................ See RMT
Removing an Item That Has Become Stuck to a
Magnet............................................................ 79
Restore Layout................................................... 30
Right Mouse Options.......................................... 48
RL....................................................................... 40
RMT
Synchronize to................................................ 41
RMT.............................................................. 55, 63
Navigation....................................................... 45
RMT Settings ..................................................... 33
Rotation Keys..................................................... 14
Save Layout ....................................................... 30
Save Screen Image............................................ 30
Screen Capture .................................................. 30
Screen Image..................................................... 30
Selectable Controls ............................................ 52
Selecting a Device ............................................. 27
Selecting a Point ................................................ 53
Sequencing
Constellation................................................... 33
Settings
Bulls Eye......................................................... 61
Display ............................................................ 33
Effective Date: 07/19/06
General ........................................................... 32
Graphics ......................................................... 33
RMT ................................................................ 33
Volume............................................................ 33
Settings Menu .................................................... 32
Show Options ..................................................... 46
Status Bar........................................................... 50
Step Script.......................................................... 15
step size ............................................................. 51
Step Size ............................................................ 37
Store Navigation........................................... 13, 38
Store Point.......................................................... 53
Store Points.................................................. 13, 39
Stuck items
Removing........................................................ 79
SUP .................................................................... 40
Synchronize View............................................... 41
System Presets .................................................. 58
Target Mode ....................................................... 35
Title/Menu........................................................... 29
transfer image .................................................... 71
Transfer Image ....................................... 13, 39, 75
translucent.......................................................... 47
update vectors.................................................... 48
User Defined Presets ......................................... 58
User Views ......................................................... 47
Vector ................................................................ 11
Vectors ......................................................... 36, 48
Drawing........................................................... 36
View Procedure .................................................. 30
View Synchronize Orientation ............................ 41
Virtual Catheter .................................................. 33
Window Display.................................................. 37
MDSS
(Medical Device Safety Service GmbH)
Burckhardtstrasse 1
D-30163 Hannover, Germany
0086
Stereotaxis, Inc
Basic Instructions
Page 81