1
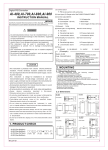
Omni8µ Alarm Annunciator
C1477-x
SCOPE
This is a User Manual supplied with the your product and provides information
necessary to install, set-up and operate the product.
This manual covers the following product Model Numbers:
DATE
Sep 1999
Nov 1999
Feb 2000
Model
C1477-1
Description
C1477-2
Omni8µ with 20-60Vdc Power Supply
C1477-3
Omni8µ with 85-264Vac/dc Power Supply
REVISION
1
2
3
Omni8µ with 10-15Vdc Power Supply
COMMENTS
Initial revision
General Corrections during development.
Released to Production
COPYRIGHT AND PROTECTIVE NOTICES
1. The Copyright of this document and the associated drawings, is the property of Omniflex and
is issued on condition that it is not copied, reprinted or reproduced or transmitted in any form
or by any means, electronically, photocopying, mechanical or otherwise, nor its contents
disclosed, either wholly or in part, without the consent in writing of, or in accordance with the
conditions of a contract with Omniflex.
2. The publication of information in the document does not imply freedom from patent or other
protective rights of Omniflex or others.
3. Although every intention is made to ensure that performance figures and data are accurate the
company reserves the right to alter without notice any product or specification. Performance
figures and data must therefore be specifically confirmed by the company before they become
applicable to any tender, order or contract.
4. In the case of electrical components, enough data is included in the drawings to allow
maintenance of the equipment. However, if component availability or substitution information
is required please consult the factory for assistance, as it is impossible to include data on
every component in this document.
5. This product is sold without liability for consequential loss of any description.
C1477 User Manual
Part No. 8.0101.013 Revision 3 (80101013R03.pdf)
-2-
© Omniflex
Introduction
The Omni8µ (pronounced “omni eight micro”) is a compact 8 point Alarm
Annunciator/Status Indicator which is fully field configurable (via two simple-to-set
8-way switches) to meet a wide range of alarm and status indication applications.
Although extremely compact in size, the Omni8µ is packed full of features
normally found only in larger alarm annunciator systems.
Available in a range of power supply options, the rugged Omni8µ is designed to
fit directly into local electrical panels without the need for external power
conditioning or interfacing for the lowest cost system implementation.
With bright back-lit LED displays, the Omni8µ provides high visibility viewing of
alarm and status information replacing the need for independent status indicators
without consuming valuable panel space.
Integral control pushbuttons and an audible device minimise the installation time
and cost.
THE OMNI8µ
µ
8 point Alarm Annunciator/Status Indicator.
C1477 User Manual
Part No. 8.0101.013 Revision 3 (80101013R03.pdf)
-3-
© Omniflex
Table of Contents
1. GENERAL DESCRIPTION ........................................................................................... 5
1.1 Features .................................................................................................................. 5
1.2 Front View showing Display Layout ....................................................................... 5
1.3 Rear View showing Terminal Layout...................................................................... 6
1.4 Left-Hand-Side View showing Switch Layout......................................................... 6
1.5 Installation and Set-up Procedure .......................................................................... 6
2. SETTING THE CONFIGURATION SWITCHES .......................................................... 7
2.1 Introduction.............................................................................................................. 7
2.2 Selecting the input sense........................................................................................ 7
2.3 Selecting the alarm sequences .............................................................................. 7
2.4 Selecting the Group Alarm (G.A.) Relay Output Function ..................................... 8
2.5 Selecting the Inhibit Input Mode ............................................................................. 8
2.6 Inhibit Input Sense .................................................................................................. 8
3. MECHANICAL INSTALLATION.................................................................................. 10
3.1 Installing the Omni8µ in a panel. .......................................................................... 10
4. ELECTRICAL INSTALLATION ................................................................................... 11
4.1 Introduction............................................................................................................ 11
4.2 Connection Table .................................................................................................. 11
4.3 Connecting the alarm inputs................................................................................. 11
4.4 Connecting the Relay............................................................................................ 12
4.5 Connecting the power supply ............................................................................... 12
5. PREPARING THE BACKLIT DISPLAY LEGEND ...................................................... 12
5.1 Overview ............................................................................................................... 12
5.2 Creating the Legend Film ..................................................................................... 12
5.3 Inserting the Legend into the Annunciator ........................................................... 12
6. OPERATION ............................................................................................................... 13
6.1 Power-up ............................................................................................................... 13
6.2 Normal Operation.................................................................................................. 13
6.3 Test Functions....................................................................................................... 13
6.3.1
Overview of the Test Functions .............................................................................................. 13
6.3.2
Pressing the Test Button ......................................................................................................... 13
6.3.3
Fault Indication on Circuit Test ............................................................................................... 13
6.3.4
Manually invoking the Circuit Test Function. .......................................................................... 14
6.3.5
The “Marching Sequence” Circuit Test Display ...................................................................... 14
6.4 Use of the inhibit input .......................................................................................... 14
7. SPECIFICATIONS ...................................................................................................... 15
8. ALARM SEQUENCE DIAGRAMS .............................................................................. 17
C1477 User Manual
Part No. 8.0101.013 Revision 3 (80101013R03.pdf)
-4-
© Omniflex
1. GENERAL DESCRIPTION
1.1 Features
•
•
Compact 48x96mm DIN panel mounted construction for minimum space
utilisation.
Bright Back-lit alarm/status display for easy viewing.
•
Solid State LED display technology for high reliability and low power
consumption -no lamps to replace.
•
User-created Display legends on standard laser/inkjet printer using software
templates supplied – no window engraving required.
•
Integral Full-Function Alarm Annunciator for independent critical alarm point
monitoring.
•
Integral audible device and control pushbuttons for ease of installation and
use.
Relay output for common group alarm or external audible device control.
Removable terminals for easy installation and maintenance.
Wetting voltage supplied to the inputs to allow potential free input contacts to
be directly connected.
Integral power supply for direct connection to available power source.
Switch selectable Normally Open or Normally Closed input contact selection.
•
•
•
•
•
•
22 Switch selectable configurations covering all popular alarm sequences and
configurations.
1.2 Front View showing Display Layout
Input 1
Input 2
Input 3
Input 4
Input 5
Input 6
Input 7
Input 8
SILENCE
ACK
RESET
TEST
Figure 1-1 Front View
C1477 User Manual
Part No. 8.0101.013 Revision 3 (80101013R03.pdf)
-5-
© Omniflex
1.3 Rear View showing Terminal Layout
Omni8µ
L N
INPUTS
1 2 3 4 5 6 7 8 C
+ 1 2 3 4 5 6 7 8 9 10 11 12 13 14 15 16
Figure 1-1 – Rear View
1.4 Left-Hand-Side View showing Switch Layout
SW1
Sequence
Selection
SW2
Input Sense
Selection
1 2 3 4 5 6 7 8
ON
1 2 3 4 5 6 7 8
ON
Figure 1-1 – Side View showing 8-way Set-up Switches
1.5 Installation and Set-up Procedure
The following steps should be implemented in the order shown to configure and
install an Omni8-µ alarm annunciator:
1. Configure the set-up switches to the required settings.
The mounting brackets are designed to cover the set-up switches so it
important to set these before mounting the unit into the panel.
(See section 2)
2. Install the unit in the panel. (See section 3)
3. Wire the inputs, power supply and relay output. (See section 4)
4. Print and install the back-lit display legend. (See section 5)
5. Power up and check your installation. (See section 6)
C1477 User Manual
Part No. 8.0101.013 Revision 3 (80101013R03.pdf)
-6-
© Omniflex
2. SETTING THE CONFIGURATION SWITCHES
2.1 Introduction
The unit is configured for operation by setting the two 8-way set-up switches found
on the left hand side of the Omni8µ. The layout of these switches can be seen in
Figure 1-1 – Side View showing 8-way Set-up Switches.
SW1 is used to set the operational configuration of the Omni8µ.
SW2 is used to set the sense of the eight input contacts – normally open or
normally closed.
Each set-up switch has 8 individual miniature switches, numbered from 1 to 8.
Each of these miniature switches can be referred to separately: for example, the 8
miniature switches on SW1 are referred to as SW1-1 to SW1-8.
2.2 Selecting the input sense
(normally open or normally closed)
The input sense for each of the 8 input contacts is selected by setting the
corresponding switch of SW2. e.g. SW2-1 sets the contact sense for input 1 and
SW2-8 sets the contact sense for input 8.
When the switch is OFF (up) then the input is set to NORMALLY OPEN. (i.e. the
input will enter the alarm state when the input contact is closed.)
When the switch is ON (down) then the input is set to NORMALLY CLOSED. (i.e.
the input will enter the alarm state when the input contact is opened.)
2.3 Selecting the alarm sequences
The 8 inputs of the Omni8µ operate as a single group of alarms all with the same
alarm/display function, which can be any one of the available alarm/display
sequences listed in Table 2-1 (detailed block diagrams of each alarm/display
sequence are provided in section 8.)
Set switch SW1-1 to SW1-5 according to the selected sequence in Table 2-1.
The sequence switch settings can be changed at any time.
Any sequence switch changes made while the unit is running in the normal mode
of operation will cause the OMNI8µ to revert to the power-up routine as described
in section 6.1. Press the ACKNOWLEDGE button to return the unit to normal
operation.
C1477 User Manual
Part No. 8.0101.013 Revision 3 (80101013R03.pdf)
-7-
© Omniflex
2.4 Selecting the Group Alarm (G.A.) Relay Output Function
The G.A. relay provided internally offers a changeover contact on the rear terminals.
SW1-6 and SW1-7 are used to set the mode of operation of this relay.
There are four modes to choose from:
1. Relay follows input
The relay is normally energised.
Any abnormal input will de-energise the relay. The relay will re-energise when all
inputs return to their normal states, regardless of the state of the alarm lamps.
This is useful for tracking the actual state of the inputs.
2. Relay follows alarm state
The relay is normally energised.
Any alarm state will de-energise the relay. The relay will return to normal when all
alarm states have returned to normal. (i.e. the entire display is off)
This is useful for tracking the actions of a local operator in clearing the problem. If a
‘fleeting’ alarm sequence is chosen, the relay will remain de-energised until the
operator clears the display.
3. Relay acts as horn
The relay is normally de-energised.
The relay will energise whenever the internal audible device sounds. The relay will
de-energise when the internal audible is silenced (normally by pressing the Silence
or Acknowledge Pushbutton).
This is useful in environments where the local internal audible will not be heard.
4. Relay acts in Multiple Reflash Mode
The relay is normally energised.
The relay is de-energised by the first abnormal input state.
Upon each subsequent abnormal input state, the relay will momentarily energise (for
about 1 second), then return to the de-energised state.
This is useful when the relay contact is used for example to trigger a dial up alarm,
and if subsequent inputs going into alarm must also trigger the dial-up alarm.
Referring to Table 2-1, select one of the 4 relay modes by setting switches SW1-6
and SW1-7 to the appropriate positions.
2.5 Selecting the Inhibit Input Mode
Input 8 may be used as a special “input inhibit” input. In this mode, when the Input 8 is in
the normal state, the other 7 inputs perform normally. When the input 8 is in the alarm
state, then all further input changes are ignored, preventing any further alarms to be
displayed. In this mode, the lamp 8 will follow the state of the inhibit function. When the
alarm system is inhibited, the lamp 8 will be on. When the alarm system is operating
normally and not inhibited, then this lamp will be off.
2.6 Inhibit Input Sense
SW2-8 contact sense selection switch is used regardless of whether the input 8 is used
as a normal alarm or as an input inhibit.
C1477 User Manual
Part No. 8.0101.013 Revision 3 (80101013R03.pdf)
-8-
© Omniflex
Table 2-1: The Sequence Switch Settings
SEQUENCE
SW1
SEQ.
NO.
1
2
3
4
5
6
7
8
DESCRIPTION
ISA
DESIGN
ATION
0
0
0
0
0
0
SERVICE MODE (consult factory for service information)
1
1
0
0
0
0
LAMP FOLLOWS INPUT
2
0
1
0
0
0
MOMENTARY (FLEETING) ALARM, MANUAL RESET
3
1
1
0
0
0
ALARM ONLY (NON-LATCHING INPUTS) AUTO RESET
4
0
0
1
0
0
MOMENTARY ALARM, MANUAL RESET WITH ALARM RINGBACK
5
1
0
1
0
0
FIRST OUT, MULTIPLE GROUPS, MANUAL RESET
6
0
1
1
0
0
FIRST OUT, MANUAL RESET, AUTO RESET ON SUBSEQUENT ALARMS
7
1
1
1
0
0
FIRST OUT, SINGLE GROUP, MANUAL RESET, FIRST OUT CONTINUOUS FLASH
8
0
0
0
1
0
FIRST OUT, MANUAL RESET, SUBSEQUENT ALARMS WITHOUT HORN
9
1
0
0
1
0
10
0
1
0
1
11
1
1
0
1
12
0
0
1
13
1
0
16
0
0
18
0
21
T
TIME DELAY
--
--
M-1
--
A-1-4
--
R-1-10
--
F2M-1
--
F3A-1-3
--
--
--
F1M-1
--
MOMENTARY ALARM, MANUAL RESET, AUTO SILENCE AFTER TIME DELAY.
--
60 seconds
0
MOMENTARY ALARM, MANUAL RESET, REALARM AFTER TIME IF STILL ABNORMAL.
--
60 seconds
0
MOMENTARY ALARM, MANUAL RESET, CONSTANT FLASH (FOR MOTOR ALARMS).
--
--
1
0
MOMENTARY ALARM, AUTO RESET, TIME DELAY ON RETURN TO NORMAL.
--
60 seconds
1
1
0
PULSE MONITORING ALARM; MANUAL RESET
--
--
0
0
1
INPUTS 1-4 SEQUENCE 1; INPUTS 5-8 SEQUENCE 27 (FOR MOTOR ALARMS)
1
0
0
1
MOMENTARY ALARM, AUTO RESET
1
0
1
0
1
FIRST OUT, MULTIPLE GROUPS, AUTO RESET
23
1
1
1
0
1
FIRST OUT, SINGLE GROUP, AUTO RESET, FIRST OUT CONTINUOUS FLASH
24
0
0
0
1
1
FIRST OUT, AUTO RESET, SUBSEQUENT ALARMS WITHOUT HORN
25
1
0
0
1
1
26
0
1
0
1
27
1
1
0
1
29
1
0
1
1
---
--
F2A-1
--
--
--
F1A-1
--
MOMENTARY ALARM, AUTO RESET, AUTO SILENCE AFTER TIME DELAY.
--
60 seconds
1
MOMENTARY ALARM, AUTO RESET, REALARM AFTER TIME IF STILL ABNORMAL.
--
60 seconds
1
MOMENTARY ALARM, AUTO RESET, CONSTANT FLASH (FOR MOTOR ALARMS)
--
--
1
PULSE MONITORING ALARM, AUTO RESET
--
--
FOLLOWS INPUT
0
0
FOLLOWS ALARM
STATE
1
0
FOLLOWS HORN
0
1
NOTE:
RELAY OUTPUT (see Section 2.4 for details)
In the above sequences, the
switch
ACTS AS MRF
(REFLASH)
1
1
sense is as follows:
INPUT 8 AS NORMAL
0
INPUT 8 ACTS AS INHIBIT
1
WHEN THIS SWITCH IS ON, INPUT 8 MAY BE USED TO INHIBIT ALL OTHER ALARMS 1 TO 7.
IN THIS MODE LAMP 8 MEANS THE ANNUNCIATOR IS INHIBITED(see section 2.5 for details)
C1477 User Manual
Part No. 8.0101.013 Revision 3 (80101013R03.pdf)
-9-
“1” = switch in on position
“0” = switch in off position
© Omniflex
3. MECHANICAL INSTALLATION
The overall dimensions and panel cut-out size of a single unit are given in the following
Figure:
Fascia Din 48x96mm
SLIDES CLAMP
Omni8u AGAINST
PANEL
PANEL CUTOUT
48
42
44
DIMENSIONS IN mm
92
190
MAXIMUM PANEL
THICKNESS: 8mm
Figure 3-1: Mounting an Omni8µ
µ
3.1 Installing the Omni8µ
µ in a panel.
Remember to set the 8 way set-up switches on the side of the unit before installing in the
panel.
Remove the two slide clamps from the unit by lifting the ratchet levers and sliding them off
the rear of the unit.
Insert the Omni8µ into the panel from the front.
Replace the slide clamps by sliding them on from the rear. Make sure that they are secure
against the front plate. Ensure the ratchets are engaged to secure the slide in position.
The unit can be further secured by turning the screw in each clamp slightly.
CAUTION: Do not over-tighten, as it may cause the slide clamp ratchets to dislodge.
C1477 User Manual
Part No. 8.0101.013 Revision 4 (80101013R04.pdf)
- 10 -
© Omniflex
4. ELECTRICAL INSTALLATION
4.1 Introduction
All electrical connections to the Omni8µ are made on the rear of the unit on plug-in terminals
provided(refer to Figure 1-1).
4.2 Connection Table
Terminal
Number
1
2
3
4
5
6
7
8
9
10
11
12
13
14
15
16
Description
Input 1
Input 2
Input 3
Input 4
Input 5
Input 6
Input 7
Input 8
Common Input Excitation Voltage ( +12volts for contact wetting)
Relay Change-over Contact – Normally Open Connection
Relay Change-over Contact – Common Connection
Relay Change-over Contact – Normally Closed Connection
No Connection
Earth
+ dc Power Connection
Live ac Power Connection
- dc Power Connection
Neutral ac Power Connection
4.3 Connecting the alarm inputs
The Omni8µ is operated with potential free contacts connected to the input terminals. The
common terminal provided (marked C) supplies a +12 volt wetting potential used to power these
contacts.
Omni8u
C
8
7
6
5
4
3
2
1
Potential-free
Input
contacts
Figure 4-1 Inputs Connection Diagram
C1477 User Manual
Part No. 8.0101.013 Revision 4 (80101013R04.pdf)
- 11 -
© Omniflex
4.4 Connecting the Relay
The relay contact shown in the Figure 1-1 is shown with the relay coil in the de-energised state.
i.e. with no power applied. The normally open contact refers to the relay convention of the
contact in the de-energised state of the relay coil. In some of the modes of operation of this
relay, the relay coil will be energised with no alarms present. The normal state of the system
would therefore be for the contact across the C and NO terminals of the relay to be closed.
4.5 Connecting the power supply
Power supply connections are made to the plug-on terminals according to the following table:
Table 2-3: Power supply connections
Supply
Connector Terminals
Voltage
14
15
16
dc
Earth
positive (+)
negative (-)
ac
Earth
Live
Neutral
5. PREPARING THE BACKLIT DISPLAY LEGEND
5.1 Overview
Legends are created for the Omni8µ on a laser or inkjet printer using the software
templates provided with the product.
Templates for popular programs are supplied on a 3,5” ‘stiffy’ diskette with your Omni8µ.
These are for Microsoft Word and Microsoft Powerpoint to run on an IBM compatible
computer running the, Windows95, Windows98 or WindowsNT operating systems. There
is also a README.TXT file on this disk. Run this first to see which version of program you
must run to use the supplied templates.
5.2 Creating the Legend Film
To create the legend, run whichever of the programs you are familiar with. Load the
appropriate template supplied and then fill in your legend detail. Print it onto overhead
transparency film (the type used for overhead presentations). A sheet is included with the
product. Cut this along the cut marks which will print onto the film and then insert into the
Omni8µ.
(We suggest that you test your printout on plain-paper first to ensure that all aspects of
your Legend Film are to your liking before printing on to the actual film supplied.)
Please note that the supplied templates have been tested on a wide range of printers.
Your particular printer may scale the image slightly differently. While the front grid
markings should accommodate this tolerance, in exceptional circumstances you may have
to alter the grid spacing on the template supplied. This needs to be done once only and
will then be set for your printer.
5.3 Inserting the Legend into the Annunciator
Cut the film to size, unclip the Omni8µ front-plate by pulling on the upper edge, and insert the
film into the recess behind the front-plate.
Replace the front-plate.
C1477 User Manual
Part No. 8.0101.013 Revision 4 (80101013R04.pdf)
- 12 -
© Omniflex
6. OPERATION
6.1 Power-up
When power is applied to the Omni8µ, the unit commences an automatic, built-in circuit test
routine. This results in the unit sounding the audible for approximately half a second followed by
the cyclic illumination of each lamp in turn from 1 to 8 and back to 1 again etc. in a “marching
sequence”.
If no internal faults are detected in the unit, then this test mode display continues until the
Acknowledge Pushbutton is pressed or until an input enters the alarm state.
If a fault was detected, then the unit will display a fault indication by continuously flashing one of
the lamps. If this occurs, then the unit must be sent for service.
If a new alarm occurs while the Omni8µ is in this test routine, the unit will immediately revert to
its normal mode of operation and will deal with the alarm state according to the pre-selected
alarm sequence.
6.2 Normal Operation
During the normal operation, the Omni8µ will act upon any alarm states according to its pre-set
alarm sequences. (The instructions for setting-up these sequences are given in SECTION 3.3).
Section 8 provides detailed block diagrams for the function of each alarm sequence.
When an alarm condition occurs and the horn sounds, the operator should depress the relevant
pushbuttons, where necessary, according to the pre-selected alarm sequence.
When the Omni8µ is put into its test routine by depressing the TEST pushbutton, any existing
alarm states are “remembered” and the alarm annunciator will revert to its previous state when it
returns to its normal mode of operation.
If a new alarm state occurs while the Omni8µ is performing its test routine, the unit will
immediately revert to its normal mode of operation and deal with the alarm state according to
the pre-selected alarm sequence.
6.3 Test Functions
6.3.1
Overview of the Test Functions
The Test button operates as a combined lamp test and circuit test function.
No information is lost during the entire test routine, and each alarm display returns to the
exact state it was in before the test.
6.3.2
Pressing the Test Button
When the Test button is pressed, the unit checks the results of its regular full circuit test,
and if all checks performed pass, then a normal lamp test is performed by illuminating all
of the lamps while the Lamp Test Pushbutton is held down.
If the circuit Test fails then the unit enters its “marching sequence” test routine described in
Section 6.3.5 and the test failure code will be displayed by flashing one of the lamps
continuously.
In this way, the display/annunciator Test button acts both as a Lamp Test and Circuit
Function.
6.3.3
Fault Indication on Circuit Test
If a fault is found in one of the tests performed, then the unit enters its full “marching lamp
sequence”, with, in addition, one or more of the lamps flashing continuously to indicate the
fault located. This is described in detail in Section 6.3.5
C1477 User Manual
Part No. 8.0101.013 Revision 4 (80101013R04.pdf)
- 13 -
© Omniflex
6.3.4
Manually invoking the Circuit Test Function.
As a confidence measure, the unit may be placed in the full “marching sequence” Circuit
Test Mode at any time by holding down the Silence button and then pressing the Test
Button. See section 6.3.5
6.3.5
The “Marching Sequence” Circuit Test Display
This routine is entered upon the following conditions:
• Upon power up.
• If the Test button is pressed and a fault is detected in the unit.
• By holding down the Silence button and then pressing the Test button manually enters
this function.
• Any time during normal operation, if the unit during its regular self-test routines detects
a fault.
This test routine begins by activating the horn output circuit for approximately one second.
The operator should therefore check that the horn sounds for this short period.
Immediately after this half-second period, if the Omni8µ is functioning correctly, the
following visual indication will occur:
The display will begin a “marching light” sequence, with each display window illuminating
and then extinguishing, one at a time, starting with the display point 1 (top left-hand
window) and ending with the display point 8 (bottom right-hand window). All display
windows will then remain extinguished for a brief moment.
The “marching” sequence will then begin again, and this procedure of “marching”
sequence followed by the brief “blank” display period will be repeated continuously until
the ACKNOWLEDGE pushbutton is depressed, or until an input changes state.
This marching sequence indicates that the alarm annunciator has passed all its own
internal tests and is functioning correctly. If the lamp display exhibits any other pattern then
a fault has been detected, and the unit should be returned for repair.
To exit the test mode and begin normal operation, the ACKNOWLEDGE pushbutton
should be pressed.
The pushbuttons may also be tested in this mode:
If the SILENCE button is depressed - lamp No. 1 flashes continuously.
If the ACK button is depressed - the annunciator reverts to normal operation.
If the RESET button is depressed - lamp No. 3 flashes continuously.
If the TEST button is depressed - lamp No. 4 flashes continuously.
If any other lamp flashes continuously, then the unit has detected a fault and must be
returned to the factory for repair.
If a new alarm occurs while the Omni8µ is in this test routine, the unit will immediately
revert to its normal mode of operation and will deal with the alarm state according to the
pre-selected alarm sequence.
6.4 Use of the inhibit input
When SW1-8 is off, then input 8 operates in the normal fashion. When SW1-8 is switched on,
then input 8 is converted into an inhibit input as operates as follows:
If input 8 is in the abnormal condition all of the other alarm inputs will be disabled from causing a
new alarm. All other functions of the unit will remain unaffected.
C1477 User Manual
Part No. 8.0101.013 Revision 4 (80101013R04.pdf)
- 14 -
© Omniflex
7. SPECIFICATIONS
TERMINALS
Connection
Wire size
: via 16 way plug-in terminal block
: 1.5 sq. mm (17 SWG/15.5 AWG) recommended
2.5 sq. mm (15 SWG/13 AWG) maximum
POWER SUPPLY
Voltage:
Maximum dc ripple
Current consumption:
Isolation test voltage
(power supply to Input
terminals):
Model C1477-1
10-15Vdc
10% pk-to-pk
300mA
None
Model C1477-2
20-60Vdc
10% pk-to-pk
250mA
1500Vac rms
Model C1477-3
85-264Vac/dc
N/A
7VA/5W
1500Vac rms
ALARM INPUTS
Quantity and Type
Contact Sense
8 potential free contacts
normally open (N.O.) or normally closed (N.C.), selectable
by DIP switch.
Max open cct voltage:
15V dc between Common (positive) and all input terminals.
Max closed cct current: 2 mA per input
Max loop resistance to 200 ohms
detect closed circuit
Min loop resistance to 100 kilo-ohms
detect open circuit
Input Scan Rate
4 ms
PUSHBUTTONS
Quantity and Type
Functions
4 Mounted on front panel Integral to Unit
Silence, Acknowledge, Reset, Test
RELAY CONTACT OUTPUT
Quantity and Type
1 Potential-free changeover relay contact (FORM C)
Contact rating
: 2 A, 30 V dc / 0.5 A, 250 V ac
Isolation
1000Vac rms between contact and other circuits
Relay operating modes: 4 types to choose from (selectable by DIP switch):
i. Relay follows input states
ii. Relay follows alarm states
iii. Relay acts as horn output
iv. Relay acts as “Multiple Re-Flash” alarm output
CONFIGURATION SWITCHES
Quantity
2
Type
Each 8-way. One for Configuration; one for Input Sense
Location
on left-hand-side of unit (accessible only when slide clamp
is removed)
C1477 User Manual
Part No. 8.0101.013 Revision 4 (80101013R04.pdf)
- 15 -
© Omniflex
SEQUENCES
Quantity
ISA types supported
DISPLAY WINDOWS
Quantity and Type
Window size
Engraving details
Fast Flash Rate
Slow Flash Rate
22 (user selectable by DIP switches)
M-1; A-1; A-1-4; R-1-10; F2M-1; F2A-1; F3A-1-3; F1M-1;
F1A-1
8 Back-lit Red LED display
20 mm wide x 10 mm high (0.8” wide x 0,4” high)
Printed on transparent film using laser or inkjet printer.
Recommended text size: 3 rows of 20 characters 2.5mm
140 flashes per minute
35 flashes per minute
TEMPERATURE RANGE
Operating
0 ºC to +60 ºC (+32 ºF to +140 ºF)
Storage
-10 ºC to +70 ºC (+14 ºF to +158ºF)
DIMENSIONS (SINGLE UNIT)
Cut-out
: 44mm (1.73”) horizontal
92 mm (3.62”) vertical
Overall
: 48 mm (1.89”) height
96 mm (3.78”) width
190 mm (6,22”) maximum depth behind panel,
(excluding front panel)
Panel thickness:
: 1,6 mm (0,062”) minimum
: 9,0 mm (0,354”) maximum
WEIGHT
Unpacked
Packed
: 300 g approximately
: 480g approximately
COMPLIANCE TO STANDARDS
Safety
Emissions
Immunity – ESD
Immunity – RF Fields
Immunity –
Fast Transients
Supply Variations
EN 60950:1995
EN 55011 and EN50081-2:1994 Group I, Class A
IEC 61000-4-2:1995, level 3
IEC 61000-4-3:1995, level 3
IEC 61000-4-4:1995
2 kV – DC power port
1 kV – input/output lines
IEC 61000-4-7:1991, 24 V dc +15% -10%
ORDERING INFORMATION
C1477-1
Omni8µ with PSU 10-15Vdc
C1477-2
Omni8µ with PSU 20-60Vdc
C1477-3
Omni8µ with PSU 85-265Vac/dc
C1477 User Manual
Part No. 8.0101.013 Revision 4 (80101013R04.pdf)
- 16 -
© Omniflex
8. ALARM SEQUENCE DIAGRAMS
STATE 1
1 2 3 4 5 6 7 8
ON
SEQUENCE SWITCH
SETTING
LAMP OFF
HORN OFF
RETURN WHILE
NORMAL
ABNORMAL
STATE 2
LAMP ON
HORN OFF
Sequence 1 - Lamp Follows Input
1 2 3 4 5 6 7 8
ON
SEQUENCE SWITCH
SETTING
STATE 1
LAMP OFF
RESET WHILE
NORMAL
ABNORMAL
HORN OFF
STATE 4
STATE 3
STATE 2
LAMP ON
LAMP FAST
FLASH
LAMP FAST
FLASH
ACK
HORN OFF
SIL
HORN OFF
HORN ON
ACK
Sequence 2 - Momentary (Fleeting) Alarm, Manual Reset, Timer option off
1 2 3 4 5 6 7 8
ON
SEQUENCE SWITCH
SETTING
RETURN TO
NORMAL
STATE 1
LAMP OFF
RETURN TO
NORMAL
ABNORMAL
HORN OFF
RETURN TO NORMAL
STATE 4
STATE 3
STATE 2
LAMP ON
LAMP FAST
FLASH
LAMP FAST
FLASH
ACK
HORN OFF
HORN OFF
SIL
HORN ON
ACK
Sequence 3 - Alarm Only (No Lock-in), Auto Reset, (Timer option off)
C1477 User Manual
Part No. 8.0101.013 Revision 4 (80101013R04.pdf)
- 17 -
© Omniflex
STATE 1
1 2 3 4 5 6 7 8
ON
SEQUENCE SWITCH
SETTING
RESET
ABNORMAL
LAMP OFF
HORN OFF
ABNORMAL
ACK WHILE NORMAL
STATE 4
LAMP SLOW
FLASH
HORN OFF
ACK
WHILE
NORMAL
STATE 3
STATE 2
LAMP FAST
FLASH
LAMP FAST
FLASH
SIL
HORN OFF
HORN ON
ACK WHILE
ABNORMAL
STATE 5
RETURN
TO NORMAL
ACK WHILE
ABNORMAL
LAMP ON
HORN OFF
Sequence 4 - Momentary Alarm, Manual Reset, with Ringback, (Timer Option Off)
STATE 1
1 2 3 4 5 6 7 8
ON
SEQUENCE SWITCH
SETTING
T
LAMP OFF
HORN OFF
RESET
WHILE
NORMAL
RESET
WHILE
NORMAL
ABNORMAL
SUBSEQUENT
FIRST OUT
INACTIVE
ACK
STATE 7
STATE 6
STATE 5
LAMP ON
LAMP ON
LAMP ON
HORN OFF
ACK
HORN OFF
SIL
FIRST OUT
INACTIVE
FIRST OUT
INACTIVE
ABNORMAL
FIRST
OUT
HORN ON
FIRST OUT
INACTIVE
ACK
STATE 4
STATE 3
STATE 2
LAMP ON
LAMP FAST
FLASH
LAMP FAST
FLASH
HORN OFF
FIRST OUT
INACTIVE
ACK
HORN OFF
FIRST OUT
ACTIVE
SIL
HORN ON
FIRST OUT
ACTIVE
Sequence 5 - Momentary (Fleeting) Alarm, First Out Multiple Groups, Manual Reset, with Ringback.
C1477 User Manual
Part No. 8.0101.013 Revision 4 (80101013R04.pdf)
- 18 -
© Omniflex
STATE 1
1 2 3 4 5 6 7 8
ON
SEQUENCE SWITCH
SETTING
LAMP OFF
ABNORMAL
SUBSEQUENT
HORN OFF
RETURN TO
NORMAL
FIRST OUT
INACTIVE
RESET
WHILE
NORMAL
ACK
WHILE
NORMAL
ABNORMAL
FIRST
OUT
ACK WHILE
NORMAL
STATE 7
STATE 6
STATE 5
LAMP ON
LAMP
LAMPFAST
ON
FLASH
LAMP FAST
FLASH
HORN OFF
FIRST OUT
INACTIVE
ACK
WHILE
ABNORMAL
RESET
WHILE
ABNORMAL
HORN OFF
SIL
FIRST OUT
INACTIVE
HORN ON
FIRST OUT
INACTIVE
ACK WHILE ABNORMAL
ACK
STATE 4
STATE 3
STATE 2
LAMP SLOW
FLASH
LAMP INT.
FAST/SLOW
LAMP INT.
FAST/SLOW
HORN OFF
ACK
FIRST OUT
ACTIVE
HORN OFF
SIL
FIRST OUT
ACTIVE
HORN ON
FIRST OUT
ACTIVE
Sequence 6 - Momentary (Fleeting) Alarm, First Out Manual Reset, Auto Reset on subsequent Alarms
STATE 1
1 2 3 4 5 6 7 8
ON
SEQUENCE SWITCH
SETTING
RESET
WHILE
NORMAL
LAMP OFF
ABNORMAL
SUBSEQUENT
HORN OFF
RESET
WHILE
NORMAL
FIRST OUT
INACTIVE
ABNORMAL
FIRST
OUT
ACK
STATE 7
STATE 6
STATE 5
LAMP ON
LAMP ON
LAMP ON
HORN OFF
ACK
HORN OFF
SIL
FIRST OUT
INACTIVE
FIRST OUT
INACTIVE
HORN ON
FIRST OUT
INACTIVE
ACK WHILE ABNORMAL
ACK
STATE 4
STATE 3
STATE 2
LAMP SLOW
FLASH
LAMP FAST
FLASH
LAMP FAST
FLASH
HORN OFF
FIRST OUT
ACTIVE
ACK
HORN OFF
FIRST OUT
ACTIVE
SIL
HORN ON
FIRST OUT
ACTIVE
Sequence 7 - Momentary (Fleeting) Alarm, First Out Single Group, Manual Reset, First Out Continuous Flash
C1477 User Manual
Part No. 8.0101.013 Revision 4 (80101013R04.pdf)
- 19 -
© Omniflex
STATE 1
1 2 3 4 5 6 7 8
ON
SEQUENCE SWITCH
SETTING
RESET WHILE
NORMAL
ABNORMAL
FIRST OUT
LAMP OFF
HORN OFF
ABNORMAL
SUBSEQUENT
FIRST OUT
INACTIVE
ACK
STATE 4
STATE 3
STATE 2
LAMP ON
LAMP
LAMPFAST
ON
FLASH
LAMP FAST
FLASH
HORN OFF
ACK
FIRST OUT
INACTIVE
HORN OFF
SIL
HORN ON
FIRST OUT
ACTIVE
FIRST OUT
ACTIVE
Sequence 8 - Momentary (Fleeting) Alarm; First Out Multiple Group; Manual Reset; No horn for subsequent alarms.
STATE 1
1 2 3 4 5 6 7 8
ON
SEQUENCE SWITCH
SETTING
RESET WHILE
NORMAL
ABNORMAL
LAMP OFF
HORN OFF
TIMER OFF
T
STATE 4
STATE 3
LAMP ON
LAMP
FAST
LAMP
ON
FLASH
HORN OFF
ACK
HORN OFF
TIMER OFF
TIMER OFF
STATE 2
LAMP FAST
FLASH
SIL
HORN ON
TIMER
RUNNING
TIME OUT
ACK
Sequence 9 - Momentary (Fleeting) Alarm; Manual Reset; Auto Silence after Time Delay.
STATE 1
1 2 3 4 5 6 7 8
ON
SEQUENCE SWITCH
SETTING
T
RESET WHILE
NORMAL
ABNORMAL
LAMP OFF
HORN OFF
TIME OUT WHILE
ABNORMAL
TIMER OFF
TIME OUT WHILE ABNORMAL
STATE 4
STATE 3
STATE 2
LAMP ON
LAMP
FAST
LAMP
ON
FLASH
LAMP FAST
FLASH
HORN OFF
TIMER
RUNNING
ACK
HORN OFF
TIMER
RUNNING
SIL
HORN ON
TIMER OFF
ACK
Sequence 10 - Momentary (Fleeting) Alarm; Manual Reset; Re-alarm after time-out if still abnormal.
C1477 User Manual
Part No. 8.0101.013 Revision 4 (80101013R04.pdf)
- 20 -
© Omniflex
1 2 3 4 5 6 7 8
ON
SEQUENCE SWITCH
SETTING
STATE 1
LAMP OFF
RESET WHILE
NORMAL
ABNORMAL
HORN OFF
STATE 4
STATE 3
STATE 2
LAMP SLOW
FLASH
LAMP FAST
FLASH
LAMP FAST
FLASH
ACK
HORN OFF
SIL
HORN OFF
HORN ON
ACK
Sequence 11 - Momentary (Fleeting) Alarm, Manual Reset, for Motor Alarms (Timer option off)
1 2 3 4 5 6 7 8
ON
SEQUENCE SWITCH
SETTING
STATE 5
STATE 1
LAMP ON
LAMP OFF
HORN OFF
TIME OUT
TIMER
RUNNING
T
ABNORMAL
HORN OFF
TIMER OFF
RETURN TO
NORMAL
ABNORMAL
STATE 4
STATE 3
STATE 2
LAMP ON
LAMP
FAST
LAMP
ON
FLASH
LAMP FAST
FLASH
HORN OFF
TIMER OFF
ACK
HORN OFF
TIMER OFF
SIL
HORN ON
TIMER OFF
ACK
Sequence 12 - Momentary (Fleeting) Alarm; Auto Reset; with Time Delay on Return to Normal.
C1477 User Manual
Part No. 8.0101.013 Revision 4 (80101013R04.pdf)
- 21 -
© Omniflex
1 2 3 4 5 6 7 8
ON
SEQUENCE SWITCH
SETTING
STATE 2
LAMP OFF
STATE 1
ABNORMAL
HORN OFF
T
LAMP OFF
STATE 3
ABNORMAL
HORN OFF
RETURN
TO
NORMAL
TIMER
RUNNING
TIMER OFF
LAMP OFF
HORN OFF
RETURN
TO
NORMAL
TIMER
RUNNING
STATE 4
RESET WHILE
ABNORMAL
TIME
OUT
TIME
OUT
LAMP FAST
FLASH
RESET WHILE
NORMAL
HORN ON
ACK WHILE
NORMAL
ACK WHILE
ABNORMAL
TIMER OFF
SIL
STATE 6
STATE 5
LAMP ON
HORN OFF
STATE 7
LAMP OFF
ACK WHILE
NORMAL
TIMER OFF
HORN OFF
LAMP ON
ACK WHILE
ABNORMAL
TIMER OFF
HORN OFF
TIMER OFF
Sequence 13 - Pulse Monitoring Alarm, Manual Reset
1 2 3 4 5 6 7 8
ON
SEQUENCE SWITCH
SETTING
STATE 1
RETURN TO
NORMAL
LAMP OFF
HORN OFF
STATE 4
LAMP ON
HORN OFF
ABNORMAL
ACK WHILE
NORMAL
STATE 3
ACK
LAMP FAST
FLASH
HORN OFF
STATE 2
SIL
LAMP FAST
FLASH
HORN ON
ACK WHILE ABNORMAL
Sequence 18 - Momentary (Fleeting) Alarm, Auto Reset, (Timer option off)
C1477 User Manual
Part No. 8.0101.013 Revision 4 (80101013R04.pdf)
- 22 -
© Omniflex
STATE 1
1 2 3 4 5 6 7 8
ON
SEQUENCE SWITCH
SETTING
LAMP OFF
HORN OFF
RETURN
TO
NORMAL
RETURN
TO
NORMAL
ABNORMAL
SUBSEQUENT
FIRST OUT
INACTIVE
ACK
WHILE
NORMAL
ACK WHILE
NORMAL
NORMAL
STATE 7
STATE 6
STATE 5
LAMP ON
LAMP ON
LAMP ON
HORN OFF
FIRST OUT
INACTIVE
ACK
WHILE
ABNORMAL
ABNORMAL
FIRST
ACK
OUT
WHILE
SIL
HORN OFF
FIRST OUT
INACTIVE
HORN ON
FIRST OUT
INACTIVE
ACK WHILE ABNORMAL
ACK WHILE ABNORMAL
STATE 4
STATE 3
STATE 2
LAMP ON
LAMP FAST
FLASH
LAMP FAST
FLASH
HORN OFF
FIRST OUT
INACTIVE
ACK
WHILE
ABNORMAL
SIL
HORN OFF
FIRST OUT
ACTIVE
HORN ON
FIRST OUT
ACTIVE
Sequence 21 - Momentary (Fleeting) Alarm, First Out Multiple Groups, Auto Reset.
STATE 1
1 2 3 4 5 6 7 8
ON
SEQUENCE SWITCH
SETTING
LAMP OFF
HORN OFF
RETURN
TO
NORMAL
RETURN
TO
NORMAL
ACK
WHILE
NORMAL
STATE 7
LAMP ON
HORN OFF
FIRST OUT
INACTIVE
ABNORMAL
SUBSEQUENT
FIRST OUT
INACTIVE
ACK
WHILE
ABNORMAL
ACK WHILE
NORMAL
ABNORMAL
FIRST
ACK
OUT
WHILE
NORMAL
STATE 6
STATE 5
LAMP ON
LAMP ON
HORN OFF
SIL
FIRST OUT
INACTIVE
HORN ON
FIRST OUT
INACTIVE
ACK WHILE ABNORMAL
ACK WHILE ABNORMAL
STATE 4
STATE 3
STATE 2
LAMP SLOW
FLASH
LAMP FAST
FLASH
LAMP FAST
FLASH
HORN OFF
FIRST OUT
ACTIVE
ACK
WHILE
ABNORMAL
HORN OFF
FIRST OUT
ACTIVE
SIL
HORN ON
FIRST OUT
ACTIVE
Sequence 23 - Momentary (Fleeting) Alarm, First Out Single Group, Auto Reset, First Out Continous Flash.
C1477 User Manual
Part No. 8.0101.013 Revision 4 (80101013R04.pdf)
- 23 -
© Omniflex
STATE 1
1 2 3 4 5 6 7 8
ON
SEQUENCE SWITCH
SETTING
RETURN TO
NORMAL
ABNORMAL
FIRST OUT
LAMP OFF
HORN OFF
ABNORMAL
SUBSEQUENT
ACK WHILE
NORMAL
FIRST OUT
INACTIVE
ACK WHILE NORMAL
STATE 4
STATE 3
STATE 2
LAMP ON
LAMP
FAST
LAMP
ON
FLASH
LAMP FAST
FLASH
HORN OFF
ACK WHILE
ABNORMAL
FIRST OUT
INACTIVE
SIL
HORN OFF
HORN ON
FIRST OUT
ACTIVE
FIRST OUT
ACTIVE
ACK WHILE ABNORMAL
Sequence 24 - Momentary (Fleeting) Alarm; First Out Multiple Group; Auto Reset; No horn for subsequent alarms.
STATE 1
1 2 3 4 5 6 7 8
ON
SEQUENCE SWITCH
SETTING
RETURN TO
NORMAL
ABNORMAL
LAMP OFF
HORN OFF
ACK WHILE
NORMAL
TIMER OFF
T
ACK WHILE NORMAL
STATE 4
STATE 3
LAMP ON
LAMP
FAST
LAMP
ON
FLASH
HORN OFF
ACK
HORN OFF
TIMER OFF
TIMER OFF
STATE 2
LAMP FAST
FLASH
SIL
HORN ON
TIMER
RUNNING
TIME OUT
ACK WHILE ABNORMAL
Sequence 25 - Momentary (Fleeting) Alarm; Auto Reset; Auto Silence after Time Delay.
STATE 1
1 2 3 4 5 6 7 8
ON
SEQUENCE SWITCH
SETTING
T
RETURN TO
NORMAL
ABNORMAL
LAMP OFF
HORN OFF
TIME OUT WHILE
ABNORMAL
ACK WHILE
NORMAL
TIMER OFF
TIME OUT WHILE ABNORMAL
STATE 4
STATE 3
STATE 2
LAMP ON
LAMP
FAST
LAMP
ON
FLASH
LAMP FAST
FLASH
HORN OFF
TIMER
RUNNING
ACK
HORN OFF
TIMER
RUNNING
SIL
HORN ON
TIMER OFF
ACK WHILE ABNORMAL
Sequence 26 - Momentary (Fleeting) Alarm; Auto Reset; Re-alarm after time-out if still abnormal.
C1477 User Manual
Part No. 8.0101.013 Revision 4 (80101013R04.pdf)
- 24 -
© Omniflex
STATE 1
1 2 3 4 5 6 7 8
ON
SEQUENCE SWITCH
SETTING
RETURN TO
NORMAL
ABNORMAL
ACK WHILE
NORMAL
LAMP OFF
HORN OFF
ACK WHILE
NORMAL
STATE 4
LAMP SLOW
FLASH
ACK WHILE
ABNORMAL
HORN OFF
STATE 3
STATE 2
LAMP FAST
FLASH
LAMP FAST
FLASH
SIL
HORN OFF
HORN ON
ACK WHILE ABNORMAL
Sequence 27 - Momentary (Fleeting) Alarm, Auto Reset, for Motor Alarms (Timer option off)
1 2 3 4 5 6 7 8
ON
SEQUENCE SWITCH
SETTING
STATE 2
LAMP OFF
STATE 1
ABNORMAL
HORN OFF
T
TIMER
RUNNING
LAMP OFF
STATE 3
ABNORMAL
HORN OFF
RETURN
TO
NORMAL
TIMER OFF
LAMP OFF
HORN OFF
RETURN
TO
NORMAL
TIMER
RUNNING
STATE 4
ABNORMAL
TIME
OUT
TIME
OUT
LAMP FAST
FLASH
RETURN TO
NORMAL
HORN ON
ACK WHILE
NORMAL
TIMER OFF
ACK WHILE
ABNORMAL
SIL
STATE 6
STATE 5
LAMP ON
LAMP FAST
FLASH
HORN
HORN OFF
OFF
ACK WHILE
NORMAL
TIMER OFF
C1477 User Manual
Part No. 8.0101.013 Revision 4 (80101013R04.pdf)
HORN OFF
TIMER OFF
- 25 -
STATE 7
LAMP ON
ACK WHILE
ABNORMAL
HORN OFF
TIMER OFF
© Omniflex