1
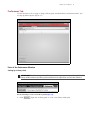
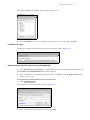
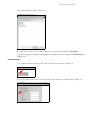
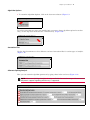
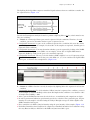
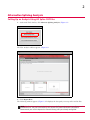
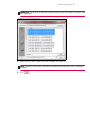
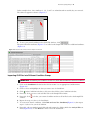
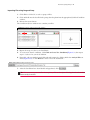
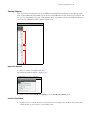
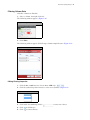
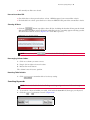
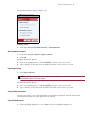
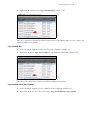
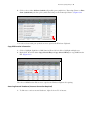
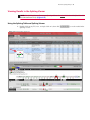
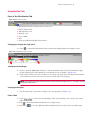
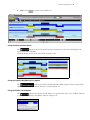
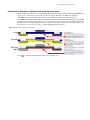
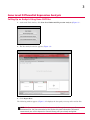
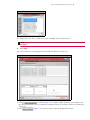
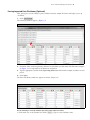
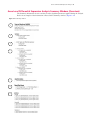
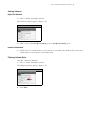
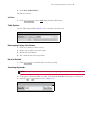
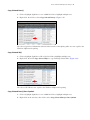
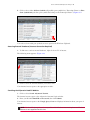
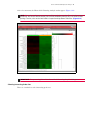
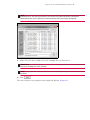
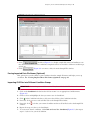
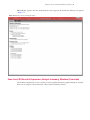
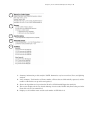
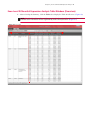
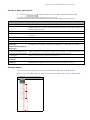
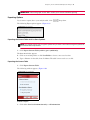
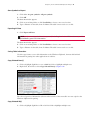
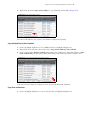
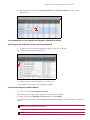
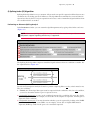
Chapter 4 | Exon Level Differential Expression Analysis 83 Figure 4.4 Import Data into Sample File Window Click checkbox (Figure 4.4) to display sample file names and attributes even they have been added to various conditions. Samples that have been added to different conditions get grayed out. Click (Figure 4.4) to remove a file(s) from the Sample File window. Parsing Imported Data File Names (Optional) This option gives you the ability to parse attributes from the sample file names and helps you set up conditions. See “Parsing Imported Data File Names (Optional)” on page 49. Importing CHP Files into Different Condition Groups IMPORTANT: Customize your condition names first, then add the CHP files into each condition. 1. Click on the Condition1 window header field to rename it to an appropriate Condition name. (Figure 4.5) 2. Click to select and highlight the data you want to use for Condition1. 3. Click in the Condition1 window to add your selected files to the Condition1 window. 4. If needed, click 5. If needed, click to move selected files back to the Sample File window. to delete your current Condition and move all its files back to the Sample File window. 6. Repeat the steps 1-3 (above) for Condition2. 7. To create more than 2 conditions, click Click to Create New Condition (Figure 4.5), then repeat steps 1-3 (above) for your 3rd Condition.