1
Smart Process Instrumentation
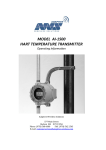
MODEL AI-1000 R2 PROGRAMMABLE
TEMPERATURE TRANSMITTER
Operating Information
Accutech
A Division
of Adaptive
Instruments,
LLC
ADAPTIVE
WIRELESS
SOLUTIONS
577 Main Street
Hudson MA 01749 USA
Phone (978) 568 0500 FAX (978) 568 9085
E-mail: [email protected]
Website: www.savewithaccutech.com
Rev 4 1/04
TABLE OF CONTENTS
1.0 INTRODUCTION ....................................................................................................................................................... 1
2.0 UNPACKING AND INSTALLATION ........................................................................................................................ 1
2.1 Unpacking ................................................................................................................................................... 1
2.2 Mechanical Installation ............................................................................................................................. 1
2.21 Weather Proof/Explosion Proof Housing ............................................................................ 2
2.22 Mounting .................................................................................................................................... 2
2.3 Electrical Installation ................................................................................................................................. 4
2.31 Output Terminals ..................................................................................................................... 4
2.32 Input Terminals ........................................................................................................................ 5
3.0 TRANSMITTER OPERATION .................................................................................................................................. 7
3.1 In a Hurry? ................................................................................................................................................... 7
3.11 Factory Configuration .............................................................................................................. 7
3.12 Operation Without a Display .................................................................................................. 7
3.13 Operation With a Display ........................................................................................................ 7
4.0 CONFIGURATION USING THE DK-2 TWO-LINE DISPLAY ...............................................................................11
4.1 Entering the Display Mode .......................................................................................................................11
4.2 Display Mode Configuration .....................................................................................................................12
4.3 Select Sensor Input ...................................................................................................................................12
4.4 Select Units .................................................................................................................................................16
4.5 Change Zero (Lower Range Value) ........................................................................................................16
4.6 Change Full Scale (Lower Range Value)...............................................................................................17
4.7 Select Sensor Fail Safe Detection .........................................................................................................18
4.8 Select Fail Safe Reporting ........................................................................................................................18
4.9 Trim 4.0mA ..................................................................................................................................................19
4.10 Trim 20.mA ................................................................................................................................................19
4.11 Trim Display ..............................................................................................................................................19
4.12 Select Language ......................................................................................................................................21
5.0 CONFIGURATION USING THE DK-1 ONE-LINE DISPLAY ...............................................................................23
5.1 Entering the Display Mode .......................................................................................................................23
5.2 Display Mode Operation ...........................................................................................................................23
5.3 Select Sensor Input ...................................................................................................................................24
5.4 Select Units .................................................................................................................................................27
5.5 Change Zero (Lower Range Value) .......................................................................................................27
5.6 Change Full Scale (Lower Range Value) ..............................................................................................28
5.7 Select Sensor Fail Safe Detection ..........................................................................................................28
5.8 Select Fail Safe Reporting ........................................................................................................................29
5.9 Trim 4.0mA ..................................................................................................................................................29
5.10 Trim 20.mA ................................................................................................................................................30
5.11 Trim Display ..............................................................................................................................................30
6.0 APPLICATIONS INFORMATION ..............................................................................................................................33
6.1 Sensor Fail-Safe Detection ......................................................................................................................33
6.2 Configuration With an External Source ..................................................................................................33
6.3 For Best Measurement Accuracy ............................................................................................................34
7.0 ACCESSORIES & INFORMATION ..........................................................................................................................35
8.0 SPECIFICATIONS .....................................................................................................................................................37
LIMITED WARRANTY .......................................................................................................................................................38
Accutech AI-1000 R2 User Manual Rev 4
LIST OF ILLUSTRATIONS
DESCRIPTION
PAGE
Figure 2-1, XP-FG Explosion Proof Housing with PY-2 Pipe Mounting Bracket ................................................... 2
Figure 2-2, DIN Rail Mounting Bracket .......................................................................................................................... 3
Figure 2-3, Weather Proof Housing ............................................................................................................................... 3
Figure 2-4, Output Terminal Connections ................................................................................................................... 4
Figure 2-5, Input Terminal Connections ...................................................................................................................... 5
Figure 3-1, Appearance of the Local Displays DK-1 and DK-2 ................................................................................. 8
Figure 8-1, Mechanical Dimensions .............................................................................................................................39
Figure 8-2, Intrinsic Safety Approval Drawings ............................................................................................................41
Figure 8-3, DK-1 One Line Display Configuration Flowchart ....................................................................................43
Figure 8-4, DK-2 Two Line Display Configuration Flowchart ....................................................................................45
INDEX
DESCRIPTION
PAGE
Configuration Flowcharts ......................................................................................................................................... 43, 45
Input Terminal Connections ........................................................................................................................................... 5
Intrinsic Safety Approval Drawings .................................................................................................................................41
Lead Resistances and Lead Length .............................................................................................................................33
LRV and URV, Enter Value............................................................................................................................16, 17, 27, 28
Mechanical Dimensions ..................................................................................................................................................39
Output Terminal Connections ........................................................................................................................................ 4
Output Trim ........................................................................................................................................................... 19, 29, 30
Sensor Selection ....................................................................................................................................................... 12, 24
Accutech AI-1000 R2 User Manual Rev 4
1.0 INTRODUCTION
The AI-1000 R2 is a Programmable compatible, isolated, two-wire, transmitter that accommodates any one of
eleven types of thermocouples, six types of RTD's, millivolt or ohm inputs. The unit is precision linearized to
the measured temperature over the entire usable range of the selected sensor. This transmitter is simple to
set up and operates much like high performance analog transmitters.
The AI-1000 R2 also has num erous advanced features that are achieved through the use of digital signal
processing and micro-controller technologies. Typical of these features are the precision linearization, the
independent zero and full scale settings, digital filtering, etc. Other advanced features, such as the automatic
self diagnostics, and the exceptional stability are transparent to the user and are continuously active.
The AI-1000 R2 transmitter can also accept one of two optional plug-in displays. The DK-1 is an inexpens ive,
single line display that is intended to give a low-cost, local indication of the measured temperature. The DK-2
two line display will give a local indication and functions as a very easy-to-use set-up tool. Both displays
facilitate local configuration and ranging of the transmitter.
This manual is divided into several sections. After a brief INTRODUCTION, the section on UNPACKING AND
INSTALLATION contains much useful information for the first time installer. The section called IN A HURRY?
helps get the system operating provided the sensor and transmitter were purchased at the same time and
thus most of the set up was completed at the factory. The next two sections explain the method of
CONFIGURATION using either display. Finally, there is additional APPLICATION INFORMATION and the
TECHNICAL SPECIFICATIONS included in the sections under those headings.
The AI-1000 R2 temperature transmitter does not have any potentiometers or switches to set and there are no
user serviceable components inside the transmitter. Opening the enclosure will void the manufacturer's
warranty. All reconfiguration, re-ranging and "calibration" can be done in the field using either one of the
displays. Any of the communication methods provides reconfiguration and re-ranging capabilities without
other external calibration tools.
2.0 UNPACKING AND INSTALLATION
2.1 Unpacking
Remove the Packing List to check off the actual equipment received. If you have any questions on your
Adaptive Wireless
solutions
atce
(978)
875 6000
shipment, please call ACCUTECH
Customer
Servi
at (978)
568-0500. Upon receipt of shipment, inspect
the container for any signs of damage in transit. Especially take note of any evidence of rough handling.
Report any apparent damage immediately to the shipping agent.
NOTE: The carrier will not honor any claims unless all shipping material is saved
for their examination. After examining and removing the contents, save the packing
material and carton in the event reshipment is necessary.
2.2 Mechanical Installation
Proper installation of the transmitter will assure highest performance and minimize errors of the measured
variable. The transmitter should be mounted in a location that minimizes temperature extremes, vibration and
shock. It is important to survey the area to ascertain the best location for installation. Will the location be
subjected to flooding? Is the location directly above, below or in proximity to a known high heat source? Does
the location make the transmitter unserviceable?
The installation recommendations outlined in this section are provided to act as a guideline only and cannot
cover all possible variations. The final installation must be made at the discretion and approval of the user.
Accutech AI-1000 R2 User Manual Rev 4
Page 1
2.21 Weather Proof/Explosion Proof Housing
Several optional transmitter housings are available. The XP-FN is an Explosion Proof / Weather Proof housing
that accommodates a transmitter when the local display option is not required. The XP -FG, with its glass
window, may be used in hazardous and wet locations when the display option is desired. The XP-HEAD is a
small electrical head that can be used without local indication in Explosion Proof environments. The WPHEAD is a small aluminum Weatherproof head designed for head mounting the transmitter without local
indication. These housings have appropriate mounting means in the bottom to attach the AI -1000 R2 in any of
four orientations 90° apart. Captive 8-32 machine screws are installed on the transmitter to facilitate
installation and removal to either a housing bottom plate or to a mounting panel.
Please note that condensation often occurs inside conduit attached to Weather Proof or Explosion Proof
housings. Care must be taken so that liquid condensation does not accumulate and fill the transmitter
housing with liquid. While the transmitter is sealed, we do not recommend operating it immersed in liquid.
Conductive liquids across the top of the transmitter will short the input and loop terminals. This installation
problem can appear to a control system as a transmitter failure.
2.22 Mounting
The AI-1000 R2 transmitter may be head mounted, mounted on a 2 inch pipe (vertical or horizontal), on a
bulkhead, a panel, a DIN rail or other rigid support members utilizing the various mounting brackets and
associated hardware available from Accutech. These types of mounts provide greater flexibility in installation
and removal of the transmitter for service. In locations where extreme temperature variations are encountered,
it is strongly recommended that enclosures be provided to maintain a somewhat constant temperature at the
transmitter. Heaters or steam tracing should be provided if the ambient temperature variations are extreme.
Figure 2-1
The XP-FG Explosion Proof Housing with PY-2 Pipe Mounting bracket
Accutech AI-1000 R2 User Manual Rev 4
Page 2
2.221 DIN Rail Mounting
A bracket is available if DIN rail mounting of the AI-1000 R2 is desired. See Figure 2 -2.
Figure 2-2
Optional DIN Rail Mounting Bracket
2.222 Head Mounting
All Explosion Proof / Weatherproof housings can be used for head mounting. All heads have two ½" female
NPT conduit entries. One of these conduit entries can be used to mount directly onto a ½" male NPT
extension of the sensor. Alternatively, a ½" NPT union coupling can be placed between the housing and the
temperature sensor. Note that the XP-HEAD and WP-HEAD cannot be used with a pipe mount bracket. For
non-display pipe mount bracket installations, use the XP -FN Housing.
Figure 2-3
Optional Weather Proof Housing
Accutech AI-1000 R2 User Manual Rev 4
Page 3
2.223 Surface Mounting
The transmitter has two mounting holes through the body of the transmitter. These mounting holes allow the
transmitters to be attached to any flat surface by means of two bolts or screws. The transmitter is provided
with 8/32 captive screws already installed.
2.224 Pipe Mounting
A stainless steel bracket is available for pipe mounting. Use the PY-2 for mounting the XP-FN or XP-FG
housing onto any 2" pipe. Note that the XP-HEAD and WP-HEAD are not suitable for Pipe Mounting. The
housing is attached to the bracket as shown in Figure 2 -1.
2.3 ELECTRICAL INSTALLATION
The AI-1000 R2 has two groups of terminals. One terminal group is for the sensor input. The second terminal
group is for transmitter output. The terminals labeled “+” and “-” are the 4 to 20mA output terminals. These
are normally connected to the corresponding polarity terminals of the power supply of the current loop. Refer
to Figure 2-4 for the arrangement of the output terminal connections.
Terminals labeled "1,2,3 and 4" are used in various connections to accommodate the different sensor inputs.
Refer to Figure 2-5 for the arrangement of the input terminal connections.
NOTE
For Intrinsically Safe Applications, please refer to the Intrinsic Safety Control Drawings included in this manual on page
41.
2.31 Output Terminals
The output terminals, labeled “+” and “-”, are generally connected to a power supply having a nominal 24 Volt
DC voltage and capable of supplying 23mA for the AI-1000 R2. The “+” and “-” terminals of the transmitter are
connected to the corresponding polarity terminals of the power supply.
Figure 2-4
−
+
NEGATIVE
POSITIVE
Output Terminal Connections
A load resistor, typically 250 ohms, may be connected in series with either terminal of the transmitter. For
Digital communications, 250 ohms must be connected in the loop. The maximum series resistance in the
circuit (including wiring lead resistance) can be calculated using the formula:
Vs - 12
Rs = ----------------0.023
The following chart gives maximum series resistance:
Max. Series Resistance, Rs
1300 ohms
520 ohms
417 ohms
250 ohms
0 ohms
Accutech AI-1000 R2 User Manual Rev 4
Supply Voltage, Vs
42.0 Volts
24.0 Volts
21.6 Volts
18.0 Volts
12.0 Volts
Page 4
2.32 Input Terminals
See Figure 2-5 for sensor input connections. Be certain to include the proper jumpers for thermocouple
sensors and for two or three wire RTD inputs. Any sensor other than the four-wire RTD requires at least one
external jumper. A jumper is supplied with the unit and is attached to terminals 3 and 4.
Jumper = 1443
2, 3, & 4 Wire RTD
\/\/\/
/\/\/\/
/\/\/\/
/
6448
Œ
•
- T/C , mV +
Figure 2-5
6448
6448
Ž
•
1443
Input Terminal Connections
2.321 Millivolt and Thermocouple Input
Apply signal to terminals 1 and 2. Terminal 1 is the negative and Terminal 2 is the positive. Terminals 3 and
4 must be jumpered together for proper operation as well as to prevent any build-up of electrostatic charge on
these terminals which could affect the transmitter readings.
2.322 Two-Wire RTD Input
Apply signal to terminals 1 and 3. Jumpers must be installed on terminals 1 and 2 as well as on 3 and 4 for
proper operation and to prevent any build-up of electrostatic charge on these terminals which could affect the
transmitter readings.
2.323 Three-Wire RTD Input
Apply the common legs from the RTD (generally the same color RTD leads) to terminals 1 and 2. Apply the
other signal lead to terminal 3. Terminals 3 and 4 must be jumpered together for proper operation and to
prevent any build-up of electrostatic charge on these terminals which could affect the transmitter readings.
2.324 Four-Wire RTD Input
Apply one set of the common legs from the RTD (generally the same color RTD leads) to terminals 1 and 2.
Apply the other signal lead pair to terminals 3 and 4. No jumpers should be used for a 4 wire RTD input.
Accutech AI-1000 R2 User Manual Rev 4
Page 5
3.0 TRANSMITTER OPERATION
3.1 In a hurry?
When in a hurry, this short set of instructions and references will help get the transmitter running.
3.11
Factory Configuration
Input
Output
4.00mA
20.00mA
Sensor Fail-safe
=
=
=
=
=
Type J Thermocouple
Analog
40°F
200°F
23.00mA (High)
On special request the factory will set the transmitter to any desired configuration. Special configurations are
identified on a tag attached to the unit.
3.12 Operation Without a Display
If the unit was ordered with the standard factory configuration, the sensor required is a Type J thermocouple.
The packing slip and a tag on the unit will indicate if the unit was set up to any other customer requested
special configuration. If there is a need to change the configuration of the transmitter, or to re-range it, use
either the DK-1 or DK-2 Display / Keyboards and refer to the procedures described in SECTIONS 4 (for DK-2)
or 5 (for DK-1).
NOTE: Even when "In a Hurry", the use of an appropriate power supply is important.
A 24V DC supply having a current handling capacity of at least 0.1A is commonly
used. Always use a DC (direct current) supply, or suitable size battery. Never
connect the transmitter directly to 115VAC.
With the power supply off, connect the + side of the power supply to the + terminal of the transmitter. Connect
the - side of the power supply to the - terminal of the transmitter. Optionally a resistor, typically 250 ohms may
be added in series with either lead.
Connect a Type J thermocouple to the transmitter input.
Thermocouple high (+) (input terminal 2)
Thermocouple low (-) (input terminal 1)
Jumper terminals 3 & 4 together
Unlike conventional electrical wiring, on a J thermocouple the red lead is negative. This should be checked
and verified with the particular sensor to be used.
To connect other sensors to the input refer to Section 2.32 for the proper sensor connections.
The output can be monitored by connecting a milliameter in series with either of the two output terminals, or by
connecting a high impedance voltmeter across the optional 250 ohm resistor. Now turn on the power supply.
In about 5 seconds the AI-1000 R2 loop current will settle to its normal value in the range of 4 to 20mA, unless
the input terminals are open, in which case the output current will be 23.00mA. Note that for a Type J
thermocouple, if 4mA = 40 °F and 20mA = 200ºF, each additional 10 °F increases the current by 1.0mA.
3.13
Operation With a Display
If the transmitter was ordered with either display option, it will have a small local LCD display module (with two
integral buttons) plugged in to the top of the unit. Either display option can be ordered already installed on the
AI-1000 R2 transmitter. Alternately, either display can be ordered and field installed at any time.
Having the display option as part of the transmitter does not affect its operation in the analog mode and the
description of the previous section applies. However, the display option does provide some very useful local
indication of the measured temperature and other diagnostic functions. Figure 3.1 indicates the arrangement
of the display screen.
Accutech AI-1000 R2 User Manual Rev 4
Page 7
Figure 3-1
Appearance of the Local Displays, DK-2 and DK-1
In operation, the DK-1 and DK-2 displays both give the process temperature. The DK-2 provides some
additional information. The DK-1 displays the process temperature and a minus sign if applicable. The
temperature is displayed with a floating decimal point. For measured temperatures over 999.9 ° no decimal
point will be displayed. Otherwise, the DK-1 will show one tenth degree increments. Unlike the more capable
DK-2 display, the DK-1 does not show the units of measurement “°C”, “°F”, “°R”, or “°K”. If it is necessary to
display the temperature units on the DK-1, note by hand or apply a separate label on the face of the display.
The DK-2 has more display capabilities. With the DK-2, the top display row shows the process temperature,
the units of measurement, “°C”, “°F”, “°R”, or “°K” and a minus sign if a pplicable. The mid portion is an analog
bar graph display showing the % of range based on the ZERO and FULL SCALE setting of the transmitter.
When power is applied the leftmost segment of the bar graph, the 0% and the 100% become energized
momentarily. If the measured temperature is below what the ZERO is set to (below LRV), then the left arrow is
energized. If the measured temperature is above the FULL SCALE setting (above URV), then the right arrow
becomes energized. The bottom portion of the DK-2 display is capable of displaying an alphanumeric
message up to 7 characters long. In normal operation this row shows a label, which is factory set to display
“AI-1000 R2”. Note that this display label can be programmed at the factory to any desired message or tag up
to 7 characters.
Note that the process temperature displayed on the DK-1 and DK-2 is the actual temperature as measured by
the transmitter, it is not affected by the analog output range settings. This is particularly useful in startup or
operation where the measured temperature is temporarily outside the normal operating range.
When the unit is first turned on, the display will show the measured temperature. It is frequently the case that
no sensor is connected when the transmitter is first tu rned on. In this case, the display will show a sensor
failure. In the event of a sensor or transmitter failure, the indication on the DK-1 display changes to read:
FAIL
SAFE
The words "FAIL" and "SAFE" will alternate in the display window to let you know that a failure condition has
occurred.
Accutech AI-1000 R2 User Manual Rev 4
Page 8
In the event of a sensor or transmitter failure, the indication on the bottom line of the DK-2 display also
changes to
0% gggggggggggggg
FAIL
100%>
0%-gggggggggggggg
100%>
SAFE
The words "FAIL" and "SAFE" will alternate in the display window to let you know that a failure condition has
occurred. The Percent of Output Bar Graph will indicate the output level of the transmitter. If the transmitter
Failsafe Report value is set to “Fail High” (23mA), the display will be as shown, at over 100% of output. If the
Failsafe Report is set to “Fail Low” (3.8mA), the Percent of Output Bar Graph would indicate the output level at
under 0% of output. See sections 4.8 or 5.8 for further information on setting Failsafe Reporting.
Once the proper sensor is connected the fault message on the display should clear and the transmitter
output should go to the proper value.
Both LCD displays take full advantage of the precision of these transmitters. The digital display of
measurement does not include the small D/A error otherwise present in the analog output. It provides highly
accurate local indication of the measurement, local fault diagnostics, and transmitter identification. The LCD
continues to dis play the measured temperature even if it is beyond the zero and full scale limits set for the
analog output. The value of this display as a set-up, calibration and reconfiguration tool may even be greater,
as will be seen in later chapters.
If you should desire to change the sensor input or to re-range or reconfigure the transmitter, please refer
to Sections 4 or 5 of this manual, which show you how to set-up the transmitter with the DK-1or DK-2
displays.
Accutech AI-1000 R2 User Manual Rev 4
Page 9
4.0 CONFIGURATION USING THE DK-2, TWO-LINE DISPLAY
To configure a transmitter using the DISPLAY MODE, either the DK-1 or DK-2 local LCD display is required.
These displays are available as an option and can be plugged into the top of the AI -1000 R2 transmitter. The
transmitter can also be purchas ed with these options already installed. These inexpensive options make the
reconfiguration, or re-ranging of the transmitter very simple and easy to follow. Without the use of a calibrator,
or any other tools, the transmitter can be set up for a different sensor, or the new range limits can be set much
like one would set the time on a digital watch.
In the event that the DK-1 or DK-2 Display / Keyboard are not purchased at the same time as the transmitter,
the one piece display design allows for easy fi eld installation by simply plugging the DK-1 or DK-2 into the top
of the transmitter.
4.1 Entering the Display Mode
To start the DISPLAY MODE, first connect the transmitter to an appropriate DC power supply. Typically a 24VDC
supply is connected with the + side of the power supply connected to the transmitter’s output “+” terminal and side of the power supply connected to the transmitter’s output “-” terminal. A series resistor in the loop is
optional. A sensor may be connected to the transmitter’s input terminals, but this is not required for setting up
the transmitter.
With the standard factory set-up and no sensor connected, the DK-2 display will give the following indication:
0% gggggggggggggg
100%>
FAIL
0%-gggggggggggggg
100%>
SAFE
The transmitter is alternating the words FAIL SAFE, since no sensor is connected, and the analog output is
indicating greater than 100%, loop current at 23.00mA, which is the standard Failsafe report condition. Please
note that the display / keyboards can be plugged into the transmitter while the transmitter is powered up.
There is no need to disconnect power before plugging the DK-1 or DK-2 into the AI-1000 R2.
Press the key marked NEXT. The display starts to alternate asking if the user wishes to return to the Operate
Mode?
RETURN
TO
OPERATE
MODE
?
To activate the NEXT and ENTER keys, a slow, deliberate push of the key is required. This prevents any casual,
inadvertent activation of the transmitter into one of the configuration modes.
The answer would be “No”, therefore, press the NEXT key. This will enter you into the DISPLAY MODE
configuration menu. If you wish to answer a question “Yes”, press the ENTER KEY . A flow chart summarizing the
operation of the DISPLAY MODE appears at the end of this manual.
Note that when more than seven characters are required to describe a function, the display keeps sequencing
through two or more screens or may use common abbreviations. In this manual, the sequencing of the
display is indicated by placing the two or more parts of the message adjacently. With some functions, the DK2 display indicates a numeric value and unit of measurement on the top line of the display in addition to the
message on the lower display line.
Accutech AI-1000 R2 User Manual Rev 4
Page 11
4.2 Display Mode Configuration
The DISPLAY MODE will allow the user to do the following:
•
Select a Sensor Input (SELECT INPUT)
•
Select a desired temperature unit, such as ºF (SELECT UNITS)
•
Change the 4mA Lower Range Value (CHANGE ZERO)
•
Change the 20mA Full Scale Value (CHANGE FULL SCALE)
•
Change the Sensor Fail Safe detection (SELECT SENSOR FAIL SAFE)
•
Change the Fail Safe reporting (SELECT FAIL SAFE REPORT)
•
Trim the 4.0mA output current (TRIM 4 MA)
•
Trim the 20.0mA output current (TRIM 20 MA)
•
Trim the display value (TRIM DISPLAY )
Each of these functions is presented in sequence on the LCD display. If the indicated function need not be
performed, press NEXT, and the next function is displayed on the screen. To perform any function press the
ENTER key. This will cause additional screens to be displayed which enable you to perform the function.
These are described in detail below and summarized on the DK-2 Two-Line Display / Keyboard Flowchart
found in the rear of this manual.
4.3 Select a Sensor Input
The SELECT SENSOR is the first function in the sequence. Virtually any thermocouple, RTD or millivolt input can
be selected. The display will read as follows to indicate this position on the menu:
SELECT
INPUT ?
If the sensor is set correctly, press NEXT and skip to Section 4.4 of this manual; otherwise press ENTER . After
pressing the ENTER key, the display will change to:
T/C J
Indicating that the transmitter is set to a Type J thermocouple input. If this is the desired sensor, then press
ENTER , otherwise press NEXT repeatedly to sequence through the available sensors. Each time NEXT is
pressed, the next available sensor selection is displayed.
Press the NEXT key to go the next sensor
T/C K
Press the NEXT key to continue through the different sensor selections
T/C L
T/C N
Accutech AI-1000 R2 User Manual Rev 4
Page 12
T/C R
T/C S
T/C T
T/C U
T/C SPEC
Note: The T/C SPEC or Special Thermocouple input is reserved for a special thermocouple input, should one
be desired. This Special must be ordered from the factory.
2W OHMS
2W DINP
Note: This is the 100Ω Platinum DIN Curve with α = 0.00385.
2W SAMP
Note: This is the 100Ω SAMA Platinum Curve, known variously as the SAMA RC21-4 or SAMA PR-279.
Constants are 98.13Ω @ 0°C, α=0.003923.
Accutech AI-1000 R2 User Manual Rev 4
Page 13
2W SPEC
Note: The 2W SPEC or Special 2 wire RTD input is reserved for a special RTD input, should one be desired.
Any special 2-wire RTD curve must be ordered from the factory.
3W OHMS
3W DINP
Note: This is the 100Ω Platinum DIN Curve with α = 0.00385.
3W SAMP
Note: This is the 100Ω SAMA Platinum Curve, known variously as the SAMA RC21-4 or SAMA PR-279.
Constants are 98.13Ω @ 0°C, α=0.003923.
3W SPEC
Note: The 3W SPEC or Special 3 wire RTD input is reserved for a special RTD input, should one be desired.
Any special 3-wire RTD curve must be ordered from the factory.
4W OHMS
4W DINP
Note: This is the 100Ω Platinum DIN Curve with α = 0.00385. This sensor will give superior measurement
results in most real-world situations where the measured temperature is under 1,000ºF.
4W SAMP
Note: This is the 100 Ω SAMA Platinum Curve, known variously as the SAMA RC21-4 or SAMA PR-279.
Constants are 98.13Ω @ 0°C, α=0.003923.
Accutech AI-1000 R2 User Manual Rev 4
Page 14
4W SPEC
Note: The 4W SPEC or Special 4 wire RTD input is reserved for a special RTD input, should one be desired.
Any special 4-wire RTD must be ordered from the factory.
MV
HHTONLY
Note: The HHTONLY is for a Hand-Held set-up. This is used for Factory set-up only.
T/C B
T/C C
T/C E
Pressing NEXT key again returns you to the J thermocouple selection. Repeated pressing of NEXT key will
again cycle you through the input selection submenu. You can stop at any one of the thermocouple, RTD or
mV selections by pressing the ENTER key. This action changes the transmitter mode to that sensor. If no
sensor change is desired, then, without sequencing through the various sensor options, but just pressing the
ENTER key will allow one to confirm the sensor selection and leave it unchanged. Assume that the sensor is
left as T/C J. After pressing ENTER the display will return to the main menu entry of SELECT INPUT. Pressing the
NEXT key then takes the transmitter to the next main menu selection.
Accutech AI-1000 R2 User Manual Rev 4
Page 15
4.4 Select Units
If the selected sensor is a thermocouple or RTD, the next menu entry is SELECT UNITS.
SELECT
UNITS?
Pressing the ENTER key displays the current units
DEG F
By repeatedly pressing the NEXT key, the display will sequence through the following screens:
DEG R
DEG K
DEG C
These correspond to K=Kelvin, R=Rankine, C=Celsius and F=Fahrenheit. Stopping the selection at any one
of these units and then pressing ENTER will set the transmitter to the corresponding new units. For the
purposes of this example the units of measure can be left at DEG F by pressing ENTER . Advancing the menu
selection with the NEXT key lets you change the zero.
4.5 Change Zero
The display will then alternate between the following screens to indicate that one may now change the zero, or
4mA output point. The numeric value seen on the upper portion of the screen is the ZERO value of the
transmitter. One can now change this ZERO, or LOWER RANGE VALUE, (LRV), totally independent of the FULL
SCALE, or UPPER RANGE VALUE, (URV), without the use of any calibrators or external sensor inputs.
40.0°F
CHANGE
40.0°F
ZERO ?
To change the ZERO, press ENTER . The display changes to read:
0040.0°F
PLUS ?
indicating that the existing ZERO is set to "plus" 0040.00ºF. The question mark “?” indicates a question asking
if this value is to remain positive (PLUS ?). By repeatedly pressing the NEXT key the display will alternate:
-0040.0°F
MINUS ?
0040.0°F
PLUS ?
Accutech AI-1000 R2 User Manual Rev 4
Page 16
After deciding whether the ZERO value, LRV, is to remain positive (PLUS), press the ENTER key. In this example
assume it is to remain positive. The display changes to read:
0040.0°F
THOUSN?
and the leftmost digit position will start blinking (shown here in italics) asking if the thousands position needs
to be changed. To change the thousands position, start pressing the NEXT key and the leftmost digit will
increment through 1 2 3 4 5 6 7 8 9 0. Stop pressing the NEXT key at the desired numeral, then press ENTER to
accept the selection. If the numeral selected before pressing ENTER was 0, then the display would change to
read:
0040.0°F
HUNDRD?
and the second digit from the left will start blinking (shown here in italics) asking if the hundreds position
needs to be changed. As before, to change the number in this digit position repeatedly press the NEXT key
until the desired numeral is reached. Then press ENTER to go to the next lower significant digit position. Each
time the NEXT key cycles through the ten choices for that digit position and the ENTER key enters the selected
number. The digit position being changed is the one that is blinking. The legend on the display will change
successively to read:
0040.0°F
TENS?
0040.0°F
ONES?
0040.0°F
TENTHS?
After the tenth’s digit position has also been changed to the desired value, the next pressing of the ENTER key
returns the transmitter to the alternating display of CHANGE ZERO. Since changing of the zero has just been
completed, press the NEXT key to proceed to the next menu selection, CHANGE FULL SCALE.
4.6 Change Full Scale
200.0°F
CHANGE
200.0°F
FULL
200.0°F
SCALE ?
To change the full scale value press ENTER . The procedure for selecting Plus or Minus is identical to that
described for changing the ZERO. Similarly, the procedure for changing each of the digit positions is identical
to that described for changing the ZERO. Once the steps of changing the FULL SCALE have been completed and
the ENTER key is pressed at the end of the procedure, the display returns to CHANGE FULL SCALE. Press NEXT for
the next function SELECT SENSOR FAIL SAFE DETECTION .
Accutech AI-1000 R2 User Manual Rev 4
Page 17
4.7 Select Sensor Fail-Safe Detection
SELECT
SENSOR
FAIL
SAFE ?
If you want to change the SENSOR FAIL SAFE detection press ENTER . The present status of the SENSOR FAIL SAFE
is displayed. It is recommended that one turns off the Sensor failsafe System when using the AI -1000 R2 with
an input simulator. It should then be turned on when reconnecting the transmitter to the actual sensor.
ON
OFF
When the desired fail-safe condition is displayed, pressing the ENTER key will change to the new setting and
the screen returns to the SELECT SENSOR FAIL SAFE display. Pressing the NEXT key will bring up the FAIL SAFE
REPORTING selection screen.
4.8 Select Fail-Safe Reporting
SELECT
FAIL
SAFE
REPORT?
Fail-safe reporting allows the transmitter to change the 4 -20mA loop to indicate a failure condition. This failure
may be a sensor failure or a transmitter failure. In any event, the user may select to drive the loop to 23.0mA,
corresponding to the “HI” selection; or 3.6mA, corresponding to the “LO” selection or to turn the function “OFF”.
HIGH?
OFF?
LOW?
Accutech AI-1000 R2 User Manual Rev 4
Page 18
4.9 Trim 4.0mA
TRIM
4 MA ?
This allows trimming of the 4.00mA output current.
Note: This function is only for the purpose of adjusting the 4.00mA limit of the
transmitter loop current to be exactly 4.00mA according to the plant's local standard.
This is NOT for the purpose of ranging the transmitter!
If trimming the 4.00mA limit is still desired then press ENTER . The transmitter will now output a milliamp
current equal to its internally set 4mA. This 4mA value should be read on an external meter and compared to
a local standard. It is advisable to use a very good voltmeter to make these comparisons. It is very possible
that the transmitter will be more accurate than a great many voltmeters. In this case, trimming will make the
transmitter less accurate rather than more accurate!
Once trimming the 4.00mA value has been selected, the display will alternate as follows:
RAISE
MA OUT ?
By pressing the NEXT key the display then alternates:
LOWER
MA OUT ?
When it is decided whether to raise or lower the output current, then press ENTER and the display changes to
one of the following depending on whether the raise or lower function has been selected.
NEXT=+
NEXT=-
Now every time the NEXT key is pressed, the display blinks, and the 4.0mA output limit decreases (-), or
increases (+). The decrease or increase is in approximately 3.5 micro ampere increments.
Note: The 4.00mA limit is factory calibrated to a precision standard. Using the Output Trim function
voids the NIST traceability of calibration. Do not arbitrarily trim the output unless a qualified and
accurate local standard is available to measure the adjusted 4.00mA output! Also note that the
4.0mA limit should not be trimmed by more than about ±50µA, or transmitter operation may be
impaired.
Once the desired trim is reached, pressing ENTER will return to one of the corresponding TRIM 4MA screen. At
this point one may still go back and do further trimming of the 4.0mA limit by pressing the ENTER key, or
pressing the NEXT key changes to the next function.
4.10 Trim 20.0 mA
TRIM
20 MA ?
Trimming of the 20.0mA current limit is done in exactly the same manner as was described for trimming the
4.0mA point. The same precautions apply. After completing the trim 20.0mA pressing the NEXT key brings up
the display trim.
Accutech AI-1000 R2 User Manual Rev 4
Page 19
4.11 Trim Display
The display trim allows the display to be trimmed by a desired offset amount. The transmitter display will
display its value based upon its internal standards. It is often desirable to alter this display to make it agree
with another external instrument at a critical measurement point. If this is desirable, the display can be
trimmed. The display trim operates as a zero shift. It shifts the display readings by the same amount at every
point. Multiple point corrections up to 22 points are possible from the factory.
Note : If a multiple point calibration curve is entered by the factory, the TRIM DISPLAY function will not appear
as a menu option in DISPLAY MODE.
You can enter a single point offset to the display. Be certain before making a display trim correction that you
have made good electrical connections to the transmitter and the sensor. In the 2 or 3 wire RTD input, or
thermocouple input modes, it is possible to produce an error of a few degrees with a fraction of an ohm in any
one of the connections. Please be careful when tightening down the input connections. These can be easily
broken if alot of torque is applied. The idea is to make a good electrical connection without breaking the
connections. When you press the ENTER key the display changes to:
0.0F
TRIM
0.0F
DISPLY?
You can now enter an offset to the display. Suppose that the display reads 530ºF, at a time when an external
device that you want to agree with reads 525ºF. You would then want to enter a -5ºF offset in the display trim.
This is done exactly the same way as setting the zero and full-scale values.
The numeric value seen on the upper portion of the screen is the existing Display Trim Value. Normally this is
set to zero. One can now change this Offset totally independent of the ZERO, or LowER RANGE VALUE, (LRV) or
the FULL SCALE, or UPPER RANGE VALUE, (URV), without the use of any calibrators or external sensor inputs. To
change the display offset, press ENTER . The display changes to:
0.0°F
PLUS ?
indicating that the existing OFFSET is set to "plus" 0000.0ºF. The question mark “?” indicates a question asking
if this value is to remain positive (PLUS ?). By repeatedly pressing the NEXT key the display will alternate
-0000.0°F
MINUS ?
0000.0°F
PLUS ?
After deciding whether the OFFSET VALUE is to become negative (MINUS), press the ENTER key. In this example
the offset is assumed to be negative and a minus s ign will be carried through this example. The display then
changes to read:
-0000.0°F
THOUSN?
The leftmost digit position will start blinking (shown here in italics) asking if the thousands position needs to
be changed. To change the thousands position, start pressing the NEXT key and the leftmost digit will
increment through 1 2 3 4 5 6 7 8 9 0. Stop pressing the NEXT key at the desired numeral, then press ENTER to
accept the selection. If the numeral selected before pressing ENTER was 0, then the display would change to
Accutech AI-1000 R2 User Manual Rev 4
Page 20
-0000.0°F
HUNDRD?
and the second digit from the left will start blinking (shown here in italics) asking if the hundreds position
needs to be changed. As before, to change the number in this digit position repeatedly press th e NEXT key
until the desired numeral is reached. Then press ENTER to go to the next lower significant digit position. Each
time the NEXT key cycles through the ten choices for that digit position and the ENTER key enters the selected
number. The digit position being changed is the one that is blinking. The legend on the display will change
successively to:
-0000.0°F
TENS?
-0000.0°F
ONES?
-0005.0°F
TENTHS?
After the tenths digit position has also been changed to the desired value, the next pressing of the ENTER key
returns the transmitter to the alternating display of TRIM DISPLAY. Since changing of the offset value has just
been completed, press the NEXT key to proceed to the next menu selection. Note, if trimming the transmitter to
external devices is desirable, it may be necessary to trim the 4 and 20mA output after setting the display
offset. After completing the trim display function, pressing the NEXT key brings up Select Language.
4.12 Select Language
SELECT
LANGU-
AGE
?
The Select Language function allows the user to configure the transmitter in any of four different languages.
English, German, French and Spanish language menu options are available. When you press the ENTER key
the display changes to:
ENGLISH
indicating that the current language setting is English. By pressing the NEXT key the display changes to read:
DEUTSCH
Accutech AI-1000 R2 User Manual Rev 4
Page 21
By repeatedly pressing the NEXT key, the display will sequence through the following screens:
FRENCH
ESPANOL
ENGLISH
After deciding which language you would like the transmitter to be set for, press the ENTER key. The display
then changes to read:
RETURN
TO
OPERATE
MODE
?
If all of the set-up and re-ranging operations have been satisfactorily completed, then pressing ENTER will
return the transmitter to the normal operate mode. Pressing the NEXT key at this point will return the display to
the first screen in the sequence, SELECT INPUT.
Note again, that whenever the transmitter is in the display set-up mode, if no activation of the pushbuttons
occur for approximately 2½ minutes, the transmitter returns to the operate mode. One can also return to the
operate mode at any point while in the DISPLAY MODE by removing power from the transmitter for about 10
seconds, then reapplying power.
Accutech AI-1000 R2 User Manual Rev 4
Page 22
5.0 CONFIGURATION USING THE DK-1, ONE-LINE DISPLAY
To configure a transmitter using the DISPLAY MODE, either the DK-1 or DK-2 local LCD display is required.
These dis plays are available as an option and can be plugged into the top of the AI-1000 R2 transmitter. The
transmitter can also be purchased with these options already installed. These inexpensive options make the
reconfiguration, or re-ranging of the transmitter very simple and easy to follow. Without the use of a calibrator,
or any other tools, the transmitter can be set up for a different sensor, or the new range limits can be set much
like one would set the time on a digital watch.
In the event that the DK-1 or DK-2 Display / Keyboard are not purchased at the same time as the transmitter,
the one piece display design allows for easy field installation by simply plugging the DK-1or DK-2 into the top
of the transmitter.
5.1 Entering the Display Mode
To start the DISPLAY MODE, first connect the transmitter to an appropriate DC power supply. Typically a 24VDC
supply is connected with the “+” side of the power supply connected to the transmitter’s output “+” terminal and
the “-“ side of the power supply connected to the transmitter’s output “-” terminal. A series resistor in the loop
is optional. A sensor may be connected to the transmitter’s input terminals, but this is not required for setting
up the transmitter.
With the standard factory set-up and no sensor connected, the DK-1 display will give the following indication:
FAIL
SAFE
The transmitter is indicating a fault. This would be the proper indication, since there is no sensor connected.
The analog output would indicate greater than 100% (loop current at 23.00mA), which is the standard over
range condition. If the proper sensor were connected to the transmitter, the display would indicate the
sensor’s temperature. Please note that the display / keyboards can be plugged into the transmitter while th e
transmitter is powered up. There is no need to disconnect power before plugging the DK-1 or DK-2 into the AI1000 R2.
Press the key marked NEXT to begin scrolling through the DISPLAY MODE menus.
9900
The 9900 code corresponds to the Return to Operate Mode function. At this point, assuming one does not
want to return to the operate mode, the answer should be no, therefore, press the key marked NEXT. Pressing
the key marked ENTER at this point will return the transmitter to the operate mode.
5.2 Display Mode Operation
The one-line, DK-1 display will allow the user to do the following in a manner similar to the two-line display.
•
Select a Sensor Input (SELECT INPUT)
•
Select a desired temperature unit, such as ºF or ºC (SELECT UNITS)
•
Change the 4mA Lower Range Value (CHANGE ZERO)
•
Change the 20mA Full Scale Value (CHANGE FULL SCALE)
•
Change the Sensor Fail Safe detection (SELECT SENSOR FAIL SAFE)
•
Change the Fail Safe reporting (SELECT FAIL SAFE REPORT)
•
Trim the 4.0mA output current (TRIM 4 MA)
•
Trim the 20.0mA output current (TRIM 20 MA)
•
Trim the display value (TRIM DISPLAY )
Each of these functions is presented with a code in a prescribed sequence on the LCD display. If the
indicated function need not be performed, press NEXT, and the next function will be displayed on the screen.
To perform any function press the ENTER key. This will cause additional screens to be displayed which enable
you to perform the function. These are described in detail below and summarized in the DK-1 One-Line
Display / Keyboard Flowchart found at the rear of this manual.
Accutech AI-1000 R2 User Manual Rev 4
Page 23
5.3 Select a Sensor Input
The SELECT INPUT is the first function in the sequence. Virtually any thermocouple, RTD or millivolt input can be
selected. The display will read as follows to indicate this position on the menu:
9000
The factory default sensor input is a J thermocouple. If the sensor does not require changing, then press
NEXT, and skip to Section 5.4 of this manual; otherwise press ENTER . After pressing the ENTER key, the display
will change to:
9004
Indicating that the transmitter is set to a Type J thermocouple input. If this is the desired sensor, then press
ENTER , otherwise press NEXT repeatedly to sequence through the available sens ors. Each time NEXT is
pressed, the next available sensor selection is displayed.
9004
The 9004 Code corresponds to a J thermocouple.
9005
The 9005 Code corresponds to a K thermocouple.
9006
The 9006 Code corresponds to an L thermocouple.
9007
The 9007 Code corresponds to an N thermocouple.
9008
The 9008 code corresponds to an R thermocouple.
9009
The 9009 code corresponds to an S thermocouple.
9010
The 9010 code corresponds to a T thermocouple.
9011
The 9011 code corresponds to a U thermocouple.
Accutech AI-1000 R2 User Manual Rev 4
Page 24
9012
Note: The 9012, T/C SPEC or Special Thermocouple input is reserved for a special thermocouple input,
should one be desired. This special curve must be ordered from the factory.
9013
The 9013 code corresponds to a 2 -wire ohm input.
9014
The 9014 code corresponds to a 2 -wire 100 Ω DIN curve platinum RTD with an α = 0.00385.
9015
The 9015 code is the 2-wire 100Ω SAMA Platinum Curve, known variously as the SAMA RC21-4 or SAMA
PR-279.
9016
The 9016 code is reserved for a Special 2 wire RTD, should one be desired. Any special 2-wire RTD curve
must be ordered from the factory.
9017
The 9017 code is for 3-wire Ohms.
9018
The 9018 code is for a 3 -wire 100Ω DIN curve RTD with α = 0.00385. This is the most commonly used RTD in
industrial applications.
9019
The 9019 code is the 3-wire 100Ω SAMA Platinum Curve, known variously as the SAMA RC21-4 or SAMA PR279.
9020
The 9020 code for the Special 3 wire RTD input is reserved for a special RTD input, should one be desired.
Any special 3-wire RTD curve must be ordered from the factory.
Accutech AI-1000 R2 User Manual Rev 4
Page 25
9021
The 9021 code is for a 4 wire Ohm input.
9022
The 9022 code is for a 4-wire 100Ω DIN curve Platinum RTD with α = 0.00385. This sensor will give superior
measurement results in most real-world situations where the measured temperature is under 1,000ºF.
9023
The 9023 code is the 4-wire 100Ω SAMA Platinum Curve, known variously as the SAMA RC21-4 or SAMA PR279.
9024
Note, the 9024 code is for Special 4 wire RTD input is reserved for a special RTD input, should one be
desired. Any special 4-wire RTD curve must be ordered from the factory.
9025
The 9025 code corresponds to a millivolt input.
9026
The 9026 code corresponds to an input known as the "HHTONLY". This is reserved for a Hand-Held set-up at
the factory only.
At this point, the menus recycle to the top and begin with the first sensor input.
9001
The 9001 code corresponds to a B type thermocouple.
9002
The 9002 code corresponds to a C type thermocouple.
9003
The 9003 code corresponds to an E type thermocouple.
You can stop at any one of the thermocouple, RTD or mV selections by pressing the ENTER key. This action
changes the transmitter mode to that sensor. If no sensor change is desired, then, without sequencing
through the various sensor options, but just pressing the ENTER key will allow one to confirm the sensor
selection and leave it unchanged. Assume that the sensor is left as T/C J. After pressing ENTER the display
will return to the main menu entry of SELECT INPUT. Pressing the NEXT key then takes the transmitter to the next
main menu selection .
Accutech AI-1000 R2 User Manual Rev 4
Page 26
5.4 Select Units
If the selected sensor is a thermocouple or RTD, the next menu entry is SELECT UNITS. You will not see this
selection if an ohms or mV input selection is made.
9100
The code 9100 corresponds to the SELECT UNITS entry in the main menu. Pressing the ENTER key takes you to
this section of the menu. This screen indicates that the transmitter is currently set to degrees F. Pressing the
NEXT key, the display will sequence through the following screens:
9133
The 9133 code corresponds to units of Degrees Fahrenheit.
9134
The 9134 code corresponds to units of Degrees Rankine.
9135
The 9135 code corresponds to units of Degrees Kelvin.
9132
The 9132 code corresponds to units of Degrees Centigrade.
Stopping the selection process on the DK-1 display at any one of these units and then pressing ENTER will set
the transmitter to the corresponding new units. For the purposes of this example the units of measure can be
left at DEG F by pressing ENTER . Pressing the NEXT key will bring you to the next section of the menu, changing
the Zero.
5.5 Change Zero (Lower Range Value)
The display will then read as follows to indicate that one may now change the zero, or 4mA output point.
9200
The code 9200 indicates that one can now change this ZERO, or LOWER RANGE VALUE (LRV), totally independent
of the FULL SCALE, or UPPER RANGE VALUE, (URV), without the use of any calibrators or external sensor inputs.
To change the ZERO, press ENTER . The display changes to:
9201
The 9201 code indicates that a positive, or "plus", number is selected for the 4 mA (LRV) output point. By
repeatedly pressing the NEXT key the display will alternate:
9202
The 9202 code corresponds to a negative number to be selected for the 4mA output point. After deciding
whether the ZERO value, or LRV, is to remain positive (PLUS), press the ENTER key. In this example assume it
is to remain positive. The display changes to read:
Accutech AI-1000 R2 User Manual Rev 4
Page 27
0040
and the leftmost digit position will start blinking (shown here in italics) asking if the thousands position needs
to be changed. To change the thousands position, start pressing the NEXT key and the leftmost digit will
increment through 1 2 3 4 5 6 7 8 9 0. Stop pressing the NEXT key at any of the numerals desired, then press
ENTER to accept the selection. If the numeral selected before pressing ENTER was 0, then the display would
change to read:
0040
The second digit from the left will start blinking (shown here in italics) asking if the hundreds position needs to
be changed. As before, to change the number in this digit position repeatedly press the NEXT key until the
desired numeral is reached. Then press ENTER to go to the next lower significant digit position. Each time the
NEXT key cycles through the ten choices for that digit position and the ENTER key enters the selected number.
The digit position being changed is the one that is blinking. The legend on the display will change
successively to read:
0040
0040
After the one’s digit position has also been changed to the desired value, the next pressing of the ENTER key
returns the transmitter to the alternating display of CHANGE ZERO. Since changing of the zero has just been
completed, press the NEXT key to proceed to the next menu selection, CHANGE FULL SCALE.
5.6 Change Full Scale (Upper Range Value)
9300
The code 9300 corresponds to selection CHANGE FULL SCALE, or UPPER RANGE VALUE (URV). To change the full
scale value press ENTER . The procedure for selecting Plus or Minus is identical to that described for changing
the ZERO, with the code 9301 corresponding to a positive (+) number and the code 9302 corresponding to a
negative (-) number. The procedure for changing each of the digit positions is identical to that described for
changing the ZERO. Once the steps of changing the FULL SCALE have been completed and the ENTER key is
pressed at the end of the procedure, the display returns to CHANGE FULL SCALE. Press NEXT for the next function
SELECT SENSOR FAIL SAFE DETECTION .
5.7 Select Sensor Fail Safe Detection
9400
The code 9400 corresponds to selecting the SENSOR FAIL-SAFE detection. If one desires to change the SENSOR
FAIL SAFE detection then press ENTER . The present status of the Sensor Fail-safe is displayed. It is
recommended that one turns off the Sensor fail-safe when using the AI-1000 R2 with an input simulator. It
should then be turned on when reconnecting the transmitter to the actual sensor.
9401
The code 9401 indicates that the sensor fail-safe detection is turned on.
9402
The code 9402 indicates that the sensor fail-safe detection is turned off. When the desired fail-safe condition
is displayed, pressing the ENTER key will change to the new setting and the screen returns to the SELECT
SENSOR FAIL SAFE display, code 9400. Pressing the NEXT key will then bring up the FAIL SAFE REPORT selection
screen.
Accutech AI-1000 R2 User Manual Rev 4
Page 28
5.8 Select Fail Safe Reporting
The code 9500 indicates the main menu entry for setting the transmitter FAIL-SAFE REPORT. Pressing the ENTER
key will bring up the following code:
9501
The code 9501 corresponds to instructing the transmitter to output 3.6mA under a fail-safe condition.
Pressing the ENTER key at this point sets the fail-safe LOW. Pressing the NEXT key brings up the following
screen:
9502
The code 9502 corresponds to instructing the transmitter to output 23.0mA under a fail-safe condition.
Pressing the ENTER key at this point sets the fail-safe HIGH. Pressing the NEXT key brings up the following
screen:
9503
The code 9503 corresponds to instructing the transmitter to not report a fail-safe condition. Pressing the
ENTER key at this point turns off this reporting. Pressing the NEXT key brings up the next function, TRIM 4 MA.
5.9 Trim 4.0mA
The code 9600 indicates the main menu entry for performing an 4 MA OUTPUT TRIM. Pressing the ENTER key will
bring up the following code.
9600
This function will trim the 4.00mA output current of the transmitter.
Note: The 4.00mA limit is factory calibrated to a precision standard. Using the Output Trim function
voids the NIST traceability of calibration. Do not arbitrarily trim the output unless a qualified and
accurate local standard is available to measure the adjusted 4.00mA output! Also note that the
4.0mA limit should not be trimmed by more than about ±50µA, or transmitter operation may be
impaired.
If trimming the 4.00mA limit is still desired then press ENTER . The transmitter will now output a milliamp
current equal to its internally set 4mA. This 4mA value should be read on an external meter and compared to
the plant standard. It is advisable to use a very good voltmeter to make these comparisons. It is very possible
that the transmitter will be more accurate than a great many voltmeters. In this case, trimming will make the
transmitter less accurate rather than more accurate!
Accutech AI-1000 R2 User Manual Rev 4
Page 29
Once trimming the 4.00mA value has been selected, the display will show:
9601
The code 9601 corresponds to selecting the function to raise mA output.
Pressing the NEXT key the display then shows:
9602
The code 9602 corresponds to selecting the function to lower the mA output. Comparing the transmitter
output to the external device will allow you to decide whether to raise or lower the milliamp value. When it is
decided whether to raise or lower the output current, then press ENTER and the display changes to one of the
following depending on whether the raise or lower function has been selected.
9610
9620
(raises output)
(lowers output)
The code 9610 confirms that you are in the Raise 4mA output trim function. Each time the NEXT key is
pressed, the display blinks, and the 4.0mA output limit increases (+). The increase is in approximately 3.5
micro-ampere increments. The code 9620 confirms that you are in the Lower 4mA output trim. Each time the
NEXT key is pressed, the display blinks, and the 4.0mA output limit decreases (-). The decrease is in
approximately 3.5 micro-ampere increments.
Note: The 4.00mA limit is factory calibrated to a precision standard. Using the Output Trim function
voids the NIST traceability of calibration. Do not arbitrarily trim the output unless a qualified and
accurate local standard is available to measure the adjusted 4.00mA output! Also note that the
4.0mA limit should not be trimmed by more than about ±50µA, or transmitter operation may be
impaired.
Once the desired trim is reached, pressing ENTER will return to the corresponding TRIM 4MA screen. At this
point one may still go back and do further trimming of the 4.0mA limit by pressing the ENTER key, pressing the
NEXT key changes to the next function.
5.10 Trim 20mA
The code 9700 indicates the main menu entry for setting the performing a 20MA OUTPUT TRIM. Pressing the
ENTER key will bring up the following code:
9700
This function will trim the 20.00mA output current of the transmitter.
Trimming of the 20.0mA current limit is done in exactly the same manner as was described for trimming the
4.0mA point. Similarly the same precautions apply. The code 9701 corresponds to selecting the function to
raising the mA output. The code 9702 corresponds to selecting the function to lower the mA output. The code
9710 confirms raising the 20mA output by approximately 3.5 micro-ampere increments with each push of the
NEXT key. The code 9720 confirms lowering the 20mA output by approximately 3.5 micro-ampere increments
with each push of the NEXT key. After completing the trim 20.0mA pressing the NEXT key brings up the TRIM
DISPLAY menu.
5.11 Trim Display
The display trim allows the display to be trimmed to a desired point. The transmitter's DK-1 or DK-2 display
will show its value based upon the transmitter's current settings. It is often desirable to alter the display to
make it agree with another instrument at a critical measurement point. If this is desirable, the display can be
trimmed. The display trim operates as a zero shift and shifts the display readings by the same amount at
every point. Multiple point corrections up to 22 points are available from the factory.
Accutech AI-1000 R2 User Manual Rev 4
Page 30
Note : If a multiple point calibration curve is entered by the factory, the TRIM DISPLAY function will not appear
as a menu option in DISPLAY MODE.
You can enter a single point offset to the display. Be certain before making a display trim correction that you
have made good electrical connections to the transmitter and the sensor. In the 2 or 3 wire RTD input, or
thermocouple input modes, it is possible to produce an error of a few degrees with a fraction of an ohm in any
one of the connections. Please be careful when tightening down the input connections. These can be easily
broken if alot of torque is applied. The idea is to make a good electrical connection without breaking the
connections.
The display trim allows you to enter an offset correction. For example, suppose that the display reads 530ºF,
at a time when an external device that you want to agree with reads 525ºF. You would then want to enter a -5ºF
offset in the display trim. This is done exactly the same way as setting the zero and full-scale values.
Pressing the NEXT key at this point advances the menus and the display will now read:
The 9800 code corresponds to the display trim.
9800
One can set the display trim offset by pressing the ENTER key. The display changes to:
9801
The 9801 code indicates that a "plus" number is selected for the display offset. By repeatedly pressing the
NEXT key the display will alternate:
9801
9802
the 9802 code corresponds to a negative number to be selected for the display trim point. After deciding
whether the display trim value is to remain positive (PLUS), or negative (MINUS) press the ENTER key. In this
example assume it is to be a negative offset. The display changes to:
- 000
and the leftmost digit position will start blinking (shown here in italics) asking if the hundreds position needs
to be changed. To change the hundreds position, start pressing the NEXT key and the leftmost digit will
increment through 1 2 3 4 5 6 7 8 9 0. Stop pressing the NEXT key at the desired numeral, then press ENTER to
accept the selection. If the numeral selected before pressing ENTER was 0, then the display would change to:
- 000
and the second digit from the left will start blinking (shown here in italics) asking i f the tens position needs to
be changed. Pressing the ENTER key will fix the tens digit and display the ones digit:
- 000
In this example, we want to enter a -5 degree offset, so we want to cycle the “ones” digit. As before, to change
the number in this digit position repeatedly press the NEXT key until the desired numeral is reached. Then
press ENTER to go to the next lower significant digit position. Each time the NEXT key cycles through the ten
choices for that digit position and the ENTER key enters the selected number. The digit position being changed
is the one that is blinking. The legend on the display will change successively to:
- 005
After the ones digit position has been changed to the desired value, the next pressing of the ENTER key returns
the transmitter to the 9800 code. Note that since the DK-1 will only display in whole degrees, the display trim
is limited to whole degrees. If greater display precision is required, the two-line DK-2 display will give you
precision to the tenths of degrees. Since changing of the zero has just been completed, press the NEXT key to
proceed to the next menu selection, RETURN TO OPERATE MODE.
Accutech AI-1000 R2 User Manual Rev 4
Page 31
9900
If all of the set-up and re-ranging operations have been satisfactorily completed, then pressing ENTER will
return the transmitter to the normal operate mode. Pressing the NEXT key at this point will return the display to
the first screen in the sequence, SELECT INPUT which corresponds to the code 9000.
Note again, that whenever the transmitter is in the display set-up mode, if no activation of the keyboard occurs
for approximately 2½ minutes, the transmitter returns to the operate mode. One can also return to the operate
mode at any point in the DISPLAY MODE by removing power from the transmitter for about 10 seconds and then
reapplying power.
Accutech AI-1000 R2 User Manual Rev 4
Page 32
6.0 APPLICATIONS INFORMATION
6.1 SENSOR FAIL-SAFE DETECTION
The AI-1000 R2 detects a sensor failure condition by making various measurements across its sensor input
terminals. As a result of these measurements, the unit can detect an open thermocouple or open RTD
condition. In addition, the AI-1000 R2 can detect if an RTD is short circuited, or if any of its terminal wires (2, 3,
or 4-wire RTD's) are open. Any one of these conditions will cause a "FAIL-SAFE" report indication.
In the process of performing these sensor failure checks, the unit periodically passes small pulses of current
through the sensor and its connecting wires. The transmitter measures the resulting voltage drop. One of the
conditions resulting in a FAIL-SAFE reporting condition is if this voltage drop exceeds 180mV.
In the case of an RTD, the fail-safe detection is part of the normal excitation for the RTD and therefore both the
temperature measurement and some of the sens or fail-safe detection routines are done simultaneously. In
the case of a thermocouple, during the temperature measurement cycle, there is no open sensor test current
in the thermocouple. Thermocouple open circuit is detected by making a second measurement with the test
current through the thermocouple.
This method of testing for sensor failure has the following advantages:
1) In the case of thermocouples, there is no steady current through the sensor during measurement
and therefore accuracy is not degraded.
2) During open sensor detection, the test current is sufficiently high that even if there is some
leakage resistance between the sensor leads, an open sensor will be positively detected.
There are certain precautions to be observed when using this method of sensor failure detection. If the lead
wire resistance is too great, then a false FAIL-SAFE report could be generated. The maximum lead wire
resistance is dependent on the type of sensor being used and the maximum temperature expected to be
measured. The maximum lead resistance for an RTD is 50Ω in any one lead. For a thermocouple, the
maximum allowable resistance is 1,000Ω for a non-grounded junction Thermocouple and 10 Ω for a
grounded junction Thermocouple.
6.2 CONFIGURATION WITH AN EXTERNAL SOURCE
With an external source, the basic procedure is to set the external source to the value you require for 4mA or
20mA. Next, read the transmitter value on the DK-1 or DK-2 display. Record these values. Then follow the
display set-up procedure to set the 4mA and 20mA values to the values that you recorded with the external
source.
When attempting to calibrate or check the calibration of the AI-1000 R2 transmitter with an external
thermocouple or RTD calibrator, it is generally advisable to disable the "SENSOR FAIL-SAFE" feature. The
open sensor test periodically injects about 5µA of current into the input terminals, the millivolts generated by
the calibration source is periodically disturbed and depending on the characteristics of the external calibration
source used, erroneous voltages may be applied to the transmitter. The "SENSOR FAIL-SAFE" can be
disabled by turning it off in the configuration menus (Sections 4.7 & 5.7). After the calibration has been
completed, this function can be re-enabled.
6.21 Thermocouple Input
Setting the ZERO and FULL SCALE with a thermocouple sensor requires some added steps because of the
automatic cold-junction compensation. Thermocouple tables are normally available for a reference junction at
the ice point of water. These table entries must be adjusted for the actual cold-junction temperature. In the
case of the AI-1000 R2 transmitter, the cold-junction is measured with an internal calibrated thermometer.
It is generally good practice to operate the transmitter for 30 minutes or more prior to calibration to allow it to
reach thermal equilibrium.
Accutech AI-1000 R2 User Manual Rev 4
Page 33
6.211 Calibration Using a Millivolt Source
The procedure starts with the selection of the thermocouple type. Then determine the temperature of the
thermocouple terminals on top of the transmitter. This can be done by measuring with a thermometer the
temperature of the thermocouple terminals on the transmitter. Or one can assume that the terminals are
approximately at room temperature and then determine the room temperature.
Next, locate the appropriate table of temperature versus mV for the selected thermocouple.
Find the table entry corresponding to the terminal block temperature, (mV @ TB°C)
Calculate the mV to be applied as follows:
(mV applied for LRV) = (mV @ LRV Table°C) -(mV @ TB°C)
Applying the millivolts (mV applied) to the transmitter and record the temperature displayed on the DK-1 or DK2 display for the ZERO (LRV) or 4mA value. Then record the FULL SCALE (URV) using a similar procedure.
These recorded values will then be set into the transmitter as the zero and full-scale values using the display
set-up procedure.
6.212 Calibration Using a Thermocouple Calibrator
Some of the thermocouple calibrators available on the market provide a means of measuring the temperature
of the terminal block and automatically apply the corrected mV to the transmitter. This procedure is rather
simple. However, there can be an appreciable difference between the temperature of the simulator and the
transmitter terminals. With some thermocouple types, this error could be amplified 5 to 10 fold, resulting in
large measurement errors. Use caution so as not to introduce these possible errors.
6.3 FOR BEST MEASUREMENT ACCURACY
The AI-1000 R2 transmitter is a stable instrument, precision calibrated at the factory for any measurement
range the user may select. However, the automatic cold-junction compensation requires certain precautions
to obtain best accuracy when used with a thermocouple sensor. Please see Accutech technical applications
Tech Note #207A for additional information.
The cold-junction compensation operates by attempting to measure accurately the temperature of the
thermocouple terminals on top of the instrument. If these term inals are exposed to thermal radiation or
convection, the cold-junction compensation will introduce an error. With certain types of thermocouples and
temperature measurement ranges, the sensitivity of the cold-junction is greater than the sensitivity of the
measurement couple. Under those conditions, a one degree error in the cold-junction temperature that the
transmitter senses can result in a greater than one degree temperature measurement error. See Accutech
Tech Note #203A.
For best measurement accuracy with thermocouple sensors, it is advisable to shield the top terminals by
placing the transmitter into a housing or enclosure, such as the model XP -FN, XP-FG, XP-HEAD, or WP-HEAD.
In addition, sufficient time should be allowed for the housing and the transmitter to reach equilibrium
temperature in a given operating environment before best accuracy is reached.
For best accuracy with any sensor, or in the millivolt mode, it is advisable to allow the transmitter to operate
with the desired fixed input signal for a period of 30 seconds before the reading is taken. The transmitter
periodically measures certain internal references. These internal measurements and the external signal
undergo digital averaging and the full accuracy of the instrument is only achieved after several readings have
been averaged.
When using an RTD sensor, a four-wire connection is generally recommended. With a three-wire RTD the AI1000 R2 makes two separate measurements before calculating the temperature, whereas, only a single
measurement is required when using a four-wire RTD. Conceptually, a better accuracy is possible using a
single measurement as compared with calculating the difference of two separate measurements. See
Accutech Tech Note # 209 for further information on the measurement accuracy improvement that is possible
with true four-wire RTD measurements.
Accutech AI-1000 R2 User Manual Rev 4
Page 34
7.0 ACCESSORIES & INFORMATION
Other accessories available from Accutech are:
DK-1
DK-2
XP-HEAD
WP-HEAD
XP-FN
XP-FG
PY-2
PS-2412
PS-2405
One-line Local Display
Two-line Local Display
Explosion Proof Housing (No Display Option*)
Weather Proof Housing (No Display Option*)
Explosion / Weather proof Housing with mounting lugs
Explosion / Weather proof Housing with mounting lugs and Glass Window
Pipe Yoke to mount XP -FG or XP-FN on 2" pipe
Power Supply, 24/28 VDC, 1.2/0.8A
Power supply, 24 VDC, 0.5A
A variety of signal conditioners, thermocouples, RTD sensors and thermowells are also available.
The following Technical Application Notes are also available on special request.
Tech Note #203A Smart Temperature Transmitter Accuracy Considerations
Tech Note #207A Using the AI-1000 R2 / AI-1500 with Thermocouples
Tech Note #208A Achieving State-of-the-Art Temperature Measurement Accuracy without
Individual, On-site Calibration
Tech Note #209A Unique Measuring Capabilities of the AI-1000 R2 / AI-1500
* The DK-1 or DK-2 can be used for setup and configuration for transmitters installed in XP -HEAD or
WP-HEAD housings, but cannot be installed permanently. The XP -HEAD and WP-HEAD will not close
properly with either of these displays installed.
Accutech AI-1000 R2 User Manual Rev 4
Page 35
8.0 SPECIFICATIONS
SENSOR INPUT
RANGE
Thermocouple Type B
Thermocouple Type C
Thermocouple Type E
Thermocouple Type J
Thermocouple Type K
Thermocouple Type L
Thermocouple Type N
Thermocouple Type R
Thermocouple Type S
Thermocouple Type T
Thermocouple Type U
100Ω Platinum RTD DIN Curve (α = 0.00385)
100Ω Platinum RTD SAMA Cu rve (α = 0.003923)
Call Factory for 100Ω Ni, 120Ω Ni, and 10Ω Cu
Millivolt
Ohm
+ 212
+ 32
- 58
- 292
- 292
- 328
+ 32
+ 32
+ 32
- 238
- 148
- 328
- 328
to
to
to
to
to
to
to
to
to
to
to
to
to
+
+
+
+
+
+
+
+
+
+
+
+
+
3,272
4,208
1,832
1,382
2,282
1,652
2,192
2,912
2,822
752
1,112
1,562
1,193
ACCURACY
RANGE
±
±
±
±
±
±
±
±
±
±
±
±
±
+100 to 1,800 °C
+ 0 to 2,320 °C
- 50 to 1,000 °C
- 180 to + 750 °C
-180 to 1,250 °C
-200 to + 900 °C
0 to 1,200 °C
0 to 1,600 °C
0 to 1,550 °C
-150 to + 400 °C
-100 to + 600 °C
-200 to + 850 °C
-200 to + 645 °C
°F
°F
°F
°F
°F
°F
°F
°F
°F
°F
°F
°F
°F
- 15 to 115mV
0 to 500 Ω
OUTPUT: Analog, Two-wire 4 to 20mA
TRANSMITTER ACCURACY: ± 0.05% of the millivolt or ohm equivalent
input reading, or the value from the Accuracy Table, whichev er is
greater; plus ±0.05% of the span. For thermocouples, add ±0.5°C
(0.9°F) for cold junction effect.
Accuracy includes transmitter repeatability, hysteresis and linearity
as well as ambient temperature effect, A/D conversion error, analog
output error, line voltage effects, humidity effect under non-condensing
conditions and vibration effect to 2g’s & 500Hz.
TRANSMITTER REPEATABILITY: One-half the transmitter accuracy.
COLD-JUNCTION COMPENSATION: Digital self -correcting over the
ambient temperature range to within ±0.5°C.
OUTPUT RANGING ADJUSTMENTS:
Analog Zero:
100% of Sensor range – Noninteracting
Analog Full-scale:
Normal or Reverse Acting
AMBIENT TEMPERATURE STABILITY: Self -Correcting over the operating
temperature range.
LONG TERM STABILITY: Stability deviation per year is less than:
(0.025% of output the span + 0.05% of the reading)
Electronics
Display (Full Visibility)
Display (With reduced visibility)
STORAGE TEMPERATURE RANGE: -50°C to +85°C, -58°F to +185°F
DAMPING: Factory selectable time constant (63%) from 0 to 32 sec.
FAILSAFE: User settable to 3.6mA or 23mA.
MOUNTING POSITION: No effect on measurement value.
WEIGHT: AI-1000 R2: 6 oz. XP -FN & FG: 2½ lbs. WP-HEAD: 12 oz
ISOLATION: Input to Output 500VAC
INPUT IMPEDANCE: Greater than 1 MΩ
POWER SUPPLY: The transmitter operates on 12 to 42 VDC (30VDC for
I/S installations) with no load. Transmitter is protected against reverse
polarity connection.
LOAD LIMITATIONS: Loop resistance including optional indicator:
R(KΩ) = (Supply Voltage - 12 VDC) / (23mA)
ELECTROMAGNETIC COMPATIBILITY (CE COMPLIANCE):
Transmitter operates within specification in fields from 20 to 1,000MHz
with field strengths to 30V/m. Meets EN 50082-1 Generic Immunity
Standard and EN 55011 Compatibility Emissions Standard.
ORDERING INFORMATION: Please order Model AI -1000 R2. Specify
custom configurat ion, options and companion products as desired.
ºF
ºF
ºF
ºF
ºF
ºF
ºF
ºF
ºF
ºF
ºF
ºF
ºF
±
±
±
±
±
±
±
±
±
±
±
±
±
0.6ºC
0.5ºC
0.2ºC
0.2ºC
0.2ºC
0.4ºC
0.2ºC
0.5ºC
0.5ºC
0.3ºC
0.4ºC
0.08ºC
0.08ºC
± 0.006 mV
± 0.002 Ω
LINEARIZATION: Thermocouple and RTD linearization to ±0.05ºC.
Custom linearization with 22 point curve (consult factory).
OPERATING TEMPERATURE RANGE:
-40°C to +85°C -40°F to + 185°F
-20°C to +70°C - 4°F to + 158°F
-40°C to +85°C -40°F to + 185°F
1.08
0.9
0.36
0.36
0.36
0.72
0.36
0.9
0.9
0.54
0.72
0.14
0.14
ACCURACY
DYNAMIC RESPONSE:
UPDATE RATE: 150 milliseconds (7 times per second), typical.
RESPONSE TO STEP CHANGE: 250 milliseconds, minimum;
1 second, typical.
START-UP TIME: 7 sec. Operation to specificat ion in less than 30 sec.
AMBIENT TEMPERATURE CHANGE: Self -correcting for ambient
temperature changes up to 20°C/hr.
INTERCHANGEABILITY: Fully interchangeable without field calibration
HAZARDOUS LOCATION CERTIFICATIONS:
Explosion Proof: Explosion Proof Housings available with and without
windows; CSA and FM approved for Class I, Div I & II, Groups B, C,
& D; Class II, Div I & II, Groups E, F & G, Class III and are rated for
NEMA 4X and NEMA 7 environments.
Nonincendive: Transmitter is CSA and FM rated nonincendive in Class
I, Div II, Groups A, B, C & D; Class II, Div II, Groups F & G, Class
III, Div II, CENELEC Ex N IIC T4-T6 certification pending.
Intrinsic Safety: The Intrinsically Safe Rated Model AI -1000 R2 I/S
Transmitter is CSA and FM rat ed Intrinsically Safe for Class I, Div I,
Groups A, B, C & D and Class II, Div I, Groups E, F, & G, and Class
III, Div I, installed in accordance with AIC Drawing 6022588.
CENELEC EEx ia IIC T4-T6 Intrinsically Safe certification pending.
OPTIONS:
INTRINSIC SAFETY: Order the AI -1000 R2 I/S
HOUSINGS:
XP-FN:
NEMA 7 Explosion-Proof, NEMA 4X Housing
XP-FG:
NEMA 7 Explosion-Proof, NEMA 4X with Window
XP-HEAD:
NEMA 7 Explosion-Proof, Rain-tight Head
WP-HEAD: IP66 Weatherproof Head
DISPLAYS:
DK-1:
One-Line Local Display and Keyboard
DK-2:
Two-Line Smart Local Display and Keyboard
THERMOWELLS: Order as required. See Accutech Bulletin PROB
SENSORS: Order as required. See Accutech Bulletin PROB
EXPLOSION-PROOF CERTIFICATION: Consult factory for details
MOUNTING:
PY -2:
2” Pipe Yoke for XP -FN & XP-FG housings
DIN-KIT R2: DIN Rail Mounting Adapter
STANDARD CONFIGURATION:
Sensor Input
J Type Thermocouple
LRV (4mA)
40ºF Lower Range Value
URV (20mA)
200°F Upper Range Value
Damping
0 seconds
Output
Linear with Temperature
Failsafe
Upscale (23mA)
NOTE: Please note that specifications are determined with the factory
default software settings or with the various software parameters set to
optimize the performance for a given specification.
Accutech AI-1000 R2 User Manual Rev 4
Page 37
LIMITED WARRANTY
This warranty is in lieu of all other warranties, expressed or implied.
The Accutech 1000 series products (Product) are warranted by
Adaptive Instruments, LLC (The Seller) to be free from defects in
workmanship and materials, under conditions of normal use and
service, for a period of two years from the date of shipment. At its
option, the Seller will repair, replace, or recalibrate, free of charge, any
Product or Products found and determined to be defective by the
Seller if returned to the Seller, per the procedure below, within two
years of its original purchase.
To claim a repair or replacement under this warranty, a Return Material
Authorization (RMA) number must be obtained from Adaptive
Instruments LLC or its operating div ision, Accutech, and the Product
returned, postpaid to the Seller. Final warranty defect determination
and determination of the cost, if any, to repair or replace will be made
by the Seller upon examination of the returned Product. Returned
units may be subject to an evaluation or recalibration charge as listed
in the Seller's price list.
Defects arising from negligence, misuse, improper installation,
accident, modification or alteration of this Product (or Products) are
not warranted nor are Products that have been opened for on-site or
field inspection or repair.
LIABILITY OF THE SELLER
Liability of the Seller is limited to repair or replacement of the Product
or Products as outlined above. Purchaser assumes full responsibility
for determining that the Product or Products purchased will meet the
Purchaser's requirements or those of the Purchaser's customers.
Purchaser agrees to indemnify, defend and hold the Seller harmless
from any liability, loss, or damage, whatsoever, caused or alleged to
be caused directly or indirectly by the Product or Products including,
but not limited to any interruption of business, loss of business,
personal injury or consequential damages resulting from the use or
operation of the Product or Products.
Copyright Adaptive Instruments. LLC. 2004
Printed in USA 1/04
Accutech AI-1000 R2 User Manual Rev 4
Page 38
Figure 8-1
Mechanical Dimensions
Accutech AI-1000 R2 User Manual Rev 4
Page 39
Figure 8-2
Intrinsic Safety Approval Drawings
Accutech AI-1000 R2 User Manual Rev 4
Page 41
Operate Mode
Note: Pressing ENTER stores
new values in transmitter. To
escape at any point, or to retain
original values (before pressing
ENTER to accept new value):
disconnect power and wait 30
seconds. Reconnect power &
transmitter will start up in Operate
Mode.
Next
9900
Return to
Operate Mode?
Enter
Return to Operate Mode
Wait 5 seconds
ACCUTECH AI-1000 R2 / AI-1500 Configuration Flowchart
DK-1 One-Line Display / Keypad
Next
9000
Select Input
Enter
9001
9002
9003
9004
9005
9006
9007
9008
9009
9010
9011
9012
9013
9014
9015
9016
9017
9018
9019
9020
9021
9022
9023
9024
9025
9026
T/C B
T/C C
T/C E
T/C J
T/C K
T/C L
T/C N
T/C R
T/C S
T/C T
T/C U
T/C Special
2 Wire Ohms
Next
2 Wire Pt DIN RTD
2 Wire Pt SAMA RTD
2 Wire Special
3 Wire Ohms
3 Wire Pt DIN RTD
3 Wire Pt SAMA RTD
3 Wire Special
4 Wire Ohms
4 Wire Pt DIN RTD
4 Wire Pt SAMA RTD
4 Wire Special
mV
HHT Only
QUESTIONS?
Call Accutech
Customer Service @
(800) 879-6576
Enter
Next
9100
Select Units
Enter
(Skipped if
Ohms or mV input)
9132 Deg C
9133 Deg F
9134 Deg R
9135 Deg K
Next
Enter
Next
Enter
Set blinking digit
NEXT increments blinking digit
ENTER sets digit
Enter
Next
Enter
Set blinking digit
NEXT increments blinking digit
ENTER sets digit
Enter
Next
Enter
Next
9200
Change
Zero (LRV)
Enter
9201 Plus?
9202 Minus?
Next
9300
Change Full
Scale (URV)
Enter
9301 Plus?
9302 Minus?
Next
9400
Select Sensor
Failsafe
Enter
9401 On?
9402 Off?
Next
9500
Failsafe Report
Enter
9501 Failsafe Low?
9502 Failsafe High?
9503 Failsafe Off?
Next
Next
9600
Trim 4mA
Enter
9601 Raise?
Enter
Enter
Next
9602 Lower?
Enter
Next
9700
Trim 20mA
9701 Raise?
Enter
Enter
Next
9702 Lower?
Enter
9610 Press NEXT to Raise mA output in
2 uA increments
----------------------------------------------------9620 Press NEXT to Lower mA output in
2 uA increments
Enter
9710 Press NEXT to Raise mA output in
2 uA increments
----------------------------------------------------9720 Press NEXT to Lower mA output in
2 uA increments
Enter
Next
9800
Trim Display
Enter
9801 Plus?
9802 Minus?
Next
Enter
Set blinking digit
NEXT increments blinking digit
ENTER sets digit
Enter
Next
Figure 8-3
DK-1 One Line Display Configuration Flowchart
Accutech AI-1000 R2 User Manual Rev 4
Page 43
Operate Mode
Note: Pressing ENTER stores
new values in transmitter. To
escape at any point, or to retain
original values (before pressing
ENTER to accept new value):
disconnect power and wait 30
seconds. Reconnect power &
transmitter will start up in Operate
Mode.
Next
Return to Operate
Mode?
Enter
Return to Operate Mode
Wait 5 seconds
ACCUTECH AI-1000 R2 / AI-1500 Configuration Flowchart
DK-2 Two-Line Display / Keypad
Next
Select Input
Enter
T/C B
T/C C
T/C E
T/C J
T/C K
T/C L
T/C N
T/C R
T/C S
T/C T
T/C U
T/C Special
2 Wire Ohms
2 Wire Pt DIN RTD
2 Wire Pt SAMA RTD
2 Wire Special
3 Wire Ohms
3 Wire Pt DIN RTD
3 Wire Pt SAMA RTD
3 Wire Special
4 Wire Ohms
4 Wire Pt DIN RTD
4 Wire Pt SAMA RTD
4 Wire Special
mV
HHT Only
QUESTIONS?
Call Accutech
Customer Service @
(800) 879-6576
Next
Enter
Next
Select Units
(Skipped if
Ohms or mV input)
Enter
Deg C
Deg F
Deg R
Deg K
Next
Enter
Next
Enter
Set blinking digit
NEXT increments blinking digit
ENTER sets digit
Enter
Next
Enter
Set blinking digit
NEXT increments blinking digit
ENTER sets digit
Enter
Next
Enter
Next
Change
Zero (LRV)
Enter
Plus?
Minus?
Next
Change Full
Scale (URV)
Enter
Plus?
Minus?
Next
Select Sensor
Failsafe
Enter
On?
Off?
Next
Failsafe Report
Enter
Failsafe Low?
Failsafe High?
Failsafe Off?
Next
Enter
Next
Trim 4mA
Enter
Raise mA Out?
Lower mA Out?
Next
Enter
Enter
Press NEXT to Raise mA output in 2 uA increments
----------------------------------------------------Press NEXT to Lower mA output in 2 uA increments
Enter
Press NEXT to Raise mA output in 2 uA increments
----------------------------------------------------Press NEXT to Lower mA output in 2 uA increments
Enter
Next
Trim 20mA
Enter
Raise mA Out?
Lower mA Out?
Next
Enter
Enter
Next
Trim Display
Enter
Plus?
Minus?
Next
Enter
Next
Enter
Set blinking digit
NEXT increments blinking digit
ENTER sets digit
Enter
Next
Select
Language
Enter
English
Deutsch
French
Espanol
Next
Figure 8-4
DK-2 Two Line Display Configuration Flowchart
Accutech AI-1000 R2 User Manual Rev 4
Page 45
Adaptive Wireless Solutions
577 Main Street
Hudson,MA01749
(978) 875 6000
Accutech AI-1000 R2 User Manual Rev 4