1
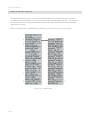
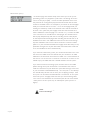
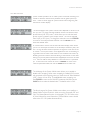
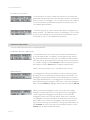
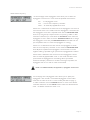
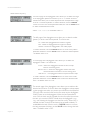
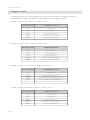
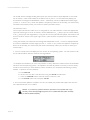
OS 2.0 Addendum
Welcome
Welcome to the Little Phatty version 2.0 Operating System! OS 2.0 adds many important new functions
and features to the Little Phatty, including:
-
LFO synchronization
Tap Tempo
An advanced, highly flexible Arpeggiator function
Enhanced MIDI setup for USB-equipped LP’s
This addendum provides detailed information about all of the new functions and features in OS 2.0, as well
as the instructions for performing the OS update on Tribute and Stage LPs. This addendum also includes descriptions of the functions and features that appeared in the OS 1.03c update not documented elsewhere.
LP OS 2.0 Addendum
Before You Begin
If you are updating the Operating System on your Little Phatty Tribute or Stage, please refer to Appendix A,
Updating the LP Tribute or Stage Edition. If you are a Little Phatty Stage II owner, OS 2.0 is already installed and
waiting for you. Please read on...
Throughout this document you will see icons that provide additional information:
This icon indicates an important note concerning the operation of the Little Phatty.
This icon indicates technical information for the advanced user or the technically curious.
This icon indicates a useful performance or programming tip.
New Features
OS 2.0 introduces a number of new features and functions to the Little Phatty. To incorporate these new
features in a streamlined and logical fashion, the Master Menu – shown on page 6 – has undergone some
changes. Complete descriptions of all new Master Menu features begins on page 7.
A few of the new features are not menu-based; these include an improved Preset Storage routine, enhanced
MIDI Continuous Controller data handling, and a convenient Tap Tempo feature. These new features are
described below.
Preset Storage
The Preset Save routine has been improved. As always, to save a preset you press the ENTER/STORE button while in PANEL Mode. You will see two lines on the Little Phatty display:
The top line shows the location where the preset will be saved, and the name of the preset which is currently saved in that location. No more overwriting your favorite presets by mistake! Use the VALUE knob
to select a preset to overwrite, then press CURSOR to move the cursor to the lower line of the LCD.
‘OVERWRITE:NO’ is the default setting. If you change your mind and do not want to save the preset, you
can press ENTER and the LP will return to PANEL mode without saving. If you are sure you want to save
your preset to the selected location, set ‘OVERWRITE:YES’ and press ENTER.
The LP will display the PRESET STORED message to confirm that your preset was saved successfully.
NOTE: When the Arpeggiator is running, the ENTER/STORE button is used to activate
the latch if the Latch parameter has been enabled. For more on the Arpeggiator and Latch
functions, see page 12.
Page 2
LP OS 2.0 Addendum
MIDI Continuous Controllers (MIDI CC’s)
The Modulation Wheel and Filter Cutoff parameters now send and receive high-resolution, 14-bit Midi CC
messages. This allows for finer control and smoother changes, whether you are using the LP as a MIDI controller, or controlling the LP via MIDI from your sequencer. The MIDI CC channels are mapped as follows;
MSB indicates the “regular” CC number for the parameter, and LSB indicates the high-resolution fine control.
If you are only sending 7-bit MIDI CC to the LP, use the MSB channel number by itself.
MOD WHEEL:
FILTER CUTOFF:
MSB = 1, LSB = 33
MSB = 19, LSB = 51
Tap Tempo
Tap Tempo is an easy and intuitive way to adjust the speed of the LFO Rate or the Arpeggiator Clock. The
Tap Tempo function is always available for any preset in PRESET Mode. Tap Tempo can be used to adjust the
LFO Rate when the Arpeggiator is not running,, or adjust the Arpeggiator Clock. when the Arpeggiator is
running.
To enter Tap Tempo Mode, press and hold the LFO RATE button until it starts flashing rapidly; this indicates
that Tap Tempo Mode is active.
When Tap Tempo is active and the Arpeggiator is not running, tapping the LFO RATE button will set the
internal LFO Rate and override the LFO Sync Mode (see ‘LFO SYNC’ on page 8). Both the LFO LED and
the LFO RATE button will begin flashing at the new rate, and the LP will display the new rate in BPM (Beats
Per Minute):
NOTE: The LP will always display BPM as the closest whole-number value. For example,
if the actual Tap Tempo rate is 271.3 BPM, the LP will display 271 BPM as shown. The LFO
will run at the actual Tap Tempo rate, however - in this case, 271.3 BPM.
When Tap Tempo is active and the Arpeggiator is running, tapping the LFO RATE button will set the rate
of the Arpeggiator Clock. Both the LFO LED and the LFO RATE button will begin flashing at the new rate,
and the LP will display the new rate in BPM:
(Arpeggiator unlatched view)
(Arpeggiator latched view)
If the MODULATION control knob is adjusted while in Tap Tempo Mode, it will override the Tap Tempo and
adjust the LFO Rate or Arpeggiator Clock to the new value.
To exit Tap Tempo Mode, press and hold the LFO RATE button until it stops flashing. This will return to
the previous mode (either free running or MIDI clock).
NOTE: If the Arpeggiator is set to ‘MIDI CLOCK’ when Tap Tempo is active, Tap Tempo will
adjust the internal LFO Rate and not the Arpeggiator Clock.
Page 3
LP OS 2.0 Addendum
Master Mode Menu Structure
The figure below shows the new structure of the Master Mode menus. With the exception of the Advanced Preset menu tree (shown on the right), all Master Menus specify global parameters. The Advanced
Preset menus are used to program parameters for individual presets; these parameters are stored separately with each preset.
New or modified menus are indicated with an asterisk (*). Descriptions of these menus follow.
*
*
*
*
*
*
*
The new OS 2.0 Master Menu
Page 4
LP OS 2.0 Addendum
Master Mode Menus
The new Master Mode menus are described below. Please refer to the LP User’s Manual for all other
menu descriptions.
LFO SYNC:
The LFO Sync menu allows you to globally set the LFO to internal
or MIDI clock signals. When set to ‘INTERNAL’, the MODULATION
control is used to set the rate of the LFO. When set to ‘MIDI CLK’, the
LFO rate is controlled by an external MIDI Clock and the selected Clock
Divider settings (see below). To change the LFO Sync Mode, use the
CURSOR button to move to the selection field and use the VALUE
knob to select the mode.
Modes: INTERNAL, MIDI CLK; the default is INTERNAL
NOTE: For additional details, see Appendix B, LFO Sync Modes
When the LFO Sync Mode is ‘MIDI CLK’, you can program the clock
divider to one of 15 different values. The divisor is based on 24 clocks
per quarter note (the MIDI standard). The table below shows how the
number of MIDI clocks relates to musical time values. When the LFO
Sync Mode is ‘MIDI CLK’, the MODULATION control can be used to
select the clock divider (the 15 divider values correspond to the 15
LEDs in the MODULATION control lightpipe). The default clock divider
value is 1/4 (24 clocks/quarter note).
CLOCKS/QUARTER
NOTE
TIME VALUE
LP DISPLAY
3
1/32 note
1/32
4
Dotted 1/32 note
1/32 DOT
6
1/16 note
1/16
8
Dotted 1/16 note
1/16 DOT
12
1/8 note
1/8
16
Dotted 1/8 note
1/8 DOT
24
Quarter note
1/4
32
Dotted quarter note
1/4 DOT
48
Half note
1/2
64
Dotted half note
1/2 DOT
96
Whole note
WH
128
Whole note + quarter note
WH + 1/4
144
Whole note + half note
WH + 1/2
168
Whole note + dotted half note
WH + 1/2 DOT
192
Whole note + whole note
WH + WH
Page 5
LP OS 2.0 Addendum
TUNING
TUNING now has a dedicated menu (it was previously combined with
LOCAL CONTROL ON/OFF, which has been moved to the MIDI
SETUP menu). The features of the TUNING function are unchanged in
OS 2.0. Refer to the LP User’s Manual for more information (Tribute
Edition owners should refer to the OS 1.03 update document).
MIDI SETUP:
The MIDI SETUP menu is used to select the LP’s MIDI options. There
are seven pages of MIDI menus, beginning with the ‘ALL NOTES OFF’
menu. This menu allows you to issue an ‘All Notes Off ’ message to the
MIDI output, shutting off all active notes on the LP and/or any attached
MIDI tone modules or keyboards. This command is the equivalent of a
MIDI panic button to silence stuck notes. To issue the command, simply
press the ENTER button. Although it is shown in the illustration here,
you do not have to enable this menu using the CURSOR button.
The second page of the MIDI Setup menu allows you to turn control of
the LP’s synth engine ON or OFF locally, i.e. the keyboard, wheels, and
any front panel controls that can also receive MIDI. It does not disable
any MIDI transmitting or receiving. A setting of ‘OFF’ will prevent double
triggering in the event you are using a MIDI sequencer with both the
MIDI IN and MIDI OUT connected, and the sequencer is echoing MIDI
data back to the LP. To change the Local Control setting, use the CURSOR button to highlight the control value, then use the VALUE knob to
change the setting.
Values: ON, OFF; the default is ON
The third page of the MIDI Setup menu allows you to select the MIDI
input connection. Since the LP Stage II offers both MIDI DIN and USB
connections, several input options are possible. To specify the MIDI
input connection, use the CURSOR button to highlight the input selection, then use the VALUE knob to select the desired input. NOTE: This
menu only applies to USB-equipped LP’s.
Values: NONE, DIN, USB, DIN/USB; the default is DIN/USB
TECH NOTE: ‘DIN’ is an abbreviation for ‘Deutsches Institut für Normung’ (in English, the
German Institute for Standardization). ‘DIN connectors’ commonly refer to a family of circular
connectors that were standardized by the DIN for commercial electronic use. When the MIDI
standard was released in 1983, it specified a 5-pin DIN connector as the hardware interconnection, thus the ‘MIDI DIN’ connector.
Page 6
LP OS 2.0 Addendum
MIDI SETUP (con’t)
The fourth page of the MIDI Setup menu allows you to select the MIDI
output connection. To specify the MIDI output connection, use the
CURSOR button to highlight the output selection, then use the VALUE
knob to select the new output. NOTE: This menu only applies to USBequipped LP’s.
Values: NONE, DIN, USB, DIN/USB; the default is DIN/USB
The fifth page of the MIDI Setup menu allows you to select the routing
of the MIDI Merge function for the USB input. When MIDI Merge is
ON, the LP will echo all MIDI data received at the USB MIDI Input port
to the selected MIDI Output port, merged with any MIDI data generated by the LP. This allows you to pass MIDI data thru the LP, even though
the LP has no dedicated MIDI Thru connector. To change the selected
MIDI output port, use the CURSOR to highlight the output parameter,
then use the VALUE knob to select the desired output. NOTE: This
menu only applies to USB-equipped LP’s.
Values: NONE, DIN OUT, USB OUT, DIN/USB OUT;
the default is NONE.
The sixth page of the MIDI Setup menu allows you to select the routing of the MIDI Merge function for the DIN input. When MIDI Merge
is ON, the LP will echo all MIDI data received at the MIDI DIN Input
port to the selected MIDI Output port, merged with any MIDI data
generated by the LP. To change the selected MIDI output port, use the
CURSOR to highlight the output parameter, then use the VALUE knob
to select the desired output.
Values: NONE, DIN OUT, USB OUT, DIN/USB OUT;
the default is NONE.
NOTE: When using MIDI Merge, take precautions to insure that you do not create a MIDI feedback
loop (the output is passed back into the input and then merged with the output again), or you may
experience unwanted side effects like a locked-up LP. Should this happen, cycling the power should
resolve the condition, but it is best not to create a MIDI feedback loop in the first place.
Page 7
LP OS 2.0 Addendum
MIDI SETUP (con’t)
The seventh page of the MIDI Setup menu allows you to set up multiple Moog synths as a polyphonic synth stack. The settings are ‘POLY:
OFF’ or ‘POLY: (#) of (##)’. The first number represents which note
this particular LP is assigned to play, the second number sets the total
number of available voices. For example, if you had an LP and a Voyager
RME, you would set the LP to ‘POLY: 1 of 2’; on the Voyager RME you
would go to ‘MIDI Key Order’ on the Master menu and set the RME to
be note 2 of 2 (note that your Voyager must also have the latest firmware installed; the current Voyager OS is version 3.3). Connect the MIDI
OUT from the LP to the MIDI IN on the Voyager. You should now be
able to play duophonically, with the LP sounding the first note played
on the keyboard and the Voyager RME sounding the second note. If all
available voices are in use, additional notes will not sound until enough
keys are released to free a voice. MIDI Continuous Control numbers
(MIDI CC’s) are consistent between the Voyager and Little Phatty, so any
parameter changes such as pitch bend and mod wheel, filter cutoff and
so on, should affect all voices simultaneously.
If you have two Little Phatty synths, you would connect MIDI OUT from
the first one to MIDI IN on the second, then you would turn on MIDI
MERGE on the second LP and connect its MIDI OUT to the MIDI IN on
the first LP. Turn off LOCAL CONTROL on the first LP so that it is controlled only by the MIDI data that is shared between the two synths.
If you have more than two Moog synths, connect them so that MIDI
passes through each synth and the last is connected to the first; but
make sure that the first synth does NOT pass MIDI through to the next,
or you will create a MIDI feedback loop. The “first synth” in this description should always be the one on which you are playing the keys. If the
first synth is an LP, make sure MIDI MERGE is turned OFF on this synth.
If the first synth is a Voyager, make sure that you are connecting MIDI
OUT from it to the MIDI IN on the second synth; do not use the MIDI
THRU jack on the first synth, only on subsequent synths (voice 2 or
higher).
NOTE: When the Arpeggiator is activated, it overrides any
POLY mode settings.
Page 8
LP OS 2.0 Addendum
SYSTEM UTILITIES:
System Utilities provide a set of useful system commands, including commands to calibrate, restore factory defaults and set global system options.. There are seven pages of System Utilities menus, beginning with
the Version number display.
The second page of the System Utilities menu depends on which LP Edition you own. LP Stage and Stage II Edition owners will see the Headphone Volume (HP VOL) menu , which allows you to scale the headphone volume in relation to the output volume. This can be adjusted
from 0 (off) to 255 (max). To change the scale value, use the CURSOR
to move to the scale parameter field then use the VALUE knob to
select the desired value.
LP Tribute Edition owners will see the EGR Matrix display, which allows
you to turn off the panel switches in the Envelope Generator (EGR) section. Turning off these switches improves the signal-to-noise ratio of the
LP Tribute. This may be useful in some applications such as recording using presets with low filter cutoff values or low oscillator level values. By
disabling the EGR switches, real time editing of the Volume or Filter EGR
settings may still be performed with Pot Mapped panel controls, or MIDI
CCs. The EGR Matrix always defaults to ‘ON’ when the LP is powered
up. To switch the EGR matrix off, use the CURSOR to move to the
ON/OFF parameter field, then use the VALUE knob to select ‘OFF’.
The third page of the System Utilities menu allows you to enable or
disable menu wrapping. When menu wrapping is enabled (‘ON’), menus
will wrap back to the beginning when you reach the end. When disabled
(‘OFF’), menus will not wrap. To enable/disable menu wrapping, use
the CURSOR to move to the ON/OFF parameter field, then use the
VALUE knob to select the desired value. The default value is ‘ON’.
The fourth page of the System Utilities menu allows you to perform a
Master Reboot of the LP, which is similar to turning the power OFF and
ON. The Master Reboot function is unchanged in OS 2.0. Refer to the
LP User’s Manual for more information (Tribute Edition owners should
refer to the OS 1.03 Update documentation).
Page 9
LP OS 2.0 Addendum
SYSTEM UTILITIES (con’t):
The sixth page of the System Utilities menu allows you to restore the
global default values, performance sets and factory presets. The Restore
Factory function is unchanged in OS 2.0. Refer to the LP User’s Manual
for more information (Tribute Edition owners should refer to the OS
1.03 Update documentation).
The seventh page of the System Utilities menu allows you perform calibration routines. The Calibration function is unchanged in OS 2.0. Refer
to the LP User’s Manual for more information (Tribute Edition owners
should refer to the OS 1.03 Update documentation).
Advanced Preset Menus
The new Advanced Preset menus are described below.
KEYBOARD PRIORITY (KB PRIOR):
The Keyboard Priority menu allows you to select the keyboard priority for individual presets. The default is GLOB (global), which inherits
the global keyboard priority setting from the Master KEYBD PRIORITY
menu, but this can be changed to low note, high note or last note priority. To make a change, use the CURSOR to move to the priority parameter field, then use the VALUE knob to select the desired value.
Values: GLOB, LOW, HIGH, LAST; the default value is GLOB
ARPEGGIATOR:
The Arpeggiator is exciting new addition to the LP’s operating system,
providing you with a wide range of musical sequence possibilities. The
Arpeggiator is programmed for each preset individually thru the seven
menu pages described here. The Arpeggiator is activated from the front
panel (see Activating the Arpeggiator and Latch). To enter the Arpeggiator
Menu, use the CURSOR to highlight ‘ARPEGGIATOR’ and press ENTER.
When you enter the Arpeggiator menu, the top line of the display
changes to indicate that you are now programming the Arpeggiator.
The first page of the Arpeggiator Menu allows you to enable the
arpeggiator function for the chosen preset. When ‘ON’ is selected,
the arpeggiator is ‘armed’ and ready to be switched on from the front
panel. When ‘OFF’ is chosen, the arpeggiator will remain off, preventing you from switching it on accidently. To change the Enable status, use
the CURSOR to move to the ON/OFF parameter field, then use the
VALUE knob to select the desired setting.
Page 10
LP OS 2.0 Addendum
ARPEGGIATOR (con’t):
The second page of the Arpeggiator menu allows you to select the
Arpeggiator Clock Source. There are three possible clock sources:
INT - The Arpeggiator Clock
LFO - The LP’s Low Frequency Oscillator
MIDI - An externally applied MIDI Clock
When ‘INT’ is selected as the clock source, the Arpeggiator runs from its
own internal clock. In this mode, when the Arpeggiator is switched ON
the Arpeggiator Clock rate is adjusted either with the MODULATION
knob, or by using the Tap Tempo function, or by issuing a MIDI CC#90
command. Note that you must select the LFO RATE switch when the
Arpeggiator is ON in order to use the MODULATION knob to change
the Arpeggiator Clock rate (the MODULATION control does not adjust the speed of the LFO when the Arpeggiator is running).
When ‘LFO’ is selected as the clock source, the Arpeggiator is driven
from the Low Frequency Oscillator. In this mode, the MODULATION
knob adjusts the speed of the Arpeggiator Clock and the LFO Rate
together, making it possible to get synchronous, arpeggiated LFO effects.
When ‘MIDI’ is selected as the clock source, the Arpeggiator is driven
from an externally applied MIDI Clock. In this mode, the MIDI Clock
synchronizes the Arpeggiator to the sending device (a software
DAW, for example). Note that if no MIDI Clock signal is present, the
Arpeggiator will not run and no notes will be heard.
NOTE: For additional details, see Appendix C, Arpeggiator Clock Source.
The third page of the Arpeggiator menu allows you to specify the
Arpeggiator Clock Divider. The available Arpeggiator Clock Divider
values are the same as the LFO Clock Divider (see table on page 7).
To make a selection, use the CURSOR button to move to the divider
parameter field, then use the VALUE knob to select the desired divisor
value. The default clock divisor value is ‘1/4’.
Page 11
LP OS 2.0 Addendum
ARPEGGIATOR (con’t):
The fourth page of the Arpeggiator menu allows you to select the range
of the arpeggiator, specified in octaves. Up to +/- 3 octaves can be selected, which allows you to create sequences that are beyond the range
of the LP’s 3-octave keyboard. To make a selection, use the CURSOR
button to move to the octave parameter field, then use the VALUE knob
to select the desired octave value.
Values: -3, -2, -1, 0, 1, 2, 3; the default value is 1.
The fifth page of the Arpeggiator menu allows you to select the order
(pattern) in which notes are sequenced. The choices are:
UP - Notes are arpeggiated from lowest to highest
DN - Notes are arpeggiated from highest to lowest
ORDER - Notes are arpeggiated in the order played
To make a selection, use the CURSOR button to move to the pattern
parameter field, then use the VALUE knob to select the desired pattern.
The default value is ‘UP’.
The sixth page of the Arpeggiator menu allows you to select the
Arpeggiator mode. The choices are:
LOOP - When the arpeggiator reaches the end, it loops
back to the starting point.
BACK-FORTH - When the Arpeggiator reaches the end it
reverses direction and returns to the starting point.
ONE-SHOT - The arpeggiator makes one pass and then stops.
To make a selection, use the CURSOR button to move to the mode
parameter field, then use the VALUE knob to select the desired mode
value. The default value is ‘LOOP’.
The seventh page of the Arpeggiator menu allows you to enable or disable the Latch function. The Latch allows the Arpeggiator to keep repeating the arpeggio state when you remove your hands from the keyboard.
The Latch menu arms the Latch function the same way the Arpeggiator
ON/OFF menu arms the Arpeggiator. When the Latch parameter is
set to ‘ON’, the Latch can be activated from the front panel (to activate
the latch, you must be in PRESET Mode when the Arpeggiator is running - see Activating the Arpeggiator and Latch for more). When ‘OFF’ is
selected, the Latch is always off and cannot be activated accidently. To
enable/disable the latch function, use the CURSOR button to move to
the latch parameter field, then use the VALUE knob to change the latch
status. The default value is ‘OFF’.
Page 12
LP OS 2.0 Addendum
Activating the Arpeggiator and Latch
Turning the Arpeggiator ON/OFF
When a preset has the Arpeggiator function enabled, you turn the Arpeggiator ON and OFF by pressing the
VALUE encoder switch (Note: you must be in PRESET mode, not MASTER mode).
When the Arpeggiator is ON, an ‘A’ will appear on the bottom line of the display:
With the Arpeggiator ON, any note or group of notes you play will be sequenced according to the settings
in the Arpeggiator menu. To turn the Arpeggiator OFF, simply press the VALUE encoder. The Arpeggiator
will switch OFF and the display will revert to the previous view:
NOTE: In previous versions of the Little Phatty OS, the VALUE encoder switch was used to advance presets.
In OS 2.0, the VALUE encoder switch operation has been changed to activate the Arpeggiator exclusively.
The VALUE encoder switch is still used in MASTER Mode to step through the presets in Performance Sets.
Note, however, that if a preset selected from the MASTER Mode Performance Sets has the Arpeggiator function enabled and you wish to turn the Arpeggiator ON for that preset, you will need to return to PRESET Mode
first, and then press the VALUE encoder switch to activate the Arpeggiator.
Turning the Arpeggiator Latch ON/OFF
When the Latch function is enabled in the Arpeggiator menu and the Arpeggiator is switched ON, pressing the ENTER/STORE button turns the Latch ON. When the Latch is ON, an ‘L’ will replace the ‘A’ on the
bottom line of the display:
As long as the Latch is ON, the Arpeggiator will keep looping in its current state. Any new note or group of
notes will initiate a new note sequence based on the Arpeggiator Menu settings. If any notes are played and
held while the Latch is ON, playing additional notes adds to the current list of notes to be arpeggiated. If all
notes are released, the first new note played will initiate a new note sequence.
To turn the Latch OFF, simply press the ENTER/STORE button. The Latch will switch OFF and the ‘L’ in the
display will be replaced by an ‘A’, indicating that the Arpeggiator is still active:
NOTES:
1. When the Latch is ON, you can turn the Arpeggiator ON/OFF using the VALUE encoder switch,
or by pressing the PRESET button.
2. If the Arpeggiator Mode is ‘One-shot’ when the Latch is ON, the Arpeggiator will make one pass
of the note sequence and then stop.
3. When the Arpeggiator is switched OFF, the ENTER/STORE button will revert to the default action
of initiating a Preset Save sequence.
Page 13
LP OS 2.0 Addendum
Arpeggiator Examples
The Arpeggiator takes the currently played note or group of notes and forms an arpeggio based on the
Arpeggiator Menu settings. Here are some simple examples of the Arpeggiator function:
Example 1. Pattern = UP, Octaves = 1, Mode = LOOP
PLAY & HOLD NOTE
THE ARPEGGIATOR PLAYS
C3
C3, C4, C3, C4...
Add E3
C3, E3, C4, E4...
Add G2
G2, C3, E3, G3, C4, E4, G2...
Add A3
G2, C3, E3, A3, G3, C4, E4, A4, G2...
Release E3
G2, C3, A3, G3, C4, A4. G2...
Example 2. Pattern = DN, Octaves = 1, Mode = LOOP
PLAY & HOLD NOTE
THE ARPEGGIATOR PLAYS
C3
C4, C3, C4, C3...
Add E3
E3, C3, E4, C4, E3...
Add G2
E3, C3, G2, E4, C4, G3, E3...
Add A3
A3, E3, C3, G2, A4, E4, C4, G3, A3...
Release E3
A3, C3, G2, A4, C4, G3, A3...
Example 3. Pattern = UP, Octaves = 1, Mode = BACK-FORTH
PLAY & HOLD NOTE
THE ARPEGGIATOR PLAYS
C3
C3, C4, C3, C4...
Add E3
C3, E3, C4, E4, C4, E3, C3, E3...
Add G2
G2, C3, E3, G3, C4, E4, C4, G3, E3, C3, G2, C3...
Add A3
G2, C3, E3, G3, A3, G3, C4, E4, A4, E4, C4, G3...
Release E3
G2, C3, G3, A3, G3, C4, A4, C4, G3...
Example 4. Pattern = ORDERED, Octaves = 1, Mode = LOOP
Page 14
PLAY & HOLD NOTE
THE ARPEGGIATOR PLAYS
C3
C3, C4, C3, C4...
Add E3
C3, E3, C4, E4...
Add G2
C3, E3, G2, C4, E4, G3, C3...
Add A3
C3, E3, G2, A3, C4, E4, G3, A4, C3...
Release E3
C3, G2, A3, C4, G3, A4, C3...
LP OS 2.0 Addendum - Appendices
Appendix A - Updating the LP Tribute or Stage Edition
All Little Phatty users can update to OS 2.0 from any previous version (the LP Tribute Edition requires a
memory upgrade prior to updating the OS - contact Moog Music for the details). Updating to the new OS
requires the Little Phatty, the OS Update file, and a computer with a MIDI interface and MIDI software that
can send large SysEx files (for the PC try “MIDI-OX” [www.midiox.com] or for the Macintosh try “SysEx
Librarian” [www.snoize.com]).
If you are new to upgrading firmware via MIDI, take some time before proceeding to become familiar with
the details of your MIDI interface and your MIDI software with regard to sending SysEx files. If your MIDI
interface sends “Active Sensing” messages, be sure to turn this feature off before attempting this upgrade.
Saving your Presets
Before you install the new operating system on your Little Phatty, you should backup your presets. You can
export your preset as SysEx format data using your computer MIDI interface and the appropriate software.
Consult the documentation and help files for these programs for instructions on using them to save SysEx
data.
To export your LP presets to your computer, you will need to connect the MIDI OUT on the side of the
Little Phatty to the MIDI IN port on your computer MIDI interface. On the Little Phatty, press Master and
scroll to the SYSEX MENU. The ‘SEND CUR PRESET’ option will send only the currently-selected preset,
while the ‘SEND ALL PRESETS’ option will send all 100 presets from your LP’s memory as one Preset Bank
file. Saving each preset using ‘SEND CUR PRESET’ will allow you to load the presets back into your LP one
at a time in any order you like, whereas ‘SEND ALL PRESETS’ creates a bank file that if sent back to the LP
will completely replace the presets in your Little Phatty with the 100 presets stored in the Bank.
Once you have saved a copy of any presets you intend to keep, you are ready to update the firmware on
your Little Phatty.
Updating the Operating System
Follow these steps to update the Little Phatty Operating System:
1. Connect your computer interface to the LP’s MIDI In and Out jacks.
2. Power up the Little Phatty and your computer, and confirm that the computer is sending MIDI
data to the Little Phatty.
3. Start the MIDI SysEx software program on your computer.
4. For PC Users:
If you are using a Windows PC, run the executable firmware loader, LP_T_200.exe for the LP Tribute
edition or LP_S_200.exe for the Stage edition. This program will open in a plain text window and
will display a numbered list of all available MIDI OUT ports on your computer. If you do not see a
numbered list of MIDI Output devices, then you do not have your MIDI interface configured correctly.
Check to make sure that the latest device drivers are installed. Otherwise, at the prompt “Select MIDI
out device->” type the number corresponding to the MIDI Output device which is connected to your
LP, and press Enter.
NOTE: It is important to only use the appropriate OS firmware for this update. Do not
attempt to use the Stage Edition firmware with the Tribute Edition, and vice versa. Doing
so may render the instrument inoperable.
Page 15
LP OS 2.0 Addendum - Appendices
You should see the message ‘Sending XXX bytes’ (the actual number of bytes depends on the LP Edition firmware). There will be a delay as the data is sent to your LP. On the Little Phatty display, you
should see the message ‘RX FIRMWARE, STAGE 1’, followed by a series of additional firmware stages
(‘STAGE 2’, ‘STAGE 3’, etc.). When the update is complete (in about 30-45 seconds), your Little Phatty
will restart automatically. When you see the LP restart, proceed to step 5.
For Macintosh Users:
Launch SysEx Librarian and make sure it is configured for your MIDI interface. Locate the appropriate
SysEx file containing the new LP firmware; it will be called either LP_T_200.syx (for the Tribute edition)
or LP_S_200.syx (for the Stage edition). Drag this file into the SysEx Librarian playlist, then select it and
click on the ‘PLAY’ button in the upper right corner. SysEx Librarian will transfer the firmware data to
your LP.
During the transfer, you should see the message ‘RX FIRMWARE, STAGE 1’ on the LP display, followed
by a series of additional firmware stages (‘STAGE 2’, ‘STAGE 3’, etc.). When the update is complete (in
about 30-45 seconds), your Little Phatty will restart automatically. When you see the LP restart, proceed to step 5.
5. The LP’s startup screen will display the new version of the operating system. You will see ‘Rev: 2.00T’
for the Tribute Edition, and ‘Rev: 2.00S’ for the Stage Edition:
To complete the installation, you must now perform a Factory Restore to load all of the correct default
values for the new operating system. This operation will reset all patches in memory to the LP factory
sounds, so be sure that you have saved any custom sounds to your computer before doing a Factory
Restore. To perform a Factory Restore:
A.
B.
C.
D.
Press MASTER
Scroll to the SYSTEM UTILITIES menu using the VALUE encoder knob
Press the CURSOR button and scroll to ‘RESTORE FACTORY’
Press ENTER, select ‘YES’, and press ENTER.
6. Your LP firmware update is complete. You can now reload your presets and explore the new functions and features that OS 2.0 offers!
NOTES: If you have any questions about this procedure or if the update does not go
smoothly, contact [email protected] or call 800-948-1990 (within the USA)
(+1-828-251-0090 worldwide).
Page 16
LP OS 2.0 Addendum - Appendices
Appendix B - LFO Sync Modes
There are two LFO Sync Modes: Internal (INTERNAL) and MIDI Clock (MIDI CLK). Detailed descriptions
of these modes appears below.
INTERNAL:
When the LFO Sync Mode is set to INTERNAL, the LFO rate is controlled directly via the MODULATION
knob (when the LFO RATE panel button is selected), or by Tap Tempo, or by sending a MIDI CC#3 command with a value between 0-127 (MIDI CC#3 controls the LFO RATE).
When the Tap Tempo function is engaged, the internal LFO Rate is adjusted directly by tapping the LFO
RATE button. You can also adjust the LFO rate using the MODULATION control as normal, and this will
override the rate set by Tap Tempo (to indicate this, the Little Phatty’s display changes from ‘LFO XXX
BPM’ to the usual ‘PANEL ACTIVE’ message). Note that the LFO RATE panel button will continue to blink,
indicating that Tap Tempo is still active - you can tap in a new tempo at any time. To disengage Tap Tempo
mode, press and hold the LFO RATE button. The LFO Rate will remain at the last rate you selected.
MIDI CLK:
When the LFO Sync Mode is set to MIDI CLK, the LFO rate is synchronized to incoming MIDI Clock pulses,
with one LFO cycle equal to the note duration set by the LFO SYNC CLOCK parameter (see page 7). The
Little Phatty must have a MIDI Input enabled in the MIDI Setup menu in order to receive MIDI Clock. The
Little Phatty Stage II has both USB and standard DIN MIDI inputs, and can receive MIDI Clock signals on
either input. It is recommended not to send different clock signals to both inputs simultaneously, unless you
want some very strange LFO signals to result!
If you change the Sync Mode from Internal to MIDI Clock while the LP is not receiving a MIDI clock signal,
the actual LFO rate does not change right away; it will continue at the same rate. However, the LFO rate
is no longer being controlled by the internal LFO clock. This means that if you try to control the LFO Rate
from the panel knob or send a MIDI CC# 3 message while the LFO Sync Mode is set to MIDI CLOCK,
the actual rate of the LFO will not change. NOTE: These actions still update the internal “LFO Clock rate”
parameter, but this parameter is offline while the LFO Sync MODE is set to MIDI Clock. If you change the
LFO Sync Mode back to INTERNAL, the rate of the LFO will jump to the internal LFO Clock rate.
If the LFO is synchronized to a MIDI Clock pulse and the MIDI Clock is stopped, the LFO will continue at
the last MIDI Clock rate it received. If you hear a change in the rate of the LFO when you stop sending a
MIDI Clock signal, it is a sign of jitter or instability in your MIDI Clock source. The Little Phatty performs a
running average of the clock pulses it receives, so the more stable your MIDI Clock source, the smoother
the resulting LFO waveform will be. Very unstable clock sources can cause distortion in the LFO waveform,
due to the constant LFO Rate corrections required to stay in sync with an unstable timing signal.
When the Tap Tempo is engaged and a valid tempo is tapped in, Tap Tempo overrides MIDI Clock sync for
the LFO. The LFO reverts to the MIDI Clock rate when Tap Tempo is disengaged.
Page 17
LP OS 2.0 Addendum - Appendices
Appendix C - Arpeggiator Clock Source
There are three Arpeggiator Clock Sources: Internal (INTERNAL), LFO, and MIDI Clock (MIDI). Detailed
descriptions of these clock source options appears below.
INTERNAL:
When the Arpeggiator Clock Source is set to INTERNAL, the Arpeggiator runs at the internal Arpeggiator
Clock rate. This defaults to the clock rate saved in the currently-active preset. You can change the internal
Arpeggiator clock rate by using the MODULATION control, or by Tap Tempo, or by sending a MIDI CC#90
command with a value in the range 0-127. While the arpeggiator is running, you can change its internal
clock rate by selecting the LFO RATE panel button and adjusting the MODULATION control. The lower
line of the Little Phatty LCD will display ‘ARP XXX BPM’, showing the tempo of the arpeggiator clock. Note
that due to the shared controls, you cannot use the MODULATION control to adjust the internal LFO
Rate while the Arpeggiator is running in this mode. However, you can still adjust the LFO Rate remotely by
sending a MIDI CC#3 command.
When the Tap Tempo function is engaged, the Arpeggiator Clock is adjusted directly by tapping the LFO
RATE button. You can also adjust the Arpeggiator Clock using the MODULATION control (provided that
prior to enaging Tap Tempo, the MODULATION control was set to adjust the Modulation Rate and not the
Amount). Adjusting the Arppeggiator Clock in this manner will override the rate set by Tap Tempo. Note
that the LFO RATE panel button will continue to blink, indicating that Tap Tempo is still active - you can
tap in a new Arpeggiator Clock at any time. To disengage Tap Tempo mode, press and hold the LFO RATE
button. The Arpeggiator Clock will remain at the last rate you selected.
LFO:
When the Arpeggiator Clock Source is set to LFO, the Arpeggiator rate is defined as one whole note
per LFO cycle. Unlike Internal mode, you can adjust the internal LFO Rate directly from the panel while
the Arpeggiator is running. The Arpeggiator Clock Divider (CLK DIV) determines how many notes the
Arpeggiator plays per LFO cycle. Note that you can still choose either Internal or MIDI Sync to be the LFO
Clock source, independent of this setting. The Arpeggiator will follow the LFO rate in either case.
MIDI:
When the Arpeggiator Clock Source is set to MIDI, the Arpeggiator rate is directly synchronized to
incoming MIDI clock. If there is no MIDI clock signal present, the arpeggiator will not play (and in fact, you
will not hear any notes from the LP keyboard!). The Arpeggiator Clock Divider (CLK DIV) determines how
many notes the Arpeggiator plays per measure.
PERFORMANCE TIPS:
1. When the Arpeggiator Clock Source is set to ‘INT’, you can use the Tap Tempo function
to get clock rates that fall outside the minimum and maximum rates available from the
MODULATION control.
2. When the Arpeggiator Clock Source is set to ‘MIDI’, if the Latch is enabled and a
latched arpeggio pattern is playing, you can stop the MIDI clock and the pattern will stop
playing; when you restart the MIDI clock, the latched pattern is retained and it will resume
playing again.
Page 18
LP OS 2.0 Addendum - Appendices
Appendix D - Additional Suggestions Using the Arpeggiator
Here are a few helpful ideas for using the Arpeggiator:
1. When the LP’s MIDI output is enabled and the Arpeggiator is running, MIDI Note data is transmitted on
the LP’s MIDI Out jack. This allows you to connect additional MIDI instruments (such as the Voyager, RME,
another LP, or any MIDI keyboard or Tone Module) and have all instruments play the same pattern (this
requires the receiving instruments to be set up to accept MIDI Note data on the correct MIDI channel).
2. If you have a MIDI/CV converter, the LP’s sequenced MIDI data can be converted to control voltages, allowing you to interface with Moogerfoogers or other CV equipment. This allows you to get synchronous
effects with the LP.
3. No MIDI/CV converter? If you have a Voyager and a VX-351 Expander, you can connect the Voyager to
the LP via MIDI, and use the Voyager/VX-351 combo to create the CV’s for your Moogerfoogers.
Appendix E - LP Stage II Presets
A list of the Stage II Presets appears on the next page. Many of the preset names are self-explanatory,
some are for fun, and all are all worth auditioning. As you listen to the presets, don’t forget check out the
Mod Wheel for additional performance control.
Stage II Preset Contributors: Steve Dunnington, Amos Gaynes, Jordan Rudess, Adam Holzman
and Huston Singletary.
Little Phatty OS 2.0 Addendum
© Moog Music 2008, all rights reserved
Text and illustrations by Greg Kist, Cyril Lance & Amos Gaynes
��
��
��
��
��
��
��
��
��
��
��
��
��
��
��
��
��
��
��
��
��
��
��
��
��
�������������
�������������
������������
������������
�������
����������
��������
�������������
���������
���������
������������
�������������
��������
�����������
�����������
�����������
�����������
����������
�������������
���������
����������
�����������
�����������
�������������
�������������
��
��
��
��
��
��
��
��
��
��
��
��
��
��
��
��
��
��
��
��
��
��
��
��
��
������������
�����������
�������������
�������������
�������������
�����������
������������
�����������
��������
����������
������������
������������
���������
�������������
���������
������������
���������
���������
�������������
����������
������������
���������
�����������
�����������
��������
��
��
��
��
��
��
��
��
��
��
��
��
��
��
��
��
��
��
��
��
��
��
��
��
��
���������
�������������
�����������
�����������
������������
�������������
��������
����������
�����������
������������
������������
�������������
����������
���������
������������
���������
�����������
����������
���������
������
���������
�����������
����������
���������
�����������
Little Phatty Stage II Presets
��
��
��
��
��
��
��
��
��
��
��
��
��
��
��
��
��
��
��
��
��
��
��
��
��
�������������
�������������
�������������
�������������
��������
��������
�����������
����������
�������������
�������������
�������������
����������
������������
�������������
���������
�������
������������
��������
���������
��������
�������������
�������������
�����������
���������
����������