1
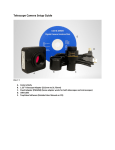
SKYRAIDER -DS Revision Sheet [Version 2.0] Michael Burns Rock Mallin [SkyRaider Quick Guide] This document will quickly introduce you to the wonders of the MallinCam SkyRaider Camera. It will include instructions on how to install the Software and Drivers and how connect the SkyRaider to your computer along with explanations of the camera’s major settings. The purpose of this guide is to quickly get you up and running with the SkyRaider Camera so that you can image. For a more detailed explanation of the various camera parameter settings, look for the SkyRaider User Manual. SkyRaider Quick Guide Page i Revision Sheet Revision History Version Date Revision Description 1.0 06/03/2015 Template Creation 2.0 07/06/2015 Added DirectShow, WDM, ASCOM, MaximDL, PHD2 SkyRaider Quick Guide Page ii Table of Contents Contents Revision History ................................................................................................................................... ii Table of Contents .......................................................................................................................... 0 1. Introduction ............................................................................................................................ 1 The Contents of the SkyRaider Package .............................................................................. 2 2. Installing Driver and Software ............................................................................................... 3 System Requirements ................................................................................................................ 3 Installing the Software ............................................................................................................... 3 Connecting the SkyRaider Camera .......................................................................................... 5 3. Using the Software .................................................................................................................. 6 The MallincamSky Window ...................................................................................................... 6 SkyRaider WorkFlow ................................................................................................................ 7 Select SkyRaider Camera....................................................................................................................... 7 Select an Exposure Time for Dark Field Correction .............................................................................. 7 Take Dark Field Correction ................................................................................................................... 8 Reduce Exposure Time to Align Telescope ........................................................................................... 9 Increase Exposure Time to Image .......................................................................................................... 9 Adjust the Parameters ............................................................................................................................ 9 Have Fun and Experiment...................................................................................................................... 9 Installing DirectShow Driver .................................................................................................. 11 Installing WDM Driver ........................................................................................................... 13 Installing Mallincam Ascom Driver ....................................................................................... 15 AutoGuiding with MaximDL .................................................................................................. 16 Running PHD2 with WDM Driver ......................................................................................... 19 Running PHD2 with ASCOM Driver ..................................................................................... 22 SkyRaider Quick Guide 1. June 30, 2015 Introduction After years of designing and testing under all operative conditions, MallinCam has created the next generation of Live Astronomical Video CCD Cameras. Not only live observation is possible, the series of SkyRaiders can take images and video recording too! No one in the industry has developed and pushed the envelope in an astronomical camera with such a state of the art product. We are the leader in the Live Video CCD camera industry and plan to stay that way for the benefit of astronomical advancement for the amateur community and professionals alike. The software package features the most advanced live video imaging system ever created. MallinCam has created the world's first software with the MC DarkField Subtraction System, on-the-fly eliminating the need of a Peltier cooler under live application and yet retaining the best low noise live image ever encountered on the market today. A MallinCam Advanced exclusive, the MallinCam Dark Field live subtraction feature is unique to the MallinCam SkyRaider Series of cameras. Images can be saved in the same manner or video files can be created with the same On-The-Fly DarkField correction. Among other advanced features, a live on-the-fly histogram make final image adjustment possible to produce the finest live image, with the option to save your view as an image or video file. The MallinCam SkyRaider-DS features the world renowned Hyper-circuit with a buffered variable gain. The Hyper circuit is used in our other camera designs and allows a user to increase sensitivity with low noise without increasing exposure time. A MallinCam Exclusive. Installation of the Hyper circuit in the SkyRaider-DS differs from other MallinCam cameras in that it uses a triple buffered electronic section to keep noise to a low level and still can be used with the Live MC Dark Field Subtraction for even lower noise. The MallinCam SkyRaider-DS features dual independent on board memory, ensuring separate video / imaging signal / data from the camera control through USB2 demand. No other video CCD camera system has these exciting unique features on the market today. The MallinCam SkyRaider-DS uses a two stage step up voltage driver to operate the CCD sensor to its maximum sensitivity at 15.3 volts from a 5 volts source. A MallinCam unique feature not found on any other video CCD cameras using USB2 system. Special thanks to Chris Appleton and Rock Mallin who expertise and experience are way beyond my capabilities. So thank you for your purchase, and let the adventure begin. SkyRaider Quick Guide Page 1 SkyRaider Quick Guide June 30, 2015 The Contents of the SkyRaider Package Depending upon the SkyRaider Model purchased, the contents may vary, but all SkyRaider cameras include the following standard equipment: MALLINCAM SkyRaider Camera High Precision 1.25" C mount Eyepiece Adapter 5 metre USB 2.0 cable. CDROM that contains the driver and software for the SkyRaider. SkyRaider-AG also includes 2 metre ST4 Guider cable SkyRaider Quick Guide Page 2 SkyRaider Quick Guide 2. June 30, 2015 Installing Driver and Software System Requirements PC running either Windows ® (32-bit & 64-bit) XP, Vista, 7, 8, 8.1, Mac OSX. Performance is not guaranteed if the following specification cannot be reached. DirectX 9.0 or later installed 2.0GHz processor(Recommend dual core 2.8GHz or more) USB 2.0 Port or USB 3.0 Port CD-ROM drive 2GB RAM(Recommend 2GB or more) 200MB Free HDD Installing the Software Step 1 Insert the Mallincam CD into CD-ROM drive of your computer. Have windows open the CD and you will be presented with 4 files: Step 2 95 MALLINCAMDshowSetup MALLINCAMSKYSetup MALLINCAMTwainSetup Double-Click on the MALLINCAMSKYSetup File Windows may display a warning asking for permission to run the program, if it does, select YES The following MallincamSky Setup Screen will appear: Step 3 Click on Next to start the installation process. SkyRaider Quick Guide Page 3 SkyRaider Quick Guide June 30, 2015 The installation program now want to know where you would like to install the software. Either choose your own location, or select the default. Step 4 Click on Install to proceed. Windows will again ask for permission to install the device software. Step 5 Click on Install to accept. The MallincamSky Software will take about a minute to be installed. When completed, the following screen will appear: Step 6 Click on Finish, and the MallincamSky will start and will appear on your screen. SkyRaider Quick Guide Page 4 SkyRaider Quick Guide June 30, 2015 Connecting the SkyRaider Camera Connect the provided USB cable to the SkyRaider Camera and connect the other end of the USB cable to a free USB port on your computer. Windows will then load the specific SkyRaider Camera Driver onto your computer. Once the driver has been successfully loaded, you will see the name of the SkyRaider Camera in the MallincamSky Camera List on the upper left of the Window. You can install numerous SkyRaider Camera’s, but the software can only control one SkyRaider Camera at a time. SkyRaider Quick Guide Page 5 SkyRaider Quick Guide 3. June 30, 2015 Using the Software The MallincamSky Window ① ② ④ ③ The MallincamSky Software Window is segmented into a few regions to make viewing and adjusting the SkyRaider camera easy and intuitive. ① The Top Menu Line provides dropdown menus to allow you to make major settings of the software ② The MallincamSky Toolbar provides the simple click activation and selection capabilities. ③ The Left SideBar provides selection options for Camera, Folders, or Undo. Left Clicking on the selection choice will fill the SideBar with its options. ④ The Video Window will contain the display from the SkyRaider Camera. It is here that you will see the video results. SkyRaider Quick Guide Page 6 SkyRaider Quick Guide June 30, 2015 SkyRaider WorkFlow The Mallincam SkyRaider Cameras provide a processing technique called Dark Field Correction (see the SkyRaider User Manual for a complete description of Dark Field Correction). The Dark Field Correction is prepared by the user at the beginning of an observing session by covering the camera or scope, pre-determining the exposure time (the times you select will become more intuitive with practice), and setting the software to automatically take up to 10 images. As your telescope equipment will be different, along with the possible use of various types of filters, and the skies you observe under, experiment with the length and number of the Dark Field Corrections. Take this into account when selecting you exposure time for your dark images. Step 1 Select SkyRaider Camera With the Camera Tab selected on the Left SideBar, LeftClick on the Camera you are currently using (between lines in Camera Heading). Once a camera is selected, a black rectangle (with SkyRaider Camera name) will appear in the Video Window of the MallincamSky Software along with the Horizontal and Vertical Rulers. Step 2 Select an Exposure Time for Dark Field Correction With the Camera Tab selected on the Left SideBar, Left-Click on the Exposure & Gain Line (a Green Rectangle with the word Exposure will appear in your Video Window, to inform you that you are setting an exposure time. Closing the Exposure Window will remove the Green Rectangle). The Exposure & Gain Window will open up and you can either slide the Exposure Time bar (Left-Click Hold and Drag) or LeftClick on the current Exposure Time value, and a another Window will open to allow you to manually enter a time (don’t forget to click OK). Exposure Target is only active when Auto Exposure is selected. The Green Rectangle is used to see if reference region it encloses matches Exposure Target that you set (We recommend that Auto Exposure is not selected). SkyRaider Quick Guide Page 7 SkyRaider Quick Guide Step 3 June 30, 2015 Take Dark Field Correction Ensure that the cover is either on the SkyRaider Camera or the Telescope is covered. With the Camera Tab selected on the Left SideBar, Left-Click on the Dark Field Correction Line. The Dark Field Correction Line will open up allowing you to select the Quantity of Dark Fields and the option to start the Dark Field Capture process. Select up to 10 for the Quantity (Start with 5 with 30 second exposures to get a feel of the process). Then Left-Click on the Capture Button. The Software will display its progress above the selected Quantity. Due to the unique way the Mallincam SkyRaider camera’s utilize odd and even image acquisition, a Dark Field is obtained for each of the odd and even frames. That is, five 30 seconds Dark Fields will take two times (5 x 30 seconds) or 300 seconds to complete. You can use this time to finish setting up your equipment. Click in the Enable check box to have Dark Fields applied in real time to your video. M57, 20 Seconds exposure, VRC 6", F/4.5 with MallinCam 0.5X focal reducer, NO Dark Field Correction. No processing, as seen live on monitor. Single frame. SkyRaider Quick Guide M57, 20 Seconds exposure, VRC 6", F/4.5 with MallinCam 0.5X focal reducer, One Single DARK FIELD CORRECTION APPLIED LIVE, No processing, as seen live on monitor, Single frame. Page 8 SkyRaider Quick Guide Step 4 June 30, 2015 Reduce Exposure Time to Align Telescope As you will most likely use the camera to align your Telescope, now is the time to reduce the Exposure Time to 1 or 2 seconds, and if not already attached to the Telescope, remove the lens cap from the SkyRaider Camera and insert the cmount on front end of the camera and slide camera into eyepiece holder of telescope. Step 5 Increase Exposure Time to Image Now is the time to display some images. Adjust the Exposure Time to match the target and the equipment you are using. Remember, due to the dual image capture process, a 30 second exposure will actually take 60 seconds to display (you will actually see the half interlaced image at 30 seconds, then the final image at 60 seconds). Since you have already created the Dark Field Corrections for this session (Dark Fields are stored directly in the SkyRaider Camera and will be deleted when the camera is turned off, sorry no way to save the Dark Fields). The SkyRaider will automatically apply the best Dark Field Correction to your image when Dark Field Correction is enabled. Step 6 Adjust the Parameters Depending upon what SkyRaider Camera you are using, determines what sort or image corrections you can apply (a Monochrome camera will not be able to adjust the colours). Choose a parameter from the Camera Tab on the Left SideBar and see what you can adjust, and how it affects your image. You will have to wait until the next image is exposed to see how your adjustments look. Step 7 Have Fun and Experiment You can now spend some time to become more comfortable with the MallincamSky Software. The SkyRaider User Manual will go into more detail about all of the options and adjustment you can perform with the SkyRaider series of camera. But, don’t be afraid to experiment. Hint Go into Options from the Top Menu Line, and choose Preferences. It is here that you can set options for the MallincamSky. If you go into Misc., you can change the Color Style of the MallincamSky software. SkyRaider Quick Guide Page 9 SkyRaider Quick Guide June 30, 2015 Some things to try: Change Exposure time (a 30 second exposure will take 60 seconds to appear, you can actually see the odd and even frames appear) Adjust the Gain to your liking (located in Exposure & Gain). Play with the Histogram Adjust Color Balance Make Color Adjustment Save a snapshot (default location is in the Documents folder in the MallincamSky sub-folder folder Save a Video Change Size of Video Window (on Mallincam Tool Bar) SkyRaider Quick Guide Page 10 SkyRaider Quick Guide June 30, 2015 Installing DirectShow Driver Step 1 Insert the Mallincam CD into CD-ROM drive of your computer. Have windows open the CD and you will be presented with 4 files: Step 2 95 MALLINCAMDshowSetup MALLINCAMSKYSetup MALLINCAMTwainSetup Double-Click on the MALLINCAMDshowSetup File Windows may display a warning asking for permission to run the program, if it does, select YES The following MallincamSky Setup Screen will appear: Step 3 Click on Next to start the installation process. SkyRaider Quick Guide Page 11 SkyRaider Quick Guide Step 4 Step 5 June 30, 2015 Click on Install to start the installation process. Click on Finish to close the process. SkyRaider Quick Guide Page 12 SkyRaider Quick Guide June 30, 2015 Installing WDM Driver Step 1 Insert the Mallincam CD into CD-ROM drive of your computer. Have windows open the CD and you will be presented with 4 files: Step 2 95 MALLINCAMDshowSetup MALLINCAMSKYSetup MALLINCAMTwainSetup Double-Click on the MALLINCAMTwainSetup File Windows may display a warning asking for permission to run the program, if it does, select YES The following MallincamSky Setup Screen will appear: Step 3 Click on Next to start the installation process. SkyRaider Quick Guide Page 13 SkyRaider Quick Guide Step 4 Click on Install to start the installation process. Step 5 Click on Finish to close the process. SkyRaider Quick Guide June 30, 2015 Page 14 SkyRaider Quick Guide June 30, 2015 Installing Mallincam Ascom Driver Step 1 Visit www.Mallincam.net Select the Support Tab Go into Software Downloads Near the bottom of the page under Miscellaneous Downloads is the ASCOM ST4 DRIVER SKYRAIDER G Guider link Step 2 Download the driver Step 3 Double Click on the Driver to install it onto your computer system (Windows), This assumes that you have already installed the latest ASCOM software on your computer. SkyRaider Quick Guide Page 15 SkyRaider Quick Guide June 30, 2015 AutoGuiding with MaximDL The following is a pictorial procedure on how to install the SkyRaider DirectShow driver (assumes you have already installed the driver) into MaximDL Step 1 Start MaximDL Step 2 Click the Setup Camera Icon. (Camera Control Window will open up) SkyRaider Quick Guide Page 16 SkyRaider Quick Guide June 30, 2015 Step 3 Choose Video DS (from Camera Model in Setup Video DS popup Window) Step 4 Click OK in the Setup Video DS popup Window. SkyRaider Quick Guide Page 17 SkyRaider Quick Guide Step 5 Click Connect in the Camera Control Window. Step 6 Now use MaximDL as you normally would. June 30, 2015 If you have installed the Mallincam ASCOM Driver, choose ASCOM Toupcam Driver from the list and have MaximDL use it to Autoguide. SkyRaider Quick Guide Page 18 SkyRaider Quick Guide June 30, 2015 Running PHD2 with WDM Driver Step 1 Start PHD2 software Step 2 Click on the Camera Icon to open up Connect Equipment Window. SkyRaider Quick Guide Page 19 SkyRaider Quick Guide June 30, 2015 Step 3 Choose WDM-style webcam camera from Camera Drop Down List. Step 4 Click on Connect button on Camera List. Step 5 The Camera choice window will pop-up. Select MALLINCAM and Click on OK. SkyRaider Quick Guide Page 20 SkyRaider Quick Guide Step 6 Select Resolution (recommend 640x480) and Click on OK Step 7 Click on Red X to close the Connect Equipment Window. Step 8 Now use PHD2 as you normally would. June 30, 2015 The Cam Dialog Box in PHD2 will open a window where you can adjust the parameters of the SkyRaider Camera (such as Exposure, as the Exposure Tab in PHD2 does not control WDM driver’s actual exposure, but rather just the refresh rate). If you see a rectangular Box in your Window, go to the ROI Tab in the Cam Dialog Box, and move and shrink the box to one side of your window so it doesn’t affect the image. SkyRaider Quick Guide Page 21 SkyRaider Quick Guide June 30, 2015 Running PHD2 with ASCOM Driver Step 1 Start PHD2 software. Step 2 Click on the Camera Icon to open up Connect Equipment Window. SkyRaider Quick Guide Page 22 SkyRaider Quick Guide Step 3 Choose ASCOM Toupcam Driver from Camera Drop Down List. Step 4 Click on Connect button on Camera List Step 5 Click on Red X to close the Connect Equipment Window. Step 6 Now use PHD2 as you normally would. SkyRaider Quick Guide June 30, 2015 Page 23