1
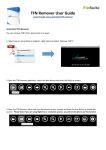
Queen Elizabeth Prize for Engineering Trophy Designer manual.
Written by Simeon Rice.
Version 1.0
Contents
Introduction
Getting Started
The Trophy Designer: User Manual
The Worktop
The Turntable
Box of Wonders
Appearance Panel
The Toolbar
Camera Zoom Slider
Camera Height Slider
Shape Size Slider
The Main Menu
Submit Trophy
Save/Load
New Design
Graphics
Help Tips
Help Video
Screenshot
Context Menu – Background
Undo
Redo
Focus On Turntable
Context Menu – Turntable
Always Align Shapes to Turntable
Vertical Drag Controls Camera
Focus On Turntable
Reset Turntable Rotation
Context Menu – Placed Shape
Appearance
Wireframe/Solid
Attachment Point
Rotation
Focus On Shape
Delete
Delete chain
Contents Continued.
The Trophy Designer: Reference Manual
The Scaffolding Technique
Extending the Turntable
Shape Chain as Templates
I Don't Have a Right Mouse Button
Performance
The Trophy Designer: Advanced Tips & Tricks
Normal mode
Held Shape Mode
Holding a Detached Shape Chain Mode
General Interactions
Introduction
Welcome to the Queen Elizabeth Prize for Engineering Trophy Designer manual.
The designer is a simple, yet powerful tool for constructing your 3D trophy. This is
achieved through the use of 'magnetic' shapes that can stick together or be pulled apart,
enabling you to effortlessly build more complex structures from simpler building blocks,
where the only limit is your imagination.
The basic building blocks used in the trophy designer are a collection of 3D shapes known
in mathematics as 'Platonic Solids' and are named after the ancient Greek philosopher
Plato. Though Platonic Solids have several interesting properties we use them for their
aesthetic beauty and symmetry.
fig 1: The five Platonic Solids and their wireframe counterparts. From left to right, tetrahedron, hexahedron (cube),
octahedron, dodecahedron and icosahedron.
Getting Started
Revealing the 3D Shapes.
To begin left-click with the mouse on any of the boxes (our 'Box of Wonders'). This will
empty out the contents (3D shapes) onto the 'worktop'. Notice that all the shapes from a
single box share the same appearance (colour and material).
Picking up a Shape
To pick up a shape left-click on it with the mouse. It is now attached to the cursor, so as
you move your mouse around the screen the held shape will follow.
Placing a copy of the Held Shape
You'll notice that as the mouse hovers over the different faces/sides of the placed shape,
your held shape will automatically snap to the correct position. It does this due to the
magnetic property of our shapes, meaning they can stick together or later be pulled apart.
This feature enables you to cleary see where left-clicking will attach the next shape.
It is through this simple activity of left-clicking to place the held shape onto either the
turntable or previously placed shapes that you can quickly build up a more complex form
and eventually design your entire trophy.
Dropping the Held Shape
To drop the currently held shape, just right-click (ctrl & left-click). Alternatively you can leftclick on any 'empty' part of the background. The held shape will drop to the worktop
allowing you to pick up another shape
Deleting a Placed Shape
If you happen to misplace a shape and want to remove it, first drop the held shape by
right-clicking, then hold down the shift key and left-click on the shape you want to delete.
Alternatively as long as you are not holding a shape, you can right-click on the shape you
want to remove and then selected 'delete' from the pop up menu.
Changing the Appearance of Shapes
To change the appearance of a shape right-click (ctrl & left-click) on the Box of Wonders it
came from. This will display the 'Appearance Panel' for that specific box, where you can
change the colour and material/texture of the shapes from that box, including those
already placed in your design.
Roll your mouse over the colour palette or the material icons to see immediately the
resulting change to your shapes. However to make the change permanent you must leftclick on the colour or material icon you wish to set.
Changing the size of the shapes
This can be accomplished through using the 'shape size' slider in the toolbar at the top of
the screen. Move your mouse over the toolbar to reveal the sliders.
Rotating the Turntable and Changing the Viewpoint
As your design grows you'll want to view it from other directions. To rotate the turntable,
left-click and drag it in a circular motion around its center. This will 'spin' the turntable
around including your design that is attached to it.
You can also rotate (or more accurately 'orbit') the view point by left-clicking and dragging
in any empty space in the background. Dragging horizontally will rotate the view around
the focus point (by default the turntable), whilst dragging vertically will change the angle or
pitch around the focus point.
The focus point itself can be changed between a placed shape or the turntable by either
double clicking on the object you want to focus on or right-clicking on a placed shape,
turntable/background and accessing the 'focus on' option from the pop-up menu.
Additional controls for the view point are accessed via the toolbar at the top of the screen.
Move your mouse over the toolbar it will slide out to reveal three sliders.
The first slider controls the zoom or distance of the camera view point to your design/focus
point. The second slider controls the camera height from the design/focus point.
Shape Chains
A Shape Chain is simply a collection of previously placed shapes that are attached
together. You obtain shape chains by detaching them from your current design.
To detach a chain of shapes, left-click and drag on a placed shape. It and the shapes
connected to it will start to wobble until eventually you drag it far enough to pull it off the
design. When you let go of the mouse button, the chain of shapes will now be attached to
your cursor and will follow it around and you can now left-click to attach a copy of it to the
turntable or previously placed shapes.
To dispose of the Shape Chain right-click anywhere or left-click in empty space.
Save and Load
Remember to periodically save your design from the save/load panel via the main menu.
Click on the 'main menu' button in the bottom right corner of the screen then click on the
'save/load' option. This will display your nine available 'memory slots', left-click on a slot to
open the pop-up menu where you can save, load or delete.
Unfortunately storage space is limited, the blue bar on the right hand side of the panel
shows you how much of the avialbe memory you have used. If it gets close to 100% you
may have to delete a previously saved design to free up enough space to save another.
Undo/Redo
If you make a mistake and don't want to simply delete a placed shape, then you can use
the undo feature. Right-click in empty space on the background to open the pop-up menu
and select undo or redo. The previous 20 actions ( adding shapes, deleting shapes,
changing appearance etc) are stored, enabling you to return your design to a previous
state from some time in the past.
The Trophy Designer: User Manual
The Worktop
This is where you will design your trophy creation, it consists of a turntable and three
boxes, which we call 'Box of Wonders'. In addition on the bottom right of the screen is the
'main menu' button and along the top of the screen is the drop-down toolbar.
The Turntable
The turntable represents the only area onto which you
can place shapes.
By left-click and dragging in a circular motion you can
rotate the turntable, allowing you to view your design
from any direction.
Right-click on the turntable to access its context popup menu (see Context Menu – Turntable for further
information).
fig 2: The Turntable
Box of Wonders
Each box contains the same collection of ten shapes, the five platonic solids in both solid
and wireframe form. The shapes within a single Box of Wonders all share the same colour
and material as denoted on the front of the box.
To access the shapes left-click with the mouse on a box. It will lift up and empty out its
contents onto the worktop. You can also click the box any time to force the shapes to be
dropped out again should they get too spread out on the worktop.
fig 3: The three boxes of wonder, their shapes and the appearance panel.
Appearance Panel
Right-click on a Box to open its 'Appearance' panel.
Here you can change the colour and material of all
the shapes from the box, including those already
placed in your design.
Rolling over the colour palette or material icons will
temporarily change the appearance of all the shapes
from the box. Left-click on the desired colour or
material to make the change permanent.
To close the panel, left-click on the 'close button' or
anywhere on the background.
fig 4: The Appearance panel.
The Toolbar
At the top of the screen is a toolbar with three headings. Move your mouse over the bar to
reveal three slider bars, one for each heading.
fig 5: The Toolbar with sliders for camera zoom, camera height and shape size.
Camera Zoom Slider
This slider controls the level of zoom of the camera. It enables you to alter the
distance/radius that the camera is from its focus point, normally the turntable or a
placed shape.
Camera Height Slider
This slider controls the height of the camera, allowing you to move it up or down
depending upon the height of your design.
Shape Size Slider
This slider controls the size of the loose shapes from the Boxes of Wonder. It will snap
to specific sizes as you drag it. Changing the size of the shapes enables you to create
more interesting designs.
The Main Menu
In the bottom right of the screen is the main menu button, click on it to reveal the options. It
will remain in view whilst the mouse is over it, but will shrink back to just the button if you
move the mouse off the menu.
fig 6: From left to right, Save/Load panel, Context Help, Graphics panel and the Main Menu.
Submit Trophy
Whilst the competition is open to entries you can click on this button to access the
submission panel, where you can send us your finished design.
Please ensure you fulfil the entry requirements and have read the rules & terms on the
website, before submitting your design.
Save/Load
Click on this button to access the save & load panel.
There are nine 'memory slots' available to you, left-click on a slot to access the
save/load/delete actions pop-up menu.
When you save your creation into a slot, a thumbnail will be generated from the current
camera view. This enables you to set up the view the get the best, most visually
descriptive thumbnail of your creation, making it easier to remember which design is in
which slot.
Storage space is limited though, so keep an eye on the blur bar on the right of the panel. If
this gets close to 100% you may be forced to delete a previously used slot to free up
space to save your current creation. The amount of memory each slot is using is displayed
beneath the slot.
New Design
Click on this button to clear the scene and start a fresh design.
Graphics
Click on this button to access the graphic settings panel where you can tweak the quality,
switch to fullscreen and disable effects, assuming they are supported on your graphics
card.
There are four pre-defined quality settings to choose from, starting with the fastest
performance (basic) to gradually improving to best quality (super). The default quality
setting is 'Normal', 'Basic' offers the widest level of support for graphic cards, whilst 'Super'
requires a recent graphics card with at least 512mb of memory.
If you see weird graphic glitches or are experience slow downs due to using a large
number of shapes try lowering the quality.
Help Tips
Clicking on this button will display a context based tool tip box at the bottom of the screen.
The tips will change based upon what type of object you mouse cursor is over on the
screen. When there are more than two lines of tips, it will periodically scroll to reveal more
detail..
Help Video
Click this button to view the quick start video which will take you through the process of
how to use the designer and start designing a trophy.
Clicking on the video will pause it, clicking again will play. Clicking on the small triangle
icon in the bottom right of the video window will toggle the video between full and half size.
You can still interact and even build your creation whilst the video is playing.
Screenshot
Click on this button to take a 'clean' screenshot of the current view (at the current size),
without the user interface, boxes of wonder or the turntable. The process often takes a few
seconds as the image is prepared.
Your browser should pop-up a dialog box asking you where you want to save the
screenshot (png format). If the browser does not do this after 10 seconds then it is likely
that it does not support this feature.
Context Menu – Background
Right-click (ctrl & left-click) on empty part of the scene
(background) to open the 'pop-up' context menu
Undo
Will 'undo' the previous action/s up to 20 times.
Redo
Will 'redo' the previous 'undo' action.
Focus On Turntable
This will force the camera to 'focus' on the turntable.
fig 7: Right-click on an empty part of the
background to open the pop-up menu.
Context Menu – Turntable
Right-click (ctrl & left-click) on the 'turntable' to open
the 'pop-up' context menu.
Always Align Shapes to Turntable
This will ensure all shapes placed on the turntable
face the same direction.
Vertical Drag Controls Camera
Now dragging horizontally will rotate the turntable,
whilst dragging vertically will rotate the camera.
Focus On Turntable
This will force the camera to 'focus' on the turntable.
fig 8: Right-click on the turntable to open its
pop-up menu.
Reset Turntable Rotation
This will reset the turntable rotation back to its original starting orientation.
Context Menu – Placed Shape
Right-click (ctrl & left-click) on the 'turntable' to open
the 'pop-up' context menu.
Appearance
Click on this option to cycle the shapes appearance
through each of the Box of Wonders settings.
Wireframe/Solid
Click this option to toggle the shapes' form between
solid and wireframe. The text is dependant upon the
current form of the shape clicked. If the shape is a
solid, then this option will be 'wireframe' and vice
versa.
fig 9: Right-click on placed shape to open its
pop-up menu.
Attachment Point
Whenever you attach a new shape to one already placed (the parent), it is positioned at
the center of the 'face/side' you are attaching. This option will cycle through the available
attachment points of the parent shape.
fig 10: Attachment points for triangle faces. The solid shape is the parent of wireframe shape.
fig 11: Attachment points for square faces. The solid shape is the parent of wireframe shape.
fig 12: Attachment points for pentagonal faces. The solid shape is the parent of wireframe shape.
Rotation - Reset All Rotations
Removes all rotation applied to this shape previously.
Rotation - Rotate Alignment
Whenever you attach a shape to another it will automatically align itself to the ensure the
'best fit', so that two same size shapes both with triangle faces will match up perfectly.
This function will cycle through all the possible 'alignment vectors' of the 'parent' shape
( i.e. the shape that the one you are rotating is connected to). In many cases when you
may not notice any difference due to the symmetry of the shapes.
An alignment vector is a line that goes from the center of shapes face to one of the faces
points (vertices). Square faces are an exception to this rule, their alignment vectors go
from the center of the face to the mid-point between two points.
fig 13: The alignment vectors for the three shape faces and examples.
Rotation - Rotate by X Degrees
Rotates the shape by 5, 15 or 45 degree intervals, though this will mean shape faces will
not be aligned to each other.
Focus On Shape
This will force the camera to 'focus' on the selected shape, zooming in to it. This means
that all movement of the camera view point will now be centered on this shape. So when
you left-click and drag on the background to rotate the view it rotates around the shape
and not the turntable.
To return the focus to the turntable (the default) right click on the turntable or the
background and select 'focus on turntable'.
Delete
This will delete the selected shape.
Delete Chain
This will delete the highlighted chain of shapes, starting with the selected shape and all of
those directly connected to it.
The Trophy Designer Advanced Tips & Tricks
The Scaffolding Technique
This is a method where you use a simple shape (usually the cube) to build a 'scaffold'
around where you plan to build your design. The cubes then provide additional placement
points from which you can build your design making the process easier and sometimes
allowing designs that would have been impossible to create any other way.
fig 14: Scaffolding: (left to right) Initial design, grey scaffold at 45 degree rotation, blue cross-beam intersects initial
design at 45 degrees, final design with scaffolding removed.
Extending the Turntable
The only area on the worktop you can place shapes is the turntable. If you find this is too
restrictive then it is recommended to build some 'scaffolding' which will provide additional
placement points, away from the turntable and your design. This process is highly useful if
you rely on using 'shape chain' as templates.
The basic steps are;
• Set the 'shape size slider' to the smallest value.
• Place a cube at the edge of the turntable.
• Build a long line of cubes moving away from the turntable.
• Use extension to attach shape chains or build from.
fig 15: Example of extended the turntable.
Shape Chain as Templates
A 'shape chain' is a great means of replicating part of a design quickly, allowing you to
place many copies. With careful planning they can become an even more powerful tool, as
you can use them as templates or larger building blocks. Just build a form that you know
you will want to re-use, then detach it from the turntable and place it back on the turntable,
somewhere out of the way of your design. Repeat the process to build up a collection of
templates that you want to use.
fig 16: Example of using shape chain templates to construct a more complex form.
I Don't Have a Right Mouse Button
If you cannot use right-click hold down ctrl and left-click instead.
Performance
If you are experiencing slow downs in performance due to using a large number of shapes
try lowering the quality setting in the 'graphics' panel.
The Trophy Designer Reference Manual
There are three main modes when using the designer.
Normal mode
This is when you are not 'holding' a shape or a detached shape chain.
Box of Wonders
• Left-click a box of wonder to empty its contents onto the worktop.
• Double Left-click to 'focus' on turntable.
• Right-click a box to access its 'appearance panel'.
Background
• Left-click & drag on the background to rotate the camera view.
• Double Left-click to 'focus' on turntable.
• Right-click on the background to access its context menu (undo/redo/focus).
Turntable
• Left-click & drag on the turntable to rotate it.
• Right-click on the turntable to access its context menu.
Loose Shapes (from the box of wonders)
• Left-click on a loose shape to pick it up.
Placed shapes
• Left-click to highlight the shape and its chain of children shapes.
• Left-click and drag to detach a shape to a shape chain.
• Left-click & hold down shift key to delete a shape.
• Double Left-click to 'focus' on shape.
• Right-click to access the shapes context menu.
Held Shape Mode
This mode is when you have clicked on a loose shape from a box of wonders to pick it up
and are holding it with the mouse.
In General
• Roll-over the turntable or placed shapes to see where the shape will attach
to.
• Left-click on the turntable to place a copy.
• Left-click on a previously placed shape to attach a copy.
• Right-click to drop the held shape.
• Left-click over the background (empty space) to drop the held shape.
Background
• Left-click & drag on the background to rotate the camera view.
Turntable
• Left-click & drag on the turntable to rotate it.
Holding a Detached Shape Chain Mode
This mode is when you have clicked and dragged on a placed shape to detach the shape
or shape chain, after which the shape chain will follow your mouse.
In General
• Left-click on the turntable to place a copy of the shape chain.
• Left-click on a placed shape to attach a copy of the shape chain to it.
• Right-click to dispose of the shape chain.
• Left-click over the background (empty space) to dispose of the shape chain.
Background
• Left-click & drag on the background to rotate the camera view.
Turntable
• Left-click & drag on the turntable to rotate it.
General Interactions
These can be used at any time.
•
•
•
•
•
•
•
Ctrl + Z to Undo
Ctrl + Y to Redo
Use the mouse wheel to zoom in or out.
Left-click & drag on the turntable to rotate it.
Left-click & drag on the background to rotate the camera view.
Left-click & hold down shift key whilst dragging (vertically) on the background
to zoom in or out.
Hold down ctrl and left-click to simulate right-clicking.