1
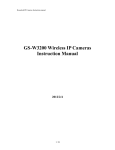
H.264 Megapixel IP Camera Hardware manual H.264 Megapixel IP Camera Hardware manual Directory 1. Introduction-------------------------------------------------------------------------------------------------3 2. Product description----------------------------------------------------------------------------------------3 2.1. Features -------------------------------------------------------------------------------------------------4 2.2. Product specifications--------------------------------------------------------------------------------4 2.3. Product appearance ----------------------------------------------------------------------------------5 2.4. Interface description ---------------------------------------------------------------------------------6 2.5. Accessories ---------------------------------------------------------------------------------------------8 3. Product use ------------------------------------------------------------------------------------------------10 3.1. Camera installation ---------------------------------------------------------------------------------10 3.1.1 Audio Connection-----------------------------------------------------------------------------11 3.2. Connect camera -------------------------------------------------------------------------------------12 3.2.1. Search IP Address --------------------------------------------------------------------------12 3.2.2. Access IP Camera via IE browser camera ------------------------------------------------13 3.2.3. Access IP Camera via Firefox Chrome Safari browser-----------------------15 3.2.4. Connect CMS software -----------------------------------------------------------------------17 1 / 54 H.264 Megapixel IP Camera Hardware manual 3.3. Camera applications --------------------------------------------------------------------------------21 3.3.1. MJPEG stream ---------------------------------------------------------------------------------21 3.3.2. RTSP stream ------------------------------------------------------------------------------------21 3.3.3. Mobile Access -----------------------------------------------------------------------------------24 3.3.4. ONVIF--------------------------------------------------------------------------------------------31 4. Frequently asked questions ----------------------------------------------------------------------------37 1. Introduction Network camera is based on Hisilicon 3507 network solutions, using the embedded Linux operating system, supporting 720P@25fps HD video, with industry-leading international standard H264 video compression algorithms, H264, MJPEG encoding, can easily achieve high-definition image of low transmission network bandwidth. In addition, it takes the high sensitivity image sensor, we demonstrate sharp and clear HD picture quality network camera with ease and convenience, using an IP-based video system, you only need a RJ45 network cable to connect to the network, built power-over-Ethernet module allows the power directly from the network, reducing installation wiring, built-in WEB server to support management via internet explore browser and configure the camera, monitor and monitor engineering solutions for a variety of occasions. You buy network video camera products should contain the following items in the box, if you find that some of these articles was not found in the product packaging, you can contact your local agent or a product manufacturer. Included in the product packaging: IP camera *1 2 / 54 H.264 Megapixel IP Camera Hardware manual IPCAM CD *1 12V power adapter *1 screw Kit *1 If you purchase a camera with WIFI function, in the product package should be shipped with a WIFI antenna 3 / 54 H.264 Megapixel IP Camera Hardware manual 2. product description 2.1. Features Megapixels CMOS sensor, integrated low lux function (L Series Aptina 9M034) / integrated WDR function (W series OV10633) / highest resolution reached UXGA 1600 * 1200 (C series OV2643) Real time (MJPEG/H.264) dual-stream encoding The use of advanced H264 video compression algorithms, support for the H264 Main [email protected] coding, H.264 Baseline [email protected] coding and the MJPEG /JPEG the Baseline encoding, you can easily achieve high-resolution images of low-bandwidth transmission Embedded Linux-based operating system, built-in WEB server, can be accessed directly via a Web browser, system stability, powerful, secure and reliable Standard RTSP stream output, supports VLC streaming Integrated ONVIF standard and various brands of camera can easily compatible platform software Bi-directional and echo cancellation function, monitoring and real time voice synchronization Supports alarm input and output Built-in automatic filter switch, can meet the needs of monitoring day and night Support POE power supply (optional) Support for WIFI, and SD card (optional) 4 / 54 H.264 Megapixel IP Camera Hardware manual 2.2. Product specifications Product Parameters System Sensor L series W series C series processor: Hisilicon 3507 operating system: embedded Linux Aptina 9M034 OV 10633 OV 2643 Lens Customize lens Infrared lamp (bullet)36 LEDs, 25-30m IR irradiation distance (dome)30 LEDs, 15-20m IR irradiation distance Video compression format H.264/MJPEG Audio compression format G.711 Resolution Main stream: 1280*720@25fps Minor stream: 352*288@30fps 176*144@30fps 320*240@30fps Main stream: 1280*720@25fps Minor stream: 352*288@30fps 176*144@30fps 320*240@30fps Main stream: 1600*1200@15fps 1280*720@25fps Minor stream: 352*288@30fps 176*144@30fps 320*240@30fps Video bit rate 32Kbps~4Mbps Network Protocol TCP/IP, HTTP, FTP, NTP, RTP, ARP, ICMP, DHCP, SMTP, POP3, DNS and RTCP PTZ Protocol RS485 communication, PTZ Protocol: Pelco-D, Pelco-P, etc. Baud rate: 2,400 Web browser Microsoft Internet Explorer 6 or above; safari; Firefox; Chrome Alarm High and low level alarm input, alarm input Power consumption 7~9W Working temperature -10℃~+ 60℃ Input voltage DC12V External interface 1 RJ45 network interfaces, one 3.5mm audio output interface, one 3.5mm audio input interface, a pair RS485 line, one power input POE Support (optional) WiFi@ SD card Support (optional) 5 / 54 H.264 Megapixel IP Camera Hardware manual 2.3. product appearance Box camera Dome Camera Bullet Camera Speed Dome Camera 6 / 54 H.264 Megapixel IP Camera Hardware manual 2.4. Interface description Tail interface of box cameras (1)Power input connection power adapter, 12 volt DC voltage/current: 1A (2)RJ45 socket 10/100M adaptive RJ45 network cable interface. Can connect to all network devices, such as switches, routers, and so on (3)Audio output connection audio output device, such as a stereo, amplifier, speakers (4)SD card slot Connection SD card, the biggest support 32 G SD card (5)Audio input connection audio input device, such as a pickup, microphone (6)Video analog signal output interface This interface to reserve the function, not to use (7)WIFI antenna interface If the camera with WIFI function. The interface would connect WIFI antenna (8) RS485 A /(9) RS485 B (10) Alarm Input Positive /(11) Alarm Input Negative (12) Alarm output NO port /(13) Alarm Output COM Port 7 / 54 H.264 Megapixel IP Camera Hardware manual External line interface (1)Power input connection power adapter, 12 volt DC voltage/current: 1A (2)Audio output connection audio output device, such as a stereo, amplifier, speakers (3)Audio input connection audio input device, such as a pickup, microphone (4)RJ45 socket 10/100M adaptive RJ45 network cable interface. Can connect to all network devices, such as switches, routers, and so on (5)RS485+/RS485connection PTZ devices 2.5. Accessories 8 / 54 H.264 Megapixel IP Camera Hardware manual Power adapter Input: 100~240V / 50~60Hz Output: DC12V / 2A Select the adapter specifications for your area accordingly AU; EU; UK; US Standard optional Poe Module Features: IP Camera after POE module is installed, you can directly through the network cable to provide power to the camera, POE switch (POE powered device)----48V power----POE camera, and transmit data simultaneously, eliminating the arrangement to deploy a wide range of wire and cable, socket circuits limit the advantages of, supply and transfer data both, safe, fast. POE Protocol: IEEE802.3af standard protocol. Power supply input: DC48V / 0.4A Power supply output: DC12V / 1.25 A 3. Product use 9 / 54 H.264 Megapixel IP Camera Hardware manual 3.1. Camera installation Pre-installation considerations 1. Please double check when you opened the box, confirm the list of articles and a consistent. 2. Please read this chapter carefully before installation. 3. When you install, be sure to turn off all power related equipment. 4. check the power supply voltage to prevent voltage not worthy cause device damage. 5. installation environment: do not use excessive humidity or high temperature environments, maintaining good ventilation, pay attention to preventing rain; avoid violent vibration environments. 6. If the device is not working properly, please contact your device dealer purchase, do not disassemble or modify the device in any way. Problems caused by the unauthorized modification or repair, at your own responsibility. Installation steps 1.Connect power supply (DC 12V), when the power led is lit, the device starts 10 / 54 H.264 Megapixel IP Camera Hardware manual Connect the power adapter Products must be used 12V/2A power adapter! 2.By cable the camera access to your networked or directly connected PC, network network within 5 seconds under normal circumstances led (green) is lit, physical connection of the camera is complete Connect the RJ45 network cable yellow led: power status led, lit when in power, under normal conditions should stay lit. Green led: communication status indicator, flashes when instructions are for data transfer, under normal circumstances should keep flashing. 3. Audio Connection: 11 / 54 H.264 Megapixel IP Camera Hardware manual Audio input:Please kindly connect power speaker in AV Port, 1Ch Audio Output: Please kindly connect power Microphone in AV Port, 1Ch 3.2. Connect camera 3.2.1. Search IP Address Factory default setting network parameters of the camera: address:192.168.1.128 Subnet mask:255.255.255.0 Gateway:192.168.1.1 HTTP port:80 RTSP port:554 PC network parameters network parameters of the camera and must belong to the same network segment to access the camera, first of all, the gateway and subnet mask should be the same, second IP address is also in the same paragraph, such as: IP address of the camera is 192.168.1.128 PC's IP address must be in the 192.168.1.1~254 range (except 192.168.1.128) If the PC's network parameters network parameters and the camera is inconsistent, you need to change the network settings of the camera enables you to access the camera. Run the DeviceSearch tool search cameras (search tool that comes with the product CD) Click Update Ip change camera network settings, after you change the network settings of the camera, search again the camera, the camera will display the change IP address 12 / 54 H.264 Megapixel IP Camera Hardware manual 3.2.2. Access via IE browser Built-in WEB server of the camera, and through IE browser, direct access to the camera, in the IE address bar, enter the IP address of the camera HTTP ports such as 192.168.1.128:80 land camera, camera default user and password is Admin After logging in, you need to install the OCX control to display the camera images, you can click on the lower right corner of the "Download OCX" download the control, or you can click on the RSAV.exe link in the message to download, as well as on the product CD, "IE Plug-in" folder you can also be found in the RSAV.exe Setup 13 / 54 H.264 Megapixel IP Camera Hardware manual Control (RSAV.exe) after the installation has completed, refresh the page, click on the message at the top of the page select allows you to use Add-ins, After the Setup is complete, the image will appear on the page. IE interface operations in detail, read the documentation that comes with the product CD "IE Operation Guide (Megapixel IP Camera)" 3.2.2. Access IP Camera via Firefox Chrome Safari browser (1)When you login firefox browser, as shown below, there are two options: OCX H264 VLC H264 please kindly select "VLC-H264" plug in. After installed the plug-in, the image will be displayed as below: 14 / 54 H.264 Megapixel IP Camera Hardware manual (2)When you login Chrome browser, as shown below, there are two options: OCX H264 VLC H264 please kindly select "VLC-H264" plug in. After installed the plug-in, the image will be displayed as below: (3)When you login Safari browser, as shown below, there are two options: OCX H264 VLC H264 please kindly select "VLC-H264" plug in. After installed the plug-in, the image will be displayed as below: 15 / 54 H.264 Megapixel IP Camera Hardware manual 3.2.3. Connect to the CMS software CMS software is that we provide a free monitoring software for camera, cameras and NVR products can connect us, supports up to 64 channel preview and 4-channel playback, supports motion detection, stability is it simple to use and powerful features. CMS software in its product CD install client Note: requires Microsoft VC 2008 and CMS software. NET Framework 3.5 supports above, make sure the PC before installing the software has installed these 2 programs, also you can also be found on the product CD in the installation package of these 2 programs. Microsoft Visual C++ 2008 http://www.microsoft.com/en-us/download/details.aspx?id=29 Microsoft .NET Framework 3.5 http://www.microsoft.com/en-us/download/details.aspx?id=22 16 / 54 H.264 Megapixel IP Camera Hardware manual 17 / 54 H.264 Megapixel IP Camera Hardware manual Run the CMS software, your account password is admin/admin In the software "configuration" page, search within your LAN into the camera are displayed in the columns, you can click on the search icon and hold in front of the camera IP address to drag to the location, search to add a camera to monitor regional , or on the right keys to select “Add ipc” to add cameras. Add requirement after enter the camera information and information such as user passwords and notes, check and enter the information and click OK. 18 / 54 H.264 Megapixel IP Camera Hardware manual The camera "Preview" interface, double-click the camera icon to begin the preview camera images CMS software detailed operation please read the documentation that comes with the product CD "CMS network video monitoring software manual" 19 / 54 H.264 Megapixel IP Camera Hardware manual 3.3. Camera applications 3.3.1. Mjpeg stream In the browser, enter the address mobile.htm to access the camera MJPEG stream, such as: http://192.168.1.128:8000/mobile.htm In addition, you can grab the pictures by following command: http://192.168.1.128:8000/cgi-bin/net_jpeg.cgi?ch=0 3.3.2. RTSP stream Our camera outputs are standard RTSP stream, you can use VLC Player or any other software connected camera supports RTSP streaming RTSP streaming online viewing. First of all you want to know the camera's Web URL address, such as 192.168.1.128, RTSP is the IP address of the camera port 554, the we network that corresponds to the URL address of the camera is as follows: Main stream:rtsp://192.168.1.128:554/ch0_0.h264 Minor stream:rtsp://192.168.1.128:554/ch0_1.h264 Audio stream:rtsp://192.168.1.128:554/ch0_3.h264 20 / 54 H.264 Megapixel IP Camera Hardware manual Specific steps for connecting camera with VLC: Run VLC and select open network stream Then enter the Web URL address of the camera, and then play. 21 / 54 H.264 Megapixel IP Camera Hardware manual Play with VLC Player camera images. 22 / 54 H.264 Megapixel IP Camera Hardware manual 3.3.3. Mobile Access Open RSee mobile phone client(The connection sample is for Android system, maybe other systems have some differences) Clicking the“device list”,and add the camera and NVR device. 23 / 54 H.264 Megapixel IP Camera Hardware manual The first runing will show a tip, click “YSE”. Input the device information, and the port is to input the camera RTSP port. The channelcount is 24 / 54 H.264 Megapixel IP Camera Hardware manual to choose “automatic get”. When finish it, please click “save”. Example 1 Adding local device Example 2 Adding internet device 25 / 54 H.264 Megapixel IP Camera Hardware manual If the device information is correct, and connecting the device by network. It will show success for getting channels, and added the device to the list. If unable to connect the device, will show the failure for getting channels. Please check the device’s information is correct, or the network is unblocked. After adding device, return to the main interface, click the “live view” to preview the camera. 26 / 54 H.264 Megapixel IP Camera Hardware manual Clicking“+”Will display the device list to choose preview camera. 27 / 54 H.264 Megapixel IP Camera Hardware manual Clicking device’s name to open the channel information, click channel will display image. Previewing the camera image 28 / 54 H.264 Megapixel IP Camera Hardware manual You can set the mobile phone software on the "local config". You can choose the four to show 4 channels image and doing other set. 29 / 54 H.264 Megapixel IP Camera Hardware manual In 4 channel window to preview device images The more use explain of other functions in mobile phone client, you can read the RSEE mobile phone client user manual. 3.3.4. ONVIF ONVIF is committed to a global open interface standards to advance the application of network video in the security market, this interface standard will ensure that different manufacturers of network video product interoperability. Our network camera integrated 1.0.2.2 ONVIF core specification, can easily access the camera supports ONVIF for platform software, such as a Milestone, such as Geovision, Axxon, our Milestone below, for example, describes how to connect to other platforms by ONVIF software. Running Milestone XProtect Go Management Application, in the home screen, select "Add Hardware" 30 / 54 H.264 Megapixel IP Camera Hardware manual In the "Add Hardware", the device detection method for selecting high-speed, click Next Milestone will automatically scan and search to the camera, enter the user name and password, and then check the use, and then click Next. 31 / 54 H.264 Megapixel IP Camera Hardware manual This means that have successfully connected my camera, click Finish to add the camera. Management in the hardware of the camera, you can view the camera information has been added. 32 / 54 H.264 Megapixel IP Camera Hardware manual Milestone XProtect Smart Client to watch the cameras. 33 / 54 H.264 Megapixel IP Camera Hardware manual Detailed connection method and other brands of software compatibility information, please read the product in the CD "ONVIF compatibility testing" document. 4. Frequently asked questions (FAQ) Q: why can I use the search tool to search the camera IP address, but you cannot use IE to access cameras, software cannot connect camera. A: this may be because of where the network and camera nets segment does not belong to the same segment, must use search tool the camera IP address has been changed to and local network belonging to the same segment of the IP address. Q: can I do with a browser other than IE to access cameras? A: no, our OCX controls inside the camera is based on IE browser kernel, apply only in the browser based on the IE core. Q: the camera all the way up to allow several users at the same time through your IE browser to watch? A: when watching the camera, mainly using camera CPU resources when the higher the resolution of the camera, camera CPU resources consumed, the larger. Tested when the camera resolution is 2 million, 1~2 users can simultaneously view, when the camera resolution is 1 million, 2~3 users can simultaneously view, when the camera resolution is 4CIF, 3~5 users can simultaneously view, when the camera resolution is when the CIF, 8~12 users can watch Q: why the camera can be accessed by IE or connected to the software, but cannot see the image. Answer: first of all, make sure to use the correct browser access to the camera, and you successfully install and load the OCX controls (for details, please read the directions 3.2.1. Access camera through IE browser) and, secondly, ensuring smooth and sufficient network bandwidth is, you can use the PING command to view network latency or switch. Enter the “ping 192.168.1.128 (IP address of the camera) – t” see network 34 / 54 H.264 Megapixel IP Camera Hardware manual If the delay is greater than 300ms or there is a long time "no response", it can be difficult to get the camera of high resolution images, so there may be no image, then you can try to change the camera resolution settings, limit the number of bit-rate frames or bit rate, or changed to a lower resolution. If the above settings or network is normal, but still cannot see the image, it may be a problem with the camera itself, contact the vendor for assistance! Q: cannot find the camera IP address, search tools search less. A: the camera could not be found due to a lot of camera hardware, software, network environment, and so forth will result in camera is not found: Search tools: search tools is by sending broadcast packets searched within the LAN network camera, when you run the network connection between the PC and a webcam software gateway (routers, for example), the gateway to filter broadcast packets, the search tool will not be able to search into the camera. PC: PC does not turn off the firewall, or other security software blocking. Through DHCP 35 / 54 H.264 Megapixel IP Camera Hardware manual assigned IP address of the PC, but the allocation of IP addresses is not valid. In the PC and the camera does not belong to a local area network. Network: ageing switch entry needs to restart. Router IP address filtering or blocking, and so on. Or cable aging network Crystal head oxidation causes, such as lack of network access. Camera: camera long because some of the causes of internal service is not running or has stopped running, needs power failure restart camera. Camera does not power on, or power supply problems, camera using POE power supply but POE module is damaged. Camera has been damaged. Because there are many causes the camera IP address cannot be found, if the camera appears unable to access, search IP address was not, we propose to do check in this order: 1. using a normal access to other cameras or sound preparations for the PC directly connected cameras. 2. manually specify the IP address of the PC and is and the camera is in the same network segment. 3. use a good network cable directly connecting the camera and PC. 4. camera power connections, and make sure that the camera is powered on (to block infrared light, check the infrared light to judge has power light does not light). 5, use the search tool to search the camera or use IE directly access attempts to connect to the camera. If you follow the above steps are still unable to connect to the camera, it could just be a problem with the camera itself, contact the vendor for assistance! How to set up WiFi Step 1: Connect your IP Camera on a network. Then access to 192.168.1.128 on IE Browser (default user name: admin; password: admin). Step 2: Set up WIFI DHCP. Enable WIFI. Go to Option “Parameters”—Choose “WIFI”—Choose “DHCP”—“ Enable” —Click “scan” to search WiFi signal 36 / 54 H.264 Megapixel IP Camera Hardware manual Step 3: Choose the right WIFI network which you are going to use Step 4: Input WLAN password in “Key” and “Re-Type” and click “OK” to save it. Step 5: Refresh the current IE page. Get the IP address automatically assigned. 37 / 54 H.264 Megapixel IP Camera Hardware manual Step 6: Remove the network cable on your IPC. Get access to IPC with the new IP address on IE. IE operating instruction manual 1 Components are mounted----------------------------------------------------------3 2 Login---------------------------------------------------------------------------------------5 3 Menu description ----------------------------------------------------------------------5 3.1 Home----------------------------------------------------------------------------------6 3.2 Replay--------------------------------------------------------------------------------8 3.3 Log-------------------------------------------------------------------------------------8 3.4 Parameters--------------------------------------------------------------------------9 3.4.1 Network---------------------------------------------------------------------------9 3.4.2 Video Parameters--------------------------------------------------------------10 3.4.3 DNS & UPnP-------------------------------------------------------------------10 3.4.4 Video Cover--------------------------------------------------------------------11 3.4.5 Motion Detection--------------------------------------------------------------12 3.4.6 CMOS Sensor-----------------------------------------------------------------12 3.4.7 OSD Set-------------------------------------------------------------------------13 3.4.8 Alarm Set------------------------------------------------------------------------14 4 System -----------------------------------------------------------------------------------14 4.1 Network------------------------------------------------------------------------------15 38 / 54 H.264 Megapixel IP Camera Hardware manual 4.2 Time Settings-----------------------------------------------------------------------15 4.3 System Tools-----------------------------------------------------------------------16 4.4 User-----------------------------------------------------------------------------------16 4.5 Device Information----------------------------------------------------------------17 5 Additional Remarks------------------------------------------------------------------18 1 Components are mounted IP camera will automatically prompt the user to install the OXC when the first viewing through the IE browser. Step 1: Open the browser and input the address, such as 192.168.1.128 (the default IP is 192.168.1.128). Step 2: Login page will appear as follows. Input the default user name: admin and password: admin. 39 / 54 H.264 Megapixel IP Camera Hardware manual Step 3: At the first viewing of the IP camera, the browser will prompt the users to install the OCX component. Note:(A). If the users didn’t install the ‘OCX’ before, please click the link on the page: ‘Please install the ActiveX widget RSAV.exe’. Or directly in the upper right corner to download OCX 40 / 54 H.264 Megapixel IP Camera Hardware manual (B). After the download installed directly 41 / 54 H.264 Megapixel IP Camera Hardware manual (C). Refresh or re-login the IE interface after installation. Then the IE will go to default page and show the preview image. 2 Login Login page will appear as follows after input default IP address of IP camera: 192.168.1.128 into the address bar of browser. Input the default user name: admin and password: admin. 3 Menu Description The menu is as below. It has 4 functions. 42 / 54 H.264 Megapixel IP Camera Hardware manual (1) Home (2) Replay (3) Log (4) Parameters (5) System 3.1 Home Connect the camera, log IE interface will show on the Home of the shooting screen. Home the upper left corner, there are some basic operations. 43 / 54 H.264 Megapixel IP Camera Hardware manual 3.2 Replay If you need to watch the saved video files, you can operate during Replay. Select the appropriate date to be able to find the desired video file. 3.3 Log 44 / 54 H.264 Megapixel IP Camera Hardware manual Search with some of the time data in the log. According to the right of the type and date will be able to search the information you need. 3.4 Parameters Including Network , Video Parameters, DDNS & UPnP, Video Cover, Motion Detection, CMOS Sensor, OSD Set and Alarm Set. Data processing allows the camera to better capture better quality picture. 3.4.1 Network 45 / 54 H.264 Megapixel IP Camera Hardware manual 3.4.2 Video Parameters Users can set the code rate, type, frame rate, image quality, etc. of the main stream in the Video Parameters Setting. The user can select the Main flow and Minor flow. 46 / 54 H.264 Megapixel IP Camera Hardware manual Both of the main and sub stream support Constant Bit Rate (CBR) and Variable Bit Rate (VBR) mode . Support 5 levels image quality setting: Very High, High, Normal, Low and Very Low. 3.4.3 DNS & UPnP That is, select the Dynamic DNS and Universal PnP switch. 3.4.4 Video Cover This menu allows users to cover the privacy area with color block. The camera maximum supports 4 color blocks area. Note: (A) Choose the area first. It allows orderly to configure 4 shield areas. (B) Click on the video image and drag the mouse, there will be a green block, that is, the cover region. Click OK. (C) Choose the Video Cover option as ‘Off’, click ‘OK’ to close all the configurations. 47 / 54 H.264 Megapixel IP Camera Hardware manual 3.4.5 Motion Detection When you select the motion detection, the whole picture will become a color, press to set the detection level such as the time interval. 3.4.6 CMOS Sensor The CMOS parameters of three areas: global settings, brightness and 48 / 54 H.264 Megapixel IP Camera Hardware manual color settings, and the CMOS settings. 3.4.7 OSD Set Users can set Time, Device Name and other 2 extended information. The color and position of the characters are adjustable. X-Coordinate range: 0-1280; Y-Coordinate range: 0-720 49 / 54 H.264 Megapixel IP Camera Hardware manual 3.4.8 Alarm Set There are 2 kinds of alarm, Motion Detection Alarm and External Alarm. Users should choose the alarm check-box first to set the alarm action, such as Record, Capture. Please insert a SD/TF card to enable the functions. Users can set the alarm time. Each blue block means 30 minutes. 50 / 54 H.264 Megapixel IP Camera Hardware manual 4 System System Setting includes Local Settings, Time Settings, System Tools, User and Device Information. 4.1 Local Settings Login options and video streaming options, select the type of stream video files and capture pictures and save path set in the Local Settings. 4.2 Time Settings Manual Setting, Sync with computer time, Sync with NTP and Time Zone are optional. Users can choose the method they want. Manual Setting: e.g. 15:17:20 31st May, 2011, please input 2011-5-31 in the data blank and input ‘15’, ‘17’, ‘20’ in the time blank, then click ‘OK’. Sync with computer time: IP camera time will be auto synchronous with the users’ PC within 1 second error. Sync with NTP: Input domain name or IP address of the NTP server. Time Zone: Users can choose the time zone according to their location. 51 / 54 H.264 Megapixel IP Camera Hardware manual 4.3 System Tools System Tools includes Reboot, Factory default, SD format, View Picture on SD-card, update Backup configuration file, Update configuration file and System. 4.4 User 52 / 54 H.264 Megapixel IP Camera Hardware manual The IP camera only supports one user at present. The user name can be repeatedly login. User name and password are adaptable. 4.5 Device Information This information includes the device information and the SD card information of two parts. Users can operate according to their needs. 3. Additional Remarks 53 / 54 H.264 Megapixel IP Camera Hardware manual 1. NVR can automatically detect the online IP camera. Users must configure the IP camera in the NVR before preview and record. IP address is the only identification. So the address of the NVR and camera can’t be the same. 2. When the IP camera is under preview condition, if the IP camera or NVR is rebooted or network abort and recovery, the NVR will forwardly preview the IP camera. 3. When the users remotely set the IP camera parameter in the NVR, please operate prudently, especially the color conditioning. If the color is abnormal, users can restore the color to default configuration. 4. The image quality will be affected by the lens. 8mm or 12mm lens are advised for indoor use. 54 / 54