1
USER MANUAL - ELECTRIC DYNAMIC PUMP
This manual briefly explains the operation of the device.
The points described below are: the on/off button , the current switch, power and charging connectors, water
connectors , final discharge, controlled loss valve , regulation intensity knob , display, battery charge
indicator , cylinder supplied and operation of filling and emptying ,depiction connection tubes , how best to
use the device and setting vacuum values.
The on/off button
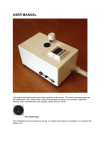
The on/off button turn the device on and off. In I position the device is in operation, in O position the device is off.
The switch
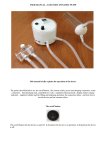
As in the figure above: the switch selects the type of power supply (only for the dual power supplymodel A/C
batteries), with AC batteries or power supply. The switch positioned on the left /black color) uses battery
supply device. The switch positioned on the right operates the device with AC mains power via a
transformer. To use the battery, keep the selector positioned on the left. To use AC power, keep the switch
positioned to the right. In order to recharge the battery keep the switch positioned to the left. If while using
the battery-powered device the switch is moved to the right, the device will lose power and stop.
The left connector is only used to recharge the battery while the device is not in use. The right connector is
for AC power supply and should only be used to supply the device while it is in use.
Water connectors
The pump has three connectors, right, center and left. The right is the discharge connector and must therefore be
connected to the connector on the left of "Final discharge unit". The middle connector must be connected to the valve
controlled loss valve and should be connected to "The final discharge unit" right connector.
The left connector of the pump, must be connected to the cylinder.
The scheme described above should be followed as pictured. The discharge connector is important , do not invert it.
If it is inverted the pump will not generate any vacuum but there are not obviously dangers or damage to the device..
Final discharge unit
The final discharge unit must be completely immersed about 6 cm in water during operation of the pump. It must be
connected the discharge tube and the tube connected to the controlled loss valve .
Controlled loss valve
The valve is positioned on the final discharge unit, during use of the pump must be completely immersed in water.
The white knob on the head of the valve controls the rate of descent of the vacuum. You have to adjust it by gently
tightening or loosening 1 or 2 mm at a time so finding the right setting at your leisure . Valve adjustments should be
made keeping it totally immersed in water If you fully tighten (clockwise) there would be no leak and the vacuum
level would remain stable.
Regulation intensity knob
The intensity control knob, above is a current regulator that regulates the speed and the noise level of the device. It
must be used gently. The intensity increases by turning it clockwise. The intensity decreases by turning it anticlockwise. If you turn the knob completely anti-clockwise you remove power to the device and it stops. This is
normal.
The knob regulates the speed of vacuum increase, and also the noise (though moderate) that the device emits. Applying
more power to the vacuum pump draws out air more quickly from the vacuum circuit (clockwise). Applying less power
to the vacuum pump draws out air more slowly (anti-clockwise).
The display
From the display you can display the vacuum value inside the circuit.
When the vacuum pump is active the numbers will be displayed in red. When the pump is not active the numbers will
displayed in green. When the device starts, the display flashes for some seconds (about 2 seconds) and it starts at the
values that have been set previously. The display shows the vacuum inside the vacuum circuit in inches of Hg (they can
also be displayed in Bar, Psi etc.) Without having closed the vacuum circuit, by connecting the small tube the display
will show - 0,1/- 0,2, that is normal since there is no vacuum.
Led indicator battery charge level
When it is green, the charge is about 100%, when is
Yellow indicates a charge from 80% to 30%. When is red indicates
a charge under 30% and then you have to recharge before the next use
of the device.
Cylinder supplied and operation of filling and emptying
Our pump could work with all kinds of cylinder, but we have designed one tailored to the needs of our device to be able
to offer you the best possible comfort in the use of our dynamic water pump.
The cylinder has two connectors and internal wing in line with one of the two connectors, this connector must be
connected to the pump tube (see figure above), you have to wear the cylinder with wing pointing on as the figure
above, we will call this connector "connector 1 up".
The inner wing perform a very important function, serves to hold any air bubbles due to possible losses caused by poor
adherence between the cylinder and the base of the penis.
If during the use of the pump you realize you have air bubbles in the cylinder, just move the cylinder towards the
vertical position so that the bubbles rise up to the highest point of the cylinder, ie, the circular top where the two
connectors are positioned at this point place the cylinder in the desired position and the air bubbles remain trapped in
the wing specially designed containment.
The second connector of the cylinder is used exclusively to fill and empty the cylinder, and we call it"connector 2
down".
By using water you'd think that you would get wet or that you will surely have water leaks in the place where you use
the device. However it is not so. By holding the cylinder in a nearly horizontal position with the tip slightly upturned,
simply connect the supplied hose connector 2 down, put it in the water and turn on the device, in less than a minute,
the tube will be filled with water, then place the cylinder vertically so that all air is sucked into the connector 1, when
the cylinder is full of water and will have a total absence of air bubbles disconnect the hose supplied from connector 2
and you can begin the session
At the end of use of the device, to empty the cylinder: connect the supplied hose to connector 2, and aim it at a drain
water. Keep the cylinder pointing down, in about a minute, the cylinder will be emptied of water.
Depiction connection tubes
How best to use it
In this section we will explain in a few essential points, and most important how to use the device.
1) Rest the device on a flat surface near the water source, connect. final discharge unit to the pump : the right
connector of the pump into the left connector of the final discharge unit , the middle connector of the pump
into the right connector of the final discharge unit, completely immerse the final discharge unit in water.
2) Wear the cylinder , connect the” connector 1 up “into the connector left of the pump , insert the hose provided
in “ connector 2 down “ of the cylinder and keep it in the water, turn on the pump and with the knob give
maximum power to fill the cylinder.
3) When the cylinder is almost full of water point it out. As soon it is completely full of water and without air
bubbles inside ,disconnect the hose provided .
WE STRONGLY RECOMMEND USING WARM WATER IN THIS PUMP. It is generally considered warmth
assists in achieving the BENEFITS this device is capable of AND PREVENTION of injuries that can result from
excessive pumping (eg red spots).
Setting vacuum values.
The device is equipped with three buttons from which you can regulate the minimum and maximum vacuum which can
be set in two different ways.
Setting minimum vacuum (N_I)
1) To set minimum vacuum turn on the device by turning the power switch on (I position). The display will show
– 0,1/-0,2,
2) now press the central button
once. You will display the flashing writing N_I present value.
3) Press the button on the right
to decrease or press the button on the left
to increase
4) press the central button once more and you have finished setting minimum vacuum.
For example, use the side left and right buttons to set –3,7” Hg. So the value -3.7” Hg that you have just set means that:
when vacuum arrives to -3.7 the device starts and leads the vacuum to the maximum preset value, the vacuum inside the
vacuum circuit will not decrease under -3,7”.
To set the maximum vacuum value vacuum that the device will reach you set a number (H_I). H_I represents the
increase in vacuum from the minimum set vacuum (N_I) (ie Maximum set vacuum = N_I + H_I).
Setting H_I
1.
Turn on the device by pressing I, the display will show – 0.1/ -0.2, hold down the central button
least 3 seconds, the display will show the writing F 0,
2.
3.
press the left button
once, the display will show the writing F 1.
Now press the central button four times until the display shows the writing H_I. You increase with the button
on the left and decrease with that on the right.
then press again the central button for at least 3 seconds, the display will show the writing – 0,1/-0,2, and you
have now set the maximum value.
4.
for at
Examples
If you want to make:
.
cycles at a minimum vacuum of -4.0 and a maximum vacuum of -9.0: set the minimum value (N_I) at -4.0 and
set H_I value at 5.0.
.
Cycles at a minimum vacuum of -3.3 and maximum vacuum of 10.2: set N_I to – 3.3, set H_I to 6.9.
.
.
cycles at a minimum vacuum of -4,5, maximum vacuum of - 8,7: set N_I -4,5 and H_I to 4,2.
cycles at a minimum vacuum - 5,5 maximum vacuum - 11,0: set N_I to - 5,5 and H_I to 5,5.
Note: If you have -4.0 as minimum value and -8.0 as maximum value, when you modify only the value N_I that is – 4.0
and you bring it to – 5.0, for example, you will obviously increase the maximum value H_I too, so it will automatically
become - 9.0, so you will have -5.0 as minimum value and -9.0 as maximum value. .
It might seem complicated but in reality it is simple because if correctly used usually you will normally only change the
maximum value, while you will almost always have the same minimum value (ie you will normally only modify the
H_I value).
You are advised to adjust minimum and maximum values by following this handbook exclusively without relying on
any other menu option, but if you "unconfigure" the menu in error with the buttons under the display, contact
[email protected] , we will help you with reprogramming.
Lithium-ion battery
The dual power supply version of the device includes a lithium-ion battery, a very powerful and safe new generation
battery that can supply the device for some hours, with a range of at least two full hours; the battery charging must be
done exclusively when the device is not in use. The battery must be charged when necessary, do not charge the battery
continually if it is not out of power for about 70/80 % or there will be the risk of nullifying its duration.
Static pumping
The device has been designed for dynamic pumping. It has a natural slow vacuum leak that is amplified and regulated
by the controlled loss valve. If you wish to use the device for static pumping you have to remember that is does not
maintain a constant vacuum but will always tend to slowly lose vacuum.
Checking pump settings
1. Turn on the device.
2. Turn the black knob fully counterclockwise.
3. Press the central (S) button for 3-4 seconds and arrive in F_0.
4. Press center (S) button one time and ensure the settings for uni is inH, if not press up or down arrows to change the
value.
5. Press center (S) button one time arrive at F_0.
6. Press left (up) button one time and arrive at F_1
7. Press center (S) button one time and ensure the setting for oUI is HYS, if not press up or down arrows to change the
value.
8. Press center (S) button one time and ensure the setting for lot is I_n, if not press up or down arrows to change the
value.
9. Press center (S) button one time and ensure the setting for n_I is -3 (your minimum vacuum), if not press up or down
arrows to change the value.
10. Press center (S) button one time and ensure the setting for H_1 is 7 (your maximum vacuum), if not press up or
down arrows to change the value.
11. Press center (S) button one time and ensure the setting for Col is Sor, if not press up or down arrows to change the
value.
12. Press center (S) button one time and arrive at F_1 and settings is complete.
13. Press and hold center (S) button for 3-4 seconds to arrive at vacuum display.
Ensure the display is red and the value is 0.0/0.1, and screw black knob clockwise to desired pumping speed .