1
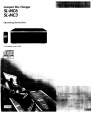
CompactDiscChanger
SL-MC6
SL-MC3
Operating
Instructions
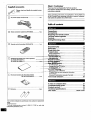
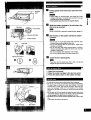
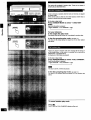
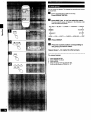
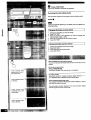
The photograph shows SL-MC6.
Dear Customer
Supplied accessories
sories.
Please check and identifythe suppliedacces-
r--I
Ac power supply cord (SJA172) ................................
1 pc.
Thank you for purchasing this Technics product.
For optimum performance and safety, please read these
instructions carefully.
These operating instructionsare applicable to the SL-MC6 and
SL-MC3 models.Theseoperatinginstructions,however,fundamentally explainthe operationof SL-MC6 model.
Table of contents
I_1 Stereo connectioncable(RJL2P004B08)..................1 pc.
Precautions ...............................................................................
4
Connections ..............................................................................
5
Preparing the remote control ...........................................
5
The liner notes organizer ...................................................
5
Controls ......................................................................................
6
Setting/Removing
[]
Remote control transmitter (EUR645270)
discs ......................................................
7
.................. 1 pc.
Sequential play ........................................................................
8
Direct play ..................................................................................
9
Single disc play .......................................................................
9
Program play .........<_._...........................................................
10
Direct programming ..,.LL......: ......................................................
10
Random play ..kd_.:._..:,,.=_..
...................................................
12
[]
Notebook-like binder [Liner notes organizer] ......
[SL-MC6] (RFA0623-K1)
[SL-MC3] (RFA0622-K1) ....................................
1 ,._
r--
....... G,u disc ranoo, i 151;zy..................................................................
12
Fu!! random pl_y ....... _L-;o.....:........................................................
12
Repeat function _.._::. ..........................................................
13
-;G =,_;U. _unciionL_._...._...i_..
....................................................
13
_l_g.play
.............................................................
14
To makegreups...l_.:_,i.._..:...:
.....................................................
14
................
_°lr_
__i group ......................................................
To name groups .--_--!_i_.:; .........................................................
.................
CD_tion....
............._
[]
[]
Numbered stickers [SL-MC6] (RQLA0326)
[SL-MC3] (RQLAO321) ................ 1 pc.
Batteries ...................................................................
2 pos.
Use numbers indicated in parentheses when asking for replacement
parts.
(Only for U.S.A.)
To order accessories
contact 1-800-211-7262
or web site
, (http://www.panasonic.com).
15
16
...................................
17
inr6_ti0n_' .........................................
17
To search discs or tracks using text information
(Text search) ...............................................................................
Entering CD information manually (Text edit) ..............................
i8
19
Time mode selection ..........................................................
20
A note on compact discs .................................................
21
Troubleshooting guide ......................................................
22
Product service .....................................................................
23
Technical specifications ..................................................
23
Disc index .............................................................
Back cover
_'he model number and serial number of this product can be
found on either the back or the bottom of the unit.
Please note them in the space provided below and keep for
future reference.
MODEL NUMBER
SERIAL NUMBER
CAUTION!
THIS PRODUCT UTILIZES A LASER.
USE OF CONTROLS OR ADJUSTMENTS OR PERFORMANCE
OF PROCEDURES OTHER THAN THOSE SPECIFIED HEREIN
MAY RESULT IN HAZARDOUS RADIATION EXPOSURE.
DO NOT OPEN COVERS AND DO NOT REPAIR YOURSELF.
REFER SERVICING TO QUALIFIED PERSONNEL.
CAUTION:
Jser memo:
TO PREVENT ELECTRIC SHOCK MATCH WiDE
DATE OF PURCHASE
DEALER NAME
DEALER ADDRESS
TELEPHONE
BLADE OF PLUG TO WIDE SLOT, FULLY
INSERT.
NUMBER
WARNING:
THE FOLLOWING
APPLIES ONLY IN THE U.S.A.
CAUTION:
TO REDUCE THE RISK OF FIRE, ELECTRIC
SHOCK OR PRODUCT
DAMAGE,
DO NOT
EXPOSE THIS APPLIANCE TO RAIN, SPLASHING, DRIPPING OR MOISTURE.
This equipment has been tested and found to comply with the
limits for a Class B digital device, pursuant to Part 15 of the
FCC Rules. These limits are designed to provide reasonable
protection against harmful interference in a residential installation. This equipment generates, uses and can radiate radio frequency energy and, if not installed and used in accordance with
the instructions, may cause harmful interference to radio communications. However, there is no guarantee that interference
will not occur in a particular installation. If this equipment does
cause harmful interference
to radio or television reception,
CAUTION:TO REDUCE THE RISK OF ELECTRIC
SHOCK, DO NOT REMOVE SCREWS.
NO USER-SERVICEABLE PARTS
INSIDE.
REFER SERVICING TO QUALIFIED
SERVICE PERSONNEL.
which can be determined by turning the equipment off and on,
the user is encouraged to try to correct the interference by one
of the following measures:
• Reorient or relocate the receiving antenna.
• Increase the separation between the equipment and receiver.
• Connect the equipment into an outlet on a circuit different from
that to which the receiver is connected.
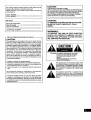
The lightning flash with arrowhead symbol, within
an equilateral triangle, is intended to alert the user
to the presence of uninsulated "dangerous voltage"
within the product's enclosure that may be of sufficient magnitude to constitute a risk of electric shock
to persons.
• Consult the dealer or an experienced radio/TV technician for
help.
Any unauthorized changes or modifications to this equipment
would void the user's authority to operate this device.
This device complies with Part 15 of the FCC Rules: Operation
is subject to the following two conditions: (1) This device may
not cause harmful interference, and (2) this device must accept
any interference received, including interference that may cause
undesired operation.
__IL
is intended to alert the user to the presence of
important operating and maintenance (servicing)
The
exclamation
withinaccompanying
an equilateral triangle
instructions
in thepoint
literature
the appliance.
Beforeusingthisunitplease read these operatinginstructionscare-fully.Take specialcare to follow the wamingsindicatedon the unit
itselfas well as the safetysuggestionslistedbelow.
Afterwardskeepthem handyforfuture reference.
n
q)
1. Power Source - The unit shouldbe connectedto powersupply
only of the type described in the operating instructionsor as
marked on the unit.
2. Polarization - If the unitis equippedwith a polarized AC power
plug(a plughavingonebladewiderthanthe other),that plugwillfit
intothe AC outletonlyone way.Thisis a safetyfeature.If you are
unableto insertthe plugfully intothe outlet,try reversingthe
plug. If the plug shouldstill fail to fit, contactyour electricianto
replace yourobsoleteoutlet.Do not defeat the safety purposeof
the polarized plug.
3. Power Cord Protection -- AC power supply cords should be
routedso that they are not likelyto be walked on or pinchedby
itemsplaceduponor againstthem.Nevertake holdof the plugor
cordif your hand is wet, and alwaysgrasp the plugbody when
connectingor disconnectingit.
4. Nonuse Periods - When the unitis notused,tumthe power off.
When left unusedfor a long period of time, the unit shouldbe
unpluggedfromthe householdAC outlet.
I Environment
1. Water and Moisture - Do not use this unit near water-for
]
ex-
ample, near a bathtub, washbowl, swimming pool, or the like.
.Damp basements should also be avoided.
2. Condensation - Moisture may form on the lens in the following
conditions...
• immediately after a heater has been turned on.
• in a steamy or very humid room.
• when the unit is suddenly moved from a cold environment to a
warm
one.
If moisture forms inside this unit, it may not operate properly. To
correct this problem, turn on the power and wait about one hour
for the moisture to evaporate.
3. Heat - The unit should be situated away from heat sources such
as radiators and the like. It also should not be placed in temperatures less than 5" C (41" F) or greater than 35" C (95" F).
I Placement
1. Ventilation
]
- The unit should be situated so that its location or
position does not interfere with its proper ventilation. Allow 10 cm
(4") clearance from the rear of the unit.
2. Foreign Material - Care should be taken so that objects do not
fall into and liquids are not spilled into the unit. Do not subject this
unit to excessive smoke, dust, mechanical vibration, or shock.
3. Magnetism - The unit should be situated away from equipment
or devices that generate strong magnetic fields.
4. Stacking - Do not place heavy objects, other than system components, on top of the unit.
5. Surface - Place the unit on a flat, level surface.
6. Carts and Stands - The unit should be used only with a cart or
stand that is recommended by the manufacturer.
The unit and cart combination should be moved with care.
Quick stops, excessive force, and uneven surfaces may cause the unit and cart combination to
overturn.
7. Wall or Ceiling Mounting - The unit should not be mounted to a
wall or ceiling, unless specified in this operating instructions.
Clean the cabinet, panel and controls with a soft cloth lightly moistened with mild detergent solution.
Do not use any type of abrasive pad, scouring
such as alcohol or benzine.
powder or solvent
1. Damage Requiring Service - The unit should be serviced by
qualified service personnel when:
(a) The AC power supply cord or the plug has been damaged; or
(b) Objects have fallen or liquid has been sp!!!ed into the unit; or
(c) The unit has been exposed to rain; or .
(d) The unit does not appear to operate normally or exhibits a
marked change in performance; or
(e) The unit has been dropped, or the enclosure damaged.
2. Servicing - The user should not attempt to service the unit beyond that described in the operating instructions. All other servicing should be referred to an authorized service personnel.
For the address of an authorized servicenter:
In the U.S.A. 1-800-211-7262 or web site
(http://www.panasonic. corn)
In Canada 905-624-5505 or web site
(www.panasonic.ca/fdbckca.htm)
Cautions on moving this unit
Before moving the changer to another location, be sure to
remove all discs from the slots and turn off the changer.
Failure to do so will expose the compact discs and the changer
to the risk of severe damage.
CAUTION
The changer mechanism automatically locks when power is
turned off, to protect it against damage in transport.
Therefore, always press POWER and make sure "OFF' appears
on the display before you unplug the changer.
Other
cautions
Outside light or noise may sometimes cause the changer to
detect a disc when there isn't one. However, the changer always
correctly detects the disc when in the play mode.
Do not leave the front panel open. Infiltrating dust or other matter may lead to damage or malfunctions.
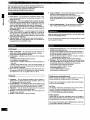
Receiver
or amplifier
CD or AUX terminals
or
Household
AC outlet
(AC 120 V,
60 Hz)
• Set the changeron a flat, levelsurface.
• Beforeconnectingthe changer to your audiosystem, make sure
thatthe powerof the changerand all othersystemcompOnentsis
turnedoff.
Stereo connection cable
White (L)
Red (R)
Memory retention
The information and presetting you enter is retained in the unit's
memory even if the unit is disconnected from the AC power source.
The period of retention for each type of information is as follows:
• program play (,,l, page 10) and disc grouping play (,,F page 14);
approximately one week
• text editing (=1, page 19); unlimited.
[]
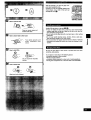
Check the (+) and (-) sides.
I Useof batteries
• Do not mix old and new batteries, or batteries of different types
(carbon and alkaline, etc.).
• Never subject batteries to excessive heat or flame; do not attempt
to disassemble them; and be sure they are not short-cimuited.
• If the remote control is not to be used for a long period of time,
remove the batteries and store them in a cool, dark place.
• Do not attempt to recharge alkaline or carbon batteries.
• Do not use rechargeable type battedes.
When you need to replace these batteries
Use two R6/LR6, AA, UM-3 or equivalentbatteries.
[]
Use the remote control within 60 degrees and within 7 meters (23
ft.) facing toward the unit.
I Operation notes
• Aim the remote control's transmission
I
window toward the unit's
sensor. Avoid any obstacles.
• Be sure the transmission window and the unit's sensor are free
from dust. Excessive dust might affect performance.
• Do not expose the remote cotrol signal sensor to direct sunlight or
to the bright light of an inverter fluorescent light.
I To prevent damage
Put two liners back-to-back
inside each pocket, as shown above.
,5
• Never place heavy items on top of the unit.
• Do not disassemble or reconstruct the unit.
• Do not spill water or other liquids into the unit.
number
Adhesive
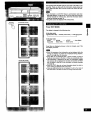
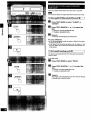
Your changer comes with a notebook-like binder (liner notes organizer) in which you can keep your CD liners. There are also numbered stickers to indicate slot numbers in the binder. This is a convenient way to keep track of what disc is in what slot.
I
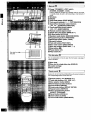
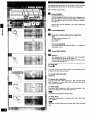
1 Main unit []
(i) Power "STANDBY IO/ON" switch
(POWER, STANDBY _ION)
Press to switch the unit from on to standby mode or vice versa.
In standby mode, the unit is still consuming a small amount of
|
power.
Disc slot for single
disc play
(_)Windows
(!) Display
(_)Text mode button (TEXT MODE)
(_)Text search buttons (V,/% TEXT SEARCH)
(_) Search/Text character select buttons
( 4<, _._., SEARCH/CHARACTER)
(Z)Track skip/Text cursor buttons
( 14_, _._t, SKIPICURSOR)
(_) Remote control signal sensor
(_)Single disc play button (SINGLE b)
_) ID scan button (ID SCAN)
Random mode button (RANDOM MODE)
(_ Programming button (PROGRAM)
Disc/Caps button (DISC, CAPS)
Numeric buttons
_Text edit button (TEXT EDIT)
Disc enter button (DISC ENTER)
_) Disc skip buttons (DISC SKIP, -, +)
(_ Stop button (n)
Pause button ( II )
_) Play button (b)
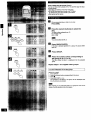
] Discslotsection[]
I
For an explanation on how to open the front panel, see page 7
UHow to set discs".
€_)Disc slots
Disc slot for single disc play (SINGLE)
Loader carriage
_) Slot numbers
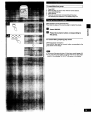
Remotecontrol[]
Buttons (_, (_, (_, _) to (_, and (_ to _
]
have the same functions as
the corresponding buttons on the main unit.
(_)Search button ( 44 SEARCH _1_ )
(_Track skip buttons ( 1_14SKIP I_ )
Disc selector button (DISC)
_) Numeric/group select buttons
Group button (GROUP)
Group enter button (GROUP ENTER)
_) Repeat button (REPEAT)
Direct programming button
(DIRECT PROGRAM)
Recall button (RECALL)
_) Clear button (CLEAR)
_)Time mode button (TIME MODE)
.
L_
_._
.
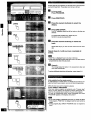
latch
n
mR Pulling gently from both ends, open the front
panel.
[d_ltlt_g
• Unless setting or removing discs, keep hands out of the
changer while open. You could injure yourself if you get
entangled in the internal mechanism.
• Keep cassette tapes away from the magnetic latches.
Magnetic
B
k';I
...............
..............................................
Slide the loader carriage to the slot where the
disc is to be inserted.
Slot number
Slot No. 0 (SINGLE) is reserved for single disc play. (=kpage 9.)
Grip here and slide.
Loader carriage
la
Set the disc on the loader and flip the loader
upwards.
Eo]_riit'R_
k'!............
;,:c
............................................
• Do not use 3" (8 cm) discs fitted with expander rings.
Expander rings could damage the disc slots.
• Do not use cleaning discs or warped discs. These could
damage your changer.
• Do not use discs with poorly attached labels or stickers.
Adhesive protruding from peeled off stickers can cause the
changer to malfunction.
• Do not put anything other than discs in the changer.
• Do not use irregular shaped CDs (heart-shape, etc.).
Flip this part upward.
Close the front panel gently.
mm
If you leave the front panel open while a disc is in play the
changer will stop when the disc is finished.
Q°.°.°o°
° °.oo.o
°....
.....
.°°..H...°.ooo°.°o..°.a
[]
°°.....e°o°..........o_
1. Open the front panel.
2. Slide the loader carriage to the slot you want.
3. Press the eject button on the loader carriage.
You can set and remove discs while another discs is playing.
• Do not set a disc in the slot of the disc being played (slot flashes).
The disc in play is returned to its slot when finished. If two discs
somehow jam in a slot, they could be damaged. When this happens, the message "TAKE OUT" will appear on the display.
Remove the disc that doesn't belong in the slot and press the stop
button.
• Do not open the CD front panel and press the eject button when
"CHECKING DISCS" appears in the display. The CD mechanism
will be damaged if the eject button is pressed at this time.
• Sometimes the front panel cannot be opened while a disc is playing.
In this case, wait until you can open it.
The changer playsall the trackson all the discsin order and stops
automaticallywhen the lasttrack on the lastdiscfinishes playing.
Before starting, load your discs.
[]
Press POWER.
The unitwill switchon.
First,the messageCHECKING DISCS will be displayedand
then the numberof the disc previouslyplayed. If it was a CDTEXT discthen the name of the albumwill also be displayed
(,,I,page 17.).
ii
Steps 2 and 3 are not necessary if you want to begin play
from this disc.
u_
I_
la
Press DlSClCAPS.
Press the numeric button(s) to select the
disc.
To select a disc numbered over 10:
For example: =11"
I_-! --,ITI
For your reference
You can also select a disc with DISC SKIP (- or +) instead of
doing steps 2 and 3.
Lq
Press DISC ENTER.
Press b.
The changer plays all the loaded discs, from the selected
disc, all the way through to the disc before it.
Text information will be displayed in place of the time if it is a
CD-TEXT disc (=k page 17.).
To stop play
Press II.
The display showing the number of tracks and the total playing time
is cleared if the front panel is opened.
To temporarily stop play
Press II.
To search for a position
DISC
1
ENTER
Press and hold either <1,< (backward) or I_1_ (forward) during
play. In program or random play modes, searching can only be
done on the current track.
To skip tracks
Press either I_<1 (backward) or I_b,I (forward) during play. In program play, skipping goes in the programmed order.
IPh_IIN
You cannot skip backwards in random mode.
To skip discs
Press either - (backward) or + (forward) either while a disc is playing or stopped.
This does not work during full disc random play mode or program
play.
You can startplayfromthe discandtrackof yourchoice
E!
m
I_
B
Press
DISC/CAPS.
Press the numeric
disc.
(._ step3 on page 8)
button(s)
to select the
Press DISC ENTER.
Press the numeric button(s) to select the
track.
Play startsat the selectedtrackand continuesthroughto the
endof that CD,
To selecta track numberedhigherthan 10:
For example:"11"
DISC ENTER
Single disc play is convenientwhen wantingto playbacka specific
disc right away, withoutgoing throughthe usual selectionprocedure,for example,to listento a discyoujustbought
H
Set a disc in slot No. 0.
IFJ Press SINGLE 1_.
The changerplaysall the tracks on the disc in slot0 andthen
stopsautomatically.
Single disc play is canceled if you skip discs
OOO
I--I
_
_
000
ooo
or-n
O0
I--I
Slotnumber
Loadercarriage
Program play lets you playback your favorite tracks in the sequence
you want to hear them. The program can hold up to 32 item.
g
[In the stop mode]
Press PROGRAM.
Press DISC/CAPS.
ffi
|
MII
I_1
Press the numeric button(s) to select the
disc(s).
Press DISC ENTER.
The =AL" indication shows that all the tracks on the disc are
selected.
To program disc numbers only, repeat step 2-4.
Slot No. 0 can also be programmed.
[]
Press the numeric button(s) to select the
track.
Repeat this step if you want to enter tracks from the same
disc.
Repeat steps 2-5 until you have completed all
entries.
DISC
ENTER
• PGM FULL is displayedifyoutryto entera 33rd item.
• Emptyslotsandtrack numbersthatdon'texistonthe discscan be
programmedbutclear whenplaystarts.
r,_
Press _.
The changer plays the tracks in the programmed
then stops automatically.
order and
To enter additional selections during play, repeat steps 2-5.
[]
(Only available from the remote control.)
If, while listening to a certain track, you decide that you want to program that track to your program, you can with direct programming.
[While the track you want to program is playing]
Press DIRECT PROGRAM.
When you make a program as explained under "Program play"
above, and then perform this procedure without clearing the program first, the selected track is added to the end of the program.
To listen to programmed tracks, press PROGRAM and check
"PROGRAM" appears on the display, then press _.
I_tVJl_
• If you press DIRECT PROGRAM and there are already 32 items
in the program, "PGM FULL" is displayed and the track cannot be
added.
• Dudng program play, DIRECT PROGRAM
touch.
does not respond to
I To checkprocjrammedcontents[]
I
(Only available from the remote control.)
Press RECALL.
The programmed
pressed.
tracks are displayed in order each time it is
I To clearprogrammedcontents
(Only available from the remote control.)
[In the stop mode]
To clear a specific item from the program
Press recall until the item is displayed, then press CLEAR.
t:
To clear the last item on the program
Press CLEAR.
To clear the entire contents of the program
Press m.
I To cancel lhe program mode
[In the stop mode]
Press PROGRAM.
The PROGRAM indicatorgoesout.
The contents of the program are stored in the memory.
To replay your program
1. PressPROGRAM.
2. Press k.
Special note on recording programs
The changer needs time to change the discs and find the tracks.
Consequently, it will take the changer slightly longer than the total
track time to record everything. Exactly hew much longer depends
on the contents of the program.
n
The trackswill be playedin randomorder.There are two types of
randomplay as describedbelow.
[]
A disc is chosen at random, then the tracks on that disc are played
in random order.
When all the tracks on that disc have been played, another disc is
chosen at random and the process repeats.
[In the stop or play mode]
Press RANDOM MODE to select "1 DISC RANDOM",
Each time the button is pressed
1 DISC RANDOM --, FULL RANDOM -, (Off)
t
I
For your reference
In the single disc play mode
Only tracks from the disc in slot No. 0 are played in random order.
In the disc grouping play mode, (._ page14.)
The discs in the chosen group are played as in one disc random
play above.
[]
Tracks are played in random order from amongst all the tracks on
all the loaded discs. In this mode, it is possible that a track will be
played twice, or not played at all.
(A maximum of 250 tracks are played.)
[In the stop or play mode]
Press RANDOM MODE to select "FULL RANDOM".
Each time the button is pressed
1 DISC RANDOM _ FULL RANDOM --* (Off)
t
I
The disc in slot No. 0 will not be played.
In the disc grouping play mode, (._ page14.)
The discs in the chosen group are played as in full random
above.
To cancel random play mode
Press II,
The "1 DISC (or FULL) RANDOM" indicator will go out.
play
(Only available from the remote control.)
This repeats play in the chosen mode.
[Before or during play]
Press REPEAT.
eoeoeoeeeooooleloeoeoeoeelooeBeoeoeeeoeoeooooeoeoeoeoeeDeooeo
To cancel repeat mode
Press
REPEAT.
To repeat a track or set of tracks
1. Program the track or tracks (=k page 10).
2. Press REPEAT "1--_" is displayed.
3.
Press _.
For your reference
In random mode, the order is different each time the process is
repeated.
o
This function helps you find a particular track. It searches through
the tracks and then plays a 10 second piece of each track around
the loudest part of the track.
H
Press ID SCAN.
ID scan will start.
B
[When the desired track has been found]
Press I_.
The changer will play the track from the beginning.
• =oeoooeQ=oeooooo•
ID SCAN
oe oeoeoeoeoeoe•=•ool
• • •••
oeoeoeoeomooeoo
To cancel ID scan
Press ID SCAN.
The =ID" indicator will go out.
The changer will continue to play from the track being played.
• e•
(Only available from the remote control.)
You can put discs into 5 groups (A-E), You can then play the discs
in those groups.
• Each disc can belong to more than one group.
• [SL-MC6] Each group can include up to 110 discs.
[SL-MC3] Each group can include up to 60 discs.
• Each group can be named.
III1
[During sequential play or while it is on stop]
Press DISC.
m
El
Press the numeric button(s) to select the
disc.
To select a disc numbered over 10
For example: "19"
I-_1-_1-¢1
1/A
000
_
r_,r/tr_
You cannot select slot No. 0.
Press GROUP ENTER.
If the disc is already registered in a group, the group's letter
lights up.
L_
Press GROUP.
Press the numeric button corresponding to
the group (A, B, C, D or E).
GROUP
0
The disc chosen in step 2 is registered
into the selected
group.
Repeat steps 1-5 to register other groups.
To checkwhat discsare in what groups
I
[While it is on stop]
1. Press GROUP.
2. Press the numeric button corresponding to the group.
3. Press m.
4. Press DISC SKIP (- or +).
The numbers of the discs in the group will be displayed each
time the buttons are pressed.
_BtRFJ
After checking, if you press the button of a group that is lit on the
display, the disc grouping mode disengages.
I To canceldiscsfrom groups
1.
2.
3.
4.
5.
GROUP
CD
PressDISC.
Selectthe discyouwantto clear withthe numericbuttons.
PressGROUP ENTER.
PressGROUP.
Pressthe numericbuttoncorresponding
to the group.
The selectedgroupindicationon the displaywillgo out.
[Whilestoppedor duringsequentialplay]
First,followthe steps onthe previouspage to registerthe groups.
H
Press GROUP.
FJ
Press the numeric button corresponding to
the group.
To cancel disc grouping play mode
(While the changer is stopped.)
Press GROUP and then the numeric button corresponding to the
group shown on the display.
• The name of the group is shown if it has been named (,,I,page 16).
• If you press the group button of a group which has no discs registered in it, the message "NO INPUT will appear on the display.
YOU can name your groups. The changer has several preset names
to choose from.
H
[Dudng sequential play or while it is on stop]
Press GROUP ENTER.
FJ
Press SKIP ( I_< or IH_I) to select the name.
The pre-entered names will appear in the following order
when the buttonsare pushed,
m
BALLADS "--* BLUES _
CLASSIC _
COUNTRY
_
DANCE
I
I
FAVORITE
I
I
I
I
ROMANTIC
ROCK ",--, POP _
HIP HOP
PARTY "--, OLDIES _--" NEW AGE *--" JAZZ
Press GROUP.
I_
Press the numeric button corresponding to
the group you want to name.
..-,..'._."i i-f-"
Repeat steps 1-4 to name the other groups.
GROUP
leDeoeoemooomoBeseoeleoeoeoo.eoeoooeoooloeoDemeBeoeloleseoe=e
To cancel names
1. Press GROUP ENTER.
2. Select =RESET" in step 2.
3. Press GROUP.
4. Select the group name you want to clear.
It will now be shown as "GROUP A...E".
This function Shows thetitle of the CD, the name Of the artist, or the
song title. There are discs with this information already stored on
them, called CD-TEXT discs, but this function also works with ordi-
[[
nary discs.
]
• The informationon CD-TEXT discs is automaticallyread when
they beginplaying.The titleof the CD andthe artistnamemust be
entered manuallyfor ordinarydiscs.Enterthis informationbefore
doingthe following (=1,page 19).
• Song titles cannothe displayedwith ordinarydiscs.
[In the stop mode]
4,
Press TEXT MODE.
The display is changed in the following order:
,_
In the stop mode
ALBUM (Album title) --, ARTIST (Artist name) --, Total playing time
t
I
In the play mode
SONG
--, ALBUM
(Song title)
t
(Album title)
--,
ARTIST
--* time display
(Artist name)
I
Song titles are displayed whenever a track is changed, even if the
time display is chosen.
[In the play mode]
4,
• Up to 32 characters of text information can be displayed while the
changer is stopped. The entire text is displayed during playback,
even if it is longer than 32 characters.
• Song titles are not displayed after a certain number of tracks if
there are many tracks on the disc or if titles are exceptionally long.
• Text information is attached to the slot. Any information entered
into memory will be displayed for that slot until another CD-TEXT
disc is played in that slot or the information is entered manually
(=I, page 19).
• Some CD-TEXT discs do not have information about the artist or
track. Nothing is displayed if this is the case.
• Only one artist name per disc is displayed. It will be the name of
the main artist on the disc and does not change with each track.
l°
II
Jl
There are 3 search modes:albumtitle,artistname or song title.
You cannot text search in program play/random play/ID scan mode.
I Tofind a specificCD (Albumsearch/Artistsearch)[]
I!
II
Press TEXT MODE to select "ALBUM"
"ARTIST".
]
or
Press TEXT SEARCH (V or A) to select the
disc.
V: Changes in reverse alphabetical order.
A: Changes in alphabetical order.
[]
Press k.
TEXT SEARCH
Iv
The changer will start playing the selected disc.
I ^1
For your reference
• In the disc grouping play mode, the search is limited to the selected group and slot No. O.
• A text search can be performed while a disc is playing. In this
case, the display will not show the information about the disc currently playing.
I To find a specificsong(Songsearch)[]
This function only works with CD-TEXT discs that have song information on them,
[In the play mode]
_1
[]
Press TEXT MODE to select "SONG".
Press TEXT SEARCH (V or A) to select the
disc.
V: Changes in reverse alphabetical order.
A: Changes in alphabetical order.
Press _.
TEXT SEARCH
I
v
I
A
I
Play begins at the selected track and then continues through
to the last track on the disc before.
32 characters worth of text information can be entered each for the
album name and artist name. This can be done for each disc
loaded in the changer.
• The information entered for the CD is attached to the slot. If the
CD is moved to another slot, the information will not be displayed.
• The information on CD-TEXT discs takes preference over manually entered information, so any information entered will be cleared
once a CD-TEXT disc is played in a slot.
[in the stop mode]
L1
Press DISC/CAPS.
IFJ Select a disc with the numeric buttons.
"_
Press DISC ENTER.
[]
O_
Press TEXT MODE to select "ALBUM"
or
"ARTIST".
Press TEXT EDIT.
The display is now ready for text to be entered.
Press DISCICAPS to select the input mode.
DISC ENTER
The display changes as follows every time the button is
pressed.
A (CAPITALS) _ a (lower case) --* 1 (numerals)
t
m
I
Press the numeric buttons to enter the text.
To continue entering characters with the same numeric button, press SKIP/CURSOR ( ,IH ).
The character is entered if a different numeric button or
SKIP/CURSOR ( I_1_1) is pressed, and the cursor moves to
the next position.
Re ;)eat steps 6 and 7 to enter more characters.
numericbutton
Characters, symbols, and _tions
++;
i ¢£a¥
- ,..
{,i-li
I §_©a._®®-°±
2 3
'p¶*
iE'_'_'i'i'|'i
AA A_E
06 Oxeo000?'
pBAdA
Am g_ _'_'_')'i_ iafibo
5otJe0
0Y P_9
2
3
4
5
6
7
8
9
0
>_10
A
D
G
J
M
P
S
V
Y
B
E
H
K
N
Q
T
W
Z
SPACE
DN
AA
OO
Aia
515
C
F
I
L
O
R
U
X
In the numeral mode, the numeral corresponding to the
numeric button is entered. In the other modes, the character
displayed changes in the order shown in the chart each time
the numeric button is pressed.
(Continued
on next page)
Press TEXT EDIT.
The text you entered is confirmed and displayed.
Canceling the text editing mode
The information entered can be cleared at any time before step 8.
Press II.
Letters and symbols appearing on the display may vary slightly from
the printed listing.
u_
I Changinginformationyou haveenlered
1. Display the information you want to change.
2. Press TEXT EDIT.
3. Move the cursor to the character you want to change
4.
I
with
SKIP/CURSOR ( 1414 or IHH ).
Enter the new character with the numeric buttons.
5. Press TEXT EDIT.
I Clearinginformationyou haveentered
1.
2.
3.
4.
"riME
MOOE
O
Display the information you want to change.
Press TEXT EDIT.
Press CLEAR on the remote control.
Press TEXT EDIT.
(Only available from the remote control.)
You can see various information about the time on the disc you are
playing.
[In the play or pause mode]
Press TIME MODE.
Track
number
The display changes in the order shown in the diagram.
and
elapsed play time of
the current track
In all play modes
When track number 21 or greater is playing, display (_) shows =---:-".
C) is displayed if play is stopped and then started again.
Total
remaining
time
(_)
In the program/random play mode
The displayed information will alternate between displays (_ and (_)
each time the button is pressed.
on the disc
Time information remains displayed in the text information display
area as long as the unit is in time mode.
Track
number
and
(_)
remaining time of the
current track
®
Total elapsed
time on the disc
play
With this changer, you can only play compact discs having this mark.
However, do not use irregular shaped CDs
X
(heart-shape, etc.). CDs of this sort can
damage the unit. (1_1)
DIGITAL
I
AUDIO
TEXT
DIGITAL
J
AUDIO
How to remove CDs
Handle CDs as shown on the left (Ir_J-r-J).
Press on center piece and
lift from both sides.
How to return CDs to their case
• if you are taking the disc from a cold to a warm environment,
moisture may form on the disc. Wipe this off with a soft, dry, lintfree cloth before using the disc.
• Do not wdte on the label side with a ball-point pen or other writing
instrument.
• Do not use record cleaning sprays, benzine, thinner, static elec-
Face label upwards and
press
downward
from
above.
How to hold CDs
O
Do not touch the recorded
surface
How to clean CDs
Wipe from inside outward.
protruding from peeled off stickers can cause the changer to malfunction.
Be sure to store discs in their cases to protect them from dust,
scratches,andwarping.
X
O
tricity prevention liquids or any other solvent.
• Do not use discs with poody attached labels or stickers. Adhesive
X
Do not place or store discs in the following places:
• Locations exposed to direct sunlight
• Humid or dusty locations
• Locations directly exposed to a heat vent or heating appliance
• In the glove compartment or on the rear deck of an automobile
8
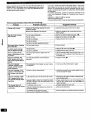
Before requestingservice for this unit, check the chartbelow for a
possiblecause of the problemyou are experiencing.Some simple
checks or a minoradjustmenton yourpart may eliminatethe problem andrestore properoperation.
If you are in doubt about some of the check points, or if the remedies indicated in the chart do not solve the problem, refer to the
directory of Authorized Service Centers (enclosed with this unit) to
locate a convenient service center, or consult your Technics dealer
for instructions.
For detailed instructions, contact an authorized servicenter in the
U.S.A. and Panasonic Canada Inc. Customer Care Center in
Canada.
In the U.S.A. 1-800-211-7262
or web site
(http://www.panasonic.com)
In Canada 905-624-5505 or web site (www.panasonic.ca/faq.html)
Reference pages indicated
I
in black circles. (For example: O)
Problem
I
Changer will not play.
Probable cause(s)
Suggested remedy
A disc(s) or other foreign object(s) has fallen
inside the changer.
• Open the front panel and remove the object.
Moisture has collected in the changer.
• Allow the changer to dry out for about one hour
before using it.
The disc in the changer
The disc label is facing left.
• Set the disc with the label facing right. (O)
does not play.
The disc is dirty.
• Wipe the disc with a soft cloth. (0)
The disc is scratched.
• Replace the disc with a new one.
The disc is warped.
The disc is not within specified standards.
Play stops before changing
to the next disc.
The front panel is open.
• Close the panel.
A certain music passage
The disc is dirty.
• Wipe the disc with a soft cloth.(O)
can't be played correctly.
The disc is scratched.
• Replace the disc with a new one.
There is noise from the
tuner or disturbance on the
TV screen,
Caused by high-frequency signals from this
changer.
• Use the changer further away from the tuner or TV.
• If the tuner or TV's antenna is the indoor type, use
an outdoor one.
The error message "NO
PGM" appears on the display, when program play is
started.
Play was started without a track being programmed.
• Program a track. (_)
The error message
"ERROR" appears on the
display, and the changer
stops operating.
The mechanism of the changer has been improperly adjusted.
• Turn the unit off and then back on again.
The error message
The servo LSI has malfunctioned.
• Unplug the changer from its outlet, replug it in and
"F-26"
appears on the display and
the changer stops operating.
turn the changer ON again.
The error message "TAKE
OUT" appears on the dis-
A disc has been put in the slot of the disc in play.
• Remove the disc whose number is displayed and
press the stop button.
play and the changer stops
operating,
Because of light or noise, the changer has detected a disc in the slot of the disc being played, even
• Check whether there is a disc in the displayed slot.
With the front panel closed, hold down • for at
though it is empty,
least 4 seconds.
The changer does not
The batteries have run out.
• Replace batteries with new ones.
respond correctly to remote
There is an obstruction between the remote con-
• Remove the obstruction.
commands,
trol and the changer.
The batteries are inserted incorrectly.
[The (+) and (-) polarities are reversed.]
• Reinsert batteries so that the polarities are correct.
!
.....
Do not attempt to remove the cover(s) or repair the unit yourself.
Refer servicing to qualified personnel only.
For product service, product information or assistance
operation, refer to the servicenter directory.
in product
i
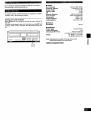
AUDIO
No. of channels
Frequency response
2 (left and right, stereo)
2-20,000 Hz, +1 dB
Output voltage
Dynamic range
S/N
2 V (at 0 dB)
92 dB
100 dB
Harmonic distortion
Wow and flutter
0.007% (1 kHz, 0 dB)
Below measurable limit
DA converter
Output impedance
Load impedance
Having your unit serviced
Before bringing in your changer for service, be sure to remove all
discs first.
if the disc in play doesn't return to its slot when you press ml hold
the button down for about 4 seconds. The disc should return to the
slot.
MASH (1 bit)
Approx.1 k.Q
More than 10 k.Q
• PICKUP
Wavelength
•
780 nm
GENERAL
Power supply
Power consumption
Dimensions (WX HX D)
f
II
l}°
]J
AC 120V, 60 Hz
11W
430X171 X392 mm
(16-15116"X6-11116"X15-7116")
[SL-MC6] 7.1 kg (15.6 lb.)
Weight
[SL-MC3] 6.4 kg (14.1 lb.)
_r-lo
0oo
Note: Specifications are subject to change without notice.
Weight and dimensions are approximate.
IMASH is a trademark
_
ooo
Oi--l--l_
IZ]
of NTT. I
q)
Q¢
Fill in the index to remind yourself which slots and groups you have
put your CDs in.
No
GROUP
0
DISC NAME
No
2
A
B
C
D
E
____3._A_.,_B_
_C_
.p__E_
....
4 A
S A
B
B
C
C
D
D
_"
...............
_.........
E
E
.... D;_A_.,_B_
C_ ._D_.E_
............................
7
A
B
C
D
E
=__
....
_9__A_._B
lO A B
.___1_1_ A_._B_
12 A B
C
C
C
C
D
D
D
D
E
E
E
E
...........................
A
A
A
B
B
B
C
C
C
D
D
D
19 A
2O A
B
B
C
C
D
D
E.............................
E
A
B
C
D
E
.__3D._A_.B_._C_.D__.E_
.............................
24
25
26
A
A
A
B
B
B
C
C
C
D
D
D
E
E
E
.__3_T_A.B_ C_.D__E_
.............................
_
3DI
.
DI
_I
g--I
I_
.............
:
30
A
B
C
C
C
C
C
D
D
D
D
C
C
C
C
C
C
C
C
C
C
E
E
E
E
D
D
D
D
D
D
D
D
D
D
E
E
E
E
E
E
E
E
E
E
B
C
D
53
54
55
A
A
A
D
D
D
..............
..............
{
E
I
C
C
C
_I
B
B
B
I
C
C
C
C
P--
E
E
E
E
E
E
.............................
1{
D
D
D
D
E
E
E
E
D
D
D
D
E
E
E
E
A
A
A
A
A
A
A
A
A
A
A
B
B
B
B
B
B
B
B
B
B
B
C
C
C
C
C
C
C
C
C
C
C
D
D
D
D
D
D
D
D
D
D
D
E
E
E
E
E
E
E
E
E
E
E
A
A
A
A
A
A
A
A
A
A
B
B
B
B
B
B
B
B
B
B
C
C
C
C
C
C
C
C
C
C
D
D
D
D
D
D
D
D
D
D
E
E
E
E
E
E
E
E
E
E
C D E
C D E
C D E
C D E
C D E
C D E
._C_._O__E_.............................
E
D
"
C
g--
B
IBm
"
_
}3"
--
--
A
gl
B
B
B
B
96 A B
97 A B
98 A B
99 A B
100 A B
101 A B
.__1_02. _A_.B_
.___4D.
_A_.
_B_._C_
.D__E_
............................
50
A
A
A
A
D
D
D
D
D
D
.__3D._A_,
_B_..9_
.P. mE_
........_....................
.___4_7._A_._B_
_c__D__E_
.............................
.___4_8. A
73
.___7_4.
75
76
77
78
79
8O
81
82
83
85
86
87
88
89
90
91
92
93
94
._-__3D_
_A_._B_.,
g_ __D_
.E_
.............................
.__ 37__A_. _B
38 A B
39 A B
4O A B
41 A B
42 A B
43 A B
44 A B
45 A B
46 A B
_--
_..
C
C
C
C
C
C
....
_._A_.
_13_
_C_.D___E
.............................
D; E
___31A.,_B_ 9_._D__E_
.............................
32 A B
33 A B
34 A B
,___35._A_._B
B
B
B
B
B
B
...............
.__3D._A_.._B_
C_.D_._E_
.............................
"
DISC NAME
.__7_2._A__B_._C_D_..E_
............................
,__2_1.
_A._B_._C_
.D__E_
.............................
22
A
A
A
A
A
A
.___98_._A_,_BC
69 A B C
70 A B C
71 A B C
E
E
E
,___17 _A__a_.c_ ._D_
_E_
.............................
.___ID._A__a_.c_ .D_.E_
.............................
1
I
.___e_7.
_A_,
_B_.,_C_
_p_.E.............................
__1_3._A _B__C_
. D_
. E_.............................
14
15
16
__1_31
63
64
65
66
.... D__A_,
_B_,C__p_.E_
.............................
I
GROUP
56!
57
58
59
60
61
.... j. _A_.,_B_
9_ .D__E_
.............................
I
I
SINGLE
E
E
E
.__1_04 _A_._13_
._C_.D_ _E............................
105 A B C D E
106 A B C D E
107 A B C D E
108 A B C D E
__1_0_9,_A_.
B_ L_C_.D__E_............................
11o A B C D E
Writeyourgroupnameshere.
GROUP
GROUPNAME
A
B
C
D
E
Panasonic Consumer Electronics
Company, Division of Matsushita
Electric Corporation of America
One PanasonicWay Secaucus,
New Jersey 07094
h,ttp://www,panasonic,corn
Panasonic Sales Company,
Division of Matsushita Electric of
Puerto Rico, Inc. ("PSC")
Ave. 65.de Infanteda.Km. 9.5
San GabrielIndustrialPark, Carolina,
PuertoRico00985
Panasonic
Canada
Inc.
5770 Ambler Drive,
Mississauga, Ontario
L4W 2T3
www. panasonic, ca
RQT4451
-P
H0298N0