Download media operation - Sound Storm Lab
Transcript
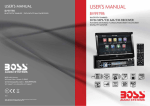
SD320
SINGLE DIN MOUNTING
DVD/MP3/CD AM/FM RECEIVER
3.2” DETACHABLE WIDESCREEN TFT MONITOR
USB and SD CARD PORTS and AUX INPUT
User Manual
SD320
3451 LUNAR COURT, OXNARD CA 93030
PHONE: 888.38.STORM
805.983.8008
FAX: 805.983.7068
TECHNICAL SUPPORT
www.soundstormlab.com
1.2013
SINGLE DIN MOUNTING
DVD/MP3/CD AM/FM RECEIVER
3.2” DETACHABLE WIDESCREEN TFT MONITOR
USB and SD CARD PORTS and AUX INPUT
CONTENT
Safety information............................................................................. 2
Installation steps............................................................................... 3
General knowledge about remote control .......................................... 7
Removing insulating sheet................................................................... 7
Replace lithium cell............................................................................. 7
Note about using remote control........................................................... 7
Warning for lithium cells of remote control............................................. 7
The functions of the buttons on the remote control............................ 8
The functions of the buttons on the control panel............................. 10
Radio operation.................................................... ........................... 13
Media operation............................................................................... 15
Loading or unloading a disc, USB or card......................................... 15
Play modes.......................................................................................17
Information on-screen display.......................................................... 18
Digital Video special functions........................................................ 19
Multi-subtitle languages..................................................................... 19
Multi-sound tracks............................................................................. 19
Multi-angles...................................................................................... 19
Title menu......................................................................................... 19
MP3/WMA/JPEG/MPEG4 root menu.................................................. 20
Media setup menu............................................................................ 21
Systeml Setup .................................................................................. 21
Language Setup ............................................................................... 22
Video Setup ..................................................................................... 23
Digital Setup .................................................................................... 24
External work source....................................................................... 25
AUX operation................................................................................. 25
Rear view camera............................................................................. 25
Specification................................................................................... 26
Troubleshooting.............................................................................. 27
-1-
SAFETY INFORMATION
CAUTION:
THIS DIGITAL VIDEO PLAYER IS A CLASS I LASER PRODUCT. HOWEVER
THIS DIGITAL VIDEO PLAYER USES A VISIBLE/INVISIBLE LASER BEAM
WHICH COULD CAUSE .
HAZARDOUS RADIATION EXPOSURE IF DIRECTED. BE SURE TO OPERATE
THE DIGITAL VIDEO PLAYER CORRECTLY AS INSTRUCTED.
USE OF CONTROLS OR ADJUSTMENTS OR PERFORMANCE OF
PROCEDURES OTHER THAN THOSE SPECIFIED HEREIN MAY RESULT IN
HAZARDOUS RADIATION EXPOSURE.DO NOT OPEN COVERS AND DO NOT
REPAIR YOURSELF. REFER SERVICING TO QUALIFIED PERSONNEL.
WARNING:
TO REDUCE THE RISK OF FIRE OR ELECTRIC SHOCK, DO NOT EXPOSE THIS
EQUIPMENT TO RAIN OR MOISTURE.
TO REDUCE THE RISK OF FIRE OR ELECTRIC SHOCK, AND ANNOYING
INTERFERENCE, USE ONLY THE RECOMMENDED ACCESSORIES.
THIS DEVICE IS INTENDED FOR CONTINUOUS OPERATION.
This product incorporates copyright protection technology that is protected
by method claims of certain U.S. Patents and other intellectual property rights
owned by Macrovision Corporation and other rights owners.Use of this
copyright protection technology must be authorized by Macro vision Corporation,
and is intended for home and other limited viewing uses only unless
otherwise authorized by Macrovision Corporation. Reverse engineering or
disassembly is prohibited.
REGION MANAGEMENT INFORMATION:
This Digital Video Player is designed and manufactured to respond to the Region
Management Information that is recorded on a Digital Video disc. If the Region
number described on the Digital Video disc does not correspond to the Region
number of this Digital Video Player, this Digital Video Player cannot play this disc.
-2-
INSTALLATION STEPS
1. Remove 2 screws for protecting deck;
1) Remove chassis from Slide Bracket Housing as bellows:
KEY PLATE
PLASTIC FRAME
KEY PLATE
If you want to take CHASSIS out of the SLIDE BRACKET HOUSING , first remove
the PLASTIC FRAME of the both sides away, then insert the two KEY PLATES into
left and right sides of chassis as above illustration.
2) Remove 2 screws for protecting deck as right;
2. Connecting all wires
1) Making chassis wear Slide Bracket Housing again;
2) Remove control panel from chassis as follows:
A. Press the OPEN button to flip down control panel .
OPEN button
B. Slide control panel rightwards a little, and pull it towards you .
-3-
INSTALLATION STEPS
3) Connecting all wires as bellows:
AUDIO L OUT (white)
RADIO ANTENNA JACK
VIDEO OUTPUT (brown)
AUDIO R OUT (red)
VIDEO IN (yellow)
ISO CONNECTOR
GREY
SUB WOOFER
(B+) 12V
REAR CAMERA SWITCH
BLUE
AUTO ANTENNA
PINK
YELLOW
(B-) PARKING BRAKE
BROWN
BLACK
YELLOW
RED
REAR CAMERA INPUT
FRONT
Lch SPK.
REAR
Lch SPK.
CONSTANT 12 VOLTS
GROUND(B-)
FUSE
WHITE
GREY
WHITE/BLACK
GREY/BLACK
GREEN
VIOLET
GREEN/BLACK
VIOLET/BLACK
IGNITION SWITCH
FRONT
Rch SPK.
REAR
Rch SPK.
NOTE:
1. Must use 4 ohms impedance of speakers.
2. Before finishing wiring, do not attach control panel onto chassis.
3. Maximum current of auto antenna is 200mA.
-4-
INSTALLATION STEPS
4) Attach control panel onto chassis.
A. Make the right hollow of control panel aim at the right bulge of chassis, then push
and hold control panel rightwards; at one time, move the left end of control panel
towards chassis to make the left hollow of control panel aim at the left bulge of
chassis and then release holding .
Bulge
Bulge
Hollow
Hollow
B. Flip control panel up till hearing a click sound to attach onto chassis.
Connector
* How to clean panel connector
Frequent detachment will deteriorate panel connectors. To minimize deterioration,
periodically wipe the panel connectors with a clean/soft/dry cloth .
5) Testing it for making sure that it can work properly .
Installation diagram
DASH BOARD
HEX NUT
METAL MOUNTING
STRAP
SPRING WASHER
PLAIN WASHER
TAPPING SCREW
CONSOLE
SLIDE BRACKET
HOUSING
HEX BOLT
-5-
INSTALLATION STEPS
3. Installing main unit according to installation diagram on the previous page:
1) Mount the sliding metal housing in the position of car multi-media system and
bend some tabs of sliding metal housing to fix sliding metal housing.
2) Insert the chassis of the car multi-media system into the sliding metal housing.
3) Use the metal strap to fix the rear part of chassis.
* Uninstalling main unit:
1) Remove metal strap from main unit;
2) Remove plastic trim frame from main unit;
3) Insert a key plate into left and right side of main unit and draw main unit out of
sliding metal housing.
-6-
GENERAL KNOWLEDGE ABOUT REMOTE CONTROL
1. Removing insulating sheet
If using remote control for the first time, you
can see an insulating sheet at the bottom
side of remote control as right.
you must remove the insulating sheet as right.
Otherwise, the remote control is disabled.
2. Replace lithium cell
If the electric energy of lithium cell is weak,
replace it.
1 ) Press and hold the movable block as direction
indicated by arrow 1 as right, at one time pull
cell holder out of remote control as direction
indicated by arrow 2 as right.
2 ) Replace the old cell by a new one with (+)
polarity side upward as right.
3 ) Insert the cell holder into remote control again
as right.
3 . Note about using remote control
1 ) You should face the emitting window of remote control towards the sensor
window of the unit.
2 ) Operation angle for front panel: About 30 degree
3 ) The distance between the emitting window of remote control and the sensor
window of the unit : < 5M .
4 . Warning for lithium cells of remote control
1 ) Cell leakage may cause damage to remote control.
2 ) Do not throw cells into fire, it may cause explosion.
.
3.To avoid risk of accident, keep cells out of reach of children.
-7-
THE FUNCTIONS OF THE BUTTONS ON THE REMOTE CONTROL
15
16
3
17
7
2
5
19
20
13
21
6
22
1
23
14
9
18
12
24
11
26
10
4
8
25
1. CLK Press it briefly to show the clock.
2. MODE Press it to select a desired work
source .
3. STOP Press once to pause playback,
then press PLAY/PAUSE to resume playback . Press twice to full-stop playback,
then press PLAY/PAUSE to play from the
beginning of the media.
4. SETUP Press it to pop up or disappear
the SETUP menu.
5.MO/ST(AUDIO) In radio mode, press it
to select STEREO or MONO mode (when
a station is weak, sometimes switching
to Mono will improve sound quality ) .
In Digital Video mode, pressing it button
opens the AUDIO setup menu for making
changes to the way te soundtrack is
reproduced
6. LO/DX(SUBTITLE) Changing of the
SUBTITLE language on multi-subtitle
language Digital Video media. In radio
mode, Press this button for distance
reception when you are located at weak
signal location, depress it for stronger
signal.
7. REPEAT Switch the Repeat mode
in media mode.
8.GOTO Press this button to begin
playback at a moment in the program you
designate. Use the number buttons to
enter the data that is needed.
-8-
THE FUNCTIONS OF THE BUTTONS ON THE REMOTE CONTROL
9.
/
Press
to skip to the next
track & press
to skip back one track.
In radio mode, press shortly to scan the
preset station, press longer to enter into
automatic memory storing function .
10. SEL Briefly press to switch between
BASS, TREBLE, BALANCE, FADE,
COLOR, BRIGHTNESS, CONTRAST,
TINT and VOLUME; Long press to dis play LOUDNESS , then briefly press to
switch between SUBWOOFER, EQ,
LOCAL/DX(in radio mode), STEREO/
MONO(in radio mode), CLK FMT, SET
CLK, FREQUENCY AREA, ANIMATION
and WALLPAPER. After selecting a n
item above, use VOL + or VOL- button to
adjust.
19. ZOOM Press this button to active
the ZOOM function . Each press of the
zoom button changes the screen in the
sequence : 2x 3x 4x ½ 1/3 1/4 .
Use the / / / buttons to move
through the zoomed picture .
Note : during the JPEG playback, press
the ZOOM button, the “ZOOM 100%” will
appear on screen, then press the
/
button to increase/decrease in size,
use the / / /
buttons to move
through the zoomed picture .
11. VOL+/VOL- Press it to adjust volume
level .
20. ANGLE Changing of the view angle
on multi-angle Digital Video media.
12. / / /
Use these buttons to
navigate the various menus present in the 21. EQ Press it briefly to turn to
product.
equalization function. Press it longer to
switch the LOUDNESS function ON or
13. MENU/SUB WOOFER Press it to
OFF .
display the root menu of the Digital Video
media. Press and hold this button to turn
22.
ON or OFF the SUBWOOFER output.
In media mode, Press
to start forward
rapidly.press
to reverse rapidly.
14. BAND(OSD) In Radio mode, press
this button repeatedly to switch between
23. ENTER This button is used to
the five radio bands .
confirm selections and settings within
In media playback mode, Press this
button to see information about the media many of the menus in the OSD system.
currently in play.
24. 0 - 9 These buttons are used for
numeric entry in many different menus.
15. POWER ( ) Press it to turn on the
unit , press it again to turn off.
25. +10 Tens digit select button,
cooperatively used with numeric buttons.
16. PLAY/PAUSE (
) In media mode,
press it to pause or resume playback.
26. RADIO PRESET Six preset memory
17. MUTE Press this button to turn off the buttons.
audio. Press again to restore the sound
to its prior volume level.
18. TITLE/PBC (A/P) Display the TITLE
menu which is recorded on the Digital
Video media; changing between PBC ON
and PBC OFF on the VCD media.
-9-
THE FUNCTIONS OF THE BUTTONS ON THE CONTROL PANEL
5
6 10
2
7
9
3
11 14 8
1
17
4 15
16
Control Panel
12
18
13
The Base of Control Panel
1. OPEN Button
Press it to flip down the front panel , then
you can insert the CD disc into the CD
compartment. You can also press the
Eject button to eject the disc.
2. (POWER On/Off) Button
Press this button to switch the device On.
Press it again to switch the device Off.
3. SEL button and VOL knob
To switch between VOLUME,BASS,
TREBLE,BALANCE, FADE, COLOR,
BRIGHTNESS,CONTRAST and TINT,
short press SEL button continuously.
After switching on a desired mode above,
rotate VOL knob to set it.
To switch between LOUD, SWF, EQ,DX/
LOCAL(in radio mode), STEREO/MONO
(in radio mode), 24/12H, SET CLOCK,
EUR/USA FREQ,ANIMATION and WALLPAPER, long press SEL button to switch
on LOUD, then short and repeatedly
press SEL button.
After switching on a desired mode above,
rotate VOL knob to set it.
-10-
THE FUNCTIONS OF THE BUTTONS ON THE CONTROL PANEL
4. BAND Button
In Radio mode, press this button repeatedly to cycle through and select the
desired radio band, the designation of
the corresponding level- FM1, FM2, FM3,
AM1(MW1), AM2(MW2)- is shown in the
TFT.
5. EQ Button
Press the EQ button briefly to turn to
equalization function and to select
desired audio mode.
There are five kinds of modes as follows:
JAZZ
CLAS
POP
ROCK
8. CH 1-6 (RADIO PRESET) or
A). In Media Playback Mode
Press this button to pause playback,
press it again to resume playback.
B) In Radio Mode
you can store 30 stations in memory:
18 FM stations and 12 AM(MW) stations,
each band stores up to six preset
stations .
The operation as below :
-Storing a station in Memory
> Select the frequency band
> Press repeatedly the button to select
the desired memory key .
> Select the station
> Keep the desired memory key pressed
in until the station is heard again after
a brief interruption .
USER
Press it long to switch the LOUD
function ON and OFF .
6.APS Button
Automatic storing stations in memory:
In Radio mode, press and hold the APS
button for about 2 seconds to active
automatic station storage. The radio
searches within the current frequency
band, e.g. FM1, for the strongest station
are then allocated to the corresponding
storage locations. Then the station of
the first storage location is set. If you
would like to search for more stations
in the FM band, press the BND button
in order to change to the FM2 or FM3
band. Press it long again for about 2
seconds to continue search.
Scanning stations in memory:
In Radio mode, press it briefly to scan
and play all the preset sations in order,
and it will hold at each band for about 5
seconds . If you like one of them, press
the PLAY/PAUSE button to stop the
scanning .
-Retrieving a station in memory
press the button repeatedly to retrieve
a station which had been stored in the
memory in advance the chose number
is shown on display .
9/10 .
/
Buttons
(tune, Seek, Track, Skip Up/down)
a) In media mode:
if you wish to jump forwards or backwards, press briefly the
or
button.
Press long over and over to f ast f orward
or backword in various speeds .
7.MUTE Button
Press this button to turn off the audio.
Press again to restore the volume to the
prior level. You can also disable the
MUTE function by rotating the VOL knob.
-11-
b) In Radio Mode:
Press briefly the
or button to manually tune the radio in single steps. Press
and hold for two seconds to start the
search for a radio station automatically.
THE FUNCTIONS OF THE BUTTONS ON THE CONTROL PANEL
11. SRC Button
Press it repeatedly to select RADIO,
DISC, USB, CARD or AUX IN mode.
12.
(EJECT) Button
In DISC playing ,Press the Open button
to flip down the control panel, then press
the EJECT button to eject the disc in the
disc compartment or pull the disc ejected
into the disc compartment .
13. RESET Button
To push the RESET button, press the
OPEN button to flip down the control
panel and remove the control panel, then
push the RESET button with either a
ballpoint pen or thin metal object.
The RESET button is pushed for the
following reasons:
A. Initial installation of the unit when all
wiring is completed.
B. Some function buttons do not operate.
C. Error symbol display on the display.
14. IR (Infrared)
Sensor window for the remote control .
15. AUX IN JACK
For information about using an AUX IN
audio source, refer to AUX operation.
16. USB PORT
17. TFT Display
18. SD/MMC CARD SLOT
-12-
RADIO OPERATION
Entering radio mode
To switch between ST and MO
Press the MODE button to select the
RADIO mode, the message will display
as follows :
Press the ST/MO button on the remote
control to select the MONO or STEREO
mode(When STEREO mode is activated,
the ST symbol will appear).
When the STEREO mode is activated,
it can get better audio effect; when the
MONO mode is activated, it can get
clearer audio signal.
LOC ST USER
101.60
FM2
MH2
1 87.50
4 105.30
2 90.10
5 106.20
3 98.10
6 88.20
To switch between LO and DX
Press the LO/DX button on the remote
control to select the LOC or DX mode
(The word “LOC” or “DX” will appear).
When the LOC mode is activated, it can
decrease interfere for tuning the local
stations; when the DX mode is activated,
it can increase singal strength for tuning
the distance station.
WELCOME TO......
Selecting a band
Repeatedly press the BAND button to
select a desired band, the message
will show in turn :
FM1
FM2
AM2(MW2)
FM3
Storing or retrieving a
station in memory
AM1(MW1)
LOC ST USER
Searching for a station
101.60
FM2
Manual Search
In radio mode, briefly press the
button on the control panel to increase
frequency by one step of channel
spacing . (Or press the button on the
remote control)
MH2
1 87.50
4 105.30
2 90.10
5 106.20
3 98.10
6 88.20
WELCOME TO......
In radio mode, briefly press the
button on the control panel to decrease
frequency by one step of channel
spacing . (Or press the
button
on the remote control)
Automatic Search
In radio mode, press and hold (for more
than 2 seconds ) the “
/ ” button
to start search for an available radio
station automatically .
Long press the “
or ” button on the
remote control to search for an available
radio station automatically .
A total of 30 stations can be stored in the
memory banks of 6 number buttons.
Each band stores up to 6 preset stations.
These bands are FM1, FM2, FM3, Am1
(MW1) and AM2(MW2).
The operation is as follows :
- Storing a station in Memory
>Select a band
>Select a station
>Long press a button from 1~6 buttons
till the color of the memory bank code
and its frequency(being alternated by
the current frequency) is changed.
-13-
RADIO OPERATION
- Retrieving a station in memory
press one of the 1~6 buttons briefly on
the remote control to retrieve a station
which had been stored in the memory
bank of the number button in advance,
the color of the memory bank code
and its frequency is changed.
Automatic storing stations in
memory and scaning them
Automatic storing stations in
memory
In radio Mode, press and hold (for more
than 2 seconds) the APS or A/PS button
to activate the automatic search mode.
The radio searches within the current
frequency band, e.g. FM1, for the strong
signal stations until the entire cycle
has finished . The six strongest stations
are then allocated to the corresponding
memory banks in the current band .
The presetting function can be implemented
in selected FM or AM band. (It can presets
3x6 stations for FM and 2x6 stations for AM
in all) . After finishing presetting , it will
resume broadcasting the station in NO.1
bank.
Scanning stations in memory
In radio mode, briefly press the APS or
A/PS button , the radio scans for each
preset station in FM or AM band from NO.1
bank, each preset station broadcasts for 5
seconds. After finishing a circle of scanning,
it will resume broadcasting the station in
NO.1 bank.
NOTE: In FM band, FM1,FM2 and FM3 are
preset or scanned as one band at a time; In
AM band,AM1 and AM2 are preset or
scanned as one band at a time.
-14-
MEDIA OPERATION
Loading or unloading a disc, USB or card
1. Loading a disc, USB or card
To play files in a disc, press OPEN button to flip down control
panel, then insert a disc with label surface up into disc slot,
and then attach control panel onto chassis again, by now it
will automatically play.
Label
surface up
* CAUTION OF USING A DISC
1) Handle a disc by its edge, do not touch the surface of play side.
2) Before inserting disc, wipe the disc outwards from the disc center
with a clean, soft, dry, lint-free cloth. Do not use solvents/thinner
such as petrol/benzine, cleaner.
3) After taking a disc out of disc slot, put the disc inside disc case to
keep it clean.
4) Do not stick paper or tape on the disc surface of play side. If
there is glue (or analog) on the disc surface, must wipe it up
before using.
To play files in a USB, firstly open USB port cover, then insert USB storage into
USB port, and then it will play files in the USB automatically.
To play files in a card, firstly press OPEN button to flip down control panel and
remove it, then insert the card into card slot as bellows, and then attach control
panel onto chassis again, by now it will play files in the card automatically .
Label side
facing upward
2. Unloading a disc, USB or card
To unload the disc in disc slot, use STOP button to stop playback and then press
OPEN button to flip down control panel and press EJECT button to eject disc and
then remove it.
-15-
MEDIA OPERATION
To pull away the USB storage, use STOP button to stop playback, then you can
remove the USB storage.
To unload the card in card slot, use STOP button to stop playback, then press
OPEN button to flip down control panel and then remove it, and then you can push
the card for release it and then pull it out of card slot.
* During MP3/WMA playback, the information of file, folder, title, artist and album
will be scrolling on LCD display. As long as the current playing MP3/WMA music
contains relevant ID3 tag information in version 1.0/2.0 format, the 3 items
underlined above will be scrolling on LCD display; otherwise, they will not.
* There is ESP function for all formats of discs.
-16-
MEDIA OPERATION
SELECTING PLAY MODE
3). INTRO FUNCTION
During disc playback, press the
“REPEAT, RDM, INT ” button on the
remote control to select the different
playing modes .
FOR CD :
Long press the 3/INT button on the
remote control to play the first 10
seconds of each track/chapter on the
disc.
(Long press again to cancel this mode)
INT
TOP
1
VOL
2
3
4
5
6
7
8
9
FOR VCD :
Long press the 3/INT button on the
remote control, the following menu
will be displayed:
RDM
SEL
SEQ PLAY
1). TOP FUNCTION
ForDigital Video/ VCD/CD/MP3:
When playing Digital Video/VCD/CD/
MP3 discs, press the button to select the
first track/chapter to play.( For VCD it
depends on which disc is used )
2). REPEAT FUNCTION
FOR Digital Video :
Press REPEAT button on the remote
control to select REPEAT mode as
follows :
CHAPT ER REP EAT ON
REP EAT OFF
TI TL E REP EAT ON
REP EAT ALL
FOR VCD/CD :
Press REPEAT button on the remote
control to select REPEAT mode as
follows :
REPEAT ONE
Note: When INTRO 1 mode is selected,
the first 10 seconds of each track/
chapter on the disc will be played. (Long
press it again to cancel this mode .)
FOR Digital Video/MP3 :
For Digital Video/MP3 , the INT button is
not available .
4). RDM (RANDOM) FUNCTION
During DISC playback, long press the
4/RDM button on the remote control to
play in random. Each playing order
is different .
( For VCD it depends on the disc used ).
Long press it again to cancel this
function .
REPEAT ALL
REPEAT OFF
FOR MP3 :
Press REPEAT button on the remote
control to select REPEAT mode as
follows :
REP EAT ONE
REP EAT OFF
INTR O 1
REP EAT FO LD ER (or DIR)
REP EAT ALL
-17-
MEDIA OPERATION
ON-SCREEN DISPLAY FUNCTION
During playback, press the
OSD button on the remote
control . It will display the
following as bellow :
1. Digital Video:
A. Press OSD for first time:
2.Example for VCD/SVCD/CD:
A. Press OSD for first time:
VCD TRK 1/19
A
PBC
C 0:01:36
B. Press OSD for second time:
VCD TRK 1/19
A
PBC
C -0:06:06
Digital Video TT 01/01CH 04/31 C 0:02:06
C. Press OSD for third time:
Title Number, Total Title Number,
Chapter Number, Total Chapter Number
of this Title of the disc currently being
played will be shown on the screen,
along with the elapsed time.
VCD TRK 1/19
2CH
T 0:02:12
D. Press OSD for fourth time:
B. Press OSD for second time:
½ ENG
A
PBC
VCD TRK 1/19
A
PBC
T -1:23:06
OFF AN OFF
The underlined part is different from
the used discs.
C. Press OSD for third time:
Digital Video TT 01/01CH 04/31 C -0:01:32
D. Press OSD for fourth time:
E. Press OSD for the fifth time:
The message on the screen will be
cleared for SVCD and VCD.
NOTE:
For CD(audio) Disc, press OSD button
is not available .
3. Example for MP3
A. Press OSD for first time:
Digital Video TT 01/01CH 04/31 T 0:16:00
CD rom TRK 2/76
E. Press OSD for fifth time:
A
C 0:00:36
B. Press OSD for second time:
Digital Video TT 01/01CH 04/31 T -1:36:55
CD rom TRK 2/76
F. Press OSD for sixth time:
The message on the screen will be
cleared.
A
C -0:03:38
C. Press OSD for third time:
The message on the screen will be
cleared.
-18-
MEDIA OPERATION
Digital Video Special Function
1. Multi-subtitle Language
Function (for Digital Video Only)
3. Multi-Angle Function
(for Digital Video Only)
During Digital Video playback.
press the SUBTITLE on the
remote control .
During Digital Video playback,
press the ANGLE button on the
remote control
Each time the button is pressed number
of the subtitle language changes
in sequential order.
Each time the button is pressed , the
number of the angle changes in sequential order.
Notes:
- The language number is different
according to the disc.
- Some discs only contain one subtitle
language.
- When no different subtitle language
are recorded, “ INVALID KEY ” will be
displayed at screen left top corner.
Notes:
- The angle number is different
according to the disc.
- The function only work for disc having
scenes recorded at different angles.
- When no different angle are recorded,
“ INVALID KEY ” will be displayed at
screen left top corner.
2. Multi-Audio Language Function
For Digital Video:
During Digital Video playback,
press the AUDIO on the remote
Each time the button is pressed number
changes on sequential order.
Notes:
- The language number is different
according to the disc.
- Some disc only contain one language
soundtrack
- When no different language soundtrack are recorded “ INVALID KEY ” will be
display at screen left top corner.
4. Title Menu Function
For Digital Video:
If the Digital Video has multiple titles
recorded on the disc. It can select
preferred title from the title menu to start
playback.
- During Digital Video playback, press
TITLE button on the remote .The title
menu is display.
- Select preferred title by the cursor
button and confirmed by press the
ENTER button .
For VCD:
Press TITLE/PBC button on the remote
control while the disc is playing, you can
switch between "PBC ON"and "PBC off"
mode.
For VCD:
during playback, Press AUDIO on the
remote control . It is possible to switch
the sound between monaural and
stereo sound.
MONO LEFT
MONO RIGHT
STEREO
MIX-MONO
-19-
MEDIA OPERATION
MP3/WMA/JPEG/MPEG4 root menu
The unit supports MP3/WMA/JPEG/MPEG4 . When loading a media with Mp3/
WMA/JPEG/MPEG4 format files, the unit will play the first track automatically .
When pressing the STOP button, the following picture will appear on the screen .
2
1 Current folder (highlighted bar) .
[MP3]
ITLE / SONG:
TRACK
03 /
2 The information of the current track.
001
WMA
002
1
Mp3
003
3 Audio icon.
004
001
005
002
006
4 Image icon.
007
003
008
5 Video(MPEG4) icon.
6 Current track .
3
4
5
6
Use the > or < button on the remote control to highlight Audio, Image or Video icon,
then press the ENTER button enter it.
Use the > or < button to highlight the current folder or current track, then press the
the ^ or v button to highlight your desired folder or track to open or to play.
-20-
MEDIA OPERATION
MEDIA SETUP MENU
The Media Setup Menu is for setting up all media parameter values.
-
Press the SETUP button to display Media Setup Menu(the defaulted page is
SYSTEM SETUP);
-
Media Setup Menu has 4 pages in all. When highlighting a page logo, press the
> or < button to highlight the other page;
-
After selecting a page, Press the ^ or v button to highlight a setup item in the
selected page;
-
After selecting a setup item, press the > button to enter the setup item, then
press the v or ^ button to select a desired value, finally press the ENTER button
to confirm it.
-
After finishing setting, press the SETUP button again to exit Media Setup Menu
to normal playback.
The 4 pages descriped as follows:
1) SYSTEM SETUP
SYSTEM SETUP
TV SYSTEM
SCREEN SAVER
TV TYPE
PASSWORD
RATING
DEFAULT
TV SYSTEM
This setup item is for setting up video system. There are NTSC, PAL and AUTO
in all.
If you set a non-matched video system for playing video, the playing video will
display white-black or flash.
SCREEN SAVER
This setup item is for switching on or off screen saver.
TV TYPE
This setup item is for setting up video display size.
-21-
MEDIA OPERATION
(1) 4:3 PS: Choose the item when connecting a monitor with 4:3 screen. When
playing video with 16:9 size, the left and right part of video will be cut out, and
display in full screen.
(2) 4:3 LB: Choose the item when connecting a monitor with 4:3 screen. When
playing video with 16:9 size, the top and bottom part of the monitor screen will
be turned into a black square respectively.
(3) 16:9: Choose the item when connecting a monitor with 16:9 wide screen.
PASSWORD
This setup item is for locking or unlocking parental control. The defaulted mode
is locked. The defaulted unlocking password is 0000.
To lock or unlock parental control:
(1) Highlight PASSWORD item and then press > or ENTER button to enter it;
(2) Input password 0000;
(3) Press ENTER button to confirm, then it will unlock or lock parental control.
Before the other persons see the User Manual, you should get the password in
mind and cut out the part of PASSWORD in the User Manual.
RATING
This setup item is for setting a new rating level of parental control.
(1) First highlight PASSWORD item to see whether parental control is locked or not.
If it is in lock mode, unlock parental control refer to PASSWORD part above.
(2) Highlight RATING item and then press > button to enter it, then use ^ or v button
to select your desired rating level, and then press ENTER button to confirm.
(3) Highlight PASSWORD item again and then press > or ENTER button to enter it,
then input password 0000, and then press ENTER button to lock parental control
again.
DEFAULT
This setup item is for making all parameter values change back to defaulted
factory values.
2) LANGUAGE SETUP
LANGUAGE SETUP
OSD LANGUAGE
AUDIO LANG
SUBTITLE LANG
MENU LANG
-22-
MEDIA OPERATION
OSD LANGUAGE
This item is for selecting a type of language of all words displayed on screen
except subtitle language and menu language(depend on current playing media).
AUDIO LANG
This item is for selecting a type of audio language(depend on current playing
media).
SUBTITLE LANG
This item is for selecting a type of subtitle language(depend on current playing
media).
MENU LANG
This item is for selecting a type of menu language(depend on current playing
media).
3) VIDEO SETUP
VIDEO SETUP
BRIGHTNESS
CONTRAST
HUE
SATURATION
SHARPNESS
BRIGHTNESS
It is for adjusting brightness of video output.
CONTRAST
It is for adjusting contrast of video output.
HUE
It is for adjusting hue of video output.
SATURATION
It is for adjusting saturation of video output.
SHARPNESS
It is for adjusting sharpness of video output.
-23-
MEDIA OPERATION
4) DIGITAL SETUP
DIGITAL SETUP
DYNAMIC RANGE
DYNAMIC RANGE
This item is for adjusting linear compression ratio. If you set it to be FULL,
Peak-to-Peak value of audio signal is minimum; if you set it to be OFF, Peak-to
-Peak value is maximum.
-24-
EXTERNAL WORK SOURCE
AUX OPERATION
REAR VIEW CAMERA
On the control panel of the unit, there is
an AUX IN jack, the external work source
can use the car media system as an
amplifier.
The AUX IN jack is only for audio source.
If you want to connect a video source,
please use the video in RCA jack from
the back of the unit .
When connecting the rear view camera.
the mirror image of the rear view through
the rear view camera is automatically
displayed on the monitor when you
change the gear to the back position.
1). Use the AUX IN jack to connect an
external work source according to the
following diagram.
Ground
Right
Left
2). In any mode, press the MODE button
to enter AUX mode, the screen will
display as follows :
AUX IN
WELCOME TO ......
3). Play the external work source. You
now hear the sound from the external
work source through the car speakers .
4). Use the SEL, VOL+, VOL-, VOL
(knob),MUTE and EQ buttons to adjust
sound.
-25-
SPECIFICATION
Supply Voltage:
Current Consumption:
Signal System:
Discs Played:
12V DC (11V-15V)
Less than10 A
Compositive video 1.0Vp-p 75
(1)VIDEO Disc
5"(12 cm) single-sided, single-layer
5"(12 cm) single-sided, double-layer
(2)Compact Disc (CD-DA, VIDEO CD)
5"(12cm) disc
Audio Signal Output:
Characteristics:
2ch&4ch line out
(1)Frequency Response
(2)S/N Ratio
(3)Wow and Flutter
20 Hz - 20 KHz
90 dB (JIS)
Below measurable limits
RADIO Section :
Frequency Coverage:
IF:
Sensitivity (S/N = 30 dB):
Frequency Coverage:
IF:
Sensitivity (S/N = 20 dB):
For 2 Bands
(Europe)
FM
87.5 to108 MHz
10.7 MHz
15 dBu
MW
522 to1620 KHz
450 KHz
40 dBu
For 2 Bands
(U.S.A.)
FM
87.5 to107.9 MHz
10.7 MHz
15dBu
AM
530 to1710 KHz
450 KHz
40 dBu
TFT Section :
Monitor Screen Size:
Color System:
3 Inch Wide
NTSC/PAL
NOTE:
Specification and design are subject to modification without notice, due to
improvements in technology.
-26-
Troubleshooting
Before going through the check list, check wiring connection. If any of the problems
persist after checking, consult your nearest service dealer.
SYMPTOM
No power
Disc cannot be
loaded or ejected
CAUSE
SOLUTION
The fuse is blown
If the power supply is properly
connected to the car accessory
terminal,switch the ignition key
to "ACC"
Replace the fuse
Another discs is inside the
player.
Remove the disc in the player,
then put in a new one
The disc is inserted upside
down
Insert the compact disc with
the label facing upward
The disc is extremely dirty
or defective
Clean the disc or try to play a
new one
The car ignition switch is
not on
Temperature inside the car Cool off or wait until the ambient
temperature returns to normal
is too high
video/image
appears
black-white
The color system is
set incorrectly
Please switch to correct color
system in menu
No video/image
appears
The unit is not connected
to the parking brake
detection switch
Make proper connection
according to “ wire connection ”
No color in picture
The parking brake is not
engaged
For safety reasons no video/
images are displayed
while the vehicle is moving.
Engaging the parking brake will
cause images to be displayed.
The disc format is not
according to the TV-set
used (PAL/NTSC)
Please use correctly formatted
discs.
No JPEG files are recorded
Change the disc
on the disc.
JPEG files are not recorded Change the disc. Record JPEG
files using a compliant
in a compliant format
application
The built-in microcomputer Press the RESET button.
The operation keys is not operating properly
Front panel is not properly fixed
do not work
due to noise
into its place
The radio does not The antenna cable is not
Insert the antenna cable firmly
connected
work
JPEG disc cannot
be played back
The signals are too weak
MADE IN CHINA
-27-
Select a station manually
88-J3312-03


