1
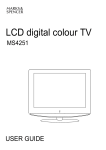
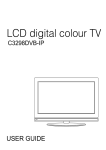
LCD digital colour TV
MS2651DVB
USER GUIDE
LCD Screen
Although the LCD screen is made with high-precision technology and
99.99% or more of the pixels are effective, black dots may appear or
bright points of light (red, blue or green) may appear constantly on the
LCD screen and is not a malfunction.
HELP
If you have any problem setting up this Television, trouble getting a
signal or difficulties with the operation of the DVD player.
Please Contact our Helpline where we will be able to assist you.
Call 0845 6710665
1
Caution
2
Safety Information
3
4
4
5
6
7
7-8
9
10
10
11
12-13
Unit and Accessories
Getting Started
Front View
Rear View
Remote Control Key Functions
Menu Operation
Basic TV operation
PICTURE menu options
SOUND menu options
TIMER menu options
FUNCTION menu options
SETUP menu options
14
15
SimpleTroubleshooting
Techincal Specifications
caution
Caution
The lightening flash with arrowhead symbol, within an equilateral triangle is
intended to alert the user to the presence of un-insulated "dangerous voltage"
within the products enclosure that may be of sufficient magnitude to constitute a
risk of electric shock to the persons.
The exclamation point within an equilateral triangle is intend to alert the user to
the presence of important operating and maintenance (servicing) instructions in
the literature accompanying the appliance.
Correct disposal of this Product
“Correct Disposal of Product”
Produced after 13 August 2005. Waste electrical should not be disposed of with household
waste. Please recycle where facilities exist. Check with your local authority or retailer for
recycling advice.
This appliance complies with European Safety and Electrical
directives
1
Safety Information
Safety Information
To ensure reliable and safe operation of this equipment, please read carefully all the
instructions in this user guide, especially the safety information below.
Electrical safety
x The TV set should only be connected to a mains supply which matches that stated on
the label on the mains adaptor
x To prevent overload, don't share the same mains supply socket with too many other
items of equipment.
- Do not place any connecting wires where they may be stepped on or tripped over.
- Do not place heavy items, which may damage the leads, on them.
- Hold the Mains plug, not the wires, when removing from a socket.
- During a thunderstorm or while leaving the TV for long periods, disconnect the
aerial (if outdoor) and mains adaptor from the supply.
- Do not allow water or moisture to enter the TV or mains adaptor. Do NOT use in
wet or moist areas such as Bathrooms, steamy kitchens or near swimming pools.
x Pull the plug out immediately, and seek professional help if:
- the mains plug or cable is damaged
- liquid is spilt onto the set, or if it is accidentally exposed to water or moisture
- anything accidentally penetrates the ventilation slots
- the set doesn't work normally.
- Do NOT remove the safety covers. There are no user serviceable parts inside. You
may invalidate the warranty. Qualified personnel must only service this apparatus.
- To avoid battery leakage, remove exhausted batteries from the remote control
handset, or when not using for a long period.
- Do NOT break open or throw exhausted batteries on a fire.
Physical safety
x Do NOT block ventilation slots in the back cover. You may place the TV in a cabinet,
but ensure at least 5cm (2") clearance all around.
x Do NOT tap or shake the TV screen, you may damage the internal circuits. Take good
care of the remote control, do not drop.
x To clean the TV use a soft dry cloth. Do NOT use solvents or petrol based fluids. For
stubborn stains, you may use a damp soft cloth with dilute detergent.
2
Unit and Accessories
Unit and Accessories
FUNCTION
STANDBY
EPG
TEXT
HOLD
SUBTITLES
OK
MENU
VOL
PROG
+
+
QUICK START
EXIT
MUTE
FAV
DISPLAY
1
2
3
4
5
6
7
8
0
PICTURE
SOUND
9
-/-TIMER
ASPECT
Power cable
Easy Start Guide
User’s Manual
Easy Start Guide
3
Getting Started
Getting Started
SWITCH: Power on/off
Remote Control Window(keep clear)
LED Indicator
(IR) Infrared Receiver: Receives IR signals from the remote control.
(Power on/Standby) LED Indicator: Press POWER to turn on and off,
Indicator on(RED)
Indicator on(GREEN)
Standby mode
Power on mode
TV/AV Press to display the input source menu(see page 8).
VOL
skip
CH
MENU
Power
4
Getting Started
1. AC POWER INPUT: 100-240V AC 50/60Hz. (Warning: This appliance must be earthed).
2. HDMI 1 / 2: Connect to the HDMI sockets of DVD player or other equipment.
3. VGA: PC Display. Connect to the D-Sub 15 pin connector of PC.
4. PC AUDIO : Connect to Audio output of PC sound card.
5. S-VIDEO: Connect to S-Video socket of DVD player or similar equipment (video only).
6. YPbPr : Connect all to video output connectors of DVD or similar equipment.
L/R in: Connect them to the audio output terminal of DVD.
7. VIDEO(CVBS): Connect to AV connector of DVD or similar equipment (Video only).
8. L/R in: Connect to audio output connectors of DVD or similar equipment when using S-Video connectors.
9. SCART 1 / 2: Connect to Scart connector of DVD or similar equipment.
SCART 1: supports CVBS (AV) and RGB signal inputs.
SCART 2: supports CVBS (AV) only.
10. RF: TV tuner input. 75 Ohm coaxial socket.
5
Remote Control Key Functions
STANDBY
FUNCTION
STANDBY
Turn the TV On / standby.
FUNCTION
Press to display the input source menu.(see page 8)
TEXT
EPG
HOLD
SUBTITLES
OK
MENU
VOL
PROG
+
+
EXIT
QUICK START
MUTE
FAV
DISPLAY
1
2
3
4
5
6
7
8
9
0
PICTURE
SOUND
-/-TIMER
ASPECT
Colour buttons: short cuts-follow the coloured links in
the text.
Blue Button: Nicam. (TV mode only)
TEXT: Turn On / Off the Teletext display.
HOLD: Hold or carry on the current subpage.
EPG: Electronic Program Guide
SUBTITLES: DVD and DTV only.
Cursor left/right/up/down: Cursor buttons used in
menus.
OK: CONFIRM BUTTON.
MENU: System setup menu.
QUICK START: To tune in your TV.
FAV: Means favorite, to display the favorite channel list
defined by you.
EXIT: Exit the OSD menu.
MUTE: Mutes the Audio.
DISPLAY: Display brief information concerning the
current channel you are viewing.
VOL+/-: Adjust the volume.
PROG+/-: Skip through the channels.
0-9,-/-Choose channel directly. Number buttons for DVD.
PICTURE: Select the picture mode.
SOUND: Select the sound mode.
Timer
Standby timer.
ASPECT
Press to change the display mode of the screen.
6
Menu Operation
Basic TV operation
TURN ON LCD TV
1.Connect power cable to mains supply and turn on the power by using the “ Switch” at the back of
the TV on the right hand side. The standby indicator on the front of the TV will light up in red.
2.Use the POWER button on the front of the TV or STANDBY button on the handset to turn on the TV ,
the indicator will turn green.
TURN OFF LCD TV
Press the POWER button on the front of the TV or STANDBY button on the handset to turn the TV off
into standby mode, the standby indicator will turn red.
First time installation
NOTE: When you initially use the TV, you will see the “First Time Installation” menu as below:
Please make sure the TV aerial is plugged
into the RF socket at the rear of the TV.
First Time Installation
Please make sure the TV aerial is plugged
into the RF socket at the rear of the TV.
Press the "OK" button on the remote control to
start the tuning procedure. This process will find
all available ATV and DTV channels and store
them.
By pressing the "Quick start" button, the first time
installation can be recalled at any time.
NOW PRESS OK
1. Press VOL+/- to adjust the volume.
2. If you want to switch the sound OFF, press the MUTE
3. You can cancel this function by pressing MUTE or VOL+ button.
1. Using the CH+/- on the front panel or PROG+/- on the remote control.
Press CH+/PROG+ to increase channel number.
Press CH-/PROG- to decrease channel number.
2. TV (ATV only) Using 0-9 digital buttons and -/-- button
Press -/-- button, then the screen will display “-”, press again it will become “- -”.
When it displays “-”, you should then press a unmber of 0-9 to play the channel you desired;
When it displays “- -”, you should then press two unmbers to play the channel you desired.
3. DTV using only 0-9 to select channel for example: Channel 83 press buttons 8 and 3
7
Press the MENU button to display the main menu.
button to enter the menu.
Use / buttons to select menu, and press
PICTURE
SETUP
SOUND
Personal
Picture Mode
20
Volume
UK
Country
Contrast
50
Sound Mode
Brightness
50
Bass
60
Manual tuning
Color
50
Treble
52
Program Edit
Balance
50
Normal
Sharpness
Music
Auto tuning
Normal
Colour temperature
Select
Select
Enter
Select
Enter
FUNCTION
TIMER
Sleep Timer
0 Min
Language
English
OSD Timer
30Sec
Video Size
Auto
Blue Screen
On
Child Lock
First Time Installation
Reset
Select
Select
Enter
Enter
You can display the input source menu by pressing the Function
button on the remote control or the TV/AV button on the TV,
press / button to select, and press OK button to confirm.
TV
SCART1
SCART2
CVBS
S-VIDEO
YPbPr
VGA
HDMI1
HDMI2
DTV
8
Enter
In this manual, the settings shown on the OSD (On Screen Display) may be different from those on
your TV. Those printed here are only an example to help demonstrate TV operation.
PICTURE menu options
Press the MENU button on the right of your tv or the MENU button on the remote control then use
button to select the picture menu, press to enter the menu. (see picture below).
PICTURE
Personal
Picture Mode
Contrast
50
Brightness
50
50
Colour
Sharpness
Normal
Colour temperature
Normal
Select
DNR
/
1. Use
/ button to select what you want to
adjust in the Picture menu.
/
button to adjust.
2. Press
3. When you are satisfied with your adjustment, press
MENU button.
Adjust
Off
Picture Mode
Select the type of picture which best corresponds to your viewing requirements by selecting Picture Mode in
Picture menu. You may select the picture mode directly by pressing the PICTURE button on the remote
control.
Contrast
Adjust the contrast of the picture.
Brightness
Adjust the brightness of the picture.
Colour
Adjust the colour of the picture.
NOTE: This option is invalid in PC mode, and it will be shown in gray.
Sharpness
Select sharpness mode of the picture.
Colour Temperature(in VGA mode)
Select an optimum color temperature mode to suit your eyes for viewing among Normal, Warm and Cold.
DNR
If the broadcast signal received is weak, you can select the DNR option to reduce the video noise level
between Off, Low, Mid and High.
9
SOUND menu options
/
Press the MENU button on the right of your tv or the MENU button on the remote control then use
button to select the sound menu, press
to enter the menu. (see picture below).
SOUND
20
Volume
Music
Sound Mode
Bass
60
Treble
52
Balance
50
Select
1. Use
/ button to select what you want to
adjust in the Sound menu.
/
button to Adjust.
2. Press
3. When you are satisfied with your adjustment, press
MENU button.
Adjust
Volume
Adjust the volume.
Sound Mode
Select the type of sound which best corresponds to your listening requirements by selecting Sound
Mode in Sound menu. You may select the picture mode directly by pressing the SOUND button on
the remote control.
Bass
Adjust the level of the lower-pitched sounds.
Treble
Adjust the level of the higher-pitched sounds.
Balance
Adjust the audio output between left and right speakers.
NOTE: The treble and Bass levels can only be adjusted when the sound setting personal is selected.
TIMER menu options
Press the MENU button on the right of your tv or the MENU button on the remote control then use
button to select the Timer menu, press
to enter the menu. (see picture below).
TIMER
Sleep Timer
0 Min
OSD Timer
30Sec
Select
/
1. Use
/ button to select what you want to
adjust in the Timer menu.
/
button to Adjust.
2. Press
3. When you are satisfied with your adjustment, press
MENU button.
Adjust
Sleep Timer
Select the sleep time to put the TV automatically into standby mode after a specified period of time.
The period of time for automatic switch off can be selected in steps 15, 30, 45, 60,
75, 90, 105, 120 and 0 Min(Off). You can also select the automatic sleep time by pressing the TIMER
button on the remote control repeatedly.
OSD Timer
You can select the time period for OSD display to remain on the screen such as: 5Sec, 10Sec, 15Sec,
20Sec, 25Sec and 30Sec
10
FUNCTION menu options
Press the MENU button on the right of your tv or the MENU button on the remote control then use
button to select the Function menu, press
to enter the menu. (see picture below) .
FUNCTION
Language
English
Video Size
Full Screen
Blue Screen
On
Child Lock
/
1. Use
/ button to select what you want to
adjust in the Function menu.
/
button to adjust.
2. Press
3. When you are satisfied with your adjustment, press
MENU button.
First Time Installation
Reset
Select
Adjust
Language
Select the language of the OSD menu.
Video Size
Select the screen display mode.
Note: The available aspect modes may differ from one input source to another.
Blue Screen
To turn on/off the function, when the function is turned on, the screen background will turn blue at very weak
or no signal condition.
Child Lock
Child Lock
Child Lock
Off
button to enter the Child Lock menu as below:
Press
Key Lock
Off
Child Lock: Turn on/off the child lock function.
Key Lock: This option allows you to lock the buttons on
Change PIN Code
the TV set, so that a child may not accidentally
Select
Adjust
change your viewing preferences.
Change PIN Code: Set pin code.
Old PIN Code: The default is no password, press
OK to confirm. If the pin code is changed, it must enter the
old code to change.
New PIN Code: Enter the new password.
Enter Again: Enter the same password twice, the
password will be changed successfully.
Change PIN Code
Old PIN Code
New PIN Code
Enter Again
Select
Delete
0 9
Input
OK
Confirm
PIN Code:
Delete
0 9
Input
OK
Enter
If you turn on the Child Lock function, and set the PIN
Code, you have to enter the program edit option in Menu Setup(page 13) to lock one or more channels.
If the Quick Start button is pressed you will also be prompted for the child lock password.
Note: If the pin code is changed and the number forgotten or lost, please call the helpline.
Reset
Press
button to reset the setup.
11
SETUP menu options(used in TV/DTV source)
Press the MENU button on the right of your tv or the MENU button on the remote control then use
button to select the setup menu, press to enter the menu. (see picture below).
SETUP
UK
Country
Auto Tuning
Manual Tuning
Program Edit
/
1. Use
/ button to select what you want to
adjust in the setup menu.
2. Press
/
button to adjust.
3. When you are satisfied with your adjustment, press
MENU button.
Common Interface
Select
Adjust
Country
This option allows you to select the country.
Auto Tuning
button to start auto tuning.
Press
Note: Before you perform Auto Tuning, you must choose the country where you are by selecting
COUNTRY option. (In TV mode)
Auto tuning
Press OK key to start
OK
Enter
MENU
Return
Manual Tuning
Note: Before you perform Manual Tuning, you must choose the country where you are by selecting
Country option. (In TV mode)
Manual Tuning in TV mode
Manual Tuning
Program
1
Sound System
I
Colour System
PAL
Program Label
AFT
Off
Manual Search
471.43MHz
Select
Adjust
0-9
Input
Program: Select the current channel.
Sound System: Select a corresponding sound system.
Colour System: Select a corresponding colour system.
Program Label: Name the current channel, you can also rename the program which you have named.
button to enter, and press
/
button to select the position, then press /
Press
button or 0-9 button to enter the character, press OK button to confirm.
AFT: Due to a weak signal some channels may not be tuned optimally.
The AFT function allows you to fine tune selected channels.
Manual Search: Press
/
button to search.
12
Manual Tuning in DTV mode
Manual Tuning
Channel
32
Start Search
Begin
Service Found
0
Signal Quality
0%
Signal Strength
0%
Frequency
474.00MHz
Select
Enter
Channel: Select the current channel.
button to begin searching, and it will display “Search”, after a few second,
Start Search: press
it will display “Finish”.
Program Edit
In DTV mode
Favorite (In DTV mode): Set favorite channels.( You could use the
Channel list
Flags
DTV
1. BBC1
X
2. BBC2
X
3. ITV1
X
4. CHANNEL 4
X
5. FIVE
Delete: Delete the channel, the channel will be deleted.
6. ITV2
Lock (In DTV mode): Lock the channel, you have to enter the code
(PIN code in Child Lock menu--Function menu) to view the
channel. Use / button to select the channel, and press the
7. BBC3
Favorite
FAV button to view the favorite channels in DTV
source.)
Use / button to select the channel, and press
the green button on the remote control to set, and there
will be a “ ” on the channel, press the green button again
to cancel. Such as channel 2.
Delete
Lock
blue button on the remote control to set, and there will be a
“ ” on the channel, press the blue button again to cancel.
Such as channel 5 and 6.
Common interface(For DTV mode)
Please contact your "Pay per View" provider who can supply a viewing card, cam unit and instructions for
their use.
13
Simple Troubleshooting
Simple Troubleshooting
If the display or performance fails check the tv in accordance with the following instructions. If the
tv still fails to function correctly contact your dealer for assistance.
SYMPTOM
REMEDY
GENERAL
Dead. No LED Lit
Dead Led lit red
No power to the TV.
Set still in standby.
Check all connections to the TV.
Press either the Power button or the Standby
button on the Remote control.
No signal.
Blue screen.
Incorrect source
selected.
Noisy, snowy,
ghosting picture (TV)
No sound
Poor aerial signal.
Press FUNCTION button to select correct
source.
If using an indoor aerial, try moving the
aerial. Check aerial connections.
Sound "Mute".
Turn sound "Mute" OFF.
Volume set too low.
Check volume settings.
External leads not
connected "if used".
Check all external leads are connected.
14
Techincal Specifications
Techincal Specifications
TV
TVSystem
Screen size
Resolution
Aerial input
Audio output power
PAL BG/DK/I
26"(diagonal)
1366x768pixels (RGB)
(unbalanced)
75
2x6 W
Power Consumption
AC 100-240V 50/60Hz 160W
Weight
11kg
Remote control
Type
Control distance
Control angle
Batteries
Dimensions
Weight
infrared
5m
30° (horizontal)
2 x 1.5 V, size AA
48 x 168 x24 mm
70 g (without battery)
15
Please retain proof of purchase in case of return. In the unlikely event of a fault
please contatct our customer service helpline on 0845 671 0665, who will advise
you of the best course of action.
This may be to return it with original packaging to any M&S store (except Outlets and
Simply Food stores) along with your receipt. If it’s within 35 days of purchase we will
offer an exchange for a new product or a full refund. After 35 days and for the remainder
of the guarantee period, we will arrange for the product to be repaired.
Once the tamperproof seal on your technology product is broken, refunds can only be
given in accordance with your legal rights. Remember you are not entitled to a refund if
you simply change your mind, or if you damage the goods after you buy them.
Should a repair not be possible, we will exchange the product for a new or nearest
equivalent product. In the unlikely event of being unable to exchange, we will offer a full
refund.
This warranty is only valid within the United Kingdom, Republic of Ireland and/or
Channel Islands. This warranty excludes faults caused by accident, neglect, misuse,
not following the instructions or normal wear and tear.
This warranty is in addition to your legal rights and supersedes any guarantee or
warranty that is with the product.
T04/9350/1969
(copyright) Marks & Spencer plc
Marks and Spencer plc
PO Box 3339 Chester CH99 9QS
W2 1NW Registered No: 214436
(England and Wales)
www.marksandspencer.com
M&S technology customer services:
Tel 0845 671 0665