1
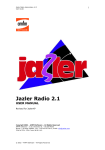
Jazler
RadioStar 2
User Manual
Spots/Commercials
Jazler Software 2
Jazler RadioStar 2
Contents
1
Summary .......................................................................................................................... 3
2
(Edit) Spots Properties ...................................................................................................... 3
3
General Properties for Spots ............................................................................................ 9
4
Spots/Commercials ......................................................................................................... 10
5
Programming the Spot.................................................................................................... 17
6
Main Screen description ................................................................................................. 20
7
TIPs ................................................................................................................................. 24
Jazler Software 3
Jazler RadioStar 2
1 Summary
The commercials or else Spots are pretty important for a Radio Station. It is the main income
and the way a Radio Station is sustained and kept alive and playing! As a result, the spots are
a great part of the RadioStar2 with many options and features that will be analyzed in the
next chapters.
2 (Edit) Spots Properties
First of all we will declare the time of the breaks that we want our station to have. By default
the values are a break at the top of the hour and at the half of the hour for each hour.
Another very interesting feature of RadioStar2 is the spots priorities and it should be
explained and programmed first, for your convenience, before we continue to the spots
programming. The next step is to navigate to the appropriate screen. From the control panel
press “Databases” and then “Spots/Commercials Database”.
Figure 2-1
Jazler Software 4
Jazler RadioStar 2
While at the “Spots Database” window, press at the bottom left the screen the “Edit Spots
Properties”.
Figure 2-2
As a result you will be transferred to the below image.
Jazler Software 5
Jazler RadioStar 2
Figure 2-3
In the tab “General” there are many options that are pretty descriptive and self-explanatory.
The option “Playlister Code Header” is an option used for those who work with playlister.
Pressing the tab “Commercial Breaks & Priorities” the following image will appear.
Jazler Software 6
Jazler RadioStar 2
Figure 2-4
At the left of the screen we can see the “Commercial Breaks”. Here the user can adjust the
time of breaks based on his needs. If you want to “Add New Break” or “Delete Break” you
can press the corresponding buttons. At the table all the breaks appear and there is the
option for each break to be set to “start immediately”. With this we mean that when for
example we have scheduled a break for 11:30, and the option is checked, RadioStar will
interrupt anything that plays at this moment (11:30) and start the break immediately. The
default behavior of RadioStar (without this option being checked) is waiting for anything that
plays to finish and then start the break even with some delay.
Furthermore, there is the “Break Position” with 3 options.
“Break Ends at this Time”: When this option is selected RadioStar will calculate where the
break should be so as the break ends at about the time of break (e.g. break time 11:00).
“Time Announcement”: When this option is selected RadioStar will calculate where the
break should be so as the “Time announcement” is played at the time of the break (e.g.
break time 11:00).
“Break Starts at this Time”: When this option is selected RadioStar will calculate where the
break should be so as the break starts at about the time of break (e.g. break time 11:00).
If the above “Break Position” options get combined with the option “Start immediately”,
RadioStar will abide with the “break position” to be played at exactly the time of “break
time”.
Jazler Software 7
Jazler RadioStar 2
At the right of the above image we can see the “Priorities” section. “Priorities” is a very
useful feature of RadioStar for the breaks. You can adjust how the break is partitioned. You
can create for each element that the break will be consisted of, a corresponding priority.
RadioStar, depending on the other options you have set, will play the elements at the order
of priorities. In order to program the breaks the user has to set a priority as “Time
announcement” (yellow) and “Playlister Priority”, even if the user is not going to use them.
For example let’s take a special occasion: the USA radio stations are obliged by the law to
broadcast their station ID at the top of the hour within a short time slot. In order to achieve
that you can schedule a break at the top of the hour and because you want the station ID to
be broadcasted almost immediately, you have to check the “start immediately” feature and
add a priority with the name “Station ID”. This station ID priority has to be set as high as it
gets and before the time announcement. This way you ensure that the station ID will be
broadcasted at the start of the break and as a result as close as to the top of the hour and of
course within the time slot the laws oblige.
If for example the priority for station id was set lower than time announcement, spots and
almost every other element, the time of broadcast would be unpredicted and highly
depending on the duration of the break. The most possible scenario would be the station Id
to be broadcasted out of the allowed time slot.
By pressing the tab “Categories & Activity-Occupation” you will face the below image.
Figure 2-5
Jazler Software 8
Jazler RadioStar 2
Notice that in order to import a spot there must be at least one “Category” and at least one
“Activity-Occupation”.
At the left of the screen the user can see the “Categories” section. Here you can create
categories for the spots that will be created according to your needs. The image displays the
default categories that are actually the most used ones by radio stations. By pressing the
buttons “Add category”, “Delete category” and “set as default” you can edit the categories.
The noteworthy button “Set as default” gives the option that when a spot is imported the
default category that will be automatically selected is the one marked by this button.
At the right of the windows there is the section “Activity-Occupation”, that lets you edit the
corresponding filed for your commercial spots. The buttons “Add activity”, “Delete Activity”
and “Set as Default” let you edit the activity as you wish. The “set as default” option lets the
user define which activity will be automatically selected when importing a new spot to the
database.
Jazler Software 9
Jazler RadioStar 2
3 General Properties for Spots
When in control panel press “Options”, “General Properties”, navigate to “Rotation
Behavior” and you will be redirected to the below screen.
Figure 3-1
Here, there is a description for each field and you can customize them based on your needs
and preferences.
Jazler Software 10
Jazler RadioStar 2
4 Spots/Commercials
First of all the Spots are located in “Databases” and more particularly at
“Spots/Commercials Database”.
Figure 4-1
Jazler Software 11
Jazler RadioStar 2
Next step is importing our first spot! In order to do so press the “Add” button and the
screen, as shown in below image, will appear.
Figure 4-2
Figure 4-3
Jazler Software 12
Jazler RadioStar 2
In the above image we can see that Jazler prompts us to set the “expire date” of the spot.
For example when we have a spot and we know that the agreement with the customer says
the spot will play until a certain date we set as expire date the agreed one. If we do not want
a specific expire date we set to “never”. This can be achieved by pressing the default buttons
at the right or alternatively selecting a date from the calendar. For our example we will
choose the one month default. The selected date is displayed at the bottom of the screen
and we press the “OK” button. By default the RadioStar will prompt us to find the audio file
that we want to import. Once we find it and press ok we will be transferred to the spot
analysis for this spot. (Alternatively we can skip the selection of audio file at this moment
and press cancel. We can return later to import the audio file).
Figure 4-4
In the above image we can see the spot analysis of the spot. There are many fields that can
(and should be) filled in order to get the most of the Spot management RadioStar can offer.
We will refer to each field in order to make the spot analysis as understandable as it gets.
Spot General Title: Here you set the name of the spot/ad campaign. This can be tricky as you
can program RadioStar so all the spots from one particular client and for one “campaign” are
imported at the same place for convenience. For our example, our client is the Beach Bar
“SeaSide” and wants to have a campaign for this summer season with many spots!
Set: BeachBar_SeaSide
Status: In status we set the current status of the spot. For the newly (nearly) imported spot
the options are “Drafts” and “Active”. “Drafts” are the temporary spots that will be
Jazler Software 13
Jazler RadioStar 2
activated in the future or maybe never. “Active” are the spots that are ready and will begin
to be broadcasted, according to our programming for it. In our example the spot will be
configured and be activated right away.
Set: Active
Client: Here we set the client. If the client is already imported in RadioStar we can press the
button “Find” and select him. If it is a new client we press the button ‘New” and the next
screen appear.
Figure 4-5
Here you edit the information about the client. All fields are pretty straight forward except
the “Reference code”. The reference code is an alias for something to be recognized among
RadioStar2 Users (for example we have agreed to call this client “client A”). After inserting
the client we select him as the spot/ad‘s campaign.
Set: BeachBar_Seaside
Ad Company: Here we set the name of the company that has the management of the
campaign. Like for the field client, for the Ad Company we have 2 buttons “Find” and “New”
that work the same way. For our example we set the ad company as Jazler Software, our
own company.
Set: “Jazler Software”
Start date: Here we set the start date and time for the spot.
Set: 25/7/2014 23:59
Expire Date: Here we set expire date and time for the spot.
Set: 24/8/2014 23:59
Jazler Software 14
Jazler RadioStar 2
Programming mode: In this field you set the mode for the programming of the spots. By
programming we mean the days and hours of broadcast. There are 3 options, “daily”,
“weekly” and “Playlister”. When choosing Daily and then pressing the button “Days and
hours of broadcast” the below image will appear that has each day of the week available.
Figure 4-6
By selecting “weekly” and pressing the button “Days and hours of broadcast” the below
image appears that has the schedule organized weekly (At top every Monday, Tuesday etc. is
mentioned).
Jazler Software 15
Jazler RadioStar 2
Figure 4-7
The 3rd programming mode, “playlister”, is a special way of managing spots and is used with
combination of external third party programs and is explained in another manual.
Comments: In the comments field we can write the desired comment about the campaign.
Set: “The spot has to be broadcasted only at morning and night!!”
Category: This field indicates the type of the audio file that is imported. We will refer to this
extensively in a next chapter. But the main idea is that in spots database we can also set the
time announcement to be made or a station id (like for radio stations of USA have to play
the station ID at the top of the hour). In this example, the spot is a commercial one.
Set: “Commercial”
Activity: Like the “category” field, the “activity” field will be explained extensively in next
chapter. For our example the activity is “café”.
Set: “café”
Agreement Cost: This field is really informative and nothing more. You can just write the
agreement cost but have in mind that Jazler is not billing software.
Set: 0
Jazler Software 16
Jazler RadioStar 2
Media Shop: The Media Shop field is used to enter the creator of the audio file. In our
example we made the audio so we could just leave it blank or set to Jazler Software.
Set: Empty
Reference Code: Reference code is used by the RadioStar users to refer to an object with a
particular alias. For example the spot can be called “Project Era”.
Set: Empty
Days and hours of broadcast: This button redirects us to the screen where we can program
the days and hours of broadcast. This feature will be explained after we finish with the spot
analysis page.
Audio Files: You can import a second audio file, spot, and in our example we will import
“BeachBar_Seaside_Opening_10.8.14.mp3” file. By pressing the button “New” we will select
the new audio file and you will notice that that by pressing the arrow at field “Filename” 2
spots are inserted. One is for the opening of the beach bar and the other for the party they
will have. The buttons “Replace” and “Delete” are executing the corresponding events.
Set: 2 spots.
At the bottom half of the page there is a console with preview and audio file options for the
spots. Furthermore, we have “File alias”, “Playlister code” (explained in another manual)
“Varied Time Spot” and “RDS Message”.
“Varied Time Spot” when ticked basically forces RadioStar to ignore the checking of time for
the spot. This feature is used for permanent broadcasted audio that the actual audio files
have to change for e.g. every day, like news. This way, you will only have to replace the old
file with the new one, and keeping the exact same filename, without having to program the
news of next day again.
“RDS message”: This option is used when you would like a certain message to appear on
RDS receivers when this particular spot is playing.
Notice that when you change the selected spot at “Filename” the bottom half of the page
that refers to the audio file will change to the new audio file!!
Jazler Software 17
Jazler RadioStar 2
5 Programming the Spot
And now it is time to show the actual programming of the broadcasts! Just press the button
“Days and hours of broadcast” and the image below will be shown. Remember that the
screen will be different if the Programming Mode is set to “daily” and “weekly”. We will
make our example using the “weekly” feature.
Figure 5-1
At the left of the screen we have:
“Programming System”, which offers 3 choices
•
•
•
“In specific order”, letting the user decide which spot from the campaign will play at
which time,
“In order”, that broadcasts the ad campaign (if 2 spots and more in a respective
way) like 1st spot, 2nd spot 1st spot etc.
“Random”, RadioStar will choose spot from the specific campaign randomly.
When “in specific order” is selected, the field “file alias” shows and asks which file/spot will
be the chosen to start the set of broadcasts. While using the other 2 “programming
systems” the “File Alias” hides as there is absolutely no use of it.
Jazler Software 18
Jazler RadioStar 2
Also we have the field “Priority” with which we declare the priority of the spot, meaning
when in the break will the spot be played (we usually use the “time announcement” as a
marker, e.g. station ID before time announcement). In the case that many spots have the
same priority, RadioStar2 will choose randomly which spot will be played first and generally
the order of the spots. Otherwise, the priority will be maintained and spots with higher
priority will be broadcasted before the ones with lower priority! The highest priority is the
priority 1 and the lowest can depend on the preferences of the user (default value 100).
After defining the options, for our example we will use “In specific order” and choose firstly
the spot for the opening. Then we choose “priority” spots priority 01 and press the button
“Set Mode”. From this time we can press at any cell for the desired spot to be broadcasted.
After setting all the desired cells we change the “File alias” to the party spot and repeat the
procedure. After all the changes you can notice that at the timetable each spot is referred
with its filename.
By pressing right click in a cell we are shown the below image.
Figure 5-2
As you can see 6 options are provided.
Mark all days with this break: By selecting this option at a cell representing a break (e.g.
11:30) the spot will be programmed to play at the selected break for each day of the week.
Jazler Software 19
Jazler RadioStar 2
Clear All Days: This option will clear all the programmed spot for the selected break for all
days.
Copy selected day: By pressing this you copy the programed day.
Paste to this day: With this option you paste a copied day to the selected day.
Paste to all days: You actually paste a copied day to all days of the week.
Clear all: By pressing this you clear all the days and all the breaks.
Note that when “in Order” or “random” you set to the timetable the ad campaign and
RadioStar will choose the suitable spot based on “programming style”.
Also, when the auto preview selected breaks is checked the corresponding break will appear
with all the entries it contains.
Finally, after filling the timetable you can save the settings as a preset with an appropriate
name. When you will need to use the same preset, or almost the same, you can press the
button “Load preset” and a list will appear with options “SET to selected Day”, “Set to ALL
days” and “Delete”.
By pressing the “Ok” button the next screen will appear shown the spots database.
Figure 5-3
Jazler Software 20
Jazler RadioStar 2
6 Main Screen description
In the above image, we notice the newly added spot. In case of many spots you can sort
them based on your preferences by dragging the desired field in the “Drag a column header
here to group by that column…”
Double clicking the spot/campaign will bring onto foreground the corresponding page for
spot analysis. The only difference with the options discussed previously is that in current
status the options are “active spot” and “disabled spot”. By selecting “disabled spot” you
disable the spot/campaign and the programmed spots will not be broadcasted.
Figure 6-1
Right clicking the spot will bring a menu, as shown above, with options “Add new”, “Delete”
and “Edit”. The option “Expire immediately” will set the expire date accordingly in order for
the spot to expire. The option “Print full campaign schedule” will prepare a report with the
corresponding details that shows the broadcast program for the spot/campaign. On the
other hand, by clicking “report of actual broadcasted hours till now” will prepare a report
that shows the when the spot/campaign was actually broadcasted till now. Though, you
have to select the starting and ending dates for the preparation of the report.
Jazler Software 21
Jazler RadioStar 2
It is time to explain the status of spots: Drafts, Active, Expired and Disabled.
Figure 6-2
Drafts: A spot is characterized as Draft when it was created but it was never set to active. So
in fact it is a temporary spot.
Active: A spot/campaign is active when it is scheduled to be broadcasted and it still has not
reached it’s expire date. When the spot/campaign reaches the expire date will be an active
and expired spot. Being expired means it will not be broadcasted. Usually the spots with
these 2 statuses need to be disabled in order not to confuse the user, unless the
spot/campaign is going to be replaced shortly be a similar one (with similar settings).
Expired: This status indicates that the spot/campaign reached the expire date and as a
result, in order to be distinguished, it is lined out. Both active and disabled spots can have
status expired, if the expire date is met. The expired spots/campaigns will not be
broadcasted.
Disabled: This status indicates that the spot/campaign got disabled and will not be
broadcasted.
By pressing at the left screen one of the spots’ status the corresponding spots with the
respective statuses will appear.
Jazler Software 22
Jazler RadioStar 2
You can also filter the spots by selecting the desired category and “Ad Company” by
adjusting the fields “Category” and “Ad Company”. By clicking the “Reset” button all the
filters will be removed. We can now proceed to the tasks part that are being shown in the
bottom left of the below image.
Figure 6-3
The tasks are “Edit Spots Properties”, “Edit Ad Companies”, “Edit Clients”, “Print Report”
and the button “Program Spots by Breaks”.
“Edit Spots Properties”: Will be explained extensively in a following chapter.
“Edit Ad Companies”: Here you can edit the Ad companies List that is being used for the
spots/campaigns.
“Edit Clients”: Here you can edit the list of clients of your radio station.
“Print Report” : By clicking this option, you get the following screen with many options for
the printing of broadcasted spots (date, time and other information) or even a report for the
spots that will be broadcasted (date, time and other information).
“Program Spots by Breaks”: By pressing this button the below image will appear.
Jazler Software 23
Jazler RadioStar 2
Figure 6-4
This feature is mainly used for those who use the playlister feature for the spots. The use for
non-playlister users is that by selecting the break time from the left you can view what spots
and audio files are programmed to play at this break time. The use with playlister code is
explained in the corresponding manual.
Finally at the bottom of the “Spots Database” Screen there is the preview console. By
checking “Autoplay”, when an audio file is selected it will automatically start playing.
Figure 6-5
Jazler Software 24
Jazler RadioStar 2
7 TIPs
•
•
•
•
•
•
•
•
•
If you do not want to set the client for each spot just create a fake client with name
“default” or “- -” to use them as default.
For USA, station ID at top of the hour please check out the special occasion at page
7.
You can manage spot analysis as an ad campaign for multiple spots. For example a
shop selling clothes would like a campaign with 2 spots one for men’s clothes and
one for women’s clothes broadcasted, both, at August!
If you change in programming timetable the programming style all the cells
containing spots from the ad campaign will automatically change to the system
chosen.
The option “Print full campaign schedule” will prepare a report with the
corresponding details that shows the broadcast program for the spot/campaign. On
the other hand, by clicking “report of actual broadcasted hours till now” will prepare
a report that shows the when the spot/campaign was actually broadcasted till now.
When entering the “Spots/Commercials Database” IF active spots are located that
have expired there will a prompt window informing the user about it.
Everything that will be played at a break must be imported as a so called “spot” in
the “Spots Database”. In order to distinguish the different elements in the “spots
database” you use the categories of spots.
Notice that in order to import a spot there must be at least one “Category” and at
least one “Activity-Occupation”.
The highest priority of a spot is the priority 01 and the lowest can depend on the
preferences of the user (default value 100). The higher the priority the sooner the
spot will be broadcasted at a break.
©2014 – Jazler Software – All rights reserved
January 2014 – Jazler Labs, Mytilene, Greece