1
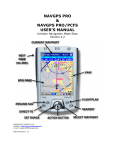
NAVGPS BASIC
(version 2.5)
USER MANUAL
1 Overview
Navgps is an aviation navigation software for Windows and PocketPC computers.
Navgps Basic features:
o World-wide database support.
o Airport runway info and communication frequencies.
o Airspace and SUA info.
o Flight-plans with auto and manual sequencing of waypoints.
o Nearest airport.
o Flight tracking.
o Alarms, count-down timers and gear-warning.
o User-extendable database format.
o Customizable color schemes.
o PocketPC version – programmable hardware buttons.
This document is written as a quick-start and a reference manual. It details the PocketPC
version specifically, but differences between that and the Windows version is minimal.
2 Setting Up
This section will explain how to get all the required hardware and software setup for a
simple test run.
2.1 Platforms
The first thing you have to do of course is figure out what platform you’d like to install
Navgps on. If you already have a Windows laptop, then that might be an option. But that
could get bulky in the cockpit, so a handheld might be in order.
If you’re starting with a fresh slate, then the Compaq iPAQ PocketPC is recommended.
It’s compact, relatively fast processor and most importantly has a sunlight readable
screen.
2.2 Installing Navgps Software
Trial versions of Navgps can be downloaded from http://www.GoNavgps.com. These
versions are fully functional for a period of 30 days and should give you a good idea on
the capabilities of the software.
The downloaded programs for the different platforms will automatically install the
software. These programs contain sample av-data for a given region – that is the data is
not current and also airspace data is not included.
Some user’s living outside USA/Europe might have to download free sample av-data for
their region.
2.3 GPS Receivers & Cable setup
To be compatible for use by Navgps, GPS receivers need to:
o Have a cable connection that can be hooked up to a standard PC.
o Send messages compatible with NMEA 0183 protocol.
The good news is that most gps handheld units qualify on both counts.
There’s an online page, that goes into detail about how to setup the hardware and getting
it to work with Navgps – so that information will not be repeated here.
http://www.GoNavgps.com/gps.shtml
3 Getting Started
It’s assumed at this time you have Navgps up and
running. It doesn’t matter if you have a gps receiver
connected or not.
3.1 Initial Startup Screen
When you start Navgps, the first screen will show all
the region-databases that are currently installed. You
can install any combination of the eight regions that
covers the world.
If the region database file is a sample release, it’ll say
so. Otherwise, the expiration date of the database will
be displayed. The database files expire after their 28day active period. Database files can be used after
expiration.
After reviewing, click on the ‘Done’ button at the
bottom.
At this time Navgps displays a gps-status message on the screen. For now we’ll assume
that you don’t have a receiver connected. Later, if you have any connection problems
when you connect a receiver, please read the section 2.3.
3.2 Main Screen
Select Options?Simulator from the menu to enter sim-mode. Depending on what
databases you have loaded (or previous setting), you’ll be positioned at a given location.
In sim-mode, you’ll be traveling at a fixed speed (150 knots) and initial heading will be
north. You can turn by pressing the LEFT-ARROW and RIGHT-ARROW keys.
You can get information on any of the displayed navaids/airports by clicking on the
identifier – an information box will be displayed.
For example, the blue box is the information displayed when the user clicked on 4N1 –
the identifier for Greenwood Lake airport.
If you click on the round-button with the D, you’ll
be given nav-info direct to that navaid/airport.
In the case of airports found in NG2 type
databases, you also have the info button (button
with an i) and the APP button. Clicking on the info
button will display information specific to that airport. For example, the communication
frequencies and the active runways.
You can get rid of the info-box by clicking on any non-button area of the box – i.e. the
cyan area.
You can also control what’s displayed on the moving-map by clicking on the toolbar
icons. Depending on what you’ve chosen in Preferences, you can make the display a
toggle (on/off) or make them rotate through
different navaid usage-categories. For
example, you can rotate through terminal,
low-altitude and hi-altitude fixes.
Another way of navigation to a station is by
the Options?Go To menu selection. With
this, you can also optionally enter a radial to
intercept.
3.3 Flight-Planning
There are two different ways of creating
your flight-plan.
3.3.1 Graphical Planning
This option allows you to click on the
navaids in your route
Select Options?Edit Plan to create a flight
plan. Creation of flight-plans is optional.
Once you’re at the flight-plan screen, you’ll
be displayed a moving map. The orientation
is always true north up. The arrow on the top-right hand corner points to magnetic north.
At this time you can look for your first waypoint in the plan. This can be done by:
Search for it by panning the screen. Hold the stylus down on one side of the screen and
move it towards the center. Or press the ARROW keys in the direction you want to pan.
Select the Options?Find menu selection. On finding the navaid, it’ll be positioned under
the cross-hairs.
Waypoints can be added by clicking on the identifier. The info box will be displayed.
If the waypoint is not currently in the flight-plan, a button with a ‘+’ (plus) is displayed.
Click on it to add it to the plan.
If the waypoint is in the flight-plan, a button with a ‘-‘ (minus) is displayed. Click on it to
remove it from the plan.
All the waypoints in the plan will be displayed in a different color and they’ll be
connected by a line (the planned flight-path).
One particular waypoint in the plan, might also be under-lined – that’s the insertwaypoint (in the example N82). It’s the waypoint after which the next added waypoint
will be inserted. Clicking on a waypoint in the plan or adding a new one makes that the
insert-waypoint.
Also, note that the total distance is displayed on the bottom right.
Select Plan?Edit again to exit edit-mode.
3.3.2 Text Entry Planning
This method allows you to enter the route as a sequence of identifiers. If you know the
identifiers in advance, this is a much faster way of creating the plan.
This option can be selected by clicking on the Plan?Enter Route menu option. Then
within the text entry box, enter the navaid/airport identifiers in your route separated by
spaces.
If you wish, you can then select Plan?Edit menu option to view the full route
graphically.
4 Appendix
4.1 Menus
4.1.1 Plan Menu
o Clear – creates a blank flight-plan. Also clears the
existing flight-plan.
o Open – pops up a file-open dialog box. Select a
flight-plan file. It’ll be the active flight-plan.
o Save – saves the existing flight-plan.
o Save As – Enables you save the current flight-plan
under a new name.
o Edit Plan – Enters flight-plan edit-mode. If currently
in edit-mode (there should be a check-mark next to
this item), selecting again exits edit-mode.
o Enter Route – Enables you to enter/edit the flight-plan in text mode.
o Reverse – Gets enabled when there’s an active flight-plan. With reverse
selected (check-mark next to item), it’ll be assumed that you want to fly the
reverse of the active flight-plan.
o Exit – exit Navgps.
4.1.2 Options Menu
o Track Flight – When enabled (check-mark next to
item), your current ground track will be saved.
By default, you’ll be able to view it when you’re in
edit-mode only. This can be overridden via the
preferences menu.
o Clear – Clears the track history.
o Set Alarm – Allows you to set timer/alarms.
o Go To – Allows you to directly go to an airport or
navaid.
o Resume Nav – If you’ve temporarily deviated from
a flight-plan (by going to another navaid/airport),
selecting this option will allow you to resume your
flight-plan navigation.
o Nav Table – Allows you to view the current
navigation status in a table format.
o EFIS – Switches to EFIS mode
o Map – If de-selected (no check-mark), the movingmap will not be displayed.
o HSI – If de-selected, the HSI will not be displayed.
o Nav – If de-selected, the Nav data, will not be
displayed.
o Simulator – If checked, you’ll be in simulator mode.
See all the functionality of the software on the ground and/or without a gps
receiver.
o Prefs – Allows you to set your preferences.
o About – Displays information about the software release.
4.2 Command Keys
4.2.1 Flight-plan edit mode
Key
UP-ARROW
DOWN-ARROW
LEFT-ARROW
RIGHT-ARROW
Command
Scroll moving-map up
Scroll moving-map down
Scroll moving-map left
Scroll moving-map right
4.2.2 Main Nav Screen
Key
UP-ARROW*
DOWN-ARROW*
LEFT-ARROW*
RIGHT-ARROW*
‘+’/’-‘ on the
keypad. Or ‘s’ and
‘w’
Shift ‘+’/’-‘ on the
keypad. Or ‘a’ and
‘q’
Shift-LEFT/RIGHTARROW
Command
If there’s a flight-plan active, selects the next waypoint.
If there’s a flight-plan active, selects the previous waypoint.
In sim-mode, turns the plane left 5 degrees.
In actual flight-mode, zooms out.
In sim-mode, turns the plane right 5 degrees.
In actual flight-mode, zooms in.
In sim-mode, adjust speed.
In sim-mode, adjust altitude.
In sim-mode, change the heading of the airplane by 1 degree.
*Note: If the screen is flashing because of an alarm or gear-warning, pressing one of
these ARROW keys, stops the flashing.
4.3 Preferences
When you select Option?Preferences, the preferences dialog box pops up. This dialog
has two different pages.
4.3.1 Basic Preferences
GPS Port/Baud
The top two entries allow you to select the communication port the gps receiver is
connected to. For handhelds, it’s almost always COM1.
The next entry allows you to select the speed at which the gps receiver is transmitting the
data. 4800 seems to be the default for most.
If your gps requires non-standard port and speed values, you can type them in.
Preferences
Next is a series of check-boxes for you to configure your software:
o Auto-sequence flight-plan waypts
With an active flight-plan, the next waypoint selection is based on your
current track. Navgps will automatically choose the waypoint whose bearing
is closest to your current track. So as you bank left and right, waypoints will
be chosen automatically. (see section 4.3.3)
o Enable hint/help messages
Enables messages at the bottom left of the screen. Tapping on the message
box will make it go away.
o Display navaids as icons
Enables the display of navaids/airports as bitmap images. Otherwise, you'll
see drawn images.
o Auto-zoom
Useful when you have a flight-plan active. With this feature enabled, Navgps
will always try to make sure that the current waypoint is visible - zooms in as
close as possible. For performance reasons, this feature is overridden when the
waypoint is relatively far away.
Also depending on your airspeed, it'll zoom in/out. For example, on the
ground it'll zoom in for you to see the runways.
o Auto-view select
On the ground, the HSI view is selected and once airborne, the EFIS view is
selected. This feature is slaved to Auto-zoom.
o Rotate thru off/low/[high]/term navs
When enabled, as you click on the toolbar navaid buttons, navaid display will
rotate through the different types. low-altitude, terminal and then off.
If disabled, then the toolbar buttons act as an on/off toggle.
o View High-alt navs
Allows you to view high-altitude navaids. If above rotate feature is enabled
then High-alt navs will be part of the rotation.
o Gear warning
If you fly a retractable gear plane, enter the typical ground-speed (not the
approach speed). You'll get a gear-down warning when you reach this speed.
You can reset the warning by tapping anywhere on the screen or pressing one
of the ARROW keys.
o View track in plan-edit mode only
By default when you enable tracking, you'll see the track as you fly. This can
slow down the screen update. When you enable this, tracking will occur but
only be viewable in edit mode - typically on the ground after the flight.
o Enable airspace display
If you find the screen update slow, you have the option to disable the display
of airspace data.
4.3.2 Advanced Preferences
Color Scheme
The top control allows you to select the color scheme. Navgps comes with two built-in
ones – default and night-flight.
You can create your own color schemes (see section 4.5) After doing so, the name of the
scheme will appear in this list and then you can set it to be the active one.
Default ICAO Prefix
This entry allows you to set the default ICAO prefix for the airports.
Airports with ICAO designations have four letters in their identifier. This feature allows
you to view and enter just the last three letters – less screen clutter.
Sim-mode Start Position
Allows you to set the start-position when you enter sim-mode. For example, you could
set it to airport you’re based at. You can:
o Select a region database. The default for that region will be used.
o Enter the navaid/airport identifier.
o Enter the latitude/longitude.
4.3.3 Buttons Preferences (PocketPC only)
The PocketPC version of Navgps, allows you to assign different functions to the four
hardware buttons on the front of the pda.
The functions you can assign are:
o No Assignment – the default system action will be active. For example,
calendar, contact etc.
o Toggle screen on/off – enables you to turn the screen on and off. This would
be useful if you’re running off batteries because the screen is quite a drain on
them. Important note: If the screen is off when a gps connection is lost –
Navgps will automatically turn it on.
o Goto/Find Navaid – pops up the goto/find dialog.
o Resume Nav – cancel current waypt and go back to flight-plan route.
o Toggle Edit Plan – enables you to enter and exit flight-plan edit mode.
o Enter Route – pops up the enter-route dialog.
o Preferences – pops up the preferences dialog.
o Nearest Airport – directs you to the nearest airport and will also put you in
approach mode.
Note that if there’s currently a dialog box popped up on screen, pressing an assigned
button will not pop up a second dialog box simultaneously. You’ll have to shut down the
first dialog, before the other can be popped up.
4.4 Flight-Plan Sequencing
When you create a flight-plan, Navgps allows
you two ways of sequencing the waypoints –
in other words, selecting the current
destination waypoint.
The two modes are auto and manualsequencing. You make the selection via the
Preferences menu. If you put a check-mark
next to ‘Auto-sequence flight-plan waypts’,
auto-sequencing is selected, else manual.
4.4.1 Auto Sequencing
In auto-sequencing, Navgps picks the
waypoint whose bearing is closest to the
current track of the plane.
Therefore, you can select the active waypoint
by just turning approximately in the direction
of the desired waypoint.
For example, take the flight-plan to the right.
SAX is chosen because it’s bearing is closest
(326) to the current track (335). If the pilot
turned left, BUDDS would be chosen and if he turned right N07 would be chosen.
Also, note that for those waypoints whose bearings are approximately the same (N07 and
4N1), Navgps will give preference to the nearer one.
You can use the UP-ARROW and DOWN-ARROW keys to manually select a waypoint.
But within 15 seconds, Navgps will revert back to auto-sequencing. Within that time you
should turn towards the desired waypoint.
4.4.2 Manual Sequencing
In manual sequencing, Navgps sets the destination to the first waypoint in the flight-plan.
As you come within 1 nm radius of that waypoint, the next waypoint is selected.
So in the same example to the right, the first waypoint would be N07 – until you flew
within 1 nm radius of it, then it would be BUDDS and so on.
You can override this selection process by using the UP-ARROW and DOWN-ARROW
keys to select waypoints manually. So if ATC says fly 4N1 direct, you’d press the UPARROW until 4N1 is the active waypoint.
4.5 Alarms and Timers
These are enabled through the Options?Set Alarm menu selection.
When you view the Alarms dialog, there are options for selecting one of three alarms.
The first one is the count-down timer and the other two are alarms.
Select the one you’d like to set and then set the values for the fields below them
Enable
Repeat
Time Interval
Message
Set it to enable that particular alarm/timer.
Set it so that it repeats after the user resets the alarm after activation
Enter the time (in minutes) when the alarm/timer is to be activated. For
example, for 02:30 would be entered as 2.5
Enter the message that you’d like to see displayed when the alarm/timer
is activated.
When you enable the timer, it’s displayed on the top-right hand corner – but it’s NOT
started. It’s started when you tap on it. After it counts down to zero, the message you
enter will flash in that part of the screen. After you reset it (by tapping on the message),
the timer will be armed once again.
The alarms time start as soon as you click on ok. When the set time has elapsed, the
entire screen will flash with the message you entered. You can reset the flashing by
tapping anywhere on the screen or by pressing one of the ARROW keys.
The values you enter for the alarm/timer is saved between sessions.
4.6 Color Scheme Files
Navgps allows you to specify your own colors if you’re not happy with the built-in
schemes.
You have to create a scheme-file. This is a text file and has extension SCM. An example
of one can be found at http://www.GoNavgps.com/misc/my-day.scm.
When you look at that file, you’ll find it’s a simple text file. You can edit it in notepad if
you wish.
Once you’re done with the file, using Activesync save the new file in the Navgps datafolder (section 4.8). Start Navgps and select the new file from the Advanced page of the
Preferences dialog.
4.7 Creating Your Own Navaid/Airport Databases
There might be cases where Navgps does not include the airport, navaid or fix that you’d
like included. In such cases Navgps, allows you to create your own database files.
These files are simple text files of a specific format and are explained in great detail at:
http://www.GoNavgps.com/ndb.shtml
4.8 Data-Folder
The data-folder is the place where all secondary files are stored. For desktop users, it’s
the same folder as the Navgps.exe file. For handheld users, it’s “\Program Files\Navgps
Basic”.
Serial.txt
*.NG2
*.SCM
*.NDB
Files to help you trouble-shoot gps receiver connection problems.
Region navaid/airport database file
Color scheme file (optional)
User-created database file (optional)
Software Licensing Terms
Trial Version
You're licensed to use the software for 30 days from the day of installation on any unique
supported device. The software will be fully functional for that period of time. You may,
if you wish, distribute the software (unmodified) freely.
After the expiration of this period, the software will not function and you're not
authorized to extend the period in any way.
Purchased Version
For each copy of Navgps you've bought, you're licensed to install and use it on that many
unique supported devices.
For example, if you buy a copy of Navgps, when you run the program for the first time
you'll be asked note down the device-identifier and then to register online.
During the registration process, you’ll enter your device-identifier and will in turn receive
the registration key. You'll enter that key in Navgps once and you're set.
The registration-key may/will not work on other platforms and other devices of the same
make/model. That means, if you've bought one copy:
o you cannot install it on multiple devices of the same make/model. For
example, two different iPAQs.
o you cannot install it on different platforms. For example, one on the iPAQ and
another on the Windows desktop.