1
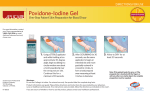
Running title: Specimen Collection: Guidelines for Best Practices
Ruth Carrico
BASIC GUIDELINES FOR COLLECTION
There are several guiding principles that should be considered and understood prior to
obtaining/collecting any specimen.
1.
Collect the material from the site in which the etiologic agent will most likely be found.
2.
Collect the specimen at the optimum time (e.g.,early morning sputum for acid-fast bacillus
(AFB).
3.
Obtain cultures prior to administration of antibiotics whenever possible.
4.
Collect adequate volume of material. Inadequate amounts of specimen may yield false negative
results.
5.
Collect specimen in a manner that minimizes or eliminates contamination from indigenous flora
as possible to ensure that the sample will be representative of the infected site.
6.
Use appropriate collection devices, transport media, and sterile, leak proof containers.
7.
Use sterile equipment and aseptic technique to collect specimen to prevent introduction of
microorganisms during invasive procedures.
8.
Clearly label the specimen including specific information regarding site of collection (e.g., blood
obtained via blue lumen of right subclavia central catheter) and complete the ordering process.
9.
Identify the specimen source and/or specific site correctly so that proper processing methods
and culture media will be selected by the laboratory personnel.
10.
If the specimen is collected through intact skin, cleanse the skin first with 70% alcohol followed
by an iodine solution (e.g. povidone-iodine) or chlorxidine/alcohol combination. If iodine is used,
remove excess iodine after the specimen has been collected.
11.
Provide clear instructions fto patients if they are collecting their own specime (e.g., clean catch
urine,or stool) in order to obtain the best quality specimen and allay their fears.
12.
Deliver the specimen promptly to the laboratory.
specimen.
13.
As with all patient contact episodes, consistent attention must be given to hand hygiene and use
of appropriate personal protective equipment.
14.
Use appropriate safety devices to minimize risk of accidental needlestick, cut or puncture. It is
advisable to make sure the user is knowledgeable about how the safety device works prior to its
use.
Draft 12/22/05
Delay in transport may compromise the
Running title: Specimen Collection: Guidelines for Best Practices
Ruth Carrico
BLOOD CULTURE:
Ensuring that blood cultures are obtained in a manner that prevents contamination is a cornerstone of
an infection prevention and control process. In addition, the increasing use of blood cultures obtained
through vascular/arterial devices necessitates meticulous technique and timely communication with the
microbiology laboratory.
Timing and Number:
Acute Sepsis: Collect two or three sets of cultures from separately prepared sites prior to starting
antimicrobial therapy. Each set consists of two bottles, one aerobic and one anaerobic or two
aerobic.
Endocarditis:
Acute:
apart in
Obtain three blood cultures from separate venipuncture sites over 1 – 2 hours,
prior to beginning therapy. These cultures are often obtained 30 minutes
order to document persistent bacteremia.
Subacute:
obtain three blood cultures on day 1 (15 minutes or more apart). If cultures
are negative after 24 hours, obtain 3 more.
Pediatrics:
collect one low volume pediatric bottle for all submissions.
Volume of Blood:
The volume of blood is critical because the concentration of organisms in most cases of
bacteremia is low, especially if the patient is on antimicrobial therapy. In infants and children,
the concentration of organisms during bacteremia is higher than in adults, so less volume of
blood is required.
Adults: 10 ml of blood per culture bottle
Children and infants: 1 – 3 ml of blood per culture bottle. The volume necessary is dependent
upon the weight of the child/infant so contact the microbiology department prior to
obtaining the blood if assistance is needed in determining the correct amount of blood needed for that
individual child/infant.
NOTE: In the event that 10 ml or less of blood is obtained from an adult, put it all into one
aerobic blood culture bottle.
Collection:
Blood can be collected by venipuncture of peripheral veins or arteries. Collection from
intravascular catheters is not recommended as they are intrinsically contaminated. If a line must
be used, indicate the type of line or port through which the blood was obtained.
Draft 12/22/05
Running title: Specimen Collection: Guidelines for Best Practices
Ruth Carrico
Collection Technique:
Technique is important to prevent contamination of the blood resulting in inaccurate results. The
following represent basic tips to help ensure the highest quality results.
•
Perform hand hygiene, explain the procedure to the patient prior to collection of all specimen,
and utilize all appropriate safety equipment.
•
Locate the venipuncture site prior to skin disinfection.
•
Disinfect the venipuncture site and the stoppers of the bottles prior to blood collection.
•
Use chlorhexidine /alcohol combination (e.g., ChloraPrep™) for skin disinfectantion for optimal
results.
•
Disinfect the top of the blood culture bottle(s) with 70% isopropyl or ethyl alcohol.
•
Scrub the site using a chlorhexidine/alcohol swab or wand.
•
Allow the disinfectant to dry. (DO NOT palpate the vein after disinfecting the skin prior to
inserting the needle.)
•
Draw blood using a sterile safety syringe and needle, or safety butterfly designed to attach to a
vacutainer holder and dispense the appropriate amount of blood into the bottles.
NOTE: The blood culture bottles can be used with the vacutainer adapter, but it may not deliver a
controlled draw. Care must be taken to dispense the appropriate amount of blood into the culture
bottle.
•
After venipuncture and inoculation of bottles, engage safety device on needle or butterfly and
immediately dispose of collection materials in a sharps container.
Wipe residual
chlorhexidine/alcohol from skin with alcohol to prevent irritation of the skin.
•
Indicate site of draw, date and time of draw, and initials of person drawing blood.
•
If blood has been obtained through an indwelling intravascular device, provide specific
information including lumen and location of the device.
•
Transport blood cultures to the Laboratory IMMEDIATELY. Do not refrigerate.
transport may compromise the specimen and recovery of organisms.
Draft 12/22/05
Delay in
Running title: Specimen Collection: Guidelines for Best Practices
Ruth Carrico
Sample Procedures for Collection of Blood Culture from an Adult Patient
POLICY/PROCEDURE
Subject:
BLOOD CULTURE, COLLECTION FROM AN ADULT PATIENT
Author:
INFECTION CONTROL
PURPOSE: To provide guidelines for obtaining blood samples for culture in a manner that minimizes
contamination and maximizes clinically relevant results.
POLICY STATEMENTS:
1. Critical elements involved in obtaining blood cultures includes adequate skin disinfection,
adequate blood volume (i.e., at least 10 cc per bottle for adults), and hand hygiene practice
performed by the collecting healthcare worker.
2. Blood cultures are to be drawn 30-60 minutes apart unless ordered otherwise by the clinician.
3. If one culture is to be obtained from a central vascular access device (CVAD) and another via a
peripheral venipuncture, those cultures can be obtained one right after the next unless otherwise
ordered by the clinician.
4. If a peripheral blood culture is ordered to be obtained after removal of a CVAD, blood for that
culture should be obtained 30- 60 minutes after removal of the CVAD.
5. Blood drawn via arterial lines is never an acceptable specimen for blood culture in the adult
patient. Blood drawn via an unbilical artery catheter (UAC) is acceptable practice in the
neonate.
6. Peripherally drawn blood cultures represent the optimal specimen as those obtained via CVAD
are more likely to be contaminated by organisms residing in the device itself or device
components (i.e., tubing, end caps).
7.
Blood specimen collection may be drawn from CVADs by Registered Nurses or physicians
only.
8. It is not within the scope of LPN practice to aspirate any CVAD for blood specimens.
9. Appropriate safety devices and personal protective equipment must be used when obtaining any
blood specimen. Examples of such safety devices include safety needle/butterfly, blood transfer
device, and gloves. Additional safety devices are selected and used based upon anticipated
activities of the individual obtaining the specimen.
10. If the patient has a multi-lumen device (i.e., triple lumen central venous catheter), it is not
necessary to draw cultures from each of the lumens unless specified by the ordering clinician.
Draft 12/22/05
Running title: Specimen Collection: Guidelines for Best Practices
Ruth Carrico
PROCEDURES:
Peripheral blood culture- Adult
11. Gather supplies:
a. Exam gloves
b. Blood culture bottles
c. Tourniquet
d. Chlorhexidine/alcohol combination for skin preparation
e. Alcohol swabs for disinfecting top of blood culture bottle(s)
f. Syringes- sized to allow 10 cc of blood per culture bottle to be filled
g. Safety needle
h. Blood transfer device (one for each blood culture bottle to be filled)
i. Adhesive bandage or gauze for venipuncture site dressing
j. Labels and transport bags for blood culture bottles
12. Verify clinician order.
13. Perform hand hygiene.
14. Verify patient’s identity and explain procedure to patient.
15. Apply tourniquet and identify vein. Release tourniquet if delay is expected prior to performing
venipuncture and reapply immediately prior to venipuncture.
16. Remove hard plastic top from blood culture bottles and swab rubber top with alcohol swab.
Leave alcohol swab on top of bottle to prevent inadvertent recontamination of the top.
17. Disinfect skin at proposed venipuncture site using chlorhexidine/alcohol combination. Scrub
anticipated area at the proposed venipuncture site using vigorous motion for approximately 30
seconds so area the disinfected area is at least 5 cm x 5cm
18. Don gloves.
19. Do not touch prepared area of skin as this causes recontamination of the disinfected site.
20. Using syringe with safety needle, perform venipuncture and obtain a minimum of 10cc per blood
culture bottle to be filled.
21. Release tourniquet.
22. After obtaining the necessary blood volume, remove needle from patient and activate safety
device.
23. Apply pressure and cover venipuncture site with gauze and/or adhesive dressing.
24. Remove needle from syringe (be sure safety device is activated first) and discard needle in
appropriate sharps container.
Draft 12/22/05
Running title: Specimen Collection: Guidelines for Best Practices
Ruth Carrico
25. Remove alcohol swab from top of blood culture bottle then open blood transfer devices and
place on top of each blood culture bottle.
26. Put hub of syringe into blood transfer device and activate the transfer device by pressing device
firmly onto top of blood culture bottle. Vacuum from the blood culture bottle will pull blood
from the syringe into the culture bottle.
27. Allow at least 10 cc of blood to transfer from syringe into blood culture bottle. Verify that the
appropriate volume transfer has occurred by looking at the volume measurement indicators noted
on the side of the culture bottle.
28. Remove syringe from transfer device and repeat the process (Steps 25-27) for the second blood
culture bottle.
29. When second bottle has received the appropriate amount of blood (i.e., at least 10 cc for adult
patients), remove syringe and the transfer device from both blood culture bottles and place them
in the designated sharps container.
30. Check on patient’s venipuncture site to ensure bleeding has stopped.
31. Remove gloves and perform hand hygiene.
32. Prior to leaving the patient’s bedside, label bottles and ensure the order contains information
including time of draw and site of draw as well as other information outlined in hospital blood
collection policy.
33. Send blood cultures to the lab in accordance with hospital procedure for transport.
Central line blood culture- adult
1. Verify physician’s order for blood specimen collection, and assess appropriateness of using
central venous access device (CVAD) for this purpose.
2. Gather supplies
a. Exam gloves
b. Blood culture bottles
c. Alcohol swabs to disinfect top of blood culture bottle(s)
d. Syringes- sized to allow 10 cc of blood per culture bottle to be filled
e. Blunt cannula for each syringe (syringes for blood draw, syringe for priming new end
cap, and for each flush)
f. Prefilled normal saline syringes (preservative free)
g. Sterile end cap
h. Blood transfer devices
i. Labels and transport bags for bottles
3. Perform hand hygiene.
Draft 12/22/05
Running title: Specimen Collection: Guidelines for Best Practices
Ruth Carrico
4. Verify patient’s identity, and explain procedure to patient.
5. Remove hard plastic top from blood culture bottles and swab rubber top with alcohol swab.
Leave alcohol swab on top of bottle to prevent inadvertent recontamination of the top.
6. Don exam gloves.
7. Discontinue administration of all infusates via the CVAD prior to obtaining blood samples. If
tubing disconnected, put a new sterile end cap or connecting device on the end of the tubing.
8. Attach a blunt cannula to the syringe containing the preservative-free normal saline.
9. Using an alcohol swab, scrub the end cap of the lumen that will be used to obtain the blood
specimen for approximately 10 seconds then insert blunt cannula into the end cap The distal
lumen of the multi-lumen CVAD is the lumen of choice.
10. Flush the lumen of the CVAD with at least 3 – 5 ml of the preservative-free normal saline.
11. Discard that flush syringe in the sharps container.
12. Attach a blunt cannula to an appropriately sized syringe (capable of withdrawing at least 10cc of
blood for each adult culture bottle).
13. Disinfect the end cap with alcohol, again using a vigorous scrubbing motion for approximately
10 seconds, then insert that newly prepared syringe with blunt cannula into the disinfected end
cap. Save the blunt cannula cap so it can be used to recap the blunt cannula for removal from
syringe as noted in step # 16.
15. Aspirate enough blood to allow 10 cc for each blood culture bottle (adults).
16. After enough blood has been drawn, remove syringe and replace blunt cannula cap so the
cannula can be removed without contaminating the syringe tip and specimen. Even though the
blunt cannula is not considered to be a sharp, recap carefully.
17. Remove alcohol swab from top of blood culture bottle. Open and place a sterile blood transfer
device onto each blood culture bottle.
18. Put the hub of the syringe containing the blood into the blood transfer device and press down to
active the device by piercing the top of the blood culture bottle. Using the blood transfer device,
transfer blood into the first blood culture bottle(s). Check markings on the side of the bottle to
ensure that at least 10 cc of blood has been used to inoculate the bottle.
19. Remove the syringe from the blood transfer device and insert it into the blood transfer device on
the next blood culture bottle and repeat the activities noted in steps #17-18.
20. Discard blood transfer devices, syringes, and blunt cannulas into appropriate sharps containers.
Draft 12/22/05
Running title: Specimen Collection: Guidelines for Best Practices
Ruth Carrico
21. Clamp the CVAD lumen in preparation for changing end cap.
22. Prime a new, sterile end cap with preservative free saline taking care to maintain sterility.
23. Remove the existing end cap and place aside for discard into regular waste.
24. Maintaining sterility of the components, connect the new, primed sterile end cap onto catheter
lumen and unclamp the lumen.
25. Flush catheter lumen with at least 10 cc of preservative-free normal saline using the prefilled
10cc syringes. Make sure to flush all visible blood from the end cap.
26. Re-establish IV fluids in accordance with physician orders making sure to vigorously swab the
end cap with an alcohol swab for approximately 10 seconds before connecting the fluids into the
end cap.
27. Remove gloves and perform hand hygiene.
28. Prior to leaving the patient’s bedside, label bottles and ensure order contains information
including time of draw and site of draw as well as other information outlined in hospital blood
collection policy.
29. Document procedure on the patient’s nursing flowsheet.
Draft 12/22/05
Running title: Specimen Collection: Guidelines for Best Practices
Ruth Carrico
GENITAL SPECIMEN:
Female: Genital tract specimen are submitted primarily for detection of sexually transmitted
pathogens. If infection is not caused by one of these pathogens, anaerobic bacteria may be involved.
If anaerobic infection is suspected, transport the specimen in an anaerobic collection system.
Male: For urethral cultures, collect specimen at least 2 hours after the patient has urinated. Obtain
specimen by inserting a thin urogenital swab 2 – 4 cm into the endourethra, gently rotate it, leave in
place for 1 – 2 seconds, then withdraw it.
COLLECTION CONSIDERATIONS FOR GENITAL CULTURES
ORGANISM
RECOMMENDED SPECIMEN
TRANSPORT SYSTEM
Culturette, Martin-Lewis plate
(culture)
M4 transport (PCR) – send on
ice, and transport to the
Microbiology Laboratory
immediately.
Neisseria gonorrhoeae
Cervical, urethral, vaginal,
anal (culture only)
Bacterial
Prostatic fluid, cervical, vaginal
Trichomonas vaginalis
Vaginal, prostatic fluid
Fungi
Anal, vaginal or cervical
Anaerobes
Epididymis aspirate, amniotic
fluid, abscess fluid
Anaerobic transport
Herpes Simplex Virus (HSV)
Genital or perianal lesion
Viral or M4 transport
Culturette, or sterile container
Sterile container
Culturette or sterile container
Viral or M4 transport for culture
Urine (male/female)
Chlamydia trachomatis
Treponema pallidum
Ureoplasma urealyticum
Draft 12/22/05
Urethral (male), cervical, vulva
(culture only)
Genital lesion (Note:
secondary lesions of syphilis
are most commonly found on
mucous membranes and skin
including palms of hands and
soles of feet, but any body
organ may be involved.)
Urethral, epididymis or prostatic
fluid.
M4 transport (PCR) – send on
ice and transport to the
Microbiology Laboratory
immediately.
Prepared slide in sterile
container.
Contact Laboratory for
transport medium.
Running title: Specimen Collection: Guidelines for Best Practices
Ruth Carrico
SUBCUTANEOUS AND SKIN SPECIMEN:
A. Burn Specimen:
1. Disinfect the surface of the burn with 70% alcohol followed by povidone-iodine or
povidone- iodine alone. Allow the skin disinfectant to dry prior to collection of the
specimen. Remove the iodine with alcohol after the procedure to prevent additional
irritation to the tissue.
2. Blood cultures should be used to monitor patient status concerning sepsis.
B. Superficial Wound (bacterial)
1. Syringe aspiration is preferable to swab collection.
2. Disinfect the surface of the wound with 70% alcohol followed by povidone-iodine or
povidone-iodine alone. Allow the skin disinfectant to dry prior to collection the specimen.
Remove iodine with alcohol after procedure to prevent irritation.
3. Using a 3 – 5 ml syringe with a small gauge needle, a physician will aspirate the deepest
portion of the lesion. If a vesicle is present, collect both fluid and cells from the base of
the lesion.
4. If the initial aspiration fails to obtain material, inject sterile, preservative-free saline
subcutaneously then repeat aspiration if necessary.
5. If no material is obtained, rinse needle and syringe with broth by drawing the culture
medium through the needle into the syringe.
C. Superficial Lesions (fungal)
1. Clean the surface with sterile water.
2. Using a scalpel blade, scrape the periphery of the lesion border. Samples of scalp
lesions should include hair that is selectively collected for examination. If there is nail
involvement, obtain scrapings of debris or material beneath the nail plate.
3. Transport in a sterile container with a screw cap.
D. Ulcers and nodules:
1. Clean the area with 70% alcohol, followed by povidone-iodine or povidone-iodine alone.
Remove iodine with alcohol after the procedure to prevent irritation.
2. Remove overlying debris.
3. Curette the base of the ulcer or nodule.
4. If exudate is present from ulcer or nodule, collect it with a syringe or sterile swab.
Draft 12/22/05
Running title: Specimen Collection: Guidelines for Best Practices
Ruth Carrico
COLLECTION CONSIDERATIONS FOR SUBCUTANEOUS TISSUE AND SKIN SPECIMEN
CULTURE
Bacteria
COMMENTS
Syringe aspirates or biopsy specimen are preferable to swab specimen.
Anaerobes
Uncommon in burn, ulcer nodules, or superficial skin infections; useful in
bites and trauma.
Fungi
Useful in diagnosing dermatophytes, yeast, filamentous fungi and dimorphic
fungi.
Mycobacteria
Useful in diagnosing Mycobacterium marinum, Mycobacterium fortuitum,
and Mycobacterium chelonei.
Virus
Draft 12/22/05
Useful in diagnosing HSV and Varicella zoster virus.
Running title: Specimen Collection: Guidelines for Best Practices
Ruth Carrico
URINE:
A. General Considerations:
1. Never collect urine from a bedpan or urinal.
2. Thoroughly clean the urethral opening (and vaginal vestibule in females) prior to
collection procedure to ensure the specimen obtained is not contaminated with
colonizing microorganisms.
3. Plain soap rather than a disinfectant is recommended for cleaning the urethral area. If
disinfectants are introduced into the urine during collection, they may be inhibitory to the
growth of the microorganisms.
4. Transport the specimen to the Laboratory within 90 minutes of collection. If it cannot be
transported within 90 minutes of collection, the urine should be refrigerated. (Bacterial
counts remain stable for at least 24 hours at 4°C.) Do not freeze.
5. Use sterile, leakproof cups or tubes to transport urine.
6. Transport suprapubic bladder aspirate specimen for anaerobic culture in an anaerobic
transport system.
7. Always transport urine for viral cultures on wet ice in a sterile, leakproof container.
8. Any urine collection procedure involving catheterization must be done with scrupulous
aseptic technique to avoid introducing microorganisms.
9. Send the first morning voided urine. Three consecutive first morning specimen are
recommended for mycobacterial culture.
10. Do not submit 24 hour urine collections for culture.
B. Collection Techniques:
1. Clean catch urine specimen (female):
a. The person obtaining the urine specimen should wash hands with soap and water,
rinse and dry. If the patient is collecting the specimen, she should be given detailed
instructions prior to specimen collection.
b. Cleanse the urethral opening and vaginal vestibule area with soapy water or clean
gauze pads soaked with liquid soap.
c. Rinse the area well with water or wet gauze wipes while holding labia apart to avoid
recontamination.
d. Continue to hold labia apart during voiding.
e. Allow a few milliliters of urine to pass. Do not collect this initial amount of urine and do
not stop the flow of urine.
Draft 12/22/05
Running title: Specimen Collection: Guidelines for Best Practices
Ruth Carrico
f. Collect the midstream portion of urine in a sterile, leakproof container.
2. Clean catch urine (male):
a. The person obtaining the urine should wash hands with soap and water, rinse and
dry. If the patient is collecting the specimen, he should be given detailed instructions
prior to specimen collection.
b. Cleanse the penis, retract the foreskin (if not circumcised), and wash with soapy
water.
c. Rinse the area well with water.
d. Keeping the foreskin retracted (to minimize contamination with skin flora), allow a few
milliliters of urine to pass. Do not collect this initial amount of urine and do not stop
the flow of urine.
e. Collect the midstream portion of urine in a sterile container.
3. Ileal conduit urine:
a. Specimen obtained via this method are not recommended as results are difficult to
interpret due to inherent contamination with fecal organisms.
b. If this method is selected, remove the external urinary appliance and discard urine
within the appliance.
c. Gently swab and clean the stomal opening with a 70% alcohol pad and then with a
povidone-iodine solution. Remove excess iodine with 70% alcohol to avoid irritation.
d. Using sterile technique, insert a urinary catheter into the stoma.
e. Catheterize the ileal conduit to a depth beyond the fascial level.
f. Collect the urine drained into a sterile, leakproof container.
4. Straight catheter urine (in/out catheter urine specimen):
A specimen from this method is useful when a clean catch specimen cannot be obtained or
when results from clean catch specimen are equivocal and a diagnosis is critical.
a. Prior to catheterization if possible, the patient should force fluids until the bladder is
full. (Forcing fluids may reduce organism number.)
b. Clean the patient’s urethral opening (and in females, the vaginal vestibule) with soap
and carefully rinse the area with water.
Draft 12/22/05
Running title: Specimen Collection: Guidelines for Best Practices
Ruth Carrico
c. Repeat the process using a skin disinfectant such as povidone-iodine takinig care to
hold the labia apart during the process.
d. Using sterile technique, pass a catheter into the bladder.
e. Discard the initial 15 – 30 ml of urine then collect the sample from the mid or later flow
of urine into a sterile, leakproof container.
5. Indwelling catheter, urine:
a. Clean the catheter collection port with a 70% alcohol wipe.
b. Using sterile technique, puncture the collection port using the type of safety device
appropriate for that type of urinary drainage system. Do not collect urine from the
collection bag.
c. Aspirate the urine and place in a sterile, leakproof container.
6. Suprapubic aspirate (SPA) of the urinary bladder:
A specimen collected in this manner is useful in determining urinary infection in adults in
whom infection is suspected and for whom results from routine procedures have been
equivocal and diagnosis is critical.
a. Before SPA, if possible the patient should force fluids until the bladder is full. (Forcing
fluids may reduce the organism number.)
b. The physician will make a small lance wound through the epidermis, just above the
symphysis pubis.
c. Aspirate urine from the bladder by using a needle aspiration technique.
COLLECTION CONSIDERATIONS FOR URINE SPECIMEN
CULTURE
Bacteria
Fungi
VOLUME (mL)
0.5 – 1 mL
>20 mL
Mycobacteria
>20 mL
Chlamydia
trachomatis
>20 mL
Draft 12/22/05
COMMENTS
Do not use urine from a 24 hour specimen for
culture. After proper cleansing of patient, use first
morning midstream void.
Do not use urine from a 24 hour specimen for
culture.. First morning void is recommended.
Do not use urine from a 24 hour specimen for
culture. Three consecutive first morning voids are
recommended.
Do not use urine from a 24 hour specimen for
culture. First morning void is recommended. Send
Running title: Specimen Collection: Guidelines for Best Practices
Ruth Carrico
on ice, and transport to the Microbiology Laboratory
immediately.
Neisseria
gonorrhoeae
>20 mL
1 mL
Anaerobes
Virus
10 – 50 mL
24 hour collection
Parasites
Do not use urine from a 24 hour specimen for
culture. First morning void is recommended. Send
on ice, and transport to the Microbiology Laboratory
immediately.
Male ONLY
Use suprapubic aspirate. Use anaerobic transport
system.
Do not use urine from a 24 hour specimen for
culture. First morning void is recommended. Useful
for adenovirus, mumps and CMV detection. Send on
ice, and transport to the Microbiology Laboratory
immediately.
Used for detecting Shistosoma haematobium eggs,
Trichomonas vaginalis trophozoites in males, and
Onchocerca volvulus microfilariae.
WOUNDS, ASPIRATES, AND TISSUE SPECIMEN:
A. Bite Wounds:
Aspirate pus from the wound or obtain it at the time of incision, drainage or debridement of
infected wound. (Do not culture fresh bite wounds, as infectious agents will likely not be
recovered.)
B. Bone:
1. Obtain bone sample at surgery.
2. Submit in sterile container without formalin. Specimen may be kept moist by placing
sterile gauze pads soaked with with sterile preservative-free saline in the bottom of the
specimen container.
C. Deep Wounds or Abscesses:
1. Disinfect the surface with 70% alcohol and a povidone-iodine solution. Remove iodine
with alcohol after procedure to prevent irritation.
2. Aspirate the deepest part of the lesion, avoiding contamination by the wound surface. If
collection is done at surgery, a portion of the abscess wall should also be sent for
culture.
D. Punch Biopsy:
1. Disinfect the skin surface with 70% alcohol and then with a povidone-iodine solution.
Remove iodine with alcohol to prevent irritation.
Draft 12/22/05
Running title: Specimen Collection: Guidelines for Best Practices
Ruth Carrico
2. Collect 3 – 4 mm sample with a dermal punch.
3. Submit for culture in a sterile container without formalin.
4. Place specimen onto a sterile gauze pad moistened with preservative-free saline in
order to keep the specimen from drying.
E. Soft Tissue Aspirate
1. Disinfect the skin surface with 70% alcohol and then with a povidone-iodine solution.
Remove tincture of iodine with alcohol to prevent irritation.
2. Aspirate the deepest portion of the lesion or sinus tract. Be careful to avoid
contamination by the wound surface.
COLLECTION CONSIDERATIONS FOR DEEP WOUND, ASPIRATE AND TISSUE SPECIMEN
CULTURE
Bacteria
COMMENTS
Biopsy specimen or aspirates are better than swab specimen
Anaerobes
Useful in diagnosing actinomycosis; place specimen in anaerobic
transport system.
Fungi
Useful in diagnosing Pseudoallescheria boydii, Bipolaris spp., Exophiala
spp. and Fusarium spp.and other fungi.
Mycobacteria
Draft 12/22/05
Useful in diagnosing Mycobacterium tuberculosis, Mycobacterium bovis,
and Mycobacterium kansasii, Mycobacterium chelonae, Mycobacterium
haemophilum, and Mycobacterium marinum.