1
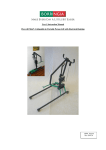
Automatic Self-leveling Rotary Laser RL300G
User Manual
Maintenance and Safety
• While the instrument is operating, be careful not to expose your eyes to the laser beam. Direct exposure to a
laser beam for a long time may be hazardous to your eyes. The laser beam is equivalent to a class II (and
class 3R for Green Beam).
• Operate this laser so that the laser beam plane avoids impact on the eyes of vehicle drivers or pedestrians.
• Do not try to dismantle the instrument. Have it repaired by your dealer or supplier. Dismantling yourself may
worsen the problem or void your warranty.
• When attaching the instrument to a tripod, make sure the instrument is securely fixed. The tripod leg clamps
should be securely fastened. If not securely fastened or tightened, the main unit could fall off or the tripod
could fall over.
• The laser should not be stored or used in extreme temperature or during rapid temperature change. The laser
may not function properly if used out of the ambient temperature range.
• Store inside the carry case and place in a dry area not subject to vibration, dust or high moisture.
• If the storage temperature and ambient temperature for usage vary significantly, leave the laser in its case
until it can adjust to the ambient temperature.
• The laser should be transported or carried carefully to avoid impact or vibration.
• The laser should be stored in the carry case and packed with cushioning material. Always handle the laser
with care.
1
1.What is included with your RL300G
•
2
Your RL300G includes the following parts:Main Instrument
Detector and Bracket 519040
Wireless Remote Control
Charger
Target
Glasses
Hard Case with Foam Insert
Extra Alkaline Battery Pack c/w 4xAA Alkaline batteries .
Please contact your supplier if any of the above parts are missing.
3
2. Find your way around the RL300G
Plumb Up Beam
Light House
Rotating Head
Optical Glass
Control Panel
LCD
Plug Hole
Plumb Down Beam
Handle
4
Base
2.1 Control Panel
Positive/Left spin
Auto/Manual
Grade Button
Negative/Right spin
Scanning
Rotational Speed
Switch ON/OFF
H.I Alert
5
2.2 Utilities of Panel
1.Manual Mode Button - Places the unit into manual mode to allow the user to adjust the unit to create slopes / grades
without dialling in a percentage.
2.Positive / Left Spin Button - Used when in grade mode to adjust the percentage of the grade that you wish to use. Used
when in scan mode to rotate the lasers head clockwise.
3.Grade Button - Places the unit into grade mode to allow the user to enter a grade percentage to be used.
4. Negative / Right Spin Button - Used when in grade mode to adjust the percentage of the grade that you wish to use.
Used when in scan mode to rotate the lasers head counterclockwise.
5. Rotational Speed Button - Press this button to cycle through the various rotational speeds from 0-600rpm.
6.Scanning Mode Button - Places the laser into scan mode to focus the laser beam between two points. Multiple presses
of the button adjusts the angle of the beam. To cancel scan mode, press the button to cycle through the different angles
and back to full rotation mode.
7.Power Button - Turns the unit on and off.
6
8.Tilt Alarm Button - Press this button to engage the tilt alarm that seizes the lasers operation if it is disturbed.
3. Directions:
3.1 Set up (Horizontal mode):
1. Attach the RL300GS to a tripod that is as level as possible or place on a flat level surface. Make sure that the laser is
aligned correctly on the tripod and securely tightened in position or the unit may move during use.
2. Press the Power button to turn the RL300G on and allow it to begin its leveling process. The Power indicator light will
be shown indicating that the unit is on and operating.
3. Once the RL300G has completed its self-leveling process the laser will begin to rotate. Please note that the leveling
time can vary based on the angle that the laser is positioned from previous use and any disturbances that the unit may be
sustaining.
4. If the RL300G is outside of its leveling range the laser beam will flash continuously indicating that it is unable to level.
Please do not stare directly into the laser beam.
3.2 Set up (Vertical mode):
7
1. Place the laser onto a flat level surface with the control panel facing upwards.
2. Press the Power button to turn the laser on and allow it to begin its leveling process. The Power indicator light will be
shown indicating that the unit is on and operating.
3. Once the laser has completed its self-leveling process the laser will begin to rotate. Please note that the leveling time
can vary based on the angle that the laser is positioned from previous use and any disturbances that the unit may be
sustaining.
4. If the laser is outside of its leveling range the laser beam will flash continuously indicating that it is unable to level.
Please do not stare directly into the laser beam.
8
3.3 Automatic Tilt Alarm:
Once the RL300G has leveled off and is rotating the automatic tilt alarm can be enabled. This feature when enabled will
stop the laser from rotating if it is disturbed while in use.
To enable the tilt alarm - simply press the tilt alarm button on the control panel and then wait approximately 15 seconds.
During these 15 seconds the tilt alarm indicator light will continue to flash. When the indicator light becomes constant the
tilt alarm has been set.
If the RL300G is disturbed when the tilt alarm is active the unit will need to be powered off and on again to reset its level
position and the user should check to see what disturbed the unit.
9
3.4 Setting up a grade (Automatically):
When the laser has leveled off and has started to rotate you can begin a slope or grade automatically by pressing the grade
mode button on either the control panel on the front of the laser or on the remote control. The screen on the unit will show
both the the X-Axis and Y-Axis percentages with the X-Axis flashing .
3.4.1 X-Axis:
The X-Axis is adjusted by pressing either the positive or negative buttons on the unit or remote control to set the
percentage of the grade that you want to use. When you have set your X-Axis grade, press the grade button again to
switch from the X-Axis to the Y-Axis.
3.4.2 Y-Axis:
The Y-Axis is adjusted by pressing either the positive or negative buttons on the unit or remote control to set the
percentage of the grade that you want to use. When you have set your Y-Axis grade, press the grade button again to
confirm the grades that you have set and the laser will begin to adjust itself accordingly.
To cancel out of grade mode press the grade mode button on the lasers control panel or on the remote control. You can
also cancel out of grade mode by turning the laser level off and on again.
10
3.5 Setting up a grade (Manually):
When the RL300G has levelled off and has started to rotate you can begin a manual slope or grade by pressing the manual
mode button on either the control panel on the front of the laser or on the remote
control. The screen on the unit will display the X-Axis and a hand symbol to show that it is in manual mode.
3.5.1 X-Axis:
The X-Axis is adjusted by pressing either the positive or negative buttons on the lasers control panel or remote control to
tilt the lasers beam either left or right on the lasers X-Axis when you are facing the control panel. To switch from the
X-Axis to the Y-Axis, press the manual mode button.
3.5.2 Y-Axis:
The Y-Axis is adjusted by pressing either the positive or negative buttons on the lasers control panel or remote control to
tilt the lasers beam either backwards or forwards on the lasers Y-Axis when you are facing the control panel. To switch
from the Y-Axis back to the X-Axis, press the manual mode button again.
To cancel out of manual mode press and hold the manual mode button on the lasers control panel or on the remote control.
You can also cancel out of manual mode by turning the laser level off and on again.
11
4.Batteries
The RL300G is supplied with a rechargeable Ni-MH battery pack installed in the base of the unit. It is recommended that
the battery pack be charged fully and discharged fully at least three times to maximise the battery capacity.
Working time for fully charged battery is 50 hours and a full charge should take approximately 8 hours. It should be noted
that as batteries get older they hold less charge and this may effect the operating time of the laser.
Battery Charger / Adaptor
The RL300G is supplied with a Battery Charger / Adaptor.
When the battery pack is running low the Voltage Indicator will light, you should recharge the battery pack as soon as
possible.
Insert Charger / Adaptor plug into the charging port. The battery pack will be charged in the laser unit and the unit will
run off mains power while it charges as long as there is enough residual charge in the battery. If completely flat allow 30
mins of recharging before using the laser unit.
Charging the battery pack while in use will prolong the full charge time beyond the quoted 8 hours. 4x C Cell Alkaline
batteries can be used in place of the Ni-MH battery pack supplied by using the alkaline adaptor pack included in your kit.
NOTE: The RL300G Charger / Adaptor is specific to this manufacturer. If your Charger / Adaptor fails DO NOT
buy or use any other that is not an official charger from Spot-on as this may damage your laser unit and void your
warranty. If you do fit dry cell batteries, never use the Charger/Adpator – dry cell batteries may explode and cause
damage to your RL300G unit which would not be covered by warranty.
12
5. Detector
1. Power Button
2. Positive / Clockwise Rotation Button
3. Negative / Clockwise Rotation Button
4. Grade Button
5. Scanning Mode Button
6. Rotational Speed Button
7. Tilt Alarm
*Note: The Remote is a 80m wireless
remote control with LCD screen display
1
2
5
3
4
6
7
13
6. Detector
1. LCD Display Screen
2. Laser Detector Sensor
3. On/Off Button
4. Sound On/Off Button
5. Detection Mode Button
(Course or Fine)
6. Speaker (Not Shown)
After attaching your 519051 Detector to your staff securely using the clamp supplied in the carry case.
To turn the 519051 Detector on simply press the power button on the detectors control panel. The speaker will beep once
and the screen will turn on indicating that the unit is operating.
The LCD screen on the 519051 Detector displays the battery level, detection mode and if the speaker is on or off.
To change between coarse and fine detection modes simply press the detection mode button on the control panel.
As the laser strikes the 519051 Detector sensor the speaker will beep and the LCD screen will display either an up or
down arrow or a level line. If the screen shows either an up or down arrow move the detector up or down the staff until
the level line has been located. When the level line has been located the speaker will emit a constant tone
14
7. Accuracy Checking
Follow these instructions for checking axis accuracy.
7.1 Horizontal-surface Checking
1. Place the instrument at the point of 50m in front of wall (or set a scale plate at the point of 50m away from the
instrument), and then adjust the level of the base approximately to aim the X1 to the wall (or scale plate), as depicted
below:
15
2. Allow the unit to level and begin rotating. Mark the beam position on the wall or scale plate as H1.
3. Loosen the screw of the tripod, and then turn the laser 180°. Allow the unit to level and rotate, mark
the beam position on the wall or scale plate as H2.
The difference between the value of H1 and H2 should be less than 10 mm.
4. Repeat the same process to check your Y-axis beam.
Again, the difference between the values of the
two measurements should be less than 10 mm.
5. If the difference in either axis is more than 8mm, the laser should be sent to your authorized dealer for
service/calibration.
16
7.2 Horizontal-line checking.
First lay down the instrument:
-Mount the instrument on tripod between A wall and B wall. Tripod near Wall A. Distance should follow the instructions
on illustration. Switch the instrument on.
17
-After leveling, direct the laser beam onto the close wall A. Mark the centre point of the laser beam on the wall (Point I)
-Turn the instrument horizontally by 180°.(without changing the height).after leveling, direct the laser beam onto Wall B.
Mark the centre point of the laser beam on the opposite wall B(Point II)
-Without turning the instrument. Position it close to wall B by moving the tripod. Switch on the instrument and let it
18
leveling.
-After leveling, align the height of the instrument by using tripod or by underlaying, if necessary. In such a manner that
the centre point of the laser beam is projected exactly located the previously marked point II on wall B.
19
D
-Rotate the instrument by 180°without changing the height. Allow it to level in and mark the centre point of the laser
beam on wall A(point III).Tare care that point III is as vertical as possible above or below point I.
-The difference D of both marked points I and III on wall A amounts to the actual deviation of the plumb up beam
D-value should be less than 4mm.
20
8. Specifications
Accuracy:
Self leveling range:
Grade Range
Operation range
Four head speeds:
Four scan widths:
IR Remote control:
Operation temperature:
Power supply:
Continuance working time:
Waterproof and dustproof:
Weight:
20 arc seconds(+/-1mm/10m)
±5°
±8%
Indoors 40m
Outdoor with detector up to 250+ radius,
500m+ diameter.
60,120,300,600 R. P. M.
10°; 45°; 90°; 180°
Available distance:20 m
-20ºC ~ +50ºC (-4°F~+122°F)
DC 4. 8-6V
(4xsub-C NI-MH battery or 4xsub-C Alkaline
battery)
Approx. 50hr.(Ni-MH) Approx. 40hr(Alkaline)
IP 55
2.8kg
21
22