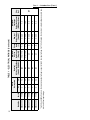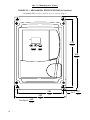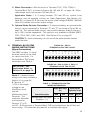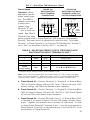
1
INSTALLATION AND OPERATION MANUAL
KBE2 DIGITAL AC
ADJUSTABLE SPEED DRIVES
for use with 1/4 - 3 HP 3-Phase Induction Motors
115, 208/230 or 380 - 460 Volts, 50/60 Hz, 1 & 3 Phase AC Line Input
KBE2-2101-P
P/N 11040
230VAC Input • 1HP (0.75 kW)
LISTED
16KJ.
POWER CONV.EQ
E177007
ISO
9002
Note: This drive has
been programmed
to operate 60 Hz
motors. For 50 Hz
motor operation,
see Section VIII-C
and Table 11 on
page 30.
This Manual Covers
Panel Mount IP-20: KBE2-1125-P, 1150-P, 1101-P, 2125-P, 2150-P
2101-P, 2202-P, 2203-P, 4301-P, 4302-P, 4303-P
NEMA-4 / IP-65: KBE2-1125-4, 1150-4, 1101-4, 2101-4
2202-4, 2203-4, 4301-4, 4302-4, 4303-4
!
See Safety Warning on page 6
The information contained in this manual is intended to be accurate. However, the
manufacturer retains the right to make changes in design which may not be included herein.
Automation and Control
© 2003 KB Electronics, Inc.
(See back cover)
TABLE OF CONTENTS
Section
i.
Page
Simplified Instructions . . . . . . . . . . . . . . . . . . . . . . . . . . . . . . . . . . . . . . . . . . . . 5
ii.
Safety Warning . . . . . . . . . . . . . . . . . . . . . . . . . . . . . . . . . . . . . . . . . . . . . . . . . 6
I.
Introduction . . . . . . . . . . . . . . . . . . . . . . . . . . . . . . . . . . . . . . . . . . . . . . . . . . . . 6
II.
Mounting Instructions . . . . . . . . . . . . . . . . . . . . . . . . . . . . . . . . . . . . . . . . . . . 13
III.
Reconditioning the Bus Capacitors . . . . . . . . . . . . . . . . . . . . . . . . . . . . . . . . . 16
IV.
Terminal Block TM1 Wiring Instructions (Power Connections) . . . . . . . . . . . . . 16
V.
Terminal Block TM2 Wiring Instructions (Signal Connections) . . . . . . . . . . . . . 19
A. External Start/Stop-Forward/Reverse Connection . . . . . . . . . . . . . . . . . . . . 20
B. External Frequency Control . . . . . . . . . . . . . . . . . . . . . . . . . . . . . . . . . . . . . 20
C. Multifunction Output Relay Connection . . . . . . . . . . . . . . . . . . . . . . . . . . . . 24
D. Analog Output Voltage Connection . . . . . . . . . . . . . . . . . . . . . . . . . . . . . . . 24
VI.
AC Line Fusing . . . . . . . . . . . . . . . . . . . . . . . . . . . . . . . . . . . . . . . . . . . . . . . . 24
VII. Recommended High Voltage Dielectric Withstand Testing (Hi-Pot) . . . . . . . . . 26
VIII. Drive Operation . . . . . . . . . . . . . . . . . . . . . . . . . . . . . . . . . . . . . . . . . . . . . . . . 26
A. Digital Keypad Description . . . . . . . . . . . . . . . . . . . . . . . . . . . . . . . . . . . . . 26
B. Digital Keypad Operation . . . . . . . . . . . . . . . . . . . . . . . . . . . . . . . . . . . . . . 28
C. Programming . . . . . . . . . . . . . . . . . . . . . . . . . . . . . . . . . . . . . . . . . . . . . . . 30
D. Programmable Functions (Summary List) . . . . . . . . . . . . . . . . . . . . . . . . . . 36
IX.
Programmable Functions (Detailed) . . . . . . . . . . . . . . . . . . . . . . . . . . . . . . . . . 39
X.
Optional Accessories . . . . . . . . . . . . . . . . . . . . . . . . . . . . . . . . . . . . . . . . . . . . 51
XI.
Limited Warranty . . . . . . . . . . . . . . . . . . . . . . . . . . . . . . . . . . . . . . . . . . . . . . . 56
Tables
1.
Electrical Ratings . . . . . . . . . . . . . . . . . . . . . . . . . . . . . . . . . . . . . . . . . . . . . 9, 10
2.
General Performance Specifications . . . . . . . . . . . . . . . . . . . . . . . . . . . . . . . . 11
3.
Model Number Identification . . . . . . . . . . . . . . . . . . . . . . . . . . . . . . . . . . . . . . 12
4.
Terminal Blocks TM1 and TM3 Wiring Information . . . . . . . . . . . . . . . . . . . . . . 17
5.
Terminal Block TM2 Wiring Information . . . . . . . . . . . . . . . . . . . . . . . . . . . . . . 19
6.
External Start/Stop Control Using Function F03 . . . . . . . . . . . . . . . . . . . . . . . 20
7.
Signal Input, F11, and SW1 Setting . . . . . . . . . . . . . . . . . . . . . . . . . . . . . . . . . 21
8.
Programmable Functions for F19 and F20 . . . . . . . . . . . . . . . . . . . . . . . . . . . . 22
9.
Selecting Preset Output Frequency with
Multifunction Input Terminals 6 and 7 . . . . . . . . . . . . . . . . . . . . . . . . . . . . . . . 23
10. Recommended Fuse or Circuit Breaker Rating . . . . . . . . . . . . . . . . . . . . . . . . 24
11. Reprogramming the Drive for 50 Hz Motor Operation . . . . . . . . . . . . . . . . . . . 30
ii
TABLE OF CONTENTS (Continued)
Tables
Page
12. Function F23, F24, F28 Code Settings . . . . . . . . . . . . . . . . . . . . . . . . . . . . . . 32
13. Functions F23, F24, F28 Set for Automatic Restart for
All Faults Except AC Power Loss . . . . . . . . . . . . . . . . . . . . . . . . . . . . . . . . . . . 33
14. Functions F23, F24, F28 Set for Automatic Restart for
All Faults Including AC Power Loss . . . . . . . . . . . . . . . . . . . . . . . . . . . . . . . . . 34
15. Programmable Functions Summary List . . . . . . . . . . . . . . . . . . . . . . . . . . 37, 38
16. Multifunction Output Relay Operating Modes . . . . . . . . . . . . . . . . . . . . . . . . . . 47
17. Fault Codes and Corrective Actions . . . . . . . . . . . . . . . . . . . . . . . . . . . . . 49, 50
18. Status Indicators when the Drive is in External Start/Stop Mode . . . . . . . . . . . 51
19. Class B Residential Standard RFI Filters . . . . . . . . . . . . . . . . . . . . . . . . . . . . . 51
20. Brake Resistor Selection Chart . . . . . . . . . . . . . . . . . . . . . . . . . . . . . . . . . . . . 52
21. AC Line Reactor Selection Chart . . . . . . . . . . . . . . . . . . . . . . . . . . . . . . . . . . . 54
22. AC Load Reactor Selection Chart . . . . . . . . . . . . . . . . . . . . . . . . . . . . . . . . . . . 54
Figures
1A. Mechanical Specifications for Models
KBE2-1125-P, 1150-P, 1101-P, 2125-P, 2150-P, 2101-P (Pkg. A) . . . . . . . . . . 12
1B. Mechanical Specifications for Models
KBE2-2202-P, 2203-P, 4301-P, 4302-P, 4303-P (Pkg. B) . . . . . . . . . . . . . . . . 13
1C. Mechanical Specifications for Models
KBE2-1125-4, 1150-4, 1101-4, 2101-4 (Pkg. C) . . . . . . . . . . . . . . . . . . . . . . 14
1D. Mechanical Specifications for Models
KBE2-2202-4, 2203-4, 4301-4, 4302-4, 4303-4 (Pkg. C1) . . . . . . . . . . . . . . . 15
2A. Pkg. A and Pkg. C Terminal Block TM1 Layout . . . . . . . . . . . . . . . . . . . . . . . . 16
2B. Pkg. B Terminal Block TM1 Layout . . . . . . . . . . . . . . . . . . . . . . . . . . . . . . . . . . 16
2C. Pkg. C1 Terminal Blocks TM1 and TM3 Layout . . . . . . . . . . . . . . . . . . . . . . . . 16
3A. Power Connections for Pkg. A and Pkg. C Models
with 1φ AC Line Input . . . . . . . . . . . . . . . . . . . . . . . . . . . . . . . . . . . . . . . . . . . . 18
3B. Power Connections for Pkg. B Models
with 1φ and 3φ AC Line Input . . . . . . . . . . . . . . . . . . . . . . . . . . . . . . . . . . . . . . 18
3C. Power Connections for Pkg. C1 Models
with 1φ and 3φ AC Line Input . . . . . . . . . . . . . . . . . . . . . . . . . . . . . . . . . . . . . . 18
4A. Pkg. A Terminal Block TM2 Layout . . . . . . . . . . . . . . . . . . . . . . . . . . . . . . . . . 19
4B. Pkg. B, Pkg. C, and Pkg. C1 Terminal Block TM2 Layout . . . . . . . . . . . . . . . 19
5A. External Start/Stop-Forward/Reverse Connections . . . . . . . . . . . . . . . . . . . . . 20
iii
TABLE OF CONTENTS (Continued)
Figures
Page
5B. External Start/Stop-Forward/Reverse Open Collector Connections . . . . . . . . . 20
6A. SW1 Set for Remote Speed Potentiometer or Voltage Following Signal Input . 21
6B. SW1 Set for Current Following Signal Input . . . . . . . . . . . . . . . . . . . . . . . . . . . 21
7.
Remote Speed Potentiometer Connection . . . . . . . . . . . . . . . . . . . . . . . . . . . 21
8.
Voltage Following Connection . . . . . . . . . . . . . . . . . . . . . . . . . . . . . . . . . . . . . 22
9.
Current Following Connection . . . . . . . . . . . . . . . . . . . . . . . . . . . . . . . . . . . . . 22
10A. Multifunction Input Terminal Connections . . . . . . . . . . . . . . . . . . . . . . . . . . . . . 23
10B. Multifunction Input Terminal Open Collector Connections . . . . . . . . . . . . . . . . 23
11. Multifunction Output Relay and Analog Output Voltage Connections . . . . . . . . 24
12. Hi-Pot Setup . . . . . . . . . . . . . . . . . . . . . . . . . . . . . . . . . . . . . . . . . . . . . . . . . . . 25
13. Digital Keypad Layout . . . . . . . . . . . . . . . . . . . . . . . . . . . . . . . . . . . . . . . . . . . 27
14. Flow Chart to Change Set Frequency (Drive in Stop Mode) . . . . . . . . . . . . . . . 29
15. Flow Chart to Program F01 [Acceleration Time] . . . . . . . . . . . . . . . . . . . . . . . . 29
16. Volts/Hz Pattern . . . . . . . . . . . . . . . . . . . . . . . . . . . . . . . . . . . . . . . . . . . . . . . . 41
17. Volts/Hz Curve Modification (Torque Boost) . . . . . . . . . . . . . . . . . . . . . . . . . . . 43
18. Controlled Deceleration-to-Stop with DC Injection Braking . . . . . . . . . . . . . . . 44
19. Recommended RFI Filter Connection . . . . . . . . . . . . . . . . . . . . . . . . . . . . . . . 52
20. DLM Connections . . . . . . . . . . . . . . . . . . . . . . . . . . . . . . . . . . . . . . . . . . . . . . 53
iv
i.
SIMPLIFIED INSTRUCTIONS
WARNING! These instructions are to be used as a guide only after reading
the complete instructions contained herein.
Important Application Information: It is recommended that this drive be used with
Inverter Duty or TENV motors which provide full rated torque over an extended
speed range without overheating. If external fan cooling is provided, open-ventilated motors can also achieve an extended speed range at full rated torque. A box fan
or blower with a minimum of 100 CFM is recommended. Mount the fan so that the
motor is surrounded by the airflow.
Some motors have low speed characteristics which cause overheating and winding
failure under light or no load conditions. If the motor is operated in this manner for
an extended period of time, it is recommended that the unloaded motor current be
checked from 2 - 15 Hz (60 - 450 RPM) to ensure that the motor current does not
exceed the nameplate rating. Do not use motor if the motor current exceeds the
nameplate rating.
!
WARNING! Disconnect the main power when making connections
to the drive.
Note: See Section III, Reconditioning Bus Capacitors on page 15.
A. AC Line Connection
1. For single phase only AC line input models (Pkg. A and Pkg. C), wire the AC
line to Terminals L1, L2, as shown in Figure 3A, on page 18.
2. For dual phase (1φ, 3φ) AC line input models (Pkg. B and Pkg. C1), wire the
1φ according to Figures 3B and 3C, on page 18. Wire the 3φ AC line to
Terminals L1, L2, L3.
3. For 3-Phase only AC line input models (Pkg. B and Pkg. C1), wire the AC line
to Terminals L1, L2, L3, as shown in Figures 3B and 3C, on page 18.
B. Ground Connection – As shown in Figures 3A, 3B, and 3C, on page 18.
C. AC Line Fusing – Install a fuse or circuit breaker in the AC line. Fuse each conductor that is not at ground (earth) potential. See Section VI, on page 24, for
recommended ratings.
D. Motor Connection – Connect the motor to Terminals T1(U), T2 (V), T3 (W) of
Terminal Block TM1, as shown in Figures 3A, 3B, and 3C, on page 18, and as
described in Section IV-C, on page 19. Motor cable length should not exceed
100 feet (30m) or special Load Reactors may be required – contact the Sales
Department. See Section X-F, Table 22, on page 53.
Note: This drive has been programmed to operate 60 Hz motors. For 50 Hz
motor operation, see Section VIII-C and Table 11 on page 30.
E. Power Up and Basic Keypad Operation – When applying power to the drive,
the LED, located at the top left of the digital display will illuminate. The digital
display will flash the set frequency (factory setting is “05.0”). To increase the frequency, press the ▲ key until the desired frequency is displayed. To decrease
frequency, press the ▼/RESET key until the desired frequency is displayed.
Press the RUN/STOP key to start the drive. See Section VIII, on page 26.
5
ii.
SAFETY WARNING
Definition of Safety Warning Symbols:
Electrical Hazard Warning Symbol – Failure to observe this warning could
result in electrical shock or electrocution.
Operational Hazard Warning Symbol – Failure to observe this warning
could result in serious injury or death.
!
This product should be installed and serviced by a qualified technician, electrician, or electrical maintenance person familiar with its operation and the hazards involved. Proper installation, which includes wiring, mounting in proper enclosure, fusing or other over current protection, and grounding can reduce the chance of electrical
shocks, fires, or explosion in this product or products used with this product, such as electric motors, switches, coils, solenoids, and/or relays. Eye protection must be worn and
insulated adjustment tools must be used when working with control under power. This
product is constructed of materials (plastics, metals, carbon, silicon, etc.) which may be a
potential hazard. Proper shielding, grounding, and filtering of this product can reduce the
emission of radio frequency interference (RFI) which may adversely affect sensitive electronic equipment. If further information is required on this product, contact the Sales
Department. It is the responsibility of the equipment manufacturer and individual installer
to supply this Safety Warning to the ultimate end user of this product. (SW effective
11/1992).
!
This drive contains electronic Start/Stop circuits that can be used to start and stop the
drive. However these circuits are never to be used as safety disconnects since they are
not fail-safe. Use only the AC line for this purpose.
Be sure to follow all instructions carefully. Fire and/or electrocution can result due to
improper use of this product.
This product complies with all CE directives pertinent at the time of manufacture. Contact the Sales Department for Declaration of Conformity.
I.
INTRODUCTION
Thank you for purchasing the GENESIS® KBE2 Series Inverter. KB Electronics, Inc.
is committed to providing total customer satisfaction by providing quality products
that are easy to install and operate.
The KBE2 is available in IP-20 Panel Mount and NEMA-4 / IP-65 (indoor) enclosures.
They operate 3-phase AC induction motors thru 3 HP. Several models are available
with 115, 208/230, and 380/460 Volts AC - 50/60 Hz AC line input. They contain a
3-digit LED display with a digital keypad for simplified programming. Although very
compact, the KBE2 contains many user-friendly features found in more costly drives.
6
Sec. I – Introduction (Cont.)
These include regenerative and DC injection braking, auto/manual restart, Volts/Hz
curve selection, selectable switching frequency, adjustable acceleration and deceleration, and 0 - 200 Hz operation.
An isolated multifunction terminal block provides for external control of start/stop,
forward/reverse, and analog input signal following. Other functions include (3) preset speeds, analog output signal (0 - 10 Volts DC), and a programmable output relay.
The KBE2 also contains the following protection features: undervoltage, overvoltage,
overtemperature, ground fault, short circuit, and I2t motor overload protection. The
fault codes are shown in the digital display. All models are UL Listed (USA and
Canada), CE and C-tick (N10980) approved and ISO-9002 certified.
Optional features include a DIN Rail Mounting Kit and RFI filter. An external brake
resistor is available for 2 HP and 3 HP - 230 Volt AC models and 1 HP, 2 HP, and 3
HP - 460 Volt AC models. The DownLoad Module™ (DLM) uploads and downloads
drive programs. Drive-Link™ software provides PC communications to facilitate
programming.
STANDARD FEATURES
•
Keypad – Used for drive operation and programming.
•
3-Digit LED Display – Provides indication of drive status and programming
(Frequency, Functions, Fault Codes).
•
Voltage/Current Switch – Selects either voltage/potentiometer or current
signal input.
•
Regenerative and DC Injection Braking – Provides controlled rapid stopping.
•
Short Circuit Protection – Shuts down the drive if a short occurs at the motor
(phase-to-phase or phase-to-ground).
•
Barrier Terminal Blocks – Separate terminal blocks are provided for power (AC
line, motor) and external signal wiring (potentiometer, multifunction input and
output terminals, voltage and current following).
•
2 Multifunction Control Inputs – Provides selection of Stop, Reset, Jog, and up to
3 Preset Speeds.
•
External Forward-Stop-Reverse Control – Provides external control of motor direction and run/stop (Forward/Stop, Reverse/Stop or Run/Stop, Forward/Reverse).
•
Isolated External Signal Inputs – Provides isolated terminals for an external signal
to control output frequency (potentiometer (5k/10k), 0 - 10 VDC, 0 - 20 mADC,
4 - 20 mADC).
•
Multifunction Output Relay – Provides normally open relay contacts for indication
of Run, Frequency Reached, or Fault.
•
Output Frequency Upper Limit – Provides adjustment of output frequency upper
limit (1.0 - 200 Hz).
7
Sec. I – Introduction (Cont.)
•
Output Frequency Lower Limit – Provides adjustment of output frequency lower
limit (0.0 - 200 Hz).
•
Acceleration and Deceleration Time – Provides adjustment of acceleration and
deceleration time (0.1 - 999 seconds).
•
Operates 60 Hz and 50 Hz Motors – Provides tailoring of the drive for 60 Hz or 50
Hz motors (factory set for 60 Hz motors).
•
Analog Output Voltage – Provides connections for an analog voltage (0 - 10 V DC)
proportional to the output frequency.
•
Preset Volts/Hz Curves with Program Modification – Used to tailor the drive for
constant torque, high starting torque, or variable torque (HVAC) applications.
•
Approvals – UL Listed (USA and Canada), CE, C-tick (N10980), ISO-9002.
PROTECTION FEATURES (Fault Codes are Displayed)
See Table 17, on pages 49 and 50.
•
Overvoltage and Undervoltage Protection – Shuts down the drive if the AC line
voltage goes above or below the operating range.
•
Regeneration Protection – Eliminates tripping due to bus overvoltage caused by
rapid deceleration of high inertial loads.
•
Stall Protection – Prevents the motor from stalling during startup of high inertial
loads.
•
Short Circuit Protection – Shuts down the drive if a short circuit occurs at the motor
(phase-to-phase or phase-to-ground).
•
Electronic Motor Overload Protection (I2t) – Prevents motor burnout and eliminates nuisance tripping due to overload.
•
Overtemperature Protection – Shuts down the drive if the temperature exceeds
safe limits.
OPTIONAL ACCESSORIES (See Section X, on page 51.)
•
Class B Residential Standard RFI Filter – Provides noise suppression for Class B
Residential Standard requirements (CE Directive 89/336/EEC).
Note: All models are available with a built-in Class A Industrial Standard RFI
Filter. Contact Sales Department.
•
Brake Resistor Kit – Provides rapid stopping of the drive. Available for Models
KBE2-2202, 2203, 4301, 4302, 4303.
•
DIN Rail Mounting Kit
•
DownLoad Module™ (DLM) – Uploads and downloads drive programs.
•
Drive-Link™ Software – Provides PC communications to facilitate programming.
Uses Windows® 95/98/2000/ME/XP/NT.
8
.5
1
11000
11010
11016
11020
11030
KBE2-1125-P
KBE2-1150-P
KBE2-1101-P
KBE2-2125-P
KBE2-2150-P
1
1
11060
11070
11080
11090
11500
11510
11516
11540
KBE2-2203-P
KBE2-4301-P
KBE2-4302-P
KBE2-4303-P
KBE2-1125-4
KBE2-1150-4
KBE2-1101-4
KBE2-2101-4
1
KBE2-2202-P
.75
.75
.37
.18
2.2
1.5
7.5
2.2
1.5
.75
.37
.18
.75
.37
.18
kW
230
115
115
115
460
460
460
230
230
230
230
230
115
115
115
Nominal
AC Line Input Voltage
(Volts AC - 50/60 Hz)
9.4
19.0
10.0
6.0
6.5
4.6
2.6
27.0 / 16.0
19.0 / 11.0
9.4
5.2
3.0
19.0
10.0
6.0
Maximum
AC Line
Input Current
(Amps AC)
1
1
1
1
3
3
3
1, 3
1, 3
1
1
1
1
1
1
Phase
Input
(φ)
TABLE 1 – ELECTRICAL RATINGS
0 - 230
0 - 230
0 - 230
0 - 230
0 - 460
0 - 460
0 - 460
0 - 230
0 - 230
0 - 230
0 - 230
0 - 230
0 - 230
0 - 230
0 - 230
Nominal
Output Voltage*
(Volts AC)
4.2
4.0
2.3
1.4
5.2
3.8
2.3
10.5
7.5
4.2
2.3
1.4
4.0
2.3
1.4
Maximum
Continuous
Output Load Current
(RMS Amps/Phase)
C
B
A
Pkg.
Ref.
Table 1 continued on page 10.
*For 230 and 460 Volt models, the maximum output voltage is equal to the AC line input voltage. For 115 Volt models, the maximum output voltage is equal to double the AC line input voltage.
.5
.25
3
2
1
3
2
11040
11050
KBE2-2101-P
.5
.25
.25
Part No.
Model No.
HP
Rated
Horsepower
Sec. I – Introduction (Cont.)
9
10
3
1
11550
11560
11570
11580
11590
KBE2-2202-4
KBE2-2203-4
KBE2-4301-4
KBE2-4302-4
KBE2-4303-4
2.2
1.5
.75
2.2
1.5
kW
460
460
460
230
230
Nominal
AC Line Input Voltage
(Volts AC - 50/60 Hz)
6.5
4.6
2.6
27.0 / 16.0
19.0 / 11.0
Maximum
AC Line
Input Current
(Amps AC)
3
3
3
1, 3
1, 3
Phase
Input
(φ)
0 - 460
0 - 460
0 - 460
0 - 230
0 - 230
Nominal
Output Voltage*
(Volts AC)
TABLE 1 – ELECTRICAL RATINGS (Continued)
5.2
3.8
2.3
10.5
7.5
Maximum
Continuous
Output Load Current
(RMS Amps/Phase)
C1
Pkg.
Ref.
*For 230 and 460 Volt models, the maximum output voltage is equal to the AC line input voltage. For 115 Volt models, the maximum output voltage is equal to double the AC line input voltage.
3
2
2
Part No.
Model No.
HP
Rated
Horsepower
Sec. I – Introduction (Cont.)
Sec. I – Introduction (Cont.)
TABLE 2 – GENERAL PERFORMANCE SPECIFICATIONS
Description
AC Line Input Voltage (VAC)
Input Line Frequency Range (Hz)
Output Waveform
Frequency Range (Hz)
Switching Frequency Range (kHz)
Parameter / Range
Factory
Setting
115 & 208/230 (±15%),
380 - 460 (±10%)
—
48 - 62
—
Sine Coded PWM
—
0.1 - 200
60
4 - 16
8
0.1 up to 100 Hz and
1.0 from 100 Hz thru 200 Hz
—
Acceleration/Deceleration Range (Seconds)
0.1 - 999
5.0
Overvoltage Trip Point @ 230 VAC, @ 460 VAC (VAC)
290, 580
—
Undervoltage Trip Point @ 230 VAC, @ 460 VAC (VAC)
140, 280
—
Frequency Resolution (Hz Increments)
Overload Rating (% for 1 Minute)
150
—
Minimum Frequency Range (Hz)
0.0 - 200
0.0
Maximum Frequency Range (Hz)
1.0 - 200
60.0
20
20
Braking Torque with Braking Resistor (%)2
20 - 130 4
20
Operating Temperature Range (ºC)
-10 to 50
—
0 - 95
—
1
—
Output Relay Contact Rating
1 Amp @ 30 Volts DC,
250 Volts AC
—
External Analog Signal Input
0 - 10 VDC,4 - 20 mADC,
0 - 20 mADC
0 - 10 VDC
Remote Speed Potentiometer (Ω)
5k or 10k
—
Analog Output Voltage (Volts DC)3
0 - 10
—
Class A Industrial
—
Braking Torque without Braking Resistor (%)1
Humidity (Relative, Non-Condensing) (%)
Maximum Vibration (G)
Built-In EMC Filter Specification (“F” Suffix Models)
Notes: 1. Models KBE2-1125-P, 1150-P, 2150-P, 2101-P do not contain a braking transistor. 2. Models KBE22202, 2203, 4301, 4302, and 4303 require optional brake resistor to achieve maximum braking. Maximum braking torque varies with model. 3. Proportional to the Output Frequency Upper Limit set with F06.
11
Sec. I – Introduction (Cont.)
TABLE 3 – MODEL NUMBER IDENTIFICATION
KBE2
–
2
1
01 –
P
F
S
Series
Input
Voltage
Input
Phase
1: 115V
2: 230V
4: 460V
1: 1φ
2: 1φ & 3φ
3: 3φ
Horsepower
25: 0.25 HP
50: 0.5 HP
01: 1 HP
02: 2 HP
03: 3 HP
Enclosure
Type
RFI (EMI)
Filter Option
Switch
Option*
P: Panel
Mount IP-20
4: NEMA-4 / IP-65
Indoor
F: With Filter
Blank: Without
Filter
S: With On/Off &
Forward/Reverse Switch
Blank: Without Switch
*Available for
NEMA-4 / IP-65 Models Only.
FIGURE 1A – MECHANICAL SPECIFICATIONS (Inches/mm)
for Models KBE2-1125-P, 1150-P, 1101-P, 2125-P, 2150-P, 2101-P (Pkg. A)
RESET
RUN
STOP
DATA
ENT
DSP
FUN
4.56
116
5.20
132
Drive Depth is
4.65
118
12
2.83
72
2.40
61
3x∅
0.18
4.6
FIGURE 1B – MECHANICAL SPECIFICATIONS (Inches/mm)
for Models KBE2-2202-P, 2203-P, 4301-P, 4302-P, 4303-P (Pkg. B)
RESET
RUN
STOP
5.04
128
DATA
ENT
DSP
FUN
5.63
143
4.25
108
Drive Depth is
II.
6.77
172
4.65
118
3x∅
0.18
4.6
MOUNTING INSTRUCTIONS
It is recommended that the drive be mounted vertically on a flat surface with adequate ventilation. Leave enough room below the drive to allow for AC line, motor
connections, and any other wiring. Care should be taken to avoid extreme hazardous locations where physical damage can occur. When mounting the drive in an
enclosure, the enclosure must be large enough to allow for proper heat dissipation
so that the ambient temperature does not exceed 50 ºC. See Figures 1A, 1B, 1C,
and 1D, on pages 12 - 15.
Note: NEMA-4 / IP-65 models are for indoor use only. They are not for use in
explosion proof applications.
CAUTION! To avoid overheating, do not mount the optional brake resistor under
the drive.
13
Sec. II – Mounting Inst. (Cont.)
FIGURE 1C – MECHANICAL SPECIFICATIONS (Inches/mm)
for Models KBE2-1125-4, 1150-4, 1101-4, 2101-4 (Pkg. C)
RESET
RUN
STOP
7.83
199
DATA
ENT
DSP
FUN
8.50
216
Drive Depth is
14
6.69
170
5.55
141
4.84
123
4x∅
0.17
4.2
Sec. II – Mounting Inst. (Cont.)
FIGURE 1D – MECHANICAL SPECIFICATIONS (Inches/mm)
for Models KBE2-2202-4, 2203-4, 4301-4, 4302-4, 4303-4 (Pkg. C1)
RESET
RUN
STOP
DATA
ENT
DSP
FUN
10.85
275
11.65
295
8.25
210
9.15
232
Drive Is Shown with Optional Power On/Off Switch, Forward-Stop-Reverse Switch, and Main Speed Potentiometer.
Drive Depth with Optional Switches:
8.35
212
Drive Depth without Optional Switches:
7.15
181
15
III. RECONDITIONING THE BUS CAPACITORS
It is recommended that the bus capacitors be reconditioned if this product has been
in storage for over one year. To recondition the capacitors, apply the AC line, with
the drive in the Stop Mode, for a minimum of one hour.
IV. TERMINAL BLOCKS TM1 and TM3 WIRING INSTRUCTIONS
(Power Connections)
WARNING! Read Safety
Warning, on page 6, before
using this drive. Disconnect the main power
when making connections to the drive.
!
For Terminal Block TM1 wiring
information, see Table 4 on
page 17.
IMPORTANT
APPLICATION NOTES:
FIGURE 2A – PKG. A and PKG. C
TERMINAL BLOCK TM1 LAYOUT
L1
L2
T1
T2
T3
FIGURE 2B – PKG. B TERMINAL BLOCK
TM1 LAYOUT
L1(L)
L2
L3(N)
P
R
T1
T2
T3
1. To Avoid False Tripping –
Do not bundle motor wires
from multiple drives in the
FIGURE 2C – PKG. C1 TERMINAL BLOCKS
same conduit. Do
TM1 and TM3 LAYOUT
not bundle the AC
line with motor
wires. (Note: AC
L1(L) L2(N) L3 230VAC Models
power to multiple
L1 L2 L3 460VAC Models
drives can be run in
the same conduit.)
TM1
TM3
Be sure at least
T1 T2 T3
P
R Chassis
Chassis
300V rated wiring is
used on 115-230 Volt
AC models and 600V
rated wiring is used
on 460 Volt AC models. Recommended insulation type is “XLPE”. Do not use
type “THHN”. If motor wires exceed 100 feet (30 m), a Load Reactor may be
required. (Do not use insulation type “THHN”.) See Section X-H, Table 22, on
page 54. The 3-phase input voltage imbalance must be less than 3%.
2. To Avoid Erratic Operation – Do not bundle signal wires (start/stop, frequency control, etc.) with AC line or motor wires. Use shielded cables on signal
wiring over 12” (30 cm). The shield should be Earth grounded on the drive side
only. Wire the drive in accordance with the National Electrical Code and other
local codes that may apply. See Figures 3A, 3B, and 3C, on page 18.
Be sure to properly fuse each AC line conductor that is not at ground poten16
Sec. IV – Term. Blocks TM1 and TM3 Wiring Inst. (Cont.)
tial. Do not fuse neutral or grounded conductors. A separate AC line switch
or contactor must be wired as a disconnect so that each ungrounded
conductor is opened. See Section VI, on page 24.
TABLE 4 – TERMINAL BLOCKS TM1 AND TM3 WIRING INFORMATION
Maximum
Wire Size (Cu)
Terminal Description
Pkg.
Horsepower
AWG
mm
A
thru 1 HP @ 115 VAC
and 230 VAC
14
B
2 HP, 3 HP @ 230 VAC
1 HP, 2 HP, 3 HP @ 460 VAC
AC Line (L1 (L), L2 (N), L3)
Motor (T1, T2, T3)
C
AC Line (L1 (L), L2 (N), L3)
Motor (T1, T2, T3)
Brake Resistor (P, R)
C1
AC Line (L1, L2)
Motor (T1, T2, T3)
AC Line (L1 (L), L2, L3 (N))
Motor (T1, T2, T3)
Brake Resistor (P, R)
2
Recommended
Tightening Torque
in-lbs
kg-cm
2.1
12
14
12
3.3
16
19
thru 1 HP @ 115 VAC
and 230 VAC
14
2.1
12
14
2 HP, 3 HP @ 230 VAC
1 HP, 2 HP, 3 HP @ 460 VAC
12
3.3
7
8
Note: To access terminals on NEMA-4X models, remove the four screws which
secure the cover. Replace the cover and the four screws after wiring is complete.
Tighten but do not over tighten these screws.
A.
AC Line Connection
Note: Be sure the drive rated AC line voltage (115, 208/230, 380/460 Volts AC)
matches the actual AC line input voltage.
1. Single phase only AC line input models (Pkg. A and Pkg. C): wire the AC line to
Terminals L1, L2, as shown in Figure 3A, on page 18.
Note: If one of the AC line inputs is a neutral (N), wire it to Terminal L2.
2. Dual phase (1φ, 3φ) AC line input models (Pkg. B): wire the 1φ AC line to
Terminals L1(L), L3(N), as shown in Figure 3B, on page 18.
3. Dual phase (1φ, 3φ) AC line input models (Pkg. C1), wire the 1φ AC line to
Terminals L1(L), L2(N), as shown in Figure 3C, on page 18.
4. Dual phase (1φ, 3φ) AC line input models (Pkg. B): wire the 3φ AC line to
Terminals L1, L2, L3, as shown in Figure 3B on page 18.
5. 3-Phase only AC line input models (Pkg. B and Pkg. C1): wire the AC line to
Terminals L1, L2, L3, as shown in Figure 3B, on page 18.
B. Ground Connection – Earth ground the drive chassis using the green ground
screw that is provided on the drive, as shown in Figures 3A and 3B, on page 18.
Application Note – Do not “daisey chain” grounds to multiple drives and motors. Run
a separate ground wire from each motor and/or drive to a central grounding point.
17
Sec. IV – Term. Blocks TM1 and TM3 Wiring Inst. (Cont.)
FIGURE 3A – POWER CONNECTIONS for PKG. A and PKG. C
MODELS with 1φ AC LINE INPUT
L1
Ground
(Earth)
L2
T1
T2
T3
3φ AC
Induction Motor
1φ AC
Line Input
FIGURE 3B – POWER CONNECTIONS for PKG. B
MODELS with 1φ and 3φ AC LINE INPUT
L1(L)
L2
L3(N)
3φ AC*
Line Input
Ground
(Earth)
P
R
T1
T2
T3
Optional
Brake Resistor
3φ AC
Induction Motor
*For 1φ AC line input, use Terminals L1(L) and L3(N)
FIGURE 3C – POWER CONNECTIONS for PKG. C1
MODELS (NEMA-4) with 1φ and 3φ AC LINE INPUT
L1(L) L2(N) L3
L1
L2
L3
230VAC Models
460VAC Models
TM1
TM3
Chassis
T1
Ground
(Earth)
Optional
3φ AC
Brake Resistor
Induction Motor
T2
T3
P
R
AC Line Input*
*For 1φ AC Line Input,
use Terminals L1(L) and L2(N)
18
Chassis
C. Motor Connection – Wire the motor to Terminals T1(U), T2(V), T3(W) of
Terminal Block TM1, as shown in Figures 3A, 3B, and 3C, on page 18. Motor
cable length should not exceed 100 feet (30 m).
Application Notes – 1. If wiring exceeds 100 feet (30 m), special Load
Reactors may be required, contact our Sales Department. See Section X-F,
Table 22, on page 53. 2. Be sure the motor rated voltage (208/230, 380/460
Volts AC) matches the control output voltage.
D. Optional Brake Resistor Connection – To improve braking, an optional brake
resistor can be connected to Terminals “P” and “R”, as shown in Figure 3B, on
page 18. This optional brake resistor can provide maximum braking torque of
up to 130% (model dependent). This option is only available for Models KBE22202, 2203, 4301, 4302, and 4303. See Section X-D, on page 52.
CAUTION! To avoid overheating, do not mount the optional brake resistor
under the drive.
V.
TERMINAL BLOCK TM2
WIRING INSTRUCTIONS
(Signal Connections)
The KBE2 contains 11 signal
terminals which can be used
for various functions. For
Terminal Block TM2 wiring
information, see Table 5.
IMPORTANT: See
Application Notes, in
Section IV, on page 16.
FIGURE 4A – PKG. A
TERMINAL BLOCK TM2 LAYOUT
RELAY
1
2
FWD REV +12 SP1 RESET +10V VIN
3
4
5
6
7
8
9
OV
FM+
10 11
FIGURE 4B – PKG. B, PKG. C, PKG. C1
TERMINAL BLOCK TM2 LAYOUT
RELAY
FW RE 12V SP
RS 10V VI
OV FM
Notes: 1. If external signal
(1) (2) (3) (4) (5) (6) (7) (8) (9) (10) (11)
wiring is not used, proceed to
Section VI, on page 24.
2. Terminal “5”
TABLE 5 – TERMINAL BLOCK TM2
(+12V) is the supply
WIRING INFORMATION
voltage for the
Supply Wire Range
Recommended
Start/Stop circuit
(Cu)
Tightening Torque
and the
mm2
Multifunction Input
Terminal Description
AWG
in-lbs
kg-cm
Terminals. The
All Signal Inputs and Outputs
24 - 18 0.2 - 0.8
5
6
maximum allowable
(Terminals 1 - 11)
load current for
Terminal “5” is 20
mA DC. 3. All terminals of Terminal Block TM2 are isolated from the AC line and
motor wiring. This eliminates the need for an isolated input signal.
19
Sec. V – Term. Block TM2 Wiring Inst. (Cont.)
FIGURE 5A – EXTERNAL
FIGURE 5B – EXTERNAL
A. External
START/STOP-FORWARD/
START/STOP-FORWARD/
Start/StopREVERSE CONNECTIONS
REVERSE OPEN COLLECTOR
Forward/Reverse
CONNECTIONS
Connection –
FWD REV +12
External control of
FWD REV +12
3 4 5
Start/Stop and
3 4 5
Forward/Reverse
is achieved by
wiring contacts to
FWD
REV
Terminals 3, 4, and
FWD
REV
5, as shown in
Figure 5A. To program the drive for external
Start/Stop, set F10 [Start/Stop Control] to “001”
[External Contacts], as described in Section IX, on page 42.
The drive is factory programmed to operate Forward/Stop using Terminal 3 and
Reverse/Stop using Terminal 4. To program the drive to operate Run/Stop using
Terminal 3 and Forward/Reverse using Terminal 4, set F03 to “001” [Run/StopForward/Reverse]. The settings for external Start/Stop control using F03
[External Forward-Stop-Reverse Control] are shown in Table 6.
!
WARNING! The Stop contact is never to be used as a Safety
Disconnect since it is not fail-safe. Use only the AC line for this purpose.
Note: Open collectors may be used in
lieu of contacts. See
Figure 5B.
TABLE 6 – EXTERNAL START/STOP CONTROL
USING FUNCTION F03
Function F03
Code Setting
Contact Status
Term. 3 (FWD)
Open
Term. 4 (REV)
Open
Drive
Operation
Stop
B. External Frequency
000
Closed
Open
Forward
Control – Terminals
(Factory
Open
Closed
Reverse
Setting)
8, 9, and 10 can be
Closed
Closed
Stop
wired in a variety of
Open
Open
Stop
ways to control the
Closed
Open
Forward
output frequency of
001
Open
Closed
Stop
the drive, as shown in
Figures 7, 8 and 9,
Closed
Closed
Reverse
on pages 21 and 22.
See Table 7 on page 21. F11 [Frequency Control Method] is used to program
the drive to control motor frequency with an external signal instead of the keypad, as described in Section IX, on page 42. F11 is factory set to “000”
[Keypad]. SW1 is used to set the drive for voltage or current input signal, as
described in Section V-B-1, on page 21. SW1 is factory set to the “V” position
(Keypad, Potentiometer, 0 - 10 Volts DC).
20
Sec. V – Term. Block TM2 Wiring Inst. (Cont.)
TABLE 7 – SIGNAL INPUT, F11, and SW1 SETTING
Frequency Control Method
F11 Code Setting
Keypad (Factory Setting)
000 (Factory Setting)
5 kΩ Potentiometer*
001
0 - 10 Volts DC
001
0 - 20 mA DC
001
4 - 20 mA DC
002
SW1 Position
V
(Factory Setting)
I
* 10 kΩ may also be used
1. Signal Input Type Selection (SW1) –
FIGURE 6A – SW1 Set for
Remote Speed Potentiometer or
SW1 selects the external signal type to
Voltage Following Signal Input
be used to control motor speed. SW1 is
factory set to the “V” position for 0 - 10 Volts DC
voltage following signal input or remote speed
I
potentiometer control, as shown in Figure 6A. For
V
0 - 20 mA or 4 - 20 mA DC current following signal input, set SW1 to the “I” position, as shown in
SW1
Figure 6B. Set F11 [Frequency Control Method] to
the appropriate setting for the signal type being
used, as described in Section IX, on page 42.
FIGURE 6B – SW1 Set for
Current Following Signal Input
Location of SW1:
a. To access SW1 on panel mount models,
remove the small cover that is located on the
right side of the drive, above Terminal Block
TM2, by gently sliding it upwards. Replace the
cover after setting SW1 as described above.
I
V
SW1
b. To access SW1 on NEMA-4 / IP-65 models,
remove the four screws which secure the cover. SW1 is located near
the top right side of Terminal Block TM2. Replace the cover and the
four screws after setting SW1 as described above. Tighten but do not
over tighten these screws.
FIGURE 7 – REMOTE
SPEED POTENTIOMETER CONNECTION
FWD REV +12 SP1 RESET +10V VIN
3
4
5
6
7
8
OV
9
FM+
10 11
Low
TM2
2
High
RELAY
1
wiper
2. Remote Speed
Potentiometer
Connection – A 5kΩ
(or 10kΩ) remote
speed potentiometer
can be connected to
Terminal Block TM2 to
control motor speed.
Connect the high side
of the potentiometer to
Terminal 8, the wiper
5 kΩ
21
Sec. V – Term. Block TM2 Wiring Inst. (Cont.)
to Terminal 9, and the low side to Terminal 10, as shown in Figure 7, on page
21. Set F11 [Frequency Control Method] to “001” [Potentiometer] and be sure
SW1 is set to the “V” position (factory setting). See Section IX, on page 42.
3. Voltage Following
FIGURE 8 – VOLTAGE FOLLOWING CONNECTION
Connection – A 0 - 10
RELAY
FWD REV +12 SP1 RESET +10V VIN OV FM+
Volt DC analog signal
1 2 3 4 5 6 7 8 9 10 11
input can be connected to Terminal Block
TM2 to control motor
TM2
+
speed. Connect the
0 - 10 VDC V
signal voltage (+) to
Terminal 9 and the
common (-) to Terminal
10, as shown in Figure 8. Set F11 [Frequency Control Method] to “001”
[0 - 10 V] and be sure SW1 is set to the “V” position (factory setting).
Note: F11 [Frequency Control Method] is factory set to “000” [Keypad].
FIGURE 9 – CURRENT FOLLOWING CONNECTION
4. Current Following
Connection – A 0 - 20
RELAY
FWD REV +12 SP1 RESET +10V VIN OV FM+
mA DC or 4 - 20 mA
1 2 3 4 5 6 7 8 9 10 11
DC analog signal input
can be connected to
Terminal Block TB2 to
TM2
+
control motor speed.
0 - 20 ma DC or 4 - 20 mA DC
Connect the signal
current (+) to Terminal
9 and the common (-)
to Terminal 10, as shown in Figure 9. Set SW1 to the “I” position.
a. For 4 - 20 mA DC analog signal input, set F11 [Frequency Control
Method] to “001”.
b. For 0 - 20 mA DC analog signal input, set F11[Frequency Control
Method] to “002”.
5. Multifunction Input Terminals 6 and 7
Connection – The Multifunction Input
Terminals are factory programmed for
Preset Speed #1 (Terminal “6” SP1) and
Reset (Terminal “7” RST). Each terminal
can be programmed for six functions
using Function Numbers F19 for
Terminal “6” and F20 for Terminal “7”.
TABLE 8 – PROGRAMMABLE
FUNCTIONS FOR F19 and F20
001
002
003
004
005
006
Jog
Preset Speed #1
Rapid Stop
Coast-to-Stop
Reset
Preset Speed #2
See Table 8, Figures 10A, 10B, and Table 9 on page 23.
22
Sec. V – Term. Block TM2 Wiring Inst. (Cont.)
Preset Speed
Operation: Many
applications require
preset speed operation. The KBE2 is
capable of providing
3 preset fixed
speeds using
Terminals “6” and
“7” plus a fourth set
speed. See Table 9.
FIGURE 10A
MULTIFUNCTION
INPUT TERMINAL
CONNECTIONS
FIGURE 10B
MULTIFUNCTION INPUT
TERMINAL OPEN COLLECTOR CONNECTIONS
+12 SP1 RESET
+12 SP1 RESET
5
6
PRESET
SPEED #1
5
7
RESET
(PRESET
SPEED #2)
PRESET
SPEED #1
6
7
RESET
(PRESET
SPEED #2)
Terminal 6 has been
factory programmed to Preset Speed #1 (F08 programs the frequency).
Terminal 7 has been factory programmed to reset the drive. To program
Terminal 7 to Preset Speed #2, use Function F20 [Multifunction Terminal 7]
set to “006”, as described in Section VIII-C-7, on page 36.
TABLE 9 – SELECTING PRESET OUTPUT FREQUENCY WITH
MULTIFUNCTION INPUT TERMINALS 6 AND 7
Preset Speed
Terminal 6
Terminal 7
Function No. to Program Output Frequency
1
Closed
Open
F08 (10.0 Hz*)
2
Open
Closed
F26 (20.0 Hz*)
3
Closed
Closed
F27 (30.0 Hz*)
Keypad
(Factory Setting)
Open
Open
Set by ▲ and ▼/RESET Keys
* Indicates factory setting of preset speed frequency (Hz).
Note: F19 is used to program Term. 6 to Preset Speed #1, F20 is used to program
Term. 7 to Preset Speed #2. Close both Terms. 6 and 7 for Preset Speed #3 (when
switching Terms. 6 and 7 together, the operation must be within 10 mSeconds).
a. Preset Speed #1 – Connect Terminal 6 to Terminal 5, of Terminal Block
TM2, as shown in Figures 10A and 10B. Note: F19 must be set to “002”
(factory setting). Set F08 to the desired output frequency.
b. Preset Speed #2 – Connect Terminal 7 to Terminal 5, of Terminal Block
TM2, as shown in Figures 10A and 10B. Set F20 to “006” (Preset Speed
#2) and set F26 to the desired output frequency.
c. Preset Speed #3 – Connect Terminals 6 and 7, of Terminal Block TM2,
to Terminal 5, as shown in Figures 10A and 10B (when switching Terms.
6 and 7 together, the operation must be within 10 mSeconds). In order
to obtain Preset Speed #3, Terminals 6 and 7 must be programmed for
Preset Speeds #1 and #2, as described above. Use Function F27 to set
the frequency of Preset Speed #3.
23
d. Fourth Speed – To select a fourth speed, open connections to Terminals
6 and 7, of Terminal Block TM2, as shown in Figures 10A and 10B, on
page 23. This allows the fourth speed to be the speed set by the keypad, remote potentiometer, or external signal input, depending on the
Frequency control Method (F11).
C. Multifunction Output
FIGURE 11 – MULTIFUNCTION OUTPUT RELAY AND
Relay Connection –
ANALOG OUTPUT VOLTAGE CONNECTIONS
Terminals 1 and 2 of
RELAY
FWD REV +12 SP1 RESET +10V VIN OV FM+
Terminal Block TM2 con1 2 3 4 5 6 7 8 9 10 11
tain a normally open (NO)
relay contact. This contact changes state
TM2
depending on the drive
– +
operation and the setting
Auxiliary Device
0 - 10 VDC
of Function F21. See
Section IX, on page 46.
F21 is factory set to “003”, which sets the relay to operate as a Fault Relay.
See Figure 11. In the Fault Mode, the relay will change state when any of the
following faults occur: OL1, OL2, OCS, OCA, OCC, OCd, OCb, OUC, LUC, and
OHC. The Output Relay can be programmed using Function F21 to operate as
a Run Relay (F21 = “000”) or as a Frequency Reached Relay (F21 = “002”).
Note: The Output Relay contact is rated 1 Amp at 30 Volts DC or 250 Volts AC.
D. Analog Output Voltage Connection – An analog output voltage (0 -10 Volts DC)
is provided at Terminals 10 (-) and 11(+) of Terminal Block TM2. This voltage is
proportional to the Output Frequency Upper Limit set with F06. See Figure 11.
VI. AC LINE FUSING
This drive does not contain AC line fuses. Most electrical codes require that each
ungrounded conductor contain circuit protection. It is recommended to install a fuse
or circuit breaker in series with each ungrounded conductor. Do not fuse neutral or
grounded conductors. See Table 10. Check all electrical codes that apply to the
application. Do not install a fuse or circuit breaker in series with motor leads.
TABLE 10 – RECOMMENDED FUSE OR CIRCUIT BREAKER RATING
24
Model
Rating (Amps AC)
Model
Rating (Amps AC)
KBE2-1125
15
KBE2-2202
20, 15*
KBE2-1150
15
KBE2-2203
30, 15*
KBE2-1101
30
KBE2-4301
15
KBE2-2125
15
KBE2-4302
15
KBE2-2150
15
KBE2-4303
15
KBE2-2101
20
*Rating is for 1φ , 3φ.
RESET
H. V.
Connect Hi-Pot
to All
AC Line Inputs
AC Line Input
TEST
10mA
RETURN
0mA
LEAKAGE
0
2
ZERO
3
Chassis
T3
T2
T1
R
P
L3
L2
L1
Chassis
Adjustable Frequency Drive
Connect All TM1
Terminals Together
(Main Power Disconnected)
Machine or Equipment Frame
L2
L1
Auxiliary Equipment
MAX
VOLTAGE
AC KILOVOLTS
1
High Voltage Dielectric Withstand Tester (Hi-Pot Tester)
Motor Wires
Frame
FIGURE 12 – HI-POT SETUP
25
VII. RECOMMENDED HIGH VOLTAGE DIELECTRIC
WITHSTAND TESTING (Hi-Pot)
Testing agencies such as UL, CSA, etc., usually require that the equipment undergo a hi-pot test. In order to prevent catastrophic damage to the drive, which has
been installed in the equipment, it is recommended that the following procedure be
followed. A typical hi-pot test setup is shown in Figure 12, on page 25.
Note: All equipment AC line inputs must be disconnected from the AC power.
CAUTION! To avoid damage to the drive, do not connect any terminals of
Terminal Block TM2 to the hi-pot tester.
A. Connect all equipment AC power input lines together and connect them to the
H.V. lead of the hi-pot tester. Connect the RETURN lead of the hi-pot tester to
the frame on which the control and other auxiliary equipment are mounted.
B. The hi-pot tester must have an automatic ramp-up to the test voltage and an
automatic ramp-down to zero voltage.
Note: If the hi-pot tester does not have automatic ramping, then the hi-pot output must be manually increased to the test voltage and then manually reduced
to zero. This procedure must be followed for each machine to be tested. A suggested hi-pot tester is Slaughter Model 2550.
!
WARNING! Instantaneously applying the hi-pot voltage will cause irreversible damage to the drive.
VIII. DRIVE OPERATION
Before operating the drive, read the following instructions on keypad use and programming functions. See Figure 13, on page 27, for the digital keypad layout.
Note: To prevent damage, do not operate the keypad with a screwdriver or other
sharp-ended tool.
A. Digital Keypad Description – The digital keypad has 5 keys and a display
which are used to program drive functions and control various features, as
described below. See Figure 13, on page 27.
1. 3-Digit LED Display – When power is applied to the drive, the LED, located
at the top left side of the digital display, will illuminate. The digital display will
flash the set frequency (factory setting is “05.0”). When the drive is in Stop
Mode, the set frequency is displayed. When the drive is in the run mode, the
output frequency is displayed.
2. RUN/STOP Key – The RUN/STOP key is used to run or stop the drive
a. If the drive is in Stop Mode, press the RUN/STOP key to start the drive.
b. If the drive is Run Mode, press the RUN/STOP key to stop the drive.
26
Sec. VIII – Drive Operation (Cont.)
3. DSP/FUN Key – The DSP/FUN key is used to change the display between
Display Mode and Function Mode.
a. If DSP/FUN is pressed while frequency is displayed, the display will indicate a function number.
b. If DSP/FUN is pressed while a function number is displayed, the display
will change to the output frequency setting.
Note: When the DSP/FUN key is pressed, the last function number will
be displayed. If the AC line is interrupted for more than 2 seconds, then
“F00” will be displayed when the DSP/FUN key is pressed.
FIGURE 13 – DIGITAL
KEYPAD LAYOUT
Power On LED
4. ▲ Key – The ▲ key is used to increase frequency, increase to the next higher function number, or increase the function value or code setting. Pressing
the ▲ key once will cause the display to increase by 1 unit. Maintaining pressure on the ▲ key will cause the display units to increase rapidly.
a. If the drive is in Run Mode, press the ▲ key to increase the run
frequency.
27
Sec. VIII – Drive Operation (Cont.)
b. If the drive is in Stop Mode, press the ▲ key to increase the set
frequency.
c. If a function number is displayed, press the ▲ key to increase the function number to the next higher number.
d. If a function value or code is displayed, press the ▲ key to increase the
function value or code setting.
5. ▼/RESET Key – The ▼ key is used to decrease frequency, decrease to
the next lower function number, decrease the function value or code setting, or reset the drive after a fault has occurred. Pressing the ▼/RESET
key once will cause the display to decrease by 1 unit. Maintaining pressure
on the ▼/RESET key will cause the display units to decrease rapidly.
a. If the drive is in Run Mode, press the ▼/RESET key to decrease the
frequency.
b. If the drive is in Stop Mode, press the ▼/RESET key to decrease the
set frequency.
c. If a function number is displayed, press the ▼/RESET key to decrease
the function number to the next lower number.
d. If a function value or code is displayed, press the ▼/RESET key to
decrease the function value or code setting.
e. If a fault has occurred, press the ▼/RESET key to reset the drive.
6. DATA/ENT Key – The DATA/ENT key is used to display or enter a function’s setting.
a. If the desired function number is displayed, press the DATA/ENT key to
display the function value or code.
b. If the desired function value or code is displayed, press the DATA/ENT
key to program the function to the new value or code. “End” will be
momentarily displayed.
B. Digital Keypad Operation – Examples of basic keypad operations are
described below.
Note: When the DSP/FUN key is pressed, the last function number will be displayed. If the AC line is interrupted for more than 2 seconds, then “F00” will
be displayed when the DSP/FUN key is pressed.
1. Setting Drive Output Frequency Using the Keypad – The drive is factory
set to run at 5.00 Hz when the drive is in the Run Mode. (Press the
RUN/STOP Key to start or stop the drive.) See Figure 14 on page 29.
a. To change the Set Frequency (drive in Stop Mode):
28
1. Press the ▲ or ▼ key until the desired frequency is displayed.
Sec. VIII – Drive Operation (Cont.)
2. Press the RUN/STOP key to run the drive at the new Set Frequency.
Note: Figure 14
is a flow chart
which illustrates
the sequence to
change and
program the Set
Frequency from
5.00 Hz to 32.1
Hz using the
keypad.
b. To change the
Run Frequency
(drive in Run
Mode): Press
the ▲ or ▼ key
until the desired
frequency is displayed.
FIGURE 14 – FLOW CHART TO CHANGE
SET FREQUENCY (DRIVE IN STOP MODE)
Power On
Example: Figure
15 illustrates the
sequence to
program F01 for a
10.0 second acceleration time.
a. Press the
DSP/FUN key to
display function
number.
Press to Change
Set Frequency
New Set Frequency
is Displayed
RUN
STOP
Press to Run the Drive
at the New
Set Frequency
Set Frequency
is Displayed
Note: In Run Mode, use the Up and Down keys to set the desired
frequency.
FIGURE 15 – FLOW CHART TO PROGRAM F01
(ACCELERATION TIME)
DSP
FUN
Power On
2. F01 (Acceleration
Time) – Used to set
the acceleration time
of the drive. The
acceleration time
can be changed
while the drive is in
the Stop Mode or
Run Mode. See
Figure 15.
Set Frequency
Flashes
Set Frequency
Flashes
Press to
Change Display
to Function Number
Function Number
is Displayed
DATA
ENT
Press 1 Time
to Change
Function Number
Acceleration Time
Function Number
is Displayed
Press to Set
Acceleration Time
Acceleration Time
Setting is Displayed
Press to Display
Acceleration Time
Setting
New Acceleration Time
Setting is Displayed
DATA
ENT
Press to Enter
the New Setting
Momentarily Displayed
which Confirms
New Setting
Acceleration Time
Function Number
is Displayed
DSP
FUN
Press to Display
Set Frequency
Set Frequency
Flashes
b. Press the ▲ key until “F01” is displayed.
29
Sec. VIII – Drive Operation (Cont.)
c. Press the DATA/ENT key. “05.0” (5.0 seconds) will be displayed
(factory setting).
d. Press the ▲ or ▼/RESET key until the desired acceleration time is displayed. Maintaining pressure on the ▲ or ▼/RESET key will cause the
display units to change rapidly. The programmable range is 0.1 - 999
seconds.
e. Press the DATA/ENT key to set the new acceleration time. “F01” will be
displayed.
f.
Press the DSP/FUN key to return to the frequency display or press the
▲ or ▼/RESET key to change to another function number.
3. F04 (Motor Direction) – F04 is factory set to “000” [Forward Direction].
The motor direction can be changed while the drive is in the Stop
Mode or Run Mode.
a. Press the DSP/FUN key to display function number.
b. Press the ▲ or ▼/RESET key until “F04” is displayed.
c. Press the DATA/ENT key. “000” will be displayed.
d. Press the ▲ or ▼/RESET key until code “001” is displayed.
e. Press the DATA/ENT key to set the drive for reverse motor direction.
“F04” will be displayed.
f.
Press the DSP/FUN key to return to the frequency display or press the
▲ or ▼/RESET key to change to another function number.
C. Programming – All drive functions have been factory programmed, as shown in
Table 15, on pages 37 and 38.
Application Notes: 1. The KBE2 drive has been factory programmed for 60 Hz
motors for use in constant torque applications. F05 is factory set to “004” [60
Hz Constant Torque]. To convert to 50 Hz motors used on general purpose
applications, set F05 to “001” [50 Hz Constant Torque], as shown in Table 11.
Also see Section IX, on page 39, for details on programming Function F05
[Volts/Hz Pattern]. 2. To reset to factory settings use F25, as described in
Section IX, on page 48.
TABLE 11 – REPROGRAMMING THE DRIVE FOR 50 Hz MOTOR OPERATION
Function
to Change
Motor Frequency
Factory Code Setting
for 60 Hz Motors for
Constant Torque Applications
New Code Setting
for 50 Hz Motors for
Constant Torque Applications
F05
004
001
1. F18 [Motor Overload Protection (I2t)] – Motor Overload Protection is used
to set the maximum motor current as a percent of the full load rating of the
30
Sec. VIII – Drive Operation (Cont.)
drive, as described in Section IX, on page 45. F18 is factory set to “100”
(100% Full Load Rating of the Drive).
Note: It is highly recommended that this function be programmed.
a. The drive must be in stop mode (press the RUN/STOP key). The set
frequency will flash on the display.
b. Press the DSP/FUN key to display function number.
c. Press the ▲ or ▼/RESET key until “F18” is displayed.
d. Press the DATA/ENT key. The function value will be displayed. Factory
setting is “100” (100% Full Load Rating of the Drive).
e. Press the ▲ or ▼/RESET key until the desired value is displayed.
Maintaining pressure on the ▲ or ▼/RESET key will cause the display to
change rapidly. The programmable range for F18 is 0.1 - 200%.
Example: If a 3.3 Amp motor is used with Model KBE2-2101 (rated 4.2
Amps), F18 should be set according to the following formula.
(Current Rating of Motor ÷ Current Rating of Drive) x 100
(3.3 Amps ÷ 4.2 Amps) x 100 = 79%, therefore, enter the function value
“079” into F18.
f.
Press the DATA/ENT key to save the new setting. “F18” will be displayed.
g. Press DSP/FUN key to return to the frequency display or press the ▲ or
▼/RESET key to change to another function number.
2. F05 (Volts/Hz Pattern) – Volts/Hz Pattern is used to set the drive for the
application in which it will be used, as described in Section IX, on page 40.
F05 is factory set to “004” for 60 Hz Constant Torque applications.
a. The drive must be in stop mode (press the RUN/STOP key).
b. Press the DSP/FUN key to display function number.
c. Press the ▲ or ▼/RESET key until “F05” is displayed.
d. Press the DATA/ENT key. “004”will be displayed.
e. Press the ▲ or ▼/RESET key until the desired setting is displayed. The
programmable codes for F05 are as follows.
F05 = 001:
002:
003:
004:
005:
006:
50 Hz Constant Torque Application
50 Hz High Starting Torque Application
50 Hz Variable Torque (HVAC) Application
60 Hz Constant Torque Application (Factory Setting)
60 Hz High Starting Torque Application
60 Hz Variable Torque (HVAC) Application
31
Sec. VIII – Drive Operation (Cont.)
f.
Press DSP/FUN key to return to the frequency display or press the ▲ or
▼/RESET key to change to another function number.
Notes: 1. Programming F05 is related to the motor characteristics not
the AC line input frequency (50/60 Hz). 2. Codes “003” and “006” are
used for variable torque loads such as fans, blowers, or centrifugal
pumps.
3. F23, F24, F28 for Manual or Automatic Restart (After A Fault Has
Cleared) – See Table 12, for a summary of manual and automatic restart
function settings.
!
WARNING! Do not set the drive for automatic restart, unless
automatic restart will not cause serious injury or death.
TABLE 12 – FUNCTION F23, F24, F28 CODE SETTINGS
Function Code Setting
F23
F24
F28
Description
000*
000*
001*
The drive must be manually restarted after a fault has cleared,
except for a momentary AC power loss.**
001
000*
001*
The drive must be manually restarted after a fault has cleared,
including a momentary AC power loss.**
000*
005
001*
The drive will automatically restart after a fault has cleared but
must be manually restarted after an AC power loss.
The drive will automatically restart after a fault has cleared,
including an AC power loss.
000*
005*
000
Note: Function F10 must be set to “001” [External Contacts]
and a jumper must be installed between Terminals 3 and 5 of
Terminal Block TM2.
*Indicates factory setting, **AC power loss of under 2 seconds.
The faults that can be manually or automatically reset are indicated by the following codes:
OCS, OCA, OCC, OCd, OCb, OUC, LUC, OHC. See Table 17, on pages 49 and 50.
a. Manual Restart – The drive is factory programmed to be manually
restarted whenever a fault occurs (see Table 17, on pages 49 and 50).
F23 [Auto Restart After A Fault Has Cleared] is factory set to “000”
[Enable Auto Restart]. In this mode, the drive must be restarted for all
faults except for a momentary AC power loss. If a momentary AC power
loss (under 2 seconds) occurs, the drive will shut down causing the motor
to slow down or stop (depending on the load type) and then accelerate
to the set frequency. If the application requires that the drive shut down
even during a momentary AC power loss, set F23 to “001” [Disable Auto
Restart].
32
Sec. VIII – Drive Operation (Cont.)
To change the setting of F23 from “000” to “001”:
1. The drive must be in Stop Mode (press the RUN/STOP key). The
set frequency will flash on the display.
2. Press the DSP/FUN key to display function number.
3. Press the ▲ or ▼/RESET key until “F23” is displayed.
4. Press the DATA/ENT key. The function code will be displayed.
Factory setting is “000” [Enable Auto Restart].
5. Press the ▲ key until “001” [Disable Auto Restart] is displayed.
6. Press DSP/FUN key to return to the frequency display or press the
▲ or ▼/RESET key to change to another function number.
b. Automatic Restart for All Faults Except AC Power Loss* – If the application requires that the drive automatically restart after a fault has cleared,
except for an AC power loss, Function F24 must be set as follows. See
Table 13. (Note: F23 and F24 are both factory set to “000”.)
The faults that are automatically reset are indicated by the following
codes: OCS, OCA, OCC, OCd, OCb, OUV, LUC, OHC
To change the setting of F24 from “000” to “005”:
1. The drive must be in Stop Mode (press the RUN/STOP key).
2. Press the DSP/FUN key to display function number.
3. Press the ▲ or ▼/RESET key until “F24” is displayed.
4. Press the DATA/ENT key. The number of restart attempts will be
displayed. Factory setting is “000”.
5. Press the ▲ key until “005” (5-restart attempts) is displayed.
6. Press DSP/FUN key to return to the frequency display or press the
▲ or ▼/RESET key to change to another function number.
* The drive will restart with a momentary power loss of less than 2 seconds (F23 set to “000”).
TABLE 13 – FUNCTIONS F23, F24, F28 SET FOR AUTOMATIC RESTART
FOR ALL FAULTS EXCEPT AC POWER LOSS
Function
Number
F23
F24
F28
Function Description
Auto Restart After a Fault
Has Cleared
Number of Auto Restart
Attempts
Automatic AC Line Start
Code/Value
000
(Factory Setting)
005
(Factory Setting is “000”)
001
(Factory Setting)
Description of Code/Value
Enable Auto Restart After a
Fault Has Cleared
Five Auto Restart attempts
Disable Automatic AC Line Start
33
Sec. VIII – Drive Operation (Cont.)
c. Automatic Restart for All Faults Including AC Power Loss* – If the
application requires that the drive automatically restart after a fault has
cleared, including an AC power loss, Function F28 must be set as follows. See Table 14.
To change the setting of F28 from “001” to “000”:
1. The drive must be in Stop Mode (press the RUN/STOP key).
2. Press the DSP/FUN key to display function number.
3. Press the ▲ or ▼/RESET key until “F28” is displayed.
4. Press the DATA/ENT key. The function code will be displayed.
Factory setting is “001” [Disable Automatic AC Line Start].
5. Press the ▲ or ▼/RESET key until code “000” is displayed.
6. Press DSP/FUN key to return to the frequency display or press the
▲ or ▼/RESET key to change to another function number.
*Note: For Automatic Restart, Function F10 must be set to
“001” [External Contacts] and a jumper must be installed
between Terminals 3 and 5 of Terminal Block TM2.
TABLE 14 – FUNCTIONS F23, F24, F28 SET FOR AUTOMATIC RESTART
FOR ALL FAULTS INCLUDING AC POWER LOSS
Function
Number
Function Description
Code/Value
Description of Code/Value
F23
Auto Restart After a Fault
Has Cleared
000
(Factory Setting)
Enable Auto Restart After a
Fault Has Cleared
F24
Number of Auto Restart
Attempts
005
(Factory Setting is “000”)
Five Auto Restart Attempts
Automatic AC Line Start
000
(Factory Setting is “001”)
Enable Automatic AC Line Start
Start/Stop Control
001
(Factory Setting is “000”)
External Contacts
(Jumper Terms. 3 & 5 of TM2)
F28
F10
4. F11 (Frequency Control Method) – Frequency Control Method is used to
set the drive for either keypad, potentiometer, voltage following, or current
following frequency control, as described in Section IX, on page 42. F11 is
factory set to “000” [Keypad] to control output frequency with the keypad.
Note: 1. SW1 must also be set to the proper setting for voltage or current
signal input, as described in Section V-B-1, on page 21.
To change the setting of F11 from “000” [Keypad] to “001”
[External Contacts]:
a. The drive must be in Stop Mode (Press the RUN/STOP key).
34
Sec. VIII – Drive Operation (Cont.)
b. Press the DSP/FUN key to display function number.
c. Press the ▲ or ▼/RESET key until “F11” is displayed.
d. Press the DATA/ENT key. The function code will be displayed (factory
setting is “000” (Keypad]).
e. Press the ▲ or ▼/RESET key until the desired setting is displayed. The
programmable codes for F11 are as follows.
F11 = 000: Keypad (Factory Setting)
001: Potentiometer, 0 - 10 V, 0 - 20 mA
002: 4 - 20 mA
f.
Press DSP/FUN key to return to the frequency display or press the ▲ or
▼/RESET key to change to another function number.
5. F10 (Start/Stop Control) – Start/Stop Control is used to set the drive for
keypad (factory setting) or external Start/Stop Control, as described in
Section IX, on page 42. F10 is factory set to “000” [Keypad].
WARNING! The Stop contact is never to be used as a Safety Disconnect
since it is not fail-safe. Use only the AC line for this purpose.
!
To change the setting of F10 to External Contacts:
a. The drive must be in Stop Mode (press the RUN/STOP key).
b. Press the DSP/FUN key to display function number.
c. Press the ▲ or ▼/RESET key until “F10” is displayed.
d. Press the DATA/ENT key. The function code setting will be displayed
(factory setting is “000” [Keypad]).
e. Press the ▲ or ▼/RESET key until code “001” is displayed.
f.
Press DSP/FUN key to return to the frequency display or press the ▲ or
▼/RESET key to change to another function number.
Notes: 1. In order for the reverse function to operate, Function F22
must be set to “000” [Enable Reverse Run] (factory setting). 2. The
STOP key on the keypad is always operative, even if F10 is set to “001”
[External Contacts].
6. F03 (External Forward-Stop-Reverse Control) – External Forward-StopReverse Control is used to set the drive for either Forward/StopReverse/Stop (factory setting) or Run/Stop-Forward/Reverse, as described
in Section IX, on page 39.
35
Sec. VIII – Drive Operation (Cont.)
!
WARNING! The Stop contact is never to be used as a Safety Disconnect
since it is not fail-safe. Use only the AC line for this purpose.
To change the setting of F03 to Run/Stop-Forward/Reverse:
a. The drive must be in Stop Mode (press the RUN/STOP key).
b. Press the DSP/FUN key to display function number.
c. Press the ▲ or ▼/RESET key until “F03” is displayed.
d. Press the DATA/ENT key. The function code will be displayed. Factory
setting is “000” [Forward/Stop-Reverse/Stop].
e. Press the ▲ or ▼/RESET key until code “001” [Run/Stop –
Forward/Reverse] is displayed.
f.
Press the DSP/FUN key to return to the frequency display or press the
▲ or ▼/RESET key to change to another function number.
7. Setting F20 for Preset Speed #2 – Multifunction Input Terminal 7 is used
to set various functions for operating the drive. F20 is factory set to “005”
[Reset] to reset the drive after a fault has cleared. See Preset Speed operation in Section V-B-5, on page 23.
To change the setting of F20 to Preset Speed #2:
a. The drive must be in Stop Mode (press the RUN/STOP key).
b. Press the DSP/FUN key to display function number.
c. Press the ▲ or ▼/RESET key until “F20” is displayed.
d. Press the DATA/ENT key. The function setting will be displayed (factory
setting is “005” [Reset]).
e. Press the ▲ or ▼/RESET key until code “006” [Preset Speed #2] is displayed.
f.
Press the DSP/FUN key to return to the frequency display or press the
▲ or ▼/RESET key to change to another function number.
Note: F20 can be used to set the following functions: Jog (“001”),
Preset Speed #1 (“002”), Rapid Stop (“003”), Coast-to-Stop (“004”),
Reset (“005”) (factory setting), and Preset Speed #2 (“006”).
D. Programmable Functions (Summary List) – All functions have been factory
set, as shown in Table 15, on pages 37 and 38. See Section IX, on page 39,
for a detailed description of each function.
36
Output Frequency Lower Limit (Hz)
Preset Speed #1 Frequency (Hz)
Jog Frequency (Hz)
Start/Stop Control (See F03)
Frequency Control Method
Switching Frequency (Code)
Volts/Hz Curve Modification (Torque Boost) (%)
Stop Method
DC Injection Brake Time (Seconds)
DC Injection Brake Start Frequency (Hz)
F07*
F08
F09
F10
F11
F12
F13
F14
F15
F16
007: 12 kHz
008: 14.4 kHz
009: 15 kHz
001: 4 kHz
002: 5 kHz
003: 6 kHz
1.0 - 10.0
45
44
44
43
42
42
42
41
41
40
40
40
40
39
Table 15 continued on page 38.
1.5
0.5
000
0.0 - 25.5
0.0
000: Controlled Deceleration-to-Stop (with DC Injection Braking)
001: Coast-to-Stop
005
000
000
6.0
10.0
0.0 - 10.0
010: 16 kHz
001: Potentiometer, 0 - 10V, 0 - 20mA
000: Keypad
002: 4 - 20mA
004: 7.2 kHz
005: 8 kHz
006: 10 kHz
001: External Run/Stop Contacts
000: Keypad Operation
1.0 - 200
1.0 - 200
0.0
60.0
1.0 - 200
Output Frequency Upper Limit(Hz)1
F06*
0.0 - 200
004
001: 50Hz Constant Torque
004: 60Hz Constant Torque
002: 50Hz High Starting Torque
005: 60Hz High Starting Torque
003: 50Hz Variable Torque (HVAC) 006: 60Hz Variable Torque (HVAC)
Volts/Hz Pattern1
F05
000
Motor Direction
F04*
000
000: Forward Direction
001: Reverse Direction
External Forward-Stop-Reverse Control (See F10)
F03
39
39
5.0
000: Forward/Stop-Reverse/Stop
001: Run/Stop-Forward/Reverse
0.1 - 999
Page
Number
Factory
Setting
5.0
Deceleration Time (Seconds)
Function Range/Code
0.1 - 999
Acceleration Time (Seconds)
F02*
Function Description
TABLE 15 – PROGRAMMABLE FUNCTIONS SUMMARY LIST
F01*
Function
Number
Sec. VIII – Drive Operation (Cont.)
37
38
30.0
001
0-5
010: Reset Drive for 50 Hz Constant Torque Motor Operation
020: Reset Drive for 60 Hz Constant Torque Motor Operation
0.0 - 200
0.0 - 200
000: Enable Automatic AC LIne Start
001: Disable Automatic AC LIne Start
Reverse Enable/Disable
Auto Restart (After a Fault Has Cleared)
Number of Auto Restart Attempts
Reset Drive to Factory Settings1
Preset Speed #2 Frequency (Hz)
Preset Speed #3 Frequency (Hz)2
Automatic AC Line Start
CPU Program Version
Logs Last 3 Faults that Occurred
F22
F23
F24
F25
F26
F27
F28
F29
F30
003: Fault
Multifunction Output Relay (Terminals 1, 2)
F21
—
—
20.0
000
0
000
000
003
51
51
48
48
48
48
47
47
47
46
46
45
45
45
Page
Number
Notes: 1. Setting F25 to “010” [50 Hz] will automatically set F05 to “001” [50 Hz] and F06 to “050” [50 Hz]. Setting F25 to “020” [60 Hz] will automatically set F05 to “004” [60 Hz]
and F06 to “060” [60 Hz]. 2. For Preset Speed #3, set F19 to “002”, F20 to “006”, and connect Terminals 6 and 7 of Terminal Block TM2 together. *Settings of F01, F02, F04, F06,
and F07 can be changed while the drive is in the run mode.
—
—
000: Enable Auto Restart 001: Disable Auto Restart
000: Enable Reverse Run 001: Disable Reverse Run
002: Frequency Reached
Multifunction Input Terminal 7 2
F20
001: Run
004: Coast-to-Stop
005: Reset
006: Preset Speed #2
001: Jog
002: Preset Speed #1
003: Rapid Stop
Multifunction Input Terminal 6 2
F19
005
002
004: Coast-to-Stop
005: Reset
006: Preset Speed #2
001: Jog
002: Preset Speed #1
003: Rapid Stop
8.0
100
1 - 200
0.0 - 20.0
Electronic Motor Overload Protection (I2t) (% Full Load)
Factory
Setting
DC Injection Brake Level (% Bus Voltage)
Function Range/Code
F18
Function Description
TABLE 15 – PROGRAMMABLE FUNCTIONS SUMMARY LIST (Continued)
F17
Function
Number
Sec. VIII – Drive Operation (Cont.)
IX. PROGRAMMABLE FUNCTIONS (Detailed)
The KBE2 Series drive contains programmable functions which are described
below. See Section VIII-A, on page 26, for keypad instructions. See Table 15, on
pages 37 and 38.
F01 – Acceleration Time
Factory Setting: “5.00” (5.0 Seconds) – F01 is used to set the acceleration time.
F01 is factory set to “05.0” for 5 second acceleration. The acceleration time is
based on the time it takes for the drive output to reach 60 Hz.
If the Set Frequency is greater than 60 Hz, the acceleration time will be proportionally increased. If the drive is set to less than 60 Hz, the acceleration time will be
proportionally decreased.
When accelerating high inertial loads, the acceleration time may be extended and
the current limit circuit may activate due to the Stall Prevention Circuitry.
Programmable Range: 0.1 - 999 Seconds
F02 – Deceleration Time
Factory Setting: “5.00” (5.0 Seconds) – F02 is used to set the deceleration time.
F02 is factory set to “05.0” for 5 second deceleration. The deceleration time is
based on the time it takes for the drive output to reach zero speed (from 60 Hz)
after a stop or zero speed command is given.
If the Set Frequency is greater than 60 Hz, the deceleration time will be proportionally increased. If the drive is set to less than 60 Hz, the deceleration time will be
proportionally decreased.
When decelerating high inertial loads, the automatic regeneration protection circuit
may activate. This circuit will extend the deceleration time to prevent the drive
from tripping, due to overcharging the bus capacitors.
Programmable Range: 0.1 - 999 Seconds
F03 – External Forward-Stop-Reverse Control
Factory Setting: “000” [Forward/Stop, Reverse/Stop] – F03 is used to set the
drive for external forward/stop-reverse/stop or run/stop-forward/reverse control.
F03 is factory set to “000”. Function F10 must be set to “001” [External
Contacts], for external Start/Stop operation. See Section V-A, on page 20.
F03 = 000: Forward/Stop-Reverse/Stop
001: Run/Stop-Forward/Reverse
Notes: 1. If both the FWD and REV contacts are closed, the drive will be in Stop
Mode. 2. If Reverse Operation does not function and “LOC” is displayed, change
F22 [Reverse Enable/Disable] to “000” [Enable Reverse Run]. If F22 is set to “001”
[Disable Reverse Run], the reverse command is disabled.
39
Sec. IX – Programmable Functions (Detailed) (Cont.)
F04 – Motor Direction
Factory Setting: “000” [Forward Direction] – F04 is used to set either forward or
reverse motor direction using the keypad. F04 is factory set to “000” for forward
operation of the motor.
F04 = 000: Forward Direction
001: Reverse Direction
Note: In order for the Reverse Function to operate, F22 must be set to “000”
[Enable Reverse Run] (factory setting).
F05 – Volts/Hz Pattern
Factory Setting: “004” [60 Hz Constant Torque] – F05 is used to set the
Volts/Hz pattern for 60 Hz and 50 Hz motors for constant torque, high starting
torque, or variable torque (HVAC) applications, as shown in Figure 16, on page 41.
F05 is factory set to “004” for 60 Hz motors used in constant torque applications.
Also see the description for F13 [Volts/Hz Curve Modification (Torque Boost)], on
page 43, which is used to modify a Volts/Hz pattern for a specific application.
F05 = 001: 50 Hz Constant Torque
002: 50 Hz High Starting Torque
003: 50 Hz Variable Torque (HVAC)
004: 60 Hz Constant Torque
005: 60 Hz High Starting Torque
006: 60 Hz Variable Torque (HVAC)
F06 – Output Frequency Upper Limit
Factory Setting: “60.0” (60.0 Hz) – F06 is used to set the output frequency
upper limit to the motor and is factory set to “60.0”, which will operate the motor
at a maximum frequency of 60.0 Hz.
Programmable Range: 1 - 200 Hz
Note: If the drive is set for 50 Hz motors, the Output Frequency Upper Limit will
automatically be set to 50 Hz.
F07 – Output Frequency Lower Limit
Factory Setting: “00.0” (0.0 Hz) – F07 is used to set the output frequency lower
limit to the motor and is factory set to “00.0”, which will operate the motor at a
minimum frequency of 0.0 Hz.
Programmable Range: 0 - 200 Hz
Note: F07 setting cannot exceed F06 setting.
40
Sec. IX – Programmable Functions (Detailed) (Cont.)
FIGURE 16 – VOLTS/Hz PATTERN
100
90
80
70
Constant Torque Application
High Starting Torque Application
60
Motor Voltage (%)
Variable Torque (HVAC) Application
50
40
30
20
10
0
0
10
20
30
40
50
60
Motor Frequency (%)
70
80
90
100
Output Frequency Upper Limit (F06)
F08 – (Preset Speed #1)
Factory Setting: “10.0” (10.0 Hz) – F08 is used to set the frequency of Preset
Speed #1 and is factory set to “10.0”, which will run the motor at 10.0 Hz if
Terminal “6” is selected, as described in Section V-B-5, on page 22.
Programmable Range: 1 - 200 Hz
F09 – Jog Frequency
Factory Setting: “06.0” (6.0 Hz) – F09 is used to set the jog frequency. F09 is
factory set to “06.0” which will run the motor at 6.0 Hz. To program the drive for
Jog operation, Multifunction Input Terminals “6” or “7” must be used. See F19 on
page 45 and F20 on page 46.
Programmable Range: 1 - 200 Hz
41
Sec. IX – Programmable Functions (Detailed) (Cont.)
F10 – Start/Stop Control
Factory Setting: “000” [Keypad Operation] – F10 is used to set either keypad
operation or external start/stop control. F10 is factory set to “000”, which provides start/stop control with the keypad. (Also see F03).
F10 = 000: Keypad Operation
001: External Run/Stop Contacts
Note: If F10 is set to “001” [External Run/Stop Contacts], the Stop Function on
the keypad (RUN/STOP key) remains operational.
F11 – Frequency Control Method
Factory Setting: “000” [Keypad Operation] – F11 is used to set the drive for
either keypad control or external signal input control (speed potentiometer, 0 - 10
V, 0 - 20 mA DC, or 4 - 20 mA DC). F11 is factory set to “000”, to operate the
drive using the keypad.
F11 = 000: Keypad
001: Speed Potentiometer, 0 - 10 V DC, 0 - 20 mA DC
002: 4 - 20 mA DC
Note: If a remote speed potentiometer or a 0 - 10 Volt DC signal is used, set SW1
to the “V” position (factory setting). If a 0 - 20 mA DC or 4 - 20 mA DC signal is
used, set SW1 to the “I” position. See Section V-B, starting on page 20.
F12 – Switching Frequency
Factory Setting: “005” [8 kHz] – F12 is used to set the switching frequency. F12
is factory set to “005”, for a switching frequency of 8 kHz, which provides low
motor noise and good motor torque. Increasing the switching frequency to the
maximum of 16 kHz will further reduce motor noise. However, increased radio frequency interference will result as well as 10% derating of the maximum output current. Reducing the switching frequency will provide increased motor torque.
However, the audible noise will also increase.
42
F12 = 001: 4 kHz
006: 10 kHz
002: 5 kHz
007: 12 kHz
003: 6 kHz
008: 14.4 kHz
004: 7.2 kHz
009: 15 kHz
005: 8 kHz
010: 16 kHz
Sec. IX – Programmable Functions (Detailed) (Cont.)
F13 – Volts/Hz Curve Modification (Torque Boost)
Factory Setting: “00.0” (0.0 %) – F13 is used to increase the percent of torque
boost that will be applied to the motor by modifying the Volts/Hz patterns set by
F05, as shown in Figure 17. F13 is factory set to “00.0”, for 0.0% torque boost.
Programmable Range: 0 - 10.0%
FIGURE 17 – VOLTS/Hz CURVE MODIFICATION (Torque Boost)
100
90
80
70
Constant Torque Application
Constant Torque Application with 10% Torque Boost
Motor Voltage (%)
60
50
40
30
0 - 10% Torque Boost
20
10
0
0
10
20
30
40
50
60
Motor Frequency (%)
70
80
90
100
Output Frequency Upper Limit (F06)
43
Sec. IX – Programmable Functions (Detailed) (Cont.)
F14 – Stop Method
Factory Setting: “000” [Controlled Deceleration-to-Stop] (with DC Injection
Braking) – F14 is used to select either controlled deceleration-to-stop or coast-tostop when a stop command is given. The controlled deceleration function uses a
combination of regeneration and DC injection braking to stop the motor. The factory setting utilizes regeneration as the primary method of braking. When the output
frequency reaches 1.5 Hz, injection braking takes effect. For high inertial loads, the
optional Brake Resistor may be required (available for Models KBE2-2202, 2203,
4301, 4302, 4303 only). See Section X-D, on page 52. If F14 is set to “000”
[Controlled Deceleration-to-Stop] and a stop command is given, the drive output will
decelerate to the braking frequency set by F16 [DC Injection Brake Start Frequency].
See Figure 18 and descriptions of F15 [DC Injection Brake Time], F16 [DC Injection
Brake Start Frequency], and F17 [DC Injection Brake Level].
F14 = 000: Controlled Deceleration-to-Stop (with DC Injection Braking)
001: Coast-to-Stop
FIGURE 18 – CONTROLLED DECELERATION-TO-STOP
WITH DC INJECTION BRAKING (F14 Set to “000”)
Motor Running at Set Frequency
Stop Command
Set
Frequency
Output Frequency (Hz)
Motor Slows by Regenerative Braking Until the
DC Injection Brake Start Frequency is Reached
DC Injection Brake
Start Frequency (F16)
1.5
DC Injection
Brake Level (F17)
0
0
Time (Seconds)
0.5
DC Injection
Brake Time (F15)
F15 – DC Injection Brake Time
Factory Setting: “00.5” (0.5 Seconds) – F15 is used to set the DC injection
brake Time. F15 is factory set to “00.5”, which will apply the DC injection brake
for 0.5 seconds. The brake time should not exceed the actual time to stop the
load since it may cause overheating of the motor. See Figure 18.
Programmable Range: 0 - 25.5 seconds
44
Sec. IX – Programmable Functions (Detailed) (Cont.)
F16 – DC Injection Brake Start Frequency
Factory Setting: “01.5” (1.5 Hz) – F16 is used to set the frequency at which DC
injection braking begins. F16 is factory set to “01.5”, which will start applying the
DC injection brake at 1.5 Hz. See Figure 18, on page 44.
Programmable Range: 1 - 10 Hz
F17 – DC Injection Brake Level
Factory Setting: “08.0” (8%) – F17 is used to set the DC injection brake level, as
a percent of bus voltage. F17 is factory set to “08.0”, which will apply a DC
Injection Brake voltage of 8% of the bus voltage to the motor. See Figure 18, on
page 44.
Programmable Range: 0 - 20%
Note: Do not increase the DC Injection Brake Level beyond what is necessary to
stop the motor since motor overheating may occur.
F18 – Electronic Motor Overload Protection (I2t)
Factory Setting: “100” (100%) – F18 is used to set the maximum motor current,
as a percent of the full load rating of the drive. F18 is factory set to “100”, which
will allow loading the motor up to 100% of the full load rating of the drive. I2t provides motor overload protection which prevents motor burnout and eliminates nuisance trips due to overload. The drive is factory set to trip at 150% of F18 setting
in 1 minute. To reset the drive, after it has tripped, press the ▼/RESET key or
activate an external reset contact wired to Terminal 7 of Terminal Block TM2.
Programmable Range: 1 - 200%
Example: If a 3.3 Amp motor is used with Model KBE2-2101 (rated 4.2 Amps),
F18 should be set according to the following formula.
(Current Rating of Motor ÷ Current Rating of Drive) x 100
(3.3 Amps ÷ 4.2 Amps) x 100 = 79%, therefore, enter “079” into F18.
F19 – Multifunction Input Terminal 6
Factory Setting: “002” Preset Speed #1 – F19 is used to set the function of
Terminal 6 of Terminal Block TM2. F19 is factory set to “002”, which will run the
drive at the frequency set by F08 [Preset Speed #1 Frequency] when Terminal 6 is
connected to Terminal 5. See Section V-B-5, on page 22.
F19 = 001: Jog. See F09 [Jog Frequency].
F19 = 002: Preset Speed #1. See F08 [Preset Speed #1 Frequency].
F19 = 003: Rapid Stop. The drive will decelerate-to-stop when a momentary “Stop” command is given. “E.S.” will flash on the display. To restart the drive, press the RUN/STOP key
(if F10 is set to “000” [Keypad Operation]) or open and close the direction contact (if F10 is
set to”001” [External Run/Stop Contacts]).
45
Sec. IX – Programmable Functions (Detailed) (Cont.)
F19 = 004: Coast-to-Stop. The drive will coast-to-stop when a momentary “Stop” command is
given. “b.b.” will flash on the display. To restart the drive, press the RUN/STOP key (if F10 is
set to “000” [Keypad Operation]) or open and close the direction contact (if F10 is set to “001”
[External Run/Stop Contacts]).
F19 = 005: Reset: Used to reset the drive after a fault has cleared.
F19 = 006: Preset Speed #2. See F26 [Preset Speed #2 Frequency] and F27 [Preset Speed #3
Frequency].
F20 – Multifunction Input Terminal 7
Factory Setting: “005” [Reset] – F20 is used to set the function of Terminal 7 of
Terminal Block TM2. F20 is factory set to “005”, which is used to reset the drive,
after a fault has cleared, when Terminal 7 is connected to Terminal 5. Set F20 to
the desired function code as follows. See Section V-B-5, on page 22.
F20 = 001: Jog. See F09 [Jog Frequency].
F20 = 002: Preset Speed #1. See F08 [Preset Speed #1 Frequency].
F20 = 003: Rapid Stop. The drive will decelerate-to-stop when a momentary “Stop” command
is given. “E.S.” will flash on the display. To restart the drive, press the RUN/STOP key (if F10 is
set to “000” [Keypad Operation]) or open and close the direction contact (if F10 is set to”001”
[External Run/Stop Contacts]).
F20 = 004: Coast-to-Stop. The drive will coast-to-stop when a momentary “Stop” command is
given. “b.b.” will flash on the display. To restart the drive, press the RUN/STOP key (if F10 is
set to “000” [Keypad Operation]) or open and close the direction contact (if F10 is set to “001”
[External Run/Stop Contacts]).
F20 = 005: Reset: Used to reset the drive after a fault has cleared.
F20 = 006: Preset Speed #2. See F26 [Preset Speed #2 Frequency] and F27 [Preset Speed #3
Frequency].
Note: When using the Rapid Stop command, the stop method programmed by
F14 [Stop Method] will be bypassed.
F21 – Multifunction Output Relay (Terminals 1 and 2)
Factory Setting: “003” [Fault] – F21 is used to set the function of the
Multifunction Output Relay. F21 is factory set to “003” [Fault], which sets the relay
to function as a Fault Relay, and change state when a fault condition has
occurred, as shown in Table 16 on page 47. See Section V-C, on page 24.
F21 = 001: Run
002: Frequency Reached
003: Fault
46
Sec. IX – Programmable Functions (Detailed) (Cont.)
TABLE 16 – MULTIFUNCTION OUTPUT RELAY OPERATING MODES
Output Relay Contacts
F21 Setting
Power
Off
Drive In
Stop Mode
Drive In
Run Mode
Frequency
Reached
Fault
001 [Run]
Open
Open
002 [Frequency Reached]
Open
Open
Closed
—
—
—
Closed
003 [Fault]
Open
Open
—
—
—
Closed
F22 – Reverse Enable/Disable
Factory Setting: “000” [Enable Reverse Run] – F22 is used to enable or disable
the drive from operating in the reverse direction. F22 is factory set to “000”
[Enable Reverse Run] which will allow the drive to be operated in the reverse
direction.
F22 = 000: Enable Reverse Run
001: Disable Reverse Run
Note: If F22 is set to “001” [Disable Reverse Run], F04 [Motor Direction] can only
be programmed to “000” [Forward Direction].
F23 – Auto Restart After a Fault has Cleared
Factory Setting: “000” [Enable Auto Restart] – F23 is used to enable or disable
automatically restarting the drive after a momentary power loss (not exceeding 2
seconds). F23 is factory set to “000” [Enable Auto Restart], which will automatically restart the drive after a momentary power loss. To set the drive for manual
restart, after a momentary power loss, set F23 to “001” [Disable Auto Restart].
F23 = 000: Enable Auto Restart (see note below)
001: Disable Auto Restart
Note: If the power loss time does not exceed 2 seconds, Auto Restart will occur.
If the power loss time exceeds 2 seconds, Auto Restart will be attempted only if
F24 [Number of Auto Restart Attempts] is set to “001” - “005”.
F24 – Number of Auto Restart Attempts
Factory Setting: “000” [Zero Auto Restart Attempts] – F24 is used to set the
number of Auto Restart Attempts that will be performed after a fault has cleared.
F24 is factory set to “000” [Zero Auto Restart Attempts], which will not allow the
drive to automatically restart after a fault has cleared.
Programmable Range: 0 - 5 Auto Restart Attempts
47
Sec. IX – Programmable Functions (Detailed) (Cont.)
F25 – Reset Drive to Factory Settings
Factory Setting: “020” [60 Hz Operation] – F25 is used to reset the drive to factory settings for both 50 Hz and 60 Hz motors.
F25 = 010: Reset Drive for 50 Hz Constant Torque Motor Operation
020: Reset Drive for 60 Hz Constant Torque Motor Operation
Note: Setting F25 to “010” [50 Hz] will automatically set F05 [Volts/Hz Pattern] to
“001” [50 Hz] and F06 [Output Frequency Upper Limit] to “050” [50 Hz]. Setting
F25 to “020” [60 Hz] will automatically set F05 to “004” [60 Hz] and F06 to “060”
[60 Hz].
F26 – Preset Speed # 2 Frequency
Factory Setting: “20.0” (20.0 Hz) – F26 is used to set the Preset Speed #2 frequency. F26 is factory set to”20.0”, which will run the motor at 20.0 Hz. See
Section V-B-5, on page 22.
Programmable Range: 01.0 - 200 Hz
F27 – Preset Speed # 3 Frequency
Factory Setting: “30.0” (30.0 Hz) – F27 is used to set the Preset Speed #3 frequency. F27 is factory set to”30.0”, which will run the motor at 30.0 Hz. See
Section V-B-5, on page 22.
Programmable Range: 01.0 - 200 Hz
F28 – Automatic AC Line Start
Factory Setting: 001 [Disable Automatic AC Line Start] – F28 is used to enable
or disable automatic starting of the drive when the AC line is applied. F28 is factory set to “001”, which will disable automatic starting of the drive when the AC line
is applied.
F28 = 000: Enable Automatic AC Line Start
001: Disable Automatic AC Line Start
The faults that can be manually or automatically reset are indicated by the following codes: OCS, OCA, OCC, OCd, OCb, OUC, LUC, OHC. (See Table 17, on
pages 49 and 50.)
Notes: 1. In order for the drive to automatically restart after a fault has cleared,
including AC line restart, set F23 to “000” [Enable Auto Restart], F24 to “005” [Five
Auto Restart Attempts], and F28 = “000”. 2. F10 must be set to “001” (External
Contacts) and a jumper must be wired to Terminals 3 and 5 of Terminal Block TM2.
Programmable Functions (Detailed) is continued on page 51.
48
Return the drive for repair.
Improve ventilation to reduce ambient temperature.
Return the drive for repair.
Detection circuitry is defective.
Ambient temperature is too high.
Detection circuitry is defective.
Overtemp. while the drive is in stop mode.
Overload while the drive is in stop mode.
Motor overload.
Drive overload.
Drive trips during startup.
Overcurrent during acceleration.
Overcurrent at set frequency.
Overcurrent during deceleration.
Overcurrent during braking.
OH
OC
OL1*
OL2*
OCS*
OCA*
OCC*
OCd*
OCb*
Replace with an appropriately rated motor.
Change the Volts/Hz pattern setting (F05).
Replace with an appropriately rated drive.
Load exceeds motor rating.
Incorrect Volts/Hz Pattern setting.
Load exceeds drive rating.
Table 17 continued on page 50.
Change the Injection Brake Level (F17).
DC injection brake level setting too high.
*Faults which will cause the Output Relay to change state if F21 [Multifunction Output Relay] is set to “003” [Fault] (factory setting).
Change the Injection Brake Start Frequency (F16).
Incorrect DC injection brake start frequency setting.
Change the DC Injection Brake Time (F15).
Install a line reactor.
Increase the deceleration time setting (F02).
Check the load.
Transient power surge.
DC injection brake time setting too long.
Replace with an appropriately rated drive.
Transient loading.
Deceleration time setting too low.
Change the Volts/Hz pattern setting (F05).
Motor load exceeds drive rating.
Change the acceleration time setting (F01).
Acceleration time setting too low.
Incorrect Volts/Hz pattern setting.
Return the drive for repair.
Transistor module is defective.
Repair motor.
Shorted motor (phase-to-phase or phase-to-ground).
Leakage current to ground due to multiple motor wires
Isolate motor wires.
in the same conduit.
Change the Volts/Hz pattern setting (F05).
Incorrect Volts/Hz Pattern setting.
Increase the I2t setting (F18).
Correct the line voltage.
Line voltage is too low.
AC line input voltage is too low.
LU
Return the drive for repair.
Return the drive for repair.
Detection circuitry is defective.
Electronic motor overload protection is set too low.
Correct the line voltage.
Line voltage is too high.
AC line input voltage is too high.
Detection circuitry is defective.
Return the drive for repair.
EEPROM is defective.
EEPROM error.
OU
Corrective Action
Add appropriate filtering.
EPR
Probable Cause
Noise interference.
Program error.
Description
TABLE 17 – FAULT CODES AND CORRECTIVE ACTIONS
CPF
Display
Indication
Sec. IX – Programmable Functions (Detailed) (Cont.)
49
50
Low voltage at set speed.
Heat sink overtemperature at set speed.
Rapid Stop.
Coast-to-Stop.
Motor direction locked.
Keypad operation error.
Frequency setting error.
LUC*
OHC*
E.S.
b.b.
LOC
Er1
Er2
Probable Cause
Corrective Action
Replace with an appropriately rated drive.
Improve ventilation to reduce ambient temperature.
Press the ▼/RESET key or use an external contact
to reset the drive.
Press the ▼/RESET key or use an external contact
to reset the drive.
Change F22 to “000”.
Change F04 to “000”.
Use ▲ or ▼/RESET to change frequency setting
F11 = 000. (Keypad Operation).
Ambient temperature is too high.
When the external stop signal is activated using
the multifunction input terminal, the motor will
decelerate and stop. The display will flash “E.S.”
after the motor stops.
When the external stop signal is activated using
the multifunction input terminal, the drive will
cease operation.
Attempt to reverse motor direction when F22 = 001.
Attempt to program F22= 001 when F04 = 001.
Pressing the ▲ or ▼/RESET key when F11 = 001 or
Preset Speed operation is selected.
F06 and F07 frequency setting are the same.
Set F06 frequency setting higher than F07.
Stop the drive and then change the function
range or code.
Replace with an appropriately rated drive.
Load current exceeds drive rating.
Factory set.
Correct the AC line input voltage.
Attempt to change a function that cannot be
changed while the drive is running.
Replace with an appropriately rated drive.
AC line voltage is too low or incorrect drive
voltage rating.
Attempt to change F29 setting (CPU Version).
Correct the AC line input voltage.
Inertial load too great.
Increase the deceleration time setting (F02).
AC line input voltage too high.
Deceleration time is set too low.
*Faults which will cause the Output Relay to change state if F21 [Multifunction Output Relay] is set to “003” [Fault] (factory setting).
Overvoltage at set speed or
during deceleration.
Description
TABLE 17 – FAULT CODES AND CORRECTIVE ACTIONS (Continued)
OUC*
Display
Indication
Sec. IX – Programmable Functions (Detailed) (Cont.)
TABLE 18 – STATUS INDICATORS WHEN THE DRIVE IS IN
EXTERNAL START/STOP MODE (F10 = 001)
Display
Indication
SP0
SP1
Description
The drive has been set to Zero Frequency using the keypad or external frequency
command.
The drive is in Stop Mode due to an interruption and resumption of the AC power.
To restart the drive, open and close the Start/Stop contact.
Note: F28 is set to “001” [Disable Automatic AC Line Start] (factory setting).
SP2
The RUN/STOP key is pressed while the drive is in the Run Mode.
F29 – CPU Program Version
Factory Setting: Current Software Version – F29 is used to display the software
version of the drive.
F30 – Logs Last 3 Faults that Occurred
F30 logs the last three faults that occurred, in chronological order. Press the key
to scroll through the three faults that occurred. The decimal point in the display
indicates the chronological occurrence of the fault (“x.xx” indicates the latest fault
that occurred. “xx.x” indicates the previous fault that occurred. “xxx.” indicates
the first fault that occurred). Press the ▼/RESET key to erase all three recorded
faults (“-.- - ”, “- -.-”, and “- - -.” will be displayed when the key is pressed). See
Table 17, on pages 49 and 50.
X.
OPTIONAL ACCESSORIES
A. DIN Rail Mounting Kit (Part No. 14000) – Available for all models except
KBE2-1125-4, 1150-4, 1101-4, 2101-4, 2202-4, 2203-4, 4301-4, 4302-4,
4303-4.
B. Class B Residential Standard RFI (EMI) Filters – Provides RFI noise suppression and complies with CE Directive 89/336/EEC relating to the EMC Class B
Residential Standard. See Table 19 and Figure 19, on page 52. The recommended maximum wiring distance between drive and filter is 12” (30 cm).
TABLE 19 – CLASS B RESIDENTIAL STANDARD RFI FILTERS
Part
No.
Rating
Drive Model
14020
10 Amps @ 230 Volts AC –1φ
14012 20 Amps @ 230 Volts AC – 1φ
Dimensions
Inches
mm
All 230 Volt AC thru 1 HP
2.99 x 6.14 x 0.98
76 x 156 x 25
All 230 Volt AC thru 3 HP
4.84 x 6.81 x 1.54
123 x 173 x 39
14015 10 Amps @ 460 Volts AC – 3φ All 380/460 Volt AC thru 3 HP 4.84 x 6.81 x 1.54
123 x 173 x 39
Note: All models are available with a built-in Class A Industrial Standard RFI Filter. Contact Sales Department.
51
Sec. X – Optional Accessories (Cont.)
FIGURE 19 – RECOMMENDED RFI FILTER CONNECTION
Drive
Cable Shield*
T3
T2
T1
R
P
L3
L2
L1
Drive Mounted on RFI Filter
RFI Filter
L1
AC Line
Input
Motor
L1'
L2
L2'
L3
L3'
Internal
Connection
PE
RFI Filter Mounted on Metal Frame
Earth
Motor Mounted on Metal Frame
*Cable shield should be grounded on drive side only.
C. Remote Speed Potentiometer Kit (Part No. 9831) – Provides remote mounting of the speed potentiometer to control motor speed. Kit includes a linear 5kΩ
- 5 Watt wire wound potentiometer, mounting hardware, and panel insulator.
D. Brake Resistor – Provides rapid stopping with high inertial loads. See Table
20. This option is only available for Models KBE2-2202, 2203, 4301, 4302,
and 4303.
TABLE 20 – BRAKE RESISTOR SELECTION CHART
Drive
Model No.*
Motor
HP, (kW)
Braking
Torque
(%)
KBE2-2202
2, (1.5)
KBE2-2203
3, (2.2)
KBE2-4301
Brake Resistor
Dimensions (W x H x L)
Inches
mm
Part No.
Ω
W
120
14180
100
150
1.57 x 0.79 x 8.46
40 x 20 x 215
115
14190
70
200
2.36 x 1.18 x 6.49
60 x 30 x 165
1, (0.75)
125
14230
750
60
1.57 x 0.79 x 4.53
40 x 20 x 115
KBE2-4302
2, (1.5)
120
14240
400
150
1.57 x 0.79 x 8.46
40 x 20 x 215
KBE2-4303
3, (2.2)
130
14250
250
200
2.36 x 1.18 x 6.49
60 x 30 x 165
* Includes all “-P” and “-4” suffix models.
52
Sec. X – Optional Accessories (Cont.)
E. DownLoad Module™ (DLM) (Part No. 14145) – Uploads and downloads drive
programs. Requires KBE2 to DLM Communication Cable (Part No. 14147).
See Figure 20.
FIGURE 20 – DLM CONNECTIONS
DLM to Drive Connection
DownLoad Module™
(Part No. 14145)
DOWNLOAD MODULE
PC to DLM Connection
DownLoad Module™
(Part No. 14145)
Adjustable Frequency Drive
Drive-Link™ Software with
Serial Communication Cable
(Part No. 14165) *
1
Model DLM-1000
Part No. 14145
CONNECTION
PC
DLM
PC
DLM
DLM
DRIVE
DRIVE
PROGRAM NO.
DOWNLOAD MODULE
Part No. 14145
PC
DLM
PC
DLM
DLM
DRIVE
PROGRAM
DRIVE
TO DLM
PROGRAM NO.
RESET
DRIVE
PROGRAM
DLM TO
DRIVE
e-Lin
k™
DATA
ENT
E2
N2
V2
DRIVE
V2
RUN
STOP
R
PWR
DRIVE
PROGRAM
DRIVE
TO DLM
Driv
PROGRAM
DLM TO
DRIVE
E2
N2
1
Model DLM-1000
CONNECTION
DSP
FUN
R
KB Electronics Inc.
KB Electronics Inc.
Coral Springs, Florida
Coral Springs, Florida
T
PC
R
PWR
T
R
PWR
DRIVE
T
PC
R
PWR
T
R
DRIVE
* For Drive-Link™ Software with
USB Communication Cable,
Order Part No. 14166
KBE2 to DLM Communication Cable (Part No. 14147)
PC to DLM to Drive Connection
DownLoad Module™
(Part No. 14145)
Drive-Link™ Software with
Serial Communication Cable
(Part No. 14165) *
DOWNLOAD MODULE
Adjustable Frequency Drive
1
Model DLM-1000
Part No. 14145
CONNECTION
PC
DLM
PC
DLM
DLM
DRIVE
DRIVE
PROGRAM NO.
PROGRAM
DRIVE
TO DLM
Driv
e-Lin
PROGRAM
DLM TO
DRIVE
k™
E2
N2
RESET
DRIVE
DATA
ENT
V2
RUN
STOP
R
DSP
FUN
KB Electronics Inc.
Coral Springs, Florida
PWR
T
PC
R
PWR
T
R
DRIVE
* For Drive-Link™ Software with
USB Communication Cable,
Order Part No. 14166
KBE2 to DLM Communication Cable (Part No. 14147)
F. Drive-Link™ Software (Part No. 14165) – Provides PC communications to
facilitate programming. Uses Windows® 95/98/2000/ME/XP/NT. Requires
DownLoad Module™ (DLM) (Part No. 14145) and KBE2 to DLM Serial
Communication Cable (Part No. 14147). See Figure 20. For Drive-Link™
Software with USB cable, order Part No. 14166.
53
Sec. X – Optional Accessories (Cont.)
G. AC Line Reactor – Eliminates erratic operation or tripping due to a noisy or
unstable AC power source. The following are some typical problems associated with an AC line which will require the addition of a line reactor: multiple drives
on the same line, solenoids, power factor correction capacitors and machinery
switching “on” and “off”. See Table 21 for the recommended AC Line Reactor.
AC Line Reactors can be purchased from ACME, MTE, and TCI.
TABLE 21 – RECOMMENDED AC LINE REACTOR SELECTIOIN CHART
AC Line Reactor Rating
Drive Model
AC Line
Input Phase(s)
Volts AC
Amps AC
KBE2-2125
1
230
3
7
KBE2-2150
1
230
5.2
4.2
KBE2-2101
1
230
9.4
2.1
1
230
19
1.1
3*
230
11
1.1
1
230
27
0.71
KBE2-2202
KBE2-2203
mH
3*
230
20
0.71
KBE2-4301
3*
460
2.5
8.4
KBE2-4302
3*
460
5
4.2
KBE2-4303
3*
460
7.5
3.6
*Note: For 3-phase AC line inputs, a 3-phase reactor or three 1-phase reactors must be used.
H. AC Load Reactor – Eliminates false tripping when motor wires exceed 100
feet (30 m). See Table 22, for the recommended AC Load Reactor. AC Load
Reactors can be purchased from ACME, MTE, and TCI.
Note: The voltage rating of the AC Load Reactor must be equal or greater than
the drive’s nominal AC line input voltage rating.
TABLE 22 – RECOMMENDED 3-PHASE AC LOAD REACTOR SELECTION CHART
54
Motor Rating
(Nominal)
(Amps AC)
2
Amps AC
2
11
3
3
7.4
3.4
4
5.5
4.8
6
3.7
7.6
8
2.8
11
12
1.8
14
16
1.4
21
25
0.88
27
27
0.82
34
35
0.63
40
45
0.49
AC Load Reactor Rating
mH
– NOTES –
55
XI. LIMITED WARRANTY
For a period of 18 months from the date of original purchase, KB Electronics, Inc.
will repair or replace, without charge, devices which our examination proves to be
defective in material or workmanship. This warranty is valid if the unit has not been
tampered with by unauthorized persons, misused, abused, or improperly installed
and has been used in accordance with the instructions and/or ratings supplied. The
foregoing is in lieu of any other warranty or guarantee, expressed or implied. KB
Electronics, Inc. is not responsible for any expense, including installation and
removal, inconvenience, or consequential damage, including injury to any person,
caused by items of our manufacture or sale. Some states do not allow certain exclusions or limitations found in this warranty and therefore they may not apply to you.
In any event, the total liability of KB Electronics, Inc., under any circumstance, shall
not exceed the full purchase price of this product. (rev 2/2000)
COPYRIGHT © 2003 by KB ELECTRONICS, INC.
All rights reserved. In accordance with the United States Copyright Act of 1976, no part
of this publication may be reproduced in any form or by any means without permission in
writing from KB Electronics, Inc. (8/22/02)
“KB” and “GENESIS” are registered trademarks of KB Electronics, Inc.
KB Electronics, Inc.
12095 NW 39th Street, Coral Springs, FL 33065-2516 • (954) 346-4900 • Fax (954) 346-3377
Outside Florida Call TOLL FREE (800) 221-6570 • E-mail – [email protected]
www.kbelectronics.com
(A98015) – Rev. B1 – 8/2003