1
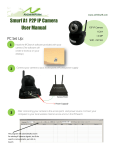
www.airlinkwifi.com Smurf ASP3 P2P IP Camera User Manual P2P IP Camera H.264 1.0 MP PC Set Up: 1 2 3 WIFI + SD Slot Install the IPsearch software provided with your camera (The software will create a shortcut on your desktop) Connect your camera to your access point (AP) and power supply After connecting your camera to the access point and power source. Connect your computer to your local wireless internet access and run the IPsearch The program will automatically search for existing IP cameras signals, but if the search is not automatic, just click in Search www.airlinkwifi.com 4 After scanning for all available IP cameras, select the desired one and double click on it (This will open an Internet Explorer Window) Internet Explorer Window 5 For firs time users of IPsearch: Download the IPsearch player and install it in your PC 7 WIFI Settings 9 Motion Detection 6 After installing the IPsearch player login using the predetermined user name: admin and password: admin (Which can be edited after you access the PCSearch platform) 1) Click “Parameters“ then under network click “WIFI” to enter the settings 2) Wifi Status: Tick the blank to enable the Wifi. 3) Search: Click it, the wifi around the camera will appear 4) Select the desired WIFI and insert the password 5) Apply the changes Week mode Work mode 8 10 EMAIL settings View of the platform 1) Click “Parameters“ then under network click “E-mail” to enter the settings 2) Server name and Port was set by default. 3) Send To: Insert the E-mail where you want to receive the notifications for alarms SD Card Settings If you want to record into the SD card. 1) Click Parameters then under Event click Record Click Parameters and under Event select Motion Detection Click in Enable Select the degree of sensibility of the motion detection Choose the way you receive the alarms (email, FTP, snap) In Schedule you can select the mode including week mode, work mode and all time day Click the botton “Time” then select the time period that motion detection works 2) Manual record: On 3) Choose the File time for the record **After you finish all the PC settings you can UNPLUG your camera from the access point and install it in your desired location** www.airlinkwifi.com Hardware Installation Location and environment precautions Location and Environment Precautions 1 Connect camera to power adaptor 2 The environment temperature should be between –54° to 55°C Do not install it near any strong electromagnetic interference source Connect power adaptor to power source (12 V) Mobile Set Up: 2 Download the app “AirLinkWiFi Smart Cam” and install it in your smartphone 1 Add Camera You can add cameras by two ways 1) Scan the QR Code from the camera with the app 2) Manually directly insert the UID No. written in the camera under the QR Code Insert UID number Scan QR Code manually **You can find the UID also in the PCSearch software under Parameters—P2P)** 3) Insert the Security Code (The predetermined security code is admin) 3 Voice and Screenshot features Snapshot feature Voice Features Talk through the camera: If you connect speakers in your P2P IP Camera, you can talk through your phone and the people close to the camera can hear. Hear the environment: If you connect a microphone to the camera you can hear the environment in your phone. Taking snapshots: You can take individuals snapshots from your phone Viewing your snapshots: You can find the pictures in the gallery icon next to the camera icon. UID www.airlinkwifi.com PC Multiple Cameras Remote viewing 1 Download PCAirLinkP2P Click Device IPCam Setting Add UID code or if same LAN Click IP Search “AUTO” appear cameras in the list 2 Click Main Function , alarm email set up as right side image 1.1