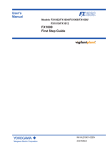
1
Wireless Calling System
Support 999 transmitters contained
Table of the content
Chapter One
The system introduction--------------------------------- ------------------------------------3
1.1 Introduction--------------------------------- ------------------------------------------------------------------3
1.2 The function features--------------------------------- -------------------------------------------------------3
Chapter Two Alarm System Appearance and Operation--------------------------------------------------3
2.1. Appearance--------------------------------------------------------------------------------- -------------------3
2.1.1 Host Appearance--------------------------------- ---------------------------------------------------3
2.1.2 Accessories appearance (optional) ------------------------------------------- -------------------4
2.2.Host Function Key Instruction --------------------------------- -----------------------------------------5
Chapter Three Operating introductions --------------------------------------------- --------------------------6
3.1 Startup and auto-check ------------------------------------------------------------------- -------------------6
3.2 Function set operation --------------------------------------------------------------------- ------------------6
3.2.1 Transmitter setting --------------------------------------------------------------- ------------------6
3.2.1.1 Add or remove the transmitter----------------------------------- --- --- --------------------6
3.2.1.2 Working mode setting--------------------------------- ---- -- --- --- --- --- --- ---------------7
3.2.1.3 Calling mode setting--------------------------------- --------- --- --- --- --- --- --- -----------7
3.2.1.4 Voice setting------------------------------- --- --- --- --- --- ---- --------------------------------8
3.2.1.5 Key exchange settings--------------------- --- --- --- --- --- -------------- --------------------8
3.2.1.6 Display interval time setting------------------------- --- --- --- --- --- ------------- ---------8
3.2.1.7 Timeout setting--------- --- - -------------------------- -----------------------------------------9
3.2.1.8 Auto delete time settings------------------------ --- --- --- --- ------------ -------------------9
3.2.2 Alarm setting--------------------------------- --------- --- --- --- --- --- --- --- --- --- --------------9
3.2.2.1 Add/ delete remote control------------ --- --- --- ------------------------ -------------------9
3.2.2.2 Add/delete detector----------------------- --- --- --- --- --- ------------- -------------------10
3.2.2.3 Phone Number Setting------------------ --- --- --- --- ------------------ -------------------10
3.2.2.4 Ring time setting---------------------- --- --- --- --- --- ------------------ -------------------10
3.2.2.5 Password setting---------------------------- ---------- --- --- --- --- --- --- --- --------------11
3.2.2.6 Scheduled arm and disarm time setting ------------------------------- -------------------11
3.2.2.7 Query alarm recode----------------------------------- ------ --- --- --- --- --- ---------------11
3.2.3 Remote Manager setting------------------------- --- --- --- --- --- ------------- -------------------11
3.2.4 Date and time setting------------------------------ --- --- --- --- --- --- ---------- -------------------12
3.2.5 Volume setting--------------------------------- ----- --- --- --- --- --- --- --- --- --- ------------------12
3.2.6 Restore factory setting----------------------------- --- --- --- --- --- --- --------- -------------------12
3.3 Calling Operation: --------------------------------- ------ --- --- --- --- --- --- --- --- --- ----------------13
3.4 Alarm Operation------------------------------ --- --- --- --- --- --- --- --- --- --- ------- -------------------13
3.4.1 Arming--------------------------------- --- --- --- --- --- --- --- --- --- --- --- --- ---------------------13
3.4.2 Disarming --------------------------------- ------ --- --- --- --- --- --- --- --- --- --- -----------------13
3.4.3 Stay Arming-------------------------------- --- --- --- --- --- --- --- --- --- --- ---- -------------------13
3.4.3 Alarm--------------- --- --- --- --- --- --- --- --- --- --- --- ---------------------- -------------------13
3.5 Force clear------------------ --- --- --- --- --- --- --- --- --- --- --- --- -- ----------------- -------------------13
Chapter Four Attention--------------------------------- ----- --- --- --- --- --- --- --- --- ------------------14
Chapter Five Technology Parameters------------------------- --- --- --- --- ------------ ---------------------14
Chapter Six Accessories in standard package---------------------- --- --- ---------------- ------------------14
Chapter Seven Trouble and Troubleshoot-------------------- --- --- --- --- --------------- ------------------14
2
Chapter one
The system introduction
1.1 Introduction
This system including calling system and alarm system function, Adopted powerful microcomputer
processing technology and wireless high sensitivity receiving technology,and embedded high quality human
voice chip.Its performance is stable and reliable , strong anti-interference ability, touch keypad design with
Excellent operating experience, Powerful dialing alarm function, wireless calling and alarm function,on day time
used as a calling system, at night, used as a burglar alarm system,it is high cost performance. It is widely used for
restaurants, bars, Internet cafes, teahouse, cafe, recreation club, sauna center, KTV, chess and card room, hospitals,
clinics, nursing homes, nursing homes, Banks, schools, factories, construction sites, hotels, hotel rooms,
enterprises and institutions and residential buildings and other places of call services.
1.2 The function features
■Wireless calling system and burglar alarm system using
■Touch keypad, good operation.
■Using high brightness large digital tube display, strikingly intuitive;
■Real human voice report, all operation is voice prompt, easy to understand
■With calendar display, power shutdown is not lost time
■Can match up to 999 road radio transmitter
■Can bewith 20 remote control to The whole management of the host
■2596 kinds of calling reporting numbers can be set free
■Transmitter keys’ function are free to define;
■32 types calling, can adapt to all kinds of occasions
■Cycle show time is 0-999 seconds,
■The remind timeout is 0-999 seconds,
■Clearing time automatic is 0-999 seconds
■Can inquire recently 50 set of contact information
■The alarm can match 99 detectors, devided to 99 defense zones.
■The alarm can bewith 20 remote control to arm/disarm.
■The alarm can set 2 groups phone numbers.
■Up to 2 sets arm/ disarm schedule function
■Display recent 100 alarm recording
■one signal output,one audio output,one,can join in Headphones or siren.
■Can compatible millions of code chips 1527 (resistance 150 k - 470 k) and common code
Chip 2262 (resistance 1.5 M to 1.5 M) full range of transmitter and remote control manager.
Chapter Two Alarm System Appearance and Operation
2.1. Appearance
2.1.1 Host Appearance
Front View
3
Rear View
2.1.2 Accessories appearance (optional)
4
Service Call Transmitter
One-Key Transmitter
Remote Control
Hospital Call Transmitter
Remote Control
2.2.Host Function Key Instruction
Six function Keys:【
】
、
【
】
、
【
】
、
【
】,
【
】,
【
】, 3 Connectors: Power, Siren, Audio. One
receiving antenna.
Key Description: Short Press——Press less than 1 second then loosen;
Long Press——Press 3 seconds or so then loosen.
【SET/ 】
:Enter SET status when short press, Exit when long press at the status of SET;
【UP/ 】
:Single page up when short press, Continuous page up when long press.
【DOWN/ 】
:Single page down when short press, Continuous page down when long press.
【CLEAR/
【EXIT/
】
:Clear one call logs when short press, delete all call logs when long press. In SET status, delete
single transmitter when short press, delete all transmitters when long press; Switch ones, tens,
hundreds; Duplicate key function; Restore factory default.
】
:Exit set when short press;
【ARM/DISARM/
】
:Change status of Arm/Disarm;
【POWER CONNECTOR/POWER】
:Connect12V/2A DC Power Adapter;
【SIREN CONNECTOR/SIREN】
:Can connect external siren, siren beeps for 1 minute when alarming
【AUDIO CONNECTOR/AUDIO】
:Audio Output, support power amplifier and earphone.
【LANDLINE CONNECTOR/LINE1】
:Connect Exterior Telephone Line;
【LANDLINE CONNECTORLINE2】
:Connect Telephone Line;
Chapter Three
Operating introductions
5
3.1 startup and auto-check
Firstly, Connect the phone line to【LINE1】, then connect the telephone to【LINE2】, at last, connect the siren to
【SIREN】. The system is on the initialization when power on, the screen will display from 0000 to 9999 with
drumming "dong dong dong dong,welcome to use calling system"voice prompt , and the screen will show current
time if startup successful.
3.2 Function set operation
Function set can according to the Chapter one. In the processing, the function of pressing the host’s
【SET/UP/DOWN/CLEAN】 key are as same as pressing the remote control’s 【SET/UP/DOWN/CLEAN】 key,
even short press or long press. You can back to the standby mode whenever you press the 【EXIT】key.
In standby mode, short press the 【set】key once enter to set, in the processing of set operation, it will exit the set
status if without any operation in 60 seconds or long press【set】button for 3 seconds.
3.2.1 Transmitter setting
3.2.1.1 add or remove the transmitter
We have the 4/6 channels transmitter, can install in whenever you want or customer need. At mostly can add 999
transmitters to one alarm system.
Add transmitter: In standby mode, short press the 【Set】 key once to enter the set status,the calling system
display “- - 1”and with voice prompt "Calling setting", display “--11” with voice prompt “add transmitter” then
short press【Set】keys once, enter add transmitter status , then the host display “001-”.you can press 【Up/Down】
to choose "001-999-ALL”.
For example for “001 zone”, when displaying " 001-", press any key on the transmitter to sent a signal, if the host
voice prompt "add successfully",and display "001H" , means 001 zone match code success, but voice prompt
"“configured before” ,means the transmitter have add already.
Note: each zone can only match one transmitter, the digital tube(right) will display "-" if no transmitter, but “H”
for yes. And you also can press 【Up/Down】 key to continue matching transmitters in other zones.Long press
【Clear】 key 3 seconds can switch single digit/ten digits/ hundreds digit.
For example,if you want add the transmitter into 501 zone,if press the【Up】key is difficult,it can long press
【Clear】 key twice,after the hundreds digit twinkle,press【Up】key to 501.
(2)Remove transmitter: press【Up/Down】key,for example for 001 zone,when the calling system display
“001H”,you can short press the【Clear】 key to remove the transmitter,the display is change to “001-”means the
transmitter is remove from 001 zone, you can press 【up/down】 key to remove other transmitter by the same
way.Long press【clear】key switch single digit/ten digits /hundreds digit,for example:if delete 501 zone,can press
【Clear】 key twice,after the hundreds digit twinkle,press【Up】key to 501.
(3)Remove all transmitters: press the【Up/Down】key to "ALL", long press 【Clear】key for 3 seconds, when
"- - - -" is displayed with voice prompt “delete successfully”, release the key, all transmitters (001-999) will be
removed.
Exit the set status : After add the transmitter, short press【exit】exit the add transmitter status.
6
3.2.1.2 Working mode setting
There are four sets of working mode from no.000 to no.999:
1. no.123 call;
2. floor1, no.23 call;
3. floor12, no.3 call;
4. floor 1, room 2, no.3 call
In standby status, short press the 【set】key once to enter the set status, the panel will display “- - 1” with voice
prompt “1 calling setting”, then short press 【set】key again to display “- - 11” with voice prompt “1 add
transmitter”, after that, short press the 【up/down】 key several times until the panel display “- - 12” with voice
prompt “2 working mode setting”, then you can enter the work mode by short press the 【set】 key at this time,
and you can select one of below four work modes by 【up/down】 key:
Work mode
Display
Display
1
Display 123,neither flash
No. 123 call
2
Display 123,1 flash
Floor 1, no.23 all
3
Display 123,12 flash
Floor 12, no.3 all
4
Display 123,all flash
Floor 1, room 2, no.3 call
Once completed, long press the 【set】 key or short press the 【exit】 key to exit the set status.
3.2.1.3 Calling mode setting
Call mode is to set the unit of the display number, such as no.1 work mode can be no.123 or floor 123. There are 8
kind of unit as 1 for “no.”, 2 for “floor”, 3 for “room”, 4 for “bed”, 5 for “table”, 6 for “building”, 7 for “zone”, 8
for “unit”.
In standby status, short press the 【set】key once to enter the set status, the panel will display “- - 1” with voice
prompt “1 calling setting”, then short press 【set】key again to display “- - 11” with voice prompt “1 add
transmitter”, after that, short press the 【up/down】 key several times until the panel display “- - 13” with voice
prompt “3 calling mode setting”, then you can enter the call mode by short press the 【set】 key. Select one of
below 8 call units for above four work modes. Such as in no.1 work mode, you just can select only one unit by
press 【up/down】 key to select one from “1-8”; if in no.2 work mode, you can select two kind of units for your
call mode, press 【up/down】 key to select the first unit, then press the 【C】 key to next unit, such as “71” for
call mode “building 1, no.23”. If in no.3 work mode, also have tow units, such as you select the “34” for “room 12,
bed 3 call”. If in no. 4 work mode, you have three units, each display number has 8 kind of units by pressing the
【up/down】 key to choose, the【C】key is to next number, such “235” for “Floor 1, room 2, table 3 call”.
3.2.1.4 Voice setting
In standby status, short press the 【set】key once to enter the set status, the panel will display “- - 1” with voice
prompt “1 calling setting”, then short press 【set】key again to display “- - 11” with voice prompt “1 transmitter
set”, after that, short press the 【up/down】 key several times until the panel display “- - 14” with voice prompt “2
Voice setting”, then short press the 【set】key to to enter the prompt music set status, the panel will display “1”
and you can press the【up/down】key to select one of the seven prompt musics.
Voice mode
1
Voice
Dong-dong-dong-dong, waiter, attention please
7
2
Ding-dong, ding-dong, waiter, attention please
3
Dong-dong-dong-dong, nurse, attention please
4
Ding-dong, ding-dong, nurse, attention please
5
Dong-dong-dong-dong
6
Ding-dong, ding-dong
7
Wu-wu-wu-wu
3.2.1.5 Key exchange
In standby status, short press the【set】 once to enter the set status, the panel will display “- - 1” with voice prompt
“1 calling setting”, then short press 【set】key again to display “- - 11” , short press the【up/down】until panel
display “- - 15” with voice prompt “5 Key exchange” , then short press the 【set】 key to enter the function setting.
Press【up/down】can select “001-999-ALL”, if display “001” means select key No. 001, then press【set】to set the
key function, display “A-1” with prompt “please treat water/ change dressing ”, than press the button”add water/
change dressing” in the transmitter No.1. Host will prompt ”ding” means set successful. Press 【up/down】to enter
the setting of other keys. When finished, short press【set】to exit the setting of this transmitter. The key function
can be copied from No.001 transmitter to No.002-999. The way is: Press【up/down】to the “All”, long press【C】
3 seconds, when panel display “----”, release the key then begin to copy.
Notice: Set the key function must add the transmitter to the zone firstly, reference 3.2.1.1 “Add or remove the
transmitter”. If you want to switch months/ten/hundred, long press 【C】3 seconds. For example, if set the function
of No.501 transmitter, long press【C】twice to switch to hundred, then press【up】to 501.
Finished setting, long press the 【set】 key or short press the 【exit】 key to exit the set status.
Set prompt voice to model 1 or 2
Set prompt voice to model 3 or 4
Host voice prompt
Key of transmitter
Host voice prompt
Key of transmitter
A-1
Please treat “water”
[Add water] key
Please treat “dressing”
[dressing] key
b-2
Please treat “Calling”
[Call] key
Please treat “Call”
[Call] key
C-4
Please treat “Check
out”
[Pay] key
Please treat “dying”
[dying] key
d-3
Please treat “order
meal”
[Order] key
Press treat “Needle
injection”
[Needle
key
E-5
Please treat “service”
[service] key
Press treat “service”
[service] key
F-8
Please treat ”Cancel”
[Cancel] key
Press treat “Cancel”
[Cancel] key
Display
injection]
3.2.1.6 Display interval time setting
Display interval time is the display time of one message when several calling messages call in in the same time.
In standby status, short press the【set】once to enter the set status, the panel will display “- - 1” with voice prompt
“1 calling setting”, then short press 【set】key again to display “- - 11” with voice prompt “1 add transmitter”, after
that, short press the【up/down】until panel display “- - 16” with voice prompt “6 Display interval time setting”,
then short press the 【set】 key to enter the function setting. Panel display “010”, press 【up/down】can select
000-999 seconds, long press 【C】 3 seconds to switch single digits/ten/hundred. For example set the time to 20
seconds, each message will display 20 seconds by turns. Set to 0 seconds means just display the last message and
won’t display other messages.
Finished setting, long press the 【set】 key or short press the 【exit】 key to exit the set status.
8
3.2.1.7 Timeout setting
Timeout reminder time means the time that one message didn’t deal with in time and it will flashing display.
In standby status, short press the【set】once to enter the set status, the panel will display “- - 1” with voice prompt
“1 calling system set”, then short press 【set】key again to display “- - 11” with voice prompt “1 transmitter set”,
after that, short press the【up/down】until panel display “- - 17” with voice prompt “7 Timeout setting”, then short
press the 【set】 key to enter the function setting. Panel display “240”, press 【up/down】can select 000-999
seconds, long press【C】3 seconds to switch single digits/ten/hundred. For example set the time to 60 seconds, the
timeout message will flashing display after 60 seconds. Set to “000” means without Timeout reminder.
Finished setting, long press the 【set】 key or short press the 【exit】 key to exit the set status.
3.2.1.8 Auto delete time setting
Auto delete time is the time message be stored until be automatically cleared.
In standby status, short press the【set】once to enter the set status, the panel will display “- - 1” with voice prompt
“1 calling system set”, then short press 【set】key again to display “- - 11” with voice prompt “1 transmitter set”,
after that, short press the【up/down】until panel display “- - 18” with voice prompt “8 Auto delete time setting”,
then short press the 【set】key to enter the function setting. Panel display “600”, press【up/down】can select
000-999 seconds, long press 【C】3 seconds to switch single digits/ten/hundred. For example set the time to 100
seconds, the message will be automatically cleared after 100 seconds. Set to “000” means message won’t be
automatically cleared.
Finished setting, long press the 【set】 key or short press the 【exit】 key to exit the set status.
3.2.2 Alarm setting
3.2.2.1 Add/ delete remote control
Remote control can control the model of arming and disarming. In the arming status, trigger the motion sensor, the
host will alarm; in the disarming status, host won’t alarm when trigger the motion sensor. Maximum can add 20
peaces remote control, one remote control correspondence one zone.
(1) Add remote control: In standby mode, short press the【Set】 key once to enter the set status, press
【Up/Down】to display “- - 2” with voice prompt "2 alarm setting", then short press【Set】keys, the host display
“--21” with voice prompt “1 Add remote control”, press【Set】to enter add transmitter status and display “001-”,
press【Up/Down】to select the number from “001-020-ALL”, if add 5th remote control, please press【Up/Down】
to “005-”, then press any key in the remote control to send a signal to the host, voice prompt "bing- bing" and
display "005H" means add successfully. If beep only once means this remote control has been configured before
and cannot be added again.
Note: each zone can only match one remote control, if no transmitter the digital tube(right) will display "-" ,
display “H” means already added. Press the【C】can delete the remote control.
(2) Delete remote control: In the status of add remote control, press【Up/Down】key to select the zone, for
example the panel display “001H”, short press the【C】key to delete remote control, the display will change to
“001-” means the remote control is deleted from 001 zone, press【up/down】key to delete other remote control by
the same way.
(3) Delete all remote control: press the【Up/Down】key to "ALL", long press【C】key for 3 seconds, when "- - -" is displayed, release the key, all remote control (001-020) is deleted.
Finished the settings, long press【set】or short press the 【exit】 key to exit the set status.
9
3.2.2.2 Add/delete detector
Detectors can anti-theft and anti-fire including PIR motion sensor, door contact and smoke detector, etc.. In the
arming status, trigger the motion sensor, the host will alarm; in the disarming status, host won’t alarm when
trigger the motion sensor. Maximum can add 99 peaces detector, one detector correspondence one zone.
(1) Add detector:In standby mode, short press the【Set】 key once to enter the set status, press【Up/Down】to
display “- - 2” with voice prompt "2 alarm setting", then short press【Set】keys, the host display “--21” then press
【Up/Down】 to “--22”, voice prompt “2 add detector”, press【Set】to enter add detector status and display “001-”,
press 【Up/Down】to select the number from “001-099-ALL”, if add 5th detector, please press【Up/Down】to
“005-”, then trigger the detector to send a signal to the host, voice prompt "Set successful" and display "005H"
means add successful. If beep only once means this remote control has been configured before and cannot be
added again.
Note: each zone can only match one remote control, if no transmitter the digital tube(right) will display "-" ,
display “H” means already added. Press the【C】can delete the remote control.
(2) Delete detector: In the status of add detector, press【Up/Down】key to select the zone, for example the panel
display “001H”, short press the【C】key to delete detector, the display will change to “001-” means the detector is
deleted from 001 zone, You can press【up/down】key to delete other detector by the same way.
(3) Delete all remote control: press the【Up/Down】key to "ALL", long press【C】key for 3 seconds, when "- - -" is displayed, release the key, all detectors (001-020) are deleted.
Finished the settings, long press【set】or short press the 【exit】 key to exit the set status.
3.2.2.3 Phone Number Setting
The model can support 2 groups of alarm numbers. Each phone number shouldn't exceed 31 digits.When
alarm happened, the host will dial the two numbers to tell the alarm zone, each phone number will dial three
times.
In standby model, short press the【Set】key once to enter the set status, press【Up/Down】to display ”- - 2” with
voice prompt "2 alarm settings", then short press【Set】key, the host display “--21” then press【Up/Down】to “--23”,
voice prompt “3 Phone Number Settings” , press【Set】to enter add detector status and display “----”, press
【Up/Down】to select the group 1 or 2, if add 1st number, please press【C】to activate the first number in panel to
flashing, then press【Up/Down】to select the number from 1-9 or P, “P” means pause 1 second when dial phone.
Selected first number then short press【C】to enter next number setting. After the phone number is all input, press
【Set】, the host will speak the number to check it.
Finished setting, long press【set】or short press the 【exit】 key to exit the set status.
3.2.2.4 Ring time setting
User can dial the number that host connect with to choose arming, disarming and so on after input the password.
The number of rings is the number of time host answer the phone.
In standby status, short press the【set】once to enter the set status, the panel will display “- - 1” then press
【up/down】to “--2”, then short press【set】again to display “- - 21” and press【up/down】to “--24”, voice prompt
“ring time setting”, then short press the【set】key to enter setting. Panel display “08” means host will answer the
phone after 8 times ring, press【up/down】can select 0-20, set to “0” means host won’t answer phone.
Finished setting, long press the 【set】 key or short press the 【exit】 key to exit the set status.
10
3.2.2.5 Password setting
User can dial the number that host connect with to choose arming, disarming and so on after input the password.
The password is 4 numbers.
In standby status, short press the 【set】once to enter the set status, press【up/down】to the panel display “- - 2” ,
then short press【set】again to display “- - 21” and press【up/down】to “--25”, voice prompt “5 Password setting”,
then short press the【set】key to enter password setting. Panel display “1234” means the default password, press
【up/down】can adjust the number.
Finished setting, long press the【set】key or short press the【exit】key to exit the set status.
3.2.2.6 Group one/two arm and disarm time setting
User can set two groups of scheduled arm and disarm time.
In standby status, short press the【set】once to enter the set status, press【up/down】to the panel display “- - 2” , then
short press【set】again to display “- - 21” and press【up/down】to “--26” or “--27”, voice prompt “6 Group one arm
and disarm time setting” or “7 Group two arm and disarm time setting”, then short press the【set】key to enter
scheduled arm and disarm time setting. Panel display “--:--” and voice prompt “Scheduled arm and disarm time
setting”, short press【set】to activate the setting, press【up/down】can adjust the number. In setting week, press
【set】to select timing or not timing. For example set Sunday is not scheduled, press【set】to switch to “7-0” when
panel display “7-1”.
Finished setting, long press the【set】key or short press the【exit】key to exit the set status.
3.2.2.7 Query alarm record
For the convenient of user, the host will record 100 pieces message including alarming defense zone, date and
time, the message won’t lost when power failure.
In standby status, short press the 【set】to enter the set status, press【up/down】to the panel display “- - 2” , then
short press【set】again to display “- - 21” and press【up/down】to “--28” , voice prompt “8 Query alarm message”,
then short press the【set】key to enter query alarm message status. Panel display the alarm zone, time, month, date
and voice prompt “XXst alarm recording”.Press【up/down】can query other recordings.
Finished querying, long press the【set】key or short press the【exit】key to exit the set status.
3.2.3 Remote Manager setting
Remote manager can control the host through long press or short press the button, manager with four button
correspond to the four button in host.
(1) Add remote manager: In standby mode, short press the【Set】key once to enter the set status, press
【Up/Down】to display “- - 3” with voice prompt "3 remote manager setting", then short press 【Set】keys, the
host display “001-” , press【Up/Down】to select the number from “001-020-ALL”, if add 5th remote control,
please press【Up/Down】to “005-”, then press【C】key of the remote manager to send a signal to the host, voice
prompt "Set successfully" and display "005H" means add successful. If beep only once means this remote
manager has been configured before and cannot be added again.
Note: each zone can only match one remote control, if no transmitter the digital tube(right) will display "-" ,
display “H” means already added. Press the【C】can delete the remote manager.
(2) Delete remote manager: In the status of add remote manager, press【Up/Down】key to select the zone, for
example the panel display “001H”, short press the【C】key to delete remote manager, the display will change to
“001-” means the remote manager is deleted from 001 zone, You can press【up/down】key to delete other remote
manager by the same way.
(3) Delete all remote manager: press the【Up/Down】key to "ALL", long press【C】key for 3 seconds, when "- - -" is displayed, release the key, all remote manager (001-020) is deleted.
11
Finished the settings, long press【set】or short press the 【exit】 key to exit the set status.
3.2.4 Date and time setting
In standby status, short press the【set】to enter the set status, press【up/down】to the panel display “- - 4” with the
voice prompt “4 Date and time setting”, then short press the 【set】key to enter setting status. Panel flashing
display the hour, press【up/down】can adjust the hour value. Then press【set】, panel will flashing display minute,
press【up/down】can adjust the minute value. Keep press【set】to adjust the year/month/date, system will calculate
the week automatically.
Finished querying, long press the【set】key or short press the【exit】key to exit the set status.
3.2.5 Volume setting
User can adjust the voice volume of the host.
In standby status, short press the【set】to enter the set status, press【up/down】to the panel display “- - 5” with the
voice prompt “5 volume setting”, then short press the 【set】 key to enter setting status. Press【up/down】can
volume from 0 to 7. “0” means silent, “7” means maximum sound.
Finished querying, long press the【set】key or short press the【exit】key to exit the set status.
3.2.6 Restore factory setting
In standby status, short press the【set】to enter the set status, press【up/down】to the panel display “- - 6” with the
voice prompt “6 Restore factory setting”, then short press the【set】key , panel will display “dEF”. Then long press
【C】until display”----”, release the key, host would restore factory settings. Factory default settings as follow:
NO.
Parameter name
Value
NO
.
Parameter name
Value
1
Added transmitter
Not deleted
11
Added remote control
Not deleted
2
Added remote manager
Not deleted
12
Added detector
Not deleted
3
System time and date
Not change
13
Arming/disarming
model
Disarming
4
Calling key function
Not change
14
Alarm recording
Not deleted
5
Cycle time
10 seconds
15
Scheduled arm and
disarm time
Delete
6
Timeout reminder time
240 seconds
16
Phone number
Delete
7
Auto clear time
600 seconds
17
System password
1234
8
Prompt music
1(dong-dong-dong-dong,staff
please note)
18
Ring times
8
9
Working model
1(No.123 calling)
19
volume
5
10
Calling model
Model
1
NO.
Model
2
Building, No.
Model
3
Building, No.
Model
4
Building, house, No.
Finished querying, long press the【set】key or short press the【exit】key to exit the set status.
3.3 Calling Operation:
12
After copy code between host and transmitter, calling system can work now take No.123 transmitter as example:
Press “Water”, the host voice prompt No.123 add water, display “123A”
Press “Call”, the host voice prompt “No.123 Call”, display “123b”
Press “Check”, voice prompt “No.123 Check”, display “123c”
Press “cancel”, Clear all call history.
If many different calling exist at the same time, press “Up/Down” to read calling record, short press “Clear” to
clear current call, long press “clear” to clear all calling record.
3.4 Alarm Operation
3.4.1 Arming
In Arming mode, the host panel will alarm when detectors be triggered, there are four methods to arming it.:
1) Press [Arming/Disarming], voice prompt “Arming”, display “bF”, means arming successful
2) Press [Arming] on remote, voice prompt “Arming”, display “bF”, means arming successful
3) Schedule arming, the host will auto-arm when time up, voice prompt “Arming”, display “bF”, means
arming successful
4) Call the host, input password, press No.1 on cell phone, will voice prompt “Arming”, means arming
successful
3.4.2 Disarming
In disarming mode, the host panel will not alarm when detectors be triggered, there are four methods to
disarming it.:
1)
、Press [Arming/Disarming], voice prompt “disarming”, display “CF”, means disarming successful
2)
、Press [disarming] on remote, voice prompt “disarming”, display “CF”, means disarming successful
3)
、Schedule disarming, the host will auto-disarm when time up, voice prompt “disarming”, display “CF”,
means disarming successful
4)
、Call the host, input password, press No.2 on cell phone, will voice prompt “disarming”, means disarming
successful
3.4.3 Stay Arming
In stay arming mode, the host panel will not alarm when detectors from 1 to 50 zones be triggered, the host
panel will alarm when detectors from 51 to 99 zones be triggered there are three methods to stay arming it:
1)
、Press [Arming/Disarming], voice prompt “stay arming”, display “LB”, means disarming successful
2)
、Press [stay] on remote, voice prompt “stay arming”, display “LB”, means disarming successful
3)
、Call the host, input password, press No.3 on cell phone, will voice prompt “disarming”, means disarming
successful
3.4.3 Alarm
After copy code between host and transmitter, In Arming mode, the host panel will alarm when detectors be
triggered, host will alarm on-site and call the set telephone number.
3.5 Force clear
In standby working mode, long press [clear ] for 5 seconds, screen will display “clr”, loose and see the
“clr”blinks, means “force clear or not ?”, short press “clear” to confirm. System will start force clear. Please be
cautious in force clear, the system will remain to the factory setting after doing it. All transmitter, remote control,
management remote will be deleted. The button functions of the transmitter will be factory setting,too. Alarm
recording will be deleted.
Chapter Four Attention
1.In setting mode, calling and alarming is disable.
13
2.Turn Off, Power off, and setting mode will delete all calling mode, alarm mode will be remained.
3.In calling system mode, short press [clear] will delete current call, the learnt transmitter will not be deleted.
4.During using, please pull out the antenna of host panel and transmitters, the signal will be in best status.
Chapter Five Technology Parameters
1:Working Voltage:DC12V/2A
2: Working currency:<500mA
3:Standby currency:<300mA
4:siren output:<200mA ,12V
5:receiving frequency:315/433MHz
6:receiveing distance:100Meters(open area)
7:working temperature:-20℃-55℃
8:Feature measurement:400×160×42mm
Chapter Six Accessories in standard package
Host Panel
1pc
Power Adapter
1pc
User Manual
1pc
Users can select remote manager, transmitter, detector, remote controller, and sirens. If choose other type of
transmitter of our company, we will define every buttons function.
Chapter Seven,
Trouble and Troubleshoot
Trouble
Cause
1. Press transmitter, host does not
reflect.
1. Transmitter does not
copy code
2. Transmitter battery low
1.Copy the code into host panel.
2.Change battery
2. Host no reflect when transmitter far
away.
Transmitter battery low
Change Battery
3. Host no voice when power on and
calling
Volume is lowest
Change the volume
4.Other brand transmitter not working
Code not right
Re-set the function of transmitter
5. No alarm when detector triggered
1.Transmitter never copy
code
2.Host never arming
1.Copy code
2.Arming it
14
Method