1
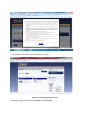
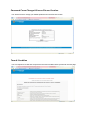
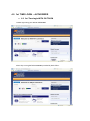
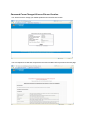
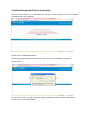
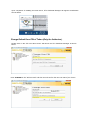
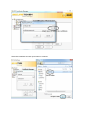
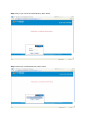
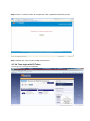
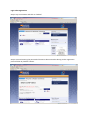
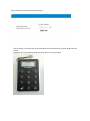
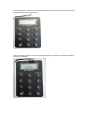
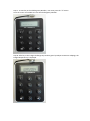
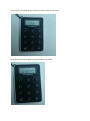
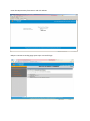
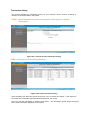
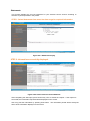
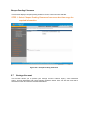
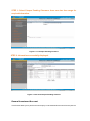
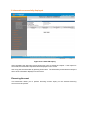
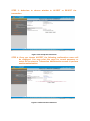
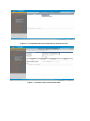
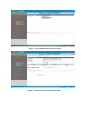
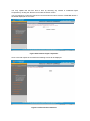
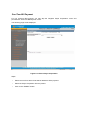
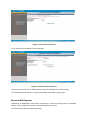
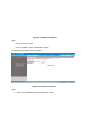
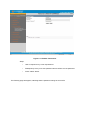
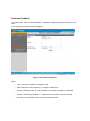
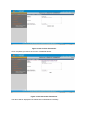
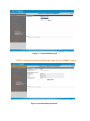
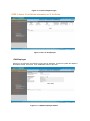
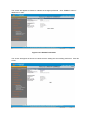
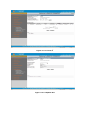
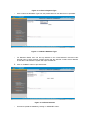
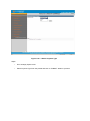
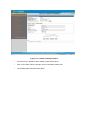
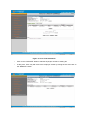
• Key Features of iRAKYAT Commerce The iRAKYAT Commerce provides the following key features: • An on-line real-time system that provides straight through processing from your deposits and financing modules. • Provide multiple checkers for an online transaction. • Functions Available in iRAKYAT Commerce The list of functions available for iRAKYAT Commerce is as follows: • Account Management • Authorisation • Payment • Bill Payment • System Administration • Customer Service 2.0 GETTING STARTED Accessing iRAKYAT Commerce web page • Go to www.irakyat.com.my • Select the tab iRAKYAT Commerce • The following page will be displayed • Click on “OK” button The following screen shows the login page for user login. Figure 2.1 Login Page for user level Please login using your default USERNAME and PASSWORD. 3.0 FIRST TIME LOGIN – DATA ENTRY First Time Login Please login using your default USERNAME. Please key in using default PASSWORD provided by bank officer. Password Force-Change & Secure Phrase Creation You will be forced to change your default password and set a Secure Phrase. Term & Condition You are required to review and accept all the term and condition before proceed to the next page. Password successfully changed Your password has been successfully changed. Please select “OK” button to proceed for re-login. Login after Registration Step 1: Key in username and click on “Submit” Step 2: Proceed entering the password if the Secret Phrase matches during earlier registration process follow by “Submit” button. Step 3: iRakyat- Commerce Landing page upon successful login 4.0 1st TIME LOGIN – AUTHORIZER 4.1 1st Time Login WITH PKI TOKEN Please login using your default USERNAME. Please key in using default PASSWORD provided by bank officer. Password Force-Change & Secure Phrase Creation You will be forced to change your default password and set a Secure Phrase. You are required to review and accept all the term and condition before proceed to the next page. Certificate Download (Only for Authorizer) Upon successful change of your password and setting the secure phrase, you will be requested to download the Token certificate. Please click on “DOWNLOAD” button. The following page will appear and proceed to save your Token certificate by clicking on “SAVE” button. You will also receive a 6-Digit Certificate (import) Password via SMS. Please contact Bank in case you do not receive this SMS. Token Software installation (Only for Authorizer) After downloading the Certificate as per 2.3 above, proceed to plug in your iRAKYAT Commerce PKI token into the USB slot of your PC and it will automatically launch Secure Token ST3 installer to initialize your Token as shown below. Follow the default instructions of the installer and finally click on Finish button to complete the setup. Upon completion of installing the token driver, ST3 Certificate Manager will appear at notification area as below. Change Default User PIN of Token (Only for Authorizer) Double click on the ST3 icon above and it will launch the ST3 Certificate Manager as shown below. Enter 12345678 as the “Old User PIN” and then set and confirm the new user PIN of your choice. Import Certificate into the Token (Only for Authorizer) Next step is to launch the ST3 Secure Token Manager to import the downloaded certificate into the token. Click on Certificates and insert token PIN code to continue. Click on import button to certificate. Select PKI certificate and click open button to continue. Enter certificate password which you will receive via SMS (or EMAIL). It will be a 6-Digit numeric value. Login after Token Installation Step 1: Key in username and click on “Submit” Step 2: Proceed entering the password if the Secret Phrase matches during earlier registration process follow by “Submit” button. Step 3: Insert Token into USB port and click on “Verify your Token PIN Code”. Step 4: Key in your Token Pin Code follow by “Next” button. Step 5: Select your certificate follow by “Next” button. Step 6: Click on “Continue” button to complete the Token registration/verification process. Step 7: Repeat step 1 & 2 to login into iRakyat Commerce. 4.2 1st Time Login with CR Token Please login using your default USERNAME. Please key in using default PASSWORD provided by bank officer. Password Force-Change & Secure Phrase Creation You will be forced to change your default password and set a Secure Phrase. Terms & Condition You are required to review and accept all the term and condition before proceed to the next page. Choose CR Token if you have received. Click ‘Request OTP’ to activate token. Pop up opens with success message on SMS sent. Close pop up and check SMS sent to the registered phone number. Open SMS and get the OTP. Enter the OTP under One Time Password (OTP) and Click Activate On successful activation, get the below success message. Login after Registration Step 1: Key in username and click on “Submit” Step 2: Proceed entering the password if the Secret Phrase matches during earlier registration process follow by “Submit” button. Step 3: Redirects to CR Token Verification Page. Step 4: Switch on the CR Token by pressing both the most bottom left (unlock) & right (arrow) button. NEW PIN - Set a new token PIN (password) for device security purpose. Step 5: PIN CONF - Reconfirm the token PIN (password) by key in the earlier PIN number to complete device security password. Step 6: CR Token is READY to use in verifying challenge key number received from iRakyat Commerce webpage. Step 7: To start key in the Challenge Key Number, user must press the “2” button. Later the screen is available to insert the Challenge Key Number. Step 8: After key in the 6 digits Challenge Key Number given by iRakyat Commerce webpage, the 8 digits Response Key is displayed. Step 9: Insert the 8 digits Response Key in iRakyat Commerce webpage. Then press Submit. Step 10: iRakyat- Commerce Landing page upon successful login 4.3 EXISTING USER WITH CR TOKEN Please login using your default USERNAME. Please key in using default PASSWORD. Click CR TOKEN Button. Click Request OTP button. Opens Pop up with success message on SMS sent. Close Pop up. Check SMS for OTP. Enter OTP received in SMS into ‘One Time Password’ Text box and Click ‘Activate’ button The following message will be prompted upon successful activation. Login again with USERNAME. Enter Password. After Successful Login, token page opens. Unlock Token using default pin. Press 2. Enter the Challenge key number from the screen into the token . New ‘Response Key from Device’ gets generated in the Token. Enter the Response Key from Device and click Submit. iRakyat- Commerce Landing page opens upon successful login • Account Management Account Summary This function displays details of all Customers‟ accounts as shown below: Figure 3.1 Account Summary Current Account This function allows you to view your current account balance, transaction history, account statements and cheque pending clearance status. User can click the menu bar to select the function and view the relevant transactions. Figure 5.2.1 Current Account Balance Inquiry This function displays the balance of your current account selected from the pick list. Figure 5.3.1 Select current account number Figure 5.3.2 View Balance Inquiry After completing the data input, press function key “OK” to submit the request. If the request is successful, the information requested will be displayed on the screen. User may print the information by pressing Print button. The information printed will be exactly the same as the information displayed on the screen. Transaction History This function displays the transaction history for your selected current account according to selection of period specified in the picklist. STEP 1: Select Transaction History from menu bar time range for required Information. Figure 5.4.1 Current account transaction history STEP 2: Information successfully displayed. Figure 5.4.2 View Transaction history After completing the data input, press function key “OK” to submit the request. If the request is successful, the information requested will be displayed on the screen. User may print the information by pressing Print button. The information printed will be exactly the same as the information displayed on the screen. Statements This function displays the account statement for your selected current account according to selection of period specified in the picklist. STEP 1: Select Statements from menu bar time range for required information. Figure 5.5.1 Statements Inquiry STEP 2: Information successfully displayed. Figure 5.5.2 View Current account statements After completing the data input, press function key “OK” to submit the request. If the request is successful, the information requested will be displayed on the screen. User may print the information by pressing Print button. The information printed will be exactly the same as the information displayed on the screen. Cheque Pending Clearance This function displays cheques pending clearance for the current account selected. STEP 1: Select Cheque Pending Clearance from menu bar time range for required information. Figure 5.6.1 Cheque Pending Clearance 5.7 Savings Account This function allows you to perform your savings account balance inquiry, view transaction history, account statements and cheque pending clearance status. User can click the menu bar to select the function and view the relevant transactions. Figure 5.7.1 Savings Account 5.8 Balance Inquiry This function will display the Savings Account balance for selected accounts number from the pick list. Figure 5.8.1 Select savings account number Figure 5.8.2 View Balance Inquiry After completing the data input, press function key “OK” to submit the request. If the request is successful, the information requested will be displayed on the screen. User may print the information by pressing Print button. The information printed will be exactly the same as the information displayed on the screen. Transaction History This function displays your savings account transaction history based on the period selected from the picklist. STEP 1: Select Transaction History from menu bar time range for required information. Figure 5.9.1 Savings account transaction history STEP 2: Information successfully displayed. Figure 5.9.2 View Transaction history After completing the data input, press function key “OK” to submit the request. If the request is successful, the information requested will be displayed on the screen. User may print the information by pressing Print button. The information printed will be exactly the same as the information displayed on the screen. Statements This function displays your savings account statements based on the period selected from the picklist. STEP 1: Select Statement from menu bar time range for required information. Figure 5.10.1 Statements Inquiry STEP 2: Information successfully displayed. Figure 5.10.2 View Current account statements After completing the data input, press function key “OK” to submit the request. If the request is successful, the information requested will be displayed on the screen. User may print the information by pressing Print button. The information printed will be exactly the same as the information displayed on the screen. Cheque Pending Clearance This function displays all cheques which are pending clearance deposited into the selected savings account STEP 1: Select Cheque Pending Clearance from menu bar time range for required information. Figure 5.11.1 Cheque Pending Clearance STEP 2: Information successfully displayed. Figure 3.3.4.2 View Cheque Pending Clearance General Investment Account This function allows you to perform account inquiry on the selected GIA account from the pick list. STEP 1: Select General Investment Account Inquiry from menu bar time range for required information.. Figure 5.12.1 GIA Account Inquiry STEP2: Select the Account no from the picklist. Figure 5.12.3 Select GIA account number 3: Information successfully displayed. Figure 5.12.4 View GIA Inquiry After completing the data input, press function key “OK” to submit the request. If the request is successful, the information requested will be displayed on the screen. User may print the information by pressing Print button. The information printed will be exactly the same as the information displayed on the screen. Financing Account This transaction allows you to perform financing account inquiry on the selected financing account from the pick list. STEP 1: Select Financing Account from menu bar time range for required information.. Figure 5.13.1 Financing Account STEP 2: Information successfully displayed. Figure 5.13.2 View Financing Inquiry After completing the data inputs press function key “OK” to submit the query. If the query is successful, the information requested will be displayed on the screen. There is an option for the user to print out the screen information on the printer by pressing Print button. The information printed will be exactly the same as the information displayed on the screen. Share Membership This function allows you to perform share membership account inquiry for the selected membership account from the pick list. Figure 5.14.1 Share Membership Account Figure 5.14.2 View Share Membership Inquiry After completing the data inputs press function key “OK” to submit the query. If the query is successful, the information requested will be displayed on the screen. There is an option for the user to print out the screen information on the printer by pressing Print button. The information printed will be exactly the same as the information displayed on the screen. • Authorisation Authorisation History (Only for Authorizer) This transaction displays all transactions authorised/rejected by User. Figure 6.1.1 Authorisation History There is an option for the user to print out the screen information on the printer by pressing Print button. The information printed will be exactly the same as the information displayed on the screen. Pending Authorisation Transaction Inquiry (Only for Authorizer) This function displays all transactions which are pending your authorization. Details displayed consists of a system generated reference number, type of transaction, amount, date & time and no of Authorizers required. Please click on the respective reference number to view the details. Figure 6.2.1 Pending Authorisation Transaction Inquiry Figure 6.2.2 View respective reference number There is an option for the user to print out the screen information on the printer by pressing Print button. The information printed will be exactly the same as the information displayed on the screen. Transaction Authorisation (Only for Authorizer) This function allows Authorizer to approve or reject pending authorization transactions based on his discretionary authorization limit. NO unauthorized user may perform this function. STEP 1: Select approval group based on your approval limit allowed. Figure 6.3.1 List of Authorizer STEP 2: Select required Reference Number and submit Figure 6.3.2 Select the reference number STEP 3: Authorizer to choose whether to ACCEPT or REJECT the transaction. Figure 6.3.4 Accept the transaction STEP 4: Once you choose ACCEPT, the following confirmation screen will be displayed. You may print this page for record purposes or select OK to return to Transaction Authorisation screen to perform another authorisation. Figure 6.3.5 Successful transaction STEP 5: Once you choose REJECT, the following confirmation screen will be displayed. You may print this page for record purposes or select OK to return to Transaction Authorisation screen to perform another authorisation Figure 6.3.6 Rejected transaction User may click on the PRINT button to print the transaction for future reference. An approval may require more than one authorizer and such transaction is deemed as fully authorized only in the event all authorizers have granted their approval. Pending which, the transaction will be listed under „pending authorization‟. • Fund Transfer Intrabank Account Transfer 7.1.1 Own Account Transfer From Current Account The following screenshot displays how user may perform fund transfer from own Current Account that is already registered in iRAKYAT Commerce to another own savings / current account within Bank Rakyat. Figure 7.1.1.1 Intrabank Own account transfer for Current Account Figure 7.1.1.2 Enter own account transfer data Figure 7.1.1.3 Print Screen after click confirm button Figure 7.1.1.4 Print Screen after click submit after confirmation After completing the data input, click on Confirm button. If the transaction is successful, the status “Successful” is displayed and the transaction reference number will be generated. Users may proceed to click on PRINT button to print the transaction for record keeping. Users may remove a transaction by selecting the said entry and clicking on “REMOVE” button. However, this may only be performed before user click on the “CONFIRM” button. Users may also cancel a transaction by selecting the said entry and clicking on the “CANCEL” button. However, this may only be performed before user click on the “CONFIRM” button. An error message will be displayed in the event user transfer funds to the same account as the originator account. Minimum transfer amount is RM 1.00. 7.1.2 Fund Transfer Status Inquiry The following transaction shows the intrabank own account transfer status inquiry for current account based on the date selected. Figure 7.1.2.1 Select Date Range Figure 7.1.2.2 Intrabank Own Account Transfer Status Inquiry for Current Account 7.1.3 Own Account Transfer for Savings Account The following screenshot displays how user may perform fund transfer from own Savings Account that is already registered in iRAKYAT Commerce to another own savings/current account within Bank Rakyat. Figure 7.1.3.1 Intrabank Own account transfer Figure 7.1.3.2 Enter own account transfer data Figure 7.1.3.3 Print Screen after click confirm button Figure 7.1.3.4 Print Screen after click submit after confirmation After completing the data input, click on Confirm button. If the transaction is successful, the status “Successful” is displayed and the transaction reference number will be generated. Users may proceed to click on PRINT button to print the transaction for record keeping. Users may remove a transaction by selecting the said entry and clicking on “REMOVE” button. However, this may only be performed before user click on the “CONFIRM” button. Users may also cancel a transaction by selecting the said entry and clicking on the “CANCEL” button. However, this may only be performed before user click on the “CONFIRM” button. An error message will be displayed in the event user transfer funds to the same account as the originator account. Minimum transfer amount is RM 1.00 7.1.4 Fund Transfer Status Inquiry The following transaction shows the intrabank own account transfer status inquiry for savings account based on the date selected. Figure 7.1.4.1 Select Date Range Figure 7.1.4.2 Own Account Transfer Status Inquiry for Savings Account Third Party Account Transfer from Current / Savings Account The following screenshot displays how user may perform fund transfer from own Current/Savings rd party savings / current Account that is already registered in iRAKYAT Commerce to another 3 account within Bank Rakyat. Figure 7.2.1 Third Party Transfer Figure 7.2.2 Submit Transaction User may click on “PRINT” button to print the transaction for record keeping. Figure 7.2.3 Successful Transaction The successful transaction will be listed in “Pending Authorisation Transaction Inquiry” page. . Third Party Transfer Status Inquiry The following transaction shows the third party transfer status inquiry based on the date selection. Figure 7.3.1 Select Date Range Figure 7.3.2 Third Party Transfer Status Inquiry IBG Transfer rd This function enables the User to transfer funds to own or 3 financial institution via IBG. party account maintained in another Funds of up to RM500,000 may be transferred via IBG. Figure 7.4.1 IBG Transaction Figure 7.4.2 Submit Transaction Figure 7.4.3 Successful Transaction User may print the screen above for record purposes by clicking on the “PRINT” button. After the IBG transaction is created, it will be listed in “Pending Authorisation Transaction Inquiry” page. IBG Status Inquiry User may view status of IBG transactions for a specific period by selecting “IBG Status Inquiry”. Figure 7.5.1 Select Date & Account Number Figure 7.5.2 IBG Status Inquiry All IBG transactions for the period selected will be displayed i.e. approved, pending authorisation, reject etc. Telegraphic Transfer rd This function enables the User to transfer funds to own or 3 financial institution via RENTAS. party account maintained in another To create transaction, select Telegraphic Transfer. Choose the account to be debited and specify the amount to be transferred. Figure 7.6.1 Enter Payment Amount Once User click on „Submit‟ button, the following screen will appear: Figure 7.6.2 Enter Beneficiary Details Press „Submit‟ button and the following screen will be displayed: Figure 7.6.3 Confirm Transaction If all details are accurate, kindly proceed to click on “CONFIRM” button and the following screen will be displayed. Figure 7.6.4 Successful Transaction Once the transaction is confirmed, it will be listed in “Pending Authorisation Transaction Inquiry” page. User may print the screen above for record purposes by clicking on the “PRINT” button. Telegraphic Transfer Status Inquiry The following transaction shows the telegraphic transfer status inquiry based on the date selected. Figure 7.7.1 Select Date Range Figure 7.7.2 Third Party Transfer Status Inquiry All Telegraphic Transfer transactions for the period selected will be displayed i.e. approved, pending authorisation, reject etc. • Bill Payment Register Payee Corporation You are first required to register the bill payee as a favorite bill payment as shown in the screen below. Steps: • Click on the picklist and select a Payee Corporation of your choice • Key in your Bill Account No as stated in your monthly Bill • Bill Description allows you to make notes for your future consumption e.g. AAM. • Click on the “SUBMIT” button. Figure 8.1.1 Submit Transaction The following screen will appear indicating that your request has been successfully processed. Figure 8.1.2 Successful Transaction List of Payee Corporation This menu will display a listing of all your registered Payee Corporation. These payee corporation will then be listed as Favourite. For future use, you may retrieve this list of payee from the “Favourite Bill Payment” Menu. Figure 8.2.1 List of Payee Corporation You may update this list from time to time by removing any unused or unwanted Payee Corporation by clicking the “Remove” link under the Action column. You are required to confirm the request for removal as shown below. Click the “CONFIRM‟ button if the details displayed are accurate. Figure 8.2.2 Remove Payee Corporation Once a removal request is successful the following screen will be displayed. Figure 8.2.3 Successful transaction One Time Bill Payment For non recurring Bill Payment, you may skip the “Register Payee Corporation” menu and proceed with “One Time Bill Payment” menu. The following page will be displayed. Figure 8.3.1 Select Payee Corporation Steps: • Select account from which funds will be debited to effect payment. • Select the Payee Corporation from the picklist • Click on the “SUBMIT” button. The following screen will be displayed. Figure 8.3.2 Submit Transaction Steps: • Key in the Bill Account No as stated in your Bill • Key in the amount to be paid • Click on “SUBMIT” button Your payment details will be displayed and if accurate, kindly proceed to click on the “CONFIRM” button. Figure 8.3.3 Confirm transaction Once confirmed, the following screen will appear. Figure 8.3.4 Successful transaction Users may proceed to click on PRINT button to print the transaction for record keeping. The transaction will be listed in “Pending Authorisation Transaction Inquiry” page. Favourite Bill Payment Subsequent to Registration of Bill Payee Corporation, to effect any bill payments to registered agency, User is required to select the “Favourite Bill Payment” menu. Proceed to key in data in the following screen. Figure 8.4.1 Favorite Bill Payment Steps: • From the picklist, choose the account from which funds will be debited • Choose the relevant Payee Corporation from the picklist • Click on the “SUBMIT” button. The following page will appear. Figure 8.4.2 Submit Bill Payment Steps: • Key in amount to be paid • Click on “SUBMIT” button if all data are accurate. The following confirmation screen will appear: Figure 8.4.3 Confirm Transaction Steps: 1. Click on the “CONFIRM” button if all details are in order The screen below will be displayed, indicating successful transaction. Figure 8.4.4 Successful Transaction Users may proceed to click on PRINT button to print the transaction for record keeping. The transaction will be listed in “Pending Authorisation Transaction Inquiry” page. Bill Payment History All records of Bill Payment transactions based on a specified period may be viewed from this menu. Once the period of transaction is selected, proceed to click on “SUBMIT” button. Figure 8.5.1 Submit transaction The following screen will be displayed. Figure 8.5.2 Bill Payment History • System Administration Password Management User may change password by selecting the Password management function. The following page will appear: Figure 9.1.1 Submit Transaction Steps: • User is required to key in his old password • Subsequently to key in his new password and reconfirm his new password. • Press „submit‟ button. The following page will appear, indicating that the password change is successful: Figure 9.1.2 Successful Transaction User is required to log in to iRAKYAT Commerce using the new password. An error message will be prompted if user entered the old password for login. Recent Transaction History Inquiry This function displays all recent transaction history inquiry for the user. Step 1: Select account number and transaction date range to be viewed and press NEXT button. Figure 9.2.1 Submit Transaction The following page will be displayed Figure 9.2.2 Recent Transaction History Account Description This function displays all accounts by account no, account type and account description as shown below: Account description is a field that may be edited by User for his reference e.g. Client Account etc. Figure 9.3.1 Account Description Click on “EDIT” to update the account description as per below: Figure 9.3.2 Submit Transaction Figure 9.3.3 Confirm Transaction Figure 9.3.4 Successful Transaction • Customer Services Rates or Dividends Inquiry For information on Bank Rakyat‟s products / services Rates and Dividends, User may go to the “Rates & Dividends Inquiry” menu. Figure 10.1.1 Submit Transaction User will be prompted to select a product or services from the picklist and click on the “SUBMIT” button. This menu is hyperlinked to the Bank‟s corporate website Figure 10.1.2 Linked with i-Rakyat Customer Feedback This menu allows User to submit feedbacks / complaints regarding iRAKYAT Commerce to the Bank. Once selected, the following screen will appear. Figure 10.2.1 Submit Transaction Steps: • Type in nature of complaint at “SUBJECT” field • Select “Objective” from the picklist i.e. complaint, feedback etc • Under the „Message” field, you may elaborate on the details of feedback / complaints • Under the field “Subject Related To” , please choose the product / services affected • Provide your e mail address at the “Reply Email Address” field. Figure 10.2.2 Confirm Transaction Once completed, proceed to click on the “CONFIRM” button. Figure 10.2.3 Successful Transaction The above will be displayed if the transaction is submitted successfully. • Autopay Creation This menu is provided to ease your bulk payment process for salary, loan or interbank fund transfer via IBG. Payment can be effected via datafile upload or manual entry. Add Employee You may manually add an employee to the current listing. STEP 1: Choose the payment type. Figure 11.1.1 Select Payment Type STEP 2: Complete all the required fields and click on “SUBMIT” button. Figure 11.1.2 Enter Employee Details STEP 3: Click on “CONFIRM” button if all details are accurate. Figure 11.1.3 Submit Transaction Employee Listing This menu displays the list of all employees added earlier. The list may be updated by clicking “E‟ to edit or „D‟ to delete. STEP 1: Choose the payment type. Figure 11.2.1 Select Payment Type STEP 3: Select „E‟ to Edit the information or „D‟ for Delete Figure 11.2.2 List of Employee Edit Employee Should you choose edit, the following screen will be displayed. Proceed to update the details in the fields provided. Once done, click “CONFIRM” button to proceed. Figure 11.3.1 Update Employee Details The screen will appear as follows to indicate the changes performed. Click “SUBMIT” button if details are in order. Figure 11.3.2 Submit Transaction The screen will appear as follows to indicate that the editing was successfully performed. Click OK to exit. Figure 11.3.3 Successful Transaction Delete Employee Should you choose delete, the following screen will be displayed. Click “CONFIRM” button to proceed. Figure 11.4.1 Delete Employee Details Figure 11.4.2 Successful Transaction Create Autopay Based On Employee List The Autopay can be credited using existing list of employee which has been created before. The following transactions show the creation of Autopay based on employee list. 11.5.1 Create Autopay Based On Employee List Employees account may be credited via Autopay based on the list of employee created. Steps: • Go to Create Autopay Based on Employee List menu. • Select payment type and click on “SUBMIT” button as shown below. Figure 11.5.1.1 Select Payment Type Steps: • User is required to select the crediting date. Only future date is allowed. • Once done, click on “PACKAGE” button. Figure 11.5.1.2 Click Package button Steps: 5. Click on “CONFIRM” button if all is in order Figure 11.5.1.3 Confirm transaction Figure 11.5.1.4 Successful Transaction The web autopay reference no will be generated after the transaction is completed successfully. User may print the transaction details for record purposes by clicking on the “PRINT” button.. Edit Employee Details User can update employee details by clicking on “E” in Action column Figure 11.5.2.1 Click „E‟ Figure 11.5.2.2 Update data Figure 11.5.2.3 Submit Transaction Figure 11.5.2.4 Successful Transaction Delete Employee Details User can delete employee details by clicking on “D” link in Action column. Figure 11.5.3.1 Click „D Figure 11.5.3.2 Delete Employee record Figure 11.5.3.3 Successful Transaction The status of transaction will be displayed as shown above. Upload Autopay Files Instead of creating employee list by manually adding each employee, User may create datafile using notepad, Excel etc and upload in iRAKYAT Commerce as follows: Steps: • User is required to select the payment type before uploading the data file, based on the picklist. Figure 11.6.1 Select Payment Type • User to select the Database Type from the picklist based on the data file to be uploaded. Figure 11.6.2 Select Database Type • For Delimiter Based, user can set any delimiter in the “Field Delimiter” field and insert decimal point in salary amount. Please ensure that the data file contains same delimiter as set above. Otherwise the system will reject the data file. 4. Click on “SUBMIT” button to proceed further. Figure 11.6.3 Enter Delimiter • Proceed to upload the datafile by clicking on “BROWSE” button. Figure 11.6.4 Browse data file and upload • The employee list will be displayed. • Click on “CONFIRM” button if all details are accurate. Figure 11.6.5 Click Confirm Figure 11.6.6 Successful Transaction Note: Only “.txt” and “.prn” type of files are allowed to be uploaded. Error message will be prompted if other types of data files or invalid data files are uploaded. The data file name should contain maximum 50 characters. • After successful transaction, the web Autopay reference no will be generated. The uploaded file will be acknowledged and all the invalid line in the uploaded file will be logged in Invalid Line log file. Autopay Details This menu displays all credited autopay transactions either performed by manual creation of employee list or via datafile upload. Autopay Listing User may view all Autopay payments credited with the following details: • Payment Type • Date Created and Date of Crediting • Status i.e. Successful, pending authorisation etc. Figure 11.7.1.1 Select Payment Type Figure 11.7.1.2 Autopay Listing Figure 11.7.1.3 View in details User may print the above screen for future reference or record purposes. The status will change from time to time based on the authorization activity. Autopay Statement System will allow user to download „Autopay Statement‟ which contains either Successful or Reject Statement File. These files may only be downloaded after daily batch run has been performed, that is on T + 1. Figure 11.7.2.1 Select Payment Type & Reference No Steps: • Go the Autopay Statement menu • Select payment type and Autopay Ref No from the picklist. • Click on “SUBMIT” button • Details will be displayed as follows: Figure 11.7.2.2 View Autopay Details Autopay Option This menu is applicable for temporary or contract employees. Create Temporary Autopay Figure 11.8.1.1 Select Payment Type Steps: • Go to Autopay Option menu. • Select Payment Type from the picklist and click on “SUBMIT” button to proceed. Figure 11.8.1.2 Enter Employee Details • Proceed to key in details for the mandatory fields shown above. • Click on the “ADD” button to add the record in the Salary Details Tab. • The crediting date should be future dated. Figure 11.8.1.3 Click Add button • Click on the “PACKAGE” button to add the employee records in existing list. • At this point, User may still remove the employee record by ticking the box and click on the “REMOVE” button. Figure 11.8.1.4 Click Confirm Button • If the details displayed are accurate, please click on “CONFIRM” button to proceed. Figure 11.8.1.5 Successful Transaction • An Autopay reference number will be generated after each successful transaction. • User may print the details by clicking on the “PRINT” button. Autopay Authorisation (Only for Authorizer) This menu displays the list of Autopay pending authorisation transactions The Authorizer may proceed as follows: STEP 1 : Select Payment Type and click SUBMIT. Figure 11.9.1 Select Payment Type STEP 2 : Select on any transactions that is Pending Authorisation by ticking on the box and click SUBMIT. Figure 11.9.2 List of Pending Authorisation STEP 3 : The following page with a listing of employees and amount to be paid will appear. You may proceed to ACCEPT /REJECT the transaction Figure 11.9.3 Accept Authorisation STEP 4 : Once you ACCEPT / REJECT, the page below with Status update will appear. Click on “OK” button to exit. Figure 11.9.4 Accepted Transaction After the creation is done, user need authorize the web autopay and perform daily batch run.