1
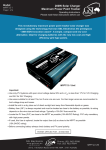
STEP 3 - Connect the battery charger to Mains Power (240Vac) Connect the battery charger to a 240VAC Mains Powered socket. Turn on the 240VAC Mains Power. The Charger will automatically start when AC power is connected and switched on. (Note: If the Fault Indicator LED illuminates Red, please check your connections as it’s likely that the Positive and Negative Leads are reversed. Refer to Trouble Shooting Page for further information) THE CHARGING PROCESS: The charging stages are as follows: Bulk Charge: Charges using a constant maximum current (1A) until the battery reaches 7.2V (6 Volt Batteries) or 14.4V (12 Volt Batteries) - (LED Color - Yellow) Fully / Float: Battery is fully charged and is being maintained. (LED Color - GREEN) STEP 4 - Disconnecting the Battery charger from Battery If the Battery is out of the vehicle. o Switch OFF and Remove the AC Power Socket from the outlet. o Remove the Black lead and then the Red lead. o Check electrolyte levels if possible. (As they may need topping up with distilled water after charging) If the Battery is in the vehicle. o Switch OFF and Remove the AC Power Socket from the outlet. o Remove the lead from the vehicle chassis. o Remove the lead from the battery. o Check electrolyte levels if possible. (As they may need topping up with distilled water after charging) LED STATUS INIDICATOR TABLE: A.C. Power connected, battery disconnected Bulk Charging Power (Red) ON ON Charging (Yellow) OFF ON Full (Green) OFF OFF Fault (Red) OFF OFF 6