Download Manual
Transcript
D S P M Inc.
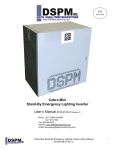
User’s Manual
Power Lynx III & Power Lynx III HE
Uninterruptible Power System / Central Lighting Inverter
Technical Manual #018-0056-15 Revision NR
Phone: (714) 970-2304 Fax: (714) 970-6171
Web Page: www.DSPManufacturing.com
Email: [email protected]
1
Congratulations on selecting one of the fine products from DSPM, the leader in power
protection technology. Our wide product offering includes Uninterruptible Power
Systems (UPS), Power Conditioners, Frequency Converters and Specialty
Transformers. Since our beginnings DSPM has shipped many of these fine products to
discerning customers for use on sensitive equipment and critical loads.
HEADQUARTERS
DSPM Inc
1921 S Quaker Ridge Place
Ontario, CA 91761
SALES
Phones
(714) 970-2304
Fax. No.
(714) 970-6171
www.DSPManufacturing.com
Email: [email protected]
SERVICE
Phone
(714) 970-2304 – 8:00 AM to 5:00 PM PST
(951) 840-0811 – 5:00 PM to 8:00 AM PST
Fax. No. (714) 970-6171
Phone: (714) 970-2304 Fax: (714) 970-6171
Web Page: www.DSPManufacturing.com
Email: [email protected]
2
DSPM Inc.
Proprietary Reproduction or Distribution forbidden
NOTICE: THIS DOCUMENT CONTAINS PROPRIETARY
INFORMATION
This document contains proprietary and confidential information of
DSPM Inc. (“DSPM”). In consideration of the receipt of this
document, the recipient agrees not to copy any of its contents, nor
disclose them to or allow them to be used by any person not
currently a DSPM employee or an employee of the recipient having
a need to know, without the express written consent of DSPM, and
further agrees to surrender this document to DSPM when the
reason for its receipt has terminated.
Phone: (714) 970-2304 Fax: (714) 970-6171
Web Page: www.DSPManufacturing.com
Email: [email protected]
3
SAFETY
Important Safety Instructions
Save These Instructions
This manual contains important instructions for the Power Lynx UPS System and
should be followed during the installation, operation and maintenance of the UPS
system.
IMPORTANT
SAFETY
When using Electrical Equipment, basic safety precautions should always be followed,
including the following:
IMPORTANT SAFEGUARDS
READ AND FOLLOW ALL SAFETY INSTRUCTIONS
1. Do not mount near gas or electric heaters.
2. Check that all electrical connections are tightened properly.
3. Equipment should be mounted in a location to prevent tampering by unauthorized
personal.
4. Equipment should be locked at all times.
5. Only DSPM trained personnel should be permitted to service or maintain equipment.
6. Only accessories recognized by DSPM shall be used with this equipment.
Contact DSPM if options are desired.
Phone: (714) 970-2304 Fax: (714) 970-6171
Web Page: www.DSPManufacturing.com
Email: [email protected]
4
BATTERY SHELF LIFE-STORAGE
The batteries must be recharged every 4 months for at least eight hours or the batteries
can be damaged. If the UPS is placed in storage, failure to re-charge batteries will
invalidate your warranty.
BATTERY SAFETY
1. Person knowledgeable of batteries and the required precautions should perform
servicing of batteries.
2. Do not dispose of batteries in a fire. The battery may explode.
3. Do not open and manipulate the battery. Released electrolyte is harmful to the
skin and eyes.
4. A battery can present a risk of electrical shock and high short circuit current.
Remove watches, rings or any other metal objects. Use only insulated tools.
5. Install in a protected environment.
6. Always turn off the battery circuit breaker before testing or performing
maintenance on the battery system.
WARNING
It is strongly advised not to open the UPS cabinet as the components have
very high voltages and touching them may be fatal. It is recommended that
a technician from DSPM or a DSPM trained technician service the unit. 24
hour phone support is available for questions.
Phone: (714) 970-2304 Fax: (714) 970-6171
Web Page: www.DSPManufacturing.com
Email: [email protected]
5
SECTION 1- OPERATION
1-1 INTRODUCTION
The POWER LYNX UPS (uninterruptible power system) from DSPM provides an
exceptional level of load protection and monitoring capabilities. The critical load is
provided with conditioned, regulated, battery backed up power at all times. Both the
voltage level and frequency are controlled at all times to the load.
When the input power is lost to the UPS, such as during a power outage, the UPS
automatically draws power from its battery supply. The critical load receives only clean
sine wave power at all times. There are no disturbances or power interruptions on the
output when the UPS transfers to battery operation. Transfers to and from battery
operations are “No Break” transfers. The internal maintenance-free batteries provide a
few minutes to hours (depending upon model) of backup power. Upon restoration of
input power, the UPS automatically resumes normal operation. Also the UPS
immediately begins to recharge the batteries.
The POWER LYNX is a dual conversion three phase UPS available in output ratings of
3.0 to 120 Kw. The UPS is U.L. listed under UL1778 and/or UL924. The UPS is
available with input voltages of 208 and 480 VAC; and output voltages of 120, 208, 480
and 277 VAC (Other voltages available, consult factory). This information is provided on
the nameplate located on the inside of the front door.
Phone: (714) 970-2304 Fax: (714) 970-6171
Web Page: www.DSPManufacturing.com
Email: [email protected]
6
1-2 BENEFITS
The POWER LYNX is designed to fit the needs for virtually all power conditioning and
UPS applications. It has been specifically designed to power all forms of modern data
processing, communications, process control equipment, lighting and emergency
lighting equipment. The UPS does not require any derating as other UPS products may
when powering 100% electronic loads including switch-mode power supplies.
The POWER LYNX protects sensitive electrical equipment, such as computer systems,
telecommunication networks, LANs, multi-user systems and instrumentation systems
from electrical interference. The UPS protects these systems from power problems
associated with poor quality AC power including complete power outages.
Electrical disturbances can come from practically anywhere: from the incoming power
lines and from within a building. Outside electrical disturbances include lightning strikes,
utility switching, brownouts, and accidents. Electrical disturbances from within the
building can be caused by load cycling (elevators, HVAC systems) fault conditions,
welders, and other electrically noisy equipment. Whether the electrical disturbances are
generated outside or from within the facility, the following power problems will occur:
•
•
•
•
•
Complete power outages
Brown-outs including momentary sags
Voltage surges
Transients including common-mode and transversemode noise
Frequency shifts and fluctuations
Sensitive electrical equipment needs protection from power problems. Without power
protection, users of sensitive equipment may experience:
•
•
•
•
•
•
•
•
Loss of data including data corruption
Database corruption
Equipment and component deterioration
Premature equipment failures
Unexpected equipment failures
Missed deadlines, especially during batch processing
Loss of real-time transaction processing
Loss of employee productivity
Phone: (714) 970-2304 Fax: (714) 970-6171
Web Page: www.DSPManufacturing.com
Email: [email protected]
7
Typical Front View (Door(s) Closed)
Phone: (714) 970-2304 Fax: (714) 970-6171
Web Page: www.DSPManufacturing.com
Email: [email protected]
8
Typical Right Hand Door View / Inverter Panel
Phone: (714) 970-2304 Fax: (714) 970-6171
Web Page: www.DSPManufacturing.com
Email: [email protected]
9
Typical Left Hand Door View /Rectifier Panel
Phone: (714) 970-2304 Fax: (714) 970-6171
Web Page: www.DSPManufacturing.com
Email: [email protected]
10
1-3 PRODUCT FEATURES
The following describes the major sub-systems within the POWER LYNX UPS.
INPUT AND OUTPUT FILTER – The input filter reduces the input transients and
harmonics on the input line. This helps protect the electronic circuitry of the UPS. The
output filter filters and noise and line spikes from loads.
RECTIFIER/INVERTER
The Rectifier-Inverter system provides controlled sine wave power to the output. The
output voltage and frequency are monitored by the microprocessor and controlled to
provide precision power with changing inputs and outputs to the UPS system.
MICROPROCESSOR DISPLAY
The microprocessor monitors the input and the output to the UPS system and corrects
for any abnormal condition that may occur. This is displayed on the LCD for operator
information.
DIAGNOSTIC TESTS
When you start the UPS, a diagnostic test is automatically executed that checks the
electronics, batteries, and reports the problems on the display.
Phone: (714) 970-2304 Fax: (714) 970-6171
Web Page: www.DSPManufacturing.com
Email: [email protected]
11
MAINTENANCE BYPASS SWITCH (MBS) (optional)
The MBS is a two position switch (Auto, and ByPass). The “Auto” position is the
“normal” position and allows full operation of the unit with the load being fed from the
inverter. The “Bypass” (MAN) position allows the load to be fed from the utility with no
power provided to the inverter. The unit must be de-energized (all feeders OFF) before
conducting service or repairs.
Phone: (714) 970-2304 Fax: (714) 970-6171
Web Page: www.DSPManufacturing.com
Email: [email protected]
12
Hydrogen Out-gassing Switch (“HOT” Switch) (optional)
The HOT switch option prevents battery charging when a system exhaust fan is not
functioning. This option incorporates the usage of a “sail switch” (Honeywell # S688A
1007 , provided by others) in the exhaust ducting of the facility. Upon exhaust fan
failure, the sail switch will close a contact which will eliminate the battery charging of the
Power Lynx.
Connect the Normally Closed and the Common contacts of the sail switch to the Hot
Switch terminal block (1 & 3) shown in the picture below.
To verify function, ensure that the system has been started up and is fully operational.
With the system battery breaker OPEN, turn off the facility exhaust fan (the sail switch
will return to its “at rest” position). Measure the DC bus voltage at the battery breaker
(the bottom of the breaker, not the top). This voltage should drop to apprx. 220 VDC in
an 18 battery system and to apprx. 120 VDC in a 10 battery system. Turn on the facility
exhaust fan. Measure the DC bus voltage at the battery breaker. The voltage should
rise to apprx. 237 VDC for an 18 battery system and to appx. 132 VDC in a 10 battery
system.
Phone: (714) 970-2304 Fax: (714) 970-6171
Web Page: www.DSPManufacturing.com
Email: [email protected]
13
EXTERNAL “WRAP AROUND” BYPASS SWITCH (EMBS) (optional)
The EMBS is a three position switch (Auto, Test and Bypass). The “Auto” position is the
“normal” position and allows full operation of the unit with the load being fed from the
inverter. The “Bypass” position allows the load to be fed from the utility with no power
provided to the inverter. The “Test” position allows power to the Inverter while the load
is being fed from the Utility.
Connect the
Auxilliary Contacts
here.
Phone: (714) 970-2304 Fax: (714) 970-6171
Web Page: www.DSPManufacturing.com
Email: [email protected]
14
System Remote Indicator Panel (Optional)
The Remote Indicator Panel provides an illuminated indication of several System
operating parameters. LED indicators as labeled below.
Terminations from the Remote Indicator Panel are made to the terminal block on the
Inverter control panel (shown below). Terminations are as indicated. All connections
must be made to the “top” of the Terminal block.
On Battery
Power On
Load on Utility
Bypass Aux. 1&2
Inverter On
Summary
Alarm
Ground
Phone: (714) 970-2304 Fax: (714) 970-6171
Web Page: www.DSPManufacturing.com
Email: [email protected]
15
SECTION 2 – PREINSTALLATION
2-1 SITE PLANNING AND PREPARARTION
The POWER LYNX is designed for installation indoors where it is protected from the
elements. The UPS can be installed in a variety of different environments including
computer rooms, offices, and industrial/process control locations. For the best
performance and reliability, temperature extremes should be avoided.
Listed below are the environmental specifications for the POWER LYNX UPS SYSTEM.
Adequate clearance around the equipment should be provided for service access and
proper equipment cooling. The UPS must be protected from contact with water and
other liquids. If the UPS is installed in a small, enclosed area, provisions for additional
cooling may be necessary.
OPERATING ENVIRONMENT. Provide an operating environment that meets the
following conditions:
o AMBIENT TEMPERATURE
32° to 104°F
0° to 40°C
o OPERATING ALTITUDE
2,286 M (7500 FT)
o NON-OPERATING ALTITUDE
up to 3,048 M (10,000 FT)
o RELATIVE HUMIDITY
0% to 95% (non-condensing)
! WARNING ! BATTERY SHELF LIFE !
•
BATTERY SHELF LIFE, WHEN STORED UNDER TEMERATURE CONDITIONS of
66° F ~ 77° F, is FOUR (4) MONTHS MAXIMUM AFTER THE SHIP DATE.
•
BATTERY MUST BE RECHARGED FOR EIGHT HOURS AFTER INSTALLATION
FOR THE FULL BACKUP TIME TO BE AVAILABLE.
Phone: (714) 970-2304 Fax: (714) 970-6171
Web Page: www.DSPManufacturing.com
Email: [email protected]
16
PL3 Uninterruptable Power System
Kilo-Watts
Input
Voltage
208
3
480
208
4.5
480
208
6
480
208
8
480
208
12
480
208
16
480
208
20
480
Output
Voltage
208
480
208
480
208
480
208
480
208
480
208
480
208
480
208
480
208
480
208
480
208
480
208
480
208
480
208
480
Utility
Feed
Amps
15
7
22
10
30
13
39
17
59
26
78
34
98
43
Max
Output
Amps
8.3
3.6
8.3
3.6
12.4
5.4
12.4
5.4
16.6
7.2
16.6
7.2
22.2
9.6
22.2
9.6
33.3
14.4
33.3
14.4
44.4
19.2
44.4
19.2
55.5
24.0
55.5
24.0
Kilo-Watts
Input
Voltage
208
24
480
208
40
480
208
60
480
208
80
480
208
100
480
208
120
480
Output
Voltage
208
480
208
480
208
480
208
480
208
480
208
480
208
480
208
480
208
480
208
480
208
480
208
480
Utility
Feed
Amps
Max
Output
Amps
66.6
28.8
66.6
28.8
111.0
48.1
111.0
48.1
166.5
72.1
166.5
72.1
222.0
96.2
222.0
96.2
277.5
120.2
277.5
120.2
333.0
144.3
333.0
144.3
117
51
195
85
292
127
389
169
486
211
583
253
All Circuit Breakers provided by end user, that are connected to the inputs and outputs need to have a Trip
Curve which is at least 10 times the rated current for .3 seconds, this is to prevent the breakers from tripping
during startup of the unit or the loads, attached to the units. Some Manufacturers refer to these breakers as
"High Inrush" breakers.
Phone: (714) 970-2304 Fax: (714) 970-6171
Web Page: www.DSPManufacturing.com
Email: [email protected]
17
SECTION 3 – INSTALLATION
The POWER LYNX UPS system is shipped on a pallet with the batteries outside the
UPS. This Manual, battery jumper wires and accessories may be included within the
packaging, ensure that these are not discarded with the packaging. Unwrap the UPS
and carefully inspect the external surfaces for abrasions, indentations, or other
obvious damage.
File a claim with the shipping agency for any damage caused by shipping. Forward a
copy of the damage claim to DSPM.
Mount the UPS system so each side and the top has six inches of clearance for
airflow. Leave appropriate space in the front so the front door can be opened fully for
operation and installation.
3-1 INSTALLATION EQUIPMENT
The following instructions cover general requirements for standard installation of the
input and output power circuits, battery connections and control interface
connections. Install the UPS using the procedures in this section. Care must be
taken to insure the unit is properly connected. Connections should be torqued as
shown in Table 2-1.
TABLE 2-1
WIRING TERMINAL TORQUE
DANGER!!
THE UPS CONTAINS POTENTIALLY LETHAL VOLTAGES INSIDE, EVEN IF
THE UNIT IS NOT CONNECTED TO AN EXTERNAL SOURCE OF POWER.
ALL INSTALLATION AND SERVICE PROCEDURES SHOULD BE
PERFORMED BY QUALIFIED PERSONNEL ONLY.
The input power circuit is supplied by the customer. This provides power from the
building source to the UPS system. This circuit should be a dedicated branch circuit that
Phone: (714) 970-2304 Fax: (714) 970-6171
Web Page: www.DSPManufacturing.com
Email: [email protected]
18
is hard wired in conduit. Size the branch circuit feeder conductors according to the
specific power rating of the unit. Refer to the latest edition of National Electric Code
(NEC) for the exact wire size required.
An insulated grounding conductor must be installed as part of the input circuit. Size the
grounding conductor in accordance with NEC and local codes. The manufacturer
recommends a parity-sized ground, with respect to the input power wires.
3-1 INSTALLATION OF EQUIPMENT (continued)
The UPS is designed to provide superior isolation and protection for sensitive loads.
The UPS can be wired as a separately derived source that allows the re-establishing of
the ground reference at the output of the UPS. This method of installation will provide
additional load isolation from noise and other disturbances.
DANGER!!
INSURE THAT ALL CODE REQUIREMENTS ARE FOLLOWED IN GROUNDING THE
UPS AND ITS LOADS. BODILY INJURY OR DAMAGE TO EQUIPMENT MAY
OCCUR IF UNIT IS NOT PROPERLY GROUNDED.
NOTE
The equipment to be connected to the UPS may require special grounding procedures.
Refer to technical documentation which accompanies that equipment.
Phone: (714) 970-2304 Fax: (714) 970-6171
Web Page: www.DSPManufacturing.com
Email: [email protected]
19
3-2 INPUT CONNECTIONS
1. Verify that power source to the unit is OFF, locked and tagged according to
OSHA requirements.
CAUTION
Verify that the input voltage as stated on the UPS nameplate, matches the
customer-supplied voltage. If the voltage does not match, STOP installation of the
UPS and contact Customer Service at DSPM.
2. Verify that Input cable and conduit are routed correctly and are in position to
3.
4.
5.
6.
7.
connect the unit.
Open front doors of UPS
Select desired mounting location and connect conduit.
Pass wires through the mounting hole.
Secure conduit fitting to the panel of unit.
Connect input wires to the input, neutral and ground terminal blocks. These are
pre-wired to the input circuit breaker.
(TB1) L1 /L2 /L3 / N /G
(Input terminals blocks and Main breaker)
Phone: (714) 970-2304 Fax: (714) 970-6171
Web Page: www.DSPManufacturing.com
Email: [email protected]
20
3-3 OUPUT CONNECTIONS
1. Verify that power source to the unit is OFF, locked and tagged according to
OSHA requirements.
CAUTION
Verify that the output voltage as stated on the UPS nameplate matches the actual
output voltage of the unit. Ensure that the intended connected load does not
exceed unit capacity. If the voltage does not match, or the intended applied load
exceeds unit capacity, STOP installation of the UPS and contact Customer
Service at DSPM.
2. Verify that Output cable(s) and conduit(s) are routed correctly and are in position
to connect the unit.
3. Open front doors of UPS.
4. Select desired mounting location and connect the conduit.
5. Pass wires through the mounting hole.
6. Secure conduit fitting to the panel of unit.
7. Connect the output wires to the output phase, neutral and ground terminal
blocks. Note: Ensure that the applied loads wired to the unit are evenly
balanced. Loads to be evenly distributed to all output circuit breakers
provided.
Output Terminal
Blocks (TB2), 3 Phase,
Neutral, Ground
(X1, X2, X3, XO, G)
Note: If output Options where ordered with the unit they will be connected to the Main
Output Terminals.
Phone: (714) 970-2304 Fax: (714) 970-6171
Web Page: www.DSPManufacturing.com
Email: [email protected]
21
3-4 BATTERIES AND BATTERY CABLES
WARNING!!
FOLLOW THE BATTERY SAFETY PROCEDURE IN THE FRONT OF THIS MANUAL.
The UPS system has fixed battery trays. All battery systems connect the batteries in
series, i.e. plus terminal to minus terminal from one battery to another battery. The
battery circuit breaker must be off during the installation. Install the batteries and
connect the battery cables. Connect the minus (-) terminal of the battery group to the
battery circuit breaker terminal that is labeled (-). Connect the positive (+) terminal of the
battery group to the battery circuit breaker terminal that is labeled (+).
+
-
Battery Connections
Phone: (714) 970-2304 Fax: (714) 970-6171
Web Page: www.DSPManufacturing.com
Email: [email protected]
22
BATTERY SYSTEM TEST
1. Make sure A.C. input circuit breaker is OFF.
2. Make sure battery circuit breakers are OFF.
3. Use a meter and note the D.C. voltage at the battery circuit breaker. The voltage
must be the correct polarity positive lead of the meter to the positive terminal of
the circuit breaker.
4. The D.C. voltage should read between115 to 130 VDC for a 10 battery string,
and 210 to 230 VDC for an 18 battery string. If the D.C voltage reads below
these voltage levels, this means the battery cables are not connected correctly.
5. If the battery polarity and voltage level are correct, continue to “Starting the
UPS”.
Phone: (714) 970-2304 Fax: (714) 970-6171
Web Page: www.DSPManufacturing.com
Email: [email protected]
23
SECTION 4 - OPERATIONS
4-1 STARTING THE UPS
1.
2.
3.
4.
5.
6.
7.
8.
9.
Check the input A.C. Circuit Breaker is OFF.
Check all output Circuit Breaker(s) (optional) are OFF.
Check the Battery Circuit Breaker(s) are OFF.
Energize the Utility feeder to the unit.
Turn Input Circuit Breaker ON.
Wait for the System display message instructing you to close the battery breaker.
Turn on the Battery Circuit Breaker.
Wait for the System Display message stating that the unit is operational.
Turn on the Output Circuit Breaker(s).
System Display Panel
Phone: (714) 970-2304 Fax: (714) 970-6171
Web Page: www.DSPManufacturing.com
Email: [email protected]
24
4-2 History Log Key:
The History Log is used to record certain events that reflect the status and operating
mode of the unit.
There are 64 lines (00 through 63).
It is read by holding down the Alarm Scan button. Each time the button is pressed, the
log is read sequentially with the most recent event being displayed first. After 00 is
displayed, the system will cycle around to 63.
After 64 events are logged, the system will start recording again at 00.
Code
Message
Description
00
01
02
04
05
07
08
09
10
11
12
00
alarm clr
Phase SEQ
Input OV
Input UV
Input CONT
Output Hi V
Output Lo V
Output O Frq
Output U Frq
Phase FLT
13
Invrtr. FLT
14
15
16
17
18
20
21
22
23
24
DC Bus OV
DC Bus UV
Input O Frq
Input U Frq
RECT off
Invrt. O frq
Invrt. U Frq
ISBS open
USBS fault
USBS short
26
28
35
36
37
Output OVL
Estop OPEN
UPS abort
Normal run
BATT test
38
40
41
42
43
Inv start
NMI trap
STKUF trap
STKOF trap
WDTMR trap
blank – used in clearing Alarm History
Alarm History has been cleared
Input phase sequence has caused a fault and must be changed
Input voltage has gone over fault limit
Input voltage has gone below fault limit
System has failed to detect closure of the Input Contactor
Output voltage has gone over fault limit
Output voltage has gone below fault limit
Output frequency has gone over fault limit
Output frequency has gone below fault limit
Input phase sequence fault has not been corrected and system has timed
out
a hardware fault has been detected by the inverter control board (IGBT
PCBA); caused by IGBT failure, unexpected power on reset, or DC Bus
over voltage
DC Bus has gone over fault limit
DC Bus has gone below fault limit
Input frequency has gone over fault limit
Input frequency has gone below fault limit
Rectifier has shut off unexpectedly
Inverter frequency has gone over fault limit
Inverter frequency has gone below fault limit
Inverter Static Bypass Switch has not engaged and system has timed out
Utility Static Bypass Switch has failed test
Utility Static Bypass Switch failure, output voltage still detected after off
command was issued
Output Current has gone over fault limit
Emergency Stop option enabled during system power-up
System faults have caused system to switch to bypass
Automated system test concluded
Automated system test initiated (15 minute rectifier shutoff and battery
run)
Inverter has been started and matched with utility voltage
NMI button on processor board has been pressed, date and time marker
Software Stack underflow detected
Software Stack overflow detected
Software has detected a Watchdog timer overflow
Phone: (714) 970-2304 Fax: (714) 970-6171
Web Page: www.DSPManufacturing.com
Email: [email protected]
25
45
46
47
49
50
51
52
53
54
56
57
58
ISBS xfer
Inv Stop
Pwr on RST
ESTOP trap
RunState0
RunState1
RunState2
RunState3
Bypass on
Battery Low
Key Code OK
Air Flow DN
Static Bypass Switch has transferred load to Inverter
Inverter has unexpected shut off
CPU initialization complete
Emergency Stop option has caused an emergency transfer to utility
Power has been applied to system
Initial system checks complete, awaiting DC breaker closure
Startup complete, system ready
Utility power failure, system is on a battery run
System is in bypass
Battery Voltage is low, causes a system shutdown
Key Code Accepted
Air Flow fault detected, DC BUS set to minimum value
CAUTION
Verify that the output voltage as stated on the UPS nameplate matches the actual
output voltage of the unit. Ensure that the intended connected load does not
exceed unit capacity. If the voltage does not match, or the intended applied load
exceeds unit capacity, STOP installation of the UPS and contact Customer
Service at DSPM.
4-3 TURNING THE UPS SYSTEM OFF
1. Turn OFF the output circuit breakers.
2. Turn OFF the input A.C. circuit breaker.
3. Turn OFF the battery circuit breaker.
Phone: (714) 970-2304 Fax: (714) 970-6171
Web Page: www.DSPManufacturing.com
Email: [email protected]
26
SECTION 5 - OUTPUT POWER
1. Normally on circuits can be provided. These circuits are on when AC input power
is on and turned off to lower the load requirements where input AC power fails.
2. Normally off circuits can be provided. These circuits provide power only when the
UPS system is on battery power. These circuits usually power exits signs and
lighting.
3. Normally off hold on circuits can be provided. These normally off circuits can be
set to stay on from 1 to 20 minutes after the return of the utility power.
Phone: (714) 970-2304 Fax: (714) 970-6171
Web Page: www.DSPManufacturing.com
Email: [email protected]
27
SECTION 6 - TECHNICAL SUPPORT
1. For Technical Support or any questions not covered in this manual, contact:
DSPManufacturing
5407 E. La Palma Avenue
Anaheim, CA 92807
714.970.2304 Phone
714.970.6171 Fax
Service:
714.970.2304 – 8:00 AM to 5:00 PM PST
951. 840.0811 – 5:00 PM to 8:00 AM PST
[email protected]
Phone: (714) 970-2304 Fax: (714) 970-6171
Web Page: www.DSPManufacturing.com
Email: [email protected]
28
SECTION 7 - MAINTENANCE
CAUTION:
DO NOT DISPOSE OF BATTERIES IN FIRE
CAUTION:
DO NOT ATTEMPT TO OPEN THE BATTERIES
CAUTION:
THE FOLLOWING PRECAUTIONS SHOULD BE TAKEN WHEN REPLACING
ANY BATTERIES:
• REMOVE WATCHES, RINGS, ETC…
• USE TOOLS WITH INSULATED HANDLES.
CAUTION:
USE RUBBER PROTECTIVE GLOVES WHEN HANDLING DAMAGED
BATTERIES.
WARNING:
HIGH VOLTAGE IS PRESENT ON BATTERIES.
a. Semi-annual
i. Cabinet/Electronics
1. Inspect all fans and insure proper operation.
ii. Batteries/Battery Cabinet
1. Inspect the battery cases for leakage.
2. Perform a battery load test of each individual battery.
a. Turn off the Battery Breaker
b. Using a Battery load tester connected to only one
battery test the battery and record the battery voltage
after a 5 to 10 second load test. The picture to the left
is an example of the type load tester that can be
used.
Phone: (714) 970-2304 Fax: (714) 970-6171
Web Page: www.DSPManufacturing.com
Email: [email protected]
29
c. Repeat step “b.” using the same timed load test, and
record the data.
d. After the testing all the batteries, compare the test
data. All recorded voltages should be approximately
the same value. Any batteries that have a reading
considerably different then the others needs to be
investigated, or considered to be bad and replaced.
e. Check wiring for proper routing and damage, such as
chaffing and/or cutting. Relocate and /or repair and
found damaged wires.
f. Check the torque of each battery connection for
70in/lbs.
CAUTION:
DO NOT OVER TORQUE THESE CONNECTION AS SOME BATTERIES HAVE
LEAD POSTS AND THEY ARE VERY EASY TO COMPRESS AND WILL CAUSE
FAILURES IN THE FUTURE.
Note: If Batteries are found to be leaking or fail the load test they should
be replaced. (Consult DSPM as to the status of your Battery Warranty)
b. Annual
CAUTION:
BEFORE PERFORMING ANY OF THE FOLLOWING STEPS BESURE THAT THE
UPS/UNITERRUPTIBLE POWER SYSTEM HAS BEEN TUNED OFF.
i. Perform all Semi-annual Maintenance.
ii. Cabinet/Electronics
1. Inspect all power connections for loose connections.
Tighten any that are found loose. See the Torque table
below.
2. Check wiring for proper routing and damage, such as
chaffing and/or cutting. Relocate and /or repair and found
damaged wires.
3. Exercise all circuit breakers.
Phone: (714) 970-2304 Fax: (714) 970-6171
Web Page: www.DSPManufacturing.com
Email: [email protected]
30
4. If there is a distribution internal to the cabinet and/or a panel
attached to the side of the UPS/Uniterruptible Power
System, check the power connections and exercise the
breakers in the cabinet.
iii. Batteries/Battery Cabinet.
1. Check wiring for proper routing and damage, such as
chaffing and/or cutting. Relocate and /or repair and found
damaged wires.
2. Check the torque of each battery connection for 70in/lbs.
CAUTION:
DO NOT OVER TORQUE THESE CONNECTION AS SOME
BATTERIES HAVE LEAD POSTS AND THEY ARE VERY EASY TO
COMPRESS AND WILL CAUSE FAILURES IN THE FUTURE.
Note: If Batteries are found to be leaking or fail the load test they should
be replaced. (Consult DSPM as to the status of your Battery Warranty)
Phone: (714) 970-2304 Fax: (714) 970-6171
Web Page: www.DSPManufacturing.com
Email: [email protected]
31
SECTION 8 - TROUBLE SHOOTING
i. If unable to resolve any problem please contact DSPM for
assistance.
DSPM
1921 Quaker Ridge Place
Ontario, CA 91761
714.970.2304
714.970.6171
[email protected]
Phone: (714) 970-2304 Fax: (714) 970-6171
Web Page: www.DSPManufacturing.com
Email: [email protected]
32


