Download AN 01457-SpectraPro for VIBER X5-REV1
Transcript
VMI AB SWEDEN
SpectraPro
©
for VIBER X5
Release date: July 2010
Doc Ref No. AN 01457
©
SpectraPro© for VIBER X5
SpectraPro© for VIBER X5
1. Introduction
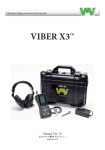
SpectraPro SP15 can work in conjunction with VIBER X5 Instrument.
In this document are described in details the new functions recently added to the
SpectraPro software.
2. Set Instrument
In the Settings menu a new command is added: Set Instrument. Using this
command, the user configures SpectraPro for one of the following instruments:
-
XVIBER
EasyViber
VIBER X5
The configuration can be observed mainly in the Route
Settings panel. Functionality of the software is not
affected anyway, just helps the user to avoid some
confusion when creates a route or when configures the
Route Settings.
Executing this command, a selection window will appear:
User can select any instrument to be the Default Instrument.
The Default selected instrument appears also in the upper-right corner of the
application:
2
VMI AB SWEDEN
3. Route settings
In the Database Edit window, the Setting Route button activates a specific panel
to set the tree items in accordance with the Default Instrument already selected.
If the VIBER X5 is selected, the route setting appears as follows:
In route can be set of extra items:
3
©
SpectraPro© for VIBER X5
-
Frequency range – can be selected from a list (400, 1600, 3200, 12800 or
25600 Hz)
Spectrum lines can be selected from a list (800, 1600, 3200 or 6400 lines)
Window can be Hanning, Hamming or Blackman.
Synchronous spectra can be collected, if a phase sensor is available.
The transducer used for vibration can be selected from a list, in accordance
with the VIBER X5 transducer settings.
In addition, you can select Auto-detect mode. A special selection is Installed
transducer. The VIBER X5 will take the measurement with the transducers found
on the VIB1 input (for more details read the VIBER X5 User Manual).
If another sensor will be used in time of route collection, a Custom transducer
type can be defined.
-
Speed sensor can be Internal, External or Current coil. You can select also the
Auto-detect mode.
NOTE: The Instrument will check the transducer before to collect data. You
must attach proper transducer for each measurement, otherwise a warning
message will be shown.
You can add also:
-
Temperature points
Speed points
Manual Entry points (From VIBER X5 Keypad)
Process points (dc signals from process in range of 1 to 5 V or 4 to 20 mA
with a 250 Ohm precision resistor)
4
VMI AB SWEDEN
4. Adding a 3-axis transducer
Because the VIBER X5 accepts 3-axis accelerometers, this type of transducer can
be added to the machine hierarchy tree.
When a new direction is added in
the hierarchy, the user must
decide if a 3-axis transducer will
be used. If yes, you must select
Triaxial transducer.
Instead to be added a single
direction, in the machine tree will
be added 3 directions, having
default name NewDirectionX, Y
and Z, but the user can change
the names in this windows or
later.
The directions are connected
together, so when the user
decides to delete one direction,
also the connected direction will be deleted.
The 3-axis directions can be used as “normal” direction in conjunction with other
Instruments.
In addition, the off-route measurements, with a single direction are accepted.
In the machine hierarchy tree, in SpectraPro, all three directions appear, but the
icon is changed:
If a point have one ore more 3-axial
transducers or a mixed monodirectional and 3-axial direction, the
order in the tree cannot be rearranged (to avoid confusion). In
fact a 3-axial transducer is a single
unit having three transducer builtin.
5
©
SpectraPro© for VIBER X5
5. Transferring Route in VIBER X5 Instrument.
Transfer can be done in two ways:
-
-
Direct transfer, from Transfer-> VIBER X5 ->Route from Analyzer menu
Indirect transfer - In this case, using Transfer-> VIBER X5 ->To/From
Route file, the Route is converted to a file first. Then, the file can be simple
copied onto the microSD Card of VIBER X5 Instrument (using Windows
Explorer). A similar way is to copy the route file onto a USB Memory Stick and
then to attach the Stick to the VIBER X5 and to copy the file onto the
microSD Card.
If you have the Instrument and a computer with SpectraPro available, the simple
way to do this job is to use the first method.
The following windows will appear:
6
VMI AB SWEDEN
If the microSD Card has the name “VIBERX5” and the USB cable is connected to
the instrument, SpectraPro will automatically recognize the Instrument microSD
Card. If this doesn’t happen, the user can browse manually for Card searching.
Before to transfer any Route content into the machine database, use the “Check
File” button and the selected file will be checked for integrity. If the file is OK, the
following message will appear:
Also in the Route List the number of measurement will
appear. For the unchecked files, a question mark
appears.
Another facility before transferring files is to have a look inside the selected
route. Just press the info button and you will be able to browse in the Route
records:
Use the arrow
buttons to make
movements in the
route list. You can
see useful
information
regarding the route
records.
7
©
SpectraPro© for VIBER X5
Finally press Transfer buttons and the measurement will be transferred from/to
the Instrument.
NOTE: The Instrument can be stopped. The Card controller is supplied via
USB connection cable. If the Instrument is started, you must select the
Communication menu first, otherwise the connection cannot be established.
As can be seen, any Route in the Instrument is a file. Transferring routes means
to transfer files from and to the computer.
In SpectraPro you can transform any Route definition into a Route file, using the
indirect transfer mode.
Use the commands Transfer-> VIBER X5 ->To/From Route file.
The following windows will appear:
Use “To file” button to transform a Route
definition into a Route file.
In addition, you can press the “From
File” button and browse for a specific
Route file. When the route file is opened,
the measurements will be transferred
directly into the machine database.
6. Off-Route measurements transfer
The off-Route measurements saved into VIBER X5 Instrument are normal binary
file. Each measurement type are saved in files with the following extensions:
-
Spectra (and time-signal) files: .mv1
8
VMI AB SWEDEN
-
Envelope files: .mv2
Coast down and Coast-up/down files: .mv3
Balancing files .mv4
Also others file can be created by special measurements in the VIBER X5
Instrument (Read the VIBER X5 User manual for details).
Are two ways for files (measurements) transfer:
-
6.1
Direct transfer, form XVIBER X5 Instrument
Indirect transfer, from any measurement file.
Direct transfer
Select the command:
Off route -> VIBER X5 -> From Analyzer, as below:
If the USB cable is plugged-in, in the SpectraPro a transfer window will appear.
Normally, the SpectraPro will detect automatically the microSD Card of the VIBER
X5 Instrument. If this is not happened, locate manually the VIBER X5 mass
storage unit.:
Now select the file type from the list above:
9
©
SpectraPro© for VIBER X5
The existing files from the microSD Card will appear:
You can show more information regarding the file contents, pressing the Info
button.
From the database tree, select a direction and after that the Transfer button.
The files can contain a single spectra measurement (show as 1/1), two
measurements show as 1/2 and 2/2) and 3-axial files (show as 3/3). The 3-axial
measurements can be transferred only to a pre-defined triaxial direction.
If the file contain a double spectra, that file is show repeated twice (1/2 and 2/2).
In similar way, you can transfer any measurement type.
10
VMI AB SWEDEN
6.2
Indirect transfer
Select the command:
Off route -> VIBER X5 -> From files.
When this command is executed, the following transfer windows will appear:
First, you must select the measurement type from the combo box.
Press Add button to add files in the left list.
Multi-selection is allowed.
Select the disk unit, folder and the files. You can select one ore more files to be
added in the transfer list (multi-selection).
You can press Add button more time to add files from various locations.
11
©
SpectraPro© for VIBER X5
After the list is completed, you can transfer the file into the database, on the
direction level.
Also, you can show more information regarding the files contents, pressing the
Info button.
12
VMI AB SWEDEN
7. USB Drivers
No driver is required to connect the VIBER X5 Instrument to the computer.
When you insert the connection cable in any USB hub, the Windows Operating
System will recognize the Instrument microSD Card as a standard mass storage
device and will publish this. For the first time, this can take 20÷30 seconds. Then,
the connection will be established in 2÷3 seconds.
The single condition to establish the connection is:
When you connect the USB cable to the PC and to the Instrument, the
Instrument must be stopped,
Or
If the Instrument is started, the user must place the VIBER X5 in the
Communication menu.
The whole contents of the card can be viewed in the Windows Explorer, as any
ordinary Removable Device.
In the PC, you can copy, delete or remove files.
You can also format the microSD Card, inside in the VIBER X5 Instrument, but
also directly when the XVIBER X5 is connected with PC.
Usually, formatting tools provided with the Windows operating systems can
format various storage media, including SD Cards, but it may not be optimized
for SD Cards and it may result into lower performances, than using the VIBER X5
formatter.
NOTE: The card accepts in the Instrument only short name files. If files with
long name are added into VIBER X5, these files will appear truncated.
13


