1
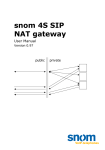
User Manual
snom 100
Version 1.15
snom 100 User Manual
Version 1.15
©
2002 snom technology Aktiengesellschaft. All Rights Reserved.
This document is supplied by snom technology AG for information purposes only
to licensed users of the snom phone and is supplied on an “AS IS” basis, that is,
without any warranties whatsoever, express or implied.
Information in this document is subject to change without notice and does not
represent any commitment on the part of snom technology AG. The product
described in this document is furnished under a license agreement and may be
used only in accordance with the terms of that license agreement. It is against
the law to copy or use this product except as specifically allowed in the license.
No part of this document may be reproduced, republished or retransmitted in
any form or by any means whatsoever, whether electronically or mechanically,
including, but not limited to, by way of photocopying, recording, information
recording or through retrieval systems, without the express written permission of
snom technology AG.
Foreword
Congratulations on the purchase of your snom 100 Voice over IP
telephone!
Telephony is part of our every day life. Over a period of more
than 100 years a communication form has evolved which we feel cannot
be ignored. In spite of the new technology base of the snom 100 most of
its look and feel will be very familiar and intuitive to you.
On the other hand, the world of the internet opens a whole range
of new possibilities. A lot of users are using web browsers and own one or
more email accounts. They will find it easy to manage the phone via its
web interface or to make a call to “sip:[email protected]” for example.
We are confident that developments in the computer industry will
be followed those in the telecom world.
VoIP is not only about transporting speech over data networks.
It is about interoperability and breaking up a vertical market as well as
streamlining business processes by seamlessly integrating the telephone
into computer networks and applications. With its technical flexibility,
our commitment to all open and relevant standards and our cooperation
with other vendors in the VoIP industry, the snom 100 represents a safe
investment for the future.
Now, we wish you a pleasant experience in the VoIP world.
snom technology AG
snom technology AG •
3
[
S N O M
100 USE
R
MAN
U A L
V1.15 ]
Note to the reader
This manual is a user manual describing the snom100 in user mode.
The administrator mode and further information can be found in the
administrator manual.
The current version of this manual can be obtained from:
http://www.snom.de/download/man_snom100e.pdf
4 •
Table of Contents
Foreword....................................................................3
Installation ................................................................9
Delivery Content ...................................................................... 10
Safety Notes ............................................................................ 10
Power Supply............................................................................................................................................................................................ 10
Setting up the Phone .................................................................................................................................................................... 10
Cleaning ........................................................................................................................................................................................................... 11
Connecting the Phone ............................................................... 11
Key Pad................................................................................... 12
Initialization............................................................................. 14
Booting .............................................................................................................................................................................................................. 14
Selecting the Language ........................................................................................................................................................... 14
Logon .......................................................................17
Mobility ................................................................................... 18
Logon Wizard ........................................................................... 18
snom Menu .............................................................................. 20
Add User.......................................................................................................................................................................................................... 20
Logoff User .................................................................................................................................................................................................. 20
Logoff All ......................................................................................................................................................................................................... 20
Select Outgoing Line...................................................................................................................................................................... 21
DND Mode on/off ................................................................................................................................................................................ 22
Basic Functions ........................................................23
Idle State ................................................................................ 24
Statistics ....................................................................................................................................................................................................... 24
Registrations ............................................................................................................................................................................................. 24
Dialing .............................................................................................................................................................................................................. 25
Input Modes ............................................................................................................................................................................................... 25
Dialing a phone number (E.164) ............................................................................................................................... 26
Dialing a H.323/SIP Address.............................................................................................................................................. 28
snom technology AG •
5
[
S N O M
100 USE
R
MAN
U A L
V1.15 ]
Dialing an IP Address ................................................................................................................................................................... 29
Number Guessing............................................................................................................................................................................... 31
Terminating a Call .................................................................... 31
Incoming Call ........................................................................... 31
Accepting a Call .................................................................................................................................................................................... 31
Denying/Blocking a Call ............................................................. 32
Adjusting the Volume during a Call.............................................. 32
Handset / Handsfree / Headset .................................................. 33
Main Menu ............................................................................... 33
Help Function ........................................................................... 34
Adjusting the Volume in Idle Mode .............................................. 34
Ring Tones ............................................................................... 35
About...................................................................................... 36
Advanced Functions .................................................39
Hold and Resume...................................................................... 40
Transfer................................................................................... 41
Direct Transfer ....................................................................................................................................................................................... 41
Consultation Transfer ................................................................................................................................................................... 42
Call Diversion ........................................................................... 42
Diverting all Calls ............................................................................................................................................................................... 42
Divert when Busy ............................................................................................................................................................................... 42
Divert when not answered .................................................................................................................................................... 43
LDAP Access ............................................................................ 43
DTMF Tones ............................................................................. 45
Short Messages (SMS) .............................................................. 45
Message Waiting Indication (MWI) .............................................. 45
Additional PBX Features ............................................................. 47
Pickup .................................................................................................................................................................................................................. 47
Conference ................................................................................................................................................................................................... 48
Call Register ............................................................51
Phone Book ............................................................................. 52
Adding an entry .................................................................................................................................................................................... 53
Editing an entry .................................................................................................................................................................................... 54
Call Lists ................................................................................. 54
Speed Dial ............................................................................... 56
Dialing................................................................................................................................................................................................................. 56
Editing speed dial entries ....................................................................................................................................................... 57
Deny List ................................................................................. 58
Browsing ......................................................................................................................................................................................................... 58
6 •
Table of Contents
[
S N O M
100 USE
R
MAN
U A L
V1.15 ]
Adding a number ................................................................................................................................................................................ 59
Removing a number ....................................................................................................................................................................... 60
List Viewing ............................................................................. 60
Modifying the view............................................................................................................................................................................ 61
Sort Criteria ................................................................................................................................................................................................ 61
Settings ...................................................................63
Settings via Phone Display ......................................................... 64
Settings via Web Browser .......................................................... 65
Options ................................................................................... 67
Call Divert ..................................................................................................................................................................................................... 67
Base ....................................................................................................................................................................................................................... 68
Apendix ....................................................................69
Standard Conformance .............................................................. 69
Index ...................................................................................... 70
snom technology AG •
7
[
8 •
S N O M
Table of Contents
100 USE
R
MAN
U A L
V1.15 ]
Installation
1
snom technology AG •
9
[
S N O M
100 USE
R
MAN
U A L
V1.15 ]
Delivery Content
Please check whether the delivery contains the following parts:
1
•
The base unit with display and key pad
•
The handset
•
The handset cable
•
The power supply (optional)
Safety Notes
Please observe the following safety advice. It is important
to observe it for the guarantee to safe and reliable
operation of the device.
Power Supply
You have two possibilities to provide the snom 100 with power:
•
Power feeding over the network cable (PowerLAN via IEEE
802.3af with 48 V)
•
An external power supply (24 and 48 V)
If you want to use an external power supply then please use
the one that is included in the package. Other power supplies may cause
damage to the phone, affect the behavior or induce noise.
Setting up the Phone
Please put the snom 100 only on even, horizontal surfaces,
enabling the rubber pads to ensure a secure grip. Do not place the snom
100 on carpets or other materials that contain fibers that can block the air
vents and cause overheating.
10 •
Installation
[
S N O M
100 USE
R
MAN
U A L
V1.15 ]
Cleaning
To clean the snom 100 use an anti-static cloth. Please avoid
cleaning liquids since they might damage the surface or internal
electronics of the phone.
Connecting the Phone
First connect one end of the handset cable to handset and then
to the jack on the left side of the phone (see illustration).
Now, plug in the Ethernet (network) cable into the RJ45 connector
on the rear side of the phone as shown below and the other end into the
network side to establish a data link.
In case you are using an external power supply, please insert the
plug of the power supply into the connector next to the data line and hook
up the casing into the mains.
If you want to use a headset, it can be connected to the audio
jacks on the backside of the snom 100. The outermost connector is for
the microphone.
snom technology AG •
11
1
[
S N O M
100 USE
R
MAN
U A L
V1.15 ]
Key Pad
1
The numeric key pad with the keys 0 to 9, * and # are used
to enter digits and letters. Depending on the operating mode, different
actions can be performed (see the table below):
•
Entry of digits only (e.g. when dialing a phone number),
•
typing in letters and digits by pressing the keys repeatedly similar to a
cellular phone,
•
or navigate in selection lists. The keys have arrows printed on
them indicating the direction similar to a numeric block on a computer
keyboard.
12 •
Installation
[
S N O M
100 USE
R
MAN
U A L
V1.15 ]
The MENU key
is used to invoke the main menu. The HELP
key
brings up context specific help texts. To cancel actions or input
the CANCEL key
can be used. The Enter/Ok key
confirms actions,
selections and inputs.
Depending on the operating mode, the keys can have context
specific meanings and are described in this user manual.
Keys F1 to F4 are context sensitive function keys. Their current
mapping is depicted in the lowest line on the display through symbols.
The keys of the numeric block in different operating modes:
Key
0
Digits
0
Lower case
(SPC)_0
Upper case
(SPC)_0
1
1
1.,?!@():;&*#+<=>[]
.,?1!@():;&*#+<=>[]
2
2
abc2
ABC2
3
3
def3
DEF3
4
4
ghi4
GHI4
5
5
jkl5
JKL5
6
6
mno6
MNO6
7
7
pqrs7$
PQRS7$
8
8
tuv8
TUV8
9
#
9
#
wxyz9
#
WXYZ9
#
*
Toggles upper and lower case
snom technology AG •
13
1
[
S N O M
100 USE
R
MAN
U A L
V1.15 ]
Initialization
1
Booting
If your network administrator or internet service provider
installed your phone, you will see how the phone connects to the network
and maybe conducts a software update if one is available. After it has
booted it enters the idle state. When this state has been reached a clock
is displayed on the right hand side of the display.
In case the phone does not reach this operation mode you should
consult your network administrator or internet service provider or refer to
the “Administrator Manual”.
Selecting the Language
The language is set to English by default. In, order to change
it, press the menu key,
go to the submenu “Settings” with
or
and press Enter
to select this menu entry.
14 •
Installation
[
S N O M
100 USE
R
MAN
U A L
V1.15 ]
Select “Вase” and press Enter.
1
Then go to “Language”
and set it to i.e. “Еnglish”
Press Enter to activate your selection.
snom technology AG •
15
[
1
16 •
Installation
S N O M
100 USE
R
MAN
U A L
V1.15 ]
Logon
2
snom technology AG •
17
[
S N O M
100 USE
R
MAN
U A L
V1.15 ]
Mobility
In business office environments, desktops are often shared by
different employees at same/different points of time like different shifts
etc. The phones which are located at the desktops should take this fact
into account.
2
To ease the effort of assigning in each case the appropriate phone
number to the phone, the snom100 offers the so called mobility features,
which are described in the next subchapters.
Logon Wizard
If no number is assigned to the phone, it is in SIP mode and the
logon feature is enable, it displays a logon screen.
After pressing a button, you will be prompted to type in your
account name
18 •
Logon
[
S N O M
100 USE
R
MAN
U A L
V1.15 ]
After typing in your account name followed by the enter key, the
phone changes to the next screen. If the SIP registrar is not set yet, the
phone prompts for the registrar you want to register to.
Type in the requested information and confirm with the enter key.
The phone tries to register your given account name at the given registrar.
The idle screen is shown and the first SIP line displays your registration.
snom technology AG •
19
2
[
S N O M
100 USE
R
MAN
U A L
V1.15 ]
snom Menu
In the idle screen the function key
is assigned to the snom menu.
Besides others the following menu items are available if the “Logon Wizard” is
configured to be active.
2
Add User
With selecting this item and pressing enter you can register an
additional account to the phone. Up to seven accounts can be assigned
like this.
Logoff User
Here you are able to logoff a registered account. A list with the
currently assigned registrations is shown. Select the registration you want
to logoff and press the enter key. The selected registration is logged off
and, if it was the one, the logon wizard is diplayed again. Otherwise the
idle screen is displayed.
Logoff All
After selecting this menu item and pressing enter you get asked,
if you really want to logoff all users.
20 •
Logon
[
S N O M
100 USE
R
MAN
U A L
V1.15 ]
With pressing the enter key you confirm the message and all
currently logged in SIP registrations are logged off and the logon wizard
is displayed again.
Select Outgoing Line
The selection of this menu item displays a list of currently
registerd SIP lines.
With choosing a different line, your the originating phone number
is changed to this line. So different people can start calls from the same
phone with their own originating phone number and the called phone
only displays this current outgoing line information of caller. The current
outgoing line is marked at the idle screen with a black colored phone icon
right in front of the registered SIP line.
snom technology AG •
21
2
[
2
S N O M
100 USE
R
MAN
U A L
V1.15 ]
DND Mode on/off
Independent from Logon Wizard settings the DND functionality is
available in the snom menu. DND is short for “Do Not Disturb” and means,
if this mode is activated, the incoming calls are not accepted by the phone
anymore. If there is a mailbox set up for you, the call is redirected to it.
Before this mode is activated, you get asked if you really want to activate
this mode.
In idle mode “DND active!” is displayed on the lower left corner of
the screen, if the mode is activated.
If the desktop style is set to “statistics”, the DND mode is shown
with a “DND” in the upper left corner.
22 •
Logon
Basic Functions
3
snom technology AG •
23
[
S N O M
100 USE
R
MAN
U A L
V1.15 ]
Idle State
Depending on which “Desktop Style” is selected (see Chapter
Settings, Base, Desktop Style) the initial appearence of the phone
differs:
Statistics
In the idle state the selection “Statistics” (especially suited for
H.323) the phone will show:
3
•
The time and date,
•
the number of dialed, received and missed calls,
•
the registration state
Continuous lines under the registration symbol indicate a
successful registration with the specified gatekeeper (
) or registrar
(
). Dashed lines (
) (see example) signal that the phone is not
registered, i.e. it did not get a reply. Vertical lines (
) denote that the
registration was denied.
Registrations
shows:
24 •
In the “Registration” mode (especially suited for SIP) the phone
•
The date and time,
•
the first five registered users,
Basic Functions
[
S N O M
100 USE
R
MAN
U A L
V1.15 ]
• the connection state of each of the first 5 registered users
An empty box ( ) before the account indicates that the registration
process is in progress. A phone symbol ( ) means that the account is
successfully registered. A black colored phone symbol ( ) means that the
account is successfully registered and the line is the active SIP line for
outgoing calls. A box with a cross ( ) signals an unsuccessful registration
attempt.
Dialing
There are two methods to begin a call from the idle state of snom
100. Either you can start dialing with the handset resting in the cradle
and then pick it up. Or pick up the handset and then dial the number. In
the latter case you will have to press Enter to indicate that the number is
complete and dialing can commence.
display.
The snom 100 shows the current communication status at the
Input Modes
Dependent on the context various types of inputs are possible.
The active input mode is indicated on the lower right corner of the
display:
123
Only digits can be entered.
+-123
Only digits can be entered. Change the
sign with * or # key.
ABC
Upper Case Mode. By pressing * lower
case mode can be toggled.
abc
Lower Case Mode. Use * to activate upper
case mode.
IP4
IP address mode, only digits can be
entered.
snom technology AG •
25
3
[
S N O M
100 USE
R
MAN
U A L
V1.15 ]
Function Key mapping for input:
Moves the cursor left.
Moves the cursor right.
Deletes the character left of the cursor.
Changes input mode to E.164 number.
Changes input mode to IP address.
3
Changes input mode to H.323/SIP address.
As mentioned in the table above with,
,
or
the
input mode can be changed. After using a specific input mode for dialing a
number, the phone saves this mode for future use as default. If you want
to use a different mode, begin dialing and in case the mode is wrong,
choose your preferred mode and continue dialing.
Dialing a phone number (E.164)
A telephone number is dialed with the numeric key pad, exactly
as one would expect.
26 •
Basic Functions
[
S N O M
100 USE
R
MAN
U A L
V1.15 ]
3
TIP
E.164 numbers
E.164
is
the
standard
that
defines normal phone numbers. They may
contain digits from 0-9, * and #. H.323
differentiates
between
these
numbers
and “H.323 addresses” which may contain
alphanumeric characters. Several gatekeeper
implementations do not differentiate E.164
numbers and H.323 addresses. In case you
encounter problems then try to specify the
number as an H.323 address.
snom technology AG •
27
[
S N O M
100 USE
R
MAN
U A L
V1.15 ]
Key mapping:
Moves the cursor left.
Moves the cursor right.
Deletes the character left of the cursor.
Changes input mode to H.323/SIP address.
3
Enter
Dials the number.
Cancel
Aborts the dialing.
Dialing a H.323/SIP Address
The H.323/SIP address can be entered via the numeric block. The
“@” symbol you will find by pressing the numeric key “1” several times.
Key mapping:
Moves the cursor left.
Moves the cursor right.
Deletes the character left of the cursor.
Changes input mode to IP address.
28 •
Basic Functions
[
S N O M
100 USE
R
MAN
U A L
V1.15 ]
Enter
Dials the H.323 if entered correctly.
Cancel
Aborts the dialing of the H.323 address.
Dialing an IP Address
The IP address can be entered via the numeric block.
3
Key mapping:
Moves the cursor left.
Moves the cursor right.
Deletes the character left of the cursor.
Changes input mode to E.164 number.
#
Jumps to the next sub field.
Enter
Dials the IP address if entered correctly.
Cancel
Aborts the dialing of the IP address.
snom technology AG •
29
[
S N O M
100 USE
R
MAN
U A L
V1.15 ]
3
TIP
Dialing an IP Address
When calling an IP address the called
phone or computer cannot determine which user
you want to reach. In SIP mode it is assumed
that “anonymous” is being called and with H.323
no assumptions are made. This works with a
lot of phones and applications. Therefore, you
should only use this method in exceptions.
30 •
Basic Functions
[
S N O M
100 USE
R
MAN
U A L
V1.15 ]
Number Guessing
For your convenience this functionality is offering you the first
number from calllog, phonebook, speeddiallist, denylist, in that order,
which is matching the begin of a number you already typed in.
If the displayed number is not what you expected, type the
backspace functionkey
and the number guessing is temporarily
switched off for this session of editing a phone number.
Terminating a Call
You can end a call by setting the handset on its cradle, pressing
the hook switch or Cancel. The snom 100 will terminate the call and
return to the idle state.
Incoming Call
screen.
When your snom 100 is called it rings and displays the following
Accepting a Call
Picking up the handset or pressing Enter will accept the call. The
snom 100 is now in a call.
snom technology AG •
31
3
[
S N O M
100 USE
R
MAN
U A L
V1.15 ]
Denying/Blocking a Call
3
When the snom 100 signals an incoming call, you have the
possibility to deny the call with
.
If you decide to press
, the caller will be placed on the deny
list and will be always automatically denied.
Adjusting the Volume during a Call
control.
While conducting a call, you can use
to invoke the volume
Key mapping:
,4,8
Reduces the volume in single steps.
,2,6
Increases the volume in single steps.
9
Reduces the volume in steps of 2.
3
Increases the volume in steps of 2.
#,7
Maximum Volume
*,1
Minimum Volume
F3
Sets the volume to the original value.
Enter
Sets the volume and returns.
Cancel
Returns without setting the volume.
32 •
Basic Functions
[
S N O M
100 USE
R
MAN
U A L
V1.15 ]
Handset / Handsfree / Headset
The snom100 is supporting to make calls while using the handset
or the handsfree capability. During a call it is possible to easily switch
between the both modes with pressing the function keys
resp.
.
In case of a connected headset, the snom100 is treating the
headset like the handset mode mentioned above. For using snom100 in
an callcenter environment the connected headset will be the default case
of dealing with the phone. Therefore the Enter key plays a main role. With
a first press of the Enter key an incoming call is answered and because the
handset is still onhook the phone is in handsfree mode. A second press
to the Enter key changes from handsfree mode to handset resp. headset
mode.
Key mapping:
Switch to handsfree mode.
Switch to handset mode.
Enter
Toggle between handsfree and handset mode.
Cancel
Returns to the idle state.
Main Menu
By pressing the menu key
in the idle state the main menu is
invoked. The following submenus are available: Phonebook, LDAP Access,
Call List, Deny List, Tones, Settings and About.
Key mapping:
Moves the cursor down.
Moves the cursor up.
snom technology AG •
33
3
[
S N O M
100 USE
R
Enter
Enters the submenu.
Cancel
Returns to the idle state.
MAN
U A L
V1.15 ]
Help Function
The snom 100 offers a context specific help.
3
Press the help key
the phone is displayed.
and the help text relevant to the state of
Adjusting the Volume in Idle Mode
Via
activated.
the
menu
“Settings/Tones”
the
following
window
is
Here the volume of the casing speaker, of the handset speaker or
of both can be adjusted. Select one of the three choices and you will see
a display similar to the one below.
34 •
Basic Functions
The current ring tone is played back at the selected volume and
you can decide on the desired setting.
Key mapping:
,4,8
Reduces the volume in single steps.
,2,6
Increases the volume in single steps.
9
Reduces the volume in steps of 2.
3
Increases the volume in steps of 2.
#,7
Maximum Volume
*,1
Minimum Volume
F3
Sets the volume to the original value.
Enter
Sets the volume and returns.
Cancel
Returns without setting the volume.
3
Ring Tones
up.
Via the menu “Settings/Tones” the following window is called
snom technology AG •
35
[
S N O M
100 USE
R
MAN
U A L
V1.15 ]
Select the submenu “Ring Tones”. Here the ring tone can be set.
3
The current ring tone is played back and you can decide on the
desired setting.
Key mapping:
Moves the cursor to next ring tone.
Moves the cursor to the previous ring tone.
Enter
Activates the selection and returns.
Cancel
Returns without changing the ring tone.
About
Via
activated.
36 •
the
Basic Functions
menu
“Settings/About”
the
following
window
is
[
S N O M
100 USE
R
MAN
U A L
V1.15 ]
It indicates type of phone, software version, date of software
build, MAC address and current assigned IP address.
3
snom technology AG •
37
[
S N O M
3
38 •
Basic Functinons
100 USE
R
MAN
U A L
V1.15 ]
[
S N O M
100 USE
R
MAN
U A L
V1.15 ]
Advanced
Functions
4
snom technology AG •
39
[
S N O M
100 USE
R
MAN
U A L
V1.15 ]
Hold and Resume
During a call is in progress, pressing the flash key
or
(language dependent) puts the call on hold, i.e. the speech is set
to mute. (Neither party can hear each other.)
4
Another press to the flash key resumes the call. While a call is on
hold you can establish a second call with only dialing the wanted number.
If the second call is established you can easily switch between the two
calls by pressing the flash key.
Key mapping:
,
CANCEL
,
The call being held and indicated on
the display is terminated.
Resumes the call being held and
indicated on the display.
Transfers the call that is being held.
* , # ,
digits,
ENTER
40 •
Can be used to initiate another call.
Advanced Functions
[
S N O M
100 USE
R
MAN
U A L
V1.15 ]
Transfer
Direct Transfer
During a call is in progress, put the connected party to hold by
pressing the hold key
or
as mentioned above.
number.
After pressing the transfer key
you are able to dial a
As soon as you press ENTER the snom 100 will transfer the other
party to that number.
Key mapping:
Moves the cursor left.
Moves the cursor right.
Deletes the character left of the cursor.
Enter
The snom 100 transfers the call.
Cancel
Aborts the transfer.
snom technology AG •
41
4
[
S N O M
100 USE
R
MAN
U A L
V1.15 ]
Consultation Transfer
During a call is in progress, put the connected party to hold by
pressing the hold key
or
.
While the call is on hold you can establish a second call with
only dialing the wanted number. If the second call is established you
can consult the second party i.e. to announce the call. With pressing the
transfer key
or hook on the handset you are connecting the two
other partys.
4
Call Diversion
All kinds of call diversions can be set, changed and deactivated in
the menu “Settings/Redirection”
Diverting all Calls
By setting the option “Settings/Redirection/Redirect Event” to
“always” every incoming call is diverted immediately to the number set in
“Settings / Redirection / Redirect Number” without the phone ringing.
To disable this feature just set the “Settings / Redirection /
Redirect Event” to “off”.
Divert when Busy
By activating the option “Settings / Redirection / Redirect Event /
When Busy” every incoming call is diverted to the number set in “Settings
/ Redirection / Redirect Number” if another call is already in progress.
42 •
Advanced Functions
[
S N O M
100 USE
R
MAN
U A L
V1.15 ]
Divert when not answered
You can set the number of seconds in “Settings / Redirection /
Redirect Timeout” after which every incoming unanswered call is diverted
to the number set in “Settings / Redirection / Redirect Number”.
Setting this value to 0 deactivates this feature.
Note: To activate immediate call divert, see above.
LDAP Access
Lets say you are looking for someone by the firstname Robert but
you do not know his exact name.
When you pressed the mainmenu key in idle state go to item
“LDAP Access” with the function keys
or
. Press the Enter key
and the LDAP request is sent automatically to the LDAP server.
After a short while the phone is showing the list of names, which
is found at the used LDAP server.
With pressing the number keys the different characters assigned
to the number keys can be used to search in the list of names found at
the LDAP server. To find the names beginning with “R” for Robert, press
number key “7” three times without making longer pauses of more then
a second each key press.
snom technology AG •
43
4
[
S N O M
100 USE
R
MAN
U A L
V1.15 ]
If you wait longer then a second after a key press, the cursor
changes its appearence and is ready for specifying the next character
which the searched name should consist of.
4
If the current selected name is the name you are looking for,
press function key
or Enter key to call it directly.
Key mapping:
Scrolls to the next found name.
Scrolls to the previous found name.
Remove the last typed in character from the search pattern
Call mailbox to listen into recorded messages.
hook off
handset
Enter
Cancel
44 •
Back to idle screen.
Advanced Functions
[
S N O M
100 USE
R
MAN
U A L
V1.15 ]
For advanced usage and setup see the LDAP chapter in the
administrators manual.
DTMF Tones
During a call, e.g. with a voice mail system, pressing the digits, *
or # will generate and send DTMF tones to the other party.
Short Messages (SMS)
Incoming short messages are automatically displayed if the
phone is in idle state.
4
Key mapping:
Scrolls the message forward.
Scrolls the message backward.
Enter
Show the next message or idle screen.
Short messages can be received from i.e. Microsoft Messenger.
Message Waiting Indication (MWI)
In case somebody tried to reach you and you did not answer the
call, but the mailbox did and recorded a message for you, the idle screen
displays that a recorded message is waiting for you.
snom technology AG •
45
[
S N O M
100 USE
R
MAN
U A L
V1.15 ]
At the “Registrations” desktop style the small letter icons
,
the SIP registration line is starting with, symbolizes for which registered
phone number the call was recorded. Also the “Call Statistics” desktop
style shows the waiting message with a blinking letter icon
, which is
placed right from the
or
symbols.
After pressing the function key
the phone displays more
information about the number of new and old but stored recorded
messages.
4
To connect the mailbox to listen into the recorded messages
press function key
or hook off the handset.
46 •
Advanced Functions
[
S N O M
100 USE
R
MAN
U A L
V1.15 ]
Key mapping:
Scrolls the message forward.
Scrolls the message backward.
,
hook off
handset
Call mailbox to listen into recorded messages.
E n t e r , Back to idle screen.
Cancel
Additional PBX Features
If the phone is set to use H.323 protocol, there are additional PBX
features available in case they are enabled from the administrator.
Pickup
If a phone of somebody else is ringing and you want to pickup the
call with your own phone, you have to press functionkey
to scroll
to the second set of available functionkeys and press the functionkey
snom technology AG •
47
4
[
S N O M
100 USE
R
MAN
U A L
V1.15 ]
(This functionality is tested and working with i.e. TEDAS
Phoneware Server and Innovaphone ip400.)
Conference
In case the phone is connected with two calls, one is held and
one is connected, with a press to the functionkey
the second set of
functionkeys is accessable.
4
With pressing functionkey
all three involved phones
are connected in a conference. With a press to functionkey
the
conference will be disconnected again.
48 •
Advanced Functions
(This functionality is tested and working with i.e. TEDAS
Phoneware Server.)
4
snom technology AG •
49
[
S N O M
4
50 •
Advanced Function
100 USE
R
MAN
U A L
V1.15 ]
[
S N O M
100 USE
R
MAN
U A L
V1.15 ]
Call Register
5
snom technology AG •
51
[
S N O M
100 USE
R
MAN
U A L
V1.15 ]
Phone Book
The snom 100 contains an internal phone book which can be
reached from the phone´s idle state by pressing the phone book key
. The book entries are displayed in a list whereby three entries
shown simultaneously.
Key mapping:
Moves the cursor down by one.
Moves the cursor up by one.
Enters the edit mode for the selected
entry.
Dials the number corresponding to the
selected entry.
5
You can also press Enter or pick up the
handset to dial the number.
Enter
Dials the number of the selected entry.
Cancel
Returns to the idle state.
52 •
Call Register
[
S N O M
100 USE
R
MAN
U A L
V1.15 ]
Adding an entry
In order to add a new entry, go to the end of the list on to the
line <new item>.
Then enter the phone number, last name, first name, abbreviation
and comment and confirm each item by pressing Enter.
The title of the window indicates which input is expected to be
made. Pressing Cancel aborts the new entry.
Key mapping:
Moves the cursor left.
5
Moves the cursor right.
Deletes the character left of the cursor.
Clears the buffer.
Enter
Accepts the entry.
Cancel
Cancels the entry.
snom technology AG •
53
[
S N O M
100 USE
R
MAN
U A L
V1.15 ]
Editing an entry
After pressing the edit key
on the entry to be modified, the
phone number, last name, first name, abbreviation and comment will be
brought up in sequence. Confirm each item by pressing Enter.
The title of the window indicates which input is expected to be
made. Enter accepts the data and pressing Cancel aborts the entry.
Key mapping:
Moves the cursor left.
Moves the cursor right.
Deletes the character left of the cursor.
Clears the buffer.
5
Enter
Accepts the entry.
Cancel
Aborts the entry process.
Call Lists
The snom 100 maintains lists of received and dialed calls that can
be accessed by pressing the call list key
from the idle state.
54 •
Call Register
[
S N O M
100 USE
R
MAN
U A L
V1.15 ]
Each line represents one call and three calls can be displayed
simultaneously. The first characters indicate the direction of the call. (‘>’) represents an incoming, (‘!>’) represents an incoming but missed
and (‘<-’) represents an outgoing call. The time and the called or calling
number follows the direction. Where the phone book contains this number,
the name associated with it is displayed instead.
Key mapping:
Moves the cursor down by one.
Moves the cursor up by one.
Deletes the selected entry.
Dials the number of the selected entry.
You can also press Enter or pick up the handset to dial the
number.
Enter
Dials the number of the selected entry.
Cancel
Returns to the idle state.
5
snom technology AG •
55
[
S N O M
100 USE
R
MAN
U A L
V1.15 ]
Speed Dial
The snom 100 supports speed dial of up to 12 numbers. These
are mapped onto the digits 0-9, * and #.
Dialing
Speed dialing is initiated with the speed dial key
in the idle
state followed by a digit 0-9, * or #. In this way, 12 speed dial numbers
can be called up without having to see the display.
The mapping can be checked by pressing the speed dial key in
the idle state.
5
One entry is displayed at a time. The list view of numbers can be
brought up by pressing
.
56 •
Call Register
[
S N O M
100 USE
R
MAN
U A L
V1.15 ]
Key mapping:
Moves the cursor down by one.
Moves the cursor up by one.
Displays the speed dial numbers in a list.
Dials the number of the selected entry.
You can also press Enter or pick up the handset to dial the
number.
Enter
Dials the number of the selected entry.
Cancel
Returns to the idle state.
Editing speed dial entries
edit key
From the speed dial list mode (see “Dialing” above) pressing the
brings up the phone number of the selected entry.
5
It can then be edited and set using Enter. Cancel aborts the changes to
the selected entry.
snom technology AG •
57
[
S N O M
100 USE
R
MAN
U A L
V1.15 ]
Key mapping:
Moves the cursor left.
Moves the cursor right.
Deletes the character left of the cursor.
Clears the edit buffer.
Enter
Accepts the entry.
Cancel
Aborts the changes.
Deny List
The snom 100 gives you the option of putting numbers on a deny
list to avoid being disturbed.
5
Browsing
Via the submenu “Deny List” you can reach the deny window.
Here the deny numbers are displayed in sequence with three numbers
displayed simultaneously.
58 •
Call Register
Moves the cursor down by one.
Moves the cursor up by one.
Deletes the selected entry.
Enters the edit mode of the selected entry.
Enter
Enters the edit mode of the selected entry.
Cancel
Returns to the idle state.
Adding a number
While you are being called you can press the deny list key
which will not only abort the call but also add the number to the deny
list.
In addition, any number can be added to the deny list by selecting
<new item> in the deny list directly.
5
After the number has been entered it is added to the deny list.
snom technology AG •
59
[
S N O M
100 USE
R
MAN
U A L
V1.15 ]
Key mapping:
Moves the cursor left.
Moves the cursor right.
Deletes the character left of the cursor.
Clears the edit buffer.
Enter
Accepts the entry.
Cancel
Aborts the changes.
Removing a number
Removing a number from the deny list is possible by using the
clear key
in the deny list viewing.
5
List Viewing
The windows of all the lists described in the previous sections can
be adjusted to suit your preference.
When you are in a list, you can access the options menu by
pressing the menu button.
60 •
Call Register
[
S N O M
100 USE
R
MAN
U A L
V1.15 ]
Modifying the view
Select the entry “View Mode” and go to one of the submenus.
They describe which view modes are available and can be
set. Select your choice and press Enter and the list will be displayed
accordingly.
Sort Criteria
Select the entry “Sort Criteria” and go to one of the submenus.
5
They describe which sort criteria are available and can be set.
Select your choice and press Enter and the list will be sorted accordingly.
snom technology AG •
61
[
5
62 •
Call Register
S N O M
100 USE
R
MAN
U A L
V1.15 ]
[
S N O M
100 USE
R
MAN
U A L
V1.15 ]
Settings
6
snom technology AG •
63
[
S N O M
100 USE
R
MAN
U A L
V1.15 ]
The settings can be specified in different ways:
•
Via the phone
•
With a browser on a PC
Settings via Phone Display
Press the menu key in the idle state of the phone. With the
function keys
and
you can navigate in the menu. Scroll to
the submenu “Settings” and press Enter.
You are now in the Settings menu and it has the following
submenus:
•
Redirection
•
Base
Please use the keys
and
to scroll within the Settings
menu. By pressing the Enter key you can enter the selected submenu.
6
Now the list of settings of the selected submenu is displayed.
Please use the
and
to scroll within the list. By pressing Enter
the value of the setting can be viewed or modified.
Some entries cannot be set to any value. Instead they offer a list
of allowed values from which a value has to be selected. Again, please
use the
and
to scroll within the list to set the desired value.
The value is set by pressing Enter. If you decide not to change the value
then press Cancel.
64 •
Settings
Other settings require the editing of numbers or strings. This can
be done with the key pad of the phone. Digits are entered directly via the
keys and letters can be called up by pressing a key repeatedly. You can
toggle between lower case letters (“a”) and upper case letters (“A”) with
the (*) key.
Key mapping:
Moves the cursor left.
Moves the cursor right.
Deletes the character left of the cursor.
Clears the edit buffer.
Enter
Accepts the entry.
Cancel
Aborts the changes.
Settings via Web Browser
You may prefer to use a web browser to configure the settings,
which is normaly much easier.
The snom 100 has a built in web server to configure its settings.
If the phone is connected to a network that provides DHCP it can be
immediately accessed via the browser. In case you do not want to use
DHCP you must specify the IP address, netmask, gateway, DNS domain
and DNS server statically to ensure correct operation. (See Administrator
Manual.)
snom technology AG •
65
6
[
S N O M
100 USE
R
MAN
U A L
V1.15 ]
Illustration 1: Web configuration
6
•
Start your webbrowser (e.g. Netscape, IE).
•
Enter the IP address of the phone as the URL (e.g. 192.168.0.100).
If you do not know the IP address please ask your network
administrator or have a look at your phone, press MENU and choose
About or press MENU and Settings / Network / Base / Identity / IP
Addr.
•
You will find a selection menu at the top (Phone / Settings).
•
Click on the menu item settings.
•
Now you should be in a drop down menu with submenus.
•
Just click on the desired submenu (e.g. Base) and the current settings
of this submenu are displayed.
66 •
Settings
[
S N O M
100 USE
R
MAN
U A L
V1.15 ]
You can now modify and store the values by using the mouse and
keyboard. Just click on the SAVE button, which you will find in the upper/
lower section, to store the changes made. If you want to discard the
changes then do NOT press SAVE.
Options
Call Divert
You can have all incoming calls diverted to a different number. From
the idle state press the MENU key and choose “Settings/ Redirection /
Redirect Event” and you have the following selection:
•
Off: This deactivates all call diverts.
•
Always: All calls are diverted to the number specified in “Phone
Number”
•
When Busy: When a call is in progress, another call would be rejected
and get a busy indication. The phone can be set in such a way that the
third caller is diverted to another number or a voice mailbox.
•
Redirect Timeout: Calls are diverted after the timeout specified.
Phone Number
Here the number to which the calls should be diverted to is specified.
Press the menu key in the idle state and select the submenu “Settings /
Redirection / Redirect Number”
Divert Timeout
Here the timeout in seconds after which the call should be diverted is
specified.
Press the menu key in the idle state and select the submenu “Settings /
Redirection / Redirect Time”
•
0: calls are not diverted.
•
1-n: calls are diverted after 1-n seconds.
snom technology AG •
67
6
[
S N O M
100 USE
R
MAN
U A L
V1.15 ]
Base
Language
Your phone is able to display all texts in different languages. Just
press the menu key in the idle state and select the submenu “Settings/
Base/Language” or the equivalent if you currently have another language
set.
Display Contrast
Here the contrast of the display can be changed. Just press
the menu key in the idle state and select the submenu “Settings/Base/
DisplayContrast”. This function is not available for snom100 A.
Date
In case your phone is not able to get the date from the Time
Server or a SIP proxy, you can set the date here. Just press the menu key
in the idle state and select the submenu “Settings/Base/Date”. The date
format used in english language mode is MM/DD/YYYY and DD/MM/YYYY
in all others.
Time
In case your phone is not able to get the time from a Time Server
or a SIP proxy, you can set the time here manually. Just press the menu
key in the idle state and select the submenu “Settings/Base/Time”.
6
Number Guessing
The number guessing functionality can be activated or deactivated
here. Press the menu key in the idle state and select the submenu
“Settings / Base / Number Guessing”.
68 •
Settings
[
S N O M
100 USE
R
MAN
U A L
V1.15 ]
Apendix
Standard Conformance
Name and address of manufacturer
snom technology AG
Pascalstraße 10
10587 Berlin
The snom technology AG assures that the product
Type: VoIP Phone
Model: snom 100
conforms with the following standards
EMC standard 89/336/EWG incl. all appendices
Low voltage standard 73 / 23 / EWG
Safety Standards
EN 60950 1992 incl. all appendices
Electromagnetic Standards
EN 55022 / 9.98 Class B
EN 55024 / 9.98
EN 61000-3-2/1995+A1/1998+A2/1998+A14 /2000
EN 61000-3-3/1.95
Place, Date
Berlin, 15.05.2001
Dr. Christian Stredicke
Vorstand (MD)
snom technology AG •
69
[
S N O M
Index
100 USE
R
MAN
U A L
V1.15 ]
DND Mode 22
E
A
E.164 27
Accepting a Call 31
Add User 20
B
End a call 31
F
flash key 40
Base 68
Date 68
H
Display Contrast 68
Handset 33
Number Guessing 68
Handsfree 33
Time 68
Headset 33
Booting 14
Help Function 34
C
I
Call 31
Idle State 24
Accepting 31
Initialization 14
Blocking 32
input mode 26
Call Lists 54
Denying 32
Diversion 42
Incoming 31
K
Key Pad 12
CANCEL key 13
Termination 31
Enter/Ok key 13
Transfer 41
HELP key 13
Call Divert 67
MENU key 13
Call Lists 54
Cleaning 11
Connecting the phone 11
L
Language
Language 68
D
Delivery Content 10
Denying 32
Deny List 58
Adding 59
Removing 60
Desktop Style 24
Dialing 25
70 •
Apendix
Selecting 14
List Views 60
Modifying 61
Sort Criteria 61
Logoff All 20
Logoff User 20
Logon 18
Logon Wizard 18
[
S N O M
100 USE
R
MAN
U A L
M
V
Main Menu 33
Volume 32
Mobility 17
V1.15 ]
Adjusting 32
MWI 45
N
Number guessing 31
O
Outgoing Line 21
P
Phone Book 52
Adding an entry 53
Power supply 10
R
Registrations 24
Ring Tones 35
S
Safety Notes 10
Settings 64
Via Web Browser 65
Setting up the Phone 10
SMS 45
Software version 37
Statistics 24
T
Timeout 67
Transfer 41
Consultation Transfer 42
Direct Transfer 41
Type of phone 37
snom technology AG •
71
snom technology Aktiengesellschaft
Pascalstr. 10E, 10587 Berlin, Germany
Phone: +49 (30) 39833-0
mailto: [email protected]
http: www.snom.de
sip: [email protected]
© 2002 snom technology AG
All rights reserved.
snom USA Representation
ABP International, Inc.
Crestside Dr.
Coppell, Texas 75019, USA
Phone: +1-972-831-0280
sip: [email protected]
mailto: [email protected]