1
Clintel Forms Builder Manual
Gen 3
Copyright Clintel 2013
Forms Builder 2012
Introduction .................................................................................................................. 3
The Forms Page ............................................................................................................ 3
Filter .............................................................................................................................. 3
Archived ........................................................................................................................ 3
New Assessment ........................................................................................................... 4
Import............................................................................................................................ 4
Create New Form .......................................................................................................... 4
Editing Forms ............................................................................................................... 5
Assessment Details .................................................................................................... 5
Available Form Components ..................................................................................... 6
Cloning a form and renaming it ............................................................................... 18
Read Only fields by default ..................................................................................... 19
HTML formatting .................................................................................................... 19
Performing an Assessment that has a Pre-Requisite Assessment ............................ 20
Performing an Assessment where a pre-requisite has not been defined .................. 20
Calculations.............................................................................................................. 21
BMI Calculation....................................................................................................... 24
Enabling an Assessment ............................................................................................ 27
Updating an existing assessment .............................................................................. 27
Archiving old versions of an assessment ................................................................. 27
Design Parameters ..................................................................................................... 28
Adding a Generic Code to a form ............................................................................ 33
Advanced code form compiler .................................................................................. 35
2|Page
Forms Builder 2012
Introduction
The forms builder enables the conversion of forms and assessment tools into electronic
format.
Electronic forms can have added features such as
automatic calculations
Suggest further assessments
Suggest care plan items and populate them with data
Show certain questions based on specific answers (branching logic)
Forms can be used for client assessments, location forms and staff forms.
Forms can be used to gather additional data items for Minimum Data Sets
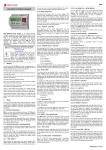
The Forms Page
Code
Title
Version
Category
Type
Disabled
Created
Updated
Actions Links
Code of the assessment
Title of the Assessment
Version number of the assessment
You can assign categories to assessments for easy sorting –
Assessment categories are set up in Generic Codes
Denotes where the assessment is used eg patient, location or
staff
Status of the assessment - if Disabled the Disabled flag displays
Date of assessment creation
Date assessment last updated
Links to actions
Edit
Destroy (only on unpublished forms)
Enable / Disable
Export
Copy
Publish (only on unpublished forms)
Archive – moves an assessment to the Archive View
Filter
Type a key word for the assessment you are looking for a click the apply button to filter for
particular assessment/s.
Archived
Link to the list of archived assessments. Archived assessments can be restored to the current
view
3|Page
Forms Builder 2012
New Assessment
Click to commence building a new assessment
Import
Click to import an assessment.
Create New Form
a.
b.
c.
d.
e.
f.
Click the Forms tab
Click New Assessment link
Enter Forms code in Name field
Enter form Name in Title field
If desired enter a description
Select where the form is to be used
a. Patient
b. Location
c. Provider
d. Care Plan ( coming in a future release)
g. Click Create
h. Once the form has been saved – click the EDIT button to begin building your form.
NB: If you wish to make changes to an existing form – use the copy function and edit the
copy.
4|Page
Forms Builder 2012
Editing Forms
Assessment Details
Field
Description
Code
Title
Version
Category
Code of the assessment
Title of the Assessment
Version number of the assessment
You can assign categories to assessments for easy sorting –
Assessment categories are set up in Generic Codes
Denotes where the assessment is used eg patient, location or
staff
a. Patient
b. Location
c. Provider
d. Plan Items – assessment is attached to a care plan item
Description
Which views?
Ongoing document
Default is no. If selected, a document can be completed over a
number of days / weeks and information already entered is made
read only i.e Monthly Bowel Charts
Test patient id
Each patient has an ID number which can be noted in the URL
when the patient record is open – not this number and enter it
here to preview your form with patient details while you are
modifying it
Click the “Get unique ID” to load extra verification (optional)
Unique Identifier
Drag and drop the required question types into the Assessment details window.
5|Page
Forms Builder 2012
Click each item to edit the values. The editable items will display to the right.
Click on the
to remove questions from the view.
Click on the
icon to copy a given question or group of questions
To view your form click the Preview link
Available Form Components
Form element
Group box
Static text
Dynamic text
Show if
Usage
Use a group box to place a set of
logically related questions
together
The static text box displays text to
the user. This is good for adding
instructional text
The dynamic text element allows
the results of calculations to be
displayed to the user. Any text
placed between curly braces {
and } is interpreted as a
calculation result.
See calculations for more details
The show_if element displays any
elements it contains if it’s
condition property evaluates to
true. This can be useful to show
or hide sections of an assessment
based on answers to questions in
the assessment.
See calculations for more details
on the condition property
Element options
Title
Nil
Nil
Add a Condition
Drag and drop the “show if”
button onto the assessment
definition
Click on the heading and the
condition builder will display on
the right hand side.
Select the question to which the
condition will apply
Two further fields display – most
commonly you will choose
“equals” in the next field and
type in Yes in the last field.
Then you need to drag and drop
what you want to display or
happen into the show if box. eg
Text field or static text, perhaps a
suggested care element or
further assessment.
6|Page
Forms Builder 2012
Form element
Label
Text field
Usage
Displays a simple piece of text in
the assessment. This is useful for
a simple description of an
element and as column headers
in tables.
Element options
Nil
The text field element can
contain small amounts of free
text. It can be restricted in what
types of values it may contain
using the Format property.
Name: name given to the field by
user
Text fields can be used to import
data from the resident
administrative details by using
the field name.
Title: Enter the field title to be
displayed
Position: position number in the
list of elements
Display Format: This allows you
to control the number of decimal
For example, naming a field
places a field displays. For 2
first_name will pre-populate the
decimal places use the following
field with the patient’s first name. code: %0.2f
If this is changed in the form, on
approval the changes will be
Size: enter the number of
saved to the clinical record. To
characters for the field to accept
prevent changes, set the
parameter Read Only to Yes.
Required: Yes makes the field
mandatory for user to complete
See Client field names list for a
when editing the form on client
full list of field names that will
record
pre-populate a form with client
data.
Read Only: Yes – used for fields
imported from patient record or
other assessments that you don’t
wish the user to alter.
Show in reports: Yes – the
default option – change to No if
the item is not required for
reports.
Format: – It can be restricted in
what types of values it may
contain using the Format
property.
Option
7|Page
Meaning
Forms Builder 2012
Form element
Text area
Usage
The text_area element is used to
enter large amounts of free text
into an assessment. This is useful
for things such as comments and
notes.
Element options
any
Any type of data may
be entered into the
field
integer
Only whole numbers
may be entered
number
Any number may be
entered
On change: allows advanced
users to add code
Name: name given to the field by
user
Position: position number in the
list of elements
Title: Enter the field title to be
displayed
Columns: enter the number of
columns for the field to accept –
this adjusts the width of the text
area
Rows: enter the number of rows
for the field to accept – this
adjusts the depth of the text area
Required: Yes makes the field
mandatory for user to complete
when editing the form on client
record
Read Only: Yes – used for fields
imported from patient record or
other assessments that you don’t
wish the user to alter.
Show in reports: Yes – the
default option – change to No if
the item is not required for
reports.
On change: allows advanced
users to add code
Image
8|Page
The image element allows an
Forms Builder 2012
Form element
Yes no
Usage
image to be embedded into an
assessment. The image can either
be referenced via an URL or
uploaded directly into the
system. Unless you control the
server where the images are
stored it is not recommended to
use the URL property.
The yes_no element displays a
pair of radio buttons preconfigured to answer “Yes or No”
type questions.
Element options
Name: name given to the field by
user
Position: position number in the
list of elements
Description: Enter the question
required for yes/no
Required: Yes makes the field
mandatory for user to complete
when editing the form on client
record
Read Only: Yes can be used for
fields imported from patient
record or other assessments that
you don’t wish the user to alter.
Show in reports: Yes – the
default option – change to No if
the item is not required for
reports.
Date picker
The date_picker element allows a
date and time to be embedded
into an assessment. This is useful
for recording things like when an
activity was performed.
On change: allows advanced
users to add code
Name: name given to the field by
user
Position: position number in the
list of elements
Title: Enter the field title to be
displayed
Size: enter a number for
preferred size – around 15 is
minimum size to diplay full date
Required: Yes makes the field
mandatory for user to complete
9|Page
Forms Builder 2012
Form element
Usage
Element options
when editing the form on client
record
Read Only: Yes – used for fields
imported from patient record or
other assessments that you don’t
wish the user to alter.
Show in reports: Yes – the
default option – change to No if
the item is not required for
reports.
On change: allows advanced
users to add code
Hidden field
Hidden fields can contain data
that you want to attach to an
assessment that you do not
necessarily want the users of the
assessment to have access to
directly. The hidden field element
also forms the basis of linking an
assessment to a client. If you
have a field called patient_id it
will be linked to the current client
when the assessment is initiated.
NB: All assessments for use in the
client record should have the
hidden field patient_id
Generic code
Calculation
The Generic Code button allows
for the selection of items from
any of the existing Generic Codes.
These are the drop down lists
that appear through CareRight.
Examples would be title, religion,
etc
The assessment system allows
calculations to be performed
based on the answers to the
questions contained in the
assessment.
Calculations do not display the
value, you may use a Dynamic
Text field to display the data.
10 | P a g e
Size: enter a number for
preferred size
Show in reports: Yes – the
default option – change to No if
the item is not required for
reports.
Format
Any
Number
Integer
Date
Time
Timestamp
See Adding a Generic Code for
a guide on its use.
Report parameter values:
Forms Builder 2012
Form element
Radio Group
Usage
The radio group element displays
a set of mutually exclusive
options and allows the user to
choose only one of them. Each
option can have a value applied if
required which can then be used
to calculate results.
Element options
Name: name given to the field by
user
Position: position number in the
list of elements
Title: Enter the field title to be
displayed
Required: Yes makes the field
mandatory for user to complete
when editing the form on client
record
Read Only: Yes – used for fields
imported from patient record or
other assessments that you don’t
wish the user to alter.
Show in reports: Yes – the
default option – change to No if
the item is not required for
reports.
Select
The select element enables the
setup of a list of mutually
exclusive options and allows the
user to choose one of them.
On change: allows advanced
users to add code
Name: name given to the field by
user
Position: position number in the
list of elements
Title: Enter the field title to be
displayed
Required: Yes makes the field
mandatory for user to complete
when editing the form on client
record
Read Only: Yes – used for fields
imported from patient record or
other assessments that you don’t
wish the user to alter.
Show in reports: Yes – the
default option – change to No if
the item is not required for
11 | P a g e
Forms Builder 2012
Form element
Usage
Element options
reports.
On change: allows advanced
users to add code
Check Box
The check_box element allows
presents the user with a “Tick the
box” on the assessment.
Check box lists allow multiple
selections.
You need to add a new check box
item for every check box required
They are either true or false
Name: name given to the field by
user
Position: position number in the
list of elements
Description: Enter the field title
to be displayed
Required: Yes makes the field
mandatory for user to complete
when editing the form on client
record
Read Only: Yes – used for fields
imported from patient record or
other assessments that you don’t
wish the user to alter.
Show in reports: Yes – the
default option – change to No if
the item is not required for
reports.
Suggest
The suggest element allows the
results of an assessment to be
used to suggest new assessments
or plan items.
A condition must be set which
triggers the system to add the
required assessment/s or care
plan/s.
On change: allows advanced
users to add code
Condition: Set the condition for
which the Assessment or Care
Plan is suggested
Assessment: enter the code of
the suggested assessment (latest
version is used)
OR
Plan item: enter the code of the
suggested care plan
This will fire on approval.
Use commas to add multiple
assessments or care plans.
The resulting assessment or care
plan appears under the
12 | P a g e
Extra care plan text: use the
same format as Dynamic text to
place key information into the
care plan.
Forms Builder 2012
Form element
Client Detail
Usage
“suggested” tab.
Inserting this item allows the user
to automate insertion of clinical
details including:
Element options
Patient address also asks user to
select which address
Address
Alerts
Allergies
Immunisations
Medications
Diet
Diagnosis
Problems
Procedures
Insurance
Insertion of any of these items
provide access to the active grids
so items can be added to the
client record via the assessment.
Once an assessment has been
Submitted, these items become
read only in the assessment,
ensuring they correctly reflect the
client’s status at the date and
time of the assessment.
Insertion of this item enables the
Client Picker user to select any client in the
database to display on the
assessment or form. It uses the
same search functions as
elsewhere in the application.
Name: name given to the field by
user
Position: position number in the
list of elements
Title: Enter the field title to be
displayed
Required: Yes makes the field
mandatory for user to complete
when editing the form on client
record
Read Only: Yes – used for fields
imported from patient record or
other assessments that you don’t
wish the user to alter.
Show in reports: Yes – the
default option – change to No if
the item is not required for
13 | P a g e
Forms Builder 2012
Form element
Location
Picker
Usage
Inserting this item enables the
user to select any location within
the organisation to add to a form.
The search feature works the
same as elsewhere in the
application.
Element options
reports.
On change: allows advanced
users to add code
Name: name given to the field by
user
Position: position number in the
list of elements
Title: Enter the field title to be
displayed
Required: Yes makes the field
mandatory for user to complete
when editing the form on client
record
Read Only: Yes – used for fields
imported from patient record or
other assessments that you don’t
wish the user to alter.
Show in reports: Yes – the
default option – change to No if
the item is not required for
reports.
Staff Picker
Adding this item to an
assessment or form enables the
user to select a staff member of
provider from the system eg
Doctor.
The search function works the
same as elsewhere in the
application.
The filter can restrict the list of
staff in the list based on Staff
Type on display.
On change: allows advanced
users to add code
Name: name given to the field by
user
Position: position number in the
list of elements
Title: Enter the field title to be
displayed
Required: Yes makes the field
mandatory for user to complete
when editing the form on client
record
Read Only: Yes – used for fields
imported from patient record or
other assessments that you don’t
wish the user to alter.
14 | P a g e
Forms Builder 2012
Form element
Usage
Element options
Show in reports: Yes – the
default option – change to No if
the item is not required for
reports.
On change: allows advanced
users to add code
Code
Validation
Table
This element is for advanced
users only – please discuss with
Clintel Systems before using this
item
This element is for advanced
users only – please discuss with
Clintel Systems before using this
item
The table element enables
elements on forms to group fields
into tables.
Image
Upload
Import data
Elements within a table
element display in rows
and columns.
Within a table each group
forms a row
Any elements within that
group form a column
Show_if elements within
a table form another row
unless they are already
also within a group.
The image upload button enables
the user to upload a jpg image to
an assessment
e.g an image of a wound
The import_data element allows
data entered on previous
assessments to be copied into the
current assessment.
The values will be copied from
the most recently performed
instance of the chosen
assessment.
The Assessment code field
contains the assessment name to
copy values from and optionally
15 | P a g e
See also design suggestions later
in this manual
Forms Builder 2012
Form element
Usage
the Assessment version field
contains the minimum
assessment version.
If the Assessment version field is
not specified then any approved
assessment will be used.
Each field to be imported must be
defined here with the name of
the Source field and the
Destination field (NB: They can
have the same name)
The destination field should be
the same element type as the
source field e.g. if source is
yes/no the destination should be
Yes/No
Journal Log
The Journal log enables you to
specify what assessment details
are included in the Clinical /
Progress Notes entry.
It operates in similar fashion to
the Dynamic text fields.
Prerequisite
The prerequisite element allows
the creation of an assessment
instance to be dependent on
another assessment being
performed.
The Assessment code field
contains the assessment name
required and optionally the
Assessment version field contains
the minimum assessment
version.
If the Assessment version field is
not specified then any approved
assessment will be used.
The Message field contains an
optional message to be displayed
16 | P a g e
Element options
Forms Builder 2012
Form element
Usage
if the required assessment is not
found.
Element options
TIP: If more than one prerequisite assessment required
modify custom message to
prompt user about BOTH
assessments.
The default warning message will
only warn for the first prerequisite.
Form name
This allows you to create a
meaningful name based on
values entered into the form.
The form name element allows
the name of a form as displayed
in the assessments grid to be
altered depending on the values
entered in the assessment
instance.
File upload
Clone form
The file upload button enables
the user to upload any file type to
an assessment e.g. pdf, word,
zip, etc
The clone_form element allows
the contents of an assessment to
be cloned on approval.
If used with the form name
function, you can automatically
renames the form if the form
name is specified
17 | P a g e
Form name expression: contains
an expression that is evaluated
whenever the form is saved. If
the expression results in a nonnull and non-empty string this
value is used as the name for the
assessment in the grid, otherwise
the default form name is
displayed.
The Number of clones field
contains an expression that is
evaluated whenever the form is
approved. The value returned is
used as the number of clones to
create.
The Sequence Target field
contains an optional name of a
field in the cloned assessment
instances that will contain the
clone number. It should be a
numeric or integer field.
Forms Builder 2012
Cloning a form and renaming it
The following fields need to be present in the form to allow cloning and
then renaming based on the clone number.
element name
Type
Clone_number
Hidden
field
Number_of_clones Text_field
Clone_form
Clone_form
Other settings
Format: integer
Comments
Hidden field to
contain the
clone number
Format: Integer
Number of
clones to make
of the form
Code to do the
Number of Clones:
if(not(hasvalue(clone_number)), cloning
number_of_clones, 0)
Sequence Target:
Clone_number
Form_name
18 | P a g e
Form name expression:
if(hasvalue(clone_number),
Form_name 'Referral Form - Session
'+string(clone_number),
'Referral Form - Initial
Allocation')
Code to rename
the form
Forms Builder 2012
Read Only fields by default
The following elements now have a flag to set as “Read Only”.
Text field
Text area
Yes/No
Date picker
Generic code
Radio group
Select list
Check box
Patient picker
Location picker
Staff picker
HTML formatting
You can use a limited number of HTML tags to format some text based description
fields. The tabs need to surround the text that you wish to format.
Name
Tag
Headings
h1, h2, h3, h4
Bold
Italic
Underlined
New line
b
i
u
br
Description
Formats text into a larger
heading font/size
Example Use
<h2>This is a level 2
heading</h2>
Formats the text bold
Formats the text italic
Formats the text underlined
Adds a new line in the
paragraph.
<b>bold text</b>
<i>italic text</i>
<u>underlined text</u>
Line 1. <br>
Line 2.<br>
Line3.
19 | P a g e
Forms Builder 2012
Performing an Assessment that has a Pre-Requisite Assessment
1.
2.
3.
4.
Ensure the pre-requisite assessment has been completed
Create the target assessment as normal
Data from the Pre-requisite assessment will be imported.
Approve as normal
NB: Where a pre-requisite assessment has not been performed, the user will be
prompted and cannot proceed.
User receives a warning
about the pre-requisite
assessment
If a pre-requisite is not set the user will not receive a message but the target fields will
be blank.
Performing an Assessment where a pre-requisite has not been
defined
1. Create new assessment as normal
2. If the source assessment has been completed
a. The fields that have been set to import will be populated with data from
the source assessment
3. If the source assessment has Not been completed
a. The user will be allowed to continue but the fields will not be populated
with data
b. Depending on set up the field will either be read only and therefore blank
c. OR will be blank but available for editing.
4. Complete and Approve assessment as usual
In this example the
fields are read only &
therefore blank
20 | P a g e
Forms Builder 2012
Calculations
The assessment builder is capable of performing complex calculations. This can be use to
calculate scores or to alter the visible questions all based on answers to the questions posed
in the assessment. The calculations that can be performed are similar to those that are
possible in a spreadsheet, but have been simplified for clarity.
Each element in an assessment has a name. A calculation can use the values entered by the
user into those fields by referencing the name. The following operations can be performed
in a calculation.
Operator
Meaning
+
Addition
-
Subtraction
*
Multiplication
/
Division
Calculations may also contain parenthesis to alter the order in which the expression is
evaluated.
For example:
(field1+field2)*27
The calculation system can also be used to make decisions. These are done using
comparison operators.
Operator
Meaning
=
Equal to
<>
Does not equal
<
Less than
<=
Less than or equal to
>
Greater than
>=
Greater than or equal to
both conditions are true
and
For example:
gender='M' and age > 50
either condition is true
or
For example:
gender='M' or (age < 50 and age > 90)
21 | P a g e
Forms Builder 2012
Simple numeric calculations can be performed using the basic arithmetic operators above,
however sometimes they are not enough. That is why the system also includes a set of built
in functions that augment the abilities of the calculation system. These functions are as
follows
Function
Description
Returns one of two values depending on the value of the first.
if
Example:
if(field1=10, 'it was ten', 'not ten')
Converts the value of a given field into a number regardless of weather it is
number defined to contain numbers. If the field does not contain a valid number it returns
0
Decode can be used transform one value into another.
For example:
decode
decode(field1, 'a', 1, 'b', 2, 'c', 3)
This will transform the value of field1 such that if it contains an ‘a’ it should be
interpreted as 1, ‘b’ as 2 and ‘c’ becomes 3
Formats a numeric result with the specified number of decimal places
fixed
For example:
Fixed(field1, 2)
Returns the generic code value for the specified table and code
code
For example:
code('Application', 'Patient')
will return the system defined term for a patient
hasvalue Returns true if the specified field has a value
Inverts the value of passed expression
For example:
not
not(gender='M')
will return true for any value of gender other than ‘M’
Contact Clintel for details on usage of the following functions:
case
contains
datediff
day
dayname
22 | P a g e
Forms Builder 2012
dayofweek
dayord
disable
enable
endswith
error
errorif
formatdate
hour
lower
minute
month
monthname
not
now
pow
set
startswith
string
upper
year
23 | P a g e
Forms Builder 2012
BMI Calculation
The standard BMI calculation is as follows:
(weight / (height x height) )
Where weight is in Kilograms and height is in Metres.
To represent this in a form, you can use the following elements:
Name
Title
Format
weight
Element
Type
Text_field
Weight
(Kgs)
Numeric
height
Text_field
Height
(Metres)
Numeric
bmi_calculation Calculation
n/a
Numeric
See below
bmi_display
n/a
n/a
See below
Dynamic_text
Code
Comments
Uses the
weight
value in
the patient
record
Uses the
height
value in
the patient
record
bmi_calculation
For whole number results: e.g. 25 use the following code:
fixed( weight / (height * height), 0 )
For a specific number of decimal places – replace the “0” with the number: e.g. 25.45
use the following code:
fixed( weight / (height * height) , 2 )
The fixed function formats the string to a certain number of decimal places.
bmi_display
Use the following code to display the BMI:
BMI = {bmi_calculation}
24 | P a g e
Forms Builder 2012
Client field names list
Use the field name, generic code and/or data type to import client details into forms.
For example, naming a field first_name will pre-populate the field with the patient’s first
name. If this is changed in the form, on approval the changes will be saved to the clinical
record. To prevent changes, set the parameter Read Only to yes.
Name
Data Type
birth
birth_country
birth_order
cim_imported
cim_person_id
cim_resident_id
cim_updated
civil_duties
community_recipient_id
confidential_birth
confirmation
crn
current_charges
date_stamp
death
death_indicator
delivery
dva
dvacolour
ethnicity
eye_colour
facility_code
first_name
gender
gestation
hair_colour
healthcare_card_expiry
healthcare_card_number
height
id
indigenous_status
language
last_name
lmo
marital_status
medicare
datetime
string
integer
datetime
integer
integer
datetime
boolean
string
boolean
boolean
string
text
datetime
datetime
boolean
string
string
string
string
string
string
string
string
float
string
datetime
string
decimal
integer
string
string
string
integer
string
string
25 | P a g e
Generic Code Table Assessment
Element
date_picker
Country
generic_code
checkbox or yes_no
text_field
checkbox or yes_no
checkbox or yes_no
text_field
text_area
Dlvry Mthd
DVA Colour
Ethnic Ori
Eye Colour
Gender
Hair Clr
indigstat
Language
Marital St
date_picker
checkbox or yes_no
generic_code
text_field
generic_code
generic_code
generic_code
location_picker
text_field
generic_code
text_field
generic_code
date_picker
text_field
text_field
generic_code
generic_code
text_field
staff_picker
generic_code
text_field
Forms Builder 2012
Name
Data Type
medicare_expiry
datetime
medicare_irn
integer
medicare_ref
integer
middle_name
string
mobile_phone
string
mother_id
integer
mrn
string
multiple_birth
boolean
nationality
string
next_court_date
datetime
nok_patient_relationid
integer
occupation
string
parole_date
datetime
pension
string
pension_expiry
datetime
pension_number
string
pension_status
string
picture_id
integer
place_of_death
string
primary_condition
integer
release_date_edd
datetime
release_date_eed
datetime
religion
string
religious_visits
boolean
require_interpreter
boolean
residential_recipient_id
string
review_by
integer
review_date
datetime
second_language
string
title
string
user_contact
integer
weight
decimal
current_location_description String
26 | P a g e
Generic Code Table Assessment
Element
date_picker
text_field
text_field
text_field
text_field
patient_picker
text_field
checkbox or yes_no
Nation
generic_code
date_picker
Occupation
molpentype
generic_code
date_picker
generic_code
date_picker
text_field
generic_code
PlaceDeath
generic_code
Benefit
Religion
Language
Title
date_picker
date_picker
generic_code
checkbox or yes_no
checkbox or yes_no
text_field
staff_picker
date_picker
generic_code
generic_code
staff_picker
text_field
text_field
Forms Builder 2012
Enabling an Assessment
For an assessment to appear in the list it needs to be Published and Enabled.
1.
2.
3.
4.
5.
6.
Log into CareRight
Click Dashboard
Click Forms
Search for the name or code of the assessment
Click Publish
Then click Enable
Ensure any old versions of the form are disabled and archived – see the next section.
Updating an existing assessment
To update an existing assessment, you need to create a copy of it and work on that.
The version number will be incremented automatically when you create a copy.
1.
2.
3.
4.
5.
6.
7.
Log into CareRight
Click Dashboard
Click Forms
Search for the name or code of the assessment
Click Copy to create a new version of the assessment
Edit the new version, making the required changes
Whilst editing, use Check and Preview in the edit window to ensure the form
changes look OK and don’t cause any errors
8. When you have finished editing the new version of the assessment:
1. Go back to the forms tab and search for the name or code of the form
2. Locate the new version of the form that you have just finished editing
(the update time will be the most recent in the list of results)
3. Click Publish
4. Then click Enable
Archiving old versions of an assessment
We would advise disabling and archiving all existing versions of a form when adding
an updated version:
1.
2.
3.
4.
5.
Log into CareRight
Click Dashboard
Click Forms
Search for the name or code of the assessment
All old versions of the assessment need to be disabled:
1. Search for the form – for any that have a version number less than the
current version number do the following:
1. click disable
2. Then archive
27 | P a g e
Forms Builder 2012
Design Parameters
This document is designed to provide a set of standards for building forms to ensure
consistency and provide guidelines for those building forms.
Printing:
Forms include in the header on each page the following:
Patient/Resident/Client details, including Medical Record Number, Surname, First name,
Middle name, DOB, Location.
Assessment title, date and time performed and by who, date and time approved and by
who (includes name, title).
Date and time printed and who printed.
These details do not need to be included as part of the form as they are automated.
Forms consideration:
All forms need to be considered in regards to:
Form layout for data entry.
Form layout on screen when retrieved.
Form layout when printed.
Abbreviations should be limited to only those in common use it there is any doubt then
abbreviations should not be used.
When asking for dates as part of the form consider providing an estimated flag or selecting a
year only. Examples include operations, dates of treatments, dates commenced
medications.
The display of numbers should be consistent.
Temperature, BSL to one decimal point ie 37.1
Pulse, BP, Peak Flow, to a whole number ie 88, 120/80
Others ie number of children, number of admissions to be a whole number ie 2
General Forms Guidelines:Clear response areas
Use of colour/grey scaling
Linear completion
Clear purpose for the form
Clear who should complete the form ie RN, Doctor.
Any prerequisites clear upfront ie to complete the form you need X
Are there adequate instructions is it clear were to get help
Sufficient space for written responses
Does the form check logic of responses
Are unnecessary questions skipped based on answers
Is the user prompted to enter required data
Is data entered into expanded fields displayed in the print out.
Option to save and continue later
On long forms is it clear where the user is up to and how many questions are left
28 | P a g e
Forms Builder 2012
Are their appropriate section headings
Can users provide feedback on the form
Is a privacy statement required
Are alternative browsers supported
Can the form be used by users without a mouse (+/- requirement)
Form title reveal the purpose
Avoids the use of obscure terms or acronyms
Contextual information related to the question if needed.
If the form is long or multi use should it be made into separate forms.
Simple everyday language
Are there few words per sentence
Does the form use words that mirror the users language
Most questions have pick lists of answers
The form completes calculations if required
The form is self instructing
Elements like question and answer boxes are placed consistently
Avoids small print, decorative fonts, italics, extensive capitalisation of text, long line
lengths, close line spacing or poor colour/shading contrast
Follows left to right and top to bottom sequence
Are the common questions up front and those that only relate to some further down the
form
Does the form display for those with visual impairments/large print
Has there been client feedback
Does the form address operational as well as policy requirementsThe form does NOT:
Have lots of options
Asks to recall information from the distant past
Reference
Australian National Audit Office (2006), User Friendly Forms Key principles and practices to
effectively design and communicate Australian Government forms.
Department of Innovation, Industry, Science and Research (2007), Form Design Standards
29 | P a g e
Forms Builder 2012
Browser Version
Due to differences in display between IE and Mozilla – forms created for a client must be
TESTED in the browser that will be used..
Layout
Forms elements are contained in groups which provide a boxed outline similar to a text box
in Word.
1. Each form should have minimum of one group
2. Use a group where a section or group of questions is defined on a paper form
3. Each group has a Static Text heading with the section title bolded using html tags
<b>Bold</b>
Static text element with bold heading
Black outline formed by group
element
Text
Forms have a consistent default text in both edit and view mode – it is recommended not
use html to change this.
Text fields
Use where only limited text required
Small – default entry
Medium – 100 (characters)
Large – 180 (no wider)
Text areas
Standard width – No wider than 150 columns
Standard depth
Average text area – Default of no entry is suitable
Large text area – 5 rows
Extra large – 10 rows
NB: Text area’s wrap text and add scroll bars in edit mode and display all entered text in
View mode
Tables
Tables provide the ability to display fields horizontally across the screen but care needs to be
taken that too many fields are not placed across the page causing spill over off the screen.
Consideration needs to be given to any “show if” elements that may also be part of the row.
In general for average size fields 3 -4 columns is the maximum that will reasonably fit on an
average screen.
If questions or field headings are particularly long reduce the number of columns
accordingly.
30 | P a g e
Forms Builder 2012
Highly Structured Tables
Row 1 = Labels for the columns below
Row 2 = Label then text fields without Titles
“Show if “warnings or other instructional text
A consistent approach to user prompts or warnings is required
All warnings should be a static text element but text not bolded
Static text element with non bolded text
Select lists
The Select list element creates drop down lists
All select lists should have a blank first item so there is NOT a default selection when
the form is created
31 | P a g e
Forms Builder 2012
Select list with empty
first field
Set up of select list with empty
first option
Forms with calculations
All questions that result in a calculation should be mandatory
Date Picker
- Minimum size to allow for long month e.g. September is 16
-
Default size – no entry in Size field
32 | P a g e
Forms Builder 2012
Adding a Generic Code to a form
The forms builder allows you to display the value from a generic code list.
The guide below shows you how to add the generic code list for “Religion”.
1. In the edit view of the form you want to add the generic code list to, Drag the
Generic Code element into the builder window
2. Next, open a new web browser tab and navigate to Admin > Generic Codes. You
now need to scroll through the screens to find the generic code for Religion. You
need to know the name of the generic code as it appears in the system. Make a
note of the name.
33 | P a g e
Forms Builder 2012
3. Back in the forms builder, click on the generic code element to display its
properties:
Table: this should be the name of the generic code list as it appears in CareRight.
E.g. Religion
Read Only: If you want the person filling out the form to be able to change the value
that appears in the generic code list, then leave this as No. If they change the value,
when the form is approved, this will write back into the clinical record for the patient.
If Read Only = Yes, then the value will display and the person completing the form
will not be able to change it.
34 | P a g e
Forms Builder 2012
Advanced code form compiler
For advanced users of the forms builder, we now have a tool that allows you to write the
code for a form, instead of using the drag and drop forms builder.
Source code for a form is written in YAML, compiled and a .form file is generated. This can
then imported into CareRight.
This approach to building forms requires:
a basic understanding of writing source code in YAML, XML or another a
programming language
advanced understanding on the forms builder and elements
If you are interested in using this please contact Clintel to discuss.
35 | P a g e