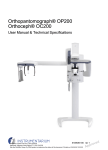
Download OC200 User Manual
Transcript
Preface Honorable customers, Thanks for choosing products of our company. The product with world cutting edge technologies—card reader and write, computer communication, as well as microelectronics, is considered to be combination of three technologies: electronics, optics and computer communication. It is no doubt that it has become the first choice of standalone time & attendance for enterprises with its strong function and veracity. Bio-office is a sub brand of Anviz USA. Bio-office series card time attendance products combine traditional RFID technology. All models come with powerful background time attendance management software that can support all kinds of complicated shift and generate various reports. It is versatile, convenient and multi-functional. Please read this user manual carefully to have an initial understanding of functions and basic knowledge of installation, debugging, maintenance, application and management to better use this product. 1 Advantage of Card Time Attendance y Three level-up 1. Management level-up 2. Profit level-up 3. Enterprise image level-up y Three reductions 1. Employee dispute reduction 2. Work redundancy reduction 3. Environmental pollution reduction y Full function The system can realize different functions such as attendance remark, calculation and report printing. The remark can be made for reasons such as business leave, absence, marriage holiday and etc.; the checking and calculation can be made in accordance with different time periods, departments, individual or combination due to various reasons for absence; the report generation and printing function can be realized perfectly. y Flexible Shift Maintenance The software supports shift on week basis, rotation shifts etc. Various shifts, public holidays, individual leave and overtime are available to meet the complicated needs of every enterprise. y Standalone The machine can work without connecting to PC, convenient in operation and no need to occupy any extra resource. y Multi-communication in network For large enterprise, multiple devices can be applied to do attendance synchronously, which will convenient for large quantity of users and save timee. 2 Software Operation Flowchart (Important chapter please read carefully) This software includes: System parameter, department management, staffer maintenance, shift management, staffer leave and statistic report etc. Then how to use this system in a right way? It is far from enough to understand only the function of each module but to know the connections between them and the system operation flowchart. Thus, a correct report can be generated. Software operation flowchart can be described in brief as follows: 1. System parameter 2. Department management 3. Staffer maintenance 4. Shift management 5. Staffer schedule Set T&A rule, statistic rule, company name and leaving class. Add, delete and modify departments. Add, delete and modify staffer. Import and transfer staffer. Set timetable and shift. Allocate staffer shift or temporary shift. 6. Record collection Collect records from the unit or import the backup record file. 7. Exception management Deal with business leave/asking for leave/forgetting clock in/collective late. 8. Statistic report Track, check and calculate records to generate time attendance report. 1.When the software is run for the first time, please set parameters including company name, time attendance rule, statistic rule for early, late and overtime etc. , leave class. When the setting is completed, it is usually not needed to be modified 3 unless the management rules of this company changes. 2.Normally there are many departments in one company and all departments need to be entered manually unlike the directly import of staffer. Department setting should be completed before staffer maintenance. 3. When the software is used for the first time, please make a Text file (*. txt) or MS Excel file (*.xls) for company staffer in accordance with certain format. For the format, please refer to【import staffer list】 so that all staffer can be import to the system at one time. Staffer can be added, deleted, modified and transferred to new department during future use. 4. First add the proper timetable (from on-duty time to off-duty time) according to the company rule and then set shifts. 5.After the shift setting is completed, it will work until shift is allocated to staffer. Each staffer can only have one shift. Please note the starting date of the shift. After the allocation of the shift, the arranged working date and time can be seen clearly for each staffer. 6.Transaction records are stored in the time attendance unit. Please download the records from the unit before report calculation. In addition, staff information and fingerprint templates can be uploaded and downloaded between the unit and the computer. Please refer to “Background management” for detailed information. 7.There is always staff away for business, asking for leave and forgetting clock happening in a company. Once it occurs, please deal with it in time in the software to ensure the correctness of the statistic report. 8.After all the above mentioned operation is done, the calculation of report can be operated. The report can calculate the time attendance status of all staffer or a certain staffer from a certain department in a certain time period. In【Attendance Calculating and report】, first please select the starting and ending date of the staffer, click “Calculate” and the system will calculate automatically and check the validity of the records. (There are some invalid records during the use of the unit. For instance, if one staffer presses the finger twice during a very short time period, one of the records will be regarded as invalid.) If there is any error in the software calculation, admin can also modify manually to ensure the correctness of the result. Please note: From the above flowchart, we can see that if there is an error in calculation report for one staff, the possible reasons are as follows: 4 Staffer shift or temporary shift is incorrect. Exceptions such as staffer away for business/ask for leave/forgetting clock in/out is incorrect. Checking and calculation of transaction records is incorrect. 5 Contents 1 Product Introduction................................................................................................. 2 1.1 OC200 Introduction........................................................................................... 2 1.1.1 2 Operation Guide ...................................................................................................... 5 2.1 Keypad Introduction.......................................................................................... 5 2.2 System Management........................................................................................ 5 2.2.1 Enroll User................................................................................................. 6 2.2.2 T&A Option ................................................................................................ 7 2.2.3 Door Open ................................................................................................. 7 2.3 Delete User....................................................................................................... 7 2.4 System Setup ................................................................................................... 8 2.4.1 Admin Password........................................................................................ 8 2.4.2 Clock Setting ............................................................................................. 9 2.4.3 Output for Access Control.......................................................................... 9 2.4.4 Communication.......................................................................................... 9 2.4.5 Network Setting ....................................................................................... 10 2.4.6 Volume .................................................................................................... 10 2.4.7 System Initialization................................................................................. 10 2.5 3 Product Feature......................................................................................... 2 System Info......................................................................................................11 2.5.1 User Information .......................................................................................11 2.5.2 Time Attendance Information ....................................................................11 2.5.3 Unit Information ........................................................................................11 2.6 T&A................................................................................................................. 12 2.7 U Disk Module Operation Guide ..................................................................... 13 2.7.1 Download Record .................................................................................... 13 2.7.2 Backup Staffer ......................................................................................... 14 2.7.3 Resume Staffer........................................................................................ 15 2.7.4 Backup System........................................................................................ 16 2.7.5 Resume System ...................................................................................... 17 System Installation................................................................................................. 20 3.1 Running Environment ..................................................................................... 20 I 4 5 3.2 System Installation.......................................................................................... 20 3.3 Uninstall the software ..................................................................................... 22 Data Communication ............................................................................................. 24 4.1 Add Time Attendance terminal ........................................................................ 24 4.2 Modify Time Attendance terminal.................................................................... 25 4.3 Delete Time Attendance terminal .................................................................... 25 4.4 Connecting Time Attendance terminal ............................................................ 26 4.5 Download records........................................................................................... 26 4.6 Download Staff................................................................................................ 27 4.7 Upload Staffs .................................................................................................. 27 4.8 Staffer Permission Management..................................................................... 28 4.9 Parameter settings of the time attendance machine....................................... 29 4.9.1 Initialize the attendance machine ............................................................ 30 4.9.2 Synchronizes the machine time with computer........................................ 30 4.9.3 Delete staff information............................................................................ 30 4.9.4 Clear Records.......................................................................................... 31 4.9.5 Items of Time and Attendance Machine parameters setting .................... 31 4.9.6 TCP/IP parameter setting ........................................................................ 33 4.9.7 New staff default identification method and access permission............... 33 4.10 Auto collect set ............................................................................................. 34 4.11 Ring time control ........................................................................................... 35 4.12 Notice management...................................................................................... 35 4.13 System setting .............................................................................................. 37 4.14 Record supervision ..................................................................................... 37 4.15 Disconnect the attendance machine............................................................. 38 4.16 Exit System................................................................................................... 38 4.17 U Disk Management Program....................................................................... 39 4.17.1 Read U disk data ................................................................................... 39 4.17.2 Modify data in U disk ............................................................................. 42 4.17.3 Export data from database .................................................................... 44 Background Management...................................................................................... 48 5.1 Log in System ................................................................................................. 48 5.2 System............................................................................................................ 49 II 5.2.1 Parameters Settings ................................................................................ 49 5.2.2 Administrators.......................................................................................... 51 5.2.3 Administrator’s Password Set.................................................................. 53 5.2.4 Modified Record Log ............................................................................... 53 5.2.5 Managing Log.......................................................................................... 54 5.2.6 Set Database Link ................................................................................... 55 5.2.7 Exit System.............................................................................................. 55 5.3 5.3.1 Department Management ........................................................................ 56 5.3.2 Staffer Maintenance................................................................................. 57 5.4 Attendance Management................................................................................ 59 5.4.1 Holiday List .............................................................................................. 59 5.4.2 Timetable and Shift.................................................................................. 60 5.4.3 Staffer Scheduling ................................................................................... 66 5.4.4 Attendance Records ................................................................................ 68 5.4.5 Attendance Calculating and Report ......................................................... 70 5.5 Deal with Exceptions ...................................................................................... 77 5.5.1 Away on Business/ Leave........................................................................ 78 5.5.2 Append Record........................................................................................ 78 5.5.3 Append Record Collectively..................................................................... 79 5.5.4 Dealing with Collectively Late / Leaving .................................................. 79 5.6 Data Maintenance........................................................................................... 80 5.6.1 Import Staffer List .................................................................................... 80 5.6.2 Import Attendance Record ....................................................................... 82 5.6.3 Clear Obsolete Data ................................................................................ 82 5.6.4 Compress Database ................................................................................ 83 5.6.5 Backup Database .................................................................................... 83 5.6.6 Initialize System....................................................................................... 83 5.7 6 HR Management............................................................................................. 56 External Program Management ...................................................................... 83 5.7.1 External Program Management............................................................... 83 5.7.2 Connect to Time Attendance Machine ..................................................... 84 FQA ....................................................................................................................... 86 6.1 The machine can't be connected with PC....................................................... 86 III 7 6.2 No records found though staff have clocked in/out. ........................................ 86 6.3 We don’t use the ID + card mode to get verified............................................. 86 Appendix................................................................................................................ 88 7.1 Interface Illustration ........................................................................................ 88 IV Chapter1 Introduction The main theme of this chapter is the advantage of this T & A, as well as function introduction. 1 1 Product Introduction 1.1 OC200 Introduction OC200 is the standalone card T&A and access control system newly launched in 2009. With the use of Taiwan RF reader module, the maximum distance is up to 15 20CM. Reliable performance, able to inductive for all different cards. OC200 is a wall mounted T&A and access control system with 128*64 blue LCD. This model can be used stand-alone or connected via TCP/IP. OC200 can control door lock for access control. The original time attendance records can also be kept in the units. OC200 Card T&A and Access control Machine 1.1.1 Product Feature y USA Philips 32 bit ARM processor; y User name display and human voice prompt; y Realtime data transfer and WEB online tracking; yOptional access controller for separate type secure access control; y Standard RFID module, optional Mifare/HID module; 2 yStandard TCP/IP, RS232/485 communication, dry contact output, Wiegand 26 output; yStandard USB pen drive module; y Identification method: ID + password, ID + card, card only; y Standard user capacity: 8000; Record capacity: 50000; y Size:140mm(w)×190mm(h)×30mm(d); 3 Chapter2 This chapter Operation Guide is mainly about appearance illustration and relevant system settings such as how to add and delete users etc. 4 2 Operation Guide 2.1 Keypad Introduction 1 2 3 C 4 5 6 0 7 8 9 Menu 7 1 6 Out/ ▲ In/ Status/Esc OK 2 5 3 4 OC200 Keypad Keypad introduction: 1. [0-9]:number key; 5. [OK]:confirm/power key; 2. [In/e]: direction(up) /status shift key; 6. [M]:menu key; 3. [Out/f]:direction(down) /status shift key; 7. [C]:back/ cancel key; 4. [Status/Esc]: T&A status self-define/return key; 2.2 System Management The administrator must enter the 【Menu】interface to operate the device when setting parameters , admin staff ,searching info . Press【M】key,enter management password interface: 2/2/2009 12:18 Admin PWD: On duty Enter the default password 8888 and press【OK】to confirm, the system will enter menu management interface as follows: 5 *Admin Setup Info Menu Enroll User T&A Option Door open Pressing【In】or【Out】can shift the menu. 【In】: the menu order is from down to up .【Out】: the menu order is from up to down . Select【Admin】menu and press【OK】to select【Enroll User】menu as follows: Menu *Admin Enroll User Setup T&A Option Info Door open Press【In/e】or【Out/f】to select the admin menu. 2.2.1 Enroll User Select 【Enroll User】 menu, press【OK】to enter user enrollment interface as follows: Enroll User Enter ID: _ Enter user ID, the range is 00000001-99999999. And press【OK】to enter user enrollment interface as follows: Enroll User Name: PWD: _ Card: 0 Password or card can be enrolled. Put the card twice on the card swiping area and 6 the voice prompt will come along. After the card are successfully enrolled, press【OK】 to save and enter enrollment status for the next staffer. Press【Start/Esc】will exit to the “admin menu” interface or “clock in/out “interface 2.2.2 T&A Option Select【T&A option】and press【OK】to enter identification method interface. Enter staff ID and press【OK】to enter setting interface as follows: T&A Option Name: ■ ID + PW ■ ID + PW □ ID + PW ID+PW: ID+password CARD:card only CARD+PW:card+password Press【C】and【M】to select or unselect. After setting is completed, press【OK】 to confirm. 2.2.3 Door Open Select【Door open】menu, press【OK】to enter access permission interface . Input the ID and press【OK】to enter access permission setting interface as follows: Door Open Name: Allowed Press【C】and【Menu】or【In/e】and【Out/f】to allow or prohibit door opening for certain staffer. Complete the setting and press【OK】to confirm 2.3 Delete User Select【Delete user】 menu, press【OK】to enter user deletion interface as follows: Delete User Enter ID: _ 7 Enter ID and press【OK】to enter deletion setting. User deletion or reservation can be set as follows: Delete User Name: Delete User Name: Reserved Delete Press【C】and【M】or【In/e】and【Out/f】to shift between reservation and deletion. After the setting is completed, press【OK】to confirm. 2.4 System Setup Select【Setup】as follows: Admin Setup Info Menu Admin PWD Clock Setup Output Press【OK】to select from sub-menu as follows: Admin *Setup Info 2.4.1 Menu Admin PWD Clock Setup Output Admin Password Select 【Admin PWD】, press【OK】to enter admin password interface as follows: Admin PWD Old PWD: 8888 New PWD: _ 8 Enter new password, press【OK】to confirm and exit to the last menu. 2.4.2 Clock Setting Select 【Clock setup】and press【OK】to enter clock setting interface as follows: Clock Setup Enter date: 02/02/09 Enter time: 13:01:29 According to your request, press【In/e】and【Out/f】to the time parameter site and input the new date and time;After the setting is completed ,press【OK】to confirm and exit to the last menu . Note: in the【Hourly alarm】option,press【M】to select ”Yes” or ”No”. 2.4.3 Output for Access Control Select【Output】and press【OK】to enter access control output interface : Output ■ Access control output □ Bell output Lock Delay 01 Sec Press【In/e】.【Out/f】can be used to select output item. Press【C】and【M】 can be used to select setting. Press number button to input Lock Delay. Press【OK】to confirm and exit to the last menu . Note: The maximum ring time is 99 seconds. 2.4.4 Communication Select 【Comm.】 menu and press【OK】to enter communication method interface as follows: Comm Comm. Method: TCP/IP 9 There are two communication methods: TCP/IP and RS232. 【In/e】.【Out/f】 can be used to select. After selected the method, press【OK】to confirm and exit to the last menu. 2.4.5 Network Setting Select【Network】menu and press【OK】to enter into network setting interface as follows: IP: Mask: Gate: Ser.: Network 192.168.000.217 255.255.255.000 192.168.000.001 192.168.000.007 【In/e】and【Out/f】can be used to select different parameter and then set the new parameter. After the setting is completed ,press【OK】to confirm and exit to the last menu. 2.4.6 Volume Select【Volume】menu and press【OK】to enter volume setting interface: Volume Volume: ________________ _ __ 【In/e】and【Out/f】can be used to increase or decrease volume. After the setting is completed ,press【OK】to confirm and exit to the last menu. 2.4.7 System Initialization Select 【Init】menu, press【OK】to enter system initialization interface as follows: System Init Enter PWD: _ 10 Enter Admin password and press【OK】 to confirm the system initialization. After initialization, the T&A device will restart again automatically. Note: The data can’t be recovered after initialization. Please be cautious! 2.5 System Info Select【Info】menu as follows: Admin Setup Info MENU User Info T&A Info Unit Info Press【OK】to enter sub-menu 2.5.1 User Information Select【User Info】menu and press【OK】to enter user information interface : User Info User Reg: 808 Space 30% User information includes: enrolled user and used space information. Press 【Start/Esc】 or 【OK】 to exit to the last menu. 2.5.2 Time Attendance Information Select【T&A info】menu and press【OK】to enter time attendance information interface as follows: T&A Info Records: 8080 Space: 9% Time attendance information includes record and used space information. Press 【Start/Esc】or【OK】to exit to the last menu. 2.5.3 Unit Information 11 Select【Unit info】menu, press【OK】to enter unit information interface : Unit Info Name: SN: 68008080 Version: V1.2 Unit information includes: product serial number and firmware version. Please note:【Start/Esc】or【OK】can be used to exit to the last menu. 2.6 T&A Card only mode: In T&A status, swipe user card close to card area. After a beep ‘di-’, system will prompt as following, Card verity ID 008101 Verified! ID+ Password mode: In T&A status, input staff ID through number keypad, i.e. 8108. Pass Verify ID 8108 Press 【OK】key to confirm ID, and input password following prompt, Input staff password and press 【OK】key to confirm. If verification passes, green LED indicator will be on with voice prompt ‘Access granted’. Else red LED indicator will be on with voice prompt ‘Access denied’. ID + Card mode: In T&A status, input staff ID, i.e. 8102 12 Pass Verify ID 8102 Press 【OK】key to confirm and swipe user card close to card area. After a beep ‘di-’, system will prompt as following, Card verity ID 008101 Verified! 2.7 U Disk Module Operation Guide Plug U disk into OC200 machine. LCD display will prompt entering admin password. BACKUP/RESUME Admin PWD: ■ Input management password (default is 8888), press 【OK】 button and enter data backup and resume menu. 2.7.1 Download Record Press 【In/ ▶】or【Out/ ◀】button to choose 【Download record】option. Download record Backup staffer Resume staffer Backup system Resume system 13 Press 【OK】to confirm and start downloading record. BACKUP/RESUME Download record Loading... 16% When progress bar reaches at 100%, it will prompt “Operation successful. Delete the record?” BACKUP/RESUME Download record Operation successful Delete the record? Press 【OK】button to agree this option. Else press 【Status/Esc】 to cancel it and back to upper menu. After downloading completed, it will create KQ081028.TXT file (file name is based on operation date) in 10000 (machine SN) file folder in root directory of U disk. 2.7.2 Backup Staffer Press 【In/ ▶】or【Out/ ◀】button to enter 【Backup staffer】option. Download record Backup staffer Resume staffer Backup system Resume system Press 【OK】to confirm and start backing up staffer info. BACKUP/RESUME Backup staffer Loading... 53% 14 When progress bar reaches at 100%, it will prompt “Operation successful. Press ‘Ok’ to escape”. BACKUP/RESUME Backup staffer Operation Successful Press ‘OK’ to escape Press 【OK】button and back to upper menu. After backup completed, it will create 080826.YG (staffer info) and 080826.ZW (fingerprint template) files in 10000 (machine SN) file folder in root directory of U disk. Prompt: If plugging out USB disk, backup operation will exit automatically. 2.7.3 Resume Staffer Please firstly create BAK.YG and BAK.ZW files in U disk root directory. (You can rename 080826.YG and 080826.ZW to BAK.YG and BAK.ZW, and then save in root directory of U disk.) Secondly, plug U disk into machine, input password, and press 【In/ ▶】or【Out/ ◀】button to enter 【Resume staffer】option. Download record Backup staffer Resume staffer Backup system Resume system Press 【OK】to confirm and start resuming staffer info. BACKUP/RESUME Resume staffer Loading... 50% When progress bar reaches at 100%, it will prompt “Operation successful. Press ‘Ok’ to escape”. 15 BACKUP/RESUME Resume staffer Operation Successful Press ‘OK’ to escape Press 【OK】button and back to upper menu. Prompt: If BAK.YG and BAK.ZW files are not correct in root directory of U disk, it will prompt “Can’t find the file. Press ‘Ok” to escape during resuming staffers. BACKUP/RESUME Resume staffer Cannot find the file Press ‘OK’ to escape Press 【OK】button and back to upper menu. Set BAK.YG and BAK.ZW files and then start resuming staffer operation. 2.7.4 Backup System Press 【In/ ▶】or【Out/ ◀】button to enter 【Backup system】option. Download record Backup staffer Resume staffer Backup system Resume system Press 【OK】to confirm and start backing up system. BACKUP/RESUME Backup system Loading... 50% When progress bar reaches at 100%, it will prompt “Operation successful. Press ‘Ok’ to escape” 16 BACKUP/RESUME Backup system Operation Successful Press ‘OK’ to escape Press 【OK】button and back to upper menu. After backup completed, it will create 080826.SY file in 10000 (machine SN) file folder in root directory of U disk. 2.7.5 Resume System Please firstly create BAK.SY file in root directory of U disk. (You can rename 080826.SY to BAK.YG and BAK.SY, then save in root directory of U disk. ) Secondly, plug U disk into machine, input management password and Press 【In/ ▶】or【Out/ ◀】button to enter 【Resume system】option. Download record Backup staffer Resume staffer Backup system Resume system Press 【OK】button and back to upper menu. BACKUP/RESUME Resume system Loading... 50% When progress bar reaches at 100%, it will prompt “Operation successful. Press ‘Ok’ to escape”. 17 BACKUP/RESUME Resume system Operation Successful Press ‘OK’ to escape Press 【OK】button and back to upper menu. Prompt: If BAK.YG and BAK.ZW files are not correct in root directory of U disk, it will prompt “Can’t find the file. Press ‘Ok” to escape during resuming system. BACKUP/RESUME Resume system Cannot find the file Press ‘OK’ to escape Press 【OK】button and back to upper menu. Set BAK.SY file and then start resuming system operation again. 18 Chapter3 System Installation This chapter mainly discusses the installation and un-installation of T&A software as well as the hardware and operation system requirement. 19 3 System Installation First we should install background management software on the computer. Please refer to the following steps: 3.1 Running Environment Hardware environment PentiumⅡ266 and above; PentiumⅢ500 and above is recommended; 128 Memory and above; Minimum 100M hardware space; COM Port; CD-ROM (CD-ROM needed in installation); VGA support 800*600 resolution and above; Operating system Microsoft Windows 2000/ XP (recommended); Microsoft Windows Vista; 3.2 System Installation Please insert T&A disc into CD-ROM and the disc will automatically run the installation program. If not, please run setup.exe in the root directory of the disc. The following window will pop up: Click 【Next】 to continue installation (see the picture below): 20 Select the target directory to install the program and the default is “C:\Bio-office”. Click 【Next】 to continue installation (see the picture below): Click 【Back】 and installation will return to the previous screen and re-select target directory; Click 【Next】and the installation will start as the following picture shows: The installation will be done after seconds (see the picture below): 21 Click 【Finish】button and exit install interface, click “Finish” to close the installation program and an icon will be added to the desktop. If you want to install the driver, you should select the driver to fit your computer’s operating system and then click 【Finish】 to install the driver. Double click it and the T&A management system will start. In addition, 【Bio-office Card T&A and Access Control System】 has been added to 【All Programs】. Please see the picture below: The shortcut of 【Card T&A and Access Control System】, 【Time and Attendance machine Management】 and 【U Disk Module Management】 are included in 【All Programs】. 3.3 Uninstall the software Click 【Uninstall Bio-office Card T&A and Access Control System】 in the above picture, click 【Next】 and the program will be uninstalled automatically. Please note: All the files and data will be deleted after uninstalling the program so please make sure before operation. 22 Chapter4 Communication The chapter is mainly about how to add, delete and set communication between PC and terminal. 23 4 Data Communication Due to different configuration of different device type, please operate based on device specification. 【start】-【all programs】-【Bio-office Card T&A and Access Control System】【Time and Attendance machine management】,open【Time and Attendance machine management】program : After successful connection via com port or network, date upload and download between terminal and software, parameters setting of the terminal can be realized very easily 4.1 Add Time Attendance terminal Click【Add】,the following window will pop up: Before communication, it needs to set the config. of the device in the software so as to make a connection between the device and the software . Every device will be used as a time and attendance terminal. The method of adding a new time and attendance terminal in the software is as follows: Click【Add】in the menu,open the【Add Time and Attendance Mach.】: 24 Mach. NO.: Serial number is used to identify every time attendance terminal, the default digit is 8 bit (this number is on back label as “Serial No”); Mach. Name:the user can set different names of the terminals in different site to distinguish the terminals; Connecting methods: Set communication method between terminal and PC (normal COM, network, RS485) Com port number: it is the communication port number between the terminal and PC when connecting them via RS232 .The default com port number is Com1 .If you don’t know which com port the PC use ,you may check it like this : computer desk Ædevice manager Æport (com & LPT ) Æcommunications port (com 1) or other com ports ; IP address:when communication via TCP/IP, it will display the terminal IP address in the Com port blank and input the IP here .The default IP address is 192.168.0.218. You may set the IP address according to your request , but the IP here must be the same as the IP address in the terminal menu - net - IP. After finishing the setting , press【OK】to save the info and exit to the main menu ,now you can see the new terminal info in the terminal list . 4.2 Modify Time Attendance terminal Choose the terminal and click 【Modify】, the following window will pop up: Modify the terminal info .After setting is completed, press【OK】to save;press 【Cancel】not to change the modification and exit the interface . 4.3 Delete Time Attendance terminal Choose the terminal and click 【Delete】, the following window will pop up: 25 click【OK】to delete the chosen terminal and click【cancel】not to delete the terminal . 4.4 Connecting Time Attendance terminal Choose the time attendance terminal and click 【 Connect 】 , the managing permission interface will pop up: Enter correct managing password and the original password is 8888. Click the 【OK】to connect to the terminal . After successful connecting, you can see the info staff, records, capacity, firmware version …below the【Data on the Time and Attendance Machine】.At the same, you can set the function of the 【Operating Items】 to communicate with the time attendance terminal. 4.5 Download records Click【Download Records】in【Operating Items】, and the confirm window will pop up : click【OK】,the following window pop up: ⊙ Download New Records: Download the new records in the machine; ⊙ Download All Records: Download all the records in the machine; Choose the download type and click the【OK】begin to download the records; click the【cancel】to exit the download operation . After downloading records is finished, it will display: 26 [11:21:11] Downloading attendance record... [11:21:19] The attendance record downloading completed, the total record: 68, succeed record: 68. 4.6 Download Staff Click【Download Staffers】in【Operating Items】, the following window will pop up : Click【OK】to download staffs to management software ,including the department info download together .The main interface display “[11:24:47] Downloading department information…”; After download is finished, data will display as the follows: [11:24:47] Downloading department information… [11:24:49]Download department successfully, Record: 10, download: 10 [11:24:49] Downloading the Staffer data... [11:24:55]The Staffer's data downloading completed, the total record: 112 succeed record: 112. 4.7 Upload Staffs Click【Upload Staffers】 in 【Operating Items】, and open【Upload the Staffers】 window : Use【Shift】or【Ctrl】to choose the staffs who you want to upload, and then click the 【OK】button, the following window will pop up : 27 Click【OK】to upload staff information ;and click【cancel】to exit the upload staffers menu . After the uploading is finished, it will prompt: Click【OK】to confirm . 4.8 Staffer Permission Management Click 【Staffer Permission】 in【Operating Items】and the window prompts: When the mouse stop on one staff item, it will prompts “click the mouse right key for more operations”. Select one staffer item and click the mouse right key, the right key menu prompts: 【Default for all staffers】: Set the staffer’s the identification method and the access permission as default value. 28 【Modify permission of selected staffers】: Set the identification method and the access permission manually. Click the menu and the【Identification method and access permission】window will popup as follows: Set the default identification method and access permission .Click【OK】to save the operation, click【Cancel】to cancel the operation . Please do not forget to update the staffers to the machine after finishing the modification. Use【Shift】or【Ctrl】to choose the modified staff, click the【OK】to update the identification method and access permission. It will prompt: Click the【OK】to confirm ,and click the【cancel】to exit the operation . After updating is finished, it will prompt: Click【OK】to confirm the update completion . 4.9 Parameter settings of the time attendance machine Main function: initialize system, time synchronization, delete staffers, clear records, item of time and attendance machine parameter settings, TCP/IP parameter settings and new staffer default identification method and access permission. Click 【setting parameters】in【Operating Items】setting parameters, the following interface will prompts : 29 4.9.1 Initialize the attendance machine The machine system will resume to factory settings when initializing. All data will be cleaned up and the data can not be resumed again. Please back up the data first before this operation! Click【Initialize System】,the following window shows : Click【OK】to start to initialize machine; click【cancel】to exit the initialization . 4.9.2 Synchronizes the machine time with computer This function is to adjust time of the machine automatically according to the computer. Click【Time synchronization】,the following window will pop up: Click【OK】to synchronize time, click【Cancel】to exit the operation . 4.9.3 Delete staff information Delete the appointed staff information. After deletion, it can not be resumed, so you’d better back up the staff information before deletion. Click【Delete staffers】and open【Delete the appointed staffer】window : 30 Use【Shift】.【Ctrl】or【 All】to select the staffer you want to delete. Click【OK】 and the following window will pop up : Click【OK】to delete the staffer; click【Cancel】to exit the operation . After the deletion is finished, it will prompt: Click【OK】to confirm the deletion completion. Notice: 【 Delete the appointed staffs on the computer 】 : delete the staffer information in the data base on the computer at the same time when deleting the staffer information in the machine. After deletion, it can not be resumed, so you’d better be cautious before deletion. 4.9.4 Clear Records Delete all of the attendance records of the machine. After deletion, it can not be resumed, so you’d better back up the records before deletion. Click 【Clear Records】,and the following window will pop up : Click【OK】to clear the records: click【Cancel】to exit the operation . 4.9.5 Items of Time and Attendance Machine parameters setting Set the admin password; lock opening time lapse, output method, real-time monitoring function … 31 【 Adjust the electronic Lock opening time lapse】: It means how many seconds later to close the door after it is opened. The delay time range is between 0~99 seconds. Set the electronic Lock opening time lapse according to your request ,and click 【Apply】to save . After the setting is finished, it prompts: Click【OK】to confirm . 【Admin password】:it is used to enter the system to set info for the administrator and connection between the machine and management software . The range of the password is 0001~9999. Input the new password , and click【Apply】to set it . After the setting is finished, it will prompt: Click【OK】to confirm . 【Output method】:set the machine connect with access controller or timing ring function . Select the output method ,and click【Apply】to effect it. It will prompt: Click【OK】to confirm . 【Real time Monitoring Function】:set the real time communication between the machine and computer . If it is effective , when anyone press his card on the machine 32 and identification is successful, you can see the records in the【Management software】 -【Record】. The detail operation please refer to the 【Records Supervision】interface . Select the【Real time Monitoring Function】if it is needed , and click【Apply】to effect it. After the setting is finished, it will prompt: Click【OK】to confirm . 4.9.6 TCP/IP parameter setting Tick the before the item you want to set, and make it effective. IP Address: the IP address of the machine; Default Gateway: Gateway IP while connecting to internet; Subnet Mask: Enter relevant subnet mask in accordance with actual network type; Server IP: Enter the management PC IP address connected with the machine; After the setting is finished , click【Apply】and it will prompts : Click【OK】to confirm . 4.9.7 New staff default identification method and access permission If the function is effective, the identification method and the access permission of all the new enroll users will follow the same setting. Set the default identification method and the access permission according to your request and click【Apply】to effect it . After the setting is finished, it will prompt: 33 Click【OK】to confirm . 4.10 Auto collect set Click【Auto-Collect Set】in【Operating Items】and open【Record timing collection】 window : Mach. No.: Please select the correct machine Password: Input password of the selected machine Collecting time: Input the time in the blank before【Add Time】on which you would like the system to auto-collect the record .Click【Add Time】to add the time into 【Collecting Time】blank and do the same operation to add more collecting time. Note: the maximum time is 5. 【+Add】: after the collecting time setting is finished ,click【Add】to save the collecting time into the below list . 【-Delete】: first select the Mach. NO. and the collecting time in the below list, and click【-Delete】, it will prompts : Click【OK】to confirm ; click【Cancel】to exit the operation . 【Clear】: it will clear all the collecting time in the below list . Click【Clear】, it will prompts : 34 Click【OK】to confirm ; click【Cancel】to exit the operation . 4.11 Ring time control Click【Ring time control】in【Operating Items】 and the window prompts: Add the ringing time: set the ringing time and select the dates of the week, Click 【+Add】to add the ringing time. The ringing times will display in the left blank【Ring time list】. Delete the ringing time: You can select one ring time in the 【Ring time list】and click【Del】to delete the ringing time .One window will popup as follows: Click 【OK】 to confirm deletion. Click【Cancel】to cancel the deletion operation. After the setting is finished ,Click【OK】to save the ring time settings. One window pops up as follows: Click【OK】to confirm ; click【Cancel】to exit the operation . 4.12 Notice management Click【Notice management】in【Operating Items】 and window prompts: 35 There are two kind of message type: private message and public message. The public message don’t need to input the ID and the default ID is 0 ; but the private message need to input the staff ID ,otherwise when you add the private message ,it will prompts : Input the message content ,and click the【Add Message】, it will prompts : Click【Read message】,you will see the message in the【Message List】: 【Delete Selected Messages】: select the message and click【Delete Selected Messages】to delete it . One window will popup as follows: Click【OK】to confirm deletion. Click【Cancel】to cancel the deletion. 36 【Delete All Messages】: Click【Delete All Messages】if you want to delete all the messages. One window pops up as follows: Click【OK】to confirm deletion. Click【Cancel】to cancel the deletion. After the deletion is finished, it prompts: Click【OK】to confirm deletion is finished and exit . 4.13 System setting Click the button【Setting】in the toolbar. One window pops up as follows: Run automatically when windows starts: the management software will run automatically when windows starts. Listen serial port: when real time communication is effective, the item must be selected. You may set the function according to your request. After the setting is finished, click【OK】and it will prompts: Click【OK】to confirm . Notice: The real time monitor will not activate if the communication method is RS485. 4.14 Record supervision Real-time monitor the time attendance machine and the attendance records will 37 upload to the software automatically. Click the button【Record】in the toolbar. One window pops up as follows: It will display the recent records of the staffers whose identification are successful .You can modify the monitor time .The valid time period is 1-1440 min and it means to display the records in the latest 24 hour. Notice: there are must be three preconditions at the same time if you want to real time monitor the records: 1.The【Real time Monitoring Function】in【Items of Time and Attendance Machine parameters setting】must be effective ; 2.The monitor method in【Real-time Comm. Parameter Setting】of【Setting】must be correct ; 3.If the communication method is RS232, please disconnect the communication between the software and the machine by click the button 【disconnect】.Then the real time monitor function can be activated; if the communication method is TCP/IP, you don’t to do so . 4.15 Disconnect the attendance machine The communication between the attendance machine and the PC must be disconnected when operating some items, such as 【 Record supervision 】 and 【Auto-collect set】. Click【Disconnect】to disconnect the attendance machine. 4.16 Exit System Close the software. Click【Exit】or the close button and following prompts: 38 Click【OK】to exit from system; click【Cancel】to cancel the operation. 4.17 U Disk Management Program U disk management program mainly manages data transaction for U disk, database and between them. Open it and the interface is show as following, 4.17.1 Read U disk data Read attendance record from U disk files: Click 【 】 button after【Read the records from the U disk】, pop-up the following window. Choose 081027.TXT in 10000 (machine SN) under the root directory of U disk (files named based on date), click 【Open(O)】button or double click 081027.TXT and back to upper interface. Click 【Start】button and attendance records will be imported to local database named Check in/out table of Att2003.mdb. 39 After importing completed, it will prompt ‘Finished!’. Read staffer info from U disk: Click 【 】 button after【Read the staffer information from the U disk】, pop-up the following window. Choose 081027.YG in 10000 (machine SN) under the root directory of U disk (files named based on date), click 【Open(O)】button or double click 081027.YG and back to upper interface. 40 Click 【Start】button and attendance records will be imported to local database named userinfo table of Att2003.mdb. After importing completed, it will prompt ‘Finished!’. Prompt: If database has exists this record, the program will prompt “Same record is existent 7876[7876]”. 41 If you need replace the previous staffer info with those in U disk, please tick 【Replace the existing staffer information】 4.17.2 Modify data in U disk Click 【 】 button after【Choose the staffer information file】, pop-up the following window. Choose 081027.YG in 10000 (machine SN) under the root directory of U disk (files named based on date), click 【Open(O)】button or double click 081027.YG and back to upper interface. Click 【Analyse】button and the program will compare the staffers’ name with those in Userinfo table of Att2003.mdb. 42 After analyse completed, it will prompt ‘Finished’. Please use 【Select all】button or 【Shift/Ctrl】button to select all or multiple select and update staffers’ name. Click【Select none】button to cancel selection. After selection completed, click 【Update the selected staffers’ name】 button to save updating of staffers’ name. 43 After updating completed, it will prompt ‘Finished!’. After updating completed, it will create a file named 081027.YG.bk1 in 10000 file of U disk that is the backup of previous 081027.YG. 4.17.3 Export data from database Input machine serial number, click 【Search】to retrieve staffer info from database. 44 Please use 【Select all】button or 【Shift/Ctrl】button to select all or multiple select and update staffers’ name. Click 【Select none】button to cancel selection. After selection completed, click 【Export the selected records to the file】 button, it will prompt the following window: Choose export directory, save to root directory of U disk or others. Click 【OK】 button and start data exporting. 45 After exporting completed, it will prompt ‘Exporting finished’. 46 Chapter5 Background Management The main theme of this chapter is how to collect attendance records from different terminals with management software and generate different reports. The background software can manage staff information, set rules of attendance etc. 47 5 Background Management Management software can collect attendance records from different terminals, calculate according to shift setting and finally generate different reports. The background software can manage staff information, set rules of attendance etc. 5.1 Log in System Double click the icon on the desktop to start the attendance background management program. The log-in interface will pop up as follows: The default administrator‘s name is “Admin” and password is empty. Log in system and the following interface will be displayed: The main interface includes three parts: 1. System menu: Include the whole function module& information 48 2. Shortcut button: Shortcut button of common function module, array in working order, easy to work on 3. Status column: Show the current time, logged-in administrator and system information. 5.2 System Click【System】 on the main menu, following springs: 5.2.1 Parameters Settings Click 【Parameters Settings】in system menu. The following window will prompt: Pic5.1 Parameters Settings Basic parameters: Set your company name, the default is “Head office” Input your company name that will be deemed as the head of departments list. A working day count as how many minutes is the base for time attendance calculation which will be the transition standard to calculate the late to work/early to leave /free overtime items, minute is the good transition standard of hours and working day. “Late for work as how many minutes” can be set when no clock-in on duty, “early to leave as how many minutes” when no clock out for off duty. Free overtime work can also be calculated on the base that how many minutes working after off duty time. “Shift expand two days” is set under real condition. 49 Stat. Rules: Click page【Stat. Rules】in pic5.1, following shows: This page describes the stat. rules of items: normal, late, early, business leave, leave, absence, overtime, free overtime. Accumulate by times: Only calculate the total times, display the accumulated times in report. Round at total: Add up the total time and then round according to corresponding unit. Round down: Abandon the number after the minimum unit one regardless it is. For example, if the minimum calculation unit is 1 day, if the accumulated time is 1.1 days or 1.9 days, the result of calculation is 1 day. Round up: Add one unit regardless the number after the minimum unit is. For example, if the minimum calculation unit is 1 day, if the accumulated time is 1.1 days or 1.9 days, the result of calculation is 2 day. Round off: If the number after the minimum unit is equal to or over 0.5, add one unit, or else, abandon it. Notice: The setting of stat. Rules above will directly affect the statistical result. Please make above setting according to the true status of your company to ensure the accuracy of reports. Leave class: Click page【Leave class】in pic5.1,following shows: 50 Add new leave class: Click【Append】, input the name of leave class and choose color and click 【save】 to finish. Revise leave class: Select the name of leave class which one need to be revised, click【Modify】,input new name of leave class and color, click【Save】to finish. Delete leave class: Select the name of leave class which one need to be deleted, click【Delete】,click 【OK】to finish. Field definition: Click page【Field definition】 in pic5.1,following shows: This page add the corresponding value for 【Nation】.【Specialty】.【Position】. 【Education】in menu【Staffer maintenance】. 5.2.2 Administrators Click【System】-【Administrators】, following window shows: 51 Append new administrator: Click 【Append】—input the name of new administrator within input field. Of 【Administrators】, select corresponding privileges below and click 【Save】 to finish adding of new administrator. The default password of new administrator is 888888. Please log in as the new registered administrator and click menu【System】-【Administrator’s password set】 to set new password of administrator for system security. Note: 1. Before you using the administrator mode, you need to set the privileges for every administrator with which the administrator can modify the operation items after he log in the software; there are all the items in the “Items operable” list in above picture, such as “Staffer maintenance, Shifts settings, Calculating and Report”; we can set different privileges for different administrators so as to divide and manage the task systematically. 2. After you add a new department, you must modify the privileges of the “Department operable” for the administrators (select the new department in the “Department operable” list and save), who will have the privileges to modify the new department, and then you may do other operations. Modify administrator: Select the name of administrator, click【Modify】, input new name of administrator and corresponding rights in【Administrator】and click【Save】to finish. Delete administrator: Select the name of administrator who will be deleted and click【Delete】to finish deleting according to the prompt. 52 5.2.3 Administrator’s Password Set Click menu【System】--【Administrator’s Password Set】, following springs: Input the original password in 【Old Pwd】, enter the new password in【New Pwd】, enter again in【Confirm Pwd】and click【OK】to finish. 5.2.4 Modified Record Log Click menu【System】--【Modified Record Log】, following springs: Select department, staffer ID and time range and click【Search】and those records which match the above condition will be displayed as follows: 53 Notice: Modified record log shows all the time attendance record modifications; If there’s record that has been revised incorrectly before, it can be recovered by selecting this record and clicking【Restore】 Click【Close】to exit. 5.2.5 Managing Log Click menu【System】--【Managing Log】, following springs: 54 This log records all the operations of every administrator. Select【Administrator】 and the time range then click【Search】to see what operations have been done by this administrator within the selected time range, which makes it possible that the multi-administrators can use the software at the same time. 5.2.6 Set Database Link This system adopts the database interface of Microsoft ADO. The acquiescence database is Access2000.The defaulted is att2003.mdb under the main setup directory. You can set up the database linking again according to the actual conditions. When the following mistake appears, you should link database again: Click 【Database Linking】in system menu, the following springs. Input the database name or click the button to select the correct database file. . Notice : you can click 【Test connection】to test the connection correctness of the database. 5.2.7 Exit System Click 【Exit System】in System menu. The following menu springs. 55 Click ok to exit management software and return to Windows system. 5.3 HR Management Click 【HR Management】on the main menu, Following springs: 5.3.1 Department Management Click 【Department Management】 in the 【HR Management】menu, springs the following window: Add a new department Click 【Append】, input the new department name and click 【Save】to add a sub department for the chosen department. Note: when you want to do some other operations to the new department ,you need to set the privilege of modifying the new department for the administrator in the 【administrator set】first (choose the new department you just added in the “Department operable”). Department modification Choose the department , click 【Modify】 and input the new department name, then click 【Save】. Delete the department 56 Choose the department , click 【Delete】and then click OK to complete. Notice: repetition of department name is not allowed; if there are staffers existing in the deleted department, those staffers will be automatically transferred to department of head office. 5.3.2 Staffer Maintenance Click 【Staffer Maintenance】in 【HR Management】 menu, the following window appears: Staffer’s adding: Choose the department that the staffs belong to, clicks 【Append】, and input staff’s information, then click 【Save】to complete. Note: 1. The items of “Calculate attendance”, ”Calculate overtime”, ”Rest on holiday” below “Attendance Set” is correlated with report, please set it correctly. If the checkbox of “Calculate Attendance” of this staffer is not checked, there will be no statistical result for this staffer in the report. If checkbox “Calculate Overtime” is not checked, the statistical result of overtime of this staffer will be 0, unless he had 57 【Temporary Shifts】which defines as overtime working; If the checkbox of “Rest On Holiday” is not checked, holidays will make no effect on the shifts for this staffer; if the checkbox of “Rest On Holiday” is checked, thus for those holidays, even there are shifts on those days for the staffer, those shifts will be invalid. And if there are time attendance records of this staffer, those records will be deemed as free overtime. 2. Staffer No. is exclusive as well as the first digit cannot be 0! Staff's modification: Choose the staff, click 【Modify】 and input the new information, then click 【Save】. Staff’s deletion: Choose the staff, click 【Delete】and then click 【OK】 to complete. Please be cautious when delete the staff since all this staffer’s time attendance records, shift arrangement will be deleted at the same time. Import staffers: Click【Import】, staffer importation window springs for importing staffers. Staff’s department shifting: Choose the staff you want to shift the department, click 【Transfer】 and following window will pop up: Select the new department and click 【OK】to complete. Export Staff: Right-click on staff list and the following window pops: 58 All displayed fields in staff info list can be defined through submenu of “Column”. Meanwhile, the modification will take effect and be saved. Click【Show all columns】to display all fields in the list. Click【Export Data】and following window will prompt: Please select your target directory of your export, file format (txt or xls) and the file name. Click 【Save】 to confirm the operation. Notice: Exported Excel file can be used as backup information and can be imported again. 5.4 Attendance Management Click【Attendance】in the main menu, following springs: 5.4.1 Holiday List Click 【Holiday List】 in 【Attendance】 menu. The following appears. 59 Add festivals or holidays Click 【Append】 then input the festival or holiday name and the rules. Click 【Save】when ready. Modification of festivals or holidays Select the festivals or holidays you want to revise, then click 【Modify】 and input the new information. Click 【Save】when ready. Deletion of festivals or holidays Select the festivals or holidays you want to delete, then click 【Delete】 to perform Deletion of festivals or holidays. 5.4.2 Timetable and Shift The relationship between shift and timetables: Shift setup should be done in two steps: First, setup necessary timetables. Second, setup shifts. One or more timetables can be included in one shift. Timetable is the time period between On-duty and Off-duty required in the company rule. For instance, the company rule requires the working hours be 08:00-12:00 and 13:00-17:00; so 08:00-12:00 and 13:00-17:00 are two timetables. If such a shift needs to be setup, these two timetables should be setup first. Here, we use time table “morning” to indicate “08:00-12:00” and time table “afternoon” to indicate “13:00-17:00”; so two timetables have been setup. (Please refer to the following chapter for details of how to add time tables) and then we can add a shift such as “Normal shift” in which “shift cycle” and “cycle unit” will be setup. Then we should add two timetables “morning” and “afternoon” so that a shift setup is completed. Brief introduction is mentioned here for you to get a general picture of the relationship between timetable and shift. The details of shift setup will be found in the next two sections. Timetable maintenance: 60 Click 【 Timetable and Shift 】 in 【 Attendance 】 menu. The following window appears. Pic5.2 Timetable Maintenance Add a new timetable Click【Append】and enter the corresponding information: 【Timetable Name】For instance: Day Shift 【On duty Time】(08:00) 【Off duty Time】(17:00 ) 【Begin Clock-in Time】(07:00) 【End Clock-in Time】(13:00) 【Begin Clock-out Time】(16:00) 【End Clock-out Time】( 20:00), 【Late error allowance】(5) 【early error allowance】(5) 【Count as work day】(1) 【Count as work time XXX minutes】(480). Tick 【Must C-In】and 【Must C-out】, Finally click【Save】to confirm. (Please note: Every item should be setup in timetables with no blank left.【Begin Clock-in Time】and【End Clock-in Time】setup the valid time period for clock-in. Records out of this time range will be treated as invalid ones. For instance【Begin Clock-in Time】 is 07:00 and【End Clock-in Time】is 13:00. If clock-in record is 07:01 or 12:59, they are valid records but if clock-in record is 06:59, it is invalid. Besides, 【Begin Clock-in Time】 and 【End Clock-in Time】 can be more than one day (meaning 【End Clock-in Time】 61 can be before 【Begin Clock-in Time】) but it can’t be longer than 24 hours. 【Late error allowance】means how many minutes after【On duty】are treated as “late”,【Early error allowance】means how many minutes before【End Clock-in Time】 are treated as “early”; 【Count as work day】and【Count as work time XXX minutes】 are used in calculating business leave, leave, absence and overtime. Checking 【Must C-In】and【Must C-out】 or not will affect the result of calculation. If 【Must C-In】 is checked and the timetable is included of Staff A’s shift, he will be either considered absence or treated according to 【Not clock in count as late XXX minutes】 in 【Parameter Settings】If he didn’t clock in or ask for leave. Otherwise, even if there is Off duty record for him only, his attendance will be treated as normal. The timetable Modification Select the timetable name you want to revise, and click 【Modify】, then input the new information, click 【Save】when finished. The timetable Deletion Select the timetable you want to delete, click 【Delete】, and click 【OK】to make sure. (Please note: Begin Clock-in Time and End Clock-in Time makes the valid time range for Clock in. Clock in out of this time range will be treated as invalid records. It is the same with Clock-out time. Please setup in accordance with practical situations.) Example——Add a timetable: Complete process for adding four timetables: Day shift 08:00 - 17:00 Morning shift 04:00 - 12:00 Noon shift 12:00 - 20:00 Night shift 20:00 - 04:00 (Other information can be setup according to practical situations. Please refer to Pic5.2. Please note there should be no blank left.) Shift Maintenance Click【Shift Maintenance】in Pic5.2 and the following window pops up: 62 Add a shift: Click【Append】and enter corresponding shit information in 【Shift Name】such as : normal shift 【Cycle】(1), 【Cycle Unit】(week), and click【Add】,select the timetables and time range required in this shift in the springing window (see the Pic5.3 below) For instance, select the timetable – Day shift and select from Monday to Friday and then click 【OK】, back to this window and click 【Save】 to complete. (Please refer to the example for details.) Pic5.3 Add a timetable Delete the timetable: select the timetable you want to delete and click【Delete】. Clear the timetable: clear all the timetables of the shift. Arrange the shift automatically: when a staffer has several shifts during one period, 63 he need to finish all the shifts if it is not arranged the shifts automatically otherwise he will be regarded as absence ; if you select the【Arrange the shift automatically】,just finishing one shift of the period is reared as normal attendance. Modify a shift: Select the shift to be modified and click【Modify】, and enter new information in 【Shift Name】etc., click【Save】to complete. Delete a shift: Select the shift to be deleted and click 【Delete】. Example——Three shifts: Add “Three shifts” Shift (Please note: It is assumed that the shift goes around every week, cycle every three weeks and staff is on holiday every Saturday and Sunday.) Step 1: Click【Append】,enter “Three shifts” in 【Shift Name】,set【Cycle】to “3” and 【Cycle Unit】to “week”. Please see the picture below: Step2 Add corresponding working hour timetable in accordance with “Cycle”: first week (morning shift, from Monday to Friday) Click【Add】and the following window pops up: 64 Select the timetable “Morning shift” to be added and select the time range to apply to this timetable ”from Monday to Friday of the first week” and click 【Ok】to complete the setting of the first week. The second week (afternoon shift, from Monday to Friday) Click【Add】, make corresponding operation in the springing window(see the result below): Click 【ok】to complete the working hour setting for the second week. The third week (night shift, from Monday to Friday) Click【Add】, make corresponding operation in the springing window(see the result below): 65 Click 【ok】 to complete the working hour setting for the third week. After the completion of above steps, please don’t forget to click 【Save】and the setup of “three shifts” will be done(see the picture below): 5.4.3 Staffer Scheduling Click 【Staffer Scheduling】 in【attendance】menu. The following window appears: 66 Pic5.4 Staff scheduling Choose the department or several personnel that need to arrange shifts, click 【Arrange】, the following window appears: Pic5.5 Add a new shift Add a new shift Select the corresponding shifts, for instance: The commencement date and deadline of this shift of “normal class ", click 【Add】 button and then click 【ok】 in Pic5.5 to finish the adding of new shifts. 67 Please note: If the cycle unit of scheduling is “week” and the amount of cycle is more than 2, the starting date should setup as “Sunday”. If the cycle unit of scheduling is “month” and the amount of cycle is more than 2, the starting date should setup as “1st day of a month”. Deletion of the shifts Select the shifts in the shifts form which you want to delete, click Delete button, and click ok on the pop up dialog box to finish the deletion. Arrange a Temporary Shift When one or many staff's working time needs to be changed temporarily, you can arrange a temporary shift. Click add 【temporary】 the following window appears: Click 【OK】 and the temporary scheduling can be operated. Then click【Add】 and the following window will pop up: Click 【OK】and the timetables will be saved. Click【Save】and the temporary scheduling will be saved. 【Delete】:Delete the selected timetable; 【Clear】:Delete all the timetables in the current time range; 【Cancel】:Delete the existing temporary scheduling in the selected time range; 5.4.4 Attendance Records Click 【Attendance Records】in 【Attendance】 menu, the following appears: 68 Inquiry of attendance record Select the department, staff, the beginning and ending time that need to inquire about, then click search, you can get the corresponding attendance record. Attendance record report form preview Click【Report】 when the window displays the attendance inquiry records, you can get the report form automatically. 69 Attendance records exporting If need to lead out the attendance record, only need to click export, you can lead out the data inquired. (File format: txt, xls) Click【Modify Log】and the log-modifying window will be called for reviewing the modification log of time and attendance records. 5.4.5 Attendance Calculating and Report Inquiry of report form: Click【Attendance Calculating and Report】in 【Attendance】menu, the following window appears: 70 Pic5.6 Attendance Calculating and Report Select the beginning, the ending date and the department and staff that need to be calculated and then click 【calculate】, the following window appears: There are four Tabs of information after search and calculation which can be 71 viewed respectively: 【 Attendance Exceptions 】 :Display the dealt result of the original attendance records; 【Shift Exceptions】Display Staff’s attendance result in the scheduled time period; 【Other Exceptions】Display Staff’s leave, out and overtime etc.; 【Calculated Items】Display all Staff’s calculated items such as “normal”, “actual”, “late”, “early”, “absent”, “overtime” etc. Please note: When dealing with “Out” calculation, there should be “Out back” and only “Out” and “Out back” in one shift can be calculated. Working hours in the report=”Actual” -”Late”-”Early”-”Out” Exceptions of attendance records dealt with: Open the attendance exceptions option card to deal with the records: We will see such mistakes as “state mistake “,” invalid record”, “repeated record”, etc. are described. (If we will revise to write down, click the right key and springs the following menu): 72 The definition of each option as follows: 【Export Data】:Export the data in the current attendance record list to a file in txt or xls format; 【Create report for current grid】:Generate report based on the data in the current attendance record list for preview and print; 【Change state】:Change the selected attendance record to a new state. Manually deal with the attendance record according to the practical situation; 【Delete selected】: mark the record as manual deleting, deleting when save it; 【Cancel operation for selected】:Cancel revision to this record; 【Deal with and save】:You can save the records that have been treated. If you want to see the changed records, you can click 【modified record log】 in system menu; 【Filter the record】:If there are too many records, you can filter them, and keep down the corresponding record you want; 【Columns】:Define the fields displayed. Meanwhile, the modification will take effect and be saved; 【Show all columns】:Display all fields in【Columns】; Please note: We can manually modify the record as stated above to assure the veracity of the report according to the practical situation. If there is disoperation, the records can be recovered through【Modified Record Log】in【System】. Right Click in【Shift Exceptions】the following shortcut menu will pop up: 【Other Exceptions】,【Calculated Items】the following shortcut menu will pop up: 73 The operation is the same as stated above. Report: Click【Report】in pic5.6 and the following menu will pop up: Pic5.7 Exception menu 【Attendance Report】:Calculate staff’s attendance record; 【Daily Report】:Calculate staff’s daily attendance record; 74 【General Report】:Calculate all staff’s attendance items such as “normal”, “actual”, “late”, “early”, “absent”, “overtime” etc; 【Exceptions Report】:Calculate staff’s “out”, “overtime”, business leave/personal leave” etc; 75 【Create a Report For Current Grid】:Print preview of the current displayed grid. For example: Attendance Report Print Report: Toolbar of report preview is as the following picture: 76 Adjust the ratio of preview content; Open the existing report file; Find the report file (*.frp) to be opened, select it and click【Open】to see the report. Save report to file; Select the directory to save the report to, enter the file name and click【Save】to complete the backup of the report for future check or copying to another computer for printing; extension file name is “*.frp”. Print Report; Close Preview Data Export: In picture 5.6, click【Export】 and the displayed data of grid in the current window will be exported to a file(*.txt or *.xls). It has the same function as 【Export Data】when right clicking in each grid. Exceptions dealt with: In pic5.6, click【Exception】 and the following menu will pop up: Click options one by one in the menu and the following modules will pop up respectively:【Append record】, 【Late/Early Collectively】,【Business Leave/leave】 and 【Modified Record Log】.If the calculation result is incorrect for some staff, first, please check whether there is leave or forgetting Clock in or Clock out for this staff. If there is, please deal with the records through above menu. Please refer to the next chapter for more details. 5.5 Deal with Exceptions Click 【Exception】 on the main menu, following springs: 77 5.5.1 Away on Business/ Leave When the staff can't punch in/out because of going out on business or asking for leave, in order to guarantee the exactness of the final statistics, we should make these settings through this function. Click 【Away on Business/ Leave】 in 【Exception】 menu, the following interface springs: Deal with staff away on business / leave: Click 【Append】, then select the proper department, staffer ID, beginning time, ending time, leave type, and click save when ready. Modification of staff away on business or leave: Select the appointed staffer whom you want to make this modification to, and click 【Modify】. Then you can modify the relative information, click 【Save】 when ready. Deletion of staff away on business or leave Select the appointed staff and the relative information you want to make this deletion, and click 【Delete】. 5.5.2 Append Record If a staffer didn’t punch in because of special reason, you can use this function to append the forgetting attendance record. Click 【Append Record】 in 【Exception】 menu, the following window Springs: 78 Select the relative items and click 【append】 when ready. 5.5.3 Append Record Collectively When part or all of the staffers in a department did not punch in/out because of some reasons, please you can use this function to add punching in/out collectively, click 【Exception】--【Append Record Collectively】,following springs: Select the department, thus the staffers in the department will be listed in the staffer list, select the staffers whom you want to add records on to, then select punching in or out and the time, click【Ok】to finish. 5.5.4 Dealing with Collectively Late / Leaving When collectively coming late / leaving early takes place for some allowable reasons, you can use this function. Click 【Dealing with Collectively Late / Leaving】 in 【Exception】- menu. The following springs: 79 Steps as follows; 1. Click “Dealing with Collectively Late/Early”; 2. Select time range for “ignore clock in record”; 3. Select the “modified clock in time” 4. Search staff through department or shift; 5. Select staff; 6. Click【OK】to confirm. 5.6 Data Maintenance Click 【Data Maintenance】on the main menu, following springs: 5.6.1 Import Staffer List Click 【Import Staffer List 】 in【Data Maintenance】 menu. Pop up the following window: 80 Click to select the personnel list file for importing. Select the right file which can be in *.txt or MS Excel ( *.xls) formats, then click 【open】to get back to above window, click 【ok】to start! The definition of (*.txt) data format as follows: This format of file only can import the staffer info of “ID, Name, and department”; The format of data must follow: Staffer ID + Tab + Name + Tab + Department; The information each staffer takes one line, no blank line between one another. See following: The definition of MS Excel(*.xls) data format as follows: This format of file can import the staffer info includes: ”Staffer No., Name, 81 Department, position, Employ Date, Telephone, Address, Sex, Language, Comment”; put those items on the head line and input the items by order, the order can not be changed. 5.6.2 Import Attendance Record Click 【Import Attendance Record】 in 【Data Maintenance】 menu, Springs the following window: Click 5.6.3 to select the attendance record file for importing, and click【ok】 to start. Clear Obsolete Data Click 【Clear Obsolete Data】 in 【Data Maintenance】 menu, springs the following window: After your system is used for a long time, you will get a large number of obsolete data in the database. It ties up the hard disk space and influences your system operation speed. At this moment you can use this function to clear these useless data. 82 Select the ending date for your data clearing. And click 【clear】 to complete this operation, after the clearance, the system will prompt asking you to compress the database as following shows, select 【ok】 to finish. (Note: you can only clear the data of one month ago) 5.6.4 Compress Database Click 【Compress Database】in【Data Maintenance】 menu to compress and repair the database 5.6.5 Backup Database For ensuring the safety of data and recoverability, we advise you to back up the database regularly. Click 【Backup Database】in 【Data Maintenance】menu, then select the route to backup the database. Click【save】when ready. Back up the database manually: Copy the Att2003.mdb from the installation directory to the route you want to backup the database, so if the system collapses, you just copy Att2003.mdb to installation directory over again after re-installation. 5.6.6 Initialize System Click 【Initialize System】 in 【Data Maintenance】 to initialize the system. (Note: After the system is initialized, all information will be lost, the system will get back to the state when just installed. Please make sure that you want to initialize the system. ) 5.7 External Program Management Click 【External】 on the main menu, following springs: 5.7.1 External Program Management We can append external program into time attendance program for convenient operation. Click【External】-【External Program Management】, following springs: 83 Firstly, we can click 【 Append 】 to add a new menu. For example, we need “calculator” when we are operating, input “Calculator ” into the input field of 【Program name 】 , and then input “C:\WINDOWS\system32\cacls.exe” into the input field of Executable file or browse to find the calculator program, click【Save】to finish at last. We will see【Calculator】when you open【External program management】over again: 5.7.2 Connect to Time Attendance Machine Click 【 External 】 - 【 Connect to Time Attendance Machine 】 springs the communication interface between the software and the machine which can control the current machine connected with the computer, it can collect the records from the machine, upload and download staffer info & clear the old data & modify the time on the machine. Find detail on clause《Time and attendance management & communication》. 84 Chapter6 FAQ Frequently asked questions and answers 85 6 FQA 6.1 The machine can't be connected with PC. Reason Solution 1. Communication method not set correctly Select the correct communication method 2. Cable not plugged firmly or cable hardware problem 3. Not able to connect COM (wrong COM No) 4. Not able to connect TCP/IP (wrong setting) Plug the cable firmly or change another cable 6.2 Please enter the right COM No Refer to the manual for connecting Time Attendance terminal No records found though staff have clocked in/out. Reason Solution 1. Unit power break for a long time (time turn to zero as default) Synchronize the time 2. Attendance records is not new Download the latest record. 6.3 We don’t use the ID + card mode to get verified. Reason Solution 1. Wrong ID entered Enter the right ID 2. This user has no right to use 1:1 identification method Set 1:1 identification method for this user. Please note: Should you have any other problems, please kindly email us the log files in zip or rar (The log files are in Log directory in the installation directory of the software)! 86 Chapter7 Appendix The main theme of this chapter is the additional information of this T & A including access control cable connection. 87 7 Appendix 7.1 Interface Illustration 12V Power in Ground Wiegand Signal D0 Wiegand Signal D1 RS485 Positive RS485 Negative Dry contact signal connector (normal close) Dry contact signal public connector Dry contact signal connector (normal open) Vin+ GND W0 W1 485A 485B NC COM NO 88


