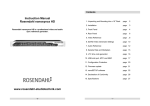
1
Instruction Manual
Rosendahl bonsaiDRIVE
The Rosendahl bonsaiDRIVE is a professional portable video
and audio multitrack recorder.
www.bonsaidrive.com
-0-
-1-
Contents
Declaration of Conformity
I. General:
Rosendahl Studiotechnik GmbH
Andechser Str. 5
D-86919 Utting a.A.
herewith confirm that the product:
Type:
Harddisk Video Recorder
Model:
bonsaiDRIVE
meets the requirements of the council of the European communities relating to electromagnetic
compatibility (Council Directive 89/336/EEC)
Technical Data:
CENELEC EN 55 103-1 + 2
CENELEC EN 61000-4 - 5
1997-06
12/2001
The CE symbol is awarded to high-quality appliances which comply with the European Directive
89/336/EEC or the EMVG (law relating to electromagnetic compatibility of appliances) and which
offer the following significant benefits:
1. Unpacking the unit
2. Mechanics
3. Installing the harddrive
4. Connection details (C1...C24)
5. Connecting a monitor
6. Connecting the remote control
7. Basic functions
8. Recording clips
9. Playing back clips
10. Updating the firmware
page
page
page
page
page
page
page
page
page
page
II. Firmware details
page 26
*Simultaneous and interference-free operation of adjoining appliances
*No unpermitted interference signals
*High resistance to electro-smog
This marking shown on the product or its literature indicates that it should not be disposed with
other household wastes at the end of its working life. To prevent possible harm to the environment
or human health from uncontrolled waste disposal, please separate this from other types of wastes
and recycle it responsibly to promote the sustainable reuse of material resources.
Household users should contact either the retailer where they purchased this product or their local
government office for details of where and how they can take this item for environmentally safe
recycling.
Business users should contact their supplier and check the terms and conditions of the purchase
contract. This product should not be mixed with other commercial wastes for disposal.
-2-
-3-
4
5
6
8
10
12
14
18
20
22
1. Unpacking the unit
2. Mechanics
The unit is available in two powering versions: Mains with built in 90230 VAC switch mode power supply or with 12 volt external DC.
Mains powered units are marked on the outside of the box with “90230 VAC”, DC powered units with “10-18 VDC”. The unit itself is
either fitted with an IEC mains socket or a 4 pin XLR DC input wired
in the standard method.
In order to reduce noise the bonsaidrive does not have a fan. It is
very important that all the ventilation holes on the bottom, side and
top of the unit are kept free for air to circulate. Do not place the unit
on top of another unit which is hot.
Avoid mechanical shock to the unit especially when the unit is on and
the harddrive is running. Switch off the unit before resiting.
Included in the DC version package is a 90-230 VAC mains adapter
with 12 Volt DC output on an XLR 4 pin female plug.
The front panel of the unit is removable and can be used as a remote
control in the studio (with the 5 meter cable provided).
Both versions come with the following accessories:
1 pcs IEC mains cable
1 pcs 9 pin D-SUB cable, 5 meters long, 2 x male plug
1 pcs 9 pin D-SUB update cable, black, 1.5 meters long
4 pcs UNC fixing screws for harddrive
1 pcs PATA-SATA adapter (effective from 2009)
1 pcs Instruction manual, that you are now reading!
On the left side of the unit is an 8 mm dia through hole behind which
is the fixing screw for the front panel.
Please check that all these items are present and contact your dealer
if anything is missing.
-4-
Turn this screw clockwise, i.e. screw it in, to release the remote
panel and remove it form the main housing.
After the left side of the panel is released it can be swung open like a
door and removed.
When replacing the front panel into the main housing, first insert the
panel into the guide post on the right side swing the panel to close on
the left side and when the fixing screw head is opposite the hole, turn
the fixing-screw anticlockwise, i.e. screw out, to lock the panel.
-5-
3. Installing the hard drive
If you have received your unit with the harddrive already built in you can pass
over this section of the manual. When replacing the harddrive at any time
please read this section in detail before proceeding.
Set the address jumpers of the harddrive to MASTER or SINGLE.
Harddrives set to SLAVE or CS (Cable Select) mode will not be
detected!
Remove the 4 black Philips screws (not the Allen screws!) on the top of the
unit.
bonsaidrive has been tested with many different harddrive models. Please
visit www.bonsaidrive.com/bonsaidisks.pdf to download a list of
recommended drives.
Mount the harddrive on its caddy (sockets to the right) with the 4 UNC
screws provided.
The harddrive used on bonsaidrive must have the following specification:
First connect the 4 pin power cable, then the 40 pin flat cable connector.
Harddrive or SSD (solid state disk) with parallel (IDE) or serial (SATA) port.
When removing the harddrive, first remove the 40 pin connector then the 4
pin power supply cable. In this way the harddrive is always grounded when
the data cable is connected or removed.
(Incidentally this procedure is standard for every computer.)
To use SATA harddrives a small IDE to SATA adapter is provided (effective
from 2009).
ATAPI, CD writer, DVD writer or Zip drives are not supported and “NO VALID
DRIVE” is shown on the bonsaidrive display.
Now replace the top cover making certain when replacing the 3mm screws
that they are not cross threaded or screwed in so tight that the thread is
stripped!
The present bonsaiDRIVE firmware can address up to 980 Gigabytes.
Harddrives with higher capacities can also be used but the effective size will
be limited to 980 Gbytes.
Now switch on the recorder with a monitor connected. The bonsaidrive serial
number and the current firmware will be displayed, after which the hard drive
will be searched and identified. If an ATA100 or ATA133 (UDMA4 or 5) is
found then the name and capacity of the drive will be displayed.
Attention! Bonsaidrive must be turned off and disconnected from its
power supply before installing or removing a harddrive.
To be certain: ALWAYS REMOVE THE POWER CABLE!
If no valid hard drive is found the following message will be displayed after
50 seconds:
"NO VALID DRIVE DETECTED"
Only after having detected a valid drive the main program will be started. If
no bonsai format is found on the drive the program will proceed to the
“FORMAT DISC” menu.
Press down the [RECORD] button and then the [◄] button simultaneously to
format 255 empty bonsai formatted clips.
Existing partitions and volumes will be overwritten by this process.
Now you can begin with the recording of a clip (see chapter 8).
-6-
-7-
4. Connections
(C1)
(C2) (C3) (C4)(C5) (C6) (C7) (C8) (C9)
(C21) (C22)
(C10)
(C11)(C12) (C13) (C14)
(C15 - C17)
(C1) Options Ports:
for bonsaiSDI 270 Mbit SDI option and bonsaiLAN Ethernet option.
(C2) Word Output:
1 x BNC socket, 48 KHz Wordclock out for synchronising peripheral audio
units.
(C3) Sync Input:
1 x BNC socket, Genlock in for connection of a PAL or NTSC black and burst
video sync. Note: Accuracy of video sync signals must be within broadcast
specs.
(C4, C5) Timecode Output, Input:
2 x RCA Timecode in, Timecode out for synchronising bonsaiDRIVE with
other video and audio recorders.
(C6, C7) Analog Audio Outputs:
2 x RCA socket. Variable output level per menu up to +9dBU = fullscale.
Low output impedance for driving professional line inputs.
(C8, C9) Analog Audio Inputs:
2 x RCA sockets. Variable input sensitivity per menu up to +9dBU = fullscale.
Input impedance 10 kΩ.
(C10) Mains socket:
Use the IEC mains cable supplied for connecting to an earthed mains socket
90-230 VAC, 50-60 Hz.
(C11, C12) Digital Audio Output, Input:
2 x Optical Toslink sockets. Digital audio interface for simultaneous record
and playback of 8 audio tracks with 48Khz/ 24 Bit in the Alesis-ADAT©
Format.
-8-
(C23)
(C24)
(C18 - C20)
(C13/ C14) MIDI Output, Input:
2 x DIN sockets for the transmission of MIDI signals for MTC synchronisation
and MMC control. Also used for bonsaiDRIVE firmware updates using MIDI
SYSEX.
(C15 - C17) Video Outputs:
3 x BNC sockets. Can be configuered as composite video on C17 and as
Y/C (S-Video) on C16, C15 or as a component signal (Y,Pb,Pr) on C17, C16,
C15.
(C18 - C20) Video Inputs:
3 x BNC sockets can be configuered for composite video input on C18, Y/C
(S-Video) input on C20, C19 or a component signal (Y, Pb, Pr) on C20, C19,
C18.
All inputs are internally terminated with 75 Ω.
(C21) bonsaiREMOTE Port:
9 Pin Sub D for connection of the bonsai remote control.
(C22) GPIOs Port:
15 pin Sub D connector for switching signals. 4 Inputs, 4 Outputs.
(C23) bonsaiDRIVE Port:
9 Pin Sub D for connection of the bonsaiDRIVE to the remote panel.
(C24) Remote Port:
9 Pin sub D, RS422 for remote controlling the bonsaidrive with the Sony ©
P2 Protocol.
-9-
5. Connecting a monitor
Professional monitors are expensive. For this reason people like to
use consumer TVs with an AV input.
Attention! Consumer TV equipment is generally safety class II, i.e.
without earth connection. This is easily confirmed by looking at the 2
pole mains plug.
Earth potential differences up to 100 volts can occur and ground
currents will flow when such TV equipment, when switched on, is
connected to your earthed studio environment.
For example when you connect the consumer TV to the studio
equipment via a BNC connector it is not guaranteed that the shield
makes contact first. In this case the signal input on the middle pin can
be subjected to several hundred volts which no input will survive, the
result being that expensive studio equipment and computer hardware
can be destroyed!
If you still intend using a consumer TV as a monitor it is
imperative that the AV ground is permanently connected to the
studio ground at all times.
This connection can be made using the ground of an audio
input to the TV set (cinch socket shield connection) which can
be permanently connected to the mains earth/ studio ground.
Switch off the TV set. Remove mains plug. Connect the
permanent earth then the AV connection to the studio system.
Then reconnect the TV to the mains and switch on.
The video outputs of the bonsaidrive have 75 Ω source impedance
and must be connected using 75 Ω coax cable and be connected to
single 75 Ω terminated inputs. With connection to 2 inputs in parallel
(2x75Ω) the video picture will be 6 dB darker and with a single input
without 75 Ω termination the picture will be 6 dB brighter.
- 10 -
bonsaidrive supports 4 different analog video formats:
(1) Composite Video (CVBS, German FBAS), a “normal” video
signal. All picture and sync information is transmitted over a single
75 Ω cable. Connection over C17 (CVBS).
(2) Y/C Video (German S-Video) is normally outputted by a small
mini DIN socket and is a 2 signal 75 Ω analog video standard, a
brightness signal (Y) and a colour signal (C). Connections over C16
(Y) and C15 (C)
(3) Component Video (German Komponentensignal) is formed out of
3 component signals (Y, Pb, Pr). Y is brightness, Pb and Pr are two
colour difference signals (Y-blue, Y-red). Connection over C17 (Y),
C16 (Pb), C15 (Pr).
Note: This analog video transmission standard offers the highest
picture quality and should always be used when the monitor has an
component video input.
(4) RGB Video is also a three signal 75 Ω video transmission
standard and offers the same advantages as Component Video. R is
red, G is green with sync siganls, B is blue.
Note: Not to be confused with a computer VGA connection!
RGB video is often used in the SCART connection in consumer TV
equipment and can be connected to the bonsaidrive using a SCART
to BNC adapter cable.
Connections are: C17 (G), C16 (B), C15 (R).
Now connect the monitor to the bonsaidrive with 75 Ω cables and
switch on. If no stable picture is shown, select the required output
format in the “ANALOG OUTPUT FORMAT” menu i.e. COMPOSITE
and Y/C,COMPONENT or RGB.
Note: In order to guarantee at least a black and white picture use the
CVBS/Y output C17 connected to a Y or CVBS input of the monitor.
- 11 -
6. Connecting the remote control panel
The removable remote control panel communicates with the recorder
over an RS422 9-pin Sub D connection and uses the same pinout as
Sony© P2, also known as Sony 9-pin protocol.
In this communication standard pin 5 is not used, but is used by
bonsaiDRIVE for the 5 volt supply to the remote control panel. This
pin 5 on output C21 (bonsaiREMOTE) of the recorder is protected by
a PTC temperature element in the event of a short circuit.
Use the 5 meter long 9-pin Sub D cable supplied or any other 1:1
wired 9 Pin Sub D cable to connect the remote control panel to the
recorder.
RS 422 works with cable lengths up to 100 meters. If you already
have a 9 pin cable system installed or use 9 pin patch fields the
bonsaidrive control panel can be integrated and locally powered with
5 Volts on pin 5.
Attention! The DC input on pin 5 is not protected against reverse
polarity or overvoltage. Be certain that the auxiliary power supply
used is a 5 Volts regulated and can deliver at least 100 mA.
The remote panel can be connected or removed at any time from the
bonsaiDRIVE (also during record) without affecting the function of the
recorder.
At every reconnection the panel does a LED test in which the LEDS
light up consecutively from left to right, after which communication
with the recorder starts.
The remote panel can not be used as a stand alone Sony 9 pin
controller to control other manufacturers' equipment.
- 12 -
- 13 -
7. Basic Functions
With the REMOTE button the serial communication to the recorder
can be switched over to an external Sony P2 controller connected to
C24.
When the REMOTE switch is on (LED lit), the recorder is connected
to the external controller on C24 and all functions of the bonsaidrive
remote panel are deactivated.
When the REMOTE switch is off (LED unlit), the remote panel of the
bonsaidrive is activated and the external controller on C24 is ignored.
The MENU button switches the on-screen menu on and off. The
button is lit with the menu on.
When the MENU is off (LED notlit), the eight buttons on the left are
used for controlling the deck.
Direct Button Functions:
[►]
[■]
[◄]
[LOC 1]
[LOC 2]
[+]
Playback forwards 100% nominal speed
Stop
Playback backwards 100% nominal speed
Recorder stops and goes to locate position 1
Recorder stops and goes to locate position 2
In stopframe mode: 1 frame forwards or clip number ++
(see also menu 075 [+] / [–] keys function)
In playback mode: increase playback speed
[–]
In stopframe mode: 1 frame back or clip number -(see also menu 075 [+] / [–] keys function)
In playback mode: decrease playback speed
[RECORD] no function as direct button
Additional button functions are activated by using the stop button [■]
as a shift button. Hold down the stop button and press the second
button as required.
Stop Shift Functions:
[■] + [►]
[■] + [◄]
[■] + [+]
[■] + [–]
[■] + [LOC 1]
[■] + [LOC 2]
[■] + [MENU]
Fast forward (64x speed)
Fast rewind (64x speed)
Slow motion forwards
Slow motion reverse
Go to clip start, end of previous clip…
Go to clip end, start of next clip…
Switch off unit (Standby)
Instead of a power on/off switch the bonsaidrive has a power down
mode in which the harddrive is put into sleep mode and all AD/DA
converters are switched off. The machine is “woken up” by pressing
any button on the control panel.
Note: the REMOTE button must be off (LED off).
By using the record [RECORD] button as shift, the following functions
can be activated. Press record then the second button as indicated
below:
Record Shift Functions:
[RECORD] + [■]
[RECORD] + [LOC 1]
[RECORD] + [LOC 2]
[RECORD] + [►]
Electronic entry (EE)
Sets locate position 1
Sets locate position 2
Start crash or insert recording
(to enter insert recording the transport must
be in locked playback condition)
Locate 1 and Locate 2 are storable (timecode) positions that serve to
fast return to or loop to a particular position in a recording.
- 14 -
- 15 -
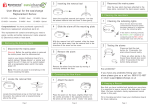
With the menu function activated [MENU] the menu is inserted into
the video picture. See below:
In general the buttons are used to navigate the menu in the following
way:
[►]
Select menu increment +1
[◄]
Select menu decrement -1
[LOC 1] Fast menu navigation tab ++
[LOC 2] Fast menu navigation tab -[+]
Activate selected parameter +1
[–]
Deactivate selected parameter -1
[■]
Confirm selection
[◄] + [RECORD] Confirm erase and format commands
The first green line "◄ MENU 001 ►" tells you in which part of the
menu you are at present. With the cursor buttons [◄] and [►] you
can move form one menu heading to the next.
[LOC 1] and [LOC 2] keys increase/ decrease the menu possition to
the next menu group (+10/ -10).
Please consult the detailed menu descriptions in the second,
“firmware” part of the manual.
When leaving the menus, the menu position will be stored and
reappear at the same position when the menu is called up again.
The list of parameters that can be altered in each menu are
hightlighted grey and appear under the menu header. The
parameters can be changed by using the [+] and [–] buttons.
The menu in the left picture shows Menu 001 "SELECT CLIP" .
Change the clip number with [+] und [–], and use the [►] button to go
to the next menu title.
The information under the menu header are white against a
transparent background and show details about the selected menu
parameter. E.g. MENU 020 "HARDDISK INFO".
The time code burned in at the bottom of the pictures can be altered
in the menu “TC INSERTER" to "LEFT", "CENTER", "RIGHT" or
"OFF".
- 16 -
- 17 -
8. Recording clips
Before beginning a new recording, check the following menu settings:
(1) "VIDEO INPUT"
Turn on the menu by pressing the menu button [MENU]. Use the
replay buttons [◄][►] to reach the menu position "VIDEO INPUT".
You will find a numerically sorted list of the various menus and their
description in the second “firmware” part of this manual. With the [+]
button you can now select the video input.
Go to menu 001 "SELECT CLIP" and select a clip number (1-255)
with the [+][–] buttons. You can note whether a clip is empty, as
opposed to a previous recording by noting "CLIP LENGTH:
00:00:00:00" and a black backgound instead of a video picture.
If all 255 clips are occupied (have recordings) go to the menu
"DELETE CLIP" to erase a clip to free it for recording.
To leave the menu press the [MENU] button again.
"CVBS" (German: FBAS) configures the input to Composite Video on
C18.
"Y/C" configures the input to S-Video on C20 (Y) and C19 (C).
"COMPONENT" configures the input to Component Video on C20
(Y), C19 (Pb) und C18 (Pb).
(2) "RECORD SYNC REFERENCE"
If your input video signal comes from a source which is not
synchronised to your system, e.g. DVD player or consumer VTR,
select "VIDEO INPUT" as sync reference (default setting).
If your input video signal comes from a synchronised video player
and your bonsaidrive is synchronised to the same reference as the
player at the "SYNC INPUT" (C3) select "SYNC INPUT" for the
RECORD SYNC REFERENCE.
To test the video, audio and timecode signals which are connected to
the bonsaidrive inputs, put the machine into elecronic entry "EE"
mode by pressing [RECORD] and [■] simultaneously. (Similar to
Bypass, Loop through in audio equipment.)
In EE mode the bypass video signal is delayed 1 frame (40 ms with
PAL). In contrast all audio signals have only a few samples delay.
This leads to a + 1 frame advance in the sound signal.
To start recording on the harddrive when in the EE mode just press
the play [►] button. If you are not in the EE mode hold down the
record button [RECORD] and then press the play [►] button.
Stop the recording by pressing the stop button [■].
(3) "RECORD MODE"
To record a new clip set the RECORD MODE to "CRASH".
The recorder will record video and 10 channels of audio (2TRK +
8TRK). See part II of this manual for more informations respecting
the other RECORD MODEs ASSEMBLE and INSERT.
(4) "VIDEO STANDARD"
If you wish to record video in NTSC set the VIDEO STANDARD to
"NTSC 29.97ND". In this case the video monitor which is connected
to the bonsaidrive must be capable of showing the NTSC video.
- 18 -
If there is valid timecode on the selected TC input (LTC or MTC
according menu 031), then this time will be taken as the start
timecode of the new clip. If no valid timecode is present then the clip
will start with the default value 00:00:00:00.
When the recording has been stopped the playback position will
remain at the end of the clip. To return to the beginning of the clip
hold down the stop [■] button and press the locate 1 button [LOC1].
- 19 -
If you simultaneously record audio using the optical input C12 then
you must be certain that it is synchronised to the video source being
recorded, to wordclock output C2 or to the optical audio output of the
bonsaiDRIVE.
In other words the audio equipment which is feeding the bonsaidrive
must be sync to either the wordclock or the optical output of the
bonsaidrive or to the audio house sync ( 48 Khz sync to house video
sync); which of course is also synchronising the video source being
recorded by bonsaidrive.
With a sound card without wordclock input, set the sync reference of
the sound card to ADAT audio input and connect the ADAT input of
the card to ADAT output C11 of the bonsaidrive.
If asynchronous digital audio is connected to bonsaidrive there will be
periodic audible clicks depending on the variation of reference
frequency between bonsaidrive and the asynchronous source!
Note: This phenomenon is not limited to bonsaidrive and will occur
with all digital audio equipment which is not synchronised together.
9. Playing back recorded clips
The playback sync reference can be selected in menu "PLAYBACK
SYNC REFERENCE" and can be set to "INTERNAL" or "SYNC
INPUT". If your studio system is not synced to a central video and
audio reference (house sync) set the sync reference to "INTERNAL"
and use the wordclock output C2 as sync reference for your digital
audio equipment.
Select the clip you wish to playback in Menu 1 "SELECT CLIP" with
the [+]/[–] buttons.
Use the direct buttons and stop shift functions as described on page
15. The two locate points will help you to store positions and
playback from required positions quickly and easily.
The timecode value required can be set at any position required by
using the menu "SET CURRENT TC POSITION". For example you
can set the timecode value 01:00:00:00 exactly over the start of the
picture cross on the video.
This will save the annoying offset calculations needed when using
other recorders where only one absolute offset is possible.
Using the menu "RESET RECORDED TC" you can reset the
timecode to the originally recorded clip timecode at any time.
All timecode and locate values will be overwritten by those stored
when moving to another clip or when the machine is restarted.
In the menu "SAVE CLIP INFO TO DISK" it is possible to store the
two locate points and the timecode offset in each clip.
The recorder can also synchronise itself to an external LTC timecode
source. Select the mode required from the "TIME CODE CHASE
MODE" menu. Please read the detailed instructions for this menu.
Note: The specification of the wordclock output fom bonsadrive is
very high (clock jitter less than 1ns RMS) and can be used to sync
the most demanding digital audio equipment without loss of audio
quality.
- 20 -
- 21 -
10 . Firmware Update
The firmware version installed in your bonsaidrive is displayed every
time the unit is switched on and has the format “BFXX.XX”.
To update the firmware you need a computer with either a MIDI or
serial (COM port or MAC-serial) interface, and the respective cables.
Visit www.bonsaidrive.com and download the newest bonsaidrive
firmware file (BFXXXX.DAT) together with a software upload module
(Windows, MAC OSX) called bonsaiLOADER.
Make a serial or Midi connection from your computer to the
bonsaidrive in the following way:
The three buttons [◄] [►] [REMOTE] will light up when the bonsaidrive is ready to accept a firmware update. There are two ways to put
the recorder into this mode:
Method (1): Select menu "FIRMWARE UPDATE" and select as
indicated using the [RECORD] and [◄] buttons.
Method (2): Disconnect the recorder from the power supply, mains or
DC. Now holding down the [◄] and the [►] button, reconnect the unit
to the power supply that was disconnected. After about 2 seconds
the [◄],[►] and [REMOTE] LEDs will light up showing that the unit is
ready for firmware update.
Now start the software "bonsaiLOADER" and select serial or Midiport as just connected in process (1).
Connection to a Serial port:
Remove the remote panel from the bonsaidrive, exposing the 9 Pin
Sub D connector C24, and connect this socket with the serial port of
your computer using the cable included in the bonsaidrive package.
This 9 pin sub D cable with male and female connectors allows
unidirectional transmission of data from a PC-COM port (RS232) to
the Sony 9 pin (RS 422) and can only be used for firmware updates.
Machine control software cannot function with this unidirectional
connection!
Now connect the remote panel C23 to the recorder, C21 with 9 pin
1:1 cable, also provided in the package.
Connection to a Midi interface:
Connect the MIDI output of your computer with the MIDI input of the
bonsaidrive.
- 22 -
Under process (2) load the firmware file from BFXXXX.DAT.
The program indicates the date and the version of the firmware.
After completing process (1) and (2), process (3) becomes active.
Start the upload process which is indicated on the [◄], [►],
[RECORD], [REMOTE] LEDs which light up consecutively.
This process takes a few minutes and is indicated by a progress
bargraph in the software display.
A premature termination of the software update process leads to the
complete loss of the firmware but does not erase the bonsaidrive
BIOS.
To repeat the upload process you must use method 2. Remove the
power supply (if not already removed), hold down the [◄] and [►]
buttons while you reconnect the power supply.
- 23 -
If a CRC error occurs, the software update process is stopped and
indicated by the red [RECORD] LED, without the [◄] and [►] LEDs.
After a successful firmware update the recorder starts and shows the
new firmware version and the serial number.
The previous menu settings are saved but should be verified, as the
new firmware possibly contains new features and settings.
After a prematurely terminated update process all menu settings are
lost and return to the default values.
The upload of firmware versions 00.50 and higher consists of two
parts where the first flashes the bonsaidrive itself and the second the
optional bonsaiLAN module.
Instruction Manual
Rosendahl bonsaiDRIVE
Part II
This part of the manual is a description of software functions
and will depend on the firmware version it describes.
bonsaidrives without bonsaiLAN module installed will boot up already
after the first part of the firmware update.
This manual contains two parts:
(I) the General Information part and
(II) a software descriptive part related to the firmware installed in
which the menu details are described.
- 24 -
- 25 -
Overview of the menu list
The following part describes the implications of firmware version
BF 00.52 from 12th of December 2008. The order and selection
possibilites of the menus described underneath can vary in older or
newer firmware versions.The following menu points are implemented:
001
SELECT CLIP
Page 28
002
DELETE CLIP
Page 28
003
SET CURRENT TC POSITION
Page 28
004-7
SET TC HOURS, MINUTES, SECONDS, FRAMES
Page 28
008
RESET RECORDED TC
Page 29
009
010
011
SAVE CLIP INFO TO DISK
Page 29
DELETE END OF CLIP
Page 30
COPY REGION
Page 30
012
PASTE REGION
Page 31
017
MAXIMUM RECORDING TIME
Page 32
018
VIDEO RECORD FORMAT
Page 32
019
RECORD MODE
Page 33
020
INSERT TRACK ARMING
Page 35
021
VIDEO INPUT
Page 35
022
ANALOG OUTPUT FORMAT
Page 36
023
SDI OUTPUT
Page 36
024
8TRK AUDIO INPUT
Page 36
025
8TRK CH1/2 3/4 MODES
Page 37
026
SDI AUDIO OUTPUT
Page 37
027
2TRK AUDIO OUTPUT
Page 37
028
2TRK INPUT SENSITIVITY
Page 38
029
2TRK OUTPUT LEVEL
Page 38
030
TIME CODE CHASE MODE
Page 38
031
TIME CODE INPUT
Page 41
032
AUTO PLAY MODE
Page 41
- 26 -
040…
Please see bonsaiLAN user manual for detailed menu descriptions.
060
INSERTER
Page 42
061
BATTERY MONITOR
Page 42
062
PEAKMETER INSERTER
Page 42
063
PEAKMETER COLOR RED
Page 43
064
PEAKMETER COLOR YELLOW
Page 43
070
VIDEO STANDARD
Page 43
071
NTSC STANDARD
Page 43
072
STILL & SLOMO PICTURE
Page 44
073
9-PIN MACHINE ID
Page 44
074
GPIO FUNCTION
Page 45
075
[+] / [–] KEYS FUNCTION
Page 46
080
RECORD SYNC REFERENCE
Page 46
081
PLAYBACK SYNC REFERENCE
Page 47
082
SYNC LOCK MODE
Page 48
083
SC-H ADJUST
Page 48
084
CALIBRATE INTERNAL
Page 49
085
COLOR BAR
Page 50
086
DYNAMIC VIDEO OFFSET
Page 50
090
FORMAT DISK
Page 51
091
FIRMWARE
Page 52
092
HARDDISK INFO
Page 52
099
SAVE AND POWER DOWN
Page 52
- 27 -
The menu appearing on screen can be activated by pressing the
[MENU] key. The menus can be navigated by using the [►] and [◄]
buttons and parameters changed by using the [+] and [–] buttons. In
some menus the stop [■] key is used to validate an entry and the
[◄] + [RECORD] buttons are used to confirm erase and format
commands. Use [LOC 1] and [LOC 2] keys for menu navigation.
MENU 001 SELECT CLIP
Press the [+] and [–] keys to select the clips from 001 to 255. The
machine goes to the selected clip and shows the length of the clip,
TC start value, TC standard and the record format. Hold down the [+]
or [–] key to get to the automatic decrement [–]/increment [+] mode.
This mode counts the clips slowly up or down depending on which
key is pressed and changes to a fast count after holding down the
respective key for more than 5 seconds.
positon changed to 01:00:00:00. The offset of the first frame of the
selected clip is then automatically calculated.
Use the normal transport functions to locate the clip at the required
position.
Press the menu key and go to menu SET CURRENT TC POSITION.
Press the stop key [■] to go to menu SET TC HOURS. Using the [+]
and [–] keys set the hours. Using the play key [►] go to the menus
SET TC MINUTES, SECONDS, FRAMES in order to set minutes,
seconds and frames.
Press the [►] key again to reach the menu SAVE CLIP INFO TO
DISK to store the values entered on the hard disk.
Note: If the values are not saved then they will only be retained until
the clip is changed.
It is also possible during active CHASE TC mode to trim the offset
"on the fly" in order to sync picture and sound empirically.
MENU 002 DELETE CLIP
MENU 008 RESET RECORDED TC
To erase a clip use the [+] and [–] keys to select the appropriate clip
as in menu SELECT CLIP. The size of the clip will be shown (SIZE
XX GBYTE). Hold down the [RECORD] key and then press the [◄]
key to delete the selected clip. An erased clip will be shown on a
black background and size "0 GBYTE" indicated. If menu 019
RECORD MODE is set to WRITE PROTECTED DISK it is not
possible to erase or modify clips.
As already described under SET CURRENT TC POSITION, at the
start of recording the time code value of the first frame is stored as
offset. The original offset value can be restored at any time by going
to menu RESET RECORDED TC and pressing the stop [■] key.
MENU 003 SET CURRENT TC POSITION
MENU 004-7 SET TC HOURS, MINUTES, SEC, FRM
Time code in bonsaidrive is not recorded on a separate track, but is
regenerated from a fixed offset. At the beginning of a recording the
time code of the first frame is stored as offset. During playback time
code is generated depending on the clip position and the recorded
offset.
In the menu SET CURRENT TC POSITION it is possible to redefine
the offset in a freely selected position. For example a clip can be
positioned on the start mark of a film and the time code offset at this
- 28 -
To store this value as present offset on the harddrive use the menu
SAVE CLIP INFO TO DISK. Otherwise the original offset will only
remain till the next time the clip is changed.
MENU 009 SAVE CLIP INFO TO DISK
For every clip on the harddrive there is a so called clip info sector. In
this section such data as clip length, TC offset and format, original
record offset, locator points, clipname and metadata are stored.
When selecting a new clip this data is read into the system and for
this reason the changed working data such as offset or locator points
must be stored before changing to another clip.
Go to menu SAVE CLIP INFO TO DISK and press the stop [■] key to
store the (new) clipdata to the harddrive.
- 29 -
MENU 010 DELETE END OF CLIP
This function deletes the section of a recorded clip from the current
transport position until the end of the clip. This command is useful
when a recording became too long because it was not stopped in
time.
Switch the menu off and use the transport keys to locate the desired
new end of the current clip. Select MENU 010 by pressing the
[MENU] key. Hold down the [RECORD] key and then press the [◄]
key to delete the marked end of the selected clip.
If the marked endpoint (LOC1) is set before the startpoint (LOC2) a
error message will occur: "ERROR: OUT BEFORE IN".
The length of a region is called DURATION and displayed in this
menu in time code format (hours:minutes:seconds:frames).
The bonsaidrive clipboard is limited to 311.296 frames
(about 2.88 hours at 30 fps).
Use the [+] and [–] keys to navigate in-between different clips.
MENU 012 PASTE REGION
Note: Previously locator positions which are not anymore inside the
clip range are automatically set to the new created end of clip.
This command adds a region you have copied before using the
COPY REGION command to the end of the currently selected clip.
The erased disk space is available for new recordings.
Use the [+] and [–] keys to navigate to the clip where you want to add
the region. The DURATION of the clipboard is shown in this menu as
well.
MENU 011 COPY REGION
Menu 011 COPY REGION and MENU 012 PASTE REGION allow
you to copy a section of a clip and paste it to the end of an other or
empty clip.
LOC1 and LOC2 markers define the start and endpoints of the
region. Switch off the MENU and use the transport keys to locate the
beginning of the region you want to copy.
Hold down the [RECORD] key and then press the [LOC1] key to set
the start point of the region (IN).
Use the transport keys to locate the end of the section you want to
copy.
Hold down the [RECORD] key and then press the [LOC2] key to set
the end point of the region (OUT).
Press stop [■] key to paste the clipboard contents to the end of the
selected clip.
The display indicates "BUSY…" during the paste process and
"DONE" when the paste procedure is completed.
A so called crossfade is processed for all 10 audio channels at the
edit point to avoid the typical "pop" noise which is generated when
audio signals are hard edited.
The copy & paste procedure does not duplicate the video and audio
material data on the harddrive. Therefore no additional hard drive
space is used and the whole process takes just a few seconds.
Select MENU 011 COPY REGION and press the stop [■] key to copy
the selected region to the bonsaidrive clipboard.
The display indicates "BUSY…" during the copy process and
"DONE" when the copy procedure is finished.
On the bonsaidrive harddisk each frame is stored individually and
can be used independent by each of the 255 clips. As long as one of
the clips uses a specific frame this frame and its diskspace are write
protected.
- 30 -
- 31 -
Example: You have copied a region from clip 001 and pasted to clip
002. Now you DELETE clip 001. The copied frames are still reserved
by clip 002 and will not be overwritten by new recordings.
MENU 017 MAXIMUM RECORDING TIME
bonsaiDRIVE recordings are organised in several CLIPS.
The maximum recording time can be set to SINGLE or MULTIPLE
CLIPS with a duration of 240, 120, 60 or 30 minutes.
When set to SINGLE CLIP 60 MINUTES for example the machine
stops automatically a recording after 1 hour. Of course you can also
stop a recording at any time manually by pressing the stop key.
When set to MULTIPLE AT 30 MINUTES the machine stops
recording the first clip after 30 minutes and starts to record a
following clip with increased clip number automatically.
MENU 018 VIDEO RECORD FORMAT
From firmware version 00.40 there are two different video codecs
implemented:
(1) bonsaidrive LOSSLESS
This is our proprietary Huffman codec used in all earlier firmware
versions.
This codec consumes about 40-60 Gbyte/ hour and does not modify
the video data. Data reduction is achieved by Huffman coding and
the coded and decoded data is identical.
(2) bonsaidrive LOW RES
For some applications the high uncompressed video quality is not
required and instead less disk space consumption desired. The new
bonsaidrive LOW RES codec consumes about 15-25 Gbyte/ hour
and allows you to record up to 40 hour on a single 750 Gbyte disk.
Only new clip recordings (RECORD MODE = CRASH) will take over
the video record format selected in this menu. ASSEMBLE or
- 32 -
INSERT recordings are automatically executed in the format of the
existing clip.
In MENU 001 "SELECT CLIP" the format of each recording is
displayed: LOSSLESS or LOW RES together with the video standard
PAL / NTSC DROP or NTSC NON DROP.
MENU 019 RECORD MODE
In this menu the record mode can be selected with the [+] and [–]
keys. From firmware BF 00.30 the following modes are available:
WRITE PROTECTED DISK
CRASH
ASSEMBLE
INSERT PREVIEW
INSERT RECORD
WRITE PROTECTED DISK means that all harddrive write
functions are disabled, including SAVE CLIP INFO TO DISK,
DELETE CLIP and FORMAT DISK.
This allows additional protection against accidental recording over or
deleting of files in certain applications.
The selection of CRASH puts the video channel and all 10 audio
channels in a record ready mode. A CRASH recording automatically
assigns the next free clip number from current clip number position.
CRASH recordings are stopped using the stop [■] key.
Selecting ASSEMBLE record mode sets the TRACK ARMING in
MENU 020 automatically to 8TRK + 2TRK + VIDEO. To enter an
ASSEMBLE recording the unit must be in the locked play forward
condition. Therefore press the play key [►] to start a locked playback
forward. After one or two seconds when the units is locked hold the
[RECORD] key down and press the play key [►] to start an
assemble recording. Press the stop [■] key to finish and exit the
assemble editing.
ASSEMBLE recordings perform a so called "clean in", which means
a seamless picture editing at the IN point together with a smooth
- 33 -
audio crossfade. The endpoint of the recording will become the new
end of clip and all later material of the clip recorded previously will be
deleted ("dirty out").
Advise: Make a copy of the complete clip using the COPY and
PASTE functions before executing ASSEMBLE edits.
Using record mode INSERT it is possible to overlay only selected
audio tracks with smooth audio crossfades at the record IN and OUT
points. The PREVIEW mode emulates the edit without writing to the
harddisk. INSERT RECORD writes new audio data to the disk.
Note: audio insert recordings affect also all copies of the
material when used in other clips (created with COPY and
PASTE functions).
This means you can not backup the material with the copy and paste
functions because audio insert recordings will also change the copy.
All editing features including track arming and auto edit can be
remote controlled via Sony P2 protocol.
See PDF document bonsaidrive 9-pin implementation for further
information.
To enter a INSERT recording manually please first press the play key
[►] to start a locked playback forward. After one or two seconds
when the units is locked hold the [RECORD] key down and press the
play key [►] to start the insert recording. Press the play key [►]
again to leave the insert recording mode.
Do not use the stop [■] key instead, because this produces a "dirty
out" without audio crossfade processing at the out point.
MENU 020 INSERT TRACK ARMING
The bonsaidrive records 10 audio channels organised in one 8 track
and a 2 track section (2TRK, 8TRK). The 2TRK section is internally
mapped as channels 9-10. The track arming is restricted to a
fragmentation of one side records where the other side is in playback
mode. Therefore the following combinations can be armed:
OFF
8TRK 1-2
8TRK 1-4
8TRK 1-6
8TRK 1-8
8TRK 1-8 + 2TRK
2TRK
2TRK + 8TRK 7-8
2TRK + 8TRK 5-8
2TRK + 8TRK 3-8
2TRK + 8TRK + VIDEO
Only video inserts are for technical reasons not possible
(variable length of the video codec).
Note: Selecting the record mode MENU 019 to ASSEMBLE arms
all audio channels + video automatically. Check MENU 020
before you start a INSERT RECORDING to avoid unwanted
overwriting of your material.
The audio level inserter indicates armed track pairs with red markers.
MENU 021 VIDEO INPUT
Select the video input used with the [+] and [–] keys. The following
selections are possible: CVBS (Composite or also called FBAS), Y/C
(S-video), COMPONENT (Component signal) and GBR ( RGB-video
signal, G on C20, B on C19 and R on C18).
With installed SDI board also appears menu item SDI.
An additonal information on input formats is available in chapter 8
“Recording clips" (I, page 18).
- 34 -
- 35 -
MENU 022 ANALOG OUTPUT FORMAT
MENU 025 8TRK CH1/2 CH3/4 MODE
Use the [+] and [–] keys to select the analog output format.
When CVBS & Y/C is selected the following signals are output:
Composite (FBAS ) video signal on C17 and a Y/C (S-video) signal
on C16 and C15. With COMPONENT selected an analog component
signal on C17-C15 is output. Select GBR to output an analog RGB
video signal (G on C17, B on C16 and R on C15).
Dolby E is a technology to transmit compressed multi channel audio
over a single uncompressed AES/EBU audio channel.
In the AES/EBU status bits exists a "non audio" flag to indicate that
the data stream is used for other datatypes than pcm audio.
Embedded SDI audio also transmits these AES/EBU status bits.
You will find a detailled description of these formats in chapter 5
"Connecting a monitor" (I, page 10).
This setting allows you to set pair 1-2 and/ or pair 3-4 to 20 BIT
DATA mode for Dolby E recordings.
Set both pairs to PCM audio for standard audio use.
Selecting 20 BIT DATA also disables the audio crossfade processing
on the respective channels (INSERT RECORD, PASTE REGION).
MENU 023 SDI OUTPUT
With you have installed the optional SDI board you can select
between two different SDI video output modes.
Setting PROGRAM ONLY outputs the video signal without any
graphic insertions.
PROGRAM & INSERTS routes the onscreen inserts and the menu to
the SDI output.
The analog outputs do always send program and inserts independent
of this setting.
MENU 024 8TRK AUDIO INPUT
Choose from OPTICAL ADAT or SDI EMBEDDED AUDIO as source
of the 8 track audio section.
SDI signals with only four embedded audio tracks will be recorded on
channels 1 to 4.
MENU 026 SDI AUDIO OUTPUT
If you have installed the optional SDI board menu 026 configures the
SDI embedded audio signals:
DISABLED no SDI embedded audio is output (blank h-sync)
8TRK 1-8
outputs channel 1-8 of bonsai 8TRK (2 groups)
8TRK 1-4
outputs channel 1-4 of bonsai 8TRK (1 group)
2TRK
outputs bonsai 2TRK audio (1 group)
MENU 027 2TRK AUDIO OUTPUT
The analog 2TRK outputs can also be used for monitoring the 8TRK
audio section in all operation modes (playback, record, insert):
Setting 2TRK (default) outputs the analog stereo signal whereas
8TRK CH 1-2, CH 3-4, CH 5-6, CH 7-8 routes the respective pair of
the 8TRK audio section to the analog outputs.
Note: This routing has no effect to the onscreen peakmeters which
will always display the 2TRK audio section.
- 36 -
- 37 -
MENU 028 2TRK INPUT SENSITIVITY
The sensitivity of the analog 2 track inputs can be adjusted in 3 dB
steps from -6 dBU up to +9 dBU as digital full scale level.
MENU 029 2TRK OUTPUT LEVEL
The full scale level of the analog 2 track outputs can be set in 3 dB
steps from -6 dBU up to + 9 dBU.
MENU 030 TIME CODE CHASE MODE
The time code chase mode is a function that synchronises the
bonsaidrive to an external time code. The machine chases (runs
after) and locks to the external time code. The bonsaidrive requires a
time code signal in the correct time code format, i.e. 25 FPS for PAL
or 29.97 FPS DF/ND for NTSC video formats (see menu 070 VIDEO
STANDARD).
The time code can either be LTC (sometimes describes as SMPTE)
or MTC, Midi Time Code format, and can be selected with menu 031
TIME CODE INPUT.
There are 6 different chase settings:
(1) DISABLE
No synchronisation to external time code.
(2) VARISPEED
In this setting the audio and video follows the speed of the input time
code. The nearest video frame to the current time code position is
shown and the audio channels are output in varispeed with so called
linear interpolation (14 bit). The audio quality is not as good as in the
normal play function which has sample synchronous audio playback.
The picture and audio signals however are output synchronous to the
chase time code.
The state of the varispeed is shown by the lighting up of either the [+]
or [–] keys. [+] means that the play speed is over the nominal value
and [–] under the nominal value.
The varispeed chase mode should be used if it is not possible to
synchronise the master and slave machines to a common house
sync, or if using the bonsaidrive just as a picture player without audio.
(3) GENLOCKED
If the feed time code is locked to the video output of the bonsaidrive
or to a house sync one should use the setting GENLOCKED.
In this mode at the start of play, the first video frames are
synchronised as in VARISPEED above, but after the correct frame
position and video phase have been reached the play speed
switches over automatically to nominal and is not regulated any
more. This status is easily recognised as only the play key lights up
in forward mode.
When using a synchronous time code source, sync is guaranteed by
the fact that both time code and the bonsaidrive are synchronised by
the same sync source.
In normal playback mode the audio signals are not interpolated and
are played back with full 24 bit resolution.
Should the time code and picture not be exactly synchronised, then
- when the error reaches 1 frame - a correction is made as in
varispeed until the error is cancelled. Then genlock mode is switched
in again.
Genlocked chase mode is mostly used in the synchronisation of
professional video machines or when using several bonsaidrives
coupled together.
The frequency of the word clock signal at output C2 and the
digital Audio output C11 do not follow the chase time code
exactly and may not be synchronous with it.
- 38 -
- 39 -
(4) TRIGGER
Midi time code is often output from PC audio workstations.
Depending on the system used there is often too much latency and
jitter in the MTC making it unsuitable for a continuous
synchronisation. To get round this problem, one can use a so called
TRIGGER setting.
In this mode the input time code is only used as a start mark that
triggers the synchronisation. From this point onwards both player and
synchronised machine run in nominal speed and through the use of
an external sync for all machines, sync is guaranteed over long play
times.
Note: One can use the word clock output of the bonsaidrive as 48
kHz word clock reference for the audio workstation.
Similar to GENLOCK mode the input time code and the internal time
code are compared, and when an error of over 1 frame has
accumulated a resync is done to remove the error.
In trigger mode the audio data are not interpolated and are given out
in full 24 bit resolution.
Note: It is advisable to use the chase mode TRIGGER when
synchronising to a MTC source.
(5) LOCK & RELEASE
Once the bonsaidrive has locked to a nominal time code source it
remains in this locked play status independent of the incoming time
code. Only a valid stop command from the bonsairemote or received
via 9-pin or MMC will cancel the locked playback. This mode can be
used to synchronise the machine to so called time code burst
recordings or to lock to fragmentary or faulty time code tracks.
(6) AUTO CRASH RECORD
To enable this time code chase mode you must also set the
RECORD MODE in menu 019 to CRASH.
When a valid nominal time code source is detected the unit starts a
new crash recording with the captured time code. When this time
code source stops or becomes not valid the recording will be stopped
automatically.
- 40 -
Each new detected offset in the time code source causes a new
separate crash recording with an increased clip number.
This chase mode serves for location recordings where each take with
new running time code values from a camera automatically starts a
new crash recording with increasing clip numbers.
MENU 031 TIME CODE INPUT
Select the time code input used for the TC chase mode and for the
TC record mode using the [+] and [–] keys. Firmware BF 00.52
supports LTC and MTC time code sources.
Note: detected 29.97 drop frame time code format is indicated by the
time code inserter with a semikolon ";" in-between the minutes and
seconds digit.
MENU 032 AUTO PLAY MODE
Select one of the AUTO PLAY MODES, "LOOP LOC1... LOC2",
START LOC1, STOP LOC2 or PLAY ALL CLIPS”.
LOOP LOC1... LOC2 plays a continuous loop of which the start and
end points are defined by the two locator points.
START LOC1, STOP LOC2 is an automatic play function that begins
with locator point 1, plays to locator point 2 and stops.
In this way in connection with the GPIO's (General Purpose Inputs/
Outputs) a particular scene can be played back at the press of a
button.
PLAY ALL CLIPS plays all 255 clips successively with “jumping” time
code values on each clip crossing.
When an autoplay function is selected play and shuttle functions
work automatically, moving from the right Locator LOC 2 back to the
left locator point LOC 1.
In order to set a new locator point and move to another play loop
press [LOC 2] to go to the end of the play loop and then press the [+]
key twice (STEP FORWARD).
Now you can move about outside the end point with normal play or
shuttle functions to set a new end point. Start and end points are set
like normal locator points with [REC] + [LOC1] or [REC] + [LOC2].
- 41 -
MENU 060 INSERTER
MENU 063 PEAKMETER COLOR RED
To insert the time code and clip number into the picture the following
positions are available: TC LEFT BOTTOM, TC CENTER BOTTOM,
TC RIGHT BOTTOM, TC & CLIP BOTTOM and the respective on the
TOP of the screen (TC LEFT TOP….).
TC & CLIP shows the time code and the current clip number.
OFF switches the inserter function off.
Semikolons ";" in-between the digits indicate the following:
Hours ; minutes: Dynamic video offset applied
minutes ; seconds: NTSC drop frame format on TC input
Seconds ; frames: NTSC drop frame format selected in menu 070
The Peakmeter display is divided into three level ranges which show
the colors green, yellow and red.
The upper red area can be adjusted in 1 dB steps from -30 dB up to
0 dB.
MENU 064 PEAKMETER COLOR YELLOW
The start level of the peakmeters yellow, center area can also be
adjusted in 1 dB steps from -30 dB up to 0 dB.
MENU 070 VIDEO STANDARD
MENU 061 BATTERY MONITOR
AUTO POWER DOWN
Set BATTERY MONITOR: ON to insert a battery monitor symbol in
the picture when you are using a bonsadrive DC version powered by
an external battery.
The AUTO POWER DOWN function switches the unit off
automatically when the feed DC supply voltage drops below 10.5
Volts.
MENU 062 PEAKMETER INSERTER
The audio levels can be monitored with onscreen peakmeter inserts.
You can select 2TRK, 8TRK, 2TRK & 8TRK or OFF to display the
respective 2, 8 or 10 audio channels simultaneously.
Levels from 0 dB to -30 dB are shown linear in one dB steps, from
-30 dB to -60 dB using a logarithmic scale.
Select the required video standard with the [+] and [–] keys.The
following selection is available.
PAL 25 FPS
NTSC 29.97 ND (non drop TC format)
NTSC 29.97 DF (drop frame TC format)
NTSC clips can be played back with non drop or drop frame time
code independently to the time code format used in recording.
The time code inserter indicates DF format showing a semikolon ";"
in-between the seconds and frames digits.
See also MENU 009 how to save the selected TC format individually
to each clip.
MENU 071 NTSC PEDESTAL
Select the black level for analog NTSC video signals according to the
standard used in your country.
7.5 IRE (USA) or 0 IRE (JAPAN)
0, -10, -20, -30, -40, -50, -60 dB positions are marked by white spots.
When an audio insert record mode is selected the armed channel
pairs become marked by red spots.
- 42 -
- 43 -
MENU 072 STILL & SLOMO PICTURE
MENU 074 GPIO FUNCTION
PAL and NTSC video standards consist of two sequential, interlaced
half frames (called first and second fields). There are video sources
where both fields are scanned simultaneously (called frame scan),
and also systems that do individual scans for each field (field scan).
The GPIO (General Purpose Input/ Output) Port C22 has the
following pinning.
The playback of a complete frame (two fields) in a still picture can
lead to a flicker effect as both fields are alternate played back.
Using the menu STILL & SLOMO PICTURE the playback mode for
still and slow motion frames can be changed:
FIELD shows only the first half frame which reduces the vertical
resolution but removes field flicker from field scanned video.
FRAME shows both half frames with full vertical resolution.
MENU 073 9-PIN MACHINE ID
To remote control the bonsaidrive through the Sony 9 pin protocol
connect the external controller being used to the remote port C24.
Using the [REMOTE] key, switch over the communication from the
bonsai remote to the external controller.
For menu settings or normal transport commands the communication
must be switched to the bonsai remote panel. That means
[REMOTE] must be deactivated.
When connecting the external controller take care that the
bonsaidrive is the Sony 9-pin "CONTROLLED DEVICE" on C24.
The pinning and signal levels must comply.
Note: The pinning and levels are not compatibel to PC COM ports
and should be adapted using the converters which are available to
buy.
Sony 9 pin communication usually starts with a "device request"
command. The machine being controlled answers with its
identification (ID).
In menu 25 "9-PIN MACHINE ID" one can select either
B1 00 PAL/ B000 NTSC for a Sony A500 or the bonsaidrive
Identification 31 E0 PAL/ 30 E0 NTSC.
- 44 -
(1) GPO_1
(2) GPO_2
(3) GPO_3
(4) GPO_4
(5) GPI_1
(6) GPI_2
(7) GPI_3
(8) GPI_4
(9-15) GND
The inputs (GPIs) are switched to ground (GND) for example with a
press button switch. The input signals are debounced in bonsaidrive
and the selected GPI command is carried out when the contact
closes.
The outputs (GPOs) are 0 V inactive, and 5 V active drivers with a
100 ohm output impedance. The output current is limited to 50 mA.
When connecting a LED one should add a series resistance of 330
ohms to limit the diode current to about 7 mA. When connecting reed
or coil relays it is recommended to use a protection diode.
Electronic solid state relays (SSR) do not need a protection diode
and can be directly connected without additonal components.
Take care that all GPIO connections are isolated and that there are
no ground or current loops to other grounds or potentials.
With the DISABLE setting all GPI inputs have no function. The GPO
outputs are switched momentarily to inactive = 0 V at reset (shortly
after start).
With the SELECT CLIP 1,2,3,4 function the GPIs 1...4 are switched
to select clip number 1...4 respectively.
When the auto play mode is activated, (menu 014) the selected clip
is played once from locator 1 to locator 2 or repeats in an endless
loop depending on the menu selection.
- 45 -
In this way it is easy to realise a media player for presentations and
exhibitions, which can be activated by the public through the GPI
buttons. Even after a power cut or switching the machine off and on
settings are stored and the machine will resume its function.
The colour subcarrier frequency of the composite video output is
asynchronously controlled for errors larger than +/- 5 ppm.
In this way errors of up to 150 ppm in the video source can be
compensated.
The respective GPOs indicate the selection of clip 1, 2, 3 or 4.
The audio section of the recorder is synced to the video input and so
the word clock output on C2 can be used to synchronise other audio
equipment.
Setting PLAY,STOP, CLIP-, CLIP+ defines the GPIs as follows:
GPI_1: PLAY
GPI_2: STOP
GPI_3: CLIPGPI_4: CLIP+
puts the machine into play
stops the transport
decreases current clip number
increases current clip number
When synchronising from the video input, only the video frequency is
used. Field and line phase are not synchronised at the output.
MENU 075 [+] / [–] KEYS FUNCTION
The setting SYNC INPUT uses external house sync on input C3
(Sync Input) to synchronise the recorder in record mode.
When using this setting the input video must be synchronised to the
same house sync as well.
In this menu the function of the [+] and [–] keys during stop mode can
be defined.
"During stop mode" means the machine shows a still picture and the
menu is switched off.
DIRECT VIDEO I/O MODE passes the video input signal data direct
to the video outputs. This mode is saving system memory throughput
and should be used for the "CAPTURE WHILE RECORD" functions
with bonsaiLAN networking option.
Selection STEP FWD/REVERSE allows you to step one frame ahead
and reverse respectively.
The function INC/DEC CLIP NUMBER changes the current clip
number without using a menu.
When entering EE or record in this mode the picture contents are
moving some seconds from a left or right offset into the centre. This
appears only on the monitoring output and does not affect the
recording on the harddisk.
MENU 080 RECORD SYNC REFERENCE
MENU 081 PLAYBACK SYNC REFERENCE
The reference sync for the bonsaidrive can be separately selected for
playback and record mode.
In play mode the recorder can be synced internally or to an external
house sync (video black and burst signal).
Select the sync reference for record mode in menu RECORD SYNC
REFERENCE.
The setting INTERNAL synchronises the internal audio clocks and
video to a very stable VCXO.
The setting VIDEO INPUT uses the video input signal as sync
reference. A digital PLL guarantees a stable lock even from very
unstable or inaccurate video sources e.g. from a VHS-video tape
recorder.
The word clock output has absolute reference quality and can be
used to synchronise all professional audio equipment.
- 46 -
- 47 -
The internal Xtal oscillator can be calibrated to the external reference
signal in menu 22 CALIBRATE INTERNAL.
Resolution is 0,02 ppm.
If the machine is to be synchronised to house sync in play mode, set
the PLAYBACK SYNC REFERENCE to SYNC INPUT and connect
the house sync reference signal to input C3 (SYNC INPUT).
When no reference signal is present the status LEDs blink on the
remote panel.
Synchronising to an external house sync takes about 2 seconds in 2field and 8 seconds in 8-field mode, depending on the SYNC LOCK
MODE used.
The external synchronising video signal (house sync) should comply
with the broadcast specification (+/- 1 ppm, black & burst, line jitter
< 10 ns).
MENU 082 SYNC LOCK MODE
MENU 083 SC-H ADJUST
In a PAL composite video signal (FBAS) the phase between the
colour subcarrier (SC) and horizontal sync (H) repeats phase
coherence every 8 fields (SC-H phase).
If one sets the SYNC LOCK MODE to 8 FIELD the composite outputs
are phase correct to the house sync (and other equipment
synchronised with the house sync).
A phase adjustment in 1.8 degree steps can be carried out in menu
21, SC-H ADJUST.
If composite video signals are to be mixed it is necessary to
sync to the 8 field sequence. For all other uses one should set
SYNC LOCK MODE to 2 FIELD sequence.
- 48 -
MENU 084 CALIBRATE INTERNAL
A composite video signal needs a very precise colour subcarrier
frequency. The tolerance lies in the under 10 ppm range.
With this menu it is possible to recalibrate the internal Xtal oscillator
for the PLAYBACK SYNC REFERENCE = INTERNAL mode.
For this one needs a very precise studio reference generator or a
clean video signal received from a public broadcaster (cable or
antenna).
(1) connect the reference signal to SYNC INPUT (C3).
(2) Set the PLAYBACK SYNC REFERENCE to SYNC INPUT.
Make certain that the recorder is in stable lock.
I.e. the key led stops blinking and is lit. A clean picture without colour
errors must now be visible on the composite output.
(3) Hold down the record key [REC] and then press [◄]. In the
display the message "DONE" appears. The calibration used to
synchronise to the external sync signal is stored and used for the
PLAYBACK SYNC REFERENCE = INTERNAL mode.
Set the PLAYBACK SYNC REFERENCE back to INTERNAL and
check the composite output signal.
Do the above calibration only if colour is missing or colour errors are
seen on the composite video output in the PLAYBACK SYNC
REFERENCE = INTERNAL mode.
The external calibration has no effect on the record sync function or
other functions using external sync sources (SYNC INPUT).
Menu 099 SAVE AND POWER DOWN must be carried out to store
the new tuning non volatile to flash memory.
- 49 -
MENU 085 COLOR BAR
MENU 090 FORMAT DISK
For test purposes you can activate the internal 75% color bar
generator by pressing the [+] key. Press the [■] or [–] key to return to
the menu.
The color bar generator is only output on the analog video outputs.
MENU 086 DYNAMIC VIDEO OFFSET
Digital TFT video displays and projectors produce frame delays
caused by the internal scaling / framing processes.
The hard drive is used with a proprietary bonsaidrive format which
divides the hard disk into blocks (clusters) of 512 Mbyte. Such a
block can store about half a minute of lossless (Huffman code) video
together with 10 channels of audio.
Every recording - no matter how small - uses at least one of these
blocks. Erasing a clip frees these blocks for rerecording. The
fragmentation of the whole hard disk is thus limited to (2 x disk
capacity/GB) units.
Note: Set to +0 frames for standard use with a tube monitor!
Parts of the hard disk which show errors are automatically avoided by
the recording.
The so called metadata, which have the LBA addresses and other
data managment informations, are stored in the lower parts of the
hard disk. When the machine starts it checks whether valid metadata
exists for 255 clips.
If no clips are present or some have erros, the machine goes to the
menu FORMAT DISK.
A value different than +0 is indicated in the time code inserter
showing a semikolon ";" in-between the hours and minutes.
When carrying out the format disk command new metadata for 255
clips is written. All clips which are on hard disk are deleted.
To compensate these effects it is possible to apply a video offset of
maximal +/- 8 frames against the bonsaidrive's internal time code and
audio engine. This offset is dynamic, which means only effective
during forward play operation. Fixed images when the transport is
stopped or playing reverse are unchanged to ensure correct spotting
and editing.
The complete action takes less than one second.
Hold down the [RECORD] key and press the [◄] key to format the
hard drive.
- 50 -
- 51 -
MENU 091 FIRMWARE
In menu 091 you can see the actual firmware version installed.
BF 00.52 is the firmware being described in this section.
To make a firmware update, hold down the [RECORD] key and press
the [◄] key. See details in chapter 10 "Firmware update" in the main
part of this manual (I, page 22).
Each time the bonsaidrive is powered up a checksum of all flash
memory cells will be calculated. Thus flash memory errors will be
detected and reported as bonsaidrive errors 030 and 031.
MENU 092 HARDDISK INFO
The menu 092 gives information about the hard drive.
In the top line is shown the name and number of the hard drive. In
the second line the total capacity in GBYTE is shown.
(GBYTE = Gigabyte)
Underneath is shown how many clips have been recorded and how
much storage space has been used.
The difference between the disk capacity and the storage space used
is the storage capacity remaining for recording.
One hour uses about 50 Gbyte storage dependant of the video
material.
The number of disk errors that have occured since the last time the
machine was switched on is shown in the bottom line. This value
should always be zero.
MENU 099 SAVE AND POWER DOWN
Press the [■] key to save all menu settings and put the bonsaidrive in
power down mode.
Use menu 009 SAVE CLIP INFO TO DISK to store modified locator
points, time code offsets and time code format in the clip info area on
the hard drive before powering down.
- 52 -