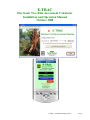
1
E-TRAC Electronic Tree Risk Assessment Calculator Installation and Operation Manual October 2008 E-TRAC – Installation and Operation - Page 1 Table of Contents: WHAT YOU WILL NEED TO RUN E-TRAC ...................................................3 Step 1: Set up your Pocket PC ..................................................................................4 Step 2: Install the E-TRAC program on your Pocket PC .........................................4 Step 3: Install the E-TRAC desktop program on your laptop/desktop PC...............5 Step 4: Customize your lists (e.g., surveyors, streets, species) .......................... 6-11 Field surveyors .............................................................6 Species .........................................................................7 Community Risk Zones ...............................................8 Streets...........................................................................9 Tree Risk Ratings.......................................................11 Step 5: Create an E-TRAC storage card .................................................................12 Step 6: Use the E-TRAC program to collect field data on your Pocket PC..... 13-20 Pocket PC screen shots ........................................ 13-16 Field Data Entry Tip Sheets ................................. 17-20 Step 7: Transfer data from the Pocket PC to your laptop/desktop PC ...................21 Step 8: Analyze the results................................................................................ 22-27 Generate reports ................................................... 22-26 Export the data ...........................................................27 Appendix A: Installing the .NET Compact Framework.........................................28 E-TRAC – Installation and Operation - Page 2 WHAT YOU WILL NEED TO RUN E-TRAC E-TRAC consists of TWO programs. One program runs on your Pocket PC (“PDA”) and is used to collect field data. Another program runs on your PC or laptop and is used to view and edit the data, print reports, and export the data to other programs (if desired). You will need the following in order to run E-TRAC: 9 9 9 9 A PC running Windows 2000, XP or VISTA A Pocket PC (“PDA”) running Windows Mobile 2003, 2003SE, Mobile 5 or Mobile 6. One or more storage cards suitable for your Pocket PC A storage card reader connected to your PC The PC program receives the field data, enables you to view and edit it, and allows you to create a variety of reports. The PC program also permits you to configure the E-TRAC program. For instance, you use this program to establish lists of surveyors, streets, tree species, costs, etc. The PDA portion of the program requires the use of a storage card. Different models of Pocket PCs may use different types of storage media. Typically these may be referred to as “SD Cards”, “Compact Flash”, “SD Mini”, “Multimedia Cards”, or “Trans Flash” cards. Storage cards are inexpensive (and rapidly getting more so). A 1GB card will hold the data for many thousands of trees. The tree data is automatically deleted from the cards after it is imported into the PC database, so they are reusable. IMPORTANT: If your Pocket PC accepts more than one kind of storage card (like some Dell AXIM models), it is important that you only insert ONE at a time in the device when using E-TRAC. The ETRAC Pocket PC program will try to detect your storage card when it runs, and may be confused if there is more than one there. Field data is transferred to the E-TRAC desktop program by using a card reader attached to your desktop/laptop computer. Typically these readers use a USB port to connect to your computer. You should be able to find a reader that works with your storage card at an office supply or electronics store for around $25. E-TRAC will NOT work with a Macintosh (unless you have installed Windows) nor will it work with any PDA running the Palm OS. IMPORTANT NOTE ABOUT ACTIVESYNC. If you don’t have ActiveSync (or, for VISTA users, ”Windows Mobile Device Center”) installed, and you are not using your Pocket PC for anything other than E-TRAC, we recommend that you NOT install it. If you already have it installed, and it starts whenever you insert your Pocket PC in its cradle, then we recommend that you shut it down before doing any E-TRAC operations. If is technically possible to transfer files to and from the Pocket PC using ActiveSync, but, unless you are an experienced ActiveSync user, it will cause you some confusion and we don’t recommend it. E-TRAC – Installation and Operation - Page 3 Step 1: Set up your Pocket PC Refer to Appendix A. You must determine the version of the .NET Compact Framework which is on your Pocket PC and install Version 2, if necessary. DO NOT SKIP THIS STEP!! Please note that it is NOT necessary to install or use Microsoft ActiveSync (or the VISTA equivalent). You may still need the cradle or sync cable that came with your Pocket PC in order to charge the battery, but you WILL NOT be using it to transfer data. Step 2: Install the E-TRAC program on your Pocket PC One of the files you got when you downloaded E-TRAC is ETRAC_PDA.CAB. Using your desktop PC and storage card reader, copy ETRAC_PDA.CAB to a storage card. Insert the card in your Pocket PC. On your Pocket PC, use File Explorer (a program) to find the CAB file on the card and tap it to run it. You may be warned that the file is from an “unknown publisher.” If you get this message, just tap “Yes” to continue. If you are asked whether you wish to install the program to “Device” or “Storage Card”, select “Device”. The CAB file will install E-TRAC to the “My Device”, “Program Files”, “ETRAC_PDA” folder. You can always run it by using File Explorer to navigate to that location and tapping the file. However, it’s more convenient to find it on your menu and/or program desktop. It’s easy to put a “shortcut” to the program in those places. To create a shortcut on your Pocket PC: Using File Explorer on your Pocket PC, navigate to “My Device”, “Program Files”, “ETRAC_PDA” and find the ETRAC file (It has a red triangle next to it). Press AND HOLD your stylus on this file until an animated circle and a drop down menu appears. Select “COPY”. Now navigate to “My Device”, “Windows”, “Start Menu”, “Programs”. Find a BLANK space in that folder and press and hold your stylus there. The animated circle and menu will appear. Select “Paste Shortcut” (NOT “Paste”!!) here. This puts a shortcut to E-TRAC on your Pocket PC program desktop. If you also want it on your START MENU, just move up one level (to My Device/Windows/Start Menu) and PASTE SHORTCUT again. Your Pocket PC may automatically delete the CAB file from your storage card. If it did not, use File Explorer to do that. E-TRAC – Installation and Operation - Page 4 Step 3 – Install the E-TRAC Desktop program on your PC. If you have a previous version of the E-TRAC desktop program installed, please go to the Control Panel on your desktop PC and UNINSTALL it. When you obtained the E-TRAC program, you received a file entitled: Install_ETRAC_Desktop.ZIP. This compressed file contains the three files you will need to install the Desktop Program. First, unzip the files in the ZIP file to a temporary folder somewhere on your PC. It does not matter where you create this temporary folder as long as you can find it. It’s probably most convenient to create it on your Windows Desktop. The 3 files in the ZIP file are: SETUP.EXE SETUP.LST ETRAC_DESKTOP.CAB Locate your temporary folder and run SETUP.EXE by double-clicking it. You may get one or more messages during the setup which tell you that “A file being copied is not newer than the file currently on your system.” Each time you see such a message, click the “YES” button to keep your current file. Follow the instructions on the screen to install the program. It will suggest installing the program to C:\Program Files\ETRAC_Desktop on your computer. It is best to let it do that. If you want to change where the program is installed, you may do so. E-TRAC – Installation and Operation - Page 5 Step 4: Customize your lists (e.g., surveyors, streets, species) The desktop program is very simple to operate. Click the START button on your PC (VISTA users will click the Windows globe icon). Select ALL PROGRAMS and navigate to ETRAC_Desktop to run the program. The screen shown below should appear. Set up your Surveyors, Risk Zone Descriptions, Risk Ratings, Street and Species lists. Once established, they are saved in the ETRAC.MDB database. The settings are transferred to the storage card when you select “Create an ETRAC Storage Card” from the menu shown above. The settings are read by the Pocket PC each time the card is inserted and the Pocket PC E-TRAC program is started. “Creating and ETRAC storage card” does NOT erase any Tree data which may be on the storage card. To customize lists, select “File” from the menu. Add your field surveyors. E-TRAC – Installation and Operation - Page 6 Customize your list of species. There are TWO options for getting Tree Species into the system. Method ONE is to input each one as follows. ETRAC will accept either the common or scientific species name. Method TWO – We have included the STATUM Species database, which was placed on your computer when you installed E-TRAC. It contains a number of tables which list Tree Species by Climate Zone. You select the climate zone appropriate for your location and import the list of species into E-TRAC. E-TRAC – Installation and Operation - Page 7 Modify your Community Risk Zones as desired (for details see the Urban Tree Risk Management Guide and the E-TRAC Field Data Entry Tip Sheets). E-TRAC – Installation and Operation - Page 8 Customize your list of streets. There are TWO methods for entering your street list. Method one involves directly entering them and checking those that should be transferred to the PDA for field lookup. Note, that you may also import a street list from an EXCEL CSV file. E-TRAC – Installation and Operation - Page 9 Customize the Tree Risk Ratings (for details see the Urban Tree Risk Management Guide and the ETRAC Field Data Entry Tip Sheets). E-TRAC – Installation and Operation - Page 10 Step 5: Create an E-TRAC storage card. The E-TRAC program uses the storage card to transfer information between the PC and Pocket PC. When you start the E-TRAC Pocket PC program, it will look for a properly formatted E-TRAC storage card. If it can’t find it, it will protest and close down. The following exercise will create a storage card with some default values for the configuration items. You may easily change them later. Using your DESKTOP PC, insert a storage card in your reader and connect it to the PC where you installed the E-TRAC program. Start the E-TRAC program. Select the FILE menu and click “Create an ETRAC Storage Card.” Check all the boxes. Select the location of your storage card from the drop down list. Press the button. After a few seconds, a confirmation message should appear. You can now close the E-TRAC desktop program. Remove the storage card, insert it into your Pocket PC and start the E-TRAC Pocket PC program. The ETRAC program should find the storage card and the main menu should appear. E-TRAC – Installation and Operation - Page 11 Step 6: Use the E-TRAC program to collect field data on your Pocket PC If you followed the installation recommendations and created a shortcut to the E-TRAC program, you will find the program on your Pocket PC under “Programs”. It has an icon which is a red triangle with an exclamation point in it. The following pages walk you through how to collect data on the Pocket PC. Refer to pages 17-20 for technical details on field data entry. E-TRAC – Installation and Operation - Page 12 Use MENU to navigate Click to pop-up a keyboard ID of currently selected tree will display at the top of each screen. After entering this information, you have the option to do a FULL assessment or proceed immediately to the Risk Ratings Screen E-TRAC – Installation and Operation - Page 13 E-TRAC – Installation and Operation - Page 14 Note that the text entry box changes position when the keyboard is activated. It returns to the original position when the keyboard is deactivated. You may edit and delete previously entered trees. E-TRAC will not allow you to repeat a Tree ID on the Pocket PC E-TRAC – Installation and Operation - Page 15 E-TRAC FIELD DATA ENTRY TIP SHEETS* Version 1.1 - January 2008 E-TRAC is an electronic data collection tool that complements the U.S. Forest Service’s publication, “Urban Tree Risk Management: A Community Guide to Program Planning and Management.” It is available on the website where you obtained the E-TRAC program or directly at: http://www.na.fs.fed.us/spfo/pubs/uf/utrmm/. LOG IN --------------------------------------------------------------------------------------------------------------------------------Select Community Risk Zone See Urban Tree Risk Management Guide - Chapter 2, p. 22-26 for details If the community is divided into community tree risk zones, then select the appropriate risk zone. ADD TREES -------------------------------------------------------------------------------------------------------------------------Tree ID Enter a unique number for each new tree. ETRAC will automatically increment by one each time a new tree is entered on the PDA. Address Specify the house/building number. Street or Park Name Specify the name of the street for street trees or name of the park for park trees. Location Specify the location of the tree in relation to the orientation to the building (e.g., front, side), or indicate if the tree is located in a street island (median) or park. Species Indicate the species. If unknown, choose unknown. If the species is not listed, choose “other” and type it on the notes page (last screen). DBH Record the trunk diameter at breast height (4.5’). Site Notes Use a number or descriptive text to indicate a more precise location of the tree if there are multiple trees at that same address, median, or park. This is particularly important if there are multiple trees of the same species and trunk diameter. NEXT SCREEN ---------------------------------------------------------------------------------------------------------------------Physical Obstruction Indicate if the tree branches are too low over the sidewalk, road, or both. Visual Obstruction Indicate if the tree branches are blocking views of a critical or non-critical sign or sight lines at an intersection or driveway. Utility Conflict Indicate if tree branches are interfering with primary electric wires, secondary electric wires, service drop wires to a house, or non-electric wires (e.g., phone, cable). *Data can also be added directly into the desktop program (without a Pocket PC). E-TRAC – Installation and Operation - Page 16 See the Urban Tree Risk Management Guide - Chapter 3, p. 41-88 for details regarding defects DEFECTS - CROWN / BRANCHES -------------------------------------------------------------------------------------------Canker Indicate if there is a canker and, if known, whether it is caused by a fungus or insect/mechanical damage. Crack Indicate if there is a crack and, if so, what type. Or indicate if there are multiple cracks. Deadwood Indicate if the entire tree is dead, one or more branches are dead, or if a branch is broken and lodged. Decay Indicate if there is decay and/or a cavity. Poor Arch (Poor Branch/Crown Architecture) Indicate if the branches are equally dispersed around the tree or if the crown is unbalanced. Also, indicate if one or more branches are abnormally-formed or if branches have been topped or storm-damaged. Weak Union (Weak Branch Union) Indicate if one or more branches are weakly attached due to included bark, epicormic sprouting, or both. DEFECTS - TRUNK ---------------------------------------------------------------------------------------------------------------Canker Indicate if there is a canker and, if known, whether it is caused by a fungus or insect/mechanical damage. Crack Indicate if there is a crack and, if so, what type. Or indicate if there are multiple cracks. Decay Indicate if there is decay and/or a cavity. Shell (outermost layer of undecayed wood) If there is decay, indicate the thickness of the remaining shell (undecayed outer layer surrounding the decay column). Take 3 measurements, and record the average. Also indicate the trunk diameter where the maximum decay is suspected. If there is an opening (crack or cavity) in the shell, indicate the size of that opening as a percent of the trunk diameter at the point of the opening. Poor Arch (Poor Trunk Architecture) • Indicate if there is are codominant stems located relatively low on the tree or if there are codominant stems without a branch bark ridge (BBR). • Also, indicate if the tree is leaning with tension buckling, soil mounding, or root damage. DEFECTS - ROOTS ---------------------------------------------------------------------------------------------------------------Buried Deep Indicate if there is too much soil over the roots and if it occurred at planting or during a grade change (fill). Injury Indicate if the roots have sustained some type of damage (yes). If known, specify the type. Decay Indicate if the roots show signs of decay. Poor Arch (Poor Root Architecture) • Indicate if the there are stem encircling (circling, but not compressing the trunk) or girdling roots. • Indicate if the roots are equally dispersed around the tree or if they are unbalanced (only on one side). Also indicate if the roots are confined to a relatively small or narrow area. E-TRAC – Installation and Operation - Page 17 RISK RATINGS ---------------------------------------------------------------------------------------------------------------------See Urban Tree Risk Management Guide - Chapter 3, p. 101-106 for details Prob. Failure (Probability of Failure) 1-4 points 1. Low: some minor defects present: • minor branch/ crown dieback • minor defects or wounds 2. Moderate: several moderate defects present • stem decay or cavity within safe shell limits: shell thickness > 1 inch of sound wood for each 6 inches of stem diameter • crack(s) without extensive decay • defect(s) affecting 30-40% of the tree’s circumference • crown damage/breakage: hardwoods up to 50%; pines up to 30% • weak branch union: major branch or codominant stem has included bark • stem girdling roots: <40% tree’s circumference with compressed wood • root damage: < 40% of roots damaged within the CRR 3. High: multiple or significant defects present: • stem decay or cavity approaching shell safety limits: shell thickness < 1 inch of sound wood for each 6 inches of stem diameter • cracks, particularly those in contact with the soil or associated with other defects • defect(s) affecting > 40% of the tree’s circumference • crown damage/breakage: hardwoods >50%; pines >30% • weak branch union with crack or decay • girdling roots with > 40% of tree’s circumference with compressed wood • root damage: > 40% of roots damaged within the CRR. • leaning tree with recent root breakage or soil mounding, crack or extensive decay • dead tree: standing dead without other significant defects 4. Extremely High: multiple and significant defects present; visual obstruction of traffic signs/lights or intersections: • stem decay or cavity at or exceeding shell safety limits and severe crack • cracks: when a stem or branch is split in half • defect(s) affecting > 40% of the tree’s circumference or CRR and extensive decay or crack(s) • weak branch union with crack and decay • leaning tree with recent root breakage or soil mounding and a crack or extensive decay • dead branches: broken (hangers) or with a crack • dead trees: standing dead with other defects such as cracks, hangers, extensive decay, or major root damage • visual obstruction of traffic signs/lights or intersections • physical obstruction of pedestrian or vehicular traffic Size of Defective Part 1-3 points 0. NA (not applicable because there are no defects and targets) 1. Parts less than 4 inches in diameter 2. Parts from 4 to 20 inches in diameter 3. Parts greater than 20 inches in diameter E-TRAC – Installation and Operation - Page 18 Prob. Target Impact (Probability of Target Impact) 1-3 points 1. Occasional Use: Low use roads and park trails; parking lots adjacent to low use areas; natural areas such as woods or riparian zones; transition areas with limited public use; industrial areas. 2. Intermediate Use: Moderate to low use school playgrounds, parks, and picnic areas; parking lots adjacent to moderate use areas; secondary roads (neighborhoods) and park trails within moderate to high use areas; and dispersed campgrounds. 3. Frequent Use: Emergency access routes, medical and emergency facilities and shelters, and handicap access areas; high use school playgrounds, parks, and picnic areas; bus stops; visitor centers, shelters, and park administrative buildings and residences; main thoroughfares and congested intersections in high use areas; parking lots adjacent to high use areas; interpretive signs, kiosks; scenic vistas; and campsites (particularly drive-in). Other Risk Factors 0-2 points This category is to be used if professional judgement suggests the need to modify the numeric risk rating due to extenuating risk factors such as: Tree Species: When tree species characteristics become a factor in risk rating. For example, some tree species are very poor wood decay compartmentalizers such as basswood, beech, and birch and some tree species have growth patterns that make them more vulnerable to certain defects such as weak branch unions (silver maple) and branching shedding (beech). Site Factors: Site conditions exist that significantly increase the probability of failure such as: Site Changes: grade changes, removal of adjacent trees, construction injury, etc. Soil Conditions: shallow soils, saturated soils, highly compacted soils, etc. Standing Dead Trees: Extensive numbers of standing dead trees exist (ex:EAB) and there is a need to prioritize tree removals (ex:1= dead for 3 years; 2 = dead for >3 years) Length of Inspection Cycle: If trees are likely to fail before the next scheduled risk inspection. Description of Other Risk Factor(s) If points are added due to other risk factors, specifically describe the reason. Re-inspect Select the year to schedule a re-inspection if needed. CORRECTIVE ACTIONS -------------------------------------------------------------------------------------------------------Put a check mark next to each corrective action needed. If more than one action is needed, you may prioritize these by using the notes section to record which are of greatest priority (e.g., “prune1”). NOTE Use this space to write any details not captured elsewhere in the program. For example: 1) Add a tree species that was not in the pre-programmed dropdown list 2) Prioritize corrective actions (e.g., “prune1”) E-TRAC – Installation and Operation - Page 19 Step 7: Transfer field data from the Pocket PC to the laptop/desktop program Connect your card reader to the desktop/laptop PC. Insert the storage card containing field tree data in the card reader Select the location of the storage card from the drop down list. If you check the “Save Individual Tree Files from PDA…” box, your individual tree files from the storage card will be archived on the desktop PC. All files imported on a particular date will be saved in a common folder which will be created and named to reflect that date. After a successful data import, the individual files will be deleted from the storage card. E-TRAC – Installation and Operation - Page 20 Step 8: Analyze the results Setting up Costing Estimates for the Risk Reduction Cost Summary Report. E-TRAC provides reporting to help you estimate the cost of various Risk Reduction scenarios. In order to make this work, you will need to assign cost estimates to each of the 11 Corrective Actions. Note that the estimates are by DBH Range. You may define these ranges any way you wish. It is important that they DO NOT overlap and that they cover the FULL RANGE of DBH measures in your survey. If you decide that a particular Corrective Action DOES NOT depend on DBH in your situation, just enter ONE DBH range for that Corrective Action and define a range to cover ALL the trees in your survey (i.e. 0 to 999 inches). E-TRAC – Installation and Operation - Page 21 All E-TRAC reports are based on the contents of the _Archived_SurveyData table in ETRAC.MDB. Risk Reduction Cost Summary report For this report to work properly, you must assign costs to EACH of the 11 Corrective Actions. See the section earlier in this document on how to do that. The report allows you to select a date range (based on the date the tree was surveyed) and a Risk Rating range. You then pick the corrective actions to include and the way in which you wish to have the report sorted. E-TRAC – Installation and Operation - Page 22 Each tree which meets your selection criteria will be listed (in the order which you specified). E-TRAC will calculate the estimated risk reduction cost for each tree based on the corrective actions identified in the survey for that tree. Click these buttons to see other pages Click to print the report Click to Zoom the report view Re-inspection Report During the field survey, E-TRAC allows you to enter the YEAR you would like to reinspect a particular tree. This report lists all such trees by Quarter and Year. You may filter the report by Risk Zone (or include all Risk Zones) E-TRAC – Installation and Operation - Page 23 Trees Needing Corrective Actions Report This report lists trees (optionally by Risk Zone) which require ANY Corrective Action. You may further filter the report by the Risk Rating. E-TRAC – Installation and Operation - Page 24 Trees Needing A Specific Corrective Action Report This report is similar to the previous (Trees Needing Corrective Actions) report. The difference is that is contains ONLY the specific corrective action you select. E-TRAC – Installation and Operation - Page 25 You may export your data (from the Archived_SurveyData table in ETRAC.MDB) to an EXCEL spreadsheet (CSV files) at any time. This export can be filtered by a user-defined date range. Also, CSV files can easily be imported into various other database and statistical programs. E-TRAC – Installation and Operation - Page 26 Appendix A: Installing the .NET Compact Framework The Pocket PC portion of the E-TRAC program requires that the Microsoft .NET Compact Framework Version 2 be installed on your mobile device. If you have a Windows Mobile 6 device, you should already have the proper version of the Compact Framework pre-installed. You will need a Pocket PC (iPAQ, AXIM, or similar device) running Windows Mobile 2003, Windows Mobile 2003SE, Windows Mobile 5 or Windows Mobile 6. E-TRAC will not work with older versions of the Mobile operating system. The first step is to determine what operating system is on your Pocket PC device. On your Pocket PC, select SETTINGS. Then select the SYSTEM tab and tap the ABOUT icon. If the version number begins with a 4, 5 or 6, the chances are pretty good that you are ok - proceed to the second step. If not, search www.microsoft.com to see if .NET Compact Framework 2 can be installed on your device. Please be aware that Microsoft licenses many versions of their mobile operating system to manufacturers, who adapt it to their own purposes. This results in devices with a variety of screen sizes and shapes, and other factors which may or may not be compatible with E-TRAC. The second step is to determine if you have the correct version of the .NET Compact Framework on your Pocket PC. On your Pocket PC, select PROGRAMS and then FILE EXPLORER. Using File Explorer, navigate to the WINDOWS folder. You will find a file named “CGAUTIL”. Tap this file to run it. If the version number is 2.0.6129.0 or higher, you are all set. You may also be told that you have both Version 1 AND Version 2 installed - that is ok). If you need to install the .NET Compact Framework, we recommend that you use the “CAB” files we provide on the E-TRAC web site (you can also download them directly from Microsoft). Determine which file you need based on the table below. If you guess incorrectly, it simply won’t work, and you can then pick the other one. Pocket PC Operating System Windows Mobile 6 Windows Mobile 5 Windows Mobile 2003 or 2003SE CAB file required NONE NETCFv2.armv4i.cab NETCFv2.ppc.arm4.cab Using your storage card reader, copy the correct CAB file to a storage card. Insert the storage card in your Pocket PC. Use File Explorer to navigate to the Storage Card, find the CAB file and tap it to run it. If you have the correct file, it will begin to install the Compact Framework. If you get an error message, try using the other CAB file. If you are asked whether you wish to install to the DEVICE or the CARD, select “DEVICE”. You may be prompted to restart your Pocket PC after the installation. After the installation is completed, you may use File Explorer to delete the CAB file from your storage card (your Pocket PC may delete it automatically for you). E-TRAC – Installation and Operation - Page 27