1
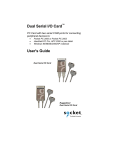
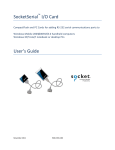
Serial I/O Card™
CompactFlash and PC Card versions
Serial I/O and Ruggedized Serial I/O Cards for adding a serial
communications port to:
• Pocket PC 2000/2002/2003/2003SE
• Handheld PC 2000
• Windows 95/98/Me/2000/XP notebook
• Windows XP tablet
User’s Guide
7/2005
Document # 6410-00154 H
Copyright Notice
Copyright © 2005 Socket Communications, Inc. All rights reserved.
Socket, the Socket logo and Battery Friendly are registered trademarks of
Socket Communications, Inc. Serial I/O Card and Hi-Speed COM Tools are
trademarks of Socket Communications, Inc. All other brand and product
names are trademarks of their respective holders.
The Serial I/O Card includes technology licensed under United States
Patent Nos. 4,543,450, 4,603,320, 4,686,506, and 4,972,470.
Reproduction of the contents of this manual without the permission of
Socket Communications is expressly prohibited. Please be aware that the
products described in this manual may change without notice.
Feel free to contact SOCKET COMMUNICATIONS at:
Socket Communications, Inc.
37400 Central Court
Newark, CA 94560
Other than the above, Socket Communications can assume no responsibility
for anything resulting from the application of information contained in this
manual.
Please refrain from any applications of the Socket product that are not
described in this manual. Socket Communications also requests that you
refrain from disassembling the card. Disassembly of this device will void
the product warranty.
You can track new product releases, software updates and technical
bulletins by visiting Socket’s web page at: www.socketcom.com.
2
Table of Contents
COPYRIGHT NOTICE
2
1 | INTRODUCTION
4
About the Software
System Requirements
Card Versions
Package Contents
Product Registration
4
5
5
6
6
2 | SETUP FOR WINDOWS MOBILE
STEP 1: Install the Software
STEP 2: Insert the Card
OPTIONAL: Use Hi-Speed COM Tools
3 | SETUP FOR WINDOWS XP, 2000, ME, 98, 95
STEP 1: Insert the Installation CD
STEP 2: Insert the Card
STEP 3: Complete the New Hardware Wizard
OPTIONAL: Use Hi-Speed COM Tools
7
7
10
11
17
17
18
19
24
APPENDICES
A | SPECIFICATIONS
31
B | SETUP FOR MS-DOS
33
C | TECHNICAL SUPPORT
35
LIMITED WARRANTY
36
LIMITED SOFTWARE WARRANTY
37
REGULATORY COMPLIANCE
38
3
1 | Introduction
The Socket Serial I/O Card makes it easy to add
a serial communications port to your Windowsbased mobile computer, so you can connect
your favorite serial peripheral. It’s perfect for
connecting your Pocket PC, Handheld PC, pen
tablet or notebook computer to a modem,
printer, writer for court reporting, GPS receiver,
digital camera, laboratory/test device, industrial
equipment, or other serial device.
The cards add an RS-232 COM port to your
mobile computer and feature plug-and-play and
hot swapping with most Windows-based
mobile computers. Hot swapping is the ability
to add and remove devices while a computer is
running and have the system automatically
recognize the change.
About the Software
Socket Hi-Speed COM Tools enables you perform “baud
mapping.” By default, many Windows applications allow you
to select a maximum baud rate of only 115 kbps. “Baud
mapping” allows you to choose higher baud rates in these
applications, up to 921.6 kbps. Advanced users can use HiSpeed COM Tools to modify flow control properties or
configure a custom baud rate.
Socket Hi-Speed COM Tools offers different features for different
Windows versions.
Windows Mobile/CE: Besides baud mapping, you can use Hi-Speed COM
Tools to quickly identify the COM port number assigned to the connection.
Windows XP and 2000: Besides baud mapping, you can use Hi-Speed
COM Tools to quickly identify and change the COM port number assigned
to the connection.
For software updates, please visit: www.socketcom.com/product/serial.asp
4
System Requirements
Your mobile computer should meet these minimum requirements:
• Any of the following operating systems:
− Windows Mobile 2003SE, 2003
− Windows CE v2.11 or later
− Windows XP, 2000, Me, 98 Second Edition or 95 v4.00.950B
− Windows XP Tablet Edition
• CompactFlash or PC Card slot
(Operation in a PC Card slot requires a PC Card adapter)
For information about using the Serial I/O Card with a DOS application,
email [email protected]
Card Versions
The Socket Serial I/O Cards are available in either the CompactFlash (CF)
or PC Card form factor and with either of two cable builds. All cables have
an industry-standard male DB-9 connector.
The standard Serial I/O Card (S-I/O) features a
removable cable.
The Ruggedized Serial I/O Card (R-I/O) features
a permanent cable, better suited for more rugged
applications.
To operate a CompactFlash card in a PC Card slot, use a Type I PC Card
adapter, available separately at: www.socketcom.com/shop/default.asp
CHAPTER 1: INTRODUCTION | 5
Package Contents
The Socket Serial I/O Card package includes these items:
• Socket Serial I/O Card
• Serial cable with DB-9 connector (permanently attached for Ruggedized
cards, removable for standard cards)
• Serial I/O Installation Disc
Product Registration
Socket highly recommends that all customers register their Socket products.
Registered users receive priority for technical support, product updates, and
special offers. Register online at: www.socketcom.com/prodreg
6
2 | Setup for Windows Mobile
This chapter describes how to set up the hardware and software on
mobile computers running Windows Mobile 2003SE/2003 or Windows
CE v2.11 or later, including Pocket PCs, Handheld PCs, and pen tablets.
STEP 1: Install the Software
Follow these instructions to install the software for Windows CE.
1.
Use ActiveSync and a serial/Ethernet/USB cable or cradle to make
an active connection between the mobile computer and a host PC.
ActiveSync should report that you have Connected, and the
ActiveSync icon should turn green.
2.
Insert the installation CD into your host PC.
CHAPTER 2: SETUP FOR WINDOWS MOBILE
7
3.
Use My Computer or Windows Explorer to access the CD-ROM
drive. In the CD, click on SETUP.EXE.
4.
Follow the instructions on your screen to install the software for
Windows Mobile/.CE.
• Read the information in the welcome screen and click NEXT.
• In the Main Page, click Install.
• In the Installation screen under Windows CE, click Install.
5.
In the File Download screen, click Run.
8
6.
In the Security Warning screen, click Run.
7.
The Setup Center will begin. Follow the wizard to install the
software.
8.
When software installation is complete, disconnect the mobile computer
from the host PC. Soft reset the mobile computer by pressing the reset
button.
CHAPTER 2: SETUP FOR WINDOWS MOBILE
9
STEP 2: Insert the Card
1. If using a removable cable, attach it to the card. Press
the side latches of the cable connector, insert the
connector into the bottom of the card, and release.
The card and cable should join snugly and remain
attached after you release the side latches. To remove
the cable, press the side latches and pull gently.
IMPORTANT! When removing the cable, press
on the side latches before pulling the cable
from the card! Otherwise, you can damage the
connector and card!
2. Insert the card into your mobile computer’s expansion card slot.
Insert the card right-side up, with the blue label on top.
• If using removable cable, do not shove on the cable while
inserting the card.
• If using a CompactFlash card in a PC Card slot, first insert the
card into a PC Card adapter (shown below right).
When properly inserted, the card will be fully contained within the slot,
with only the connector and cable protruding.
WARNING! Do NOT insert the card upside down or shove the
card in too hard. Damage may occur!
To remove the card, use your device’s card eject button. DO NOT pull
on the cable or cable connector, especially if using a removable cable!
10
OPTIONAL: Use Hi-Speed COM Tools
Socket’s Hi-Speed COM Tools for Windows Mobile has two main screens.
The Ports screen allows you to identify the COM port number assigned to
your Serial I/O Card. Advanced users can use the Advanced screen to
program a device to work at a higher baud rate than those normally available
in Windows applications, up to 921 kbps, depending on your card version.
This section explains how to use Hi-Speed COM Tools to do the
following:
• View COM port assignment
• Determine the maximum baud rate of your card
• Map baud rates
• Use advanced options
View COM Port Assignment
1.
Pocket PC: Tap Start | Settings | Connections | Hi-Speed COM Tools.
HPC: Tap Start | Settings | Control Panel | Hi-Speed COM Tools.
2.
Use the Ports screen to view the COM port assignment.
Note: If you are using a hi-speed card, the Card Type field will report
Single I/O Card (HS).
CHAPTER 2: SETUP FOR WINDOWS MOBILE
11
Determine the Maximum Baud Rate of Your Card
If you plan to use the Hi-Speed COM Tools to map baud rates, it is useful
to know the maximum baud rate that your Serial I/O Card can handle. The
most recent revisions of the card can handle higher baud rates, up to 921
kbps. Check the Revision Level (Rev) of your card and refer to the chart
below to determine the maximum baud rate of your card.
Note: The maximum baud rate varies with your device’s operating system,
processor speed, and other variables. Higher baud rates may not work
correctly on some older devices.
Part
Number
Not
Compatible
with Hi-Speed
COM Tools
Maximum Baud Rate
230 kbps
921 kbps
CF with
Removable cable
8510-00094
8010-00075
Rev A
Rev B
Rev C or later
CF with
Ruggedized cable
8510-00115
8010-00087
Rev A
Rev B
Rev C or later
Custom CF Card
8510-00155
N/A
Rev A
N/A
PC Card with
Removable cable
8510-00012
8010-00012
Rev A-J
Rev K-L
Rev M or later
PC Card with
Ruggedized cable
8510-00073
8010-00065
Rev A-D
Rev E-F
Rev G or later
8010-00074
8510-00088
Rev A
Rev B
N/A
8010-00095
8010-00096
8510-00119
8510-00121
N/A
Rev A
N/A
Card Type
Custom PC Card
12
Map Baud Rates (ADVANCED USERS ONLY!)
What is baud rate mapping?
Most Windows applications offer baud rate settings only up to 115
kbps, because this is the maximum speed of typical serial ports.
What if you need or want to transfer data faster than 115 kbps?
The latest hardware and software of Socket’s Serial I/O Cards
were designed to handle much higher speeds, up to 921 kbps.
Many Windows applications can handle speeds higher than 115
kbps, although they do not list any values higher than 115 kbps in
their options for baud rate configuration.
Socket has created Hi-Speed COM Tools to enable you to use your
COM port at higher baud rates in applications that only let you
choose a baud rate up to 115 kbps. The program essentially lets
you use one of the available baud rate values as a placeholder for a
new baud rate of your choice. This is known as “mapping” a new
baud rate to an available baud rate option.
For example, if you need your device to work at a baud rate of
230,400 bps, most Windows applications will not list 230,400 bps
as a baud rate option. Hi-Speed COM Tools cannot change which
options are listed, but it does let you program one of the options to
work at 230,400 bps (e.g., you can change the “300” bps option to
actually work at 230,400 bps).
Note:
• Some applications (e.g., those for Windows 95, 98, and Me)
may have timing issues when you set them to baud rates that
are higher than they were designed for.
• After mapping a baud rate to a new speed, you can re-map it
back to its original speed.
CHAPTER 2: SETUP FOR WINDOWS MOBILE
13
Follow these steps to map baud rates:
1. Make sure the serial port is not already open on your device.
2.
Tap on the Advanced tab.
3.
In the drop-down menu at the top of the screen, select Socket SIO Card or
Socket SIO HS Card.
4.
The screen has a From: field and a To: field.
5.
•
The From: field lists baud rate options
available in typical applications. The
number that you select in the From: field
will be the baud rate option that you
change to function at a new speed.
•
The To: field lists the baud rates you can
choose from for your new speed. Included
in the To: list are baud rates (e.g., 921,600
bps) that are not available as options in
typical applications.
Use the From: and To: fields to scroll and select the appropriate baud
rates, then tap ok.
Example: Select “300” in the From: field and “921600” in the To: field and
tap ok. Now, whenever you select a baud rate of 300 bps in a Windows
application, your COM port will communicate at 921,600 bps instead.
Notes:
• After mapping a baud rate option to communicate at a new speed,
the original speed will no longer be available unless you map baud
rates again.
•
Make sure the new baud rate does not exceed the maximum baud
rate for your card (see previous chart)
•
The new baud rate will not apply until you tap ok and exit the HiSpeed COM Tools.
WARNING! DO NOT set the baud rate higher than
the maximum baud rate for your card, or you may
experience functionality problems!
Refer to the chart on page 12 to determine the
maximum baud rate for your card.
14
Use Advanced Options
WARNING! In most communication settings, these
options will not need to be altered. Do not modify these
options if you do not understand their function, or you
may cause functionality problems with existing
communication settings.
Modify Flow Control Properties
1.
From the initial Advanced screen, tap on Show
Advanced Options. The next screen will let
you modify flow control options.
2.
To modify flow control properties, use the
check boxes and bullets as appropriate.
If your application expects certain signals not
supported by your Data Communication
Equipment (DCE) hardware, you may want to
use a “simulate” option. Examples of DCE
include modems, printers, etc.
• Simulate DCD (Data Carrier Detect) — The DCE is receiving a carrier
signal from the other end of the telephone circuit.
• Simulate CTS (Clear to Send) — The DCE is clear to send.
• Simulate DSR (Data Set Ready) — The DCE is ready to send data from
the terminal.
If your DCE expects certain signals not supported by your application, you
may want to use a “force” option.
• Force DTR (Data Terminal Ready) — Can be used for hardware
control. A Control signal sent from the DTE to the to the DCE
indicating that the DTE is powered on and ready to communicate.
• Force RTS (Request to Send) — One of the control signals on a
standard RS-232 connector. It places the modem in the originate mode
so it can begin to send.
3.
After modifying your flow control settings, tap ok to apply the changes and
exit the Hi-Speed COM Tools. To return to the previous screen, tap Show
Baud Rates. To create a new baud rate not listed in the previous screen, tap
Set Custom Baud Rate.
IMPORTANT! Your changes will not take effect until you tap
ok and exit the Hi-Speed COM Tools!
CHAPTER 2: SETUP FOR WINDOWS MOBILE
15
Set a Custom Baud Rate
1.
From the initial Advanced screen, tap on Show Advanced Options. In
the next screen, tap on Set Custom Baud Rate.
2.
Use the Generate Custom Baud screen to create a new baud rate not
listed in the To: field in the first Advanced screen. Enter the Divisor
and TCR and tap ok.
3.
In the next screen, if you are done modifying your COM port
settings, tap ok to exit the Hi-Speed COM Tools.
To return to the initial baud mapping screen, tap Show Baud Rates.
IMPORTANT! Your changes will not take effect until you tap
ok and exit the Hi-Speed COM Tools!
16
3 | Setup for Windows XP, 2000,
Me, 98, and 95
This chapter describes how to set up the
hardware and software on a notebook
computer running Windows XP, 2000, Me, 98
or 95. Please note that the Serial I/O Cards
work with only certain versions of Windows
95 and 98: Windows 95 v4.00.950B,
Windows 98 and Windows 98 Second Edition.
Setup Summary
STEP 1: Insert the CD.
STEP 2: Insert the card into your computer.
STEP 3: Complete the new hardware wizard.
OPTIONAL: Use Hi-Speed COM Port Tools.
STEP 1: Insert the Installation CD
CHAPTER 3: SETUP FOR WINDOWS XP, 2000, Me, 98, 95
17
STEP 2: Insert the Card
IMPORTANT! Insert the card BEFORE installing the software!
1. If using a removable cable, attach it to the card. Press the
side latches of the cable connector, insert the connector
into the bottom of the card, and release.
The card and cable should join snugly and remain
attached after you release the side latches. To remove the
cable, press the side latches and pull gently.
IMPORTANT! When removing the cable, press
on the side latches before pulling it from the
card! Otherwise, you can damage the connector
and card!
2. Insert the card into your mobile computer’s expansion card slot. Insert
the card right-side up, with the blue label on top.
• If using removable cable, do not shove on the cable while inserting
the card.
• If using a CompactFlash card in a PC Card slot, first insert the card
into a PC Card adapter (shown below right).
When properly inserted, the card will be fully contained within the slot,
with only the connector and cable protruding.
WARNING! Do NOT insert the card upside down or shove the
card in too hard. Damage may occur!
To remove the card, use your device’s card eject button. DO NOT pull on
the cable or cable connector, especially if using a removable cable!
18
STEP 3: Complete the New Hardware Wizard
The first time you insert the card into your computer, a new hardware or
device driver wizard will appear. Follow the wizard to install the Serial I/O
Card drivers. Make the appropriate selections below for your Windows
version as prompted:
IMPORTANT! The CD must still be inside your computer!
Windows XP
• In the welcome screen, make sure the option Install the software
automatically (Recommended) is selected. Click Next>.
• If a screen warns you that the software has not passed Windows Logo
testing, click Continue Anyway.
• Follow the remaining instructions until installation is complete.
CHAPTER 3: SETUP FOR WINDOWS XP, 2000, Me, 98, 95
19
Windows 2000
• In the first screen, click Next>.
• Select Search for a suitable driver for my device (recommended). Click
Next>.
• In the next screen, check CD-ROM drive. Click Next>.
• Follow the remaining screens until installation is complete.
20
Windows Me
• In the first screen, click Next>.
• Select Search for the best driver for your device (Recommended).
Check Specify a location and click Browse to select your CD-ROM drive.
Click Next>.
• Follow the remaining screens until installation is complete.
CHAPTER 3: SETUP FOR WINDOWS XP, 2000, Me, 98, 95
21
Windows 98
• In the first screen, click Next>.
• Select Search for the best driver for your device (Recommended).
• In the next screen, check CD-ROM drive. Click Next>.
• Follow the remaining screens until installation is complete.
22
Windows 95
• In the first screen, click Next>.
• Windows should automatically search for the drivers on the CD. Follow
the remaining screens until installation is complete.
CHAPTER 3: SETUP FOR WINDOWS XP, 2000, Me, 98, 95
23
OPTIONAL: Use Hi-Speed COM Tools
Socket’s Hi-Speed COM Tools have two main components:
• Card Status — works only with Windows 2000/XP and allows you to
identify and/or modify the COM port assigned to any Socket card
installed on your computer.
• Baud Rate Mapping — allows you to program your computer to
work at a baud rate (up to 921 kbps, depending on your card version)
not normally available in Windows.
This section covers the following:
• Start the program
• View/modify COM port assignments (Windows XP and 2000 only)
• Determine the maximum baud rate of your card
• Map baud rates
• Access help information
• Exit the program
Start the Program
1.
Windows 95/98/Me/2000:
Go to Start | Settings | Control Panel | Hi-Speed COM Tools.
Windows XP: Go to Start | Control Panel | Hi-Speed COM Tools.
Alternatively, you can access the tools via a task tray icon:
2.
The Socket Hi-Speed COM Tools screen will appear.
3. If desired, check Always show icon on the taskbar at the bottom of the screen.
This will place an icon on the task tray so the program can be accessed later.
24
View/Modify COM Port Assignments (Windows 2000/XP only)
The Card Status section provides COM port information. Please note that
this feature only works with Windows 2000 and XP.
• Card Type: Make sure the correct Socket card is selected. Any highspeed Socket cards previously installed on your computer will appear
in the drop-down menu.
• Ports: Reports the number of ports detected for the selected card.
• Status: Reports the availability status of the port(s)
• Assigned COM Port(s): Shows the COM port(s) assigned to the
selected card. To change the port assignment, use the drop-down
menu to select another port. Ports already in use will be labeled as
{in use}.
• Card detection status: The field at the bottom reports how many
available Socket COM ports your computer detects. If no card is
inserted, a No Socket Card Detected message will appear.
To update the Card Status report, click REFRESH.
After making any changes, click APPLY.
Note: If you modify any settings, the changes will only take effect after you
click APPLY. If you modify settings when you have a connection with a
serial I/O port open, then the settings will not take effect until you
disconnect and reconnect the port.
CHAPTER 3: SETUP FOR WINDOWS XP, 2000, Me, 98, 95
25
Determine the Maximum Baud Rate of Your Card
If you plan to use the Hi-Speed COM Tools to map baud rates, it is useful
to know the maximum baud rate that your Socket Serial I/O Card can
handle. Later revisions of the card can handle higher baud rates, up to 921
kbps. Check the Revision Level (Rev) of your card and refer to the chart
below to determine the maximum baud rate of your card.
Note: The maximum baud rate varies with your device’s operating system,
processor speed, and other variables. Higher baud rates may not work
correctly on some older computers.
Part
Number
Not Compatible
with Hi-Speed
COM Tools
Maximum Baud Rate
230 kbps
921 kbps
CF with
Removable cable
8510-00094
8010-00075
Rev A
Rev B
Rev C or later
CF with
Ruggedized cable
8510-00115
8010-00087
Rev A
Rev B
Rev C or later
Custom CF Card
8510-00155
N/A
Rev A
N/A
PC Card with
Removable cable
8510-00012
8010-00012
Rev A-J
Rev K-L
Rev M or later
PC Card with
Ruggedized cable
8510-00073
8010-00065
Rev A-D
Rev E-F
Rev G or later
8010-00074
8510-00088
Rev A
Rev B
N/A
8010-00095
8010-00096
8510-00119
8510-00121
N/A
Rev A
N/A
Card Type
Custom PC Card
26
Map Baud Rates
What is baud rate mapping?
Most Windows applications offer baud rate settings only up to 115
kbps, because this is the maximum speed of typical serial ports. What
if you need or want to transfer data faster than 115 kbps? The latest
hardware and software of Socket’s Serial I/O Cards were designed to
handle much higher speeds, up to 921 kbps. Many Windows
applications can handle speeds higher than 115 kbps, although they do
not list any values higher than 115 kbps in their options for baud rate
configuration.
Socket has created Hi-Speed COM Tools to enable you to use your
COM port at higher baud rates in applications that only let you choose
a baud rate up to 115 kbps. The program essentially lets you use one
of the available baud rate values as a placeholder for a new baud rate
of your choice. This is known as “mapping” a new baud rate to an
available baud rate option.
For example, if you need your device to work at a baud rate of
230,400 bps, most Windows applications will not list 230,400 bps as a
baud rate option. Hi-Speed COM Tools cannot change which options
are listed, but it does let you program one of the options to work at
230,400 bps (e.g., you can change the “300” bps option to actually
work at 230,400 bps).
Note:
• Some applications (e.g., those for Windows 95, 98, and Me) may
have timing issues when you set them to baud rates that are higher
than they were designed for.
• After mapping a baud rate to a new speed, you can re-map it back
to its original speed.
CHAPTER 3: SETUP FOR WINDOWS XP, 2000, Me, 98, 95
27
Follow these steps to map baud rates:
1. Make sure the serial port is not already open on your computer.
2. In the Card Status section, make sure the correct Card Type is chosen and the
correct card is listed.
3. The Baud Rate Mapping section has a FROM field and a TO field.
6.
•
The FROM field lists baud rate options available in typical applications.
The number that you select in the FROM field will be the baud rate
option that you change to function at a new speed.
•
The TO field lists the baud rates you can choose from for your new
speed. Included in the TO list are baud rates (e.g., 921,600 bps) that are
not available as options in typical applications.
Use the FROM and TO fields to scroll and select the
appropriate baud rates. Select Enable and click
APPLY.
Example: Select “110” in the FROM field and
“921600” in the TO field. Select Enable and click
APPLY. Now, whenever you select a baud rate of
110 bps in a Windows application, your COM port
will communicate at 921,600 bps instead.
Notes:
28
•
After mapping a baud rate option to communicate at a new speed, the
original speed will no longer be available unless you map baud rates again.
•
Make sure the new baud rate does not exceed the maximum baud rate
for your card (see previous chart)
•
The new baud rate will not apply until you click Enable tap APPLY.
•
If you modify settings when a connection with a serial I/O port is open, then the
settings will not take effect until you disconnect and reconnect from the port.
WARNING! DO NOT set the baud rate higher than the maximum
baud rate for your card, or you may experience functionality
problems! Refer to the previous chart to determine the maximum
baud rate for your card.
4. To revert a Windows baud rate that you mapped back to the original
speed, select Disable, then click APPLY.
Alternatively, you can select the original baud rate in both the FROM and
TO fields, select Enable, then click APPLY.
CHAPTER 3: SETUP FOR WINDOWS XP, 2000, Me, 98, 95
29
Access Help Information
For help with the Hi-Speed COM Tools or information about the software,
click on Help.
Exit the Program
When done with the tools, click EXIT.
Note: If you forgot to click APPLY after changing settings in the Hi-Speed
COM Tools, then when you click EXIT, a screen will appear asking if you
want to apply the changes. Click APPLY to have the changes take effect.
30
Appendix A Specifications
Physical Characteristics:
PC Card:
Dimensions:
Weight:
CompactFlash Card:
Dimensions:
Weight:
Interconnect Cable
Standard Card:
Ruggedized Card:
Serial Connector:
Removable Cable Weight:
Environmental Conditions:
Operating Temperature:
Storage Temperature:
Relative Humidity:
3.37 x 2.13 x 0.197 in
(85.6 x 54.0 x 5.0 mm)
1 oz (28.4 g) with no cable
2.5 oz (70.9 g) with permanent cable
1.433 x 1.685 x 0.130 in
(36.4 x 42.8 x 3.3mm)
0.32 oz (9 g) with no cable
1.82 oz (51.5 g) with permanent cable
12 in (305 mm) long removable
16 in (406 mm) long fixed
9-Pin D Shell Male
1.1 oz (31.2 g)
0°C to +55°C
-20°C to +65°C
10% to 90% non-condensing
Power Consumption (power supplied by host):
PC Card:
Inactive:
5 mA (12 mW)
Active:
13 mA (65 mW)
CompactFlash Card:
With 3.3V Supply:
Inactive:
2.4 mA (8 mW)
Active:
8 mA (26 mW)
With 5V Supply:
Inactive:
4.3 mA (22 mW)
Active:
13 mA (65 mW)
Operating System Support:
Windows Mobile 2003SE, 2003
Windows CE v2.11 or later
Windows XP, 2000, Me
Windows 98 Second Edition
Windows 95 v4.00.950B
APPENDIX A: SPECIFICATIONS | 31
An enabler for DOS is available to programmers and developers. Please
contact Socket technical support for more information.
Interface Standards:
PC Card Interface:
CompactFlash Interface:
Serial Communications:
PCMCIA Release 8.0, Type II
JEIDA 4.1 Compliant
CompactFlash I/O Type I
Asynchronous RS-232;
16550 type UART
Software Included:
Windows 95/98/98SE/2000/Me/XP .INF
Windows CE
Media:
CD ROM
Programmable Characteristics:
Character length:
Parity:
Baud rate generation:
5-, 6-, 7- or 8-bit
Even, odd or none
921K baud maximum
Pin Assignments for DB-9 Connector:
Pin Number
1
2
3
4
5
6
7
8
9
Function
Data Carrier Detect
Receive Data
Transmit Data
Data Transmit Ready
Ground
Data Set Ready
Request to Send
Clear to Send
Ring Indicator
32 | APPENDIX A: SPECIFICATIONS
Appendix B Setup for MS-DOS
An enabler for MS-DOS is available for programmers and developers. This
appendix briefly describes how to set up the hardware and software on a
notebook computer running MS-DOS. Please contact Socket technical
support for more information at [email protected]
Note: The Hi-Speed COM Tools utility does not work with MS-DOS.
STEP 1: Install the Software
For DOS, you must install the enabler, then insert and activate the card.
1. Make sure your computer’s PCMCIA card controllers support a 16-bit
PCIC mode. In most cases, you can check from the system BIOS menu.
If your computer has a different mode (e.g., 32-bit Cardbus), consult
with your computer manufacturer for help in changing the settings.
IMPORTANT! The DOS enabler only works properly if your
notebook’s PCMCIA card controllers support a 16-bit PCIC mode!
2. If you have Card Services software installed on the computer, disable it.
Contact your computer manufacturer for help.
3. Insert the Serial I/O Installation CD into your
CD-ROM drive.
4. Type: X:\INSTALL (replace X with your CD-ROM drive letter).
5. Follow the instructions on the screen until installation is complete.
APPENDIX B: SETUP FOR DOS | 33
STEP 2:Insert the Card
1. If using the standard version of the Serial I/O Card, with
removable cable, attach the cable to the card. Pressing
the side latches of the cable connector, insert the
connector into the bottom of the card then release.
The card and cable should join snugly and remain
attached after you release the side latches. To remove the
cable, press the side latches and pull gently.
IMPORTANT! Press on the side latches before
pulling the cable from the card! Otherwise, you
can damage the connector and card!
2. Insert the Serial I/O Card into your computer’s PC Card slot. Make sure
the card is right-side up, with the blue label on top.
WARNING! DO NOT insert the card upside down or shove the
card in too hard. Damage may occur!
STEP 3: Activate the Card
After inserting the Serial I/O Card into your computer, you must activate
the card.
1. Type: STARTCOM
2. Your screen should display the COM port number used by the Serial I/O
Card. Make note of the COM port number, which will be the address of
any serial device you attach to the Serial I/O Card.
The Serial I/O Card should appear as a standard COM port to any MS-DOS
or Windows application. For more information on Socket’s direct enabler,
please refer to the README.TXT file on the Serial I/O Installation Disc.
34 | APPENDIX B: SETUP FOR DOS
Appendix C Technical Support
If you have trouble installing or using the Serial I/O Card, please refer to
the “Troubleshooting” section of this User’s Guide. If problems persist,
contact Socket’s technical support department.
IMPORTANT! To obtain personal assistance from a Socket technical
support engineer, you must first register your product online at
www.socketcom.com/prodreg.
After you register your product and log in, click on the Technical Support
tab, then click New Trouble Ticket to submit an online request for technical
support. Afterwards , you can log on anytime to monitor the status of your
request. If we are unable to resolve your support inquiry online, we can
arrange for a technical support representative to call you at a specific time.
Please refrain from disassembling the Serial I/O Card. Disassembly of this
device will void the product warranty.
APPENDIX C: SUPPORT RESOURCES | 35
Limited Warranty
Socket Communications Incorporated (Socket) warrants this product against defects in
material and workmanship, under normal use and service, for the following period
from the date of purchase:
Plug-in card: Lifetime (Three years if not registered)
Non-removable cable, if included: Lifetime (Three years if not registered)
Removable cable, if included: 90 days
Incompatibility is not a defect covered by Socket’s warranty. During the warranty
period, Socket will, at its option, repair or replace the defective product at no charge
when furnished with proof of retail purchase, provided that you deliver the product to
Socket or to an authorized Socket Service Center.
The returned product must be accompanied by a return material authorization (RMA)
number issued by Socket or by Socket's Authorized Service Center. If you ship the
product, you must use the original container or equivalent and you must pay the
shipping charges to Socket. Socket will pay shipping charges back to any location in
the contiguous United States. This warranty applies only to the original retail
purchaser and is not transferable.
Socket may, at its option, replace or repair the product with new or reconditioned parts
and the returned product becomes Socket's property. Socket warrants the repaired or
replaced products to be free from defects in material or workmanship for ninety (90)
days after the return shipping date, or for the duration of the original warranty period,
whichever is greater.
This warranty does not cover the replacement of products damaged by abuse, accident,
misuse or misapplication, nor as a result of service or modification other than by
Socket.
SOCKET IS NOT RESPONSIBLE FOR INCIDENTAL OR CONSEQUENTIAL
DAMAGES RESULTING FROM BREACH OF ANY EXPRESS OR IMPLIED
WARRANTY, INCLUDING DAMAGE TO PROPERTY AND, TO THE EXTENT
PERMITTED BY LAW, DAMAGES FOR PERSONAL INJURY. THIS
WARRANTY IS IN LIEU OF ALL OTHER WARRANTIES INCLUDING IMPLIED
WARRANTIES OF MERCHANTABILITY AND FITNESS FOR A PARTICULAR
PURPOSE.
Some states do not allow limitation of implied warranties, or the exclusion or
limitation of incidental or consequential damages, so that the above limitations or
exclusions may not apply to you. This warranty gives you specific legal rights and you
may also have other rights which vary from state to state.
This product may contain fully tested, recycled parts, warranted as if new.
For warranty information, call (510) 744-2700.
36
Limited Software Warranty
LIMITED WARRANTY. SOCKET warrants that the original disk or CD ROM is free
from defects for 90 days from the date of delivery of the SOFTWARE.
CUSTOMER REMEDIES. SOCKET’S entire liability and your exclusive remedy shall
be, at SOCKET’S option, either (a) return of the price paid or (b) replacement of the
SOFTWARE which does not meet SOCKET’S Limited Warranty and which is returned
to SOCKET with a copy of your receipt. Any replacement SOFTWARE will be
warranted for the remainder of the original warranty period or 30 days, whichever is
longer. THESE REMEDIES ARE NOT AVAILABLE OUTSIDE OF THE UNITED
STATES OF AMERICA.
NO OTHER WARRANTIES. SOCKET disclaims all other warranties, either express or
implied, including but not limited to implied warranties of merchantability and fitness for
a particular purpose, with respect to the SOFTWARE and the accompanying written
materials. This limited warranty gives you specific legal rights. You may have others
which vary from state to state.
NO LIABILITY FOR CONSEQUENTIAL DAMAGES. In no event shall SOCKET or
its suppliers be liable for any damages whatsoever (including, without limitation,
damages for loss of business profits, business interruption, loss of business information,
or other pecuniary loss) arising out of the use of or inability to use the SOFTWARE,
even if SOCKET has been advised of the possibility of such damages. Because some
states do not allow the exclusion or limitation of liability for consequential or incidental
damages, the above limitation may not apply to you.
EXPORT LAW ASSURANCES. You may not use or otherwise export or reexport the
SOFTWARE except as authorized by United States law and laws of the jurisdiction in
which the SOFTWARE was obtained. In particular, but without limitation, none of the
SOFTWARE may be used or otherwise exported or reexported (a) into (or to a national
or resident of) a United States embargoed country or (b) to anyone on the U.S. Treasury
Department’s list of Specially Designated Nationals or the U.S. Department of
Commerce’s Table of Denial Orders. By using the SOFTWARE, you represent and
warrant that you are not located in, under control of, or a national or resident of any such
country or on any such list.
GOVERNMENT END USERS. If the SOFTWARE is supplied to the U. S. Government,
the SOFTWARE is classified as “restricted computer software” as defined in clause
52.227-19 of the FAR. The U. S. Government ‘s rights to the SOFTWARE are as
provided in clause 52.227-19 of the FAR.
CONTROLLING LAW AND SEVERABILITY. This License shall be governed by the
laws of the United States and the State of California. If for any reason a court of
competent jurisdiction finds any provision, or portion thereof, to be unenforceable, the
remainder of this License shall continue in full force and effect.
37
Regulatory Compliance
This equipment has been tested and found to comply with the limits for a
Class B digital device, pursuant to Part 15 of the FCC rules. This equipment
is also CE EN55024:1998 and C-TICK compliant. These limits are
designed to provide reasonable protection against harmful interference
when the equipment is operated in a commercial environment.
This equipment generates, uses, and can radiate radio frequency energy
and, if not installed and used in accordance with the instruction manual,
may cause harmful interference to radio communications. Operation of this
equipment in a residential area is likely to cause harmful interference in
which case the user will be required to correct the interference at his or her
own expense.
If this equipment does cause harmful interference to radio or television
reception, which can be determined by turning the equipment off and on,
the user may try to correct the interference by one or more of the following
measures:
•
Reorient or relocate the receiving antenna of the radio or television.
•
Increase the distance separating the equipment and the receiver.
•
Connect the equipment to an outlet on a different branch circuit than
that of the receiver.
•
Consult the dealer or an experienced radio/TV technician for help.
The user may find the following booklet helpful:
How to Identify and Resolve Radio-TV Interference Problems
This booklet is available from the U.S. Government Printing Office,
Washington, D.C. 20402.
Product Disposal
Your device should not be placed in municipal waste. Please
check local regulations for disposal of electronic products.
38
© Socket Communications, Inc.
July 2005
Printed in U.S.A.