Download Short instructions for the Leica-Inverted-2
Transcript
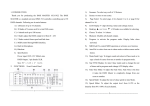
Leica-Inverted-2 -1- Short instructions Short instructions for the Leica-Inverted-2 Version 120702 This short instruction will guide you through the turn on and off sequence of the microscope system. For a detailed instruction in system operation refer to the Leica user manual. This instruction also contains important information on laser safety and general guidelines. Content: 1. Laser safety Page 2 2. General guidelines Page 3 3. Switching on the microscope Page 5 4. Operating the microscope with Ar and HeNe lasers Page 6 5. Operating the microscope with the 405nm laser Page 6 6. Acquiring images Page 7 7. Switching off the system Page 8 8. Trouble shooting Page 10 Leica-Inverted-2 -2- Short instructions 1. Laser safety Safety notes for operating the laser scanning microscope: During scanning, the laser radiation is freely accessible after exiting the objective in the specimen area of the laser scanning microscope. This circumstance demands special attention and caution. If the laser radiation comes in contact with the eyes, it may cause serious eye injuries. For this reason, prudent handling is absolutely necessary as soon as one or several laser emission warning indicators are lit. If used as prescribed and observing the safety notes during the operation of a laser scanning microscope, there are no dangers to the user. 1. According to IEC/EN 60825−1, this laser scanning microscope is a laser device of Class 3B. 2. Never look directly into a laser beam or a reflection of the laser beam. Avoid all contact with the laser beam. Otherwise, your eyesight may be permanently damaged. A reflected laser beam is just as dangerous as a direct beam. 3. Never deactivate the laser protection devices. Read the chapter "What are the safety devices of the laser scanning microscope?" to familiarize yourself with the safety devices of the laser scanning microscope. If you find any of the laser protection devices inactivated, please contact the facility staff immediately. 4. Note that objects (such as micromanipulators) in the specimen area may cause laser light to exit the safe beam path during the scanning in an uncontrolled manner by means of reflection or scattering and endanger the environment. 5. Do not change a specimen during scanning. 6. Do not change any objectives during scanning. 7. All unused positions of the objective turret should be closed with a cap. 8. Do not change any filter cubes or beam splitters during scanning. Never disconnect an optical waveguide. 9. Never remove the scan head from the microscope stand during operation. Before removing the scan head, the system must be completely switched off. 10. Do not remove the microscope condenser. Leica-Inverted-2 -3- Short instructions 2. General guidelines 1. Lab rules: This room is a S2 laboratory. At times when S2 experiments are performed in this room, you are not allowed to enter the room. S2 experiments will be indicated by a sign at the outside of the door and in the online booking system. When no S2 experiments are performed everyone who is authorized by the facility staff can enter the room. You always have to wear a lab coat. Lab coats can be left in the cupboard, first door left from the entrance. 2. Booking and keys: Before you can use a microscope you have to make a reservation in the online booking system. Always pick up a key from Wolfgang Posselt in room 1052. Office hours: Monday to Friday. IIf you are planning to use a microscope outside these hours, pick up a key in advance. When you are leaving lock the microscope room and after 17:00 also look the main door of the facility. Return the key to Wolfgang Posselt or to the mail box of the Laser Microscopy Facility, level S, in the hallway left from the stair case, second row, in the center. 3. UV-excitation: In addition to the Ar and HeNe lasers this microscope is equipped with a UV laser at 405nm. This laser has to be switch on separately from the other lasers. Follow the instructions in chapter 5. Leica-Inverted-2 -4- Short instructions 4. Immersion oil: Always remove old immersion oil, before you add new ones. Only use the lens tissues provided by the Laser Microscopy Facility staff. In case there is oil on no-oil objectives, don’t try to clean them but leave a note in the log book. 5. Changing objectives: Never change the objectives manually! To change objectives use the objective button within the Leica software. 6. Changing the specimen: Before you change the specimen, drive down the objective nosepiece. Don’t forget to remove the old oil from the objective before you add new ones. 7. Switching between the scan mode and the visual mode: Use the microscope button within the Leica software. 8. Switching the system on and off: If the lasers or the HBO lamp have been switched off, you have to wait at least for 1 hour before they can be switched on again. If you find the system completely switched off, check the logbook to ensure that the system was switched off at least 1 hour ago. If not you have to wait! Before you switch off the lasers or the HBO lamp check the online booking system, if there are users booked right after you. In this case leave the lasers, the HBO lamp, the three red buttons on the control panel, and the large button right on the monitor table switched on. But exit the Leica software and restart Windows! Turn the power knob of the Ar laser (Figure1, G) to “min”. 9. Data transfer: Never save any data on the microscope computer. There are three ways to transfer your data from the microscope computer: a. Transfer through the MHH network. Save your data on hard disk P: of your department. b. USB-sticks or movable hard disks connected via USB. The USB sockets are located at the back of the computer.´ c. Writable CDs. This computer supports only CD-R, -RW. Other formats will not be recognized. Open the Nero Start Smart software and follow the instructions. Leica-Inverted-2 -5- Short instructions 3. Switching on the microscope 1. If you find the system completely switched off, check the logbook to ensure that the system was switched off at least 1 hour ago. If not you have to wait! If you find the system switched on continue with point 5. 2. Switch on the 3 red buttons of the control panel (Figure 1, A to C). Buttons should glow red. control panel HBO Figure 1 3. Switch on the HBO lamp (Figure 1 H, on the floor left from the microscope). 4. Log on to Windows: Select “MH-Hannover” type in your user name and your password. 5. At the microscope drive the objective nosepiece completely down, select the 40Xobjective. 6. Start the Leica software: double click on “Leica Confocal Software”. 7. Select “Personal” and then click on “Start” 8. Do not perform the next step until the software start up is completed. If you get any error messages at this step consult the trouble shooting guide at the end of this instrauction. Leica-Inverted-2 -6- Short instructions 4. Operating the microscope with Ar and HeNe lasers 1. Activate the lasers needed by turning the ignition keys of the control panel (D, E, F) clockwise. When using the Ar laser make sure to turn the key to the start position. The yellow light should be on. Note, switch on only the lasers you need: Laser (description on the control panel) Wave length [nm] Ignition key D; Ar/ArKr 456, 476, 488, 496, 514 Ignition key E; HeNe 543/594 543 Ignition key F; HeNe 633 633 2. When using the Ar laser turn the power knob on the control panel (G) to 11 o’clock. 5. Operating the microscope with the 405nm laser 1. The control unit for the 405nm laser is located under the monitor platform on the left side. 2. Switch on the red button. 3. Turn the ignition key to on. 4. Follow the instructions in chapter 6. In the "Beam Path Setting" dialog window select the method DAPI for a simultaneous scan method. This method can also be used as part of a sequential scan method, e. g. the DAPI-FITC-TRITC method from the sequential scan dialog window if you are using these or similar fluorescent dyes. Leica-Inverted-2 -7- Short instructions 6. Acquiring images 1. Affix a specimen and adjust the specimen using the conventional microscopy mode. a. Turn the fluorescence filter dial to the appropriate filter cube. 1: DAPI 2: TRITC 3: FITC 4: empty position (scan) b. Open the light path shutter to the mercury lamp. c. Within the Leica software select VISUAL from the microscope control button. d. Focus your specimen. 2. Acquire images in the scan mode. a. b. c. d. Turn the fluorescence filter dial to the empty position (position 4, “scan”). Close the light path shutter to the mercury lamp. Within the Leica software click on BEAM. Select a method in the open "Beam Path Setting" dialog window (top right window). e. Start the scan by clicking on CONTINUOUS. f. Optimize the acquisition parameters in continuous scan. Leica-Inverted-2 -8- Short instructions 7. Switching off the system 1. First, check in the online booking system, if there are users booked within the next hour. If this is the case, continue with point 5. 2. If nobody is booked within the next hour, switch off the Ar, HeNe, or 405nm lasers by turning the ignition keys of the control panel counterclockwise. The yellow lights should be dark. Note, no other switches should be turned off for another 5 min, the time needed to cool the lasers. Turn the power knob of the Ar laser (Figure 1, G) to “min”. Switch off the HBO lamp. 3. Before you terminate the Leica software, place the 40x objective in the light path, and drive the objective nosepiece completely down. Exit the Leica software. Shut down Windows. 4. 5 min after the lasers have been switched off, press off the 3 red buttons of the control panel, and the red button of the 405nm laser control unit, if used. The buttons should be dark. Continue with point 6. 5. In case users are booked within the next hour, leave the HBO lamp, all red control buttons and ignition keys switched on. Place the 40x objective in the light path, and drive the objective nosepiece completely down. Then exit the Leica software and restart Windows! Turn the power knob of the Ar laser (Figure 1, G) to “min”. 6. Remove any oil from the oil immersion objectives using the lens cleaning paper. In case there is oil on no-oil objectives, don’t try to clean them but leave a note in the log book. 7. Sign in the log book: user name, date, time, HBO lamp, and the lasers used. 8. Only if the system will be completely switched off cover the microscope stand. Leica-Inverted-2 -9- Short instructions 8. Trouble shooting If you experience problems when using the Leica confocal system, please follow these guidelines. If you can not solve the problem call for help: -3914 (Rudolf Bauerfeind). “You receive an error message during or after the Leica software start up.” 1. Exit the Leica software and restart Windows. Then open the Leica software. 2. “If you still receive an error message.” Exit the Leica software and shut down the computer. Switch off the red button on the very right of the control panel (Figure 1, C). Wait for 10 seconds. Then switch on the red button, log on and open the Leica software. 3. “If you still receive an error message” and no laser is switched on: Exit the Leica software and shut down the computer. Switch off the all red buttons of the control panel. Wait for 10 seconds. Then switch on the red buttons, log on and open the Leica software. In case lasers are switched on: Switch off the lasers with the ignition keys, Wait for 10 minutes. Exit the Leica software and shut down the computer. Switch off the all red buttons of the control panel. Wait for 10 seconds. Then switch on the red buttons, log on and open the Leica software. No error message anymore? Then, you have to wait additional 50 Minutes before you are allowed to switch on the lasers again. “You don’t see an image during the continuous scan “ 1. Look at your specimen during continuous scan. “You don’t see pulsing laser light.” a. Check the ignition keys on the control panel if the correct lasers are switch on. Yellow light should be on. Check the filter wheel and turn it to the “scan” position, which is position 4. b. “The lasers were on, but still no laser light visible.” Within the Leica software select FITC-TRITC-CY5 from the beam path settings. Start continuous scan. When you see the laser light on the specimen, return to your own beam path settings. c. “Still no laser light visible.” Exit the Leica software and restart Windows. Then open the Leica software, select FITC-TRITC-CY5 from the beam path settings, and start continuous scan. When you see the laser light on the specimen, return to your own beam path settings. Leica-Inverted-2 -10- Short instructions d. “Still no laser light visible.” Switch off the lasers with the ignition keys, Wait for 10 minutes. Exit the Leica software and shut down the computer. Switch off the all red buttons of the control panel. Wait for additional 50 minutes. Then switch on the red buttons, log on and open the Leica software, switch on the correct lasers, and select FITC-TRITCCY5 from the beam path settings. Start continuous scan. When you see the laser light on the specimen, return to your own beam path settings. 2. Look at your specimen during continuous scan. “Pulsing laser light is visible.” a. Increase the gain of the active PMTs to maximum (1000V). During continuous scan slowly move the z-position up and down until you see structures. b. “Now the image shows just noise, no structures.” Check the zoom, and eventually set it back to zoom factor = 1. c. “The image still shows noise, no structures.” Within the Leica software select FITC-TRITC-CY5 from the beam path settings. Start continuous scan and move slowly the z-position up and down until you see structures. If, at least one channel shows structures, check on the microscope stand if the fluorescence filter dial is in the "Scan" position, that is position 4. Then review your own beam path settings, and retry.


