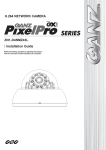
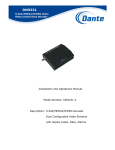
1
(FW Version 1.8.0.8) PixelPro GXi Series Web Page User’s Manual V1.8.0.8 Table of Contents WHAT’S NEW ........................................................................................................... 5 1. INTRODUCTION .................................................................................................... 7 1.1. Welcome................................................................................................................... 7 1.2. Getting Started.......................................................................................................... 7 1.3. IP Address Setting ..................................................................................................... 7 2. USING A WEB BROWSER ....................................................................................... 9 2.1. ActiveX Installation (AxUMF.cab) ............................................................................... 9 2.2. Recommended PC Specification ............................................................................... 11 3. LIVE PAGE CONFIGURATION ............................................................................... 12 3.1. Log In ...................................................................................................................... 12 3.2. Live Page Menus ..................................................................................................... 13 4. STORAGE CONFIGURATION ................................................................................. 17 4.1. Storage device settings ............................................................................................ 17 4.1.1. USB/SD Storage ......................................................................................................... 17 4.1.2. FTP ............................................................................................................................. 18 4.2. Recording ................................................................................................................ 19 4.2.1. Recording file format ................................................................................................ 19 4.2.2. Continuous recording ................................................................................................ 19 4.2.3. Event recording ......................................................................................................... 21 4.3. Search and Download .............................................................................................. 22 4.3.1. Continuous recording file download ......................................................................... 22 4.3.2. Event Search & Download ......................................................................................... 22 5. SETUP ................................................................................................................. 24 5.1. Basic Configuration.................................................................................................. 24 5.1.1. Users.......................................................................................................................... 24 5.1.2. TCP/IP ........................................................................................................................ 24 5.1.3. Date and Time ........................................................................................................... 24 5.1.4. Stream ....................................................................................................................... 24 5.1.5. Focus Assist ............................................................................................................... 25 5.2. Video and Audio ...................................................................................................... 26 5.2.1. Camera (channel naming/video format/ color control)............................................ 26 5.2.2. Repositioning............................................................................................................. 31 09-2014-A 2 PixelPro GXi Series Web Page User’s Manual V1.8.0.8 5.2.3. Zoom/Focus............................................................................................................... 33 5.2.4. Burnt-in Text.............................................................................................................. 34 5.2.5. Encoder profile .......................................................................................................... 35 5.2.6. Stream ....................................................................................................................... 39 5.2.7. Privacy Mask.............................................................................................................. 40 5.2.8. Video-Out .................................................................................................................. 42 5.3. EVENT CONFIGURATION .......................................................................................... 43 5.3.1. Event Rules ................................................................................................................ 43 5.3.2. Motion Detection ...................................................................................................... 50 5.3.3. Network Lost ............................................................................................................. 51 5.3.4. E-mail recipient ......................................................................................................... 52 5.3.5. FTP Notification ......................................................................................................... 53 5.3.6. HTTP Notification ...................................................................................................... 55 5.3.7. TCP Notification......................................................................................................... 57 5.3.8. TCP Server ................................................................................................................. 59 5.3.9. Multicast Notification................................................................................................ 59 5.3.10. Heart beat ............................................................................................................... 59 5.3.11. Schedule .................................................................................................................. 60 5.4. Network Configuration ............................................................................................ 62 5.4.1. TCP/IP(DHCP, Static IP, DNS setting .......................................................................... 62 5.4.2. Web Server ................................................................................................................ 64 5.4.3. NTP Server ................................................................................................................. 66 5.4.4. UPnP .......................................................................................................................... 66 5.4.5. RTSP/RTP (multicast or unicast) ................................................................................ 67 5.4.6. mDNS (Multicast DNS) .............................................................................................. 69 5.4.7. WS-Discovery ............................................................................................................ 69 5.4.8. SMTP ......................................................................................................................... 70 5.4.9. DDNS (Dynamic DNS) ................................................................................................ 71 5.4.10. SNMP ....................................................................................................................... 72 5.4.11. IP Filtering ............................................................................................................... 74 5.4.12. Hosted Service ......................................................................................................... 75 5.4.13. Wireless LAN ........................................................................................................... 76 5.5. VCA......................................................................................................................... 77 5.6. Peripheral ............................................................................................................... 77 5.6.1. Sensor/Alarm............................................................................................................. 77 5.6.2. PIR ............................................................................................................................. 79 09-2014-A 3 PixelPro GXi Series Web Page User’s Manual V1.8.0.8 5.6.3. Serial Port .................................................................................................................. 79 5.7. PTZ settings ............................................................................................................. 80 5.7.1 PTZ .............................................................................................................................. 80 5.7.2. Touring ...................................................................................................................... 81 5.7.3. Autorun ..................................................................................................................... 81 5.7.4. Protocols ................................................................................................................... 82 5.8. Maintenance ........................................................................................................... 83 5.8.1. Users.......................................................................................................................... 83 5.8.2. Date & Time .............................................................................................................. 85 5.8.3. API ............................................................................................................................. 86 5.8.4. Language ................................................................................................................... 86 5.8.5. Firmware Upgrade .................................................................................................... 86 5.8.6. System Log ................................................................................................................ 88 5.8.7. Event Search .............................................................................................................. 89 5.8.8. Configuration Import/Export .................................................................................... 89 5.8.9. Reset All Settings ....................................................................................................... 90 5.8.10. Reboot ..................................................................................................................... 91 5.9. Activation ............................................................................................................... 91 5.10. About .................................................................................................................... 92 5.10.1.Information .............................................................................................................. 92 5.10.2. License ..................................................................................................................... 92 APPENDIX(A) : ENCODERS....................................................................................... 93 Video-In ............................................................................................................................... 93 Encoder Profile .................................................................................................................... 94 Video-Out ............................................................................................................................ 94 Information ......................................................................................................................... 95 REVISION HISTORY ................................................................................................. 96 09-2014-A 4 PixelPro GXi Series Web Page User’s Manual V1.8.0.8 WHAT’S NEW K1.6.0.4 [Added] Features relevant to the encoder [Added] Video-In menu for the encoder [Added] Video resolution for the encoder [Added] RS-485 configuration page [Change] PTZ configuration page [Added] RACK system information on About page [Change] Relocation of Event Search to the maintenance category in Setup [Added] Image Rotation in Camera Setting [Change] Minimum shutter speed changed from 1/5000 per second to 1/10000 per second. [Added] Smart IR function [Added] Refocus for transition of day and night [Change] Privacy Mask setting for PTZ positional change [Added] Trigger mode in VCA source in Event Rules [Added] Inactive option for DI in Event Source under Event Rules [Added] Attaching snapshots of pre image in e-mail notification in Event Action in Event Rules [Added] Duration (time extension) setting for DI in Sensor/Alarm [Added] Replay attack protection for ONVIF in API maintenance setting [Change] UI rearranged in API maintenance setting [Added] Link-local address in TCP/IP [Added] Option of ‘basic’ in Authentication type under RTSP/RTP [Added] Options of NO-IP and FreeDNS in DDNS Protocol Type [Added] Save event log in Event Action under Event Rules [Added] Multiple DIDOs in Event Configuration K1.7.0.7 [Added] Record, Snapshot, Pause and Setting of Video Control in Live Page [Added] Video Stabilization in Camera settings [Added] Recurrence and schedule in Event Sources [Added] Message Customization in TCP Notification and TCP Server [Added] Hosted Service in Network Configuration [Added] Off option for Smart IR in Video Settings [Added] IP filtering in Network Configuration K1.8.0.4 [Change] IR option in Video settings changes from Auto to On [Added] Viewer and Operator user group in Users settings [Added] ONVIF Profile G support [Change] WS-Discovery menu moved to network configuration page [Added] 4:3 display mode support [Added] Unwarping panel in Live View Page [Added] Certificate modification in HTTPS settings [Added] IPv6 support [Change] Auto flip menu moved to PTZ setup page (Setup-PTZ-PTZ) [Added] Focus Assist function in Basic Configuration settings [Added] v3 SNMP version [Added] Profile name and Description field in Encoder Profile settings 09-2014-A 5 PixelPro GXi Series Web Page User’s Manual V1.8.0.8 [Added] Network loss/detect option in event rules settings [Added] Active & Inactive options under Event Action tab [Change] Display name of recording option under Event Action tab [Added]Notification message added under Event Action tab [Added] Network Loss page in Event Configuration settings [Added] Send rate limit option in E-Mail Recipient settings [Added] Net-Loss filtering in Event Search settings (Setup-Maintenance-Event Search) [Added]Net-Loss & Manual filtering in Event settings (Storage-Search&Download-Event) [Added]Playback column in Event settings [Change] Download option in Event settings [Added] Show motion activity option in Motion Detection settings [Added] Video-Out menu for encoder 09-2014-A 6 PixelPro GXi Series Web Page User’s Manual V1.8.0.8 1. INTRODUCTION 1.1. Welcome This manual explains how to interface with the H.264 codec supporting IP camera series using the Microsoft® Internet Explorer web browser. The Web Page of the product has been implemented with the protocols below: HTTP API – Parameter configuration commands RTP/RTSP – Video, Audio, and Metadata Streaming Active X program – Image display on client PC 1.2. Getting Started Before utilizing the web interface, install and connect the camera and other physical devices. Refer to the hardware manual supplied for the product installation steps. The installation manual provides detailed information for installation and configuration of the device. 1.3. IP Address Setting How to find the IP Address of your device: The product has its unique IP address, and users can identify the address by converting the MAC address’ last two digits of hexadecimal numbers described on the sticker that is attached to the device. Refer to the following figure, and convert the MAC address to an IP address. Type the identified IP address in the address bar of the Internet Explorer to access the web page of the product. MAC address = 00-1C-B8-01-23-45 → IP address = 192.168.35.69 Convert the last two sets of hexadecimal numbers to decimal numbers. 09-2014-A 7 PixelPro GXi Series Web Page User’s Manual V1.8.0.8 How to change the default IP address: IPAdminTool software allows users to search and change the IP address of connected devices. The figure below shows a main UI of the IPAdminTool. The IPAdminTool helps to search multiple devices. Please refer to the ‘IPAdminTool User’s Manual.pdf’ for the detailed information and its usage. What is IPAdminTool? IPAdminTool automatically scans all of the products including encoders and cameras on the network and displays product’s information, including product name, IP address, MAC address, firmware information, and devices’ uptime. The tool also allows users to change the IP address or update the firmware. It is highly recommended for users to review before using this tool for better understanding the software functions and administration controls. Limitation of the concurrent clients Depending on streaming configurations and settings, simultaneous connections might reach the limitation due to system maxed-out capability. RTSP Streaming, Unicast: Heavily depends on the maximum throughput in a given time. 09-2014-A 8 PixelPro GXi Series Web Page User’s Manual V1.8.0.8 2. USING A WEB BROWSER After the network and power connection are established, access the web browser to view the live streaming of the connected device. Installation of the ActiveX is required to see the live page and to access full controls in Microsoft® Internet Explorer. 2.1. ActiveX Installation (AxUMF.cab) For full control of a device through a web browser, installation of the ActiveX control is required. Refer to the following steps to install the ActiveX. Disable the Pop-up blocker or run “Add-on” notice in a browser to install the ActiveX and Installation file. 1. Click the installation warning message on the view page as below. JPEG snapshot is displayed every 1 second before you install AxUMF.cab 2. Click the Install button on the security warning message box. If the page is not responding after the installation, refresh the page. 3. Install“setup.exe” by clicking the link shown on the main page. JPEG snapshot is displayed every 1 second before you install “setup.exe”. 09-2014-A 9 PixelPro GXi Series Web Page User’s Manual V1.8.0.8 4. Follow the instructions of the dialog boxes, and complete the installation. 5. When the dialog box appears to request user name and password, enter the default value for the administrator account (case-sensitive) as below: User Name: root Password: pass 6. Refresh the page and check if the live image is displayed successfully. i Note 09-2014-A If ActiveX is not run properly, please make sure all of your software components are up to date: .NET Framework V3.5 http://www.microsoft.com/en-us/download/details.aspx?id=21 Microsoft Visual C++ 2008 SP1 Redistributable Package (x86) http://www.microsoft.com/en-us/download/details.aspx?id=5582 10 PixelPro GXi Series Web Page User’s Manual V1.8.0.8 2.2. Recommended PC Specification The following table describes the recommended requirement of the PC system to use a Web browser with our products. Item VGA OS Direct X i Recommended D3D support Vista, 7, 8 9.0 Only Internet Explorer 8 or higher version x86 is officially supported. Note 09-2014-A 11 PixelPro GXi Series Web Page User’s Manual V1.8.0.8 3. LIVE PAGE CONFIGURATION When the device is accessed via the web browser, the live image of the device appears on the window. To go back to the Live page either from the Storage or Setup page, click Live on the upper left corner of the web page. 3.1. Log In To access the device on the web browser: 1. Enter root for the user name and pass for the password on the pop-up window. 2. Click the OK to access the main page. 09-2014-A 12 PixelPro GXi Series Web Page User’s Manual V1.8.0.8 3.2. Live Page Menus Option Tab Panel: Clicking the Panel button enables users to hide/show the menu tabs. Stream: The drop-down box displays available streams of the camera for users to select from. i There is no UDP stream type supported for IPv6 network. Note Size: Users may select the size of image that is displayed on a web page. - Fit: Image size is reduced / enlarged to “fit” into the current web window. - 25%: Image size is reduced to a quarter of original resolution. - 50%: Image size is reduced to a half of original resolution. - 75%: Image size is reduced to three quarters of original resolution. - 100%: Image size is displayed as its original resolution size. - 150%: Image size is 50% more enlarged than its original resolution size. - Full: The image is shown on a full screen mode. Trigger-Alarm(DO): Users may enable or disable the alarm. Setting up the alarm from the setting menu is required. (Setup > Peripheral > DI/DO) Audio: - Speaker :Speaker will be activated when Audio Input (Setup > Stream > Audio) and audio stream (Setup > Network Configuration > RTSP/RTP) are ticked. - Microphone :Microphone will be activated when the Audio Output (Setup > Stream > Audio) is ticked. Video Control: Users can readily record or take a snapshot of the live image in a local storage while monitoring the live image. i Note 09-2014-A The operation of Video control requires Internet Explorer to access the client system. If a message box of User Account Control asks you to make changes on your computer, click Yes to allow the control. 13 PixelPro GXi Series i Web Page User’s Manual V1.8.0.8 Video Control cannot be supported in any browser other than Internet Explorer. Note - - Record/Stop: Click the Record button to record the current scene of the live image as an AVI file, and click the Stop button when you need to stop recording. Snapshot: Click the Snapshot button to take a snapshot of the current scene. Pause/Resume: Click the Pause button when you need to observe a fast moving scene in the live image, and you can also take a snapshot of the paused scene. Click the Resume button if you want to see the live image again. Setting: Users can configure the settings of recording and snapshot. Clicking the Setting button will make the Recording/Snapshot Configuration page popped up. i Note Turn off the pop-up blocker on the Live page. Clicking the Setting button will bring up the Recording/Snapshot Configuration page. Local Recording: - Save Path : Select a local path to save recordings of Live Page. - Prefix of filename: You can change the prefix of the file name. - Recording resource: Select either ‘Video only’ or ‘Audio+Video’ according to your intention. - Rule of segmentation: You can set a segmentation rule to limit a file size. (by) Size: The range of the file size is from 10 to 4000 Megabyte(s). (by) Time: The range of the recording length is from 10 to 3600 seconds or from 1 to 3600 minutes. Snapshot - Save Path: Select a local path to save snapshots of Live Page. - Prefix of filename: You can change the prefix of the file name. 09-2014-A 14 PixelPro GXi Series Web Page User’s Manual V1.8.0.8 Status Tab Status: Status panel displays items listed below. - System : Shows Usage of CPU and memory. - Time: Time after booting. - First Stream/Second Stream/Snapshot: Configuration information of each stream. - RTSP Connect List : shows all IP addresses currently accessing the webpage. If the live image is not shown, 1. Check if the camera is powered on and connected properly. 2. When using the Internet Explorer, check if the ActiveX control is installed. For other types of web browsers, the live image is displayed via QuickTime Player. 09-2014-A 15 PixelPro GXi Series Web Page User’s Manual V1.8.0.8 PTZ Tab PTZ Tab is shown if the model supports PTZ operation or it is Speed PTZ camera. Movement: The arrow buttons can enable users to move Pan/Tilt. -Zoom In/Out: Click ‘+’ button to zoom in (Tele) and ‘-‘ button to zoom out (Wide). -Focus Near/Far: Click ‘+’ button to focus in near and ‘-‘ button to focus in far. Speed: Adjust the speed of the pan/tilt control. Pre Position: Users can preset various positions by numbering different spots of space. The maximum number of positions that user can set are 255. Clicking GO after a preset number was selected from the drop-down list will show the corresponding position. Tour: Tour shows the video stream from the different preposition in a pre-defined order for intervals. Select the Touring Number and then click the Start button to start the predefined Touring. If you want to stop Touring immediately, Click Stop button. Please refer to 5.7.1 Touring for the configuration. Home Position: One position can be set as the Home position which is readily accessible by just clicking “Go” or goes to when there is no operation with Autorun. Please refer to 5.7.3. Autorun for the configuration. 09-2014-A 16 PixelPro GXi Series Web Page User’s Manual V1.8.0.8 4. STORAGE CONFIGURATION From the Storage page, a user can configure a storage device and recording. 4.1. Storage device settings 4.1.1. USB/SD Storage To search for mounted USB or storage devices and check the device information, click Storage . Device List: The mounted devices are listed by clicking “Refresh USB/SD Device List”. Device Information: The detailed information of the selected storage device is displayed. The information includes device name, type, total capacity, free space, and device status. Record Device Control: allows users to format a storage device as vfat or ext3 file system, and mount or eject storage device that is available from the device list. i Note Ext3 file system is recommended due to its resilience against data loss in case the card is ejected or if there is abrupt power loss. Class 4 or higher Class SD card is recommended when recording high resolution video. To start the recording, the device must be connected. If the connected device does not appear, try to reboot the device and check its status again. 09-2014-A 17 PixelPro GXi Series Web Page User’s Manual V1.8.0.8 4.1.2. FTP To specify the FTP server to record the video and audio, click Storage > FTP. Please note that this is the configuration for FTP server used only for the event recording. Please refer to 4.2.3 Event recording and 5.3 Event Configuration for more details. Name Specify the FTP server name. IP Address Enter the FTP server address. Port Enter the server port number. The default is 21. Target Directory Enter the target directory to store the data. Account Enter the login user name of the FTP server. Password Enter the password of the FTP server. Prefix of filename The prefix of file name is USN (Unique Serial Number) of each device for easier recognition of the recorded files among numerous using the same FTP server. i The date and time in the recorded file name is based on UTC time. Note 09-2014-A 18 PixelPro GXi Series Web Page User’s Manual V1.8.0.8 4.2. Recording i Note GXi series devices currently support recording limited for H.264 video codec. Please configure the video codec as H.264 if you need to record video. (Refer to 5.2.6 Stream for the codec configuration.) 4.2.1. Recording file format Continuous This mode enables continuous recording on a SD card with AVI format. Event Event mode enables intermittent recording when there is an event such as an intrusion or any other specific occasion. 4.2.2. Continuous recording For the Continuous configuration, click Storage > Recording > Configuration. On this page, users can configure the recording storage option and recording conditions and perform the instant recording. Recording storage Options - Storage device: SD card is pre-ticked and selected. - Recycling :Users can select one of the options when the storage is full. Stop recording: Stops recording and keeps the recorded data. Delete files and recycle (oldest first): Replaces oldest files with latest files (based on dates). 09-2014-A 19 PixelPro GXi Series Web Page User’s Manual V1.8.0.8 Recording Setting - Prefix of filename Give relevant name that will be used as the recorded file. For easier recognition of duplicate files, the end of every recording file name includes the date and time information as a default. - Recording resource Select the choice between ‘Video only’ and ‘Audio+Video’. - Rule of segmentation (by) Size: The range of the file size is from 100 to 1440 Megabytes. (by) Time: The range of the recording length is from 5 to 20 minutes. - Stream source Users may choose primary recording source from either first stream or second stream. If it is a single stream, the second stream option is unavailable. Instant Recording If the Start button is pressed, the recording will be started immediately. Before pressing the start button, input recording time (seconds) in the box next to the start button. The system default is 60 seconds, and the available recording time is from 10 to 600 seconds. (10 minutes) While the recording is in progress, the button label changes from “Start” to “Stop”; Users can manually stop the recording while it is being progressed. i Note Instant recording is enabled only when you select Continuous as the recording format. When the recording is complete, Download button appears on far right; Click the button to download the recording as a file. 09-2014-A 20 PixelPro GXi Series Web Page User’s Manual V1.8.0.8 4.2.3. Event recording To configure the event recording, click Storage > Recording > Configuration, and then select Event of Recording Format. On this page, users can choose the desired storage (SD card, or FTP server) for event recording and set related recording parameters. Recording storage Options Select the storage device type. If FTP is selected, the SD memory can be used as a buffer to transfer stably. Recording Setting - Recording resource Select the choice between ‘Video only’ and ‘Audio+Video’. - Event hold off time Specify the time between the successive triggered events so as to ignore the often repeated event. Stream source Users may choose primary recording source from either first stream or second stream. If it is a single stream, the second stream option is unavailable. 09-2014-A 21 PixelPro GXi Series Web Page User’s Manual V1.8.0.8 4.3. Search and Download 4.3.1. Continuous recording file download To view and download the recorded files, click Storage > Search & Download > Continuous Download. All of the recorded files are listed with maximum 40 files per page on the File Download page. Currently recording file is displayed as [Recording] on the Download column. Users can select the desired file from the list or search it by date. To list up the files which are recorded on a specific date only, click on the Search box. A calendar appears from the search box and select the desirable date. To go back to the original list, click the ‘x’ button next to the Search box. To download a file, click [Download]. Then, the pop up window appears for the file download. 4.3.2. Event Search & Download To search event and download the corresponded recorded files, click Storage > Search & Download. 1. 2 3 - 1. Users can select or specify a period. - 2. Users can select event types. - Event Rule Name: The name defined when creating the rule - Type: The event type selected on the 3rd row - Rule Time: The time that the event was detected - Description: Additional information about the event - Download: Clicking a floppy disk icon enables users to download the file. In the following preconditions, the download button is inactive. - When the event type is Schedule only. - When the event type is Net-Loss only - When the event type is Schedule and Net-Loss together (When other types selected together with Schedule and Net-Loss excluded) - When the event type is manual only - Playback : Clicking the playback button enables users to reply the video. 09-2014-A 22 PixelPro GXi Series Web Page User’s Manual V1.8.0.8 Clicking the playback button will bring a pop-up window with the distinguished user interface depending on the browser. (IE Browser) -Slide bar : it displays the progress of video paly. But it cannot be manually controlled (The slide bar only appears in IE browser) - Control button : Play the video : Pause the video : Stop the video : Download the snapshot. The save path is the same as the one configured at Live > Panel > Video Control > Setting. :Display the full screen mode. Only IE browser supports this function. -Size : Users can adjust the video pixel. -Mute Audio : Users can mute audio by this option. (It’s only supported in IE browser). 09-2014-A 23 PixelPro GXi Series Web Page User’s Manual V1.8.0.8 5. SETUP To configure the setting values of the device, click Setup on the main page. To access the Setup page, ID and passwords are required. 5.1. Basic Configuration The Basic Configuration provides the menus required for the basic settings that users must configure after the camera installation. 5.1.1. Users Refer to 5.8.1. Users to get information on how to add, modify, or remove the web page users. 5.1.2. TCP/IP Refer to 5.4.1. Setting TCP/IP (DHCP, Static IP, DNS setting) for TCP/IP configuration. 5.1.3. Date and Time Refer to 5.8.2. Date & Time for time and date setting. 5.1.4. Stream The Stream configuration page from Setup > Basic Configuration > Stream operates the same way as of the page from Setup > Video & Audio > Stream. Refer to 5.2.6. Stream for the details. 09-2014-A 24 PixelPro GXi Series Web Page User’s Manual V1.8.0.8 5.1.5. Focus Assist This option helps users conveniently set the focus of the camera with vari-focal or fixed lens. This menu will appear only for the models supported with focus assist function. Start : Click the button to start Focus Assist. Stop : Click the button to stop Focus Assist. Preview : Click the button to display Live view. Pop-up : Click the button to open a pop-up window of live view. 09-2014-A 25 PixelPro GXi Series Web Page User’s Manual V1.8.0.8 5.2. Video and Audio To change the setting for video input, burnt-in text, encoder profile, and steam, go to the Video & Audio page by selecting Setup > Video & Audio. This menu is configured with five sub menus: Camera, Repositioning, Burnt-in Text, Encoder Profile, and Stream. 5.2.1. Camera (channel naming/video format/ color control) The camera setting page provides options to: Name a channel for the camera Set image attributes Adjust the image exposure Configure Day & Night mode Configure the image signal processing Preview the current setting Rotate image Stabilize the image 1. Adjust the camera settings based on the instructions for each component o the following pages, and click the Apply button to save changes. To return to the previous settings of each component, click Cancel button. i The cancellation will work only before the Apply button is clicked Note 2. Click Preview to see how the image will appear on the preview window. Or, click the Pop-Up button to have a separate pop-up window to preview the image. 09-2014-A 26 PixelPro GXi Series 09-2014-A Web Page User’s Manual V1.8.0.8 27 PixelPro GXi Series Web Page User’s Manual V1.8.0.8 Friendly name Users may provide friendly name (alias) to an individual camera in case when utilizing multiple channels and cameras. Using alias is recommended to distinguish the device where environment requires multiple image feedbacks with multiple monitoring devices. Aspect Ratio This feature will appear only for the camera models supported with 4:3 and 16:9 modes. The model supported with 4:3 mode shows different resolution and Max FPS range. Video Appearance Brightness, contrast, saturation, sharpness and orientation are adjusted. -Brightness: The range is from 0 to 255, the default is 128. -Contrast: The range is from 0 to 255, the default is 128. -Saturation: The range is from 0 to 255, the default is 128. -Sharpness: The range is from 0 to 255, the default is 128. i Note Sharpness is affected by installation environment. Here in the web menu’s “range” definition is operating range, therefore configuring the right value for each camera is necessary. Vertical Flip This enables an image to be rotated vertically. Horizontal mirror This enables an image to be mirrored. Rotation Image rotation is a corridor mode which rotates the video image 90 degrees in an area that is more vertical than horizontal in shape such as staircase, hallways, aisles to view a vertically oriented video stream. The options are ‘Normal’, ‘Left(-90°)’, and ‘Right(+90°)’. i Note i Image rotation is not supported for the product types below. Repositioning cameras / PTZ camera s/ Video Encoders Image rotation using high resolution (1080p) may affect the frame rate. Note Exposure mode Selecting the right exposure control mode depends on the installation site’s environment. Three modes are available; - Auto : This mode tries to adjust the shutter speed automatically in range from the shutter speed specified by minimum speed to maximum speed of the camera depending on light condition.Brightness: The range is from 0 to 255, the default is 128. *Shutter speed will vary from 1/50 per second up to the degree the user sets as the maximum shutter speed. 09-2014-A 28 PixelPro GXi Series Web Page User’s Manual V1.8.0.8 - Manual : If the auto mode doesn’t work properly or you want to fix the shutter speed, you may select this mode and set the shutter speed manually. - Flickerless : Under the florescent light, the flicker may happen and select proper light frequency to compensate the light flickering. Exposure adjustment Correct exposure value should be selected from the list box to adjust the target brightness for the automatic exposure setting. The high value makes the image brighter, and the low value makes the image darker. Select the value as follows: +1.0, +0.6, +0.3, 0, –0.3, –0.6, –1.0(EV) Backlight compensation (BLC) allows the camera to adjust the exposure of the entire image to properly expose the subject in the foreground. (In images where a bright light source is behind the subject of interest, the subject would normally appear in silhouette.) Digital slow shutter allows to get the proper exposure in low light condition even the frame rate may be dropped. IR enables to adjust the IR power output depending on the surrounding light conditions. It also eliminates overexposure if a subject is detected closer to the camera. - On (Smart IR): This mode automatically adjusts the pre-defined levels of the IR power output with the range is from 0 to 255. - Manual: User can manually set a static level of the IR power output with the range of 0 to 255. - Off: This mode makes the camera’s IR LEDs turned off. i IR feature is available only for the specific camera models equipped with IR LEDS. Note Digital Wide Dynamic Range (DWDR) This ensures image clarity in strongly lit and contrasting places. Auto Focus Mode (Note: Auto focus mode is for speed PTZ cameras only.) Autofocus allows the lens to remain in focus during tele, wide and direction movement operating automatically. There are three modes. - Auto: this mode enables to focus automatically. - Semi-auto: This mode allows adjusting focus once automatically in the below cases. PAN/TILT movement Zoom In/Out Change Preset position The PTZ position change by Autorun - Manual: This mode allows user to change the focus with Focus Near/Far control. 09-2014-A 29 PixelPro GXi Series Web Page User’s Manual V1.8.0.8 Day & Night Three different day/night modes are supported: Auto, Day, and Night. Select the desired mode based on the installation environment. Default value is Auto. Threshold value for Day to Night and Night to Day can be controlled when the Auto mode is set. Please note that Night to Day level should always be set higher than Day to Night level. - Day to Night level: This has range of 0 ~ 63. (Default value is 0) - Night to Day level: This has range of 1 ~ 64. (Default value is 3) - Refocus: This function enables automatic focus when day changes to night and viceversa. White Balance Several white balance modes are available in this option. - atw1: Automatically adjust white balance for video images. - atw2: Automatically adjust white balance but with different adjustable range when compared to atw1 mode. - push: It applies adjusted white balance to image. - manual: Users can manually set up red and blue hues to adjust white balance. Image Signal Processing When noise filter value is 0, the noise filter is off. The noise suppression is performed to the maximum when the value set is 15. The video quality will suffer when the value is set to the highest. The range is from 0 to 15, and the default is 3. Video Stabilization Video Stabilization is used to keep the image stable against camera sway and other unwanted camera movement. Video stabilization can be enabled / disabled independently for each individual stream. In order to keep the output frames steady and aligned to a reference frame, the output frames are shifted with respect to the input frames. As the camera moves around, the output frames are shifted to keep the image features aligned with previous frames. This results in areas for which there is no image data available. The Border In-fill option controls what happens to those areas that do not contain any image data. There are three options available: - dynamic: The borders uniformly expand and contract in real-time in response to the amount of camera motion. - fixed: A fixed size black border is present on all sides which blanks out the moving edges of the image. The size of the borders is equal to the maximum frame shift. - none: Regions of the output image for which there is no available data are filled with black. i Note 09-2014-A The performance of the stabilization may be limited due to the characteristic of image sensor. The performance is optimized in the frequency range of 1-5 Hz. 30 PixelPro GXi Series Web Page User’s Manual V1.8.0.8 5.2.2. Repositioning Note: This part is for the repositionable dome cameras only. To change the repositioning setting, go to Setup > Video & Audio > Repositioning 09-2014-A 31 PixelPro GXi Series Web Page User’s Manual V1.8.0.8 Movement - Arrow buttons: The camera can move to 4 directions; up, down, left, and right. The camera moves to the desired position while the button is clicked and held. Stop button can be used while using zoon/focus settings or auto focus settings. - Zoom/Focus buttons: 3 levels of movements are available for wide, tele, near and far movements. Clicking the buttons move the lens more extensively than the buttons . - One Click Focus: Clicking this button automatically sets the lens focus. Pre Position - Drop-down list: Stored position list (available to store maximum 16). - Name: Text box to enter name of appointed position. - Go: Clicking Go moves the camera to the selected position after selecting one from the drop-down list - Set: Saving the current camera position. - Clear: Removing the current camera position. Calibration - Pan/Tilt: Move Pan and Tilt to default location. - Zoom/Focus: Move zoom and focus to default location Status - Cycle(Pan)/ Cycle(Tilt): Pan and Tilt cycle status. Numbers indicate pan and tilt motor’s number of revolutions. Schedule - Set up to 4 schedules of prepositions to focus on during desired date and time periods. 09-2014-A 32 PixelPro GXi Series Web Page User’s Manual V1.8.0.8 5.2.3. Zoom/Focus Note: Zoom/Focus is for motorized lens cameras only. To change the Zoom/Focus setting, go to Setup > Video & Audio > Zoom/Focus - Zoom/Focus: Three levels of movements are available as wide, tele, near and far. Clicking the buttons move the lens more extensively than the buttons . - One Click Focus: Clicking this button automatically sets the lens focus. - Calibrate (Zoom/Focus): This function rectifies misalignment by rebooting to a zero point and then aligning to a correct position. 09-2014-A 33 PixelPro GXi Series Web Page User’s Manual V1.8.0.8 5.2.4. Burnt-in Text To change the burnt-in text setting, go to Setup > Video & Audio > Burnt-in Text. The setting of the Burnt-in Text is applied to first stream, second stream (if the device supports) and snapshot modes identically. To add burnt-in text, check on the box of Enable B-I Text after the setting and click Apply What is Burnt-in Text? Burnt-in Texts ‘burns’ information into streaming visuals before it gets compressed, thus prohibiting manipulation or alteration of the events’ time. It allows the file to become reliable evidence as it discourages intentional manipulation of the date and time for an alibi. Text configuration Select information (Date, time and name) to include as the burnt-in text in image. To include a specific name or info, type the desired text on the name text box. To display millisecond (time), check the ‘Enable milliseconds for time display’ checkbox. Text position Set where the burnt-in text will be positioned in image. Predefined locations are provided as well as manual position options. i Note It is recommended to use normalized X, Y instead of predefined positions (left-top, left-bottom, right-top, right-bottom) for the burnt-in text positions. Selecting same predefined positions on all three categories may cause overlapping texts, depending on image resolution or the position of each text. Utilizing PREVIEW is highly encouraged to review the selected positions of those burnt-in texts. Preview Preview button allows to view the visual with applied settings (need to press APPLY to view). 09-2014-A 34 PixelPro GXi Series Web Page User’s Manual V1.8.0.8 5.2.5. Encoder profile To create pre-defined encoder profiles, go to Setup > Video & Audio > Encoder Profile. Stream Profile List: It shows a list of defined encoder profiles. Clicking a highlighted profile shows the detailed information about the profile. Click Add to create a new profile, and click Copy to easily create a duplicated profile. If you want to modify a currently existing profile, click Modify, and make changes on the existing setting. Clicking Remove gets rid of the highlighted profile on the list, but the default profile cannot be removed. 09-2014-A 35 PixelPro GXi Series Web Page User’s Manual V1.8.0.8 If you click either one of Add, Copy, or Modify button, the profile configuration page appears as shown below. On this page, users can name the profile, add description and configure the settings for each stream, snapshot and audio separately. Users can configure streams, snapshot and audio settings. Click OK to apply all changes to the current profile, or click Cancel to go back to the last saved profile. Stream Configuration (First Stream and Second Stream) The expected codec usage The expected codec usage is calculated automatically according to your configuration parameters. Do not exceed the usage over 100%. * The expected codec usage does not appear for encoders. Enable streaming Check the ‘Enable streaming’ box to enable streaming on the selected stream. Always keep unused streams disabled. Video codec Select the video codec from MJPEG and H.264. 09-2014-A 36 PixelPro GXi Series Web Page User’s Manual V1.8.0.8 Resolution The supported resolution in pixels for the current stream profile is listed on the drop down box. Select the desired resolution. For encoders, refer to APPENDIX[A]:ENCODERS. i 16:9 mode 4:3 mode 1920x1080 * 1280x720 * 1120x630 * 960x540 800x450 640x360 480x270 320x180 2048x1536 1600x1200 1280x960 1024x768 800x600 640x480 320x240 4:3 mode is only supported for fisheye cameras and panomorph camera. Note i Note i Note The three resolutions with the asterisk above are applied mutually exclusively between the first stream and the second stream. If the resolution 1920x1080 is applied to the first stream, the second stream can take the same resolution 1920x1080 but cannot take the either 1280x720 or 1120x630. For decent image quality, the recommended bitrate range for the two resolutions, 1920x1080 and 1280x720 are as follows if the maximum frame rate is 30. 1920x1080 1270x720 Min : 1.5Mbps, Max : 6Mbps Min : 1Mbps, Max : 4Mbps *if the setting values for the frame rate drop, the recommended bitrate range will also comparatively drop. Maximum FPS Define the desired frame rate per second. The max frame rate is 30 for cameras. For encoders, refer to APPENDIX[A]:ENCODERS. GOP This parameter defines the length of the group of pictures. If this value is set to 1, the video stream will only have one I-frame. Keep this value high to minimize bandwidth. The max GOP is 30. For encoders, refer to APPENDIX[A]:ENCODERS. Profile Identification This option allows users to select between three H.264 different profiles. This directly affects the quality of the video due to the amount of compression applied. Baseline profile provides maximum compression to the video. High profile gives the best quality. Selecting the Main profile is balances between the other two. 09-2014-A 37 PixelPro GXi Series Web Page User’s Manual V1.8.0.8 Variable Bit Rate (VBR) VBR allows a higher bitrate (and therefore more storage space) to be allocated to the more complex segments of media files while less space is allocated to less complex segments. It is used when the system has enough storage and a high quality image is required. Image quality can be configured as highest, high, normal, low and lowest. Constant Bit Rate (CBR) CBR mode maintains the defined bitrate level all the time. Snapshot Configuration Once ‘Enable snapshot’ is ticked, it will not stop until the checkbox is unchecked and ‘Apply’ is pressed. Enable snapshot Tick Enable snapshot to enable snapshot on the selected stream. Resolution The supported resolution for the product is listed on the drop down box. Select the desired resolution. If one of the video streams is set to 1080P, other video stream resolution cannot be used as greater than 1088 horizontal. Maximum FPS Enter how many snapshot files you want to send per a second. The maximum value is 5. JPEG quality Enter the JPEG quality. The range is from 0 to 100 and ‘100’ means the best quality. Audio Configuration Enable audio Select the Enable check box for the microphone or speaker to be enabled. Audio Input Volume: Enter the audio input volume. The available range is from 0 to 225. Codec: G.711 is supported for the audio codec. Sampling Frequency: The sampling frequency is selectable between 8kHz and 16kHz. Audio Output Volume: Enter the audio output volume. The available range is from 0 to 255. TCP/IP listen port: Set the port for listening to the audio received from the camera. The default is 6000 and the range is from 1 to 65535. i After the setting, make sure to click OK to save changes. Note 09-2014-A 38 PixelPro GXi Series Web Page User’s Manual V1.8.0.8 5.2.6. Stream To configure predefined stream profile, go to Setup > Video&Audio > Stream. This part has the same structure as in Setup > Encoder Profile, and actual stream is applied on this page. Clicking Show profile list will display all the profiles that you had previously added in 5.2.5 Encoder profile . 1. Highlight a profile that you wish to configure from the list, and click Load profile settings to bring up its setting below the Stream panel. 2. Click Apply to implement all changes to the currently loaded profile. Or, click Cancel to reverse all the changes made on this page to the latest-applied values. *Different values for streaming can be applied by directly changing the values below the Stream panel other than setting profiles thru Encoder Profile. i Note 09-2014-A If the rotation option is set up in Setup>Vdeio&Audio>Camera, it will display +50% codec usages. 39 PixelPro GXi Series Web Page User’s Manual V1.8.0.8 5.2.7. Privacy Mask To set up the privacy mask, go to Setup > Video & Audio > Privacy Mask. How to configure privacy mask zones except repositioning camera 1. Check Show button of the desired privacy zone ID on the information panel. 2. On the display window, click the left mouse button and drag the mouse diagonally until the desired size is made. 3. Click the Save button to save changes. 09-2014-A 40 PixelPro GXi Series Web Page User’s Manual V1.8.0.8 repositioning camera 1. Move to the area where privacy mask is needed by clicking the arrow buttons under the Movement tab. 2. Tick the checkbox of a desired Zone ID, type an easily recognizable name under the name tab, and set the mask position and size by entering appropriate values under the Position tab based on Center and Range information. 3. Click SAVE to apply the privacy mask on the screen. 4. Adjust and resize the privacy mask to completely cover the object you targeted by changing the values you had entered. If you want to see each privacy mask you already set in different areas on the screen, click GO. What are P,T,W, and H? P means Pan, indicating the camera’s panning position. The value is from 0 to 360. T means Tilt, indicating the camera’s tilting position. The value is from -25 to 70. W means Width, indicating the width of privacy mask. The value can be from 1 to 40. H means Height, indicating the height of privacy mask. The value can be from 1 to 30. *The sum of the T value and the H value should be less than or equal to 70. What is Center ? It is the coordinate of Pan and Tilt, whose location is center of the video on the screen. What is Range? The range indicates vertical and horizontal view angle of the video on the screen. 09-2014-A 41 PixelPro GXi Series Web Page User’s Manual V1.8.0.8 (Center50,45) W(15) P(57.5),T(45) H: 35 Object H(8.75) W: 60 < Example of Privacy Mask shown on the screen > How to draw the privacy mask above Let’s suppose there is an object you want to hide inside the privacy mask zone. The center of the camera is located at the coordinate, (50, 45) of pan and tilt, and the horizontal and vertical view angles are 60 and 35 respectively. 1. Let’s define the initial point to cover the object. The object is away toward the right by 1/4 horizontally and on the same line vertically from the center. Thus, the values of the initial point are 57.5 and 45, which are respectively P value and T value. 2. To fully cover the object horizontally, there needs to be two squares from the red point(P,T) to the right, whose width is 2/4(=15). Therefore the W value is 15. 3. To fully cover the object vertically, there needs to be one square downward from the red point(P,T), whose height is 1/2(=8.75). Therefore the H value is 8.75. i Note The speed dome cameras have the range limit in tilting. Thus, the field available for privacy mask is also limited. 5.2.8. Video-Out Camera with video output mode among NTSC, PAL and off according to your intention. Unless you change the mode, the current selection is maintained. 09-2014-A 42 PixelPro GXi Series Web Page User’s Manual V1.8.0.8 5.3. EVENT CONFIGURATION On the Event Configuration section, users can link event sources such as DI(Digital Input: sensor) and Motion Detection to event actions such as triggering alarms and sending notifications via email or FTP/HTTP/TCP servers. i Note Before you create an event profile, go to the desired subscriber configuration page (E-Mail Recipient, FTP Notification, or HTTP Notification), and complete the required server settings. 5.3.1. Event Rules After the event subscriber configuration, you can make several event profiles with different options of event source and notification. Go to Setup > Event Configuration > Event Rules to manage the event profile. On this page, you can configure the event source type and specify how to send notification message when an event trigger is activated. 09-2014-A 43 PixelPro GXi Series Web Page User’s Manual V1.8.0.8 You can check the defined profile list on the main page, and add, copy, modify or remove an event rule. 1. Tick the checkbox of Enable event rules under Configuration tab, and click apply to begin creating event rules. 2. Click Add to create an event rule, and select desired Event Sources when a pop up window of Add to Event Rule List appears. 3. Click Event Action tab to select desired Event Actions. 4. Name the event rule on the Configuration section, and tick Enable Rule if you want to use the event rule, and then click OK. 5. Clicking on an event rule in Event Rule List will display the detailed information about the highlighted event rule. If you want to copy a profile of an existing event rule, highlight the desired event rule, and click Copy. Copying an event profile allows you to easily create multiple profiles with the same configuration. Clicking Modify enables you to modify the profile of the highlighted event rule. Clicking Remove will get rid of the highlighted event rule from Event Rule List. * Please see the following pages for the detail about the event sources and event actions. 09-2014-A 44 PixelPro GXi Series Web Page User’s Manual V1.8.0.8 Event Source Configuration i Note The supported event source may be different depending on the hardware/software specification of each model. The event sources can be categorized into three different groups for their mutually exclusive operations. When any source from each group is enabled, all the other sources of the other group are disabled. i Schedule is a supplement to help event sources become more time specific. Note 1st group (Detectors) Sensor (DI#1) Select Sensor(DI#1) to enable DI as the event source. There are three modes: - Active: Selecting Active enables detection of digital input. - Inactive: Selecting Inactive enables detection of the ending moment of digital input. - Both: combination of Active and Inactive There is a hyperlink to access the Sensor/Alarm configuration page. 09-2014-A 45 PixelPro GXi Series Web Page User’s Manual V1.8.0.8 PIR Select PIR to enable PIR sensor as the event source. There is a hyperlink to access the PIR configuration page. Alarm(DO#1) Select Sensor(DO#1) to enable DO as the event source. There are three modes: - Active: Selecting Active enables detection of digital output. - Inactive: Selecting Inactive enables detection of the ending moment of digital output. - Both: combination of Active and Inactive - There is a hyperlink to access the Sensor/Alarm configuration page. Motion detection Select motion detection to enable motion detection as the event source. Selecting the check box displays the motion interval setting as shown on the screenshot above. Set the time for motion interval from 0 to 3600 seconds to avoid continuous triggered MD events. Then, select the motion detection zones to use as the event source from the list. (Refer to 5.3.2. Motion Detection to create the motion detection zones prior to setting motion detection as the event source.) There is also a hyperlink to access the motion detection configuration page. VCA source Select VCA source if you want a certain VCA source as one of the event sources. Available options may differ by purchased analysis options. There is also a hyperlink to access the VCA configuration page Here is the explanation on some major VCA sources. - Configuration: When VCA configuration is changed - Tamper: When there is camera tampering. - Trigger mode: This mode enables users to set the moments that VCA defines a rule as a trigger. Rising edge: The moment a defined rule begins Falling edge: The moment a defined rule ends Both: combination of Rising edge and Falling edge Network loss/detect Select Network loss/detect to enable network loss and detection as an event source. 09-2014-A 46 PixelPro GXi Series Web Page User’s Manual V1.8.0.8 2nd group (System) Video loss/detect This option appears only for the encoder. - Loss: Tick this checkbox if you want to generate an event when there is video loss - Detect: Tick this checkbox if you want to generate an event when video is detected. - Both: Tick this checkbox if you want to setup both above as event source. Network setting changed This option allows users to receive events when network setting is changed. Fan/Heater operation changed This option allows users to receive events when the operation of fan and heater is changed. i This option appears only for the models which have fan and heater. Note 3rd group (Time) Recurrence This option allows users to periodically take certain actions. Set the Recurrence period by day, hours, or minutes. The range of the input number is from 0 to 1440. i Note The initial point of the recurrence period is midnight. However, if Recurrence is combined with schedule, the initial point of the recurrence time will be the initial time set for schedule. Additional option for event sources Schedule Schedule is the additional option to add time conditions to event sources. Thus, Schedule allows users to receive events or to take certain actions according to the defined specific schedules. Select a desired schedule profile from the drop-down list. The profiles are configured in the Schedule page. Go to Setup > Event Configuration > Schedule for more details. Or, use the hyperlink Go to Schedule Configuration. i Note 09-2014-A Schedule can be combined with Recurrence, and the time settings in Schedule always control the time settings in Recurrence. 47 PixelPro GXi Series Web Page User’s Manual V1.8.0.8 Event Action Configuration i Note The supported event action may be different depending on the hardware/software specification of each model. Active Alarm (DO) Tick the check box to activate the Dos for the event publisher. The number of DO check boxes varies depending on each device. - Active : If you check this option, DO will be activated when there is an event. - Inactive : If you check this option, DO will be deactivated even when there is an event detected. Specify the alarm duration. Duration indicates how long the DO works, which can be adjusted from 0 to 600 seconds. If you select Unlimited, DO will last long until you manually turn it off. Recording Select the check box to record the video and audio data to the preconfigured FTP or SD memory card when the event is triggered. To use this event action, make sure that the recording type is set as Event. It can be configured at Storage > Recording > Configuration. 09-2014-A 48 PixelPro GXi Series Web Page User’s Manual V1.8.0.8 Prebuffer and Postbuffer specify the recording duration before and after the event occurs. But the buffer bar will be inactive when the following options are selected at Event Source tab. - Only Network Loss/detect is selected. - Only Schedule is selected. - Only both of Network loss/detect and Schedule are selected. Save event log It is automatically ticked as an event action in case Network setting changed or Fan/Heater operation changed is selected as an event source. Send E-mail notification Select the check box to send E-mail to designated recipients. To attach a snapshot image, select Attach a snapshot. Up to three snapshots taken before the triggered moment (defined as pre-image on the webpage) can be emailed while one snapshot at the triggered moment can be attached. From the recipient list, select the recipient to send the notification. To create a new recipient that is not on the list, go to Setup > Event Configuration > E-Mail Recipient and create a new recipient information. Once the desired recipient is selected, write the subject for the email. Upload notification to FTP Select the check box to activate the FTP notification method. To attach a snapshot image, select the Attach a snapshot check box. From the FTP server list, select the FTP server to send the notification. To create a new FTP server that is not on the list, go to Setup > Event Configuration > FTP Notification and create a new FTP server information. If Schedule in the event sources is used as the only one event source, this option will be blocked. Send HTTP Notification Select the check box to activate HTTP notification method. From the HTTP notification list, select the HTTP server to send the notification. To create a new HTTP server that is not on the list, go to Setup > Event Configuration > HTTP Notification and create a new HTTP server information. Send TCP Notification Select the check box to activate TCP notification method. To configure a new TCP server, go to Setup > Event Configuration > TCP Notification and configure TCP server information. Send Notification via TCP event server Select the check box to activate TCP event server notification method. To configure a new TCP server, go to Setup > Event Configuration > TCP Server and configure TCP server. Send multicast notification Select the check box to activate multicast notification, and go to Setup > Event Configuration > Multicast Notification to configure multicast notification. Or, go to 5.3.9. Multicast notification for the detail. Active PTZ Select the check box, and select the preset position to move to the specific preset position of PTZ camera. To configure a preset, go to Live > Panel > PTZ > Pre Position. i Note 09-2014-A To attach a snapshot image on the configuration of E-mail Recipient or FTP notification, make sure the snapshot setting from Setup > Video & Audio > Encoder Profile has been enabled. 49 PixelPro GXi Series Web Page User’s Manual V1.8.0.8 5.3.2. Motion Detection To set up the zones and rules configuration required for the motion detection, go to Setup > Event Configuration > Motion Detection. Motion Zone Please configure the motion detection zones by the following steps. 1. Under the panel of Motion Zones, select Enable on a desired Zone ID. Then, a rectangle appears on the screen. 2. Relocate the rectangle or adjust the size with the left mouse button by dragging the mouse on top or on the edge of the rectangle. The rectangle is motion detection zone. 3. Provide a relevant name and description of the motion detection zone on its text box. 4. Adjust the value sensitivity and object size. 5. Uncheck Enable if you want to hide the motion detection zone. 6. Click SAVE to apply changes to the screen. What is Sensitivity? Every motion detection zone is divided into multiple squares, which is called ‘Macro blocks.’ Each of macro blocks consists in groups of 16 x 16 pixels. The value of sensitivity means the sensitivity of each macro block. To configure the zone less sensitive than the factory default (128), set the number value higher; to configure the zone more sensitive than the factory default, set the number value lower. 09-2014-A 50 PixelPro GXi Series Web Page User’s Manual V1.8.0.8 What is Object size? The object size value means the proportion of the macro blocks which has exceeded the configured sensitivity. If you want to configure the zone less sensitive than the factory default (128), set the number value higher; to configure the zone more sensitive than the factory default, set the number value lower. Display Motion Information -Show motion blob Tick the checkbox of show motion blob, and click SAVE to apply if you want to see which spot has subject’s movement on the screen. Before enabling motion blobs on the view, enable metadata of stream in RTSP/RTP is pre-requisite. Click the hyperlink of GO to RTSP/RTP Configuration under the tab of Motion Blob. Or refer to 5.4.5. RTSP/RTP (Multicast or unicast) for the details. -Show motion activity Tick this option to show the graph of motion zone. The red line in the black box helps users intuitively adjust the Sensitivity and Object parameters which is usually useful when installation. If the motion is detected, there will be write graph shown. When the white graph bar matches with the red line, which means the motion zone is configured perfectly. In another word, if the motion graph exceeds the red line, an alarm will be occurred. 5.3.3. Network Lost To configure the network loss event, got to Setup > Event Configuration > Network Loss. Check Ethernet connectivity : Select this option to check Ethernet connectivity which is actually RJ-45 cable connection. Check ping response : select this option to check the network connectivity by ping test. Interval : Adjust the slide bar to set the interval for ping test. Host address : input the IP address or URL for ping test. 09-2014-A 51 PixelPro GXi Series Web Page User’s Manual V1.8.0.8 5.3.4. E-mail recipient To configure the email recipient list for event notification, go to Setup > Event Configuration > E-Mail Recipient. Send rate limit : Users can set a period to block repeated email notifications within the configured time period from o second to 600 seconds. Set the send rate limit and click the Apply button. E-Mail Recipient List 1. Clicking Add will bring up a pop-up window, Add to E-Mail Recipient List as shown below. 2. Create an E-mail recipient profile. -Name : Specify the e-mail recipient name. -Description : Input a brief description of the e-mail recipient to easily distinguish. -E-Mail Address : Enter the e-mail address of the e-mail recipient. If you use host name, a valid DNS server must be specified in TCP/IP network settings. 3. If you want to modify an E-mail recipient’s information, click Modify, and update the information.( Clicking an E-mail recipient under E-Mail Recipient List will display the detail about the selected recipient profile.) If you want to remove an E-mail recipient from E-Mail Recipient List, click Remove, and click OK to apply the removal when a popup window appears to ask you to confirm the removal. *Go to SMTP Configuration: If you want to send test E-mail to the E-mail recipients, you need to configure the SMTP server information first. Go to Setup > Network Configuration > SMTP(E-Mail), and complete the required settings. Refer to 5.4.7. SMTP for more information. i After the setting, make sure to click OK to save changes. Note 09-2014-A 52 PixelPro GXi Series Web Page User’s Manual V1.8.0.8 5.3.5. FTP Notification To configure the FTP server for event notification, go to Setup > Event Configuration > FTP Notification. You can check the defined FTP server list on the main page, and add, modify, or remove server information. - FTP Notification List: It shows all the defined FTP server names. - Add: Click this button to add FTP server information. - Modify: Select an FTP server name, and click this button to modify the current information of the FTP server. - Remove: Select an FTP server name, and click this button to remove from the list. - Information: It displays the detailed information of the selected FTP server from the list. 09-2014-A 53 PixelPro GXi Series Web Page User’s Manual V1.8.0.8 Clicking either Add or Modify button will display the configuration page shown below. Name Specify the FTP server name. Description Input a brief description of the server to easily distinguish. Address Enter the IP address of the FTP server. Port Enter the server port number. The default is 21. Target directory Enter the folder name where the created files will be placed. If the folder does not exist on the server, the specified folder name will be automatically created on the FTP server. Account and password Enter the login user name and password of the FTP server. The account and password information must be entered even for the anonymous FTP. File name format Select the desired date format. i After the setting, make sure to click OK to save changes. Note 09-2014-A 54 PixelPro GXi Series Web Page User’s Manual V1.8.0.8 5.3.6. HTTP Notification To configure the HTTP server for event notification, go to Setup > Event Configuration > HTTP Notification. You can check the defined HTTP server list on the main page, and add, modify, or remove server information. - HTTP Notification List: It lists the defined HTTP server names. - Add: Click this button to add HTTP server information. - Modify: Select an HTTP server name, and click this button to modify the current information of the FTP server. - Remove: Select an HTTP server name, and click this button to from the list. - Information: It displays the detailed information of the selected HTTP server from the list. 09-2014-A 55 PixelPro GXi Series Web Page User’s Manual V1.8.0.8 Clicking either Add or Modify button will display the configuration page shown below. Name Specify the HTTP server name. Description Input a brief description of the server to easily distinguish. Address Enter the IP address of the HTTP server. Port Enter the server port number. The default is 80. Account and password Enter the login user name and password of the HTTP server. If you want to skip the login authentication process, leave the text boxes blank. Message Enter the message that you want to send with. Enabling the ‘Append detailed information’ will add event details in message. Please note that this requires ‘/’ at the beginning of the message. For example, YES(“/ABABAB”), NO(“ABABAB”) i After the setting, make sure to click OK to save changes. Note 09-2014-A 56 PixelPro GXi Series Web Page User’s Manual V1.8.0.8 5.3.7. TCP Notification To configure the TCP push for event notification, go to Setup > Event Configuration > TCP Push Notification. IP Address, port Type the configuration of TCP server. Connect Timeout TCP push tries to connect to TCP server during the setting time, but if connection is not made during the setting time, TCP push will stop to try to connect. Send Timeout Holding time for data transmission when event occurs. Alive Type You can configure the condition of connection and the default value is Timeout. - Once: Only one connection is made for each event. There is no check that the connection is succeeded or not. Unlimited: The connection continues for data transmission whether event occurs or not. Timeout: After the last data transmission if there is no event for setting time of alive time the connection will be disconnected. Alive Time When Alive type is configured as Timeout, the connection will be continued for Alive time. 09-2014-A 57 PixelPro GXi Series Web Page User’s Manual V1.8.0.8 Message Customization Users can customize the message for TCP notification. Clicking the button of Message Customization will generate a pop-up window like below. - Message Header: To use the customized message header, click the checkbox of Enable using customized message header. Then, the box with the message header will be activated. - VCA/MD/Network/ DIDO: You can choose an option between default message and customized message on each event. 09-2014-A 58 PixelPro GXi Series Web Page User’s Manual V1.8.0.8 5.3.8. TCP Server To configure the TCP server, go to Setup > Event Configuration > TCP Server. You can use TCP server to get the event notification from the device and send them to the client application. Port Type the utilized port number to deliver the event message program Message Customization Customize the message for TCP server. Clicking the button of message customization will generate a pop-up window like the same in TCP Notification. Refer to 5.3.7 TCP Notification for the instruction. 5.3.9. Multicast Notification To configure the multicast server, go to Setup > Event Configuration > Multicast Notification. You can use Multicast server to get the event notification from the device and send them to the client application. Type Address, port, and TTL according to your system setting. Factory default is 2555. 5.3.10. Heart beat The camera sends the event repeatedly with the specific interval for the client to check the camera alive. 09-2014-A 59 PixelPro GXi Series Web Page User’s Manual V1.8.0.8 5.3.11. Schedule Users can create a list of schedules to use them for the combination with the other event sources. To configure schedules, go to Setup > Event Configuration > Schedule. You can add, modify, or remove the schedules on the main page. - Schedule List shows all the defined profiles of schedules. - Add: Click this button if you need to create a specific schedule. - Modify: Click a schedule on the Schedule List that you wish to modify, and click the Modify button to bring up a pop-up window of Modify Schedule. - Remove: Click a schedule on the Schedule List that you wish to delete, and click Yes or Cancel if a pop-up window asks you to confirm the removal. - Information: Clicking a schedule on the Schedule List will display the profile of the highlighted schedule. 09-2014-A 60 PixelPro GXi Series Web Page User’s Manual V1.8.0.8 Clicking Add or Modify will display the configuration page shown below. Name Type an easily recognizable name so that you can conveniently select it by the name on the drop-down list when using it in the event source. Description Type additional information to help you identify the configuration easily if wished. Date Click the checkbox of Date if you want to have a specific period for the schedule. Then, define the month, the date and the year of Start and End respectively. Time Click the checkbox of Time if you want to have a specific duration for a schedule. Days Click the checkboxes of corresponding days you wish to apply for the schedule. 09-2014-A 61 PixelPro GXi Series Web Page User’s Manual V1.8.0.8 5.4. Network Configuration 5.4.1. TCP/IP(DHCP, Static IP, DNS setting To change the TCP/IP setting, go to Setup > Basic Configuration > TCP/IP. 09-2014-A 62 PixelPro GXi Series Web Page User’s Manual V1.8.0.8 IP Address Configuration User can set up network configuration of IPv4 or IPv6 here. Enable IPv4 : tick this option to activate and configure IPv4 settings. - IP Configuration by DHCP If you want to get your IP from DHCP server automatically, check this option and click the Apply button. When the dialog box appears on the screen, click the OK button. - Use the static IP address If you want to use your device with a static IP, select ‘Use the following IP address’ and input the following information: - IP address: The IP address of your device. The test button shows if the typed IP address is occupied or not. If the typed address is available, “Okay” appears next to the Test button. If the typed address has been taken already, “Fail” appears next to the button. - Subnet mask: The address of subnet mask of your device. - Gateway address: The gateway address of your device. - Broadcast address: It is automatically fixed by the subnet mask and IP address of your own. For example, if you use B class (255.255.0.0) of mask, the broadcast address will be 192.168.255.255. Enable IPv6 : tick this option to activate and configure IPv6 settings. - IP address (Information) : It will automatically show the IP address after activation IPv6 option. - Enable accept router advertisements : Tick this option if you want to receive network advertisement from the router. - Enable DHCP : Tick this option to enable DHCP service. - DHCP type : - auto : Automatically get an IP address through one of the two ways below. - stateful : Get the IP address of IPv6 from DHCP server. - stateless : Get the IP address of IPv6 by combining MAC address with the network information that has received from router. ( in this case, if the Enable accept router advertisements option is disabled, you cannot get the IP address.) - IP address : You can also input a static IPv6 address here. - Fixed length : The length of prefix of your device. - Default router : The default router of your device. DNS Configuration Type the IP address of DNS server you use. Link-Local Address This is a built-in function that assigns the device an additional IP address, which can be used to access the unit from other hosts on the same segment of the local network. An IP address is automatically assigned when the camera boots up. The camera can have both a Link-Local IP and a static/DHCP-supplied IP address at the same time. The IP address block is from 169.254.1.0.to 16.254.254.255. To change the IP address, click Renew. 09-2014-A 63 PixelPro GXi Series Web Page User’s Manual V1.8.0.8 5.4.2. Web Server To change the HTTP server setting, go to Setup > Network Configuration > HTTP. The default value of web server is set to HTTP. To change its setting from HTTP to HTTPS, select HTTPS from the menu. It is recommended if enhanced security is required for accessing the web page. The data transmitted by HTTPS is encrypted by SSL to strengthen the security. What is SSL? SSL is the abbreviation of Secure Socket Layer. SSL protects web server and makes it easy for users to trust the contents. When HTTPS is being utilized to communicate with a server, the SSL certificate is required for the web server and the certificate enables encryption of video and audio data during online transactions. OpenSSL is one of the data security protocols for Linux system, which is used for the product. Setting the port number of web server To communicate with server by HTTP or HTTPS with TCP, the port number should be in between 1 and 65535. The default value is 80. Redirecting HTTP to HTTPS Even when a user tries to access the server with http, it is possible to enable the server to be redirected to HTTPS. In this case, do not set the value ‘80’ as the port number since it may cause a conflict with HTTP port. Authentication Type When accessing the page which requires authority, the web browser asks ID and password and then transfers them to the camera by the methods below. basic: It uses simple way of encryption of ID and Password with clear text digest: It uses more enhanced way of encryption. 09-2014-A 64 PixelPro GXi Series Web Page User’s Manual V1.8.0.8 HTTPS Setting The features rec-tangled in red will appear when HTTPS is selected on the configuration tab. Certificate Create & Install Create & install self-signed certificate: Click the Create button to create a self-signed certificate. Create certificate signing request : A certificate request will be created when clicking the Create button. Then, browse the certificate which will be installed. Create certificate request The text box will show the status of the certificate request. If you want to see the information about the certificate request, click the Properties button. To remove the certificate request, click the Remove button. Installed certificate The text box will show the status if there si certificate has been installed. If you want to see the information of the certificate, click the Properties button. To remove the certificate request, click the Remove button. 09-2014-A 65 PixelPro GXi Series Web Page User’s Manual V1.8.0.8 5.4.3. NTP Server To change the NTP server setting, go to Setup > Network Configuration > NTP. NTP Server Lists Users can set up to four NTP servers. To enable the NTP servers, DNS server setting must be completed from Setup > Network Configuration > TCP/IP. 5.4.4. UPnP To change the Universal Plug & Play configuration, go to Setup > Network configuration > UPnP. UPnP allows IP devices to connect seamlessly, and simplify the implementation of network in remote PC environments. On this page, users can enable or disable UPnP by clicking the Enable check box and apply the desired name (friendly name). 09-2014-A 66 PixelPro GXi Series Web Page User’s Manual V1.8.0.8 5.4.5. RTSP/RTP (multicast or unicast) For the RTSP/RTP setting, go to Setup > Network Configuration > RTSP/RTP. Select the correct streaming tab. The product supports multicast and unicast for both stream channels. Click the appropriate stream tab and configure the RTP session as required by your network system. 09-2014-A 67 PixelPro GXi Series Web Page User’s Manual V1.8.0.8 RTSP Configuration Set the port number for RTSP streaming. RTSP Authentication option is available for those who have implemented the authentication process. It has two methods. - Basic: It uses simple way of encryption of ID and Password with plain text. - Digest: It uses more enhanced way of encryption. RTSP Configuration for UNICAST Session name Type the appropriate session name. The allowed range for the session name is 64 characters with alphabets, Arabic numbers, and underscore bar(_). Enable audio stream Check this box to include the audio stream in addition to the video stream. Enable Metadata Check this box to add the metadata. Enable Onvif Metadata Check this box to include the Onvif metadata. Enable QoS DSCP By enabling the Quality of Service (QoS) feature, you can specify priority level of network traffic for video, audio, and metadata (motion detection and VCA). For each traffic type, determine the DSCP (Differentiated Services Codepoint) value, which represents a QoS class in the Differentiated Services (DiffServe) model. For the details about the DiffServ standard, refer to RFC2474 and RFC2475. RTSP configuration for MULTICAST IP Address In order to receive the streaming data from the device, set the IP address of group which is used for PC to join. ‘0,0,0,0’ is configured as a factory default and it enables router program to generate the available IP for the device automatically. If you want to use specific address, type the address in the blank. Available IP address range is from 224.0.0.0 to 239.255.255.255. However, there are already assigned IP addresses in the range. Please refer to http://tools.ietf.org/html/rfc5771 for further detail. i Note RTP multicast is not allowed for streaming even if the address and the port information are known. How does auto configuration of IP address work? As the session name for each RTP session is defined already on the server, your PC can get the stream by the ‘rtsp:// rtsp server ipaddress : port / rtp session name’ without the manual decision of IP address on the webpage. 09-2014-A 68 PixelPro GXi Series Web Page User’s Manual V1.8.0.8 Port Set the port number used for router to receive the streaming data from the product (No need for unicast). The range of the port numbers is from 1 to 65535. Be sure that there are specific port numbers that you cannot use as they are already assigned to other necessary protocols. * Default port number for each stream for each data is pre-defined on the textbox of the webpage, but users can set the numbers within the port range. TTL Set the TTL value. If you set 1 for TTL, it means the packet will pass only in a subnet (No need for unicast). What is TTL? It’s the abbreviation of Time to live. If data is sent out from the encoder via network and all of the packets are alive permanently on the network, it will cause the big network load. TTL helps reduce the network load by controlling the time of staying on network. For example, if you set the TTL as 50, the data will be deleted after passing by 50 routers. i All other options are the same as the Unicast. Note 5.4.6. mDNS (Multicast DNS) For the multicast DNS setting, go to Setup > Network Configuration > mDNS. Configuration If you check the box of ‘Enable,’ mDNS is activated. To use the IPAdminTool to identify the device, mDNS must be enabled. You can type a friendly name to be shown on the application program. 5.4.7. WS-Discovery For the WS-Discovery setting, go to Setup > Network Configuration > WS-discovery. Configuration If you check Enable, WS-Discovery function will be activated. It enables users to browse all the ONVIF supported cameras on the network. 09-2014-A 69 PixelPro GXi Series Web Page User’s Manual V1.8.0.8 5.4.8. SMTP To change the SMTP setting, go to Setup > Network Configuration > SMTP(E-Mail). You can set the user’s email account and server to apply this SMTP for the event subscriber or any other SMTP required purpose. Configuring user information Sender’s name Type the name of the sender; it can be either generic notification bot, name of the administrator, or the specific camera device, depends on its purpose. Input range: 40 characters limit From email address Type the e-mail address of a sender. Input range: 128 characters limit Configuring server information Mail server address In order to send an email, the product needs the information of user’s mail server. Type the host name or IP address of the mail server. If you use the host name, it requires the DNS registration. Check the DNS configuration from Network Configuration > TCP/IP and see if your DNS configuration is correct. If you use host name, a valid DNS server must be specified in TCP/IP network settings. Input range: 128 characters limit Mail server port Type the mail server’s port number within the range from 0 to 65535. Enable encrypted connection (SSL) If your email server requires encryption process of SSL and TLS, select the ‘Enable encrypted connection (SSL)’ check box. TLS (Transport Layer Security) and SSL (Secure Sockets Layer) algorithm can be required for the security of communication over networks. It depends on your email server and you should check out the communication protocol of SMTP server. 09-2014-A 70 PixelPro GXi Series Web Page User’s Manual V1.8.0.8 Use authentication to log in this server If login information is mandatory before connecting to the server, check the box. Once the box is checked, the user name and password boxes appear for user to type. User name input range: 128 characters limit Password input range: 32 characters limit Send Test E-Mail Enter an email address that you want ot receive the test e-mail, and click the Test button. Then, check if the email account receives the test email from the sender’s email address. 5.4.9. DDNS (Dynamic DNS) To change the Dynamic DNS setting, go to Setup > Network Configuration > DDNS. Configuration Enable or disable DDNS by selecting the check box. DDNS Protocol Type Select the desired protocol type. DynDNS is the only available option. DDNS Setting Type the domain name you want to use for the product and define the update time. The factory default is 600 seconds, and it enables the product to notify the DDNS of the current domain name in a given length of interval. Type the user name and password of your DDNS account. i 8 asterisks cannot be used for the password. Note 09-2014-A 71 PixelPro GXi Series Web Page User’s Manual V1.8.0.8 5.4.10. SNMP Simple Network Management Protocol (SNMP) is used in network management environment to monitor network-attached devices for their conditions. By retrieving the system information, it allows to manage network architecture, performance, device, and security. To enable SNMP, select the Enable check box. The encoder supports SNMP version 1 and 2. Setup > Network Configuration > SNMP Configuration Activate checkbox to enable the SNMP. SNMP Version Select version2c or version 3 that you will use for SNMP setting. Depending on which type you choose, it may show different option at configuration sub-categories. SNMP Description - Location: Provide description of SNMP location - Contact: Provide SNMP managing contact VACM View Access Control Model) setting - Read Community: input the community name, which is the authorized ID for reading SNMP data. - User : It is to add, Modify and Remove User information which is needed when accessing to SNMP. (shown in v3 only) 09-2014-A 72 PixelPro GXi Series Web Page User’s Manual V1.8.0.8 How to add a user for VACM Setting 1. Input the User name and Password to create a profile. 2. Authentication Protocol : Select authentication protocol type as MD5 or SHA. 3. Privacy Protocol : Select privacy protocol as CBC_DES or CFB_AES. i Note SNMPv3 contains the specification that consist of NoAuthNoPriv, AuthNoPriv, AuthPriv communication mechanisms. In vv1.8.0 firmware, it only supports AuthPriv mechanism. So both of authentication and privacy protocol mechanisms have to be selected. Trap Setting Trap Setting provides information including changed DI, DO, or VCA to notify the manager. Select the SNMP Trap version to receive Trap event, and input the IP address and community on the text box. 09-2014-A 73 PixelPro GXi Series Web Page User’s Manual V1.8.0.8 5.4.11. IP Filtering If you want to control the network traffic to your camera, go to Setup > Network Configuration > IP Filtering. Configuration - Enable: Tick the checkbox if you want to use IP filtering function. - Always allow ping request: This allows users to ping the camera even if certain IP addresses are blocked. - Allow admin IP: The IP address in the IP address box is always allowed to the camera. The address will be an admin user’s IP. Policy - Allow: In Allow mode, IP addresses except those specified in the list of Filtered IP Addresses are denied. - Deny: In Deny mode, IP addresses except those specified in the list of Filtered IP Addresses are allowed. How to configure IP filtering 1. Tick the checkbox of ‘Enable’. 2. Specify the admin IP (if needed). 3. Choose the policy between Allow mode and Deny mode. 4. Add the IP addresses based on the mode in Policy. 5. Click the Apply button. 09-2014-A 74 PixelPro GXi Series Web Page User’s Manual V1.8.0.8 5.4.12. Hosted Service To Configure the hosted service connection, go to Setup > Network Configuration > Hosted Service. Tunneled Link Setup Setting 1. When you enable Hosted Service, you should type server address, TCP pot of hosting server and update interval. 2. When you connect to the hosting server, your device sends MAC address, brand and model name to the hosting server. 3. Your device sends update to the hosting server periodically depending on Update Interval. 09-2014-A 75 PixelPro GXi Series Web Page User’s Manual V1.8.0.8 5.4.13. Wireless LAN Note: This part is for the camera with wi-fi module only. To configure the wireless mode, the device needs to be connected to a wired network for the first time. Setup > Network Configuration > Wireless Lan 1. From the USB Wireless AP List tab, select the wireless network where the device will be located under. Provide the network key (password). 2. From Wireless network IP configuration tab, select Obtain an IP address via DHCP or Use the following IP address. A. Use Obtain an IP address via DHCP if you want network to provide automatic address. B. Use Use the following IP address and type specific addresses if you want the device to use specific designated address. 3. Click Apply button and wait for system to correspond. 4. Disconnect the wired cable from the camera and wait for 10~15 seconds. 5. Use IPAdminTool* to identify the device or type URL in Windows Explorer to access. 09-2014-A 76 PixelPro GXi Series Web Page User’s Manual V1.8.0.8 Link-Local Address This is a built-in function that assigns the device an additional IP address, which can be used to access the unit from other hosts on the same segment of the local network. An IP address is automatically assigned when the camera boots up. The camera can have both a Link-Local IP and a static/DHCP-supplied IP address at the same time. The IP address block is from 169.254.1.0.to 16.254.254.255. If you want to enable this function, tick the checkbox of Enable Auto-Configuration link-local address, and click Renew if you want to change the IP address. ! Caution * IPAdminTool needs to be started in a same network where wireless device is operating at. 5.5. VCA For the details of VCA, refer to the VCA Manual. 5.6. Peripheral 5.6.1. Sensor/Alarm To configure the digital input and output to control external devices such as sensors or alarms, go to Setup > Peripheral > Sensor/Alarm. Please refer to the product user guide to know more about the electrical characteristic of these ports. 09-2014-A 77 PixelPro GXi Series Web Page User’s Manual V1.8.0.8 Sensor (DI) Configuration Resource type Select the type of sensor module. It can be either voltage [maximum 5 volts] or relay. Trigger type Select type ‘Normally open’ or ‘Normally closed’. Interval between triggers Set the detection time interval for event publishers. For example, if you input ‘0,’ it generates events whenever DI is activated. When the value is set to’10,’ then only 1 event will be triggered every 10 seconds even if multiple DI events are detected within 10 seconds. Duration This function is used when a DI is combined with other events. Setting duration virtually extends the interval to make the combined several events within the same time frame to trigger an alarm. The duration has a range of 0 ~ 600. Alarm (DO) configuration Alarm Control Select “Active” or “Inactive” for alarm. Interval between triggers Set the detection time interval for event publishers. For example, if you input ‘0,’ it generates events whenever DO is active or inactive. When the value is set to’10,’ then only one event will be triggered every 10 seconds even if multiple DO events are detected within 10 seconds. Duration This function is used when a DO is combined with other events. Setting duration virtually extends the interval to make the combined several events within the same time frame to trigger an alarm. The duration has a range of 0 ~ 600. 09-2014-A 78 PixelPro GXi Series Web Page User’s Manual V1.8.0.8 5.6.2. PIR Note: This part is for the camera with passive infrared (PIR) sensor only. Passive infrared sensor (PIR sensor) is a motion detector that senses object’s radiating infrared (IR) light in its field of view. Users can configure the sensor detection intervals by accessing Setup > Peripheral > PIR. The available intervals range from o to 600 seconds. 5.6.3. Serial Port For the USRT setting, go to Setup > Peripheral > Serial Port. The Serial port setting page may not appear depending on a device type. Serial port setup These settings are necessary when you want your serial device to be communicated with the encoder or IP camera. The default values are set for the serial device but you can change the values according to your own device requirement. Serial port mode - Serial Port (RS485): This is used when you want to control a PTZ camera or the serial device with the selected PTZ protocol embedded in a device. For detailed information on the embedded protocols, please see 5.7.3. Protocols. - SerialOverIP: Used to enable the communication for the devices connected to the serial ports of an encoder 09-2014-A 79 PixelPro GXi Series Web Page User’s Manual V1.8.0.8 SerialOverIP This section is enabled only when you select SerialOverIP for the serial port mode. Select the desired communication mode: UDP, TCP Client, or TCP Server. Once the mode has been selected, type the IP address of client and port number in the text boxes of SerialOverIP section. If you select the TCP Client or TCP Server mode, you can set the time to end the connection automatically when there is no data coming from a client PC to the encoder in a specified time. This feature is provided to detect an abnormal closure of the socket or LAN cable disconnection. Input the desired time in the timeout text box. The Status box indicates the connection status in the TCP Client or TCP Server mode. Refer to the following table and check how the message appears according to a connection status. Status Not Connected Connected i Note i Note Message for TCP Client Connecting Connected Message for TCP Server Disconnected Connected The Timeout and Status option are available only in the TCP Client and TCP Server mode. The mode for the serial port is selected as SerialOverIP, the menus in Protocol<PTZ<Setup will be deactivated. Likewise, the menus in SerialOverIP are deactivated when the mode is selected as PTZ. You can check the communication status from the client PC by using a related freeware. If you run the program and connect to a device via its IP address and port number, you can see that the data transferred from the port is received at the serial port. 5.7. PTZ settings 5.7.1 PTZ Auto flip : If Enable this option, the PTZ camera will Flip image when moves more than 90 degree automatically Digital zoom : If Enable this option, the zoom function will be enhanced on the basis of default maximum capacity. 09-2014-A 80 PixelPro GXi Series Web Page User’s Manual V1.8.0.8 5.7.2. Touring Configure the Touring 1. 2. 3. 4. 5. 6. Select the Touring number from 1 to 6 to define. Select the Preset number to add. Select the Interval in second which stops at. Click Add. Repeat from step 2 to step 4 for adding the Preset. Click the Apply to save changes. To reset Touring, select the desired Touring Number and then click Remove. 5.7.3. Autorun When there is no operation on PTZ during a specific period in minute, the predefined operation is called automatically. 09-2014-A 81 PixelPro GXi Series Web Page User’s Manual V1.8.0.8 5.7.4. Protocols Protocols configuration allows users to set the PTZ protocols and the PTZ address. Available protocols are; TBT(T-Pro), American Dynamics, Bosch, CDC, Elbex, JVC, Kalatel(ascii), Panasonic (CS850), Pelco-d(probe), Pelco-d, Pelco-p, Convex, and Samsung 09-2014-A 82 PixelPro GXi Series Web Page User’s Manual V1.8.0.8 5.8. Maintenance 5.8.1. Users To create/remove/modify a user group, go to Setup > Basic Configuration > Users. How to add a user To add a user for the webpage, 1. Go to Setup > Basic Configuration > Users. 2. Click Add below the User List. 3. When the pop-up window appears, type a user name and password. Limitation on user name The user name can consist of alphabets from “a” through “z”, numbers from 0 to 9, and underscore symbol; the user name must begin with an alphabet letter. Length: The length of user name must be between 4 and 32. Character range: All upper or lower case letters, numbers from 0 to 9, and underscore Limitation on password A password can contain from 4 to 32 characters with a combination of English alphabet and numbers. Length: The length of password must be between 4 and 32. Character range: All upper or lower case letters and numbers from 0 to 9 i Note The maximum length of password varies depending on the firmware version. The version lower than1.7.0.7 has the password of eight characters. 4. Select a User Group for the new added user. Viewer/Operator The users with Viewer/Operator privilege can only access Live Page. 5. Click Apply to save the changes. 6. Check if the user name is added to the User list. 09-2014-A 83 PixelPro GXi Series Web Page User’s Manual V1.8.0.8 User Authentication Enable or disable for anonymous viewer to connect Live page. How to modify a user To change your password or user name, 1. Go to Setup > Basic Configuration > Users or Basic Configuration > Users. 2. On the User List, highlight user name. 3. Click the Modify button below the User List. 4. When the pop-up window appears, type the new password. 5. Re-type the same password again on the ‘Confirm password’ text box. 6. Click Apply to save the changes. i Note Once the user name is set, it cannot be modified. Simply remove the user name and add a new user with desired name. How to remove a user To remove a user name form the User List, 1. Go Setup > Basic Configuration > Users. 2. Select the user name to remove on the User List. 3. Click the Remove button below the User List. 4. When the dialog box appears to confirm your request, click the OK button. 5. Check if the user name is removed from the list on the page. 09-2014-A 84 PixelPro GXi Series Web Page User’s Manual V1.8.0.8 5.8.2. Date & Time Time setting is very significant for all parts of the product server because it affects the log of streaming and burnt-in text of video. To configure the date and time, go to Setup > Maintenance or Basic Configuration > Date & Time . Current Camera/Encoder Time It shows the camera’s recognized time. Configuration Time zone Select the proper time zone of where the camera is installed from the drop-down box. Daylight saving time applies automatically. Sync source The camera/encoder is synchronized with the Real-time clock by default whenever the camera/encoder reboots once or when the system time is twelve at night if 24-Hour option is on. If NTP server is selected, the system time will be synchronized with the predefined the NTP server. Real time clock on system – Time setting relies on the Real-time clock which is inside the camera. The clock chip is attached as internal part of the product, and it is recharged automatically when the device is powered. NTP server – Time setting relies on designated NTP server. Users can configure available NTP servers at Setup > Network Configuration > NTP. Four NTP server lists can be added, and the first top list is the default source of the time (time.windows.com). Date and time format Select the desired date and time format from the drop-down list box. 09-2014-A 85 PixelPro GXi Series Web Page User’s Manual V1.8.0.8 New camera/encoder time Select one of 3 options: Synchronize the camera/encoder time with current client system time Synchronize the camera/encoder time with NTP server Set the camera/encoder time manually 5.8.3. API To activate the third party APIs or Onvif protocol, go to Setup > Maintenance > API. Enable genetec Protocols of Omnicast is supported. Enable ONVIF ONVIF is supported. - Enable ws-discovery: This function enables users to browse all the ONVIF supported cameras on the network. - Enable authentication: This function asks users to type IP and Password. Enable replay attack protection: This reinforces authentication by preventing replay attack. - Enable profile G: This function enables devices to support ONVIF profile G. 5.8.4. Language English, Korean and Chinese are supported in the Web interface, with English as the default language. 5.8.5. Firmware Upgrade To update firmware, go to Setup > Maintenance > Firmware Upgrade and follow the directions below. 09-2014-A 86 PixelPro GXi Series Web Page User’s Manual V1.8.0.8 Firmware update via the tool To enable the firmware update via the IPAdminTool.exe, highlight the device to upgrade the firmware, and click Update button. Then, the FWUpdate window appears where users can set multiple devices to upgrade simultaneously. Refer to the ‘IPAdminTool User’s Manual.pdf’ for the details how to update the firmware on your devices by using this tool. Firmware update on the web browser To update the firmware on the web browser, click Browse button and search the firmware file. If you select the file to upload, the Upload button appears next to the Browse button. Click the Upload button to update the firmware. Firmware update using ONVIF protocol To update the firmware using the Onvif protocol, please turn on Enable Onvif at Setup > Maintenance > API. ! Caution 09-2014-A Remind that the process of firmware update should not be interrupted. If the update process is interrupted(such as by a power outage), the device will go into safety mode 87 PixelPro GXi Series Web Page User’s Manual V1.8.0.8 5.8.6. System Log To download system log, go to Setup > Maintenance > System Log and follow the directions as below. Click Download System Log, then file download dialog box will appear. FTP Log Backup Mode - Enable auto backup: Ticking the checkbox enables automatic backup to the FTP server configured under FTP Log Backup Configuration. - Backup: Clicking the button enables users to backup system logs to the client PC. FTP Log Backup Configuration This is a section to set up FTP configuration to enable automatic backup of system logs. 09-2014-A 88 PixelPro GXi Series Web Page User’s Manual V1.8.0.8 Show notification list Clicking the button shows all available FTP notification list at the bottom. Load notification into setting Clicking Load notification into setting will copy pre-defined FTP server information in FTP Notification List under Event Configuration into FTP Log Backup Configuration. 5.8.7. Event Search To search all the recorded events, go to Setup > Maintenance > Event Search. This feature enables searches for the recorded events. To download recording files, go to Storage > Search & Download, or refer to 4.3. Search and Download in this manual. 5.8.8. Configuration Import/Export For backup or apply same settings to other device purposes, configuration file can be imported or exported. Setup > Maintenance > Configuration Import/Export Click Export to save latest settings as a file. Within few second, the web will ask a user to save or open the configure.dat file. To overwrite latest settings, click Browse, and load the configure.dat file, and click Import. * The Import button will appear next to the Search button once a file to be imported is loaded. 09-2014-A 89 PixelPro GXi Series Web Page User’s Manual V1.8.0.8 5.8.9. Reset All Settings All information is initialized except user, network and time zone. To reset the system setting to the factory default setting, go to Setup > Maintenance > Reset All Setting and follow the directions below. 1. The checkboxes of network settings, user account information and time zone setting are pre-selected. Thus, make sure to select only the items you intend to preserve from the initialization. 2. Click Reset All settings, and then the dialog box appears as follows. 3. Click OK to reset all settings. 4. The reboot starts automatically. Then, count for 120 seconds after ”Initializing…..” displays. 5. Check if all the settings are returned to the factory default values 09-2014-A 90 PixelPro GXi Series Web Page User’s Manual V1.8.0.8 5.8.10. Reboot To reboot the system on the web browser, go to Setup > Maintenance > Reboot. Click Reboot button to reboot the device. 5.9. Activation To activate the license for the device, go to Setup > Activation. < How to activate the license > 1. Input the activation code received. 2. Click Apply. Then, the installed license and the hardware code will be appear on the activation page if the activation code is valid. 09-2014-A 91 PixelPro GXi Series Web Page User’s Manual V1.8.0.8 5.10. About 5.10.1.Information To find the product information including the hardware specification and software version, go to Setup > About > Information. 5.10.2. License To find the license information of the open source software that is used in the camera/encoder. 09-2014-A 92 PixelPro GXi Series Web Page User’s Manual V1.8.0.8 APPENDIX(A) : ENCODERS Video-In This part is corresponding to 5.2.1. Camera (Channel naming/video format/color control) in Video and Audio. Only the different features from cameras will be covered on this part. For the other common features, refer to 5.2.1. Camera (channel naming/video format/color control). Video Standard Format This indicates the current video standard format that is configured by the hardware switch. Please see the installation guide of the corresponding device for more detailed information. Vertical/Horizontal Delay If the images from camera do not fit into the screen view, users have an option to adjust the image position vertically or horizontally to fit images into screen. For PAL, the range of vertical delay is from 2 to 128, and the range of horizontal delay is from 5 to 128. For NTSC, the range of horizontal delay is from 2 to 128, and the range of horizontal delay is 2 to 128. For PAL, the default value for vertical delay is 24 and horizontal delay is 10. For NTSC, the default value for vertical delay is 18 and horizontal delay is 15. PAL Min 2 NTSC 2 Vertical Default 24 18 Max 128 Min 2 Horizontal Default 10 Max 128 128 2 15 128 High Performance Image Processing Selecting ‘Enable De-interlace’ will execute the encoder to merge even fields and odd fields to display a high performance level image streaming. 09-2014-A 93 PixelPro GXi Series Web Page User’s Manual V1.8.0.8 Encoder Profile This part is corresponding to Stream Configuration in 5.2.5. Encoder profile. Only the different features from cameras will be covered on this part. For the other common features for stream configuration, refer to 5.2.5. Encoder profile. Resolution The supported resolution in pixels for the current stream profile is listed on the drop down box. Select the desired resolution. Encoders NTSC D1 (720x480) 4CIF (704x480) 2CIF (704x240) VGA (640x480) CIF (352x240) QVGA (320x240) QCIF (176x120) i Note PAL D1 (720x576) 4CIF (704x576) 2CIF (704x288) VGA (640x480) CIF (352x2288) QVGA (320x240) QCIF (176x120) For decent image quality, the recommended bitrate range for the resolution D1 is from 512Kbps to 2Mbps. If the setting value for the frame per second drops, the recommended bitrate range will also comparatively drop. Maximum FPS Define the desired frame rate per second. The max frame rate is 25 when the video standard format is PAL. For NTSC, the maximum frame rate is 30. GOP This parameter defines the length of the group of pictures. If this value is set to 1, the video stream will only have one I-frame. Keep this value high to minimize bandwidth. The max GOP size is 25 when the video standard format is PAL. For NTSC, the maximum GOP size is 30. Video-Out This part is corresponding to Video-out in 5.2.8. Video-Out. Only the different features from cameras will be covered on this part. Select one between Loop-back and DAC options, and click Apply. Loop-back : In this mode, the signal will be streamed out without internal processing r modification. DAC : In this mode, the signal will be streamed out with some modification which is applicable when you use Burnt-in Text or Burnet-in Annotation function. 09-2014-A 94 PixelPro GXi Series Web Page User’s Manual V1.8.0.8 Information This part is corresponding to 5.9.1. Information in About. There is some additional information on the information page in case the device is a blade card, or an encoder, or a rack. Module ID appears if the device is an encoder having a module ID. Rack information appears if the device is a rack. The rack information shows a series of numbers with hyper-text, which indicates rack number, blade number, and module number in a row. Clicking the hyper-text will bring a pop up window to display additional information as follows. - Temperature - Input power status - Fan status Clicking Renew shows updated information. 09-2014-A 95 PixelPro GXi Series Web Page User’s Manual V1.8.0.8 REVISION HISTORY MANUAL# 01A.01 02A.01D 02A.02 02A.03 02A.04 02A.05 02A.06 03A.01 03A.02 03A.03 04A.04 04A.05 COMMENTS Created FW V 1.2.0. updated Official FW V 1.2.0 updated Contents update and fixes Live Page screen capture (PTZ) part removed Minor description and grammar corrections Zoom/Focus Page’s “Calibration” button update FW V.1.4.0 updated Repositioning and Information UI update 5.2.3 image and Event Action tab label fix FW V1.4.0.7 Updated / Recording settings changed. FW V1.4.0.10 Updated / Day & Night settings changed 04B.01 Feb/26/2013 FW V1.4.1.6 Updated / PTZ part 04C.02 Apr/25/2013 Minor corrections 05A.03 Jun/7/2013 FW V1.5.0.9 Updated. 11-2013-A Nov/07/2013 FW V1.6.0.4 Updated. 05-2014-A May/13/2013 FW V1.7.0.7 Updated. 09-2014-A Sep/04/2013 FW V1.8.0.8 Updated. ** Refer to WHAT’S NEW page (p.5) for more detailed update contents. 09-2014-A DATE (M/D/Y) Nov/09/2011 Feb/29/2012 Apr/05/2012 May/17/2012 Aug/16/2012 Sep/04/2012 Oct/09/2012 Oct/17/2012 Nov/21/2012 Dec/03/2012 Jan/24/2013 Feb/22/2013 96