1
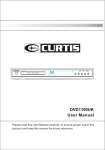
FRG Series Laser Markers
User Manual
Automated Laser Corp.
14224 Plank Street
Fort Wayne, IN 46818
Release 1.00 – 01/10
Table of Contents
FCC Compliance _______________________________________________________________________v
System Description _____________________________________________________________________ 6
Unpacking the System __________________________________________________________________ 7
System Connections ____________________________________________________________________ 8
Indicators ___________________________________________________________________________ 10
System Start-Up ______________________________________________________________________ 11
Operation ___________________________________________________________________________ 12
General Settings ____________________________________________________________________________ 12
Automation Objects _________________________________________________________________________ 13
Wait for External Signal _____________________________________________________________________________ 14
Open Shutter ______________________________________________________________________________________ 15
Marking Object ____________________________________________________________________________________ 17
Close Shutter ______________________________________________________________________________________ 18
Marking your job ___________________________________________________________________________ 19
Power Adjustment __________________________________________________________________________ 20
Shutting Down _______________________________________________________________________ 21
Automatic Mode ______________________________________________________________________ 21
Mounting the marker head _____________________________________________________________ 23
Interfacing to Other Systems ____________________________________________________________ 23
Remote Interlock ___________________________________________________________________________ 24
Laser Enable _______________________________________________________________________________ 24
Trigger ___________________________________________________________________________________ 24
Fume Extraction ___________________________________________________________________________ 25
Screen Savers ______________________________________________________________________________ 25
General Maintenance _________________________________________________________________ 26
Cleaning the Air Filters ______________________________________________________________________ 26
Inspecting and Cleaning the Exit Aperture ______________________________________________________ 26
Replacing the fuse __________________________________________________________________________ 26
Additional inspections _______________________________________________________________________ 27
Warranty And Limitation Of Liability_____________________________________________________ 28
Electrical Specifications _______________________________________________________________ 29
I/O _______________________________________________________________________________________ 29
Automated Laser Corporation
FRG Series Markers User Guide
Sample connections _________________________________________________________________________ 30
Mechanical Specifications - FRG-20 _____________________________________________________ 31
Marker Head ________________________________________________________________________ 32
Appendix A: Laser Safety _______________________________________________________________ 1
Appendix B: Using the Serial Port to transfer Line Data to the FRG-Series Markers _______________ 1
Description _________________________________________________________________________________ 1
Setup ______________________________________________________________________________________ 1
Communication Port _________________________________________________________________________________ 1
Cabling____________________________________________________________________________________________ 1
ii
REQUIRED PRECAUTIONS
1. This equipment must be operated by Class IV Laser trained and qualified personnel only. Read and
understand this manual before operating the equipment.
2. Prior to operating this equipment, safety shielding must be supplied by the end user to enclose
the lens aperture and marking area. This shielding should meet the requirements of a Class I
enclosure as defined by the Center for Devices and Radiological Health (CDRH). This shielding must
be present on the machine, interlocked and activated to protect personnel from contacting direct or
scattered invisible laser radiation. DO NOT BYPASS interlocks during operation at any time. Only
authorized service personnel are to have access to any bypass interlocks.
3. Always remove all electrical power prior to servicing or adjusting the system. Do not remove the
housing or aperture shield at any time. Any internal service to the FRG-20 marking heads must be
completed by factory trained or certified personnel only to avoid injury and to maintain the factory
warranty. All service internal to the marker head is to be performed by the factory.
4. This equipment is designed to cycle automatically when activated. Always keep hands, loose
clothing, hair, etc. away from the lens aperture and all moving parts of the equipment during the
operation of the machine.
5. The laser beam exits the laser housing bottom aperture opening. Never look into or expose skin to
the beam area at any time with power applied to the system. Always remove AC power to the
complete system before service or adjustment.
6. As with any machine, bodily harm may result from misuse, lack of training, maintenance or experience
with the equipment, etc. Always observe safety precautions both as stated within these guidelines
as well as standard operational considerations for any Class IV Laser equipment and/or
automated machinery.
7. Use caution if operating the system with flammable materials. Some materials may burn or ignite
when exposed to laser radiation. Venting of the material vapors that result from laser etching is
recommended in all applications and especially in those applications where burning of the
intended materials produced any byproducts known to be a health hazard.
See Section 7.3 in the ANSI Z136.1-1993 Standard for the Safe Use of Lasers, for exposure criteria in
29 CFR 1910 Subpart Z (from the US Government). Also, see the American Conference of
Governmental Industrial Hygienists (ACGIH) for published Threshold Limit Values (TLVs). It may
also be necessary to consult with your local government agencies regarding restrictions on the venting
of vapors.
8. This product emits invisible laser radiation. Do not allow any part of your body (including skin,
hair, eyes, etc.) to come into contact with the radiation emitted from this product, whether direct
or scattered. Protective eyewear must be worn when operating and servicing this unit.
Automated Laser Corporation
FRG Series Markers User Guide
Note: The information presented within this document is provided as a guide to the operation and function of
this equipment as well as related safety warnings and precautions. Although every effort was made to
provide this documentation as complete, the possibility exists that some portion of information may not
be included within this manual. Only those trained, qualified and familiar with the operation and
servicing of Class IV automated laser equipment should operate this system. Should any questions
exist regarding the safe operation of this equipment, contact Automated Laser Corp., Fort Wayne, IN
prior to operation or service. For additional related Class IV laser guidelines and regulations, see ANSI
Z136.1-1993 Standard for Safe Use of Lasers, or contact the Center for Devices and Radiological
Health, Div. Of FDA, 2098 Gaither Road, Rockville, Maryland 20850.
iv
Automated Laser Corporation
FRG Series Markers User Guide
GENERAL SAFETY
•
Read and understand this manual completely before operating this machine. The machine can cycle
automatically and must be operated by qualified personnel only.
•
This equipment is supplied as a Class IV Laser Product. All applications must consider use and
operator safety requirements at all times. Industry standards are set as outlined in ANSI standard
Z136.1, CDRH regulations and as published by ANSI/OSHA requirements.
•
See Appendix B included with this manual for additional safety information.
•
Note all warning signs and labels attached to the equipment.
Caution: Use of controls, adjustments, or performance of procedures other than those specified
herein may result in hazardous radiation exposure.
FCC COMPLIANCE
This equipment has been tested and found to comply with the limits for a Class A digital device,
pursuant to Part 15 of the FCC Rules. These limits are designed to provide reasonable
protection against harmful interference when the equipment is operated in a commercial
environment. This equipment generates, uses, and can radiate radio frequency energy and, if
not installed in and used in accordance with this instruction manual, may cause harmful
interference to radio communications. Operation of this equipment in a residential area is
likely to cause harmful interference in which case the user will be required to correct the
interference at his own expense.
Note: Any changes or modifications made to this piece of equipment not expressly
approved by Automated Laser Corp. could void the user’s authority to operate the
equipment.
v
Automated Laser Corporation
FRG Series Markers User Guide
FRG Series Laser Marker Description
SYSTEM DESCRIPTION
The FRG Series Laser Marker is a high-speed industrial permanent marking system. The system
comes complete with everything needed to run, including the marker head, controller, and
software. (Note: Optional Monitor, keyboard, and mouse may be purchased from Automated
Laser or provided by the end-user).
A detailed description of each component follows:
Marker Head
The marker head contains the beam delivery optics and the laser, which is a sealed, industrial Diode
Laser unit. The FRG-20 series marker head provides a 4” X 4” marking window at a maximum of 20
watts of optical power. Other marking window sizes and laser power options are available upon
request.
Controller
The control system is enclosed inside the control housing and performs all of the necessary system
control. Also contained in the Control Housing are the supporting electronics and galvo head controller.
Autolase Software
The Autolase weldMARK Software comes installed on the system controller. This software provides
the functionality for all of the marking parameters.
Cables
The FRG-20 requires a standard molded AC power cable.
Depending on the desired level of automation, an I/O cable may need to be constructed by the user.
This cable attaches to the marker head and provides supplemental I/O, including trigger, safety
interlocks, and a Mark In Progress bit. This would be connected to the pluggable screw-terminal block
on the back of the marker head.
If a host computer will be used to send the FRG-20 marking information, then a standard RS-232C
Null Modem cable will be required. See Appendix B for details.
6
Automated Laser Corporation
FRG Series Markers User Guide
UNPACKING THE SYSTEM
The FRG series markers are carefully packaged prior to shipment. Be sure to save the cartons
and packing material in case you need to ship the system.
Note: If your FRG Series marker needs to be returned to the factory for any reason, the
warranty will be voided if the system is not returned to Automated Laser Corporation in its
original packaging. An approved shipping container can be ordered by contacting Automated
Laser Corporation.
Marking System
Open the shipping container and remove the packing material. Lift the marker head and control
housing out of the container (this may require two people) and place on a bench. Be careful not to
stress or sharply bend the fiber optic cable connecting the two units.
Accessories
Included in the shipping carton should be accessories, such as this manual, a power cable, I/O
connector, and a USB security dongle.
Once all of the components are unpacked, place them on a bench. You are now ready to make
the system connections.
7
Automated Laser Corporation
FRG Series Markers User Guide
SYSTEM CONNECTIONS
Automated Laser, Inc. recommends using a multiple outlet strip with surge protection to supply
power to the Autolase System. This will not only protect the system from power surges, but will be
a convenient way of turning the system on and off.
Interface
The monitor is a standard 15-pin SVGA cable that plugs into the back of the control housing.
Plug in a USB keyboard and mouse on the back of the marker head.
Connect the DB25 cable to the Control Housing and Remote Head.
Connect the circular connector cable from the control housing to the remote head and screw the
connector securely in place.
Caution: Do not connect or disconnect this circular connector with the power to the control
housing switched on.
Power Cable
After verifying that the power switch is in the OFF position, plug in the molded 120-VAC cordset into
the Control Housing, and Monitor. Finally plug the other ends of all the power cables into the outlet
strip.
Interlocks
The FRG Series marking heads have a series of interlocks to provide an advanced level of safety
while operating the unit. Whenever an interlock is opened, the laser energy will be defeated and no
emissions will be produced.
Key Switch
The key switch on the front panel of the control housing interrupts the power to the laser. While the
key is in the ON position, it cannot be removed.
Remote Interlock
The Remote Interlock connections must be tied together for operation of the laser. These can be
found on Pins 9 and 10 of the User I/O connector on the back panel of the Control Housing. These
positions are shipped from the factory with a jumper installed. This is intended to be used with
external safety equipment, PLCs, and lockout devices.
There is a LED on the front panel that is an interlock status indicator. If the interlock terminals are
shorted and the Key switch is on, the LED will turn on.
Other Interlocks
There is an additional Laser Enable interlock on pins 7 and 8 of the User I/O connector that may be
used to momentarily defeat the laser output. This interlock is intended to be used on a piece of
guarding that has to opened to allow a part to be changed as on a piece of automated equipment.
8
Automated Laser Corporation
FRG Series Markers User Guide
While this interlock is open, the laser output is defeated by an internal mechanical shutter being placed
in the beam path. Once these contacts are closed again, laser output is immediately restored.
9
Automated Laser Corporation
FRG Series Markers User Guide
INDICATORS
The FRG laser marker has two LED indicators to monitor status of the system.
Interlocks closed
The interlocks closed LED in on the front panel of the control housing. This LED will illuminate when
all of the interlocks are made, and the key switch is in the On position. This indicator gives a quick
indication of interlock status and is quite useful for troubleshooting.
Mark in Progress
The Mark in Progress (MIP) LED is located on the Front of the control housing and illuminates any
time the internal safety shutter is opened. This gives a visual representation of when the laser output
may be energized.
10
Automated Laser Corporation
FRG Series Markers User Guide
SYSTEM START-UP
Caution: Use of controls, adjustments, or performance of procedures other than those specified
herein may result in hazardous radiation exposure.
•
Once all of the connections are made, switch on the Control housing and Monitor.
•
If you are using a multiple outlet strip, switch it ON to apply power to the system.
The computer will perform its boot tasks and start the Autolase weldMark Software, showing the
main screen.
Figure 1: Autolase weldMARK Software Main Screen
11
Automated Laser Corporation
FRG Series Markers User Guide
OPERATION
General Settings
Figure 2: General Settings Screen
The opening screen of the marking software with a job already define will look very similar to the
screen shown in Figure 2.
The large window on the right side of the screen represents the marking field of the laser. Objects
to be marked can be placed in this window and will mark in the same relative location in the actual
marking field of the laser.
The section to the left shows the Automation Objects associated with a complete marking profile.
These objects are processed from top to bottom each time a mark is started.
The following section describes the function of each of the automation objects used in the
standard marking profile.
12
Automated Laser Corporation
FRG Series Markers User Guide
Automation Objects
Figure 3: Automation Objects
Automation objects control the flow of the marking profile and process from top to bottom when the
mark job is started. In the example shown above, once the job is started, it will wait for an external
trigger before progressing any further. Once the conditions in the Wait for Trigger object are met the
sequence will step to the next object.
Clicking on any of these objects then pressing F2 will open that object’s properties window where the
parameters for that object may be modified.
Objects may be added by selecting Objects > Add >Automation from the menu bar.
The following list will appear to display the different type of objects that may be inserted.
Figure 4: Automation Object List
13
Automated Laser Corporation
FRG Series Markers User Guide
Wait for External Signal
Figure 5: Wait for External Signal object
The Wait for External Signal object causes the sequence of processing objects to pause until the
defined conditions are met. The object may be renamed here to give it a more descriptive name. This
name will appear in the Objects list in the main window. The ‘Use I/O port’ field allows you to define
which port to receive the input from.
14
Automated Laser Corporation
FRG Series Markers User Guide
Open Shutter
Figure 5: Open Shutter object
The Open Shutter object is actually a ‘Set I/O Port’ object that has been renamed to reflect its function
more clearly on the main screen. To open the shutter, the specified port is set to True.
15
Automated Laser Corporation
FRG Series Markers User Guide
Shutter Open Delay
Figure 6: Open Shutter Delay object
The Open Shutter Delay object is actually an ‘Insert Time Delay’ object renamed to reflect its function
more clearly on the main screen.
This delay is inserted to allow the mechanical shutter time to open before firing the laser. Without this,
the mark would likely be missing a small portion of the beginning of the mark due to the shutter
opening slower than the laser fire signal takes to start the mark.
16
Automated Laser Corporation
FRG Series Markers User Guide
Marking Object
Figure 7: Text Parameters
The Text Object properties defines the speed and power for the characters to marked. Each object to
be marked may have different power and speed settings. This is particularly useful when marking text
and graphics together. Each may be independently controlled to provide the best mark.
Other parameters in the lower section of this window may be used to fine tune how characters are
drawn. The default settings are generally adequate for most marking needs, but the Autolase
weldMARK software gives us the flexibility to further tweak the marks for special needs.
17
Automated Laser Corporation
FRG Series Markers User Guide
Close Shutter
Figure 8: Close Shutter object
The Open Shutter object is actually a ‘Set I/O Port’ object that has been renamed to reflect its function
more clearly on the main screen. To close the shutter, the specified port is set to False.
For further details on using Automation Objects, refer to the online help in the software, or the software
manual “Manual_weldMARK_en.pdf” located in the Program Files directory, typically:
"C:\Program Files\RAYLASE\weldMARK\Documentation\manual_weldMARK_en.pdf".
18
Automated Laser Corporation
FRG Series Markers User Guide
Marking your job
To begin marking, simply click on the Run Process Icon located on the top toolbar.
This will start the job marking by working down the list of Automation Objects.
Depending on how the software is configured, it may be necessary to click on this icon each time you
want to mark. Typically in an automated system the software would be configured to receive this Run
command serially to enable the job each cycle.
19
Automated Laser Corporation
FRG Series Markers User Guide
Power Adjustment
The laser output power is adjusted via the marking object’s properties window. Each object may have
its own power level setting, allowing ultimate flexibility in marking clarity between objects.
Because of the wide range of materials capable of utilizing laser marking, experimentation will be
needed to determine the optimum laser power and beam velocity settings. In some cases poor
marking output may be attributed to incorrect power or speed settings. If assistance is required in
determining the best range for these settings, please contact the factory.
NOTE: Automated Laser strongly recommends leaving the Key Switch on the Rear Panel in the
OFF position until you are ready to mark. Once marking is completed, turn the switch to the
OFF position.
NOTE: In order for the Laser Marker to work, all interlocks must be closed. This means that
the Key Switch on the back panel must be ON, and the Remote Interlock terminals on the User
IO connector must be connected together.
20
Automated Laser Corporation
FRG Series Markers User Guide
SHUTTING DOWN
•
Wait for any active job to complete marking.
•
Close the Automated Laser weldMARK software, saving any changes you have made when
prompted.
•
Exit Windows
•
Switch off laser power.
AUTOMATIC MODE
The FRG Series markers can be run in an Automatic mode where the system goes to the Marking
Screen, waiting for a trigger upon startup.
To have the system start in automatic mode, there must be a job selected in the System Preferences
dialog box.
Fig. 9 System Preferences
Select Enable AutoStart and Browse to the job file you want to have started automatically.
This will load the selected job, but will not enable the job for marking. To do this you will need to either
select the ‘Run Process’ icon from the menu bar, or enable the job via serial commands in Host mode.
Host mode starts the laser in a “listening” mode with no job active. The following describes how to
enable Host mode, and the commands are used to load a job and enable it for marking.
21
Automated Laser Corporation
FRG Series Markers User Guide
Select System > Preferences from the menu bar. In the Host Interface tab, select the host connection type,
port, and speed parameters and check the ‘Enter Run from Host mode’ box to enable the program to receive
serial data on startup.
Fig. 10
In Host mode the following commands may be sent to the laser to initialize a job file.
Autolase weldMARK serial commands
Command
OPEN,file,C:\Default.wmj
MODIFY,field,04,*****
RUN
After marking….
MODIFY,field,04,*****
RUN
Action
Loads the specified job for marking. Full path with extension is required.
Inserts the data "****" to be marked into our field.
Laser is now waiting for trigger input.
Inserts new data "****" to be marked into our field. (Optional)
Laser is now waiting for trigger input.
At end of run….
SET,control,local
Returns control of program to the keyboard so user can access menu options or
shut down the marker.
22
Automated Laser Corporation
FRG Series Markers User Guide
MOUNTING THE MARKER HEAD
The FRG Series marker heads are designed with a focal length of approximately 8 inches from the baseplate
of the laser. This distance is critical for high-quality laser marking. Failure to position the marking part
within tolerance will cause blurring of the mark or even eliminate marks at any power or speed setting.
The marker head may be mounted utilizing the four (4) ¼-20 threaded holes on the bottom of the unit. To
minimize the effects of vibration, mount the marker head to solid surface. This will prevent the mechanical
motion of the marker from agitating the work piece.
INTERFACING TO OTHER SYSTEMS
Several features of the FRG Series Markers make it easy to interface to external control systems. As stated
in the Triggers Section, a trigger may be assigned to a function key or a programmable input. All of the
external I/O connections can be found on the pluggable screw-terminal connector on the back of the marker
head.
Pin
1
2
3
4
5
6
7
8
9
10
Description
Start (Trigger)
Ground
Comment
Dry Contact closure to start
marking
MIP
MIP
Contact closure output, on
when safety shutter is open
Close to enable laser, open ckt.
Defeats safety shutter disabling laser
output.
Laser Enable
Laser Enable
Interlock
Interlock
Close to enable laser, open ckt.
Disables laser.
23
Automated Laser Corporation
FRG Series Markers User Guide
Remote Interlock
The Remote Interlock can be found on Pins 9 and 10 of the User I/O connector. This is a safety
device that is normally wired through a safety circuit such as an Emergency Stop. These two
terminals need to be connected together in order for the laser to work. Dry contacts are
recommended for this input.
Laser Enable
The Laser Enable input allows the user to disable the command signal to the laser, the Interlock
Inputs for safety considerations.
Trigger
The Trigger Input is activating by shorting pins 1 and 2 on the I/O connector together. Dry
contact PLC outputs, or a relay contact are recommended for these inputs.
24
Automated Laser Corporation
FRG Series Markers User Guide
NOTES ABOUT M ARKING
Fume Extraction
Due to the variety of materials that the FRG Series Markers can mark, Automated Laser strongly
recommends that you provide a method of fume extraction around the marker head. The reason for
this is two-fold:
1. Different materials respond differently to laser marking. Most materials release an unpleasant odor
when marked, possibly causing operator discomfort. Some of these odors may be not only
unpleasant, but hazardous to breathe for extended periods of time. Certain materials can produce
noxious, toxic, or even fatal contaminants in the air when processed with a laser. The vapors, fumes,
and/or particles that result from laser marking should be thoroughly evaluated, and the adequacy of
the provisions for fume extraction, filtering, and venting should be carefully considered.
See Section 7.3 in the ANSI Z136.1-1993 Standard for the Safe Use of Lasers, for exposure criteria in
29 CFR 1910 Subpart Z (from the US Government). Also, see the American Conference of
Governmental Industrial Hygienists (ACGIH) for published Threshold Limit Values (TLVs). It may
also be necessary to consult with your local government agencies regarding restrictions on the venting of
vapors.
2. While every attempt has been made to provide a virtually maintenance-free system, the release of
by-products in the air while marking can accumulate on the exit aperture. This is a very delicate lens
that focuses the beam to a very small point. If a means of fume extraction is not provided, this lens
will need to be cleaned regularly.
Screen Savers
Because the FRG Markers are real-time marking systems and need to perform real-time
calculations on the fly, the Autolase weldMARK Software demands dedication of the computer’s
processor to the marking task. Installing additional applications, utilities, and networking can
cause unpredictable results with the laser marker. It is best to consider the FRG computer as a
dedicated controller, to be used only for laser marking.
25
Automated Laser Corporation
FRG Series Markers User Guide
GENERAL MAINTENANCE
Cleaning the Air Filters
If the marker system is heavily used, the air filters should be cleaned on a weekly interval. Clean
only the foam-style filters, paper filters must be replaced.
1. Remove power from the Marking System.
2. Snap the filter guard off of the fan housings.
3. Remove the foam filter. Wash clean using warm water. A very mild, diluted detergent may be
used.
4. Allow filter to dry completely before re-installing.
The filter may be cleaned less frequently if the marking system is used under a lighter duty.
Inspecting and Cleaning the Exit Aperture
The exit aperture is the final optic that the beam passes through prior to marking. This can be
found on the bottom side of the laser marker. The lens should appear clean, free of dust and
fingerprints. If this is not the case, perform the following steps for cleaning:
1. Remove all power from the marking system.
2. Turn off the key switch and remove the key.
3. Remove light dust and debris with an air duster.
4. Using rubbing alcohol and a cotton swab, clean the lens using very light pressure in a circular
motion. Do not use excessive force. The lens is easily scratched and can be damaged from trying
to clean it.
5. Allow to air-dry.
The accumulation of dirt on the exit aperture can cause the lens to over-heat and break. A dirty
lens will also reduce the net output power of the laser.
Replacing the fuse
A 7-Amp fuse protects the AC input to the marker head (FRG-20). If the cooling fans do not turn
when power is applied, the input fuse may need replacing.
1. Remove the power cord from the input module.
2. Using a small screwdriver, open the hinged cover to the power entry module.
3. Lift up on the red insert with the screwdriver. Note the orientation of the text “115V” on the red
insert.
4. Remove the fuse from the insert. Check for continuity to make sure it is blown.
26
Automated Laser Corporation
FRG Series Markers User Guide
5. If blown, replace with an equivalent 7A ¼” X 1-¼” fuse. Use Buss number AGC-7 or equivalent.
6. Replace the fuse into the insert.
7. Replace the insert into the input module, noting the correct orientation.
8. Snap the hinged cover closed on the input module. NOTE: Be certain that the “115 V” text is
displayed in the window on the input module. If not, reverse the red insert.
Additional inspections
1. Ensure that the “LASER ON” Indicator properly functions during marking. Perform a test mark.
The indicator should turn on after activating the marking trigger and turn off once the mark is
complete.
2. Inspect the housing, making sure there are no gaps or holes that could allow laser energy to
exit the marking head assembly.
Caution: There is no need to remove the marker housing for standard
maintenance procedures. Laser radiation levels inside the housing can be as high
as 30 W.
27
Automated Laser Corporation
FRG Series Markers User Guide
WARRANTY AND LIMITATION OF LIABILITY
Automated Laser Corporation, Fort Wayne, IN warrants to the original end user purchaser (the “purchaser”)
of the equipment supplied by Automated Laser Corporation (“equipment”) that such equipment will be free
from manufacturing defects in materials and workmanship use for a period of one year from the date of
shipment to the purchaser from the factory or authorized distributor. This warranty only applies if the
product is received by the purchaser as new, in the original factory sealed shipping carton and is used
under normal service and for the intended equipment purpose.
Automated Laser Corporation’s obligation under this warranty shall be strictly and exclusively limited to the
repairing or replacing any such equipment that is found to be defective in material or workmanship under
normal use and service provided the equipment is returned to the factory within one (1) year from the date
of the original shipment to the purchaser. This warranty does not apply to any product that has been
tampered with, altered or modified in any way or improperly installed, misused or damaged.
THIS STATED WARRANTY IS IN LIEU OF ANY OTHER WARRANTIES, EXPRESS OR IMPLIED,
INCLUDING, WITHOUT LIMITATION, ANY IMPLIED WARRANTY OF MERCHANTABILITY OR
FITNESS FOR A PARTICULAR PURPOSE, AND OF ANY OTHER OBLIGATIONS OR LIABILITIES
ON THE PART OF AUTOMATED LASER CORPORATION. IN ADDITION, NO OTHER PERSON
OR ORGANIZATION IS AUTHORIZED TO ASSUME OR EXTEND FOR AUTOMATED LASER
CORPORATION ANY OTHER LIABILITY WITH RESPECT TO EQUIPMENT MANUFACTURED
OR SUPPLIED BY AUTOMATED LASER CORPORATION. AUTOMATED LASER CORPORATION
SHALL HAVE NO LIABILITY WHATSOEVER IN ANY EVENT FOR PAYMENT OF ANY
INCIDENTAL OR CONSEQUENTIAL DAMAGES INCLUDING, WITHOUT LIMITATION,
DAMAGES FOR INJURY TO ANY PERSON OR PROPERTY, OR LOSS OF SERVICE OR
PRODUCTION, AND COSTS INLUDING ATTORNEY FEES.
Equipment subject to this stated warranty must be authorized by the factory to be returned for evaluation,
repair or replacement prior to shipment from the purchaser to Automated Laser Corporation complete and
returned complete in the original shipping packaging. Unless pre-approved in writing, Automated Laser
Corporation shall not be responsible for any freight or transportation charges incurred for any shipments.
IN NO EVENT WILL AUTOMATED LASER CORPORATION BE LIABLE FOR ANY DAMAGES
(INCLUDING ATTORNY’S FEES) ARISING OUT OF THE SALE OF EQUIPMENT, SOFTWARE,
PROGRAMMING OR ANY SERVICES, INCLUDING LOSS OF USE OF EQUIPMENT, LOSS OF
PROFIT, LOSS OF DATA, INCINDENTAL, CONSEQUENTIAL OR INDIRECT DAMAGES OR ANY
OTHER LOSSES, WHETHER SUCH LIABILITY IS BASED ON WARRANTY, NEGLIGENCE,
CONTRACT, STRICT LIABILITY IN TORT OR OTHERWISE. THE PURCHASER REMAINS
RESPONSIBLE TO APPROVE THE OPERATION, SAFETY AND ACCURACY OF RESULTS FOR
ALL APPLICATIONS AND ACKNOWLEDGES THIS RISK AS AN AGREEMENT OF PURCHASE.
28
Automated Laser Corporation
FRG Series Markers User Guide
ELECTRICAL SPECIFICATIONS
Component
Marker head
Laser module
Electrical Specification
Voltage
Current
Frequency
115 vac
7 amps
60 hz
Laser power output
Laser Wavelength
20 watts
1064 nM
I/O
Output
User I/O
pins
Comments
MIP
5-6
5A @ 30 vdc
Input
Trigger
Laser
Enable
1-2
Dry contact closure
7-8
Interlock
9 - 10
Dry contact closure
Typically through MCR or Safety
relay.
29
FRG-20
Automated Laser Corporation
FRG Series Markers User Guide
Sample connections
The following diagram is a representation of a typical interface. This is not intended to be allinclusive.
Figure 11: Typical User Connections
30
Automated Laser Corporation
FRG Series Markers User Guide
MECHANICAL SPECIFICATIONS - FRG-20
All Dimensions in inches
Figure 12: Control Housing & Remote Head Dimensions
31
Automated Laser Corporation
FRG Series Markers User Guide
MARKER HEAD
FRG-20
Figure 13: Control Housing Layout & Label Locations
32
Automated Laser Corporation
FRG Series Markers User Guide
Figure 14: Remote Head Layout & Label Locations
33
Automated Laser Corporation
FRG Series Laser Markers User Guide
Appendix B
APPENDIX A: LASER SAFETY
Safety Standards
The most predominating set of standards for laser safety can be found in the American National
Standards Institute’s (ANSI) publication Z136.1 – Standard for the Safe Use of Lasers. This
document is referenced by Federal and state authorities, as well as OSHA, and can be obtained
from ANSI or the Laser Institute of America (LIA), at 407-380-1553. Additionally, your state may
have regulations for laser safety.
The type of laser in the FRG Series Marking Head is a 1064nM Class 4 Diode Laser system. A
Class 4 laser or laser system is any that exceeds the output limits (Accessible Emission Limits,
AEL's) of a Class 3 device and are considered to be an acute hazard to the skin and eyes from
scattered or direct radiation. As would be expected, these lasers may be either a fire or skin
hazard or a diffuse reflection hazard. Very stringent control measures are required for a Class 4
laser or laser system. The end use applications must take standard industry precautions into
account for the safe use of this product.
Laser Beam Hazards
The FRG Series Laser Marker produces an intense beam of coherent (same wavelength) light.
This light is in the mid-infrared region and is not visible by the human eye. By nature, when light
falls upon an object, it will be partially absorbed by that object. This is especially true with laser
light, which when directed upon an object (whether directly or indirectly) will be at least partially
absorbed. When an object absorbs energy such as an intense beam of light, the temperature is
raised of the object, which is how the laser performs its function. The laser focuses an intense
beam of coherent light onto a very small surface area, causing such results as melting, burning, or
deformation.
This same intense coherent light when exposed to the human body can result in tissue damage,
with the eye being the most vulnerable part of the body. The FRG Series Markers emit a
wavelength between 1064 nM. The part of the eye that absorbs most of this wavelength is the
cornea. This is why it is important to wear certified protective laser eyewear at all times
when using the FRG Series Laser Markers. Protective eyewear must be worn when the
emitted beam is not completely enclosed with an external housing to create a Class I Enclosure.
The skin is also vulnerable to laser radiation. Care must be taken to prevent skin exposure to the
laser beam, whether direct or scattered. This is why it is important to enclose the beam path
whenever possible.
A-1
Automated Laser Corporation
FRG Series Laser Markers User Guide
Appendix B
Additional Hazards
There are also hazards related to the use of lasers that are not associated directly with the beam.
These non-beam hazards include electrocution, fire, and asphyxiation – all of which can result in
severe injury or death.
Electrocution: If the system needs to be serviced, disconnect all AC power prior to opening the
cover. Lethal voltages exist inside the Laser Marker housing, and the cover must not be removed
unless absolutely required and with power off.
Fire: Due to the wide range of products that can be marked with the laser, use extreme caution
when marking on new materials. The ablation process with a high-energy beam can result in an
unintended fire.
Asphyxiation: Because the FRG Series Laser Markers typically ablate the material being marked,
the resulting smoke and fumes could be a hazard and ventilation is often necessary. Know and
understand the materials being processed prior to use.
The Laser Safety Officer
The ANSI Z136.1 standard specifies that a Laser Safety Officer (LSO) be designated to oversee
safety for all operational, maintenance, and servicing situations for any facility using Class 3b or
Class 4 lasers or laser systems.
The LSO should monitor and enforce the control of laser hazards. This person is also responsible
for the evaluation of laser hazards, the establishment of appropriate control measures, training
personnel on laser safety, maintenance procedures and schedules, and procurement of laser
safety equipment. See ANSI Z136.1 for more information regarding the LSO.
For additional related Class IV laser guidelines and regulations contact the Center for Devices and
Radiological Health, Div. Of FDA, 2098 Gaither Road, Rockville, Maryland 20850.
A-2
Automated Laser Corporation
FRG Series Laser Markers User Guide
Appendix C
APPENDIX B: USING THE SERIAL PORT TO TRANSFER LINE DATA TO THE
FRG-SERIES M ARKERS
Description
The FRG Series markers have the capability to retrieve the marking text through the serial port on the controller. This can allow
real-time data to be marked, which can come from a variety of sources such as PLCs, other PCs, test equipment, and other
processors.
Setup
Communication Port
The primary COM port on the FRG Marker is the 9-Pin D-Sub male connector found on the back housing. The host controller
will need to be configured with the same settings as the FRG Controller, shown below:
Baud Rate
Parity
Data bits
Stop bits
Soft Handshaking
Hard
Handshaking
9600
None
8
1
XOn /
XOff
(off)
The XOn/XOff handshaking protocol prevents the COM port from being overrun. A maximum buffer size has been set to 1024
bytes (1 byte is approximately 1 character). When the FRG serial buffer has reached this limit, the XOff character will be sent to
the host computer, informing the host to suspend data transfer until an XOn character is sent by the FRG Controller. Once the
Marker’s serial buffer has begun to be emptied, the XOn character will be sent to the host, allowing additional data to be sent.
If your host controller does not support the XOn/XOff protocol, special care must be taken in order not to overrun the FRG buffer
of 1024 bytes. The buffer is cleared every time a valid trigger is received.
Cabling
Three signals are needed to support data transfers from a host to the FRG Marker. These are the Transmit (Tx), Receive (Rx),
and Ground (Gnd). Facing the rear of the marker head, the pin-outs can be found on the 9-pin connector by the diagram below.
Receive
Transmit
Gnd
Figure 3: 9-Pin D-Sub Male Serial Connector
In order for RS-232 communications to work properly, these minimum signals need to be connected properly. The Receive of
one port needs to connect to the Transmit of the other. Similarly, the Transmit of one port needs to connect to the Receive of the
other. Finally, the Ground pins from each port must be connected.
B-1
Automated Laser Corporation
FRG Series Laser Markers User Guide
Appendix C
The connection method to the host can vary depending on the type of host system. Several options are shown below.
Figure 4: Custom Cable Connections from a 9-Pin D-Sub to a 9-Pin D-Sub
Figure 14: Connecting a 9-Pin D-Sub to a 9-Pin D-Sub using standard cable assemblies
B-2