1
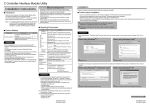
2. The USB Net Share Station will show up on the
USB Server utility software. There will be a icon
indicating that the USB Net Share Station is
available and ready to be connected. If for any
reason the USB device does not show up,
please click the SEARCH button to refresh the
utility
Back Layout:
USB Net Share Station
Features:
Reset
RJ45 Connector
5V Power adapter jack
● Share your USB devices through your home or
office network
● Wirelessly share your USB devices through
your wireless router
● Share an external hard drive, flash drive or
mem ory card reader with multiple users over
your network
● Share a USB webcam over a network
● Enjoy music stored on any networked PC with
a USB speaker
● Allows multiple users to share a Multi-Function
Printer (MFP)
over a network to print, scan, and fax from any
networked computer
● Supported protocols: LPR/LPD, DHCP, UPnP
● Supports USB 2.0 and 1.1 devices
● Supports Windows Vista Rally Technology
● Works with any home or office Ethernet network
Specifications:
● Operating System Support: Windows XP/Vista/7
● Network Protocol: TCP/IP
● Network Interface: 10/100Mbps RJ45
● Printer Connection: USB 2.0 / USB 1.1
● Management: Web Interface
● Dimensions: 88.5*55*23mm
Hardware Installation:
※ Make sure that your USB devices are switched
off and that the server’s power adapter is
disconnected
1. Connect your USB device to the USB port of
the USB Net Share Station
2. Connect the USB Net Share Station server to
the router or switch with the Ethernet cable
3. Connect the power adapter to the USB Net
Share Station server When the Ethernet Link
indicator lights up, the USB Net Share Station
is correctly connected to the network
USB Server Software
Installation:
1. Insert the supplied driver CD into the CD-ROM
drive. Open the CD under My Computer and
double-click USB Server folder For windows
XP/Vista/7: Please double-click run “Install.exe”
The following window will be seen
3. Select “storage” and click the “Connect Device”
button
Once connected, the icon will turn orange to
indicate that the connection has been established
After you have started USB Net Share Station,
the icon will show up in the taskbar, as shown
Package Contents:
Disconnecting a USB Device:
● 1 x 1-Port USB Net Share Station
● 1 x User Manual
● 1 x Installation CD
● 1 x Power adapter
● 1 x Ethernet cable
1. To Disconnect the USB Net Share Station from
your computer simply select the USB Device
and click on the Disconnect button
2. Click “Finish”
Support Devices:
● Printer or Multi-function printer with USB
connection
● External USB hard drive
● USB speaker*
● USB webcam*
● USB flash drive
● USB memory card reader
● USB scanner
Web Management Interface:
3. Click “Finish” to restart your computer.
To access web management interface, in the USB
Server utility, select “View” on the menu, and click
off the “Only Show USB Device”
Connecting to a USB Device:
Click the “USB server”, and then Click
“Open Web Page”
※ Some USB devices require a direct connection
for optimum performance
System Requirements:
● CPU of 1.7GHz and above
● Minimum 512MB RAM
● Windows XP/Vista/7
● Available Ethernet port in home/office network
Layout:
1. Double-click “Launch USB Server” icon on the
desktop
Front Layout:
Power Indicator
Ethernet Link Indicator
USB port
1
2
3
• Although the USB Net Share Station could work
with a very wide spectrum of USB devices, it still
has limited support on some USB devices
Please refer to the supported device list for
details
The left panel of the web management interface
provides a list of different options to choose from
Displays the current USB device info and will tell
you which computer a USB device is connected to
2. How come I cannot see any servers on my USB
Server listing window after installing it? Please
make sure that all of your USB Net Share
Stations are correctly connected to your
network. Also, certain anti-virus programs come
with firewall functions that might prevent the
USB Net Share Station utility from accessing
the network Please make sure USB Net Share
Station utility is not being blocked by your
anti-virus program
Firmware Update:
The firmware link will allow you to upload the
latest firmware on the USB Net Share Station
server. Click on “Browse” to specify the firmware
location on your PC. Once the location path of
the firmware has been set, click “Submit” to begin
the update. Please note that if the DVI Net Share
Station has a set password, you will need to
enter it into the password field box
Device Status:
Network:
3. The connected USB devices are disconnected
after my PC wakes up from Standby? The
connected devices will automatically be
released for other users in case you forget to
release them. Please reconnect the USB
devices again after your PC “wakes up”
You can change the network settings according to
your network specifications. If you would like to
give the USB Net Share Station a static IP
address,you will need to Disable DHCP in the
“DHCP Setting” menu. Once DHCP is disabled,
enter the desired IP address on the IP address
field along
with the subnet mask and click the “Submit”
button to reboot the USB Net Share Station.
Please note that if the USB Net Share Station has
a set password, you will need to enter it into the
password field box
Password Change:
You can add or change an existing password on
the USB Net Share Station in this window. By
default the USB Net Share Station does not come
with a default password
The Reset Device window will allow you to reboot
the USB Net Share Station server. Please note
that if the USB Net Share Station has a set
password, you will need to enter it into the
password field box
FAQ:
1. How come I cannot connect to my USB device
to my computer through the USB Net Share
Station?
• Make sure the USB device functions normally
when you plug it into your PC via USB cable
• If the USB device, such as USB printer or multifunction printer, requires a driver, please make
sure you have installed it on the computer you
wish to use Rebooting your PC after installing
USB device driver might also help.
Allows you to restore the USB Net Share Station
back to Factory default. Please note that if the
USB Net Share Station has a set password, you
will need to enter it into the password field box
4
5
6