Download Gebruikershandleiding phpwcms
Transcript
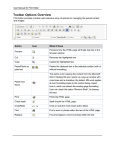
User Manual phpwcms Working with phpwcms © Voskotan Webservices http://www.voskotan.com © Voskotan Webservices Pagina 1 van 21 Index 1 2 3 4 5 6 7 8 Introduction .............................................................................................................................. 3 System requirements ............................................................................................................... 3 Logging in ................................................................................................................................ 3 Control interface cms ............................................................................................................... 4 4.1 Subdivisions inside the cms .............................................................................................. 4 Control interface parts.............................................................................................................. 6 5.1 Article section ................................................................................................................... 6 5.2 File section ....................................................................................................................... 7 5.3 Admin section ................................................................................................................... 7 5.3.1 Edit (Menu) Structure................................................................................................. 8 5.3.2 Adding a subcategory ................................................................................................ 8 5.3.3 Editing category properties. ....................................................................................... 9 Editing website ...................................................................................................................... 10 6.1 Edit text existing articles ................................................................................................. 10 6.2 Adding a news item ........................................................................................................ 11 6.3 Adding attachments to an article ..................................................................................... 13 6.3.1 Adding contentpart [file list] to an article................................................................... 13 6.4 Adding/editing photo album ............................................................................................ 14 6.4.1 Uploading images .................................................................................................... 14 6.4.2 Adding contentpart [images <div>] to an article ....................................................... 14 6.4.3 Edit images photo album ......................................................................................... 16 Uploading files and images to ‘file center’ .............................................................................. 17 7.1 Uploading files to file center one by one ......................................................................... 17 7.2 Multiple file upload to file center ...................................................................................... 18 Logout ................................................................................................................................... 21 © Voskotan Webservices Pagina 2 van 21 1 Introduction Phpwcms is a powerful content management system (cms) with many features, written by Oliver Georgi. Despite its many features, you don’t have to be an absolute computer freak to operate phpwcms. It is easy controllable by the average internet user. This manual is made to cover the actions that are most commonly used to modify/maintain a website. Therefore not every aspect will be discussed in detail. 2 System requirements To adjust web pages, we suggest the internet browsers Firefox or Internet Explorer 7 or higher. Internet Explorer 6 has trouble viewing images sometimes. (Internet explorer 9 needs to be run in compatible modus To view the web pages you can use every browser. ) 3 Logging in To pursue adjustments on a website, you first have to log in. Go to your website and type ‘login.php’ instead of ‘index.php?’. e.g. http://www.yourwebsite.com/home/login.php Figure 1 Figure 2 © Voskotan Webservices Pagina 3 van 21 4 Control interface cms Once you logged in the control interface of the cms-system will show up. Figure 3 There are several different menu options: Home – a summary of pages and content parts modified last. Article – here you will find the pages of the website. File – here you will find the files and images that are uploaded. Modules – here you will find the expansion modules. Is not used Communication – allows you to communicate with fellow users. Is not used Profile – to control the user data, such as changing your password. Admin – admin part, only accessible for administrators. The website settings are tracked here. Only modify settings here when you know what you are doing! If something is done wrong in this section, the entire website will malfunction. Logout, speaks for itself, nevertheless you should use it! The section ‘Article’ is the one we will use most. 4.1 Subdivisions inside the cms The cms-system works with 3 important concepts: Site structure – The menu structure of a site. A menu item is called a category. (Figure 4) Pages – These are the web pages of the site, a page is called an Article. (Figure 5) Content part – A page (article) consists out of one or more parts. These parts can contain text, images, attachments, etc. A part of a page (article) is called a content part or content. (Figure 6). Example of a site structure: Figure 4 © Voskotan Webservices Pagina 4 van 21 Example of an article: Figure 5 Example of an article with different content parts: contentpart: summary contentpart: Text with image contentpart: HTML Figure 6 © Voskotan Webservices Pagina 5 van 21 5 Control interface parts In ‘Control interface cms’ we already discussed what menu options there are and that the article and file sections are used most. Now we will explain those parts more thoroughly. 5.1 Article section In the article section you can edit, add and delete pages. You can recognize articles by the orange icon in front of the name. You can recognize category’s because they are bold. Category Article To view a page, you can click on the icon in front of the name. The relevant page will show up. Adjustments to an article are made by clicking the icons behind the article. These icons have the following functions: Create a new article under this category Edit an article Cut article (to move it to a different category, only possible if user is admin) Copy article (to a different category, only possible if user is admin) Move article up and down Make article visible / invisible Make article public / non public Delete article. Once deleted, you cannot recover the article! © Voskotan Webservices Pagina 6 van 21 5.2 File section In the file section we put files and images that can be used in content parts. In example images that you use in a photo album. In the file section you can create directory’s to order your files. I recommend you to use this function or you will quickly lose the overall picture. Especially in websites that use many files / images. Directory Attachment or image Upload new file to directory Create new directory Show help text Open all directory’s Close all directory’s Enable / disable thumbnails in list. Cut file Paste file in this directory Edit file details Save file Make file/directory active or inactive Make file/directory public or non-public. You can only use public files on your website Delete directory (only if empty) to trash bin Recover file from trash bin 5.3 Admin section In the admin section there are several occasions that you shouldn’t touch. This can disturb the functioning of a website. The only thing you are allowed to touch is the structure of the website. Nevertheless you should be careful here to. If you delete a category, the entire category, including all articles and subcategories, will be lost. © Voskotan Webservices Pagina 7 van 21 5.3.1 Edit (Menu) Structure You can edit the structure of a website (also known as menu) by going to the Admin section. Here you will find the structure of your site. Create subcategory under this category Cut category Paste category (after you cut one) Copy category Copy category (including content) Edit category details Move category up / down Make category visible / invisible Make category public / non-public Delete category including content Once deleted, you cannot recover the category or its contents. 5.3.2 Adding a subcategory • Select [insert structure level] behind the category you want to add the subcategory to. © Voskotan Webservices Pagina 8 van 21 • Insert title and alias (these are the same) and choose the right template. • Choose [save & close] to save your changes. You can now see your new subcategory. If not you have to click the [open] icon in front of the category to see the subcategory’s. 5.3.3 Editing category properties. • • To edit the category properties, click on the button [edit category] behind the regarding category. Tick invisible to make sure the category is invisible in the navigation of the website (because we are working on it). • Tick [Search] machines. • Status [visible] means that the category is visible on the website. If you are working on a category, it is handy to tick it off. Status [sitemap], means the category is included in the sitemap. • © Voskotan Webservices off to make sure the category is not being found by searching Pagina 9 van 21 6 Editing website Below you will find several standard actions to edit articles, add images add attachments etc. 6.1 Edit text existing articles • • • Go to the article tab in the menu and choose which article you want to edit. You can recognize articles by the orange icon in front of the name. Now click on the first icon [edit article] behind the name. Now click on in the right top to edit the article. • Make your adjustments in the editor. (See extensive FCKeditor manual for full possibilities of the editor.) • Now save your changes by clicking the the cancel button, changes won’t be saved. © Voskotan Webservices [save & close] button. By clicking Pagina 10 van 21 6.2 Adding a news item A news item always consists of 2 sections. The intro and the sequel. The intro is visible in the news summary. If you click on ‘read more’ the sequel will show up. Intro Link to sequel • Go to the article tab in the menu and select the category. • Enter the title and click [save] • Enter the intro of a news item in ‘summary’. • (See extensive FCKeditor manual for full possibilities of the editor.) [save & close] button. Save the changes by clicking the [create article] icon behind the regarding Summary contains the intro of a news item. NOT the entire news item. © Voskotan Webservices Pagina 11 van 21 • Add a new [HTML (wysiwyg)] ‘content’ to the article. • Now enter the sequel of the news item. • Tick status: Visible and click [save & close] • Select [preview] to view your news item or view it on the website. Do not forget to refresh the page if you already opened it. Shortcut refresh : [F5] © Voskotan Webservices Pagina 12 van 21 6.3 Adding attachments to an article Attachments are all files but images. For example MS-word files, PDF files, Excel spreadsheets, PowerPoint presentations and so on. To put these in an article, it is necessary that you upload them first. Once you’ve uploaded the file, it can be used in one or more articles by creating a content [file list]. 6.3.1 Adding contentpart [file list] to an article Sometimes you have to select the in front of the map to open the map. • • • Go to the article section by clicking [article]. Select the [edit article] icon of the article you want to put the file in. Add content [File list]. • Select • The file is in the list now. Tick ‘visible’ and click [save & close] [open file browser] and select the file from the ‘pop-up’ screen by clicking on it. © Voskotan Webservices Pagina 13 van 21 • In the article information you can see that the content [file list] is added and the file is in the list. • To add multiple files, you first have to upload them in the [file] section. Now you can add them to this list of files by first selecting the [edit article] icon. Then you select [edit] behind the list and you can add your files. 6.4 Adding/editing photo album To create a photo album, you always need to do two steps. First you upload the photos in the [file] section. Then you add them to the [image div] content. 6.4.1 Uploading images See 7. Uploading files and images to ‘File center’ to upload images. An image is a file after all. 6.4.2 Adding contentpart [images <div>] to an article • • Go to the article section. Select the [edit article] icon of the article you want to put the file in. © Voskotan Webservices Pagina 14 van 21 • Add content [images <div>]. • Select [browse] in the screen below. Images you’ve added will appear here • Now a pop-up screen will appear. Select the images you want by clicking the [add] icon. Once you’re finished you close the screen by clicking the in the right top corner. © Voskotan Webservices Pagina 15 van 21 • • you can add more images, change the order or delete images. With the icons o In [max. width] you set the maximum width of a ‘thumbnail’. o Tick [click enlarge], [lightbox] and [hide caption for thumbnails] so the full image will pop-up if you click on a thumbnail. o In the ‘caption’ box you can type the text that is showed under the image. o The first line is showed below image 1. The second line below image 2 etc. o Tick [status visible] to make the album visible. Select [save & close] to save your photo album. 6.4.3 Edit images photo album • • Choose which article (with photo album content part) you want to edit. Click on the first icon next to the name [edit article] to edit the article. • Click on [edit] behind [images] to edit the photo album. © Voskotan Webservices Pagina 16 van 21 7 Uploading files and images to ‘file center’ To put files and images in you webpage you firts need to put them on the webserver, this is called uploading. We can upload files one by one or multiple files together. Below is explained how you can do that. 7.1 Uploading files to file center one by one • Go to • • Select [Upload file to] behind the directory you want to put the file in. Select [browse] and select the file you want to upload on your computer. • Tick status: visible and public and click [Upload files]. [File] © Voskotan Webservices Pagina 17 van 21 • 7.2 The file is now uploaded to the directory. Multiple file upload to file center If you need to place multiple files or images on your website it's handy to upload then all together. Here fore we use the option [multiple file upload] in the file center. • Go to • [browse files], a new windows will open. Select the files you want to select upload (hold down the CTRL key and click with the mouse the files you want) and click [open] (right below). © Voskotan Webservices [File] and select [multiple file upload] Pagina 18 van 21 • Click • • Now the files are uploaded to the webserver, we have to place them into the phpwcms system. There fore click on [ftp takeover] and follow the next steps. Select ALL to select al the files • Choose the folder where you want to store the uploaded files • Check the active, public and replace eponymous files • click [take over selected files] and the files will be place in the right folder. NOTE, this will go very fast and takes only a split second. © Voskotan Webservices [Upload selected files] to upload the files Pagina 19 van 21 • Go to the file center folder and the uploaded files will be there © Voskotan Webservices Pagina 20 van 21 8 Logout Finally, something very obvious but important. Do not forget to log off! Especially in public places or ‘odd’ locations. Always make sure you log off and close all internet browsers. This is how you make sure that strange people are unable to modify / delete your website. © Voskotan Webservices Pagina 21 van 21


