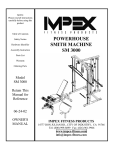
1
About
1
1
About
cncGraF©
Controlling the CNC milling machines in the Windows systems
Copyright © 1993 - 2007 by Michael Boenigk
Internet: www.boenigk-electronics.com
E-Mail: [email protected]
It is FORBIDDEN to copy the software or any of the printed materials either in one piece or in parts
regardless of whether the software or materials are in their original or altered version.
All the data carriers have been checked and tested before dispatch for the presence of viruses or
errors. It is recommended, however, that the client additionally controls the data carriers. Boenigk is
not liable for any potential damage (e.g. loss of data, machine damage, material damage, personal
damage, cost increase or incorrect results) arising from the use of their programs / software. It is
FORBIDDEN to remove the LICENCE NUMBER from the software and to modify or disassemble the
program. All the COPIES must comply with and be identical with the supplied original.
Microsoft, Windows, Autodesk, Autocad, Adobe, Hewlett Packard and other product and company
names mentioned in this booklet are registered names of their owners.
Copyright © 1993 - 2007 by Michael Boenigk
2
2
cncGraF Online Hilfe
Basics
The cncGraF software is a program for controlling and operating CNC milling machines with three
stepper motors. Command signals are sent via a parallel port (LPT) or a USB port to the power drivers
and then to the built-in stepper motors of the CNC machine. The program also reads and indicates the
condition of the three limit reference-switches, the emergency STOP switch, the material height sensor
or the tool-length sensor. Two command signals, independent of the other signals, are used for the
switching on, with the aid of relays, of the mill spindle motor and the coolant pump.
The WINDOWS operating system does not allow, without the application of an extra external unit (a
special controller), for steering in real time. This is because in the Windows system the timer is used
for performing multi-task activities. Thus the stepper motors are driven with the aid of an external
SMC4D controller which performs, among other tasks, the task of the timer, emits the heartbeat signal
and the direction signals for driving the 4 stepper motors.
Copyright © 1993 - 2007 by Michael Boenigk
Basics
2.1
3
What the cncGraF program can do?
The cncGraF software has an innovative graphic interface. It is clearly devised and easy to operate.
All the main functions have been equipped with their respective icons and shortcut keys. The
CAD-similar interface of the software presents the working scope /area of the CNC machine, which
includes all the elements, e.g. drawing data, material, zero point, park point or the display of the
scan/measurement point.
The cncGraF program is mostly used for performing the following work:
· milling
· drilling / boring
· foil cutting
· engraving
· height scan/measurement
· drawing
· Processing into digital format
· automation
2.2
What you need additionally?
The list below presents all the components (hardware and software) essential in order to use the
cncGraF program:
·
·
·
·
·
·
·
·
·
·
Operating system: Windows 2000 / XP / Vista (32bit)
Microsoft .NET Framework V2.0
Microsoft Managed DirectX9 or a later version for the joystick
Pentium 600MHZ Processor or better (or equivalent hardware)
Disc station CD-ROM
Graphic card OpenGL
RAM 256 MB
Hard disc 40MB free
USB Port
Controller SMC4D
The cncGraF program is based on the latest Microsoft .NET technology and it requires the Microsoft
.NET Framework V2.0. Microsoft .NET Framework is free of charge and may be downloaded from the
Microsoft websites.
2.3
Installation
The cncGraF program may be downloaded from our website. On your request we may supply you with
the CD-ROM version of cncGraF. The CD-ROM also contains Microsoft Framework V2.0. To install
the cncGraF program you need to perform the following operations:
1. Install Microsoft .NET Framework V2.0 by calling up the dotnetfx.exe file. The Microsoft
installation program will take you through the installation procedure in a step-by-step manner. In the
event that Microsoft .NET V2.0 was already installed earlier this installation should be omitted.
Windows Vista users do not need to install Microsoft .NET Framework V2.0 either, as Vista already
includes the Microsoft .NET Framework V2.0.
2. Install the cncGraF program by starting the setupxxx.exe file. The cncGraF installation program will
take you through the installation procedure in a step- by-step manner.
Copyright © 1993 - 2007 by Michael Boenigk
4
cncGraF Online Hilfe
To install cncGraF you need administrator level access to the computer!
1. To control the CNC milling machine with the use of the joystick it is essential to install Microsoft
Managed DirectX9 or its later version. To install Microsoft Managed DirectX9 call up the installation
file dxsetup.exe with the '/installmanageddx' parameter.
Example: CD-ROM:DirectX\dxsetup /installmanageddx
To drive and control the stepper motors via the cncGraF program, the SMC4D controller is essential.
In order not tot interrupt the work of the CNC milling machine, Power Management must be
turned off in BIOS. Please also check the power management in the options of the Windows
management panel.
Installation of the SMC4D drive
First install the cncGraF program and then connect the USB cable (turn on the electronics). This is in
order to ensure that the USB drive has been copied onto the hard disc. Further information has been
included in the file install-en.pdf.
2.4
Settings
Program cncGraF saves the settings in config.xml. The config.xml file contatins all the settings for the
software as well as for the cnc milling machine. File config.xml is in folder:
c:\Dokumente und Einstellungen\[Benutzername]\Lokale Einstellungen\Anwendungsdaten\[Boenigk]\[cncGraF]\
Due to the fact that the cncGraF saves all the data in this folder, the user does not need administrator
level access in Windows. Furthermore, multiple users can use the cncGraF on the same computer
with different settings.
Special Functions contained in config.xml
There are several special functions which could be set up only in the file config.xml. These functions
are described below.
· Parameter Timer in field <Joystick> defines the joystick query interval in milliseconds. Default value
is 100. For older systems this value should be
higher, around 300.
· Parameter CurveSpeed in <SMC> definess the speed of move on bends. Allowed range is 0 to
100. Default value is 20. The smaller the value, the
higher the speed on bends. Value of 0 disables the function.
· Parameter MeasureCalculateInvert calculates the inverted new postion after the tool
measurement. Value "false" is default and should not be
changed. This parameter is used only by special cnc machines which are capable of table rotation in Z
axis, which causes problems with calculation
of the position after the measurement.
· Parameter ResetSwitchesWhileReference has default value of "true". If this parameter has value
of “false” the refrence move does not reset the
reference sensors to default values.
Copyright © 1993 - 2007 by Michael Boenigk
Basics
5
Saving and Loadig of the settings
To avoid losing the settings, saving in regular intervals is recommended. Saving of all the settings is
performed in dialog „Settings” -> „Settings” -> „Save as...” In the dialog “Settings” -> „Settings” -> „
Load...” the previously saved settings can be loaded.
In dialog "Settings” -> „Options” -> „General" there is a function which enables automatic
saving of the settings at regular intervals.
On termination of the program all the settings are saved automatically. If a need arises to save the
settings during the machine operation in can be done by calling function “Save settings” in the main
menu “Settings”.
2.5
SMC4D
The SMC4D controller generates the heartbeat and direction signals for 4 stepper motors. The
maximum clock frequency equals 42kHz for the interpolation moves on 4 axes. Through the inputs the
reference connectors / pins may be read: start, stop, and other signals. Additional outputs may be
used for performing such operations as: turn on/off the pump, limit the motor current, turn on/off the
drill spindle motor and regulate its rotation. Organisation of signal flow on the controller output
connection has been adopted from the cncGraF version for DOS system.
The controller is based on PLD (programmable logic device). The 12MHz quartz oscillator and the 64
kByte of data memory ensure a stable impulse transmission. Quick data exchange with the computer
is performed via the USB 1.1 port. Power supply for the system may be performed from the source of
port USB 1.1. or through a flat cable connection of 5 V stabilised voltage to the MOST3/4A driver for
stepper motors.
Copyright © 1993 - 2007 by Michael Boenigk
6
2.5.1
cncGraF Online Hilfe
Starting up the controller
1. After installing the USB driver and the cncGraF program, controller SMC4D must be connected to
the computer and the stepper motor driver.
2. Switch the stepper motor driver. The spindle of the milling machine should not switch on now.
Otherwise, contact S1 in the controller Dip switch (Dip-Schalter) needs to be toggled.
3. Start the cncGraF Win program.
S2 inverts the signal to the coolant pump and transmitters 2 and 3. S3 inverts the beat signal to the
stepper motors. Depending on the stepper motor driver, the beat inversion may prevent loss of the
motor steps.
Copyright © 1993 - 2007 by Michael Boenigk
Basics
7
List of signals on D-SUB 25-contact joint / connection.
1. Spindle (transmitter 1)
2.
3.
4.
5.
6.
7.
8.
X direction
X beat
Y direction
Y beat
Z direction
Z beat
Transmitter 3
9. Transmitter 4
10. Reference switch 1
11. Reference switch 2
12. Reference switch 3
13. Scanner and tool-length-scan sensor
Copyright © 1993 - 2007 by Michael Boenigk
14.
15.
16.
17.
18.
19.
20.
21.
22.
23.
24.
25.
Pump (transmitter 2)
Reference switch for 4th axis (A)
A direction
Electric current reduction for motors
A beat
Connect N.C. to GND
Connect N.C. to GND
Connect N.C. to GND
Connect N.C. to GND
Connect N.C. to GND
N.C.
GND
8
cncGraF Online Hilfe
Spindle rotation
The control signals for the spindle rotation are available on pins # 5-8 (Con3) in 15 degrees. More
information can be found in chapter „Toolbox 37 ”.
Pin 8
1
1
1
1
1
1
1
1
0
0
0
0
0
0
0
0
Pin 7
1
1
1
1
0
0
0
0
1
1
1
1
0
0
0
0
Pin 6
1
1
0
0
1
1
0
0
1
1
0
0
1
1
0
0
Pin 5
1
0
1
0
1
0
1
0
1
0
1
0
1
0
1
0
Spindle rotations in degrees
0 (no rotation)
1
2
3
4
5
6
7
8
9
10
11
12
13
14
15 (maximum rotations)
.
2.6
Starting up the cncGraF program
Once the program is installed, cncGraF may be started up by clicking the icon on the desktop or by
clicking the Start menu -> Programs key. cncGraF may be started up only once. At the start up it is
possible to quote a file along with a catalogue, which shall be opened automatically.
Example: cnc.exe c:\directory\file.plt
During the first start-up, the cncGraF program does not have any configuration setup and the basic
configuration is being established. Before you can do any actual work on the CNC machine, specific
machine parameters must be determined this only once, in the main menu "Settings - > Machine
parameters - > Adjust .." Optionally, it is possible to download the specific machine parameters from
the main menu "Setup - > Machine parameters - > Open..".
All the machine parameters have been described in detail in the "Settings
26
" chapter.
Each time the cncGraF program is started up a so-called "reference move 49 " must be
performed. This operation makes it possible to determine the ZERO point, which means that
from this moment on the program is able to recognise where the point of coordinates 0,0,0 is.
Without this operation the program will not recognise the position of each of the machine
axes.
Copyright © 1993 - 2007 by Michael Boenigk
Basics
3
9
Menu
In order to make the implementation and usage easier, the cncGraF program has been equipped with
an innovative, graphically designed interface, which is much similar to the standard WINDOWSÓ
applications.
The modern interface of the cncGraF program can be customised in the following way:
1. Tools view can be customised in dialog "Settings -> Options -> View" by switching off unnecessary
symbols.
2. Modules "Manual move", "Explorer", "Text editor", "Tracer", "PhotoVec" are all attachable windows,
which can be minimized, maximized, moved or attached to an arbitrary place within the main
window.
3. Program can be executed in XP or standard mode.
3.1
Main menu "Pulldown" bar
The "Pulldown" main menu bar includes all the functions except "Selection Window" and "Unit". The
"Pulldown" main menu bar consists of the following options:
Illustration: "Pulldown" main menu
1. The File menu includes functions which concern file processing / editing. Some functions at your
disposal here are: "open file", "close the opened file", "open text editor". Detailed information on the
topic of files has been included in the "data" chapter.
2. The Edit menu includes functions which concern the processing of entered data. A drawing may be
altered here or the Tangential cutter correction may be calculated. Detailed information on the topic of
data processing has been included in chapter entitled "Data editing"
3. The View menu includes functions which change the size of the loaded drawing. Detailed
information on the topic of viewing data has been included in the chapter entitled "The Zoom function"
4. The Move menu includes functions which advance the CNC milling machine. Some of the functions
are: "Simulation", "Job", "Material height scan" or "Machine manual advance". Detailed information on
the topic of advancing the CNC machine has been included in chapter entitled "Move"
5. The Setup menu includes all the functions concerning the setup of the CNC milling machine and
the cncGraF program. The particularly important function is "Machine parameters" which must be set
well so that the CNC machine operates accordingly. Detailed information has been included in the
"Settings" chapter.
6. The Help menu is equipped with a user's manual and information on the topic of cncGraF.
Copyright © 1993 - 2007 by Michael Boenigk
10
3.2
cncGraF Online Hilfe
Toolbars
The most crucial functions are equipped with their relative icons on the horizontal and vertical toolbars,
and shortcut keys.
Toolbars may be turned on or off in the main menu “View -> Toolbars”.
3.3
Attachable dialog windows
Modules "Manual move", "Explorer", "Text editor", "Tracer", "PhotoVec", “2D View”, “3D View” are all
attachable windows, which can be minimized, maximized, moved or attached to an arbitrary place
within the main window. To change position of an attachable dialog box one needs to press the left
mouse button while pointing to the title bar and hold. The pointers used for placing are shown in the
main program window.
Description
Key Menu command
Reset attachable dialog windows none Settings · Reset attachable
dialog windows
Icon
none
Now a pointer must be selected with the mouse cursor and the left mouse button released. The
highlighted window changed its position and is now on previously highlighted pointer. If the needle icon
on the title bar of the attachable dialog window is pointed down, the dialog window is permanently set.
If the needle icon on the title bar of the attachable dialog window is pointed horizontally, the window will
close automatically when released.
Copyright © 1993 - 2007 by Michael Boenigk
Menu
3.4
11
The status bars
The cncGraF program is equipped with three status bars which provide the user with the following
information:
· Both upper status bars indicate the current position of the CNC milling machine. The position is
displayed in absolute and relative coordinates in millimetres. Relative coordinates may be deleted in
the "View" dialogue window or directly on the status bar by pressing the key of a particular relative
coordinate.
Illustration 1: The upper status bars with relative and absolute coordinates of the CNC machine.
· The bottom status bar indicates the mouse coordinates, the unit, and provides information related to
the CNC milling machine's work (amount of work performed in %, tool number, speed of manual
drive,…)
Illustration 2: The bottom status bar
The status bars may be turned on or off in the main menue "View -> Toolbars".
Copyright © 1993 - 2007 by Michael Boenigk
12
3.5
cncGraF Online Hilfe
The coordinate system
The machine coordinate system corresponds to the Cartesian coordinate system. The starting point of
the X and Y axes is located in the left bottom corner. Once a Reference Move is performed, the
counters for the machine absolute coordinates for axes X and Y are set to value 0 (zero), whereas for
axis Z the before set length of axis Z.
Note: When the Z-axis is moved downward, the value of the Z axis counter diminishes!
Illustration: The coordinate system
The mouse coordinate system
The left bottom corner of the screen displays the mouse coordinates. These co-ordinates may either
be displayed in centimetres or in inches. Additionally, it is possible to switch to and from the absolute
and relative values. The relative values have their origin in the zero point of the material, whereas the
absolute values in the zero point of the machine. The icon for switching between the absolute-relative
values and the centimetre-inch values is located on the horizontal tool bar.
Description
Switching between the absolute and
relative values and cm/inches
Key
none
Menu command
none
Icon
Copyright © 1993 - 2007 by Michael Boenigk
Menu
3.6
13
Interface
The USB port in a PC computer includes input and output drives. The input is used for reading the
signals sent by the machine e.g. by the limit switches. The computer, on the other hand, sends,
through the output drives, signals which control the machine. Clicking the mouse left key on a proper
area changes its active level to the opposite level. Clicking the mouse on input 1 switches on or off the
cutter / fraise drive.
Description
Key
Menu command Icon
Dialogue window " Interface" [Ctrl + I] View · Interface none
enables control over the USB
port input and output drives
The configuration of the pins may be checked using the connector. By switching the
reference switches on and off the pin status changes.
3.7
Switching functions On and Off
In the main program window "Settings -> Swtich function On/Off" the program may be limited to
necessary functions to facilitate easier learning. Activation of this function may be password-protected.
More information is in dialog “Machine parameters 26 ” in field “Password 28 ”.
Copyright © 1993 - 2007 by Michael Boenigk
14
4
cncGraF Online Hilfe
Data files
The cncGraF program makes it possible to import various data file-formats: HPGL, DIN 66025, Isel
NCP, DXF, Postscript, Adobe Illustrator, Excellon, Sieb & Maier 1000 and Sieb & Maier 3000. The
read data files can be altered in size by scaling or changing the scale.
4.1
Working on the data
The "Open / Insert" dialogue window makes it possible to enter new or insert / load other data to the
files currently open. Both windows are the standard dialogue windows for the Windows system.
Open file
In order to open a data file, click on icon
on the horizontal toolbar. Alternatively, a date file may be
opened in the main menu of the cncGraF program or by pressing a shortcut key.
Description
Open file
Key
[Ctrl +O]
Menu command
File · Open
Icon
Choosing 1 of the 4
recently retrieved files
none
File · 1 to 4
none
In the "Open" dialogue window the following types of files may be chosen:
·
·
·
·
·
·
·
HPGL(*.plt)
DIN 66035(*.nc) and ISEL NCP
Sieb & Maier(*.drl), Excellon, SM1000, SM3000
Adobe IIlustrator (*.ai) and Postscript (*.eps)
Autocad DXF (*.dxf)
cncGraF(*.grf)
all NC files(*.*)
When choosing a type of file without a file extension (*.*), this type of file shall be recognised
automatically. The last 8 files accessed may be reopened in the main window „File -> 1 to 8”.
In the event that the type of file could not be recognised automatically, the following
information appears:
"File ,c:\example.nc' is of unknown format. Do you wish to quote the file type and try again?"
Copyright © 1993 - 2007 by Michael Boenigk
Data files
15
Insert file
Once a data file is opened, it is possible to insert into it a drawing from an outside file. The procedure
is identical here as in the case of opening a file.
Description
Insert data
Key Menu command Icon
none File · Insert
none
1. In the "Insert" dialogue window for 2D files the following types of files may be selected:
· HPGL(*.plt)
· Sieb & Maier(*.drl), Excellon, SM1000, SM3000
· Adobe Illustrator (*.ai) and Postscript (*.eps)
· Autocad DXF, 2D (*.dxf)
2. In the „Merge” (Attach?) dialogue window for 3D files the following file types may be selected:
· Sieb & Maier (*.drl), Excellon, SM1000, SM3000
· Autocad DXF, 3D (*.dxf)
· DIN 66025 (*.nc)
It is not possible to merge (attach?) files of different numbers of dimensions, e.g. 2D and
3D.
Once the unit and the scale of the drawing are selected, the "Location choice" dialogue window
appears which makes it possible it define the location of the inserted file.
Browse with the aid of the view window
With the use of the "Browse" function it is possible to view the files in the view window before they are
loaded. A file is loaded with a double click of the left mouse button. All the loaded files are
automatically added to the "Favourite" list which then makes it easy to find a particular file and load it
again.
Description
Search with the use of the view
window
Key
none
Menu command
File · Search
Icon
In the course of opening the files the settings defined in the "Options
are applied.
Copyright © 1993 - 2007 by Michael Boenigk
39
" dialogue window
16
4.2
cncGraF Online Hilfe
Interpreter HPGL
Hewlett Packard Graphics Language, HPGL in short, is a data format generated or exported by almost
all CAD-programs. The cncGraF program interprets the following HPGL commands:
HPGL
PU
PD
PA
PR
SPx
AA
AR
CI
functions
- Tool up
- Tool down
- Further move to positions with latest definitions
- Move to relative position
- Tool number
- Absolute arc
- Relative arc
- Circle
HPGL
Example
Description of commands
PU;
PA100, 50;
Tool up
Move to the absolute position, X=100, Y=50
PR100, 50;
Move to relative position, so that the new absolute
position is: X200,Y100
Tool down
PD;
CI100;
Circle radius equal 100 counter-clockwise, (for radius
-100 clockwise),
AA300, 200, 50;
Draws a 50-degree-radius arc with its centre at point
X300,Y200 and the starting point at 100,50
SP1;
Tool choice (here tool no.1)
Copyright © 1993 - 2007 by Michael Boenigk
Data files
4.3
17
Drill data interpreter
The cncGraF program recognizes the following drill data formats: Excellon, Sieb&Maier 1000 and
Sieb&Maier 3000. Two examples have been provided below:
Sieb & Maier
Example 1
Example 2
%
%
T01
T01
Description of commands
T01 Tool no. 1 has been selected
X001Y0001
X100Y10
Move to positions X100, Y10 and
the tool immerses in the material
M30
M30
M30 end of program
There are two types of drill data at your disposal. The first format (see example 1): the coordinates are
always 5-digit ones. This is why they have the leading zeroes. The back zeroes are frequently skipped.
The second format (see example 2) has no leading zeroes and the numbers are of varied length. The "
Options 39 " dialogue window makes it possible to set the type of drill data.
Copyright © 1993 - 2007 by Michael Boenigk
18
4.4
cncGraF Online Hilfe
Interpreter DIN 66025
The standardized data file-format DIN 66025 is the standard applied in professional CNC 2½ and 3D
machines.
The Din 66025 type files may not be edited. Only copying, moving and scaling is possible.
The cncGraF program interprets the following commands:
G-Codes:
G00
Rapid advance
G01
Working speed advance
G02
Circle (Arc) clockwise movement
G03
Circle (Arc) counter-clockwise movement
G04
Pause
G40
Delete tool diameter correction
G41
Tool diameter correction left
G42
Tool diameter correction right
G70
Unit in inches
G71
Unit in millimeters
G90
Absolute mode
G91
Relative mode
G98
Subprogram definition
M-Codes:
M00
Program execution paused (program resumes when any key is pressed)
M03
Turn on the power feed of the tool
M05
Turn off the power feed
M08
Turn on the coolant pump
M09
Turn off the coolant pump
M20
Plasma is off
M21
Plasma is on
M30
End of program
Other CNC commands
F
Advance rate mm/min
N
Task number
T
Tool number
S
Adjustment of spindle rotation
L
Calls a subroutine of selected number
The G00 command moves the tool with the maximum speed rate of the milling machine. The tool is
positioned above the material.
DIN 66025
NO1 G00 X0 Y0 Z10
N02 M3 M8
Example 1
Description of commands
Moves the tool to point X0, Y0, and
Z10
M3 turns on the drill spindle M8 turns
on the coolant pump
N03 G01 Z-2 F50
The tool penetrates the material 2mm
deep with the speed of 50 mm/min.
Copyright © 1993 - 2007 by Michael Boenigk
Data files
19
N04 G01 X100 Y100 F100 Moves the tool at advance seed rate of
100 mm/min. to point X100 and Y100
N05 G00 Z10 M5 M9
Moves the tool to position Z10 M5
turns off the drill spindle M9 turns off
the coolant pump
N06 M30
End of program.
The G02 command moves the tool along the arc in a clockwise manner, whereas G03 moves the tool
counter-clockwise. The starting point of the arc is in the current tool position. The end of the arc is
determined in commands G2(G3) with the use of commands X,Y and Z, which stand for, respectively,
the coordinates for axes X, Y and Z. Commands J and I determine the centre of the circle. Please find
below the control commands for the G2(3) instructions:
X
Y
I
J
K
End coordinates in axis X
End coordinates in axis Y
Circle centre in axis X
Circle centre in axis Y
Circle centre in axis Z
Example 2
Description of commands
Moves the tool to position X0, Y0 and Z10
DIN 66025
N01 G00 X0 Y0 Z10
N02 M3
M3 turns on the drill spindle
N03 G01 X10 Y10 F100
Moves the tool at the speed rate of 100
mm/min. to position X10, Y10
N04 G01 Z-2 F50
The tool penetrates the material 2mm
deep with the speed of 50 mm/min.
N05 G02 I20 J10 X30 Y10
Moves the tool along the arc with the arc
centre at point I20, J10, from point X10,
Y10 to X30, Y10
N07 G00 Z10
N08 M30
Lifts up the tool by 10 mm
M30 End of program
Example 3 illustrates the making of a screw thread (2mm pitch of thread 6 mm long) – 3
coils/convolutions. When making a full circle, the starting point corresponds to the ending point.
Example 3
N01 G0 X500 Y500
N02 G0 Z-5
N03 G2 I550 J500 Z-7 F60
N04 G2 I550 J500 Z-9
N05 G2 I550 J500 Z-11
N06 G0 Z0
The G04 command enables a delay to be programmed. G04 H2 denotes a 2-second delay. This
function is used, for example, to allow time for the drill spindle to gather speed.
DIN 66025
Example 4
Description of commands
Copyright © 1993 - 2007 by Michael Boenigk
20
cncGraF Online Hilfe
N10 G04 H2.5
The tool stops for 2.5 seconds (the drill
spindle continues rotating)
The G90 command sets the coordinate system at the absolute values.
Example 5
DIN 66025
Description of commands
Absolute coordinates
N08 G90
N09 G01 X100 Y100 Moves the tool to position X100, Y100
G91 switches on the relative
N10 G91
coordinates
N11 G01 X10
Moves the tool to position X110, Y100
N12 G01 X5 Y-5
Moves the tool to position X115, Y95
Command G98 defines up to 99 subroutines at the end of the main program, after command M30.
Subroutine definition commences with command G98 Lx and ends with command G98 L0 (see
example 6). Call of subroutine executes with command Lx.
DIN 66025
...
N20 L1
...
...
M30
G98 L1
...
...
...
G98 L0
Example 6
Description of commands
Subroutine 1 is called by main
program
End of main program
Definition of subroutine 1
Content of subroutine
Subroutine is completed
The list of control commands may be created under any freely selected text editor. Small letters may
be used but the command code must not contain any blank spaces. It is not obligatory to number the
instructions and so numbering may be skipped.
Copyright © 1993 - 2007 by Michael Boenigk
Data files
4.5
21
Interpreter GRF4
The GRF format is the format of the cncGraF program and it saves in the file all the changes made by
the cncGraF. The GRF format includes the following information:
·
·
·
·
·
·
Vectors and drill points (all drawing elements)
Tools for vectors and drill points
Tool adjustment
Unit and drawing scaling (for file DIN 66025 only scaling)
Material offset and the zero point of the material
Order of execution with correction of depth
When opening the GRF4 file, cncGraF checks whether the zero point in the GRF4 format is used. If
the zero point is not used, the user is presented with a request to check the offset of the material.
File conversion from type GRF to GRF4
To enable program cncGraF to read files type GRF, they have to be converted to files type GRF4.
During conversion to new format the old files are not being deleted but new files with extension GRF4
are created
Description
Convertion of old files type
GRF to GRF4
Copyright © 1993 - 2007 by Michael Boenigk
Key
[F9]
Menu command
File · GRF Converter
Icon
22
4.6
cncGraF Online Hilfe
Interpreter DXF
Program cncGraF reads files type DXF. Format DXF (Drawing Exchange Format) has been created by
the Autodesk company for their AUTOCAD software and is being used for data exchange between
CAD programs. cncGraF reads the following commands:
·
·
·
·
·
·
·
·
·
·
·
3DFACE
ARC
CIRCLE
LINE
LWPOLYLINE
POINT
POLYLINE
SPLINE
VERTEX
LAYER
ELLIPSE
As files type DXF can contain data in 2D or 3D, program cncGraF must execute them in two different
ways.
1. If a DXF file contains 2D data it means that the file does not contain any Z-axis data (Z is always 0),
and data for depth Z are imported from tool box.
2. If a DXF file contains 3D data it means that the file does contains at least one non-zero Z-axis value.
Then data for depth Z is not imported from tool box but form the DXF file.
The type of file is shown on the status bar (also see the „Options
39
” chapter).
Copyright © 1993 - 2007 by Michael Boenigk
Data files
23
LAYERS
cncGraF may assign LAYER data to a given tool. For this to be possible the name of the layer must be
present in the toolbox in filed “Name” for the selected tool. If the LAYER’s name is not found in the
toolbox, the LAYER’s data is assigned to tool 0.
Illustration: In dialog box 'DXF Layer' any LAYER can be assigned to any tool.
Copyright © 1993 - 2007 by Michael Boenigk
24
4.7
cncGraF Online Hilfe
Postscript Interpreter and Adobe Illustrator
cncGraF reads Postscript 3 files (extension *.eps) and Adobe Illustrator files (extension *.ai). Postscript
has been created by the Adobe company. Adobe Illustrator format is based on Postscript, However it
contains limited number of commands.
Postscript or Adobe Illustrator can be used to import from program Corel Draw. For the
Corel Draw script to be accepted, function “Export text as spaces” must be switched on.
Copyright © 1993 - 2007 by Michael Boenigk
Data files
4.8
25
The zoom functions
The size of the drawing can be increased or reduced at any time. In order to achieve this aim you can
choose from several options. For instance: you can use the mouse to click on the appropriate icon or
press the key [1] or [2] (only in the 2D view]. The "Zoom window" makes it possible to enlarge / expand
the fragment indicated with the mouse. The "Pan" function moves the drawing without changing its
size. All the zoom-functions have been listed in the table below.
Zoom funcions in 2D and 3D view
Description
Zoom a selected area
Key
none
Menu command
View · Zoom window
Enlarging the drawing
none
none
Diminishing the drawing
none
none
Display the drawing
[F4]
View · Display drawing
Display the machine area [F3]
View · Display
machine area
View · Display material
Display the material
[F2]
Zoom in / out [only in 2D
view]
[ 1 or 2 ] + mouse
position, or mouse with
scroll
[Ctrl + R]
Mouse position + mouse
right key + Pan
Mouse left key on the
drawing move-bar
New drawing
Move the drawing (Pan)
Vertical and horizontal
drawing-move bar (Pan)
Icon
none
none
View · Refresh
none
none
none
none
none
Zoom funcions in 3D view
Description
Rotation of drawing
Key
press and hold left
mouse button while
moving the mouse
press and hold left
mouse button while
moving the mouse
none
Menu command
none
none
none
Front view
none
none
Top view
none
none
View ISO
none
none
Change from parallel to
perspective
none
none
Moving of drawing (Pan)
Maximisation and
minimisation of drawing
Side view
Copyright © 1993 - 2007 by Michael Boenigk
none
none
Icon
26
5
cncGraF Online Hilfe
Settings
In order for the cncGraF program to control the stepper motors, the CNC milling machine parameters
must be set and adjusted accordingly in the „Machine parameters 26 ” dialogue window. Apart from the
CNC machine parameters, other settings are possible, for example: “Toolbox 37 ”, “Material
parameters 37 ” or “Unit and scaling 42 ”.
5.1
Machine parameters
Once the program is installed, it is required to determine what the parameters of the CNC machine
are; the CNC machine is referred to here as the "machine". The parameters must be determined
correctly as their wrong introduction may hamper the operation of the machine and may even lead to
the damage of the processed material, the milling cutter / the drill or the milling machine.
To enable a quick change in the parameters for various types of machines, the machine parameters
may be entered into a file or a machine parameter file may be opened.
Description
Key
Opening a dialogue window with machine [F8]
parameters
Opening a file with machine parameters none
Saving machine parameters in a file
none
Cnc machine setting assistant
none
Menu command
Settings · Machine
parameters · Adjust
Settings · Machine
parameters · Open
Settings · Machine
parameters · Save
Settings · Machine
parameters · Cnc machine
setting assistant
Icon
none
Copyright © 1993 - 2007 by Michael Boenigk
Settings
27
Illustration: Cnc machine setting assistant easily sets 3-axis cnc milling machines
All the CNC milling machine parameters are saved in the cncGraF in the "machine" directory in an
XML file type. The dialogue window "Machine parameters" is organised in the following manner:
Code
Axes
28
28
Axis of rotation 28
Tangent axis 29
Z2 29
Backlash elimination 30
Pin parameters (Port A) 31
Input signals (Port A-B 32 )
Speed 32
Automatic tool change 33
Height scan sensor 34
The "OK" and "Apply" keys
Any changes made in the "Machine parameters" dialogue window are saved by pressing the "OK" or
the "Apply" keys. The "Apply" key does not close the dialogue window and the introduced changes are
applied right away without opening and closing the dialogue window.
Copyright © 1993 - 2007 by Michael Boenigk
28
5.1.1
cncGraF Online Hilfe
Code
When the machine parameters are set, it is sometimes worthwhile to protect them from inexperienced
users. The introduction of a code makes it impossible for unauthorized users to gain access to the
"Machine parameters" dialogue window. Similarly, it is then impossible for others to save CNC
machine parameters. To turn off the code it is necessary to enter the current code into the "old code"
option leaving other options blank.
As help in case the code is forgotten, it is possible to enter a tip (word or sentence)
concerning the code.
5.1.2
Axes
cncGraF may control up to 4 axes. Additionally, it is possible to control axis X/Y with a double drive.
Illustration: DIP Switch S2 is down on SMC4D, double drive for axis X is on
The following settings are at available:
· The length of axis Z is assumed to equal its permissible scope of revolution. On the screen, the
scope of revolution of axis X and Y is shown as a white sheet.
· To define the resolution, the number of steps per rotation and the length of rotation must be
entered for each axis. For each orientation the axis resolution is automatically calculated in
millimetres per step and shown in box below.
· To define the axis resolution, for each axis the number of steps per rotation and the rotation path
must be quoted. Initially, the axis resolution is calculated automatically in millimetres per step and is
presented in a box below.
· Switch A switches on or off the fourth axis. When the fourth axis is switched off, it is not possible to
use the axis of rotation or the tangent axis 29 as axis four. Axis A is available in the controller
versions from V2.0 to SMC4D.
· Axis of rotation 28 may work with a 4-axes driver as well as, with certain inconveniences, with a
3-axes driver.
5.1.2.1
Axis of rotation
Depending on the number of axes of the steering electronics, two work modes are possible:
4-axes driver
The machine parameters allow the axis of rotation to be defined as the fourth axis once the axis
Copyright © 1993 - 2007 by Michael Boenigk
Settings
29
switch has been activated. The axis of rotation may be installed on the milling table in the direction of
axis
or axis
. Selecting an adequate direction: direction or direction results in directing the
coordinates of a selected axis to the axis of rotation. If the scratch file has coordinates for all 4 axes
(processing in four dimensions), then the selection of direction X or Y serves merely the purpose of
displaying the axis position on the screen. The reference move to the limit switches and positioning
may take place on 4 axes.
3-axes driver
With a 3-axes driver, axis A must be inactive (the switch
is turned off).
The axis of rotation is connected to the driver (output X or Y) through a change / swap of plugs.
Symbolic presentation of the axis of rotation on the screen
Once the axis of rotation is switched on in the menu "Machine parameters-> Axes -> Axis of rotation",
the length line shall appear on the screen U=DxP, where D is the diameter of the material. Another
line runs from the onset of the length line and perpendicularly to it, a line which corresponds to the axis
of rotation. The third dashed line outlines the material area.
Positioning the axis of rotation
Once a device with the axis of rotation is installed on the milling table, its position must be entered into
the program.
1. Before switching on the axis of rotation in menu "Machine parameters -> Axes -> Axis of rotation",
perform a reference move.
2. Fix the material to the rotation axis handle.
3. Using the manual advance locate the device blade on the onset of material and over its axis of
rotation.
4. Save the position in menu "Location" under the name "Axis of rotation".
5. Switch on the rotation axis in menu "Machine parameters -> Axes -> Axis of rotation". Lines will
appear on the screen symbolizing the axis of rotation with a direction adjusted to a selected axis (X
or Y).
6. When using a 3-axes driver it is now possible to plug in the axis of rotation in place of a selected
axis (X or Y).
5.1.2.2
Tangent axis
For cutting thick foil or cardboard a Tangential cutter is used. The Tangential cutter is set, with the use
of stepper motors, in the direction of material cutting. The applied cutter must be double-edged with
the blade in the axis of rotation. For the drive of a stepper motor a 4-axes driver is necessary. Once
the 4 axis is activated with a switch
, the function of the tangential cutter is available.
Steps/turn is the number of stepper motor steps per one full turn. Raise from the angle is the angle
in degrees between the subsequent segments (vectors) within the scope of which the cutter remains in
the material in the course of its rotation, in agreement with the direction of move. Over this angle the
cutter is removed from the material, turned in the new segment cutting direction and is again
immersed into the material. To avoid damage to the material, the value of this angle should not exceed
45 degrees.
When the angle is smaller or equal to the rotation angle to, the knife rotates in the course of the
move until its blade finally achieves the move direction. As the material may be damaged, the
indicated angle should be small, up to about 10 degrees.
5.1.2.3
Z2
Function Z2 enables control of of cnc milling machines with double Z-axis. To drive axis Z2, control of
4-axis is needed. By enabling 4 axis
(see Axis 28 ) the fourth axis can be defined as Z2. Distance
Copyright © 1993 - 2007 by Michael Boenigk
30
cncGraF Online Hilfe
between Z and Z2 along axis X and Y must be entered at the end.
Illustration 1: Axis Z2 is 20mm from axis Z.
Illustration 2: having defined the 4th axis as Z2, two cutter-symbols are shown in the main window
Function Z2 can be used only for 2D files and for 4D files type DIN 66025. More information
is available in chapter "Toolbox 37 ".
5.1.2.4
Backlash
Backlash is undesirable play between the spindle and the cap or between the pinion and the toothed
bar of the power drive. The play is generated in the course of a change in move direction. This function
cancels the play. Backlash is entered for axis x, y and axis z in millimetres or in steps.
The "Backlash elimination" function is applied only in the course of milling / drilling.
Copyright © 1993 - 2007 by Michael Boenigk
Settings
5.1.3
31
PIN parameters (Port A)
It is essential to correlate the move directions, input and output, and so they must be adjusted. The
following settings are available:
· Reference connectors may be inverted manually or with the aid of the PIN reference assistant.
Illustration: PIN reference assistant
· In the course of the Reference Move, first the Z axis moves upwards until the limit switch switches
into operation, and next the axes X, Y and A perform the same operation in a set reference move
sequence. Once all the axes reach the limit switches, they then move slowly in the opposite
direction until the switches are disconnected. The counters for axes X, Y and A reach the zero value,
whereas axis Z is set at the length of this axis.
· The move direction and reference move direction may, if needed, be changed. The correctness
of a set direction may be checked in case of manual advance. Axis X moves forward when pressing
the cursor-key ®. The - key moves the Y axis forward, whereas the ¯ key moves the Z axis
downwards (that is in the negative direction).
· It is advisable to limit the motor current as it protects the driving motors against overheating in the
course of a lengthy inactivity.
· Controller SMC4D has input drives 1,2,3 and 6 for the reference move. Depending on the cables,
connectors X, Y, A and Z may be freely assigned to the reference input drives.
· The hood switch controls the hood in the course of milling. If the hood is raised in the course of
milling, then milling is stopped and the "Raised hood" report appears.
· Sometimes the output drives are distorted and they function the other way round. In this case such
output drives must be inverted. The spindle, pump, motor current and the fixing clamps may be
inverted. Output may also be adjusted for the pump, spindle and the fixing clamps.
Copyright © 1993 - 2007 by Michael Boenigk
32
cncGraF Online Hilfe
5.1.3.1
Input signals (Port A-B)
There are further 9 inputs on the side of the SMC4D controller. These are for the following external
signals:
Job start
Job continue
Pause, the machine has been stopped
Start the reference move
The hood has been opened. If the hood has been opened in the course of milling or the reference
move, then the work of CNC milling machine is stopped immediately and the message "Hood is
open" appears.
· The last two slow readings work identically to the above hood queries with a small exception that
now an arbitrary message can be entered.
·
·
·
·
·
Illustration: Instead of sign "?" an arbitrary message can be entered.
The external signal must
5.1.4
be ticked to be active.
Speed
The speed must be adjusted accordingly to the type of the CNC milling machine. Too high speed may
result in a loss of step. The following parameters are available:
· The maximum speed parameter determining the maximum permissible speed, at which the
machine operates appropriately and skips no steps.
· Reference speed is the speed of axes X, Y and Z in the course of performing the Reference Move.
· Function "Accelerate reference move 49 " performs idle move before the reference move. Position of
the idle move may be defined arbitrary and it should be near the reference point.
· The Start/Stop speed prevents step skipping in the course of accelerating or stopping the motors.
The value of this parameter must not be too high.
· The constant working speed is active at the „Constant working speed” function and is also
constant during interpolation moves.
Copyright © 1993 - 2007 by Michael Boenigk
Settings
33
Illustration: With constant work speed off the interpolation distance is longer (vector 3) but traveled in
unchanged time, hence speed of move is higher.
· Acceleration rate may be low, average, high or extremely high.
· Move speed to a scan / measurement point is the speed of axis Z in the course of a move to the
height scan point. Once the height scan is performed, axis Z is raised at the Start/Stop speed.
5.1.5
Automatic tool change
The automatic tool change option has control over the machine / device and may have up to 33 tools.
To use the automatic tool change option the following operations must be performed:
· The Properties define the general setup for the automatic tool change. The first thing to do is to
switch on this option by pressing the connector. Waiting time is the time when the opened spindle
is waiting and subsequently either picks a new tool or puts away the old tool. Once the tool position
is arrived at, an immersion is made on axis Z with the entered speed and segment. Connector
allows to count the tools from number 0. Finally, the colour of the empty of full space in the device
may be given.
· Next the position X, Y and Z of the first tool must be given.
· The Offset list defines positions of the next tools (maximum up to 32). The offset is the distance of
axis X and Y to the last tool. Particular tools may be switched off by clicking a box on the list. Tools
switched off are not displayed graphically.
Copyright © 1993 - 2007 by Michael Boenigk
34
5.1.6
cncGraF Online Hilfe
Height sensor
The height sensor measures the height of the material surface. With the backup of data, the measured
material surface, cncGraF corrects the height of the drill spindle (axis Z) in the course of milling. A
further possibility is the export of material height data to DXF format (as lines or points) or to format
Din66025. For the height sensor to work appropriately, the distance (offset) in X and Y between the
height sensor and the tool tip (see: illustration) must be measured carefully and accurately.
Illustration: Distance between the height sensor and the tool
How to calculate the distance between the height sensor and the tool (Offset):
1. Move the machine to Point Zero of the material and carefully and accurately mark this position on
the material e.g. by scratching the surface with the tip of the milling cutter.
2. Change the machine coordinates to Relative and make a note of them.
3. Locate the tip of the height sensor precisely above the marked point.
4. Choose the "Machine parameters" option from the menu and enter the previously noted
coordinates into the Offset area/box
Copyright © 1993 - 2007 by Michael Boenigk
Settings
5.2
35
Positions
In order to perform a move to the park point or the measurement point, the points must first be defined
in the "Position" dialogue window. This window may be opened through the main menu of the program
or the "Manual advance" dialogue window.
Description
Position setting
Key
[Ctrl +P]
Menu command
Icon
Settings · Position (in the program main menu)
or Settings · Zero point/Park point/Measurement
Point (in the "Manual advance" dialogue menu)
Here any number of zero points, park points and measurement points may be defined, however only
one of each of the point types may have the "in use" status. For this reason only (maximally) one zero
point
, one park point
drawing.
, and one measurement point
is graphically displayed in the
Selection of zero point, park point and measurement point
By choosing a relevant tab the type of position for the purpose of processing is selected and a list of
such positions appears.
Illustration: Tag selected for zero points
Insert positions
By clicking the "Add" option, the "Add positions" dialogue window appears. Here the parameters of a
new point (X-, Y-, Z-, A- coordinates, status and name of point) are entered. By clicking "Insert" the
current machine coordinates are entered into the input fields. Height may be defined by entering the
material thickness data. In order to enter the material thickness data, calibration of the tool-length
sensor must be performed once.
Key "OK" closes dialog box and saves new point on the list.
Change positions
First you need to select a point, that you wish to change, from the list. Then it is possible to change the
properties of the selected point directly by clicking on the column in the table of a particular point value.
Also by selecting "Insert positions" you may enter the current coordinates of the CNC milling machine
by clicking "Insert".
Delete positions
In order to delete a location from the list, first the selected location must be entered and then the
"Delete" key must be pressed.
Changing the properties of positions
These properties define the performance of zero points, scan points and park points. A move to a
particular point may be performed directly or in a defined sequence of axes. The "Display confirmation"
option turns on or off the dialogue window which appears prior to a move to a point. A move to the
Copyright © 1993 - 2007 by Michael Boenigk
36
cncGraF Online Hilfe
zero point may be performed automatically after the reference move.
5.3
Material offset
The material offset is the distance between the point at which the tool is fixed and the material zero
point (see: Illustration 4). In the GRF format of the cncGraF program the material offset and the
material zero point are recorded. Material zero point is recorded in the GRF format only for control
purposes while opening this file. In the event that the material zero point of the entered drawing does
not correspond to the currently active material point, the following information is displayed:
„cncGraF has no zero point for the particular the drawing! Please check the material offset."
If the zero point of the material has changed, there is no need to change all the GRF type
files but just the material offset in the opened GRF file.
Copyright © 1993 - 2007 by Michael Boenigk
Settings
5.4
37
Material parameters
For the purpose of visual control, the size of the processed material may be graphically displayed on
the screen.
Description
Key
Opens the "Material parameters" dialogue none
window
Menu command
Icon
Settings · Material parameters
In direction X and Y the defined material size (in millimetres) may be displayed in a freely chosen
colour. From the list of existing zero points a new zero point may be selected.
If a new point is needed, it must be defined in the "Position
5.5
35
" dialogue window.
Toolbox
The "Toolbox" dialogue window controls the two lists of tools for the vectors (for HPGL and optionally
for DIN 66025 – see chapter: "Options 39 ") and the drill points (Sieb & Maier). Each list may manage
up to 100 tools and offers such properties as, for example, working speed, speed of pulling out the
tool, depth of penetration, diameter, etc. These properties are used in the process of milling, drilling or
at calculating the tool correction. The column "Active/No." enables the switching on and off of particular
tools. Switched off tools are not displayed in the drawing and are not used for milling and drilling.
Description
Opens the "Toolbox" dialogue window
Key
[Ctrl + T]
Menu command
Settings · Toolbox
Icon
Depending on the depth of immersion and the type of tool, the diameter of the milled surface changes.
As help for the calculation of the diameter the "Calculate diameter" dialogue window may be used by
clicking the key
beside the diameter box. Calculation of the tool diameter is possible only for the
milling cutter. The diameter is necessary for tool diameter correction 61 .
Rotations of the spindle are regulated in 15 degrees. By pressing key
next to field „Spindle
rotations” the ranges for the 15 degrees are difined. In column Z2 in the toolbox table the tools can be
directed to Z2 axis. Function Z2 is available only for 2D data, e.g. HPGL. DIN 66025 files must contain
data for the 4th axis defined as Z2.
The "Display tools in use" function limits the tool overview to the tools currently in use.
5.6
Macros
In the "Macros" dialogue window it is possible to define operation sequences, operations that may be
part of the milling or drilling process and that could be called up at any given point. This way the
performance of various tasks may be automated. Each operation sequence, here called a macro, is
saved under a file name. The "Macros" dialogue window displays a list of all the program macros.
Description
Macro – process
Key
none
Menu command Icon
Settings · Macros none
Saving and changing a macro
Upon clicking the "New" option in the "Macros" dialogue window, the "Macro save" dialogue window
Copyright © 1993 - 2007 by Michael Boenigk
38
cncGraF Online Hilfe
appears where a new macro is defined. If an existing macro is to be changed, then it must be selected
from the list displayed in the "Macros" dialogue window and the option "Edit" must be selected.
The "Macro save" dialogue window consists of two sections:
1.The "Macro" section includes a list with the commands of a given macro. The macro is performed
according to this list, from top to bottom. The list consists of a sequence and all the parts of the
sequence are performed. The sequence may be changed by pressing the arrow function keys. Single
sequences are cancelled by pressing the "Delete" key. A new sequence may be set up or changed in
the "Command" section.
2.The "Command" section allows for the addition of a new task to a particular macro or for changes to
the tasks existing already. The following commands are available:
· With the use of the absolute vector a move to a chosen X, Y, Z and A point is performed. The
speed of the move is entered manually or by quoting the maximum speed of the machine.
· Waiting time stops the machine for a given time in milliseconds.
· With the use of a connector the drill spindle and the pump are turned on or off.
Saving a macro
Once a macro is established it must be saved in a file. All macros are saved in the "Macros" catalogue
in files supplied with the .macro extension. To save a macro the "Save" option must be clicked in the
"Macro save" dialogue window.
Exporting macros
Macros may be exported for further editing in format Din 66025. To export a macro you need to select
a particular macro from the list and click the "export" key.
Testing a macro and applying it to / inserting into Milling/Drilling
Before a macro is applied in the "Milling/Drilling" operation it should be checked first. The "Perform
macro" dialogue window enables the application of particular macros through the selection of a
particular macro from the list and clicking the "Start" option.
Description
Key Menu command
Icon
Single macro
none Move · Macro
none
performance
Editing,
[F9] Move · Milling/drilling
apply/insert macro
Any macros for the operation of "Milling/drilling" may be entered into the "Work parameters" dialogue
window. The first thing to do is to activate a macro in the "Macro" section. Then a particular macro
must be selected from the list of macros and the place for its application must be defined. Here
various possibilities apply:
· Perform macro at the beginning of work
· Perform macro at the end of work
· Perform macro after processing (the "Repeat processing" function)
· Perform macro after tool change
Upon selecting a macro and defining the location for the performance of a given macro, the particular
macro must be added to the performance list with the '->' key. With the use of the '<-' key the macro
is removed from the performance list.
Copyright © 1993 - 2007 by Michael Boenigk
Settings
5.7
39
Options
The "Options" dialogue window includes all the settings of the graphical editor of the cncGraF
program. These settings have been grouped into "General", "View", "Performance" and "Editor" tabs.
Description
All settings of the
graphic editor
Key
none
Menu command
Settings · Options
Icon
General
The work directory is the starting point once the "Options" and "Save" dialogue window is opened.
Decimals are shown as per requirements of the currently used language, that is with comma or full
stop separator.
Illustration 1: There are additional special functions in group „Misc parameters”.
Messages
The position of the drawing or the material, lack of command M03 (only Din 66025) or lack of a
reference move may be checked before milling. For cncGraF to be able to control, the command given
must be active.
Illustration 2: All messages.
View
This option includes the settings which define the view of the idle running of vectors, the area of
height scan, the raster, tool correction, toolbars, 3D view and the absolute and relative
coordinates. The size of the raster is arbitrary and is quoted in millimeters or in inches. The view of
the particular elements may be switched on or off in the main menu "View". Font types may be defined
for absolute and relative coordinates. In the main "View" menu it is possible to turn on or off the status
bars 11 .
External and internal text editors
Text editor capable of reading HPGL, DIN 66025 and Sieb & Maier files is accessed here. If such a file
is opened by the cncGraf program, it can be opened in the text editor through the main menu “File” -> “
Open with text editor”. GRF files cannot be opened by an external text editor. Internal text editor may
load files type HPGL and DIN 66025 up to a specified size. Maximum file size is shown in Mbytes.
Copyright © 1993 - 2007 by Michael Boenigk
40
cncGraF Online Hilfe
Files
Once a file is opened the drawing can be automatically placed in zero position in the centre of the
material or in an original position defined by the file.
Program cncGraF holds data in memory. For large files the system can be overloaded. To limit the
data file size cncGraF includes several functions preventing the system overload.
· Working with large files, for example Din 66025 is only conditionally sensible. Therefore a limit can
be set for maximum file size in MBytes. If such maximum size is exceeded a symbol
appears in
the bottom status bar. Program cncGraF loads large files saving the computer memory, with text
editor and 3D view switched off, and only repositioning and resizing of the drawing data enabled.
DIN 66025
In the event that a DIN 66025 file is loaded, the dialogue window "DIN 66025" displays speed rates
from the file. The speed rates (function „F”) for the DIN 66025 files are always supplied in millimeters
per minute. The cncGraF program makes use of the speed rate quoted in millimeters per second, so
the speed of the DIN 66025 files is automatically recalculated. If the speed rates are inappropriate,
they may be adjusted by providing a vector or by selecting a speed rate from a vector list in the
toolbox.
Description
Key
Adjusting the speed of the opened none
file type DIN 66025
Menu command
Icon
Settings · Options · DIN
66025
none
DIN 66025 type files have the following settings available:
·
·
·
·
·
·
Letter definition for 4th axis
Definition of 4th axis in degrees
Command G02/03 (clockwise or counter-clockwise arc) always relatively
Invert vectors, change of axis Z direction
Selection of arc resolution, from low, medium to high
Definition of transmitters (command M) which may be used for turning on or off various devices
through files type Din 66025
Hpgl
Sometimes it may be required that the tool, once it immerses in the material, does not commence
work immediately but pauses for a particular period of time. This may be achieved with the application
of the "Time after tool lowering" function expressed in milliseconds. If, before raising the tool, the tool
is supposed to remain immersed inside the material for certain time, the time has to be defined in
milliseconds in "Time before raising tool”. Before the actual work commences, a delay may be
defined needed for reaching adequate rotation speed of the spindle with a tool.
Copyright © 1993 - 2007 by Michael Boenigk
Settings
41
Illustration 3: All settings for HPGL interpreter.
Sieb & Maier
There are two different types of drill data (see: Interpreter of drill data
by ticking the type selected.
17
). Select one of the two types
DXF
When function "Ignore Z values" is switched on all the files are loaded in 2D format. Therefore values
of Z in DXF files are ignored and set to value of 0 (see also chapter "Interpreter DXF 22 ").
Default units
For HPGL, Sieb & Maier and DXF files default unit may be set. This has the advantantage that when a
file is being opened a most commonly used unit is proposed.
If the unit is changed, the previously loaded file does not change. Therefore the
parameters must be set first, before opening the file.
Copyright © 1993 - 2007 by Michael Boenigk
42
5.8
cncGraF Online Hilfe
Keypad
The dialogue window "Keypad" may define, for some functions, shortcut keys of the keypad. As such
functions are activated directly with the keys, it is recommended that the keys be selected carefully.
The whole list of defined keys may be switched on or off with one connector.
Description
Key Menu command
Definition of shortcut keys none Settings · Keypad
for some functions
5.9
Icon
none
Joystick
cncGraF may control the CNC milling machine with the use of a joystick. Joystick control may be tuned
on or off with the use of a switch. Joystick buttons may be used to access various functions,
e.g. “Change speed of manual move”, “Reference move”, “Move to zero position”, etc. Value -1
switches the function off. The joystick button must be pressed and held during reference move as the
release of the buton stops the machine.
To facilitate joystick steering, Microsoft Managed DirectX9 (see: installation
installed.
5.10
3
) must be
Unit and scaling
Without determining the appropriate units of measure, the entered drawing shall not be correct. To
make the selection of an appropriate unit of measure easier, some of them have been defined (1 mil,
1/40, 1/100, 1/1000 mm). In the event that there is no pre-defined unit of measure, it is possible to
enter one's own definition with the use of the keypad keys. Additionally, the entered drawing may be
recalibrated by quoting an appropriate scale for X, Y or Z.
Description
Key
Changing the units of measurement of the none
entered drawing
Menu command
Settings · Unit and scaling
Icon
none
The measurement unit for file type DIN 66025 may not be changed, as the original unit
contained in the file is used, with no possibility, however, of unit selection.
Copyright © 1993 - 2007 by Michael Boenigk
Settings
6
43
Move
The main menu "Move” includes functions which control the advance of the CNC milling machine.
6.1
Simulation
The simulation function allows for the acknowledgement of the path which the milling tool is to follow in
the course of performing actual work. The simulation speed may be changed in the main menu
between the options of slowly, average, fast and extremely fast.
Description
Key Menu command
Simulation start-up
none Move · Simulation · Start
Choice of simulation speed none Move · Simulation · slowly /
average / fast / extremely fast
6.2
Icon
none
none
Milling/Drilling
Clicking on the
icon in the horizontal toolbar or pressing the F9 key function starts up the progress
of the CNC milling machine. Before the actual start-up, the "Work parameters" dialogue window
appears, where it is possible to set the final parameters.
Description
Processing
Key
[F9]
Menu command
Icon
Move · Milling/Drilling
Copyright © 1993 - 2007 by Michael Boenigk
44
cncGraF Online Hilfe
Illustration 1: The "Work parameters" dialogue window.
Selection of data and their sequence of performance
Data of the printed-circuit board consists of files with the HPGL type of vectors and files with drill points
of the Sieb & Maier type. The cncGraF program may open both the files in one document, process and
display them. In this case it is necessary to select the processing data from the tab "Vectors" or "Drill
points" (see: illustration 2). In the event that the current document has only the drill points or only the
vectors, only one tab is displayed and there is no possibility of choice (see: Illustration 3).
Copyright © 1993 - 2007 by Michael Boenigk
Move
45
Illustration 2: Here both vectors and drill points are present so it is necessary to select the data.
Illustration 3: Here only the vectors are present so there is no possibility of selection.
The vector and drill point lists display all the tools in use in the processing-sequence order. To allow for
the possibility of changing the order of the tools, at least two tools must be used (see: illustration 4).
Changing the tool sequence for files Din 66025 is not possible.
Quoting values for "Repeat processing" and "Notch correction in millimetres" is possible by
clicking the adequate line and column in the table. Value 0 of "Repeat processing" parameter indicates
that the processing / milling shall be performed once only. Value 1 indicates that the process is
repeated one time, etc. This function, along with the notch correction in axis Z, facilitates such
processing when the material must be subjected to several working cycles e.g. the milling of deep
holes in metal, grinding etc.
Illustration 4: The „Change tool” function is switched on. The sequence of processing is changed by
selecting a tool and pressing the arrow keys.
For 3D data the order of tool cannot be changed. Various tool heights in Z may result in an
angled move. In such case both keys usually assigned for tool change (arrow keys) are not
visible.
Copyright © 1993 - 2007 by Michael Boenigk
46
cncGraF Online Hilfe
Repeat processing and notch correction
Values for "Repeat processing" and "Notch correction in millimeters" is possible by clicking the
adequate line and column in the table. Value 0 of "Repeat processing" parameter indicates that the
processing / milling shall be performed once only. Value 1 indicates that the process is repeated one
time, etc. This function, along with the notch correction in axis Z, facilitates such processing when the
material must be subjected to several working cycles e.g. the milling of deep holes in metal, grinding
etc.
Program cncGraF offers the following options for function “Repeat processing".
1. Function "Processing relative to object” can be used only for 2D drilling data. In this case an
object is processed in full before the next is handled.(see example below)
Illustration 5: Processing relative to object minimised the time required for processing
2. Function "Repeat processing without changing the order of operations defined in the file”
performs work exactly as defined in the file.
3. If the above options are switched off „Repeat processing” is performed according to the order of
tools.
Copyright © 1993 - 2007 by Michael Boenigk
Move
47
Properties
The "Properties" tab includes the following functions:
· The function "Measure the tools" may not be switched on without the function "Change tools". Once
a tool is changed, the spindle moves to the tool length sensor which shall measure the tool and on
this basis an adequate correction shall be performed. A standard micro-switch may be applied as
the sensor. Once the measurement is performed, the processing is continued.
More information on the topic of „Measure the tools " is included in the chapter „Measure
the tool 52 "
· Flight altitude is the distance between the tool (milling cutter) tip from the material in the course of
idle advance (above the material).
· At the end of processing such actions may be defined: "Tool up", "Move to point zero", "Perform
reference move", "Tool down" (applicable only with active automatic tool changer), which are
performed once milling or drilling is completed.
· After a pause is performed, it is possible to perform such actions as: "Tool up" or "Move to park
point". For more information go to chapter 'Pause 56 '.
· In a situation when the height scan has already been performed previously, the height correction
option may be activated. For more information go to chapter "Material height scan 50 ".
Macro
The Macro function is described in chapter "Macros
6.3
37
".
Manual advance
The "Manual advance" dialogue window includes several functions which concern the manual
advance of the CNC milling machine. This dialogue window does not block the main menu of the
cncGraF program and may remain open all the time.
Description
Key
Menu command
Icon
Manual advance of the [Ctrl + W] Move · Manual advance
CNC milling machine
The "Manual advance" dialogue window includes the following functions:
· Manual advance with the keys
· Manual advance speed
· Move to and fro
· Turn on or off the drill spindle and the pump
· Material offset 36
· Reference move 49 , park point 49 , zero point 49 , measurement/scan point
49
Manual advance with the keys
The CNC milling machine may be operated by pressing the arrow keys (Tabulator and Spacebar) or
with the use of the mouse. Each axis is monitored in the process of manual advance. The control over
each particular axis may be separately switched on or off. With the function "Relative advance" a move
is made of a precisely defined length. To perform the move, the length (segment) must be indicated in
millimetres and an appropriate arrow key must be pressed. The arrow key indicates the direction of the
move. There are three boxes to enter the move segments, and it is possible to switch between them
without the necessity to enter the values again.
Manual advance speed
Here three different manual advance speed rates for axes X, Y, Z and A are defined, expressed in
millimetres per second. The selected speed rate is used in the "Key move" and "Move to and fro"
Copyright © 1993 - 2007 by Michael Boenigk
48
cncGraF Online Hilfe
functions. Additionally, a very slow advance (5 steps per second) is available. This advance mode is
used for the function "Manual advance with keys" and facilitates precise positioning on axis Z.
Move to/Move to and fro
Functions "Move to" and "Move to and fro" include the possibility of controlling the machine. In both
functions the destination point is determined by entering relevant data with the use of the keypad.
When the "Start" key is pressed a particular operation is started up, and when the "Cancel" key is
pressed the operation is stopped.
Illustration: The "Move to" and "Move to and fro" functions make absolute advance of the CNC milling
machine possible.
The position may be entered into the X, Y boxes with the use of the mouse (left mouse key). To make
this possible the "Insert positions x,y with mouse" box must be ticked.
Drill spindle and pump
The power feed of the drill spindle motor and the pump may be turned on or off in the course of
manual advance. In this case the machine functions just like a standard milling machine with control
over the path length.
Monitoring
For each axis the supervision function may be switched off or on. The function makes sure that the
range of the machine is not exceeded during processing.
6.4
Height of drawing measurement
To transform HPGL files into 3D type files, the drawing must be divided into small vectors and then the
height of the vectors must be measured at their starting and final points. The resulting measurements
are saved along with the HPGL coordinates as file Din 66025.
Description
Key
Menu command
Icon
Divide the drawing into
small vectors
none
Process · Drawing · Split
vectors
none
Copyright © 1993 - 2007 by Michael Boenigk
Move
6.5
Measurement of height of
drawing
none
Move · Height measurement none
· Drawing measurement
Show starting and final
points of vectors
graphically on the screen.
none
View · Starting and final
points of vectors
49
none
Reference move, and moves to positions
In the "Move" main menu or in the menu of the "Manual advance" dialogue window it is possible to
perform reference moves or a move to the park point, the zero point or the measurement/scan point.
Description
Reference move
Key
[F12]
Menu command
Move · Reference move
Move to park point
[F10]
Move · Park point
Move to zero point
[F11]
Move · Zero point
Move to measurement point
none
Move · Measurement point
Icon
none
For the CNC machine to recognise the position of the CNC machine axis, a reference move must be
made, for example each time the cncGraF program is started up or after a move is interrupted. In the
"Reference move" dialogue window the axes, which are to perform the reference move, are selected.
A reference move may also be performed manually in the main menu "View". Once the reference
move is performed, the absolute coordinates are deleted (see: Status bars 11 ).
Reference move is performed with lower speed and takes quite a long time on large cnc milling
machines.Therefore function “Accelerate reference move” performs idle move to postion X, Y, Z near
the reference point and only then the reference move is commenced. Position X, Y, Z is set in dialog
box „Machine parameters -> Speed -> Accelerate reference move 32 ”.
Function "Accelerate reference move” cannot be used immediately upon the start up of the
program. It may only be used when the position of the CNC machine is recognised by the
program.
At the end of the reference move loss of steps is shown in the „Results” field. If the dialog window is to
close automatically after a reference move then the function “close at the end” must be switched on. In
order to perform a move to the zero point, park point or the measurement point, the points must first
Copyright © 1993 - 2007 by Michael Boenigk
50
cncGraF Online Hilfe
be defined in the "Position
6.6
35
" dialogue window.
Material height scan
In order to enable the engraving of an uneven material surface, the material height measurement
(scanning with an appropriate raster) may be performed first. With the aid of thus acquired data,
correction of the Z axis is performed in the course of engraving or milling; in this case the milling cutter
penetrates the material to an unchanging and constant depth (+/- tolerance).
Description
Key Menu command
Icon
Material height
[F11] Move · Material height scan
measurement/scan
Illustration: The "Material height scan" dialogue window parameters.
The dialogue window parameters in detail:
Distance from the edge
To avoid error measurement on the material edge, the area under measurement should not be in
contact with the edge of the material.
Scan area
Here the size of the area under measurement is defined (in millimetres) in X and Y directions.
Division
The number of measuring/test points, that is the so-called raster, is calculated by the program on the
basis of dividing the length and the width of the material by the value quoted in the material division
box. For example, with the length of material equal 100 mm and the stand-off ratio (division factor)
equal 5, we shall come up with 6 measuring points distributed every 20 mm. With considerably even
surfaces, to achieve a sufficient height correction precision, few raster points are required. For control
purposes the scan area may be displayed on the screen.
Lift the height meter
This height is the distance between the tip of the tool and the material in the course of an idle move.
Display the scan area
Switch on or off the display of the height measurement area.
Height scan deviation
Copyright © 1993 - 2007 by Michael Boenigk
Move
51
At the end of the measurement, cncGraF calculates the ideal values of a particular measurement for
each raster (square). The deviation is the difference between the ideal value and the measurement
value. The highest deviations are displayed. If a deviation is higher than 0,1 mm then the raster may
have a bulge or a notch. In such an event it is advisable to perform a height scan once again but with a
smaller raster.
A height scan deviation may also be displayed in the menu "View -> Height scan deviation
".
Export/Import of height scan data
The height measurement data may be recorded through the main menu "File -> Height scan data ->
Export" as a DXF file (lines or points), Din 66025 file, a text file or the SCAN file type of the cncGraF
program. The SCAN type file may be retrieved again later. The height scan deviation of the retrieved
SCAN type file may be quoted back from the main menu "View ->Height scan deviation".
6.7
Calibration of the tool-length sensor
To be able to use the tool-length sensor, its calibration must once be performed. Calibration of the
sensor is performed with the use of the calibration assistant.
Description
Key
Menu command
Icon
Calibration of the tool-length sensor
none
Move · Tool · Measure the tool
none
Delete the measurement values
none
Move · Tool · Delete the
measurement value
none
The assistant performs the following actions, in this order:
1. Reference move
For the position of the CNC milling machine to be adequate, a reference move must be performed. If
the reference move has already been performed before, this step may be skipped by clicking
"Continue".
2. Table height measurement
Please fix a chosen tool and move in axis z till the tool tip touches the CNC milling machine table. The
saved height of the CNC milling machine results, together with the material thickness, in a new axis z
height at point zero. Please note that the material thickness starts at the table height and finishes at
the top edge of the material (see: Illustration).
Illustartion: Height of the machine table and thickness of material result in the height of point zero
Copyright © 1993 - 2007 by Michael Boenigk
52
cncGraF Online Hilfe
In the "Positions" dialogue window the new height of point zero may be defined by
providing the material thickness data.
3. Measurement of the height of the tool-length sensor
Now a move is performed to the sensor in order to measure its height.
4. Summary
This last page of the assistant shows the height of the table and the height of the tool-length sensor at
its start. By clicking on the "Complete" option the values are saved and the assistant is closed.
If the tool-length sensor is not to be used again, the calibration data should be deleted.
6.8
Measure the tool
In order to measure the length of the tool, calibration of the tool-length sensor
performed.
51
Description
Key
Menu command
Manual measurement of tool length
[ALT + T]
Move · Tool · Measure tool
must once be
Icon
If several parts are to be produced with the use of the same tool (serial production), it is wise to
perform the tool measurement just once. This way a multi-time performance of the tool measurement
before the milling of each part may be avoided. To avoid a multi-time performance of the tool
measurement, it is also necessary to turn off the change and measure the tool functions in the "Work
parameters" dialogue window.
6.9
Tool change
This function is applicable exclusively along with the automatic tool changer
automatic setting aside or picking up of tools.
33
. The function facilitates
Copyright © 1993 - 2007 by Michael Boenigk
Move
7
53
Data editing
The cncGraF program has numerous functions meant for use when editing a drawing. All such
functions can be found in the main menu "Edit" and most of them may be activated by clicking the
icons on the vertical toolbar. The "Undo" function makes it possible to undo the last 10 changes.
7.1
Insert, copy, rotate, mirror reflection and expand
The main menu "Edit -> Drawing" has functions for the purpose of editing a drawing. A given drawing
or its part may be positioned differently, changed or copied. All the functions have been constructed
similarly and are made up of the same or similar elements.
The range defines the area (material or machine area) which is subject to positioning. Example: A
drawing may be positioned in the centre of the material by choosing the "Material" scope.
The displayed groups help to select the data which is subject to editing. Example: In the event that
only the drill points are to be moved with the use of the "Insert" function, the "Drill points" group must
be selected. Depending on the type of data at your disposal, the particular groups are on or off.
Description
Key
The drawing may be positioned in the none
centre or with relation to the zero
point or the machine area
The drawing may be rotated (in
none
degrees) clockwise or
counter-clockwise
Mirror reflection of the drawing may none
be performed on axis X or Y
The drawing may be copied a
none
multitude of times
The drawing may be expanded by
none
quoting the margin on the material or
the machine area
7.2
Menu command
Icon
Edit · Drawing · Locate
Edit · Drawing · Rotate
Edit · Drawing · Mirror
reflection
Edit · Drawing · Copy
Edit · Drawing · Expand
Selection window
The "Selection window" allows for editing particular drawing elements with the mouse (moving,
rotating, copying or deleting). The first operation to be performed is the selection of relevant data type,
that is the "Vectors", "Poly-lines", "Drill points" or "All", by clicking the
icon on the horizontal toolbar.
The graphic range of the drawing shall now display the mouse cursor (a cross) and the appropriate
data may be selected now. By pressing the left mouse key, moving the mouse, and pressing the left
mouse key again a rectangle is pulled to enclose the drawing or its part. Eventually, the drawing or a
part of the drawing is enclosed in the rectangle (see: Illustration).
Copyright © 1993 - 2007 by Michael Boenigk
54
cncGraF Online Hilfe
Description
Key Menu command Icon
Selection window allows for the selection none none
(with the mouse) of a drawing or a part of
the drawing for editing
Illustration: The content of the selection window is rotated with the use of the mouse.
Once the data has been selected with the use of the mouse, a particular operation may be conducted
by choosing a key function and, by pressing the left mouse key, clicking on the content of the selection
window.
Description Key
Delete
[Del]
Icon
none
Copy
none
Move
Rotate
7.3
Menu command
Edit · Selection
window contents ·
Delete
[Ctrl +C] plus left mouse Edit · Selection
key
window contents ·
Copy
[Ctrl +X] plus left mouse Edit · Selection
key
window contents ·
Move
Selection window centre none
and left mouse key
none
none
Change of tool number and the direction of milling
The direction of milling and the change of the tool number is performed in the "Properties" dialogue
window. In order to be able to change the properties, the drawing data intended to be changed must
be selected with the use of the "Selection window 53 ". The "Properties" dialogue window displays the
current tool number of the selected data. If the selected data has more than one tool, then the tool
number is not displayed. Now the new tool number may be entered or the direction of milling and the
"Change" key performs the required changes.
Description
Change of tool number and
milling direction
Key Menu command Icon
none none
Copyright © 1993 - 2007 by Michael Boenigk
Data editing
7.4
55
Removing drill points, height scan data and tool diameter
correction
The "Edit -> Delete" menu allows for the removal of the drill points and the height scan data and the
tool correction.
Description
Key
Remove tool
none
diameter correction
Remove drill
none
points
Remove height
none
scan data
7.5
Menu command
Icon
Edit · Remove · Tool diameter none
correction
none
Edit · Remove · Drill points
Edit · Remove · Height scan
data
none
Correction of the trailing cutter
Prior to the performance of cutting, the position of the trailing cutter with respect to the axes is not
known. Thus the Y direction must be set accordingly (see: Illustration 1).
Description
Key Menu command Icon
Correction of the Trailing cutter none Edit · Trailing
none
cutter correction
Illustration 1: Starting point of the trailing cutter.
Immediately after the start, the cutter must be adjusted with the help of the axial section in the Y
direction (see: Illustration 2).
Copyright © 1993 - 2007 by Michael Boenigk
56
cncGraF Online Hilfe
Illustration 2: Axial section in the Y direction.
In the "Trailing cutter correction" dialogue window the diameter of the trailing cutter is corrected. Cutter
offset is the distance between the rotation axes of the cutter and the cutter blade (diameter of the
cutter). Angle start defines the angle deviations for subsequent paths. The angles, in the course of the
correction of the trailing cutter path, are calculated. The bigger the angle start parameter, the more
rounded the angles. The recommended value equals 8 degrees. The Scale parameter expands the
drawing. Once the correction of the trailing cutter is calculated, the drawing may no longer be
expanded as the cutter's diameter has changed as well.
7.6
Pause
The pause enables milling to be continued from any given location. The location may be set manually
or in the course of milling by clicking the icon on the horizontal toolbar. In the numerical space for
introducing data in the "Pause" dialogue window, the number of the vector must be entered as the
location of a pause. With the aid of the group, a choice is made between the grill points and the
vectors. The parts of the drawing which are to be milled are displayed in grey colour.
Description
Key Menu command
Locate position, in the
none none
course of milling
Locate position, move/shift none Edit · Pause
Icon
none
Copyright © 1993 - 2007 by Michael Boenigk
Data editing
7.7
57
PhotoVec
1. Introduction to PhotoVec 3D
PhotoVec 3D is a tool for converting 2D pictures into 3D data. JPG or BMP files can be used as input
data. A 3D map, viewable in the main window, is the result of this conversion.
2. Method
2.1 Step 1: Choice of picture
Please choose „File” from the menu, to access „Explorer”. Choose the catalogue and picture. The
picture will be automatically converted into shades of gray.
Previously used files, to speed up access, are stored in “Recent files”. Up to 20 files may be accessed
here.
2.2 Step 2: Picture processing
There are two ways of changing the picture size:
1. direct entry of picture width and/or height
2. percentage change of width and/or depth
It is also possible to choose option „Lock aspect ratio” to maintain the width:height ratio.
Copyright © 1993 - 2007 by Michael Boenigk
58
cncGraF Online Hilfe
Before exiting, brightness and contrast can be adjusted. Selecting “Standard” removes all the
changes.
2.3 Step 3: Data destination settings
Sending data to Milling
There are two possible settings of „White”
1 White at the bottom: the brighter the point on display, the higher is its negative value of Z.
2 White on the top: the darker the point on display, the higher is its negative value of Z.
Example:
For depth value „0.5mm from Max.” and setting „White on top” the white point has value Z=0, and
black Z=-0.5. The object can be milled in one or many layers. Set maximum depth is evenly spread
over all the layers
Example:
For two layers and maximum depth of 2mm the first layer will be milled to 1mm of depth, and the
second to 2mm. The milling depth for each layer can be adjusted after choosing the layer from the
menu. The tool can be changed as well. At any given moment the same tool is used for all the layers.
Sending data to Laser
Copyright © 1993 - 2007 by Michael Boenigk
Data editing
59
Parameters for laser-based processing (e.g. wood processing) can be set here. The laser moves
slower or faster, depending on where on the gray scale the point is. Therefore the speed for white and
black point colours must be defined. For different shades of gray the speed will be interpolated. The
width sets the size of the laser dot.
Key “Send” sends the data.
7.8
Internal text editor
The internal text editor is a full-featured program, which can accept DIN 66026 and HPGL files (see
chapter: Options -> Internal and external text editor) and it has the following functions:
Description
Internal text editor
Copyright © 1993 - 2007 by Michael Boenigk
Key
Menu command
none View · Text editor
Icon
60
cncGraF Online Hilfe
1. Auto-improvement for DIN 66025 and HPGL files makes the text easier to read.
Illustration 1: Din 66025 and HPGL commands are displayed in blue, bold font.
2. Code Snippets for DIN 66025 data make programming easier.
Illustration 2: Pressing [CONTROL + SPACE] keys shows window "Code Snippets".
Illustration 2: Command G01 is chosen from the list of G-Codes.
By pressing [Enter] the list of 'G Codes' is selected (see Illustration 3). A small Help list appears next to
the selected G Code command. The list describes the command. By pressing [Enter] key G Code
command G01 is entered into the text editor.
3. Internal text editor contains functions „Find & Replace”, „Go to line”, and function „Print” with „Adjust
page” (Dialog: Find and File -> Print)
4. By selecting a G-Code line it can be viewed in 3D. Here the icon must be switched on in 3D view.
Selection can be performed by pressing
editor.
the left key in 3D view or by selecting a line in the text
Copyright © 1993 - 2007 by Michael Boenigk
Data editing
61
Illustration 3: Command G02 for arch (Spiral) is selcted in the text editor and highlighted in 3D
graphics in yellow.
5. cncGraF enables programming in DIN 66025 and immediate checking of the resulting 3D view.
Selecting “Save file” in text editor saves the changes and reloads the 3D view.
The text editor is in an attachable dialog box and can be placed anywhere in the main
program window.
7.9
Tracer
Tracer is a simple program for conversion from raster graphics to vector graphics. Tracer may
vectorize text or black and white pictures (bitmap). Please enter an arbitrary text or load black/white
graphics (bitmap) and press “Overtake” key. The picture or text is vectorized and shown in the main
program window.
Description
Tracer converts raster
graphics into vector one
7.10
Key Menu command
none none
Icon
Tool diameter correction
Correction of the tool diameter determines if a tool needs to be moved to the left or to the right of the
drawing vector. cncGraF facilitates the tool correction to the left, right, inside or outside (see
illustrations 1 to 4). The smoothing factor should have the value, in most cases of small vectors, from
15 to 45. The smoothing factor changes the data generated by the tool correction. Original vectors
remain unchanged. The higher the factor of smoothing, the fewer the small vectors and the thicker in
outline the tool diameter correction.
Copyright © 1993 - 2007 by Michael Boenigk
62
cncGraF Online Hilfe
Illustration 1: Tool correction to the left, the arrow indicates the vector direction
Illustration 2: Tool correction to the right, the arrow indicates the vector direction
Illustration 3: Tool correction to the inside
Illustration 4: Tool correction to the outside
7.11
Path optimisation
Path optimisation sorts out the data, removes small vectors (smoothing factor) and shortens the
working time of the CNC milling machine. Tool correction may be performed for all or for only one tool.
Copyright © 1993 - 2007 by Michael Boenigk
Data editing
7.12
63
Calculation of processing time
Function "Calculate process time" calculates time needed for processing.
Description
Calculates time needed for work
Key
none
Menu command
Edit · Calculate the
work time
Icon
During the cnc milling machine operation the estimated remaining time of process is shown on the
status bar. This time is estimated and, especially at the beginning of process, not accurate. (see "
Status bars 11 ").
7.13
TeachIn
TeachIn is a Help Function which saves the position of the milling machine in a HPGL file or in DIN
66025 file.
Description
Calculates time needed for work
Key
none
Menu command
Edit · TeachIn
Icon
After opening the dialogue "TeachIn", the „Manual advance 47 ” function can be accessed and a move
performed to any position. This operation can be then added to the command list by using “Add”.
When the command list is complete it can be saved in a HPGL file or in DIN 66025 file.
Copyright © 1993 - 2007 by Michael Boenigk
64
8
cncGraF Online Hilfe
Problem solving
Problem
There is no connection
with the drive electronics
of SMC4D.
Possible solution
SMC4D
· Disconnect the USB cable and plug in again.
· Change the USB cable to a different one.
· Turn off the electronics and turn it on again.
· End the program and restart.
· Check in the Windows system tool manager if the
electronics drive is recognized by Windows. The
USB-Controller section must state: SMC4D
In the course of a
reference move at least
one axis moves slowly
from or to the axis
connector.
· The reference move directions have been set
wrongly and must be changed. For a correct setup of
the pin connectors please use the "Reference pin
assistant". More information in the "Machine
parameters 26 " chapter.
The CNC milling machine · The stepper motors are not supplied with enough
can be heard working but
electric current which, in case of stepper motors,
does not operate.
must be inverted. More information in the "Machine
parameters 26 " chapter.
The CNC milling machine · Probably the computer switches off on its own after a
works well at the
few minutes. Please turn off the Power Management
beginning. After a few
in BIOS. Please also check the power management
minutes either
in the options of Windows management panel.
communication is
interrupted or inexpicable
errors occur.
Copyright © 1993 - 2007 by Michael Boenigk